ECO mode JEEP RENEGADE 2023 Service Manual
[x] Cancel search | Manufacturer: JEEP, Model Year: 2023, Model line: RENEGADE, Model: JEEP RENEGADE 2023Pages: 364, PDF Size: 18.65 MB
Page 169 of 364

MULTIMEDIA 167
NOTE:
You must have Bluetooth® enabled on your
phone to complete this procedure.
The vehicle must be in PARK or at a standstill.
Follow these steps to pair your phone:
1. P lace the ignition in the ACC or ON/RUN
posit
ion.
2. Press the Phone button.
NOTE:
If there are no phones currently connected
with the system, a pop-up will appear asking
if you would like to pair a mobile phone.
This pop-up only appears when the user
enters Phone Mode and no other device(s)
have previously been paired. If the system
has a phone previously paired, even if no
phone is currently connected with the
system, this pop-up will not appear.
3. Select “Yes” to begin the pairing process.
4. Sea
rch for available devices on your
Blue t
ooth®-enabled mobile phone.
Press the Settings button on your mobile
phone.
Select “Bluetooth®” and ensure it is
enabled. Once enabled, the mobile phone
will begin to search for Bluetooth® connec -
tions.
NOTE:
During the pairing procedure, you may receive a
pop-up
on your touchscreen asking you to make
sure the PIN on the touchscreen matches the PIN
from the pop-up on your mobile phone.
5. If “No” is selected, and you still would like to pair
a mobile phone, press the Phone Pairing
or Settings button from the Uconnect Phone
main screen.
Press the Paired Phones and Audio Devices
button and then press the Paired Phones
button
Search for available devices on your
Bluetooth®-enabled mobile phone (see
below). When prompted on the phone,
select “Uconnect” and accept the connec -
tion request.
6. U connect Phone will display an in-progress
scre e
n while the system is connecting.
7. When your mobile phone finds the Uconnect syste
m, select “Uconnect.”
8. When prompted on the mobile phone, accept the c
onnection request from Uconnect.
9. When the pairing process has successfully comple
ted, the system will prompt you to
choose whether or not this is your favorite
phone. Selecting “Yes” will make this phone
the highest priority. This phone will take
precedence over other paired phones within range and will connect to the Uconnect system
automatically when entering the vehicle. Only
one mobile phone and/or one Bluetooth®
audio device can be connected to the
Uconnect system at a time. If “No” is selected,
simply select “Uconnect” from the mobile
phone/audio device Bluetooth® screen, and
the Uconnect system will reconnect to the
Bluetooth® device.
NOTE:
For phones which are not made a favorite, the
phone p
riority is determined by the order in which
it was paired. The most recent phone paired will
have the higher priority.
NOTE:
During the pairing procedure, you may receive a
pop-up
on your mobile phone for the Uconnect
system to access your “messages” and “contacts”.
Selecting “Ok” or “Allow” will sync your contacts
with the Uconnect system.
You can also use the following VR command to
bring
up the Paired Phone screen from any screen
on the radio:
“Show Paired Phones”
NOTE:
Software updates on your phone or the Uconnect
syste m
may interfere with the Bluetooth®
connection. If this happens, simply repeat the
pairing process. However, first make sure to delete
5
Page 176 of 364
174 MULTIMEDIA
NOTE:
Only use the numbering listed in the provided
table .
Otherwise, the system will not transpose the
message.
Did You Know: Your m
obile phone must have the
full implementation of the Message Access Profile
(MAP) to take advantage of this feature. For details
about MAP, visit UconnectPhone.com .
Apple® iPhone® iOS 5 or later supports reading
i ncomin
g text messages only. For further
information on how to enable this feature on your
Apple® iPhone®, refer to your iPhone® “User
Manual”.
Did You Know: Voice
Text Reply is not compatible
with iPhone®, but if your vehicle is equipped with
Siri® Eyes Free, you can use your voice to send a
text message.
SIRI® EYES FREE — IF EQUIPPED
When used with your Apple® iPhone® connected
to your vehicle via Bluetooth®, Siri lets you use
your voice to send text messages, select media,
place phone calls and much more. Siri uses your
natural language to understand what you mean
and responds back to confirm your requests. The
system is designed to keep your eyes on the road
and your hands on the wheel by letting Siri help you
perform useful tasks.
To enable Siri, push and hold, then release the
Uconne c
t Voice Recognition (VR) button on the
steering wheel. After you hear a double beep, you
can ask Siri to play podcasts and music, get
directions, read text messages, and many other
useful requests.
BLUETOOTH® COMMUNICATION LINK
Mobile phones may lose connection to the
Uconnect Phone. When this happens, the
connection can generally be re-established by
restarting the mobile phone. Your mobile phone is
recommended to remain in Bluetooth® ON mode.
POWER-UP
After switching the ignition key from OFF to either
the ON/RUN or ACC position, or after a language
change, you must wait at least 15 seconds prior to
using the system Ú page 349.
ANDROID AUTO™ & APPLE CARPLAY® —
IF EQUIPPED
ANDROID AUTO™
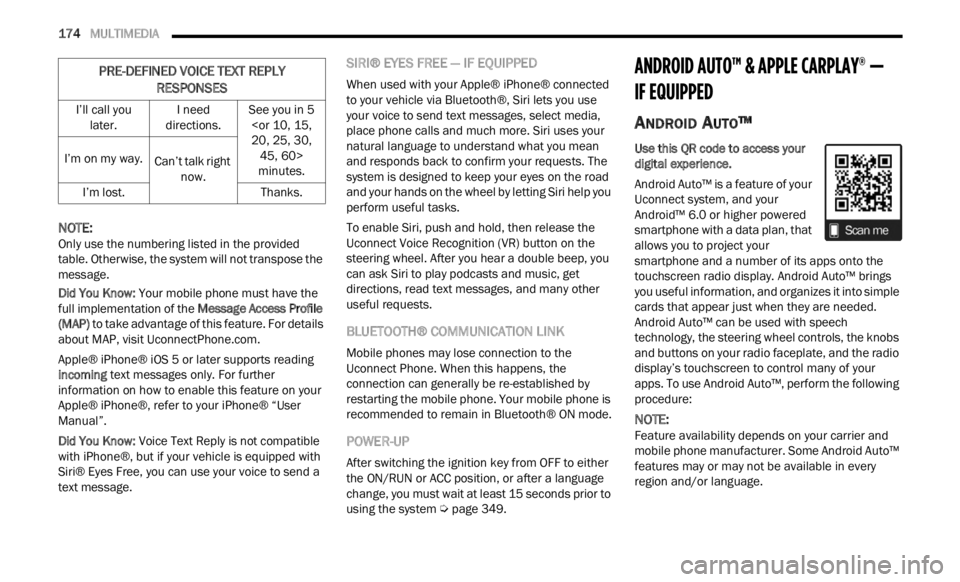
Use this QR code to access your
digital experience.
Android Auto™ is a feature of your
U connec
t system, and your
Android™ 6.0 or higher powered
smartphone with a data plan, that
allows you to project your
smartphone and a number of its apps onto the
touchscreen radio display. Android Auto™ brings
you useful information, and organizes it into simple
cards that appear just when they are needed.
Android Auto™ can be used with speech
technology, the steering wheel controls, the knobs
and buttons on your radio faceplate, and the radio
display’s touchscreen to control many of your
apps. To use Android Auto™, perform the following
procedure:
NOTE:
Feature availability depends on your carrier and
mobile
phone manufacturer. Some Android Auto™
features may or may not be available in every
region and/or language.
I’ll call you
later . I
need
direct ions. See you in 5
minutes.
I’m on my way.
Can’t talk right
now.
I’m
lost. Thanks.
PRE-DEFINED VOICE TEXT REPLY
RESPONSES
Page 217 of 364

MULTIMEDIA 215
Speed Alert
Receive a notification whenever your car
exceed
s a speed limit you set.
Valet Alert
Receive a notification if and when your vehicle is
driven
outside a quarter-mile radius of a valet
drop-off zone.
SmartWatch Integration — If Equipped
Description
SmartWatch Integration puts the Mobile App right
on your
Apple® Watch or Android™ Wear. To get
started, follow these steps:
1. Download the Mobile App from the App Store ®
or Google Play.
2. Log onto the app from your smartphone using the u
sername and password you created when
you first set up your account.
3. Make sure your watch and smartphone are conne c
ted through Bluetooth®.
4. The Mobile App should appear on your Smart
Watch.
Once the app is downloaded on your SmartWatch,
you can
enjoy these features:
Lock or unlock your vehicle by tapping the
remote lock button in the app and entering your
security PIN.
Remote start or stop your vehicle.
View important vehicle stats, such as fuel level,
vehicle location, tire pressure warning, and
more.
For help, refer to the Uconnect YouTube channel
for Sm a
rtWatch Integration.
MANAGE MY SIRIUSXM GUARDIAN™
A
CCOUNT
To manage your SiriusXM Guardian™ account,
press the ASSIST button in your vehicle, or call
SiriusXM Guardian™ Customer Care.
NOTE:
It is recommended, when selling your vehicle, or
turni n
g in your lease, to call SiriusXM Guardian™
Care to remove your personal data.
CONNECTED SERVICES FAQS
For additional information about SiriusXM
Guardian™, active subscribers can push the
ASSIST button (if equipped) and then select
SiriusXM Guardian™ Call on your in-vehicle
touchscreen to contact SiriusXM Guardian™. Your
call will be directed to a SiriusXM Guardian™ agent
or held in a queue until an agent is available. If you
do not have an active subscription, push the
ASSIST button and press the Activate button on the
touchscreen to activate services.
CONNECTED SERVICES SOS FAQS —
I
F EQUIPPED
1.
What happens if I accidentally push the SOS
Call button on the mirror or overhead console?
You have 10 seconds after pushing the SOS
Call button to cancel the call. To cancel the
call, either push the SOS Call button again, or
press the Cancel button on the in-vehicle
touchscreen.
2. What type of information is sent when I use the
SOS C
all button from my vehicle? Certain
vehicle information, such as make and model,
is transmitted along with the last known GPS
location.
3. When could I use the SOS Call button? You c
an
use the SOS Call button to make a call if you or
someone else needs emergency assistance.
CONNECTED SERVICES REMOTE DOOR
L
OCK/UNLOCK FAQS
1.
How long does it take to unlock or lock the
door?
Depending on various conditions, it can
take up to three minutes or more for the
request to get to your vehicle.
2. Which is faster, my key fob or the Mobile App?
Your k
ey fob will lock/unlock the door more
quickly, however its range is limited and your
Mobile App comes in handy for these and
other situations.
5
Page 223 of 364
221
(Continued)
SAFETY
SAFETY FEATURES
ANTI-LOCK BRAKE SYSTEM (ABS)
ABS provides increased vehicle stability and brake
performance under most braking conditions. The
system automatically prevents wheel lock and
enhances vehicle control during braking.
The ABS performs a self-check cycle to ensure that
the AB
S is working properly each time the vehicle
is started and driven. During this self-check, you
may hear a slight clicking sound as well as some
related motor noises.
The ABS is activated during braking when the
syste m
detects one or more wheels are beginning
to lock. Road conditions such as ice, snow, gravel,
bumps, railroad tracks, loose debris, or panic stops
may increase the likelihood of ABS activation(s).
You also may experience the following normal
chara c
teristics when the ABS activates:
ABS motor noise or clicking sounds (you may
continue to hear for a short time after the stop)
Brake pedal pulsations
A slight drop of the brake pedal at the end of the
stop ABS is designed to function with the Original
Equip
m
ent Manufacturer (OEM) tires. Modification
may result in degraded ABS performance.
Anti-Lock Brake System (ABS) Warning
Light
The yellow ABS Warning Light will turn on when the
ignition is placed in the ON/RUN mode and may
stay on for as long as four seconds.
If the ABS Warning Light remains on or comes on
while
driving, it indicates that the anti-lock portion
of the brake system is not functioning and that
service is required. However, the conventional
brake system will continue to operate normally if
the ABS Warning Light is on.
WARNING!
The ABS contains sophisticated electronic
equipment that may be susceptible to interfer -
ence caused by improperly installed or high
output
radio transmitting equipment. This
interference can cause possible loss of
anti-lock braking capability. Installation of
such equipment should be performed by qual -
ified professionals.
Pumping of the Anti-Lock Brakes will diminish
their effectiveness and may lead to a collision.
Pumping makes the stopping distance longer.
Just press firmly on your brake pedal when you
need to slow down or stop.
The ABS cannot prevent the natural laws of
physics from acting on the vehicle, nor can it
increase braking or steering efficiency beyond
that afforded by the condition of the vehicle
brakes and tires or the traction afforded.
The ABS cannot prevent collisions, including
those resulting from excessive speed in turns,
following another vehicle too closely, or hydro -
planing.
The capabilities of an ABS equipped vehicle
must never be exploited in a reckless or
dangerous manner that could jeopardize the
user’s safety or the safety of others.
WARNING!
6
Page 226 of 364
224 SAFETY
ESC Operation Modes
To disable ESC and other safety systems, follow
the instructions below.
There are three modes of active safety systems
presen
t on the vehicle:
ESC On
Partial Off
Full Off
ESC On – Two-Wheel Drive Vehicles And
Four-W h
eel Drive Vehicles In 2WD And 4WD High
This is the normal operating mode for ESC when
operati
ng a two-wheel drive vehicle. It is also the
normal mode for operating a four-wheel drive
vehicle in 2WD or 4WD High. The ESC system will
be in “ESC On” mode whenever the vehicle is
started or the power transfer unit (if equipped) is
shifted out of 4WD Low. This mode should be used
for most driving situations. ESC should only be
turned to “Partial Off” or “Full Off” for specific
reasons as noted. Refer to “Partial Off” and to “Full
Off” for additional information.
NOTE:
It is recommended to select the mode "Partial Off"
or "Fu l
l Off" only for specific reasons.
Partial Off – Two-Wheel Drive Vehicles And
Four-Wh
eel Drive Vehicles In 2WD And 4WD High
The “Partial Off” mode is intended for driving in
deep s
now, sand, or gravel. This mode raises the threshold for TCS and ESC activation, which allows
for more wheel spin than what ESC normally
allows.
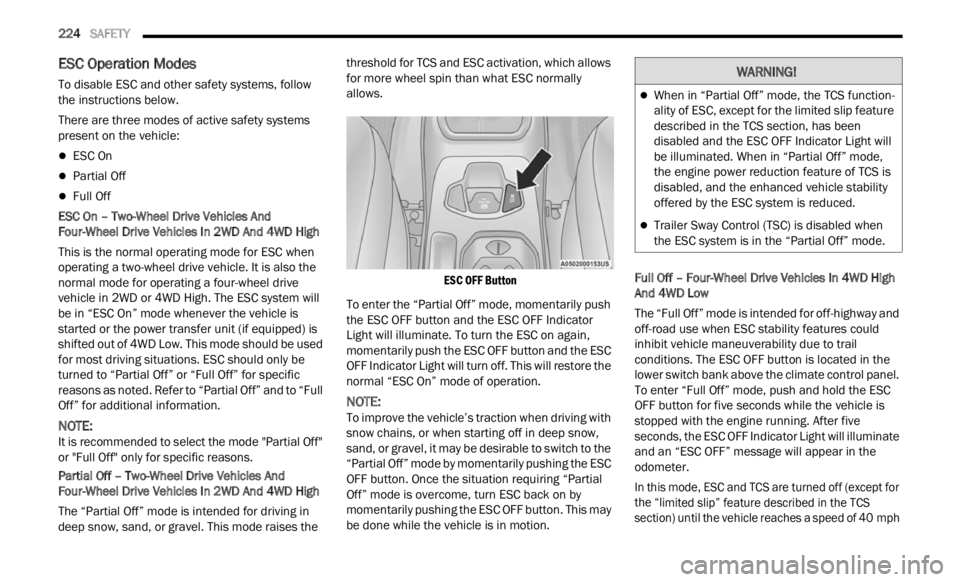
ESC OFF Button
To enter the “Partial Off” mode, momentarily push
the E S
C OFF button and the ESC OFF Indicator
Light will illuminate. To turn the ESC on again,
momentarily push the ESC OFF button and the ESC
OFF Indicator Light will turn off. This will restore the
normal “ESC On” mode of operation.
NOTE:
To improve the vehicle’s traction when driving with
snow c h
ains, or when starting off in deep snow,
sand, or gravel, it may be desirable to switch to the
“Partial Off” mode by momentarily pushing the ESC
OFF button. Once the situation requiring “Partial
Off” mode is overcome, turn ESC back on by
momentarily pushing the ESC OFF button. This may
be done while the vehicle is in motion. Full Off – Four-Wheel Drive Vehicles In 4WD High
And 4
W
D Low
The “Full Off” mode is intended for off-highway and
off-road
use when ESC stability features could
inhibit vehicle maneuverability due to trail
conditions. The ESC OFF button is located in the
lower switch bank above the climate control panel.
To enter “Full Off” mode, push and hold the ESC
OFF button for five seconds while the vehicle is
stopped with the engine running. After five
seconds, the ESC OFF Indicator Light will illuminate
and an “ESC OFF” message will appear in the
odometer.
In this mode, ESC and TCS are turned off (except for
the “ l
imited slip” feature described in the TCS
section) until the vehicle reaches a speed of 40 mph
WARNING!
When in “Partial Off” mode, the TCS function -
ality of ESC, except for the limited slip feature
descr i
bed in the TCS section, has been
disabled and the ESC OFF Indicator Light will
be illuminated. When in “Partial Off” mode,
the engine power reduction feature of TCS is
disabled, and the enhanced vehicle stability
offered by the ESC system is reduced.
Trailer Sway Control (TSC) is disabled when
the ESC system is in the “Partial Off” mode.
Page 227 of 364
SAFETY 225
(64 km/h). At speeds over 40 mph (64 km/h), the
system
automatically switches to “Partial Off” mode,
described above. When the vehicle speed returns to
less than 35 mph (56 km/h), the ESC system will
retur n
to “Full Off” mode. The ESC OFF Indicator
Light is always illuminated when ESC is off. To turn
ESC on again, momentarily push the ESC OFF
button. This will restore the normal “ESC On” mode
of operation.
NOTE:
With the ESC switched off, the enhanced vehicle
stabi l
ity offered by ESC is unavailable. In an emer -
gency evasive maneuver, the ESC system will not
e ngage
to assist in maintaining stability. “Full Off”
mode is only intended for off-highway or off-road
use.
NOTE:
“Full Off” is the only operating mode for ESC in
4WD Low. The ESC system will be in this mode
whenever the vehicle is started in 4WD Low or
the power transfer unit is shifted into 4WD Low.
The “ESC OFF” message will display and a chime
will sound when the gear selector is moved from
any position to the PARK (P) position and then
moved out of the PARK position. This will occur
even if the message was cleared previously.
Selec-Terrain — If Equipped
On models equipped with Selec-Terrain, the
a ctiva
tion of some driving modes provide partial off or full off of some active safety systems in order
to optimize performance in specific modes.
Partial or full off of the active safety systems will be
indic
a
ted by a light in the instrument cluster.
In "SAND" and "MUD", the active safety systems
are pa
rtially disabled and put in place to ensure
maximum performance in the specific mode of
operation. However, you can reactivate them
completely at any time by pushing the ESC button.
NOTE:
In 4WD Low, the active safety systems are
comple t
ely bypassed in order to ensure maximum
off-road performance.
ESC Activation/Malfunction Indicator Light
And ESC OFF Indicator Light
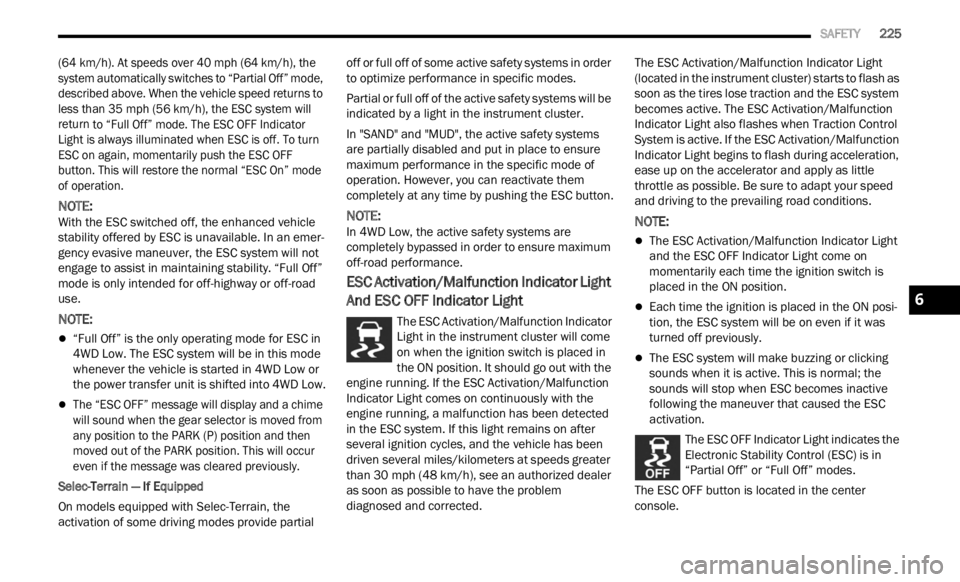
The ESC Activation/Malfunction Indicator
Light in the instrument cluster will come
on whe n
the ignition switch is placed in
the ON position. It should go out with the
engine running. If the ESC Activation/Malfunction
Indicator Light comes on continuously with the
engine running, a malfunction has been detected
in the ESC system. If this light remains on after
several ignition cycles, and the vehicle has been
driven several miles/kilometers at speeds greater
than 30 mph (48 km/h), see an authorized dealer
as soon
as possible to have the problem
diagnosed and corrected. The ESC Activation/Malfunction Indicator Light
(locat
e
d in the instrument cluster) starts to flash as
soon as the tires lose traction and the ESC system
becomes active. The ESC Activation/Malfunction
Indicator Light also flashes when Traction Control
System is active. If the ESC Activation/Malfunction
Indicator Light begins to flash during acceleration,
ease up on the accelerator and apply as little
throttle as possible. Be sure to adapt your speed
and driving to the prevailing road conditions.
NOTE:
The ESC Activation/Malfunction Indicator Light
and the ESC OFF Indicator Light come on
momentarily each time the ignition switch is
placed in the ON position.
Each time the ignition is placed in the ON posi -
tion, the ESC system will be on even if it was
turne d
off previously.
The ESC system will make buzzing or clicking
sounds when it is active. This is normal; the
sounds will stop when ESC becomes inactive
following the maneuver that caused the ESC
activation.
The ESC OFF Indicator Light indicates the
Electronic Stability Control (ESC) is in
“Part i
al Off” or “Full Off” modes.
The ESC OFF button is located in the center
console.
6
Page 229 of 364
SAFETY 227
Hill Start Assist (HSA)
HSA is designed to help the driver accelerate the
vehicle from a complete stop while on an incline. If
the driver releases the brake while stopped on an
incline, HSA will continue to hold the brake
pressure for a short period. If the driver does not
apply the throttle before this time expires, the
system will release brake pressure and the vehicle
will roll down the hill as normal. The system will
release brake pressure in proportion to amount of
throttle applied.
The following conditions must be met in order for
HSA to a
ctivate:
The vehicle must be stopped.
The vehicle must be on a 5% (approximate)
grade or greater hill.
The gear selection must match vehicle uphill
direction (i.e., vehicle facing uphill is in forward
gear; vehicle backing uphill is in REVERSE gear).
For vehicles equipped with an automatic trans -
mission, the HSA will work in REVERSE gear and all f
or ward gears. The system will not activate if
the transmission is in PARK.
Disabling And Enabling HSA
This feature can be turned on or turned off. To
chang e
the current setting, see Ú page 64.
Traction Control System (TCS)
TCS monitors the amount of wheel spin of each of
the driven wheels. If wheel spin is detected, brake
pressure is applied to the slipping wheel(s) and
engine power is reduced to provide enhanced
acceleration and stability. A feature of the TCS,
Brake Limited Differential (BLD) functions similarly to a limited slip differential and controls the wheel
spin across a driven axle. If one wheel on a driven
axle is spinning faster than the other, the system
will apply the brake of the spinning wheel. This will
allow more engine torque to be applied to the
wheel that is not spinning. This feature remains
active even if TCS and Electronic Stability Control
(ESC) are in the “Partial Off” mode or the “Full Off”
modes. For further information, see
Ú page 223.
Trailer Sway Control (TSC) — If Equipped
TSC uses sensors in the vehicle to recognize an
excessively swaying trailer and will take the
appropriate actions to attempt to stop the sway.
The system may reduce engine power and apply
the brake of the appropriate wheel(s) to counteract
the sway of the trailer.
NOTE:
TSC cannot stop all trailers from swaying. Always
use c a
ution when towing a trailer and follow the
trailer tongue weight recommendations. For
further information, see Ú page 124. When TSC is
functioning, the ESC Activation/Malfunction Indi -
cator Light will flash, the engine power may be
r educ e
d and you may feel the brakes being applied
to individual wheels to attempt to stop the trailer
from swaying. TSC is disabled when the ESC
system is in the “Partial Off” mode.
WARNING!
HDC is only intended to assist the driver in
controlling vehicle speed when descending hills.
The driver must remain attentive to the driving
conditions and is responsible for maintaining a
safe vehicle speed.WARNING!
There may be situations where the Hill Start
Assist (HSA) will not activate and slight rolling
may occur, such as on minor hills or with a
loaded vehicle, or while pulling a trailer. HSA is
not a substitute for active driving involvement. It
is always the driver’s responsibility to be
attentive to distance to other vehicles, people,
and objects, and most importantly brake
operation to ensure safe operation of the vehicle
under all road conditions. Your complete
attention is always required while driving to
maintain safe control of your vehicle. Failure to
follow these warnings can result in a collision or
serious personal injury.
6
Page 242 of 364

240 SAFETY
display the “SERVICE TPM SYSTEM” message in
the instrument cluster display but dashes (--) will
remain in place of the pressure values.
To reactivate the TPMS, replace all four wheel and
tire a
ssemblies (road tires) with tires equipped with
TPMS sensors. Then, drive the vehicle for up to
20 minutes above 15 mph (24 km/h). The TPMS
will c
hime, the TPMS Light will flash on and off for
75 seconds and then turn off, and the instrument
cluster will display the “SERVICE TPM SYSTEM”
message. The instrument cluster will also display
pressure values in place of the dashes. On the next
ignition switch cycle the “SERVICE TPM SYSTEM”
message will no longer be displayed as long as no
system fault exists.
OCCUPANT RESTRAINT SYSTEMS
Some of the most important safety features in your
vehicle are the restraint systems:
OCCUPANT RESTRAINT SYSTEMS
Seat Belt Systems
Supplemental Restraint Systems (SRS) Air Bags
Child Restraints
Some of the safety features described in this
secti on
may be standard equipment on some
models, or may be optional equipment on others. If
you are not sure, ask an authorized dealer.
IMPORTANT SAFETY PRECAUTIONS
Please pay close attention to the information in
this section. It tells you how to use your restraint
system properly, to keep you and your passengers
as safe as possible.
Here are some simple steps you can take to
minimi
ze the risk of harm from a deploying air bag:
1. Children 12 years old and under should alway
s ride buckled up in the rear seat of a
vehicle with a rear seat.
2. A child who is not big enough to wear the vehi c
le seat belt properly must be secured in
the appropriate child restraint or
belt-positioning booster seat in a rear seating
position Ú page 255.
3. If a child from 2 to 12 years old (not in a rear-
facing child restraint) must ride in the
front passenger seat, move the seat as far
back as possible and use the proper child
restraint Ú page 255.
4. Never allow children to slide the shoulder belt behi n
d them or under their arm.
5. You should read the instructions provided with your c
hild restraint to make sure that you are
using it properly.
6. All occupants should always wear their lap and shoul d
er belts properly. 7. The driver and front passenger seats should
be m ov
ed back as far as practical to allow the
front air bags room to inflate.
8. Do not lean against the door or window. If your vehi c
le has side air bags, and deployment
occurs, the side air bags will inflate forcefully
into the space between occupants and the
door and occupants could be injured.
9. If the air bag system in this vehicle needs to be modif i
ed to accommodate a disabled person,
see Ú page 346 for customer service contact
information.
WARNING!
Never place a rear-facing child restraint in
front of an air bag. A deploying passenger
front air bag can cause death or serious injury
to a child 12 years or younger, including a
child in a rear-facing child restraint.
Never install a rear-facing child restraint in the
front seat of a vehicle. Only use a rear-facing
child restraint in the rear seat. If the vehicle
does not have a rear seat, do not transport a
rear-facing child restraint in that vehicle.
Page 265 of 364

SAFETY 263
Installing A Child Restraint With A
Switchable Automatic Locking Retractor
(ALR):
Child restraint systems are designed to be secured
in vehicle seats by lap belts or the lap belt portion
of a lap/shoulder belt.
1. Place the child seat in the center of the seating
posit
ion. If the second row seat can be reclined,
you may recline the seat and/or raise the head
restraint (if adjustable) to get a better fit. If the
rear seat can be moved forward and rearward in
the vehicle, you may wish to move it to its
rear-most position to make room for the child
seat. You may also move the front seat forward
to allow more room for the child seat.
2. Pull enough of the seat belt webbing from the retra
ctor to pass it through the belt path of the
child restraint. Do not twist the belt webbing in
the belt path.
3. Slide the latch plate into the buckle until you hear
a “click.”
4. Pull on the webbing to make the lap portion tight again
st the child seat. 5. To lock the seat belt, pull down on the shoulder
part
of the belt until you have pulled all the seat
belt webbing out of the retractor. Then, allow the
webbing to retract back into the retractor. As the
webbing retracts, you will hear a clicking sound.
This means the seat belt is now in the Automatic
Locking mode.
6. Try to pull the webbing out of the retractor. If it is locke
d, you should not be able to pull out any
webbing. If the retractor is not
locked, repeat
step 5.
7. Finally, pull up on any excess webbing to tighten the lap portion around the child restraint while
you push the child restraint rearward and
downward into the vehicle seat.
8. If the child restraint has a top tether strap and the s
eating position has a top tether anchorage,
connect the tether strap to the anchorage and
Frequently Asked Questions About Installing Child Restraints With Seat Belts
What is the weight limit (child’s weight + weight of the child
restraint) for using the Tether Anchor with the seat belt to attach
a forward facing child restraint? Weight limit of the
Child
Restraint Always use the tether anchor when using the seat belt to install a
forwar
d
facing child restraint, up to the recommended weight
limit of the child restraint.
Can the rear-facing child restraint touch the back of the front
passen
ger seat? YesContact between the front passenger seat and the child restraint
is all
owed, if the child restraint manufacturer also allows contact.
Can the rear head restraints be removed? No
Can the buckle stalk be twisted to tighten the seat belt against
the b e
lt path of the child restraint? NoDo not twist the buckle stalk in a seating position with an ALR
retrac
tor.
WARNING!
Improper installation or failure to properly
secure a child restraint can lead to failure of
the restraint. The child could be badly injured
or killed.
Follow the child restraint manufacturer’s
directions exactly when installing an infant or
child restraint.
6
Page 267 of 364
SAFETY 265
SAFETY TIPS
TRANSPORTING PASSENGERS
NEVER TRANSPORT PASSENGERS IN THE CARGO
AREA.
TRANSPORTING PETS
Air Bags deploying in the front seat could harm
your pet. An unrestrained pet will be thrown about
and possibly injured, or injure a passenger during
panic braking or in a collision. Pets should be restrained in the rear seat (if
equip
p
ed) in pet harnesses or pet carriers that are
secured by seat belts.
CONNECTED VEHICLES
Privacy of any wireless and wired communications
cannot be assured. Third parties may unlawfully
intercept information and private communications
without your consent. For further information, refer
to “Data Collection & Privacy” in your Uconnect
Owner’s Manual Supplement or “Onboard
Diagnostic System (OBD II) Cybersecurity”
Ú page 78.
SAFETY CHECKS YOU SHOULD MAKE
I
NSIDE THE VEHICLE
Seat Belts
Inspect the seat belt system periodically, checking
for cuts, frays, and loose parts. Damaged parts must be replaced immediately. Do not
disassemble or modify the system.
If your vehicle is involved in a collision, or if you
have
q
uestions regarding the seat belt or retractor
conditions, take your vehicle to an authorized FCA
dealer or authorized FCA Certified Collision Care
Program facility for inspection.
Air Bag Warning Light
The Air Bag Warning Light will turn on for
four to eight seconds as a bulb check
when t
he ignition switch is first placed in
the ON/RUN mode. If the light is either
not on during starting, stays on, or turns on while
driving, have the system inspected at an
authorized dealer as soon as possible. After the
bulb check, this light will illuminate with a single
chime when a fault with the Air Bag System has
been detected. It will stay on until the fault is
removed. If the light comes on intermittently or
remains on while driving, have an authorized
dealer service the vehicle immediately
Ú page 240.
Defroster
Check operation by selecting the defrost mode and
place the blower control on high speed. You should
be able to feel the air directed against the
windshield. See an authorized dealer for service if
your defroster is inoperable.
WARNING!
Do not leave children or animals inside parked
vehicles in hot weather. Interior heat buildup
may cause serious injury or death.
It is extremely dangerous to ride in a cargo
area, inside or outside of a vehicle. In a colli -
sion, people riding in these areas are more
l ikely
to be seriously injured or killed.
Do not allow people to ride in any area of your
vehicle that is not equipped with seats and
seat belts.
Be sure everyone in your vehicle is in a seat
and using a seat belt properly.
WARNING!
It is not possible to know or to predict all of the
possible outcomes if your vehicle’s systems are
breached. It may be possible that vehicle
systems, including safety related systems, could
be impaired or a loss of vehicle control could
occur that may result in an accident involving
serious injury or death.6