ECU JEEP WRANGLER 2015 JK / 3.G Owner's Guide
[x] Cancel search | Manufacturer: JEEP, Model Year: 2015, Model line: WRANGLER, Model: JEEP WRANGLER 2015 JK / 3.GPages: 695, PDF Size: 20.64 MB
Page 214 of 695
Rear Hard Top Removal
1. Remove both front panels. Refer to “Front Panel(s)
Removal” in this section.
2. Open both doors.
3. Remove the two Torx® head screws that secure the
hard top at the B-pillar (near the top of the door) using
a #40 Torx® head driver (Four–Door Only).
4. Remove the six Torx® head screws that secure the
hard top to the vehicle (along the interior bodyside)
using a #40 Torx® head driver.
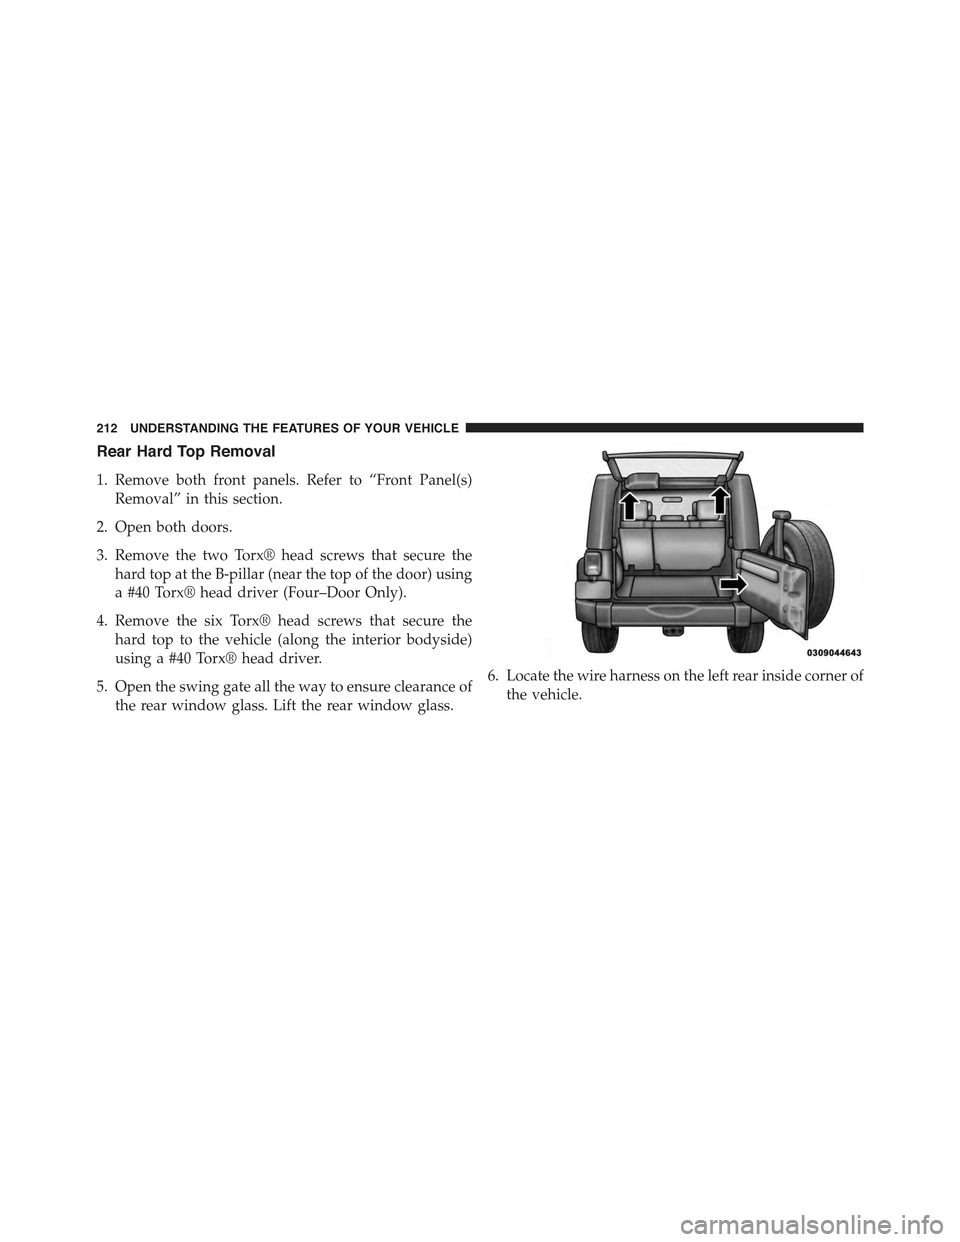
5. Open the swing gate all the way to ensure clearance of
the rear window glass. Lift the rear window glass.
6. Locate the wire harness on the left rear inside corner of
the vehicle.
212 UNDERSTANDING THE FEATURES OF YOUR VEHICLE
Page 219 of 695
WARNING!
Use both hands to remove the door frames. The door
frames will fold and could cause injury if both hands
are not used.
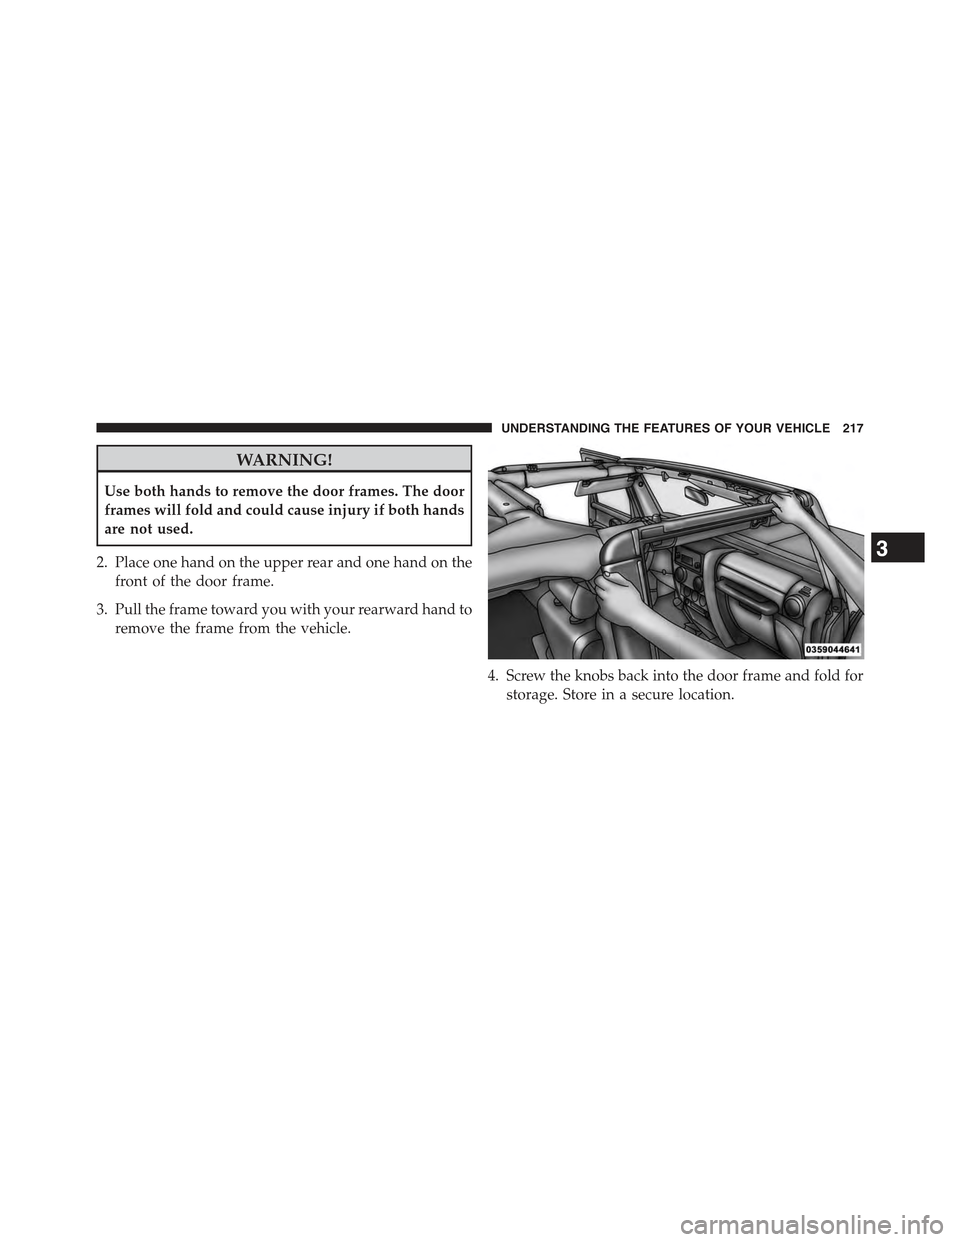
2. Place one hand on the upper rear and one hand on the
front of the door frame.
3. Pull the frame toward you with your rearward hand to
remove the frame from the vehicle.
4. Screw the knobs back into the door frame and fold for
storage. Store in a secure location.
3
UNDERSTANDING THE FEATURES OF YOUR VEHICLE 217
Page 226 of 695
CAUTION!(Continued)
•Refer to “Appearance Care For Fabric Top Models”
in “Maintaining Your Vehicle” for further informa-
tion. It contains important information on cleaning
and caring for your vehicle’s fabric top.
•Do not use any tools (screwdrivers, etc.) to pry or
force any of the clamps, clips, or retainers securing
the soft top. Do not force or pry the soft top
framework when opening or closing. Damage to
the top may result.
WARNING!
•Do not drive the vehicle with the rear window
curtain up unless the side curtains are also re-
moved. Dangerous exhaust gases could enter the
vehicle causing harm to the driver and passengers.
(Continued)
WARNING!(Continued)
•The fabric upper doors and fabric top are designed
only for protection against the elements. Do not
rely on them to contain occupants within the ve-
hicle or to protect against injury during an acci-
dent. Remember, always wear seat belts.
CAUTION!
Failure to follow these cautions may cause interior
water damage, stains or mildew on the top material:
•It is recommended that the top be free of water
prior to opening it. Operating the top, opening a
door or lowering a window while the top is wet
may allow water to drip into the vehicle’s interior.
(Continued)
224 UNDERSTANDING THE FEATURES OF YOUR VEHICLE
Page 254 of 695
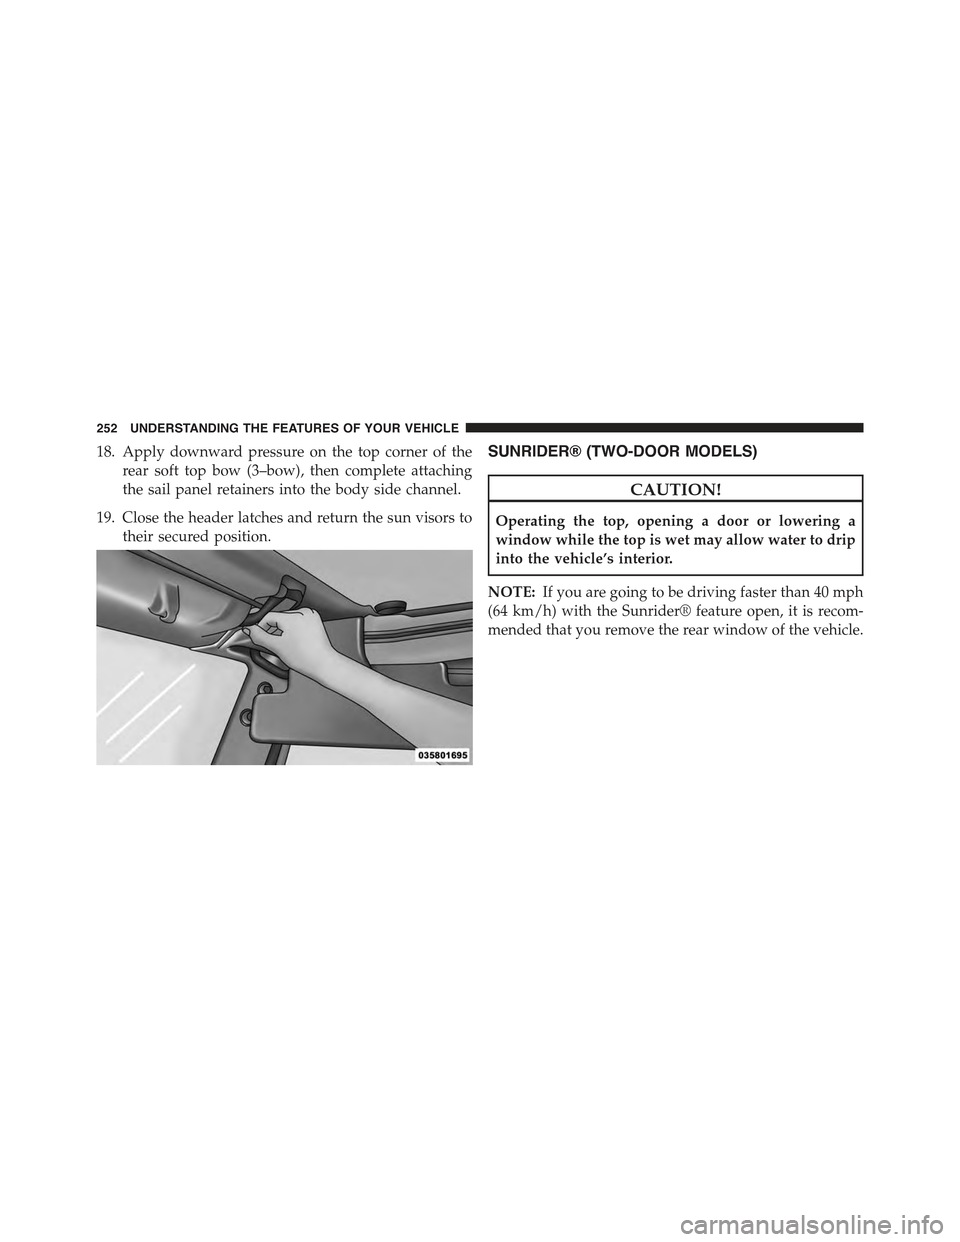
18. Apply downward pressure on the top corner of the
rear soft top bow (3–bow), then complete attaching
the sail panel retainers into the body side channel.
19. Close the header latches and return the sun visors to
their secured position.
SUNRIDER® (TWO-DOOR MODELS)
CAUTION!
Operating the top, opening a door or lowering a
window while the top is wet may allow water to drip
into the vehicle’s interior.
NOTE:If you are going to be driving faster than 40 mph
(64 km/h) with the Sunrider® feature open, it is recom-
mended that you remove the rear window of the vehicle.
252 UNDERSTANDING THE FEATURES OF YOUR VEHICLE
Page 256 of 695
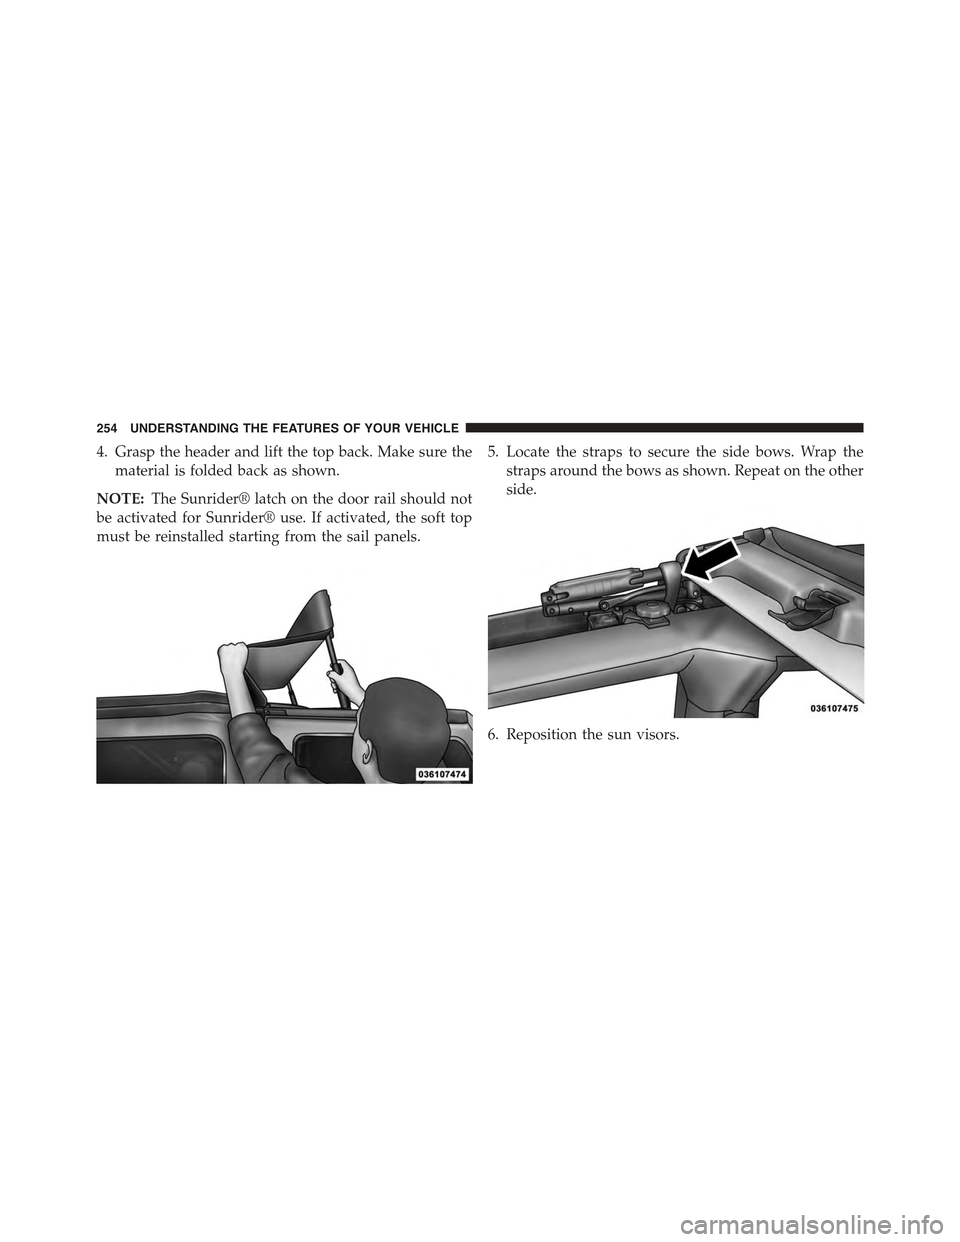
4. Grasp the header and lift the top back. Make sure the
material is folded back as shown.
NOTE:The Sunrider® latch on the door rail should not
be activated for Sunrider® use. If activated, the soft top
must be reinstalled starting from the sail panels.
5. Locate the straps to secure the side bows. Wrap the
straps around the bows as shown. Repeat on the other
side.
6. Reposition the sun visors.
254 UNDERSTANDING THE FEATURES OF YOUR VEHICLE
Page 258 of 695
Place the vehicle in a warm area. Pull steadily on the top
fabric. The vinyl will stretch back to its original size and
the top can then be snapped into place.If the tempera-
ture is 41°F (5°C) or below, do not attempt to put the top
down or roll the rear or side curtains.
CAUTION!
•Do not run a fabric top through an automatic car
wash. Window scratches and wax buildup may
result.
•Do not lower the top when the temperature is
below 41°F (5°C). Damage to the top may result.
•Do not lower the top when the windows are dirty.
Grit may scratch the window.
•Do not move your vehicle until the top has been
either fully attached to the windshield frame, or
fully lowered.
(Continued)
CAUTION!(Continued)
•Do not lower the top with the windows installed.
Window and top damage may occur.
•Refer to “Appearance Care for Fabric Top Models”
in “Maintaining Your Vehicle” for further informa-
tion. It contains important information on cleaning
and caring for your vehicle’s fabric top.
•Do not use any tools (screwdrivers, etc.) to pry or
force any of the clamps, clips, or retainers securing
the soft top. Do not force or pry the soft top
framework when opening or closing. Damage to
the top may result.
256 UNDERSTANDING THE FEATURES OF YOUR VEHICLE
Page 279 of 695
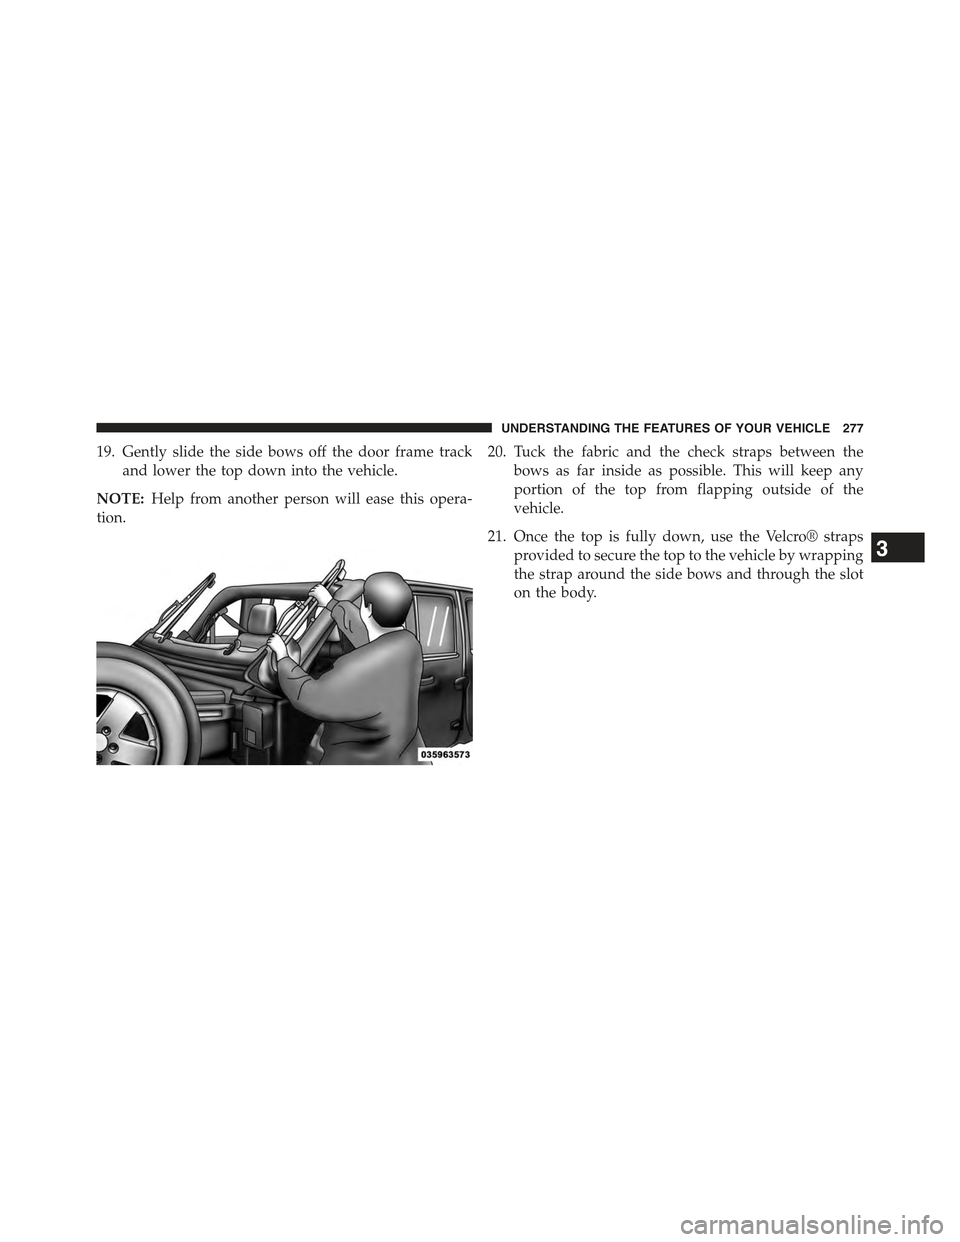
19. Gently slide the side bows off the door frame track
and lower the top down into the vehicle.
NOTE:Help from another person will ease this opera-
tion.
20. Tuck the fabric and the check straps between the
bows as far inside as possible. This will keep any
portion of the top from flapping outside of the
vehicle.
21. Once the top is fully down, use the Velcro® straps
provided to secure the top to the vehicle by wrapping
the strap around the side bows and through the slot
on the body.
3
UNDERSTANDING THE FEATURES OF YOUR VEHICLE 277
Page 280 of 695
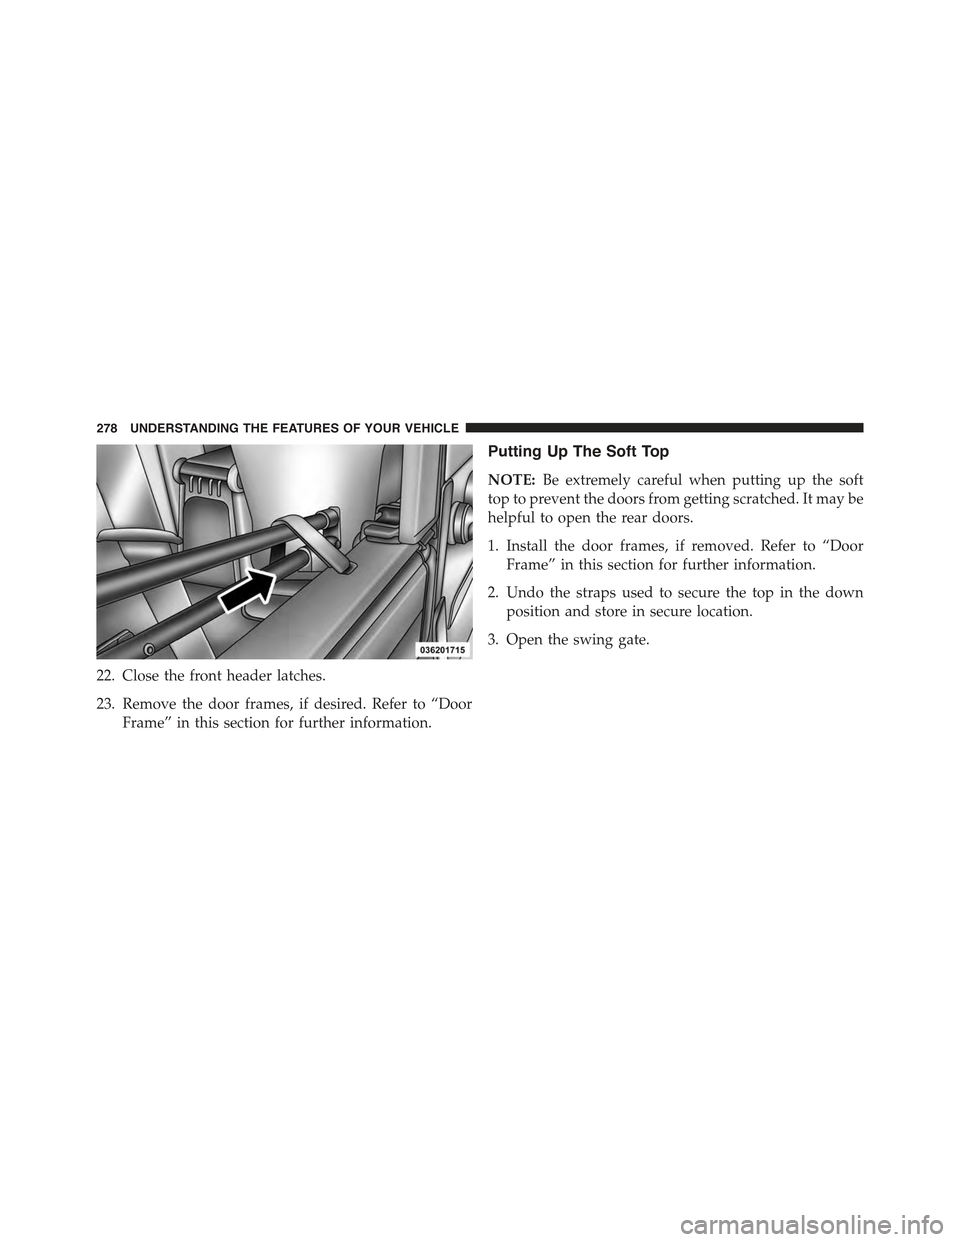
22. Close the front header latches.
23. Remove the door frames, if desired. Refer to “Door
Frame” in this section for further information.
Putting Up The Soft Top
NOTE:Be extremely careful when putting up the soft
top to prevent the doors from getting scratched. It may be
helpful to open the rear doors.
1. Install the door frames, if removed. Refer to “Door
Frame” in this section for further information.
2. Undo the straps used to secure the top in the down
position and store in secure location.
3. Open the swing gate.
278 UNDERSTANDING THE FEATURES OF YOUR VEHICLE
Page 289 of 695
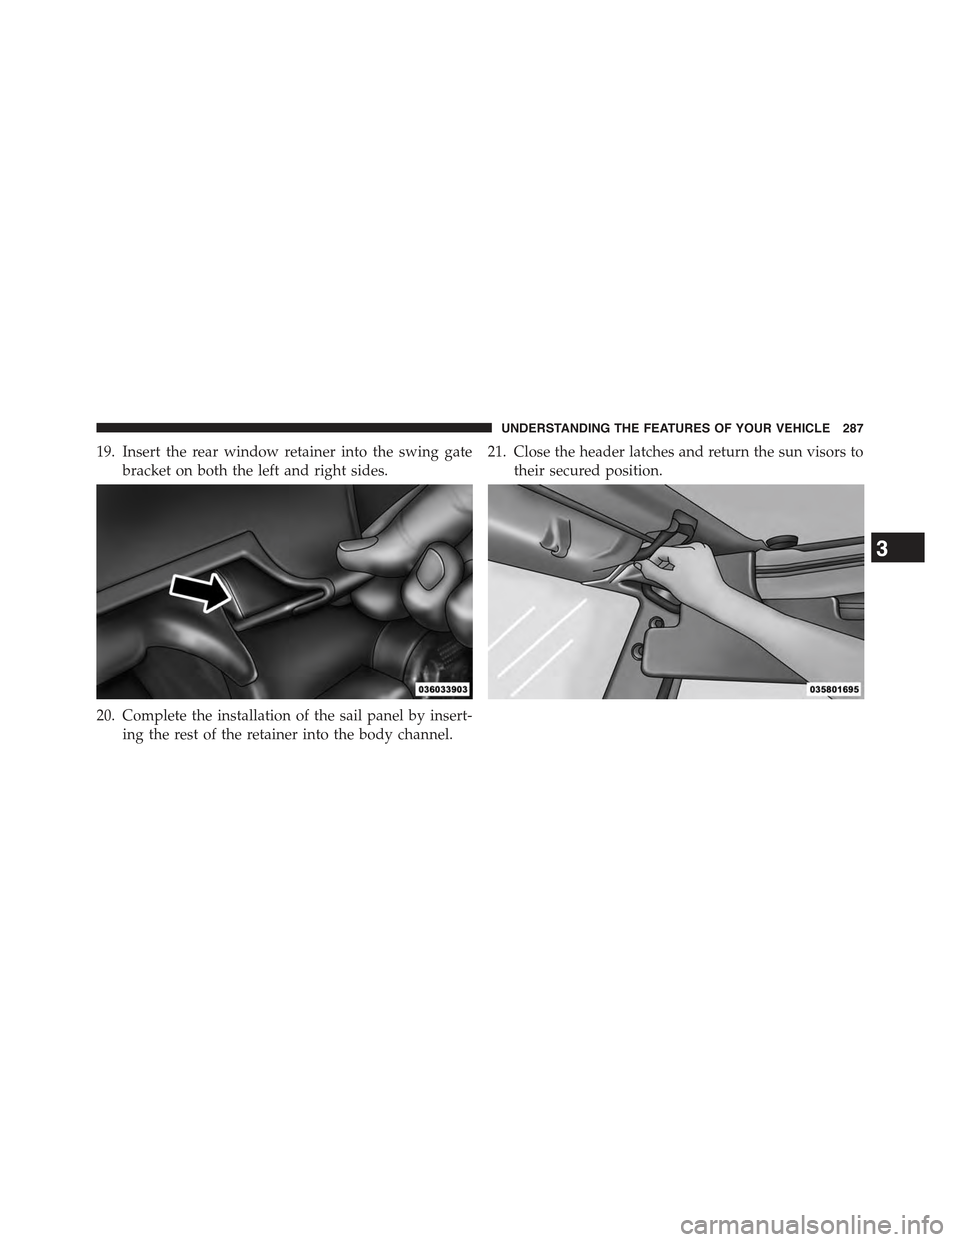
19. Insert the rear window retainer into the swing gate
bracket on both the left and right sides.
20. Complete the installation of the sail panel by insert-
ing the rest of the retainer into the body channel.
21. Close the header latches and return the sun visors to
their secured position.
3
UNDERSTANDING THE FEATURES OF YOUR VEHICLE 287
Page 292 of 695
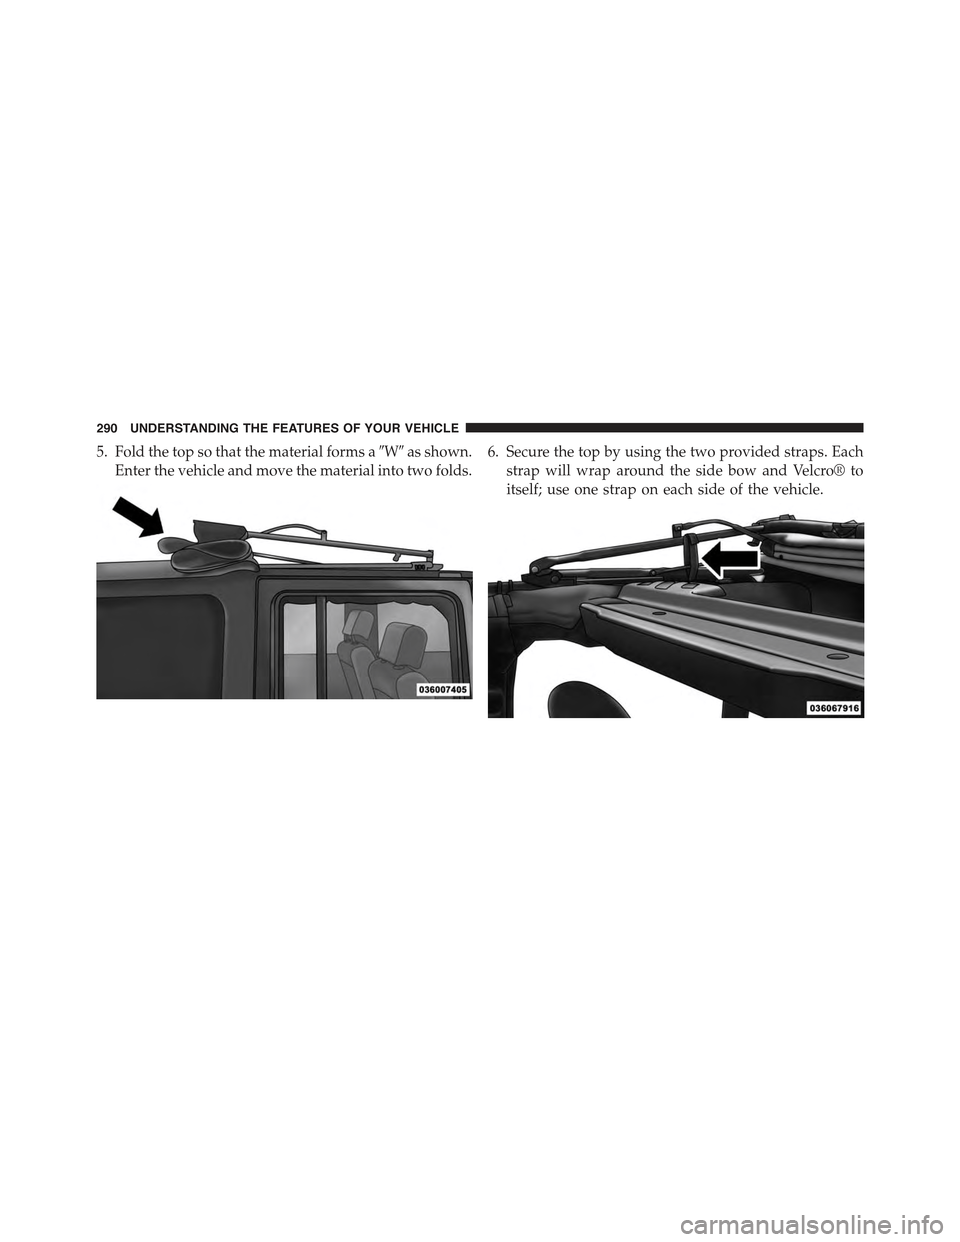
5. Fold the top so that the material forms a#W#as shown.
Enter the vehicle and move the material into two folds.
6. Secure the top by using the two provided straps. Each
strap will wrap around the side bow and Velcro® to
itself; use one strap on each side of the vehicle.
290 UNDERSTANDING THE FEATURES OF YOUR VEHICLE