check oil JEEP WRANGLER 2023 Owners Manual
[x] Cancel search | Manufacturer: JEEP, Model Year: 2023, Model line: WRANGLER, Model: JEEP WRANGLER 2023Pages: 396, PDF Size: 25.15 MB
Page 7 of 396
5
ANDROID AUTO™ & APPLE CARPLAY® —
IF EQUIPPED ..................................................................... 222Android Auto™
S
.................................................... 222
Apple CarPlay®
S
.................................................. 224
Android Auto™ And Apple CarPlay® Tips And
Tricks.......................................................................... 225
CONNECTED VEHICLE SERVICES — IF EQUIPPED ...... 225 Is My Vehicle Connected? ........................................ 225Introduction To Connected Vehicle Services .......... 226
Getting Started With Connected Vehicle Services ... 227
Using SiriusXM Guardian™ ...................................... 228
Manage My SiriusXM Guardian™ Account ............. 237
CONNECTED SERVICES FAQS ....................................... 237 Connected Services SOS FAQs — If Equipped ........ 237
Connected Services Remote Door Lock/Unlock
FAQs .......................................................................... 237
Connected Services Roadside Assistance FAQs .... 237Connected Services Send & Go FAQs —
If Equipped ............................................................... 238
Connected Services Vehicle Finder FAQs ............... 238
Connected Services Stolen Vehicle Assistance
FAQs — If Equipped .................................................. 238
Connected Services Remote Vehicle Start FAQs ... 238
Connected Services Remote Horn & Lights FAQs .. 239
Connected Services Account FAQs — If Equipped .. 239
Data Collection & Privacy ......................................... 240
RADIO OPERATION AND MOBILE PHONES .................. 240 Regulatory And Safety Information .......................... 241
OFF-ROAD PAGES — IF EQUIPPED ................................ 241 Off-Road Pages Status Bar ...................................... 241
Drivetrain .................................................................. 242
Accessory Gauge ...................................................... 242Pitch & Roll ............................................................... 242
TrailCam — If Equipped ............................................. 243
SAFETY
SAFETY FEATURES .......................................................... 244 Anti-Lock Brake System (ABS) ................................ 244
Rear Seat Reminder Alert (RSRA) — If Equipped .... 244
Electronic Brake Control (EBC) System .................. 245
AUXILIARY DRIVING SYSTEMS ...................................... 252 Blind Spot Monitoring (BSM) — If Equipped ........... 252
Forward Collision Warning (FCW) With
Mitigation — If Equipped........................................... 255Tire Pressure Monitoring System (TPMS) ............... 257
OCCUPANT RESTRAINT SYSTEMS ............................... 261 Occupant Restraint Systems Features ................... 261
Important Safety Precautions .................................. 261
Seat Belt Systems .................................................... 261
Supplemental Restraint Systems (SRS).................. 267
Child Restraints ........................................................ 277
SAFETY TIPS ..................................................................... 288 Transporting Passengers ......................................... 288
Transporting Pets ..................................................... 288
Connected Vehicles .................................................. 288Safety Checks You Should Make Inside The
Vehicle ...................................................................... 288
Periodic Safety Checks You Should Make Outside
The Vehicle ................................................................ 290Exhaust Gas .............................................................. 290
Carbon Monoxide Warnings ..................................... 290
IN CASE OF EMERGENCY
HAZARD WARNING FLASHERS ..................................... 291
ASSIST AND SOS SYSTEM — IF EQUIPPED .................. 291 JACKING AND TIRE CHANGING
S
...............................293
Preparations For Jacking ......................................... 294
Jack Location ............................................................ 294 Spare Tire Removal .................................................. 295
Jacking Instructions .................................................. 295
JUMP STARTING ..............................................................298 Preparations For Jump Start..................................... 298
Jump Starting Procedure .......................................... 299
IF YOUR ENGINE OVERHEATS......................................... 300
MANUAL PARK RELEASE ................................................301
FREEING A STUCK VEHICLE ........................................... 302
TOWING A DISABLED VEHICLE.......................................303 Four–Wheel Drive Models ........................................ 303Without The Key Fob ................................................. 304
Emergency Tow Hooks — If Equipped ..................... 304
ENHANCED ACCIDENT RESPONSE SYSTEM (EARS) ..305
EVENT DATA RECORDER (EDR)......................................305
SERVICING AND MAINTENANCE
SCHEDULED SERVICING — GASOLINE ENGINE ...........306 Maintenance Plan ..................................................... 307
SCHEDULED SERVICING — DIESEL ENGINE .................310 Maintenance Plan — Diesel Fuel Up To B5
Biodiesel .................................................................... 311Additional Maintenance — B6 To B20 Biodiesel ..... 313
ENGINE COMPARTMENT ................................................. 314 2.0L Gasoline Engine ............................................... 3143.6L Gasoline Engine ............................................... 3153.0L Diesel Engine .................................................... 316
Checking Oil Level ..................................................... 317Adding Washer Fluid ................................................. 317
Maintenance-Free Battery ....................................... 317Pressure Washing ..................................................... 318
23_JL_OM_EN_USC_t.book Page 5
Page 120 of 396
118GETTING TO KNOW YOUR INSTRUMENT PANEL
Electric Power Steering (EPS) Fault
Warning Light
This warning light will turn on when there's a
fault with the EPS system Úpage 146.
Electronic Throttle Control (ETC) Warning
Light
This warning light will illuminate to indicate a
problem with the ETC system. If a problem is
detected while the vehicle is running, the light
will either stay on or flash depending on the
nature of the problem. Cycle the ignition when the vehicle
is safely and completely stopped and the transmission is
placed in the PARK (P) position. The light should turn off.
If the light remains on with the vehicle running, your
vehicle will usually be drivable; however, see an
authorized dealer for service as soon as possible.
NOTE:This light may turn on if the accelerator and brake pedals
are pressed at the same time.
If the light continues to flash when the vehicle is running,
immediate service is required and you may experience
reduced performance, an elevated/rough idle, or engine
stall and your vehicle may require towing. The light will come on when the ignition is placed in the ON/RUN or
ACC/ON/RUN position and remain on briefly as a bulb
check. If the light does not come on during starting, have
the system checked by an authorized dealer.
Engine Coolant Temperature Warning
Light
This warning light warns of an overheated
engine condition. If the engine coolant
temperature is too high, this indicator will
illuminate and a single chime will sound. If the
temperature reaches the upper limit, a continuous chime
will sound for four minutes or until the engine is able to
cool, whichever comes first.
If the light turns on while driving, safely pull over and stop
the vehicle. If the Air Conditioning (A/C) system is on, turn
it off. Also, shift the transmission into NEUTRAL (N) and
idle the vehicle. If the temperature reading does not return
to normal, turn the engine off immediately and call for
service
Úpage 300.
Hood Open Warning Light
This indicator will illuminate when the hood is
ajar/open and not fully closed.
NOTE:If the vehicle is moving, there will also be a single chime.
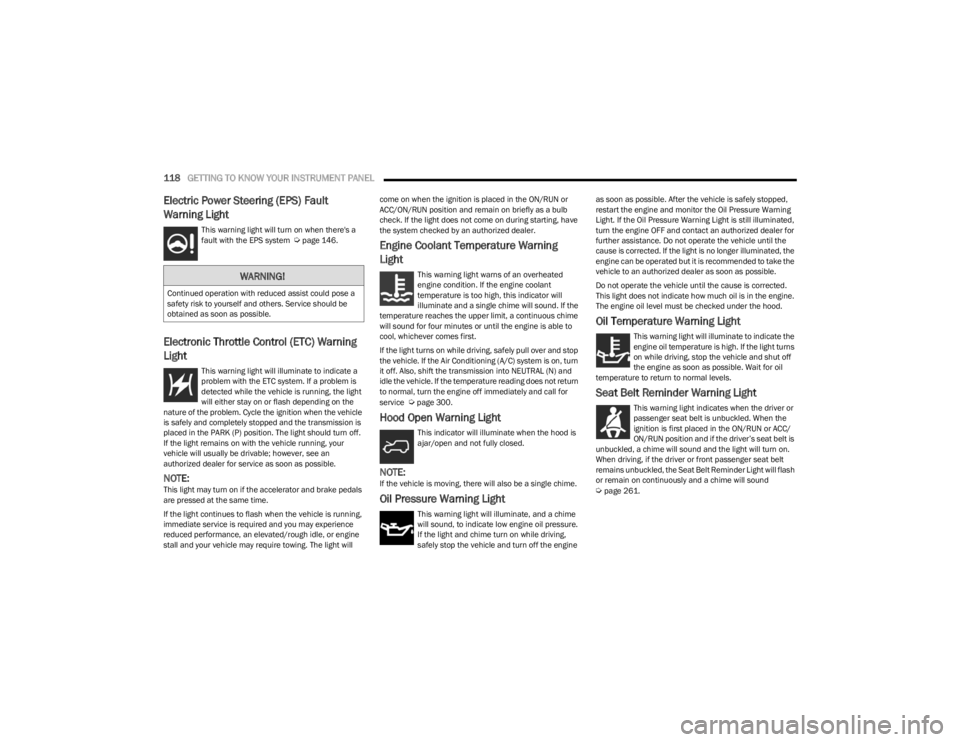
Oil Pressure Warning Light
This warning light will illuminate, and a chime
will sound, to indicate low engine oil pressure.
If the light and chime turn on while driving,
safely stop the vehicle and turn off the engine as soon as possible. After the vehicle is safely stopped,
restart the engine and monitor the Oil Pressure Warning
Light. If the Oil Pressure Warning Light is still illuminated,
turn the engine OFF and contact an authorized dealer for
further assistance. Do not operate the vehicle until the
cause is corrected. If the light is no longer illuminated, the
engine can be operated but it is recommended to take the
vehicle to an authorized dealer as soon as possible.
Do not operate the vehicle until the cause is corrected.
This light does not indicate how much oil is in the engine.
The engine oil level must be checked under the hood.
Oil Temperature Warning Light
This warning light will illuminate to indicate the
engine oil temperature is high. If the light turns
on while driving, stop the vehicle and shut off
the engine as soon as possible. Wait for oil
temperature to return to normal levels.
Seat Belt Reminder Warning Light
This warning light indicates when the driver or
passenger seat belt is unbuckled. When the
ignition is first placed in the ON/RUN or ACC/
ON/RUN position and if the driver’s seat belt is
unbuckled, a chime will sound and the light will turn on.
When driving, if the driver or front passenger seat belt
remains unbuckled, the Seat Belt Reminder Light will flash
or remain on continuously and a chime will sound
Úpage 261.
WARNING!
Continued operation with reduced assist could pose a
safety risk to yourself and others. Service should be
obtained as soon as possible.
23_JL_OM_EN_USC_t.book Page 118
Page 132 of 396
130STARTING AND OPERATING
NORMAL STARTING
Observe the instrument cluster lights when starting the
engine.
NOTE:Normal starting of either a cold or a warm engine is
obtained without pumping or pressing the accelerator
pedal.
1. Always apply the parking brake.
2. Press and hold the brake pedal while pushing the
ENGINE START/STOP button once.
NOTE:A delay of the start of up to five seconds is possible under
very cold conditions. The Wait to Start telltale will be illumi -
nated during the preheat process. When the engine Wait
To Start telltale goes off the engine will automatically
crank.
3. The system will automatically engage the starter to crank the engine. If the vehicle fails to start, the
starter will disengage automatically after 25 seconds.
4. If you wish to stop the cranking of the engine prior to the engine starting, push the ENGINE START/STOP
button again. 5. Check that the Oil Pressure Warning Light has turned
off.
6. Release the parking brake.
STARTING FLUIDS
The engine is equipped with a glow plug preheating
system. If the instructions in this manual are followed, the
engine should start in all conditions and no type of starting
fluid should be used.
NORMAL OPERATION — DIESEL ENGINE
Observe the following when the diesel engine is operating:
All message center lights are off.
Malfunction Indicator Light (MIL) is off.
Engine Oil Pressure telltale is not illuminated.
Voltmeter operation.
The voltmeter may show a gauge fluctuation at various
engine temperatures. This is caused by the glow plug
heating system. The number of cycles and the length of
the cycling operation is controlled by the engine control
module. Glow plug heater operation can run for several
minutes. Once the heater operation is complete, the
voltmeter needle will stabilize.
CAUTION!
If the Water in Fuel Indicator Light remains on, DO NOT
START the engine before you drain the water from the
fuel filters to avoid engine damage
Úpage 321.
WARNING!
Do not leave children or animals inside parked vehi -
cles in hot weather. Interior heat buildup may cause
serious injury or death.
When leaving the vehicle, always make sure the
keyless ignition node is in the OFF position, remove
the key fob from the vehicle and lock the vehicle.
Never leave children alone in a vehicle, or with
access to an unlocked vehicle. Allowing children to
be in a vehicle unattended is dangerous for a
number of reasons. A child or others could be seri -
ously or fatally injured. Children should be warned
not to touch the parking brake, brake pedal or the
gear selector.
Do not leave the key fob in or near the vehicle, or in
a location accessible to children, and do not leave
the ignition of a vehicle equipped with Keyless
Enter ‘n Go™ in the ACC or ON/RUN position. A child
could operate power windows, other controls, or
move the vehicle.
23_JL_OM_EN_USC_t.book Page 130
Page 134 of 396
132STARTING AND OPERATING
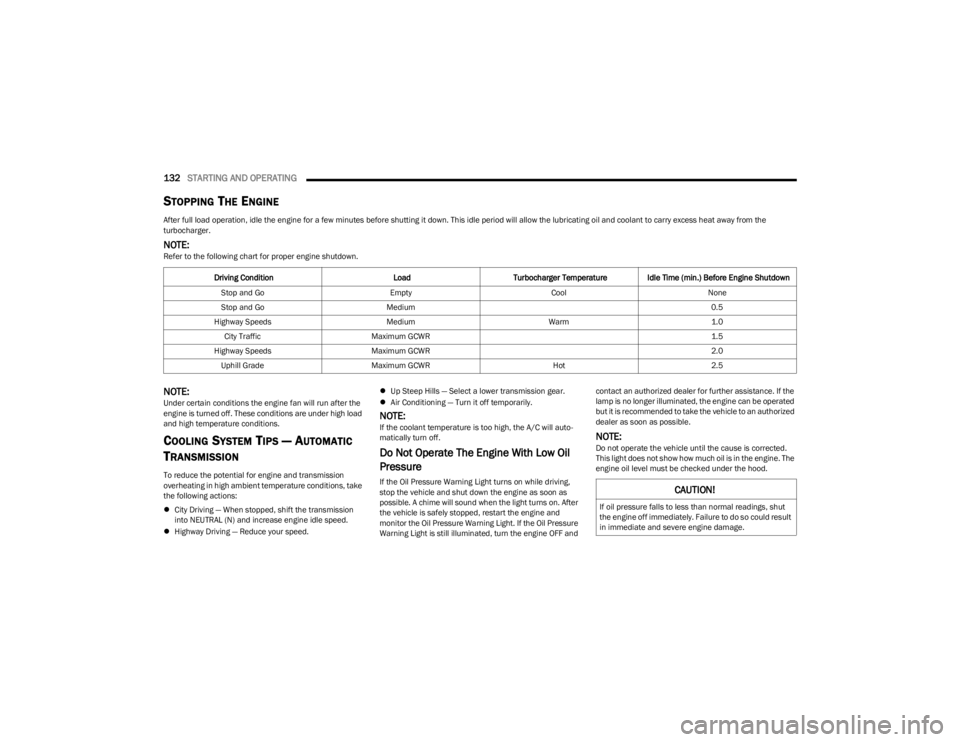
STOPPING THE ENGINE
After full load operation, idle the engine for a few minutes before shutting it down. This idle period will allow the lubricating oil and coolant to carry excess heat away from the
turbocharger.
NOTE:Refer to the following chart for proper engine shutdown.
NOTE:Under certain conditions the engine fan will run after the
engine is turned off. These conditions are under high load
and high temperature conditions.
COOLING SYSTEM TIPS — AUTOMATIC
T
RANSMISSION
To reduce the potential for engine and transmission
overheating in high ambient temperature conditions, take
the following actions:
City Driving — When stopped, shift the transmission
into NEUTRAL (N) and increase engine idle speed.
Highway Driving — Reduce your speed.
Up Steep Hills — Select a lower transmission gear.
Air Conditioning — Turn it off temporarily.
NOTE:If the coolant temperature is too high, the A/C will auto -
matically turn off.
Do Not Operate The Engine With Low Oil
Pressure
If the Oil Pressure Warning Light turns on while driving,
stop the vehicle and shut down the engine as soon as
possible. A chime will sound when the light turns on. After
the vehicle is safely stopped, restart the engine and
monitor the Oil Pressure Warning Light. If the Oil Pressure
Warning Light is still illuminated, turn the engine OFF and contact an authorized dealer for further assistance. If the
lamp is no longer illuminated, the engine can be operated
but it is recommended to take the vehicle to an authorized
dealer as soon as possible.
NOTE:Do not operate the vehicle until the cause is corrected.
This light does not show how much oil is in the engine. The
engine oil level must be checked under the hood.
Driving Condition Load Turbocharger Temperature Idle Time (min.) Before Engine Shutdown
Stop and Go EmptyCoolNone
Stop and Go Medium 0.5
Highway Speeds MediumWarm 1.0
City Traffic Maximum GCWR 1.5
Highway Speeds Maximum GCWR 2.0
Uphill Grade Maximum GCWR Hot2.5
CAUTION!
If oil pressure falls to less than normal readings, shut
the engine off immediately. Failure to do so could result
in immediate and severe engine damage.
23_JL_OM_EN_USC_t.book Page 132
Page 135 of 396
STARTING AND OPERATING133
Do Not Operate The Engine With Failed
Parts
All engine failures give some warning before the parts fail.
Be on the alert for changes in performance, sounds, and
visual evidence that the engine requires service. Some
important clues are:
Engine misfiring or vibrating severely
Sudden loss of power
Unusual engine noises
Fuel, oil or coolant leaks
Sudden change, outside the normal operating range, in
the engine operating temperature
Excessive smoke
Oil pressure drop
ENGINE BREAK-IN RECOMMENDATIONS —
GASOLINE ENGINE (IF EQUIPPED)
A long break-in period is not required for the engine and
drivetrain (transmission and axle) in your vehicle.
Drive moderately during the first 300 miles (500 km).
After the initial 60 miles (100 km), speeds up to 50 or
55 mph (80 or 90 km/h) are desirable.
While cruising, brief full-throttle acceleration within the
limits of local traffic laws contributes to a good break-in.
Wide-open throttle acceleration in low gear can be
detrimental and should be avoided.
The engine oil installed in the engine at the factory is a
high-quality energy conserving type lubricant. Oil changes
should be consistent with anticipated climate conditions
under which vehicle operations will occur. For the recommended viscosity and quality grades
Úpage 374.
NOTE:A new engine may consume some oil during its first few
thousand miles (kilometers) of operation. This should be
considered a normal part of the break-in and not inter
-
preted as a problem.
ENGINE BREAK-IN RECOMMENDATIONS —
DIESEL ENGINE (IF EQUIPPED)
The diesel engine does not require a break-in period due
to its construction. Normal operation is allowed, providing
the following recommendations are followed:
Warm up the engine before placing it under load.
Do not operate the engine at idle for prolonged periods.
Use the appropriate transmission gear to prevent
engine lugging.
Observe vehicle oil pressure and temperature indica -
tors.
Check the coolant and oil levels frequently.
Vary throttle position at highway speeds when carrying
or towing significant weight.
NOTE:Light duty operation such as light trailer towing or no load
operation will extend the time before the engine is at full
efficiency. Reduced fuel economy and power may be seen
at this time.
The engine oil installed in the engine at the factory is a
high-quality energy conserving type lubricant. Oil changes
should be consistent with anticipated climate conditions
under which vehicle operations will occur. For
recommended viscosity and quality grades see
Úpage 374. NON-DETERGENT OR STRAIGHT MINERAL
OILS MUST NEVER BE USED.
PARKING BRAKE
Before exiting the vehicle, make sure that the parking
brake is fully applied. Also, be certain to leave an
automatic transmission in PARK, or manual transmission
in REVERSE or FIRST gear.
The parking brake lever is located in the center console.
To apply the parking brake, pull the lever up as firmly as
possible. To release the parking brake, pull the lever up
slightly, push the center button, then lower the lever
completely.
CAUTION!
Never use Non-Detergent Oil or Straight Mineral Oil in
the engine or damage may result.
4
23_JL_OM_EN_USC_t.book Page 133
Page 184 of 396
182STARTING AND OPERATING
DRIVING ACROSS AN INCLINE
If at all possible, avoid driving across an incline. If it is
necessary, know your vehicle's abilities. Driving across an
incline places more weight on the downhill wheels, which
increases the possibilities of a downhill slide or rollover.
Make sure the surface has good traction with firm and
stable soils. If possible, transverse the incline at an angle
heading slightly up or down.
IF YOU STALL OR BEGIN TO LOSE HEADWAY
If you stall or begin to lose headway while climbing a steep
hill, allow your vehicle to come to a stop and immediately
apply the brake. Restart the engine and shift into
REVERSE. Back slowly down the hill allowing engine
braking to control the descent and apply your brakes, if
necessary, but do not allow the tires to lock.
Driving Through Water
Extreme care should be taken crossing any type of water.
Water crossings should be avoided, if possible, and only
be attempted when necessary in a safe, responsible
manner. Only drive through areas which are designated
and approved. Tread lightly and avoid damage to the
environment. Know your vehicle's abilities and be able to
recover it if something goes wrong. Never stop or shut a
vehicle off when crossing deep water unless you ingested
water into the engine air intake. If the engine stalls, do not
attempt to restart it. Determine if it has ingested water
first. The key to any crossing is low and slow. Shift into
FIRST gear (manual transmission), or DRIVE (automatic
transmission), with the transfer case in the 4L position
and proceed very slowly with a constant slow speed of {3
to 5 mph (5 to 8 km/h) maximum} and light throttle. Keep
the vehicle moving; do not try to accelerate through the
crossing. After crossing any water higher than the bottom
of the axle differentials, inspect all of the vehicle fluids for
signs of water ingestion.
BEFORE YOU CROSS ANY TYPE OF WATER
As you approach any type of water, you need to determine
if you can cross it safely and responsibly. If necessary, get
out and walk through the water or probe it with a stick. You
need to be sure of its depth, approach angle, current and
bottom condition. Be careful of murky or muddy waters;
check for hidden obstacles. Make sure you will not be
intruding on any wildlife, and you can recover the vehicle
if necessary. The key to a safe crossing is the water depth,
current and bottom conditions. On soft bottoms, the
vehicle will sink in, effectively increasing the water level on
the vehicle. Be sure to consider this when determining the
depth and the ability to safely cross.
CROSSING PUDDLES, POOLS, FLOODED
AREAS OR OTHER STANDING WATER
Puddles, pools, flooded or other standing water areas
normally contain murky or muddy waters. These water
types normally contain hidden obstacles and make it
difficult to determine an accurate water depth, approach
angle, and bottom condition. Murky or muddy water holes
are where you want to hook up tow straps prior to entering.
This makes for a faster, cleaner and easier vehicle
recovery. If you are able to determine you can safely cross,
than proceed using the low and slow method.
WARNING!
Driving across an incline increases the risk of a rollover,
which may result in severe injury.
WARNING!
If the engine stalls or you lose headway or cannot make
it to the top of a steep hill or grade, never attempt to
turn around. To do so may result in tipping and rolling
the vehicle, which may result in severe injury. Always
back carefully straight down a hill in REVERSE. Never
back down a hill in NEUTRAL using only the vehicle
brakes. Never drive diagonally across a hill, always drive
straight up or down.
CAUTION!
Water ingestion into the axles, transmission, transfer
case, engine or vehicle interior can occur if you drive
too fast or through too deep of water. Water can
cause permanent damage to engine, driveline or
other vehicle components, and your brakes will be
less effective once wet and/or muddy.
When driving through water, do not exceed 5 mph
(8 km/h). Always check water depth before entering
as a precaution, and check all fluids afterward.
Driving through water may cause damage that may
not be covered by the New Vehicle Limited Warranty.
CAUTION!
Muddy waters can reduce the cooling system
effectiveness by depositing debris onto the radiator.
23_JL_OM_EN_USC_t.book Page 182
Page 234 of 396
232MULTIMEDIA
Working Vehicle Conditions
The vehicle must be off or in ACC mode.
The vehicle has been started with the key fob within the
last 14 days.
The vehicle must be in PARK or at a standstill.
The vehicle’s security system has been armed and not
triggered since the last vehicle start.
The doors, hood, and trunk/liftgate are closed.
The vehicle’s check engine light must be off.
The vehicle must have at least a quarter tank of fuel,
along with oil and battery power.
The vehicle’s hazard lights must be off.
If equipped, the vehicle must have an automatic trans -
mission.
The vehicle must be in an open area with cell tower
reception.
Your mobile device must have a cellular or Wi-Fi
connection.
If the Panic button has been pressed, the vehicle must
be started at least once after alarming the system.
NOTE:The SiriusXM Guardian™ Customer Care agents are not
authorized for Remote Vehicle Start services. Contact the
Uconnect Care Team for assistance.
Remote Horn & Lights
Description
It is easy to locate a vehicle in a dark, crowded or noisy
parking area by activating the horn and lights. It may also
help if you need to draw attention to your vehicle for any
reason. If you want, you can set up push notifications every time a
command is sent to turn on the horn and lights.
Working Vehicle Conditions
The vehicle must in PARK or at a standstill.
The vehicle must be in an open area with cell tower
reception.
Your mobile device must have a cellular or Wi-Fi
connection.
NOTE:The Remote Horn & Lights feature is designed to be loud
and get noticed. Please keep in mind the surroundings
when using this feature. You are responsible for
compliance with local laws, rules and ordinances in the
location of your vehicle when using Remote Horn & Lights.
Assist — If Equipped
Description
Vehicles equipped with the SiriusXM Guardian™
connected services feature may contain an ASSIST button
in the vehicle. Once your SiriusXM Guardian™ connected
services have been activated, the ASSIST button can
connect you directly to the Customer Care call center (if
equipped). You will be directed to one of the following four
services:
Roadside Assistance — If you get a flat tire or need a
tow, you’ll be connected to someone who can help
anytime.
Connected Services — Contact the SiriusXM
Guardian™ Customer Care call center to activate your
services, renew after your trial has expired, for
in-vehicle support for your SiriusXM Guardian™ connected services, or help answering any general
questions surrounding your connected services.
Uconnect Care — In-vehicle support for all
non-connected Uconnect system features, such as
radio and Bluetooth® connections.
Vehicle Care — Total support for your vehicle.
SiriusXM Guardian™ In-Vehicle Assistance Features —
If Equipped
With SiriusXM Guardian™, your vehicle has onboard
assistance features located on the rearview mirror or
overhead console designed to enhance your driving
experience if you should ever need assistance or support.
How It Works
Simply push the ASSIST button in the vehicle and you will
be presented with your ASSIST options on the
touchscreen. Make your selection by pressing the
touchscreen.
Requirements
This feature is available only on vehicles sold in the US
and Canada.
Vehicle must be properly equipped with the SiriusXM
Guardian™ connected services.
Vehicle must have an operable LTE (voice/data) or 4G
(data) network connection.
Vehicle must be registered with SiriusXM Guardian™
and have an active subscription that includes the appli -
cable feature.
Vehicle must be powered in the ON/RUN or ACC (Acces -
sory) position with a properly functioning electrical
system.
23_JL_OM_EN_USC_t.book Page 232
Page 292 of 396
290SAFETY
PERIODIC SAFETY CHECKS YOU SHOULD
M
AKE OUTSIDE THE VEHICLE
Tires
Examine tires for excessive tread wear and uneven wear
patterns. Check for stones, nails, glass, or other objects
lodged in the tread or sidewall. Inspect the tread for cuts
and cracks. Inspect sidewalls for cuts, cracks, and bulges.
Check the lug nut/bolt torque for tightness. Check the
tires (including spare) for proper cold inflation pressure.
Lights
Have someone observe the operation of brake lights and
exterior lights while you work the controls. Check turn
signal and high beam indicator lights on the instrument
panel.
Door Latches
Check for proper closing, latching, and locking.
Fluid Leaks
Check area under vehicle after overnight parking for fuel,
coolant, oil, or other fluid leaks. Also, if gasoline fumes are
detected or if fuel or brake fluid leaks are suspected, the
cause should be located and corrected immediately.
EXHAUST GAS
The best protection against carbon monoxide entry into
the vehicle body is a properly maintained engine exhaust
system.
Whenever a change is noticed in the sound of the exhaust
system, when exhaust fumes can be detected inside the
vehicle, or when the underside or rear of the vehicle is
damaged, have an authorized dealer inspect the complete
exhaust system and adjacent body areas for broken,
damaged, deteriorated, or mispositioned parts. Open seams or loose connections could permit exhaust fumes
to seep into the passenger compartment. In addition,
inspect the exhaust system each time the vehicle is raised
for lubrication or oil change. Replace as required.
CARBON MONOXIDE WARNINGS
WARNING!
Exhaust gases can injure or kill. They contain carbon
monoxide (CO), which is colorless and odorless.
Breathing it can make you unconscious and can
eventually poison you. To avoid breathing (CO), follow
these safety tips:
Do not run the engine in a closed garage or in
confined areas any longer than needed to move your
vehicle in or out of the area.
If you are required to drive with the trunk/liftgate/
rear doors open, make sure that all windows are
closed and the climate control BLOWER switch is set
at high speed. DO NOT use the recirculation mode.
If it is necessary to sit in a parked vehicle with the
engine running, adjust your heating or cooling
controls to force outside air into the vehicle. Set the
blower at high speed.
WARNING!
Carbon monoxide (CO) in exhaust gases is deadly.
Follow the precautions below to prevent carbon
monoxide poisoning:
Do not inhale exhaust gases. They contain carbon
monoxide, a colorless and odorless gas, which can
kill. Never run the engine in a closed area, such as a
garage, and never sit in a parked vehicle with the
engine running for an extended period. If the vehicle
is stopped in an open area with the engine running
for more than a short period, adjust the ventilation
system to force fresh, outside air into the vehicle.
Guard against carbon monoxide with proper mainte -
nance. Have the exhaust system inspected every
time the vehicle is raised. Have any abnormal condi -
tions repaired promptly. Until repaired, drive with all
side windows fully open.
When exiting the vehicle, always make sure the igni -
tion is in the OFF position, remove the key fob from
the vehicle and lock your vehicle.
23_JL_OM_EN_USC_t.book Page 290
Page 308 of 396
306
SERVICING AND MAINTENANCE
SCHEDULED SERVICING — GASOLINE
ENGINE
Your vehicle is equipped with an automatic oil change
indicator system. The oil change indicator system will
remind you that it is time to take your vehicle in for
scheduled maintenance.
Based on engine operation conditions, the oil change
indicator message will illuminate. This means that service
is required for your vehicle. Operating conditions such as
frequent short-trips, trailer tow, extremely hot or cold
ambient temperatures will influence when the “Change
Oil” or “Oil Change Required” message is displayed. Have
your vehicle serviced as soon as possible, within the next
500 miles (805 km).On vehicles equipped with instrument cluster display, “Oil
Change Required” will be displayed and a single chime will
sound, indicating that an oil change is necessary.
On non-instrument cluster display equipped vehicles,
“Change Oil” will flash in the instrument cluster odometer
and a single chime will sound, indicating that an oil
change is necessary.
An authorized dealer will reset the oil change indicator
message after completing the scheduled oil change. If a
scheduled oil change is performed by someone other than
an authorized dealer, the message can be reset by
referring to the steps described under Instrument Cluster
Display for further information
Úpage 108.
NOTE:Under no circumstances should oil change intervals
exceed 10,000 miles (16,000 km), 12 months or 350
hours of engine run time, whichever comes first. The 350
hours of engine run or idle time is generally only a concern
for fleet customers.
Once A Month Or Before A Long Trip:
Check the engine oil level.
Check the windshield washer fluid level.
Check the tire inflation pressures and look for unusual
wear or damage, rotate at the first sign of irregular
wear.
Check the fluid levels of the coolant reservoir, brake
master cylinder, and power steering, and fill as needed.
Check the function of all interior and exterior lights.
23_JL_OM_EN_USC_t.book Page 306
Page 312 of 396
310SERVICING AND MAINTENANCE
SCHEDULED SERVICING — DIESEL ENGINE
Your vehicle is equipped with an automatic oil change
indicator system. The oil change indicator system will
remind you that it is time to take your vehicle in for
scheduled maintenance.
Based on engine operation conditions, the oil change
indicator message will illuminate. This means that service
is required for your vehicle. Operating conditions such as
frequent short-trips, trailer tow, extremely hot or cold
ambient temperatures will influence when the “Oil Change
Required” message is displayed. Have your vehicle
serviced as soon as possible, within the next 500 miles
(805 km).
An authorized dealer will reset the oil change indicator
message after completing the scheduled oil change. If a
scheduled oil change is performed by someone other than
an authorized dealer, to reset the message
Úpage 108.
NOTE:Under no circumstances should oil change intervals
exceed 10,000 miles (16,000 km) or 12 months,
whichever comes first.
Engine Oil Filter Replacement
Residual oil in the housing may spill from the housing
when the new filter is installed if the residual oil is not
either removed from the housing or enough time has not
elapsed to allow the oil to drain back into the engine.
When servicing the oil filter on this engine, open the filter
cap approximately six turns until the cap o-ring is visible
and stop. Wait five minutes with the cap in this position to
allow dirty engine oil to drain back into the engine. After
five minutes, the cap and filter assembly can be removed
and discarded. When installing the new oil filter cartridge
assembly, ensure the cap is tightened to the specified
torque to prevent low oil pressure conditions. Once A Month Or Before A Long Trip:
Check engine oil level
Check windshield washer fluid level
Check the tire pressures and look for unusual wear or
damage
Check the fluid levels of the coolant reservoir, brake
master cylinder, and fill as needed
Check function of all interior and exterior lights
23_JL_OM_EN_USC_t.book Page 310