JEEP WRANGLER UNLIMITED 2013 Owners Manual
WRANGLER UNLIMITED 2013
JEEP
JEEP
https://www.carmanualsonline.info/img/16/58902/w960_58902-0.png
JEEP WRANGLER UNLIMITED 2013 Owners Manual
Trending: rear view mirror, low beam, radio, fog light, cruise control, transmission fluid, overheating
Page 151 of 655
• “Previous Station” (to select the previous station)
• “Radio Menu” (to switch to the radio menu)
• “Main Menu” (to switch to the main menu)
Radio FM
To switch to the FM band, say “FM” or “Radio FM”.
In this mode, you may say the following commands:
• “Frequency #” (to change the frequency)
• “Next Station” (to select the next station)
• “Previous Station” (to select the previous station)
• “Menu Radio” (to switch to the radio menu)
• “Main Menu” (to switch to the main menu) Satellite Radio
To switch to satellite radio mode, say “Sat” or “Satellite
Radio”. In this mode, you may say the following com-
mands:
• “Channel Number” (to change the channel by its
spoken number)
• “Next Channel” (to select the next channel)
• “Previous Channel” (to select the previous channel)
• “List Channel” (to hear a list of available channels)
• “Select Name” (to say the name of a channel)
• “Menu Radio” (to switch to the radio menu)
• “Main Menu” (to switch to the main menu)
3 UNDERSTANDING THE FEATURES OF YOUR VEHICLE 149
Page 152 of 655
Disc
To switch to the disc mode, say “Disc”. In this mode, you
may say the following commands:
• “Track” (#) (to change the track)
• “Next Track” (to play the next track)
• “Previous Track” (to play the previous track)
• “Main Menu” (to switch to the main menu)
Memo
To switch to the voice recorder mode, say “Memo”.
In this mode, you may say the following commands:
• “New Memo” (to record a new memo) — During the
recording, you may press the Voice Command
button to stop recording. You proceed by saying
one of the following commands:
– “Save” (to save the memo) – “Continue” (to continue recording)
– “Delete” (to delete the recording)
• “Play Memos” (to play previously recorded memos) —
During the playback you may press the Voice Com-
mand button to stop playing memos. You pro-
ceed by saying one of the following commands:
– “Repeat” (to repeat a memo)
– “Next” (to play the next memo)
– “Previous” (to play the previous memo)
– “Delete” (to delete a memo)
• “Delete All” (to delete all memos)
Setup
To switch to system setup, you may say one of the
following:
• “Change to setup”
• “Switch to system setup”150 UNDERSTANDING THE FEATURES OF YOUR VEHICLE
Page 153 of 655
• “Change to setup”
• “Main menu setup” or
• “Switch to setup”
In this mode, you may say the following commands:
• “Language English”
• “Language French”
• “Language Spanish”
• “Tutorial”
• “Voice Training”
NOTE: Keep in mind that you have to press the Voice
Command button first and wait for the beep before
speaking the “Barge In” commands. Voice Training
For users experiencing difficulty with the system recog-
nizing their voice commands or numbers the Uconnect™
Voice “Voice Training” feature may be used.
1. Press the Voice Command button, say “System
Setup” and once you are in that menu then say “Voice
Training.” This will train your own voice to the system
and will improve recognition.
2. Repeat the words and phrases when prompted by
Uconnect™ Voice. For best results, the “Voice Train-
ing” session should be completed when the vehicle is
parked, engine running, all windows closed, and the
blower fan switched off. This procedure may be re-
peated with a new user. The system will adapt to the
last trained voice only.
3 UNDERSTANDING THE FEATURES OF YOUR VEHICLE 151
Page 154 of 655
SEATS
Seats are part of the Occupant Restraint System of the
vehicle.
WARNING!• It is dangerous to ride in a cargo area, inside or
outside of a vehicle. In a collision, people riding in
these areas are more likely to be seriously injured
or killed.
• Do not allow people to ride in any area of your
vehicle that is not equipped with seats and seat
belts. In a collision, people riding in these areas are
more likely to be seriously injured or killed.
• Be sure everyone in your vehicle is in a seat and
using a seat belt properly. Front Seat Adjustment
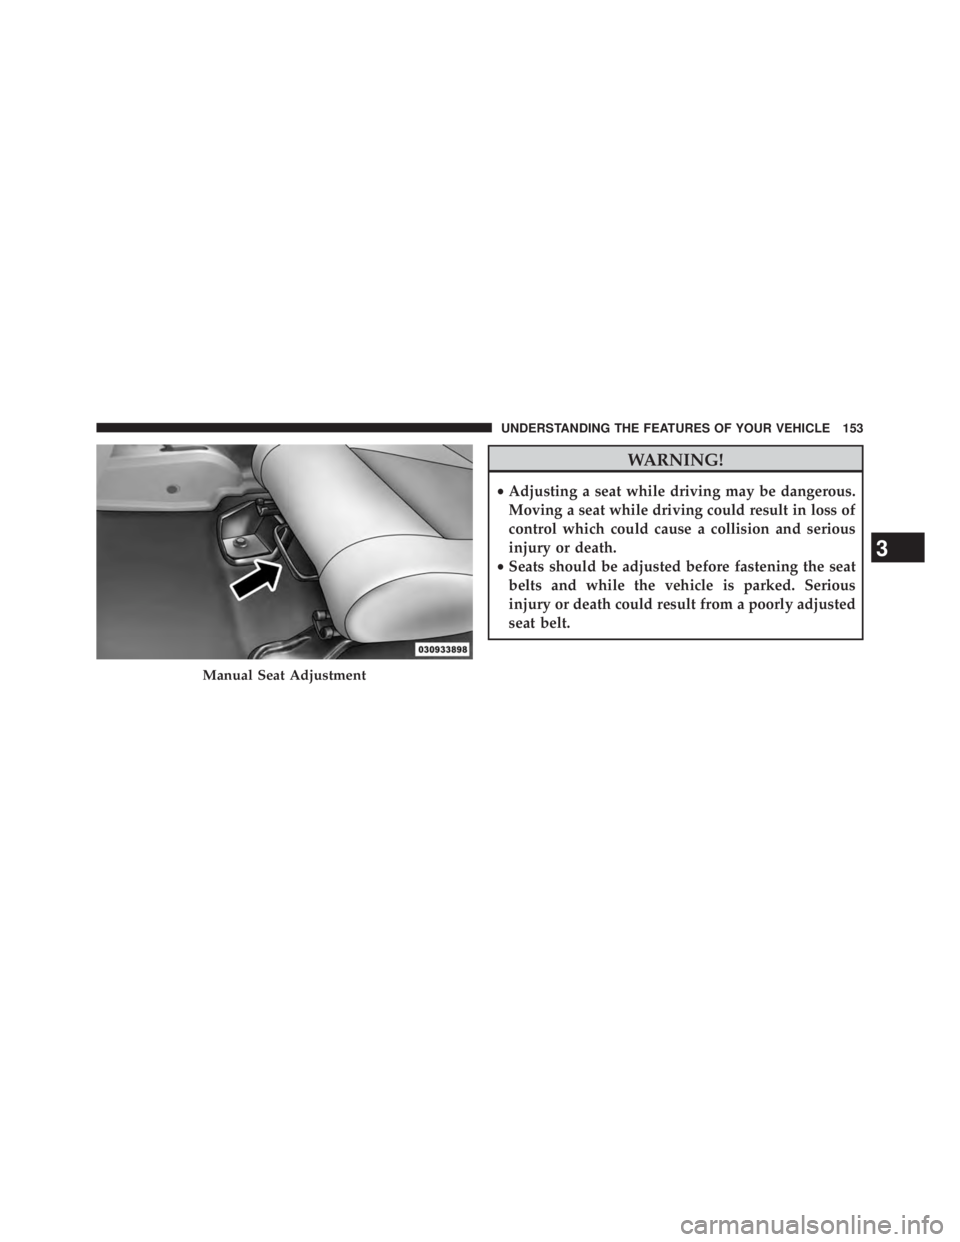
The seat can be adjusted forward or rearward by using a
bar located by the front of the seat cushion, near the floor.
While sitting in the seat, lift up on the bar located under
the seat cushion and move the seat forward or rearward.
Release the bar once you have reached the desired
position. Then, using body pressure, move forward and
rearward on the seat to be sure that the seat adjusters
have latched.152 UNDERSTANDING THE FEATURES OF YOUR VEHICLE
Page 155 of 655
WARNING!• Adjusting a seat while driving may be dangerous.
Moving a seat while driving could result in loss of
control which could cause a collision and serious
injury or death.
• Seats should be adjusted before fastening the seat
belts and while the vehicle is parked. Serious
injury or death could result from a poorly adjusted
seat belt.Manual Seat Adjustment
3 UNDERSTANDING THE FEATURES OF YOUR VEHICLE 153
Page 156 of 655
Manual Seat Height Adjustment — If Equipped
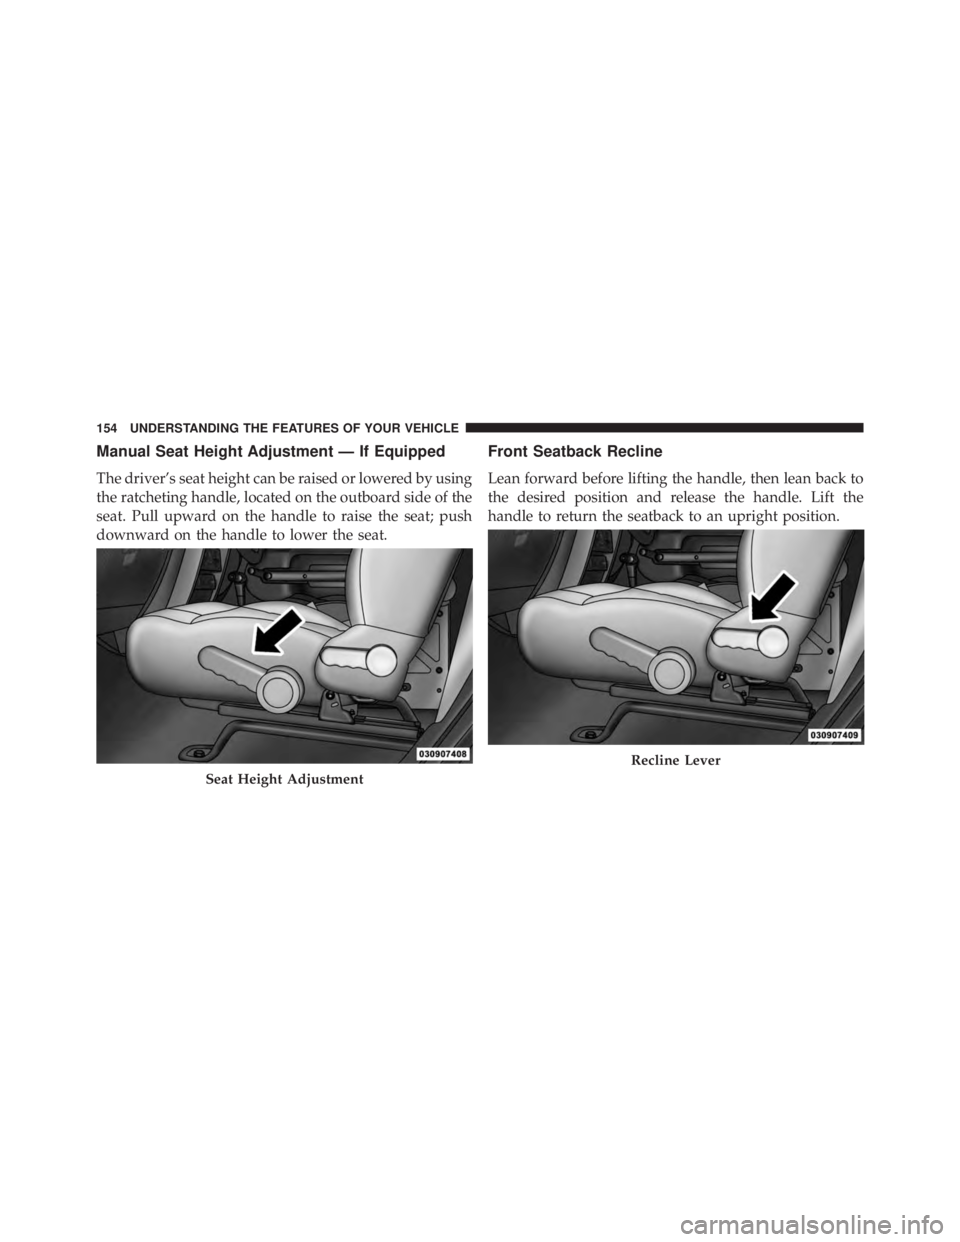
The driver’s seat height can be raised or lowered by using
the ratcheting handle, located on the outboard side of the
seat. Pull upward on the handle to raise the seat; push
downward on the handle to lower the seat. Front Seatback Recline
Lean forward before lifting the handle, then lean back to
the desired position and release the handle. Lift the
handle to return the seatback to an upright position.
Seat Height Adjustment Recline Lever154 UNDERSTANDING THE FEATURES OF YOUR VEHICLE
Page 157 of 655
WARNING!Do not ride with the seatback reclined so that the
shoulder belt is no longer resting against your chest.
In a collision you could slide under the seat belt,
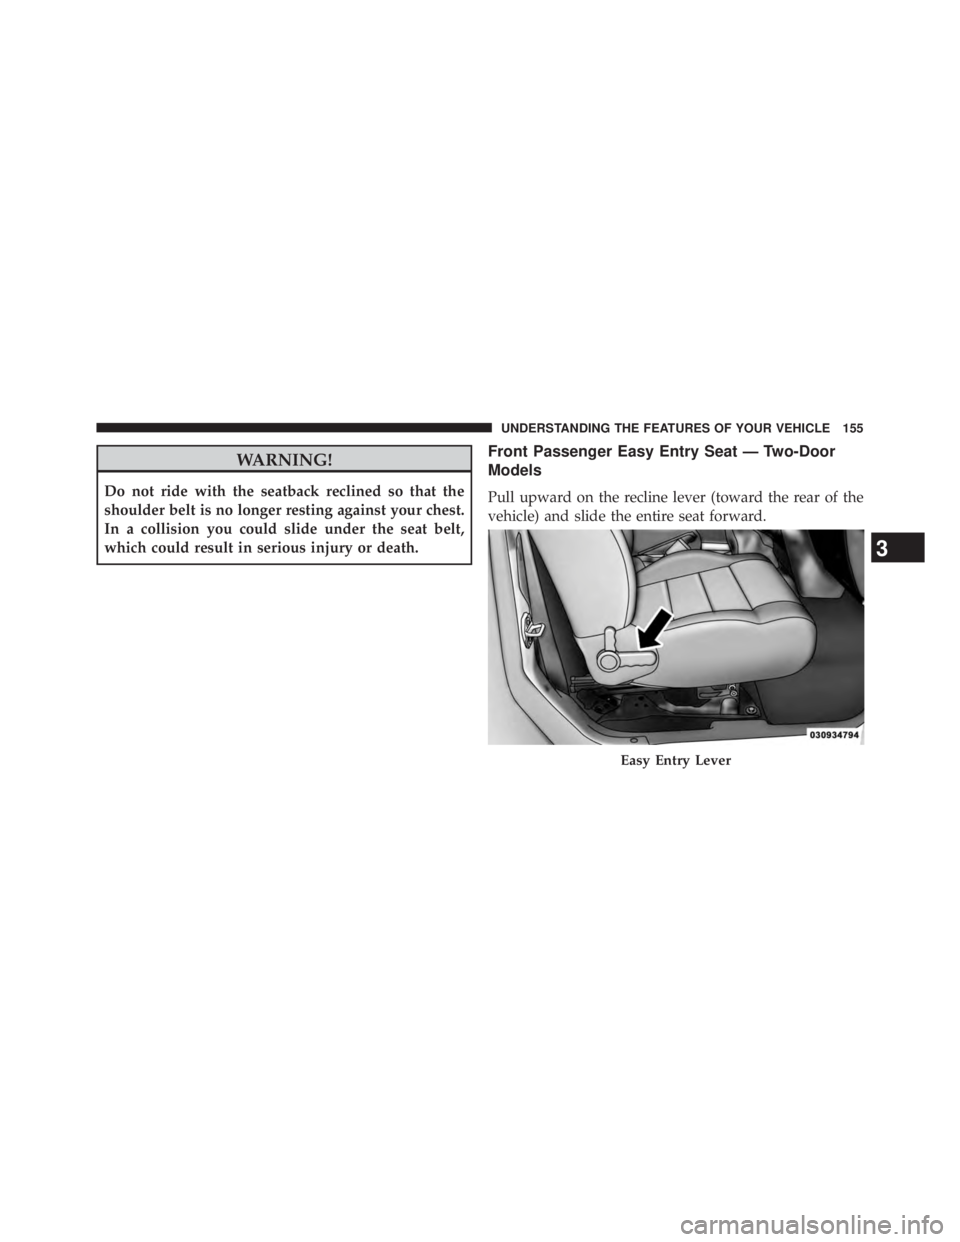
which could result in serious injury or death. Front Passenger Easy Entry Seat — Two-Door
Models
Pull upward on the recline lever (toward the rear of the
vehicle) and slide the entire seat forward.
Easy Entry Lever
3 UNDERSTANDING THE FEATURES OF YOUR VEHICLE 155
Page 158 of 655
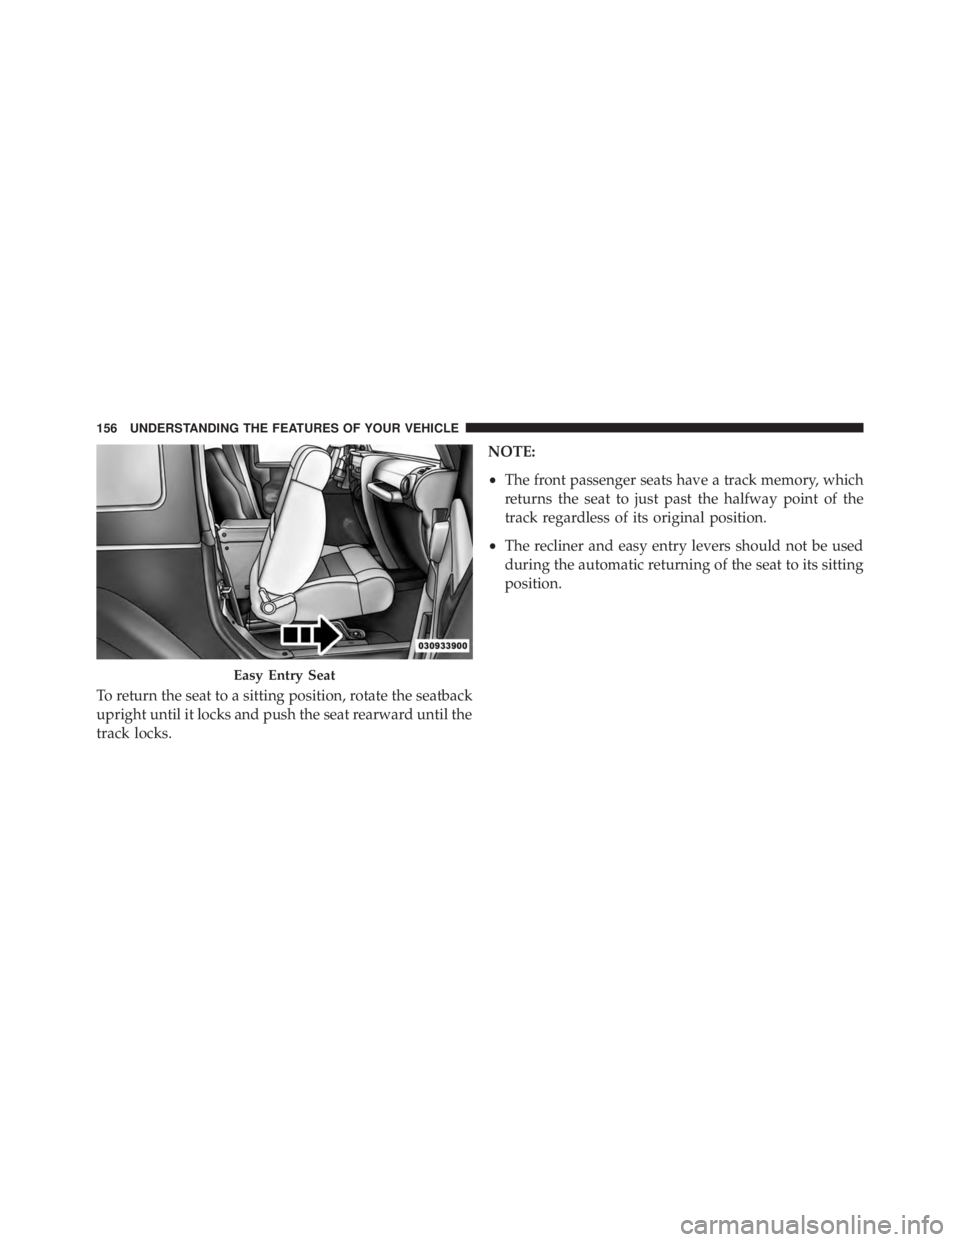
To return the seat to a sitting position, rotate the seatback
upright until it locks and push the seat rearward until the
track locks. NOTE:
• The front passenger seats have a track memory, which
returns the seat to just past the halfway point of the
track regardless of its original position.
• The recliner and easy entry levers should not be used
during the automatic returning of the seat to its sitting
position.
Easy Entry Seat156 UNDERSTANDING THE FEATURES OF YOUR VEHICLE
Page 159 of 655
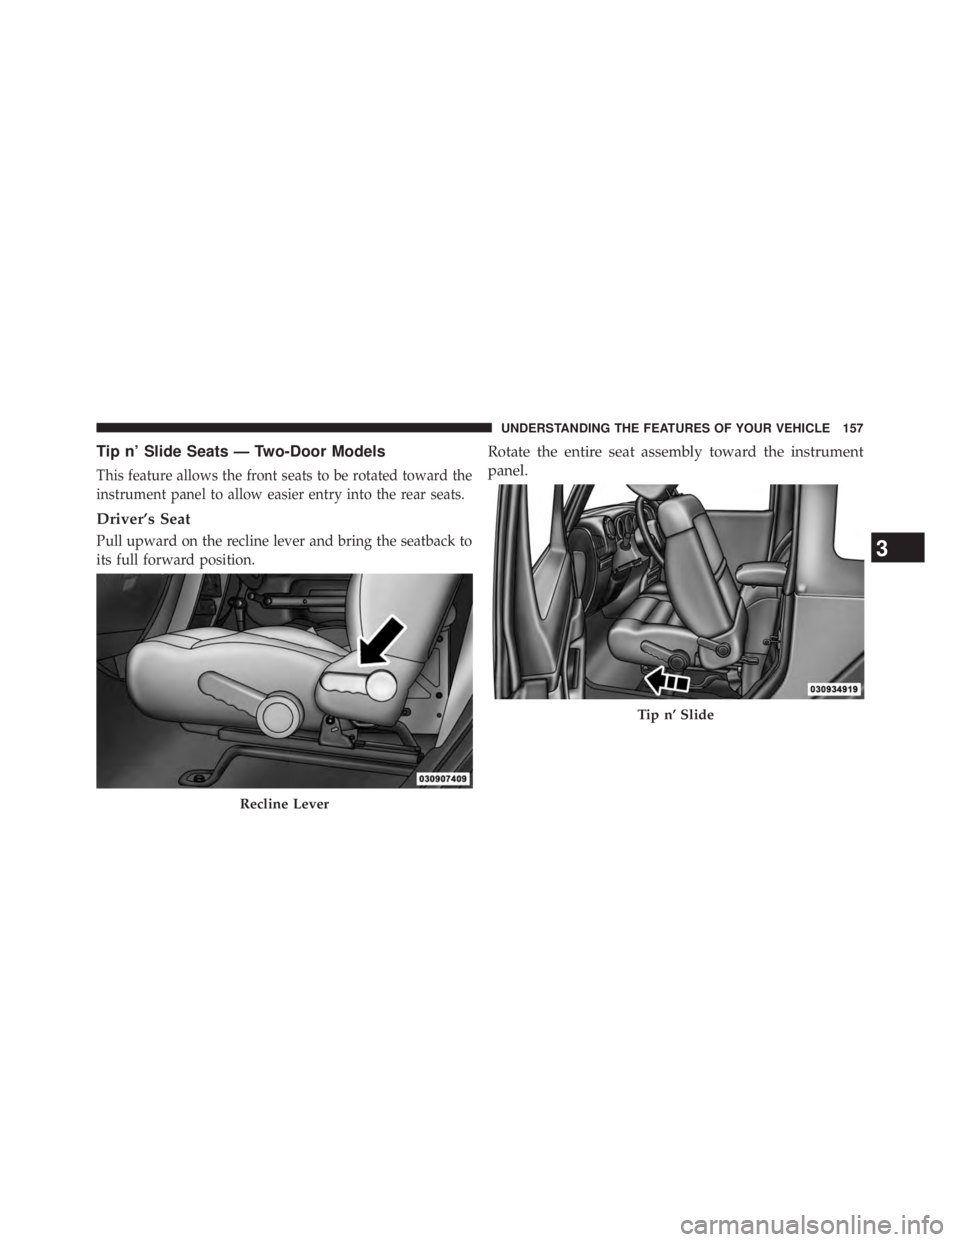
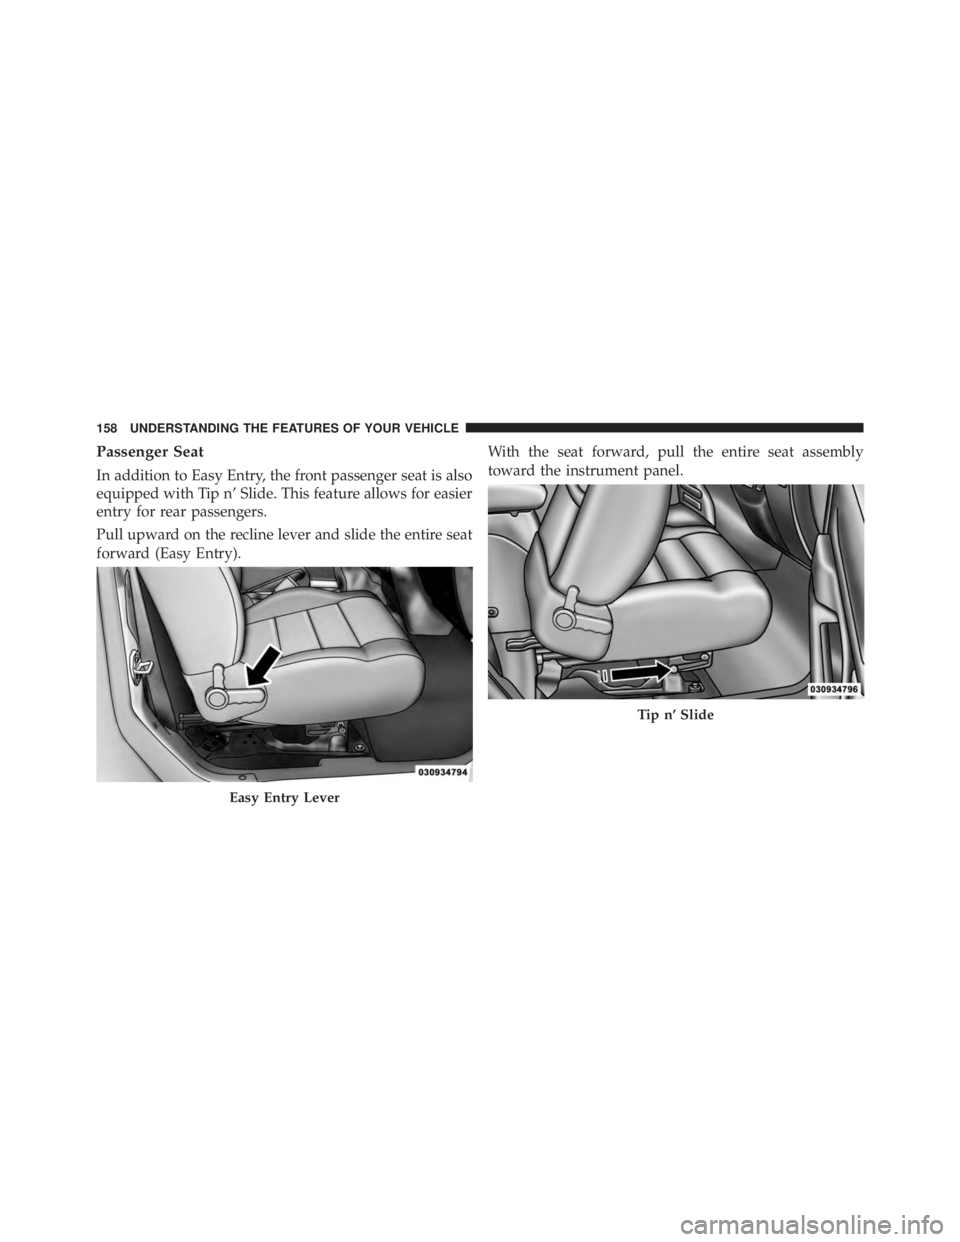
Tip n’ Slide Seats — Two-Door Models
This feature allows the front seats to be rotated toward the
instrument panel to allow easier entry into the rear seats.
Driver’s Seat
Pull upward on the recline lever and bring the seatback to
its full forward position. Rotate the entire seat assembly toward the instrument
panel.
Recline Lever Tip n’ Slide
3 UNDERSTANDING THE FEATURES OF YOUR VEHICLE 157
Page 160 of 655
Passenger Seat
In addition to Easy Entry, the front passenger seat is also
equipped with Tip n’ Slide. This feature allows for easier
entry for rear passengers.
Pull upward on the recline lever and slide the entire seat
forward (Easy Entry). With the seat forward, pull the entire seat assembly
toward the instrument panel.
Easy Entry Lever Tip n’ Slide158 UNDERSTANDING THE FEATURES OF YOUR VEHICLE
Trending: coolant capacity, spare wheel, windshield wipers, recommended oil, bluetooth, open hood, radiator


