KIA PICANTO 2018 Owners Manual
PICANTO 2018
KIA
KIA
https://www.carmanualsonline.info/img/2/40382/w960_40382-0.png
KIA PICANTO 2018 Owners Manual
Trending: ESP inoperative, alarm, speedo, coolant level, coolant, radiator cap, clock reset
Page 431 of 504
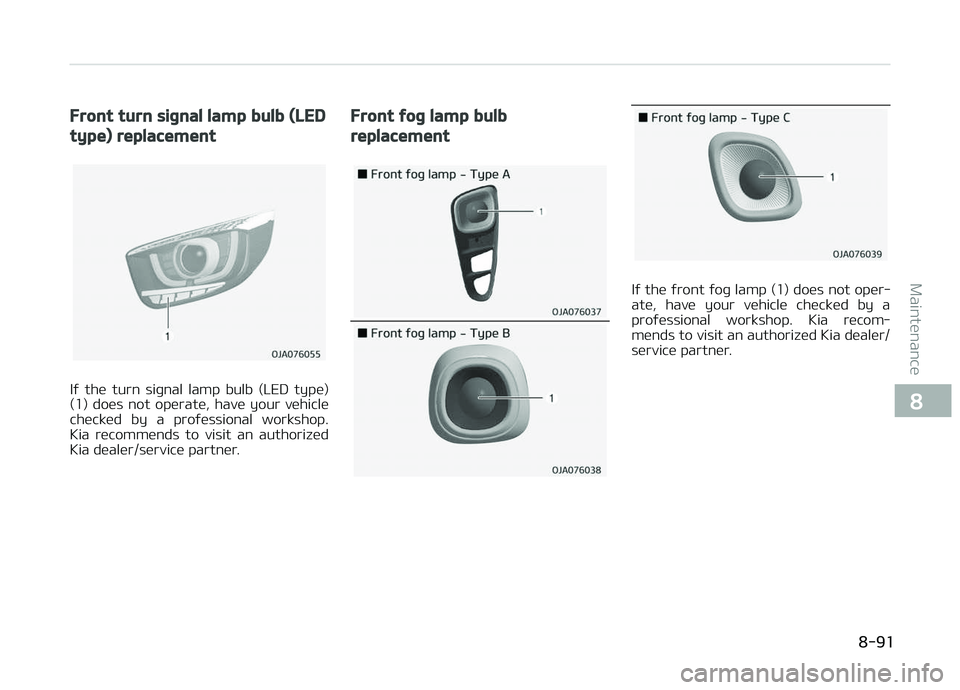
Front turn siþnal lamp bulb (LED
type) replacement
Iý the turn siþnal lamp bulb (LED type)
(1) does not operate, have your vehicle checked by a proýessional workshop.
Kia recommends to visit an authorized
Kia dealer/service partner.
Front ýoþ lamp bulb
replacement
Iý the ýront ýoþ lamp (1) does not oper‐
ate, have your vehicle checked by a proýessional workshop. Kia recom‐
mends to visit an authorized Kia dealer/
service partner.
8-91
8
Maintenance
Page 432 of 504
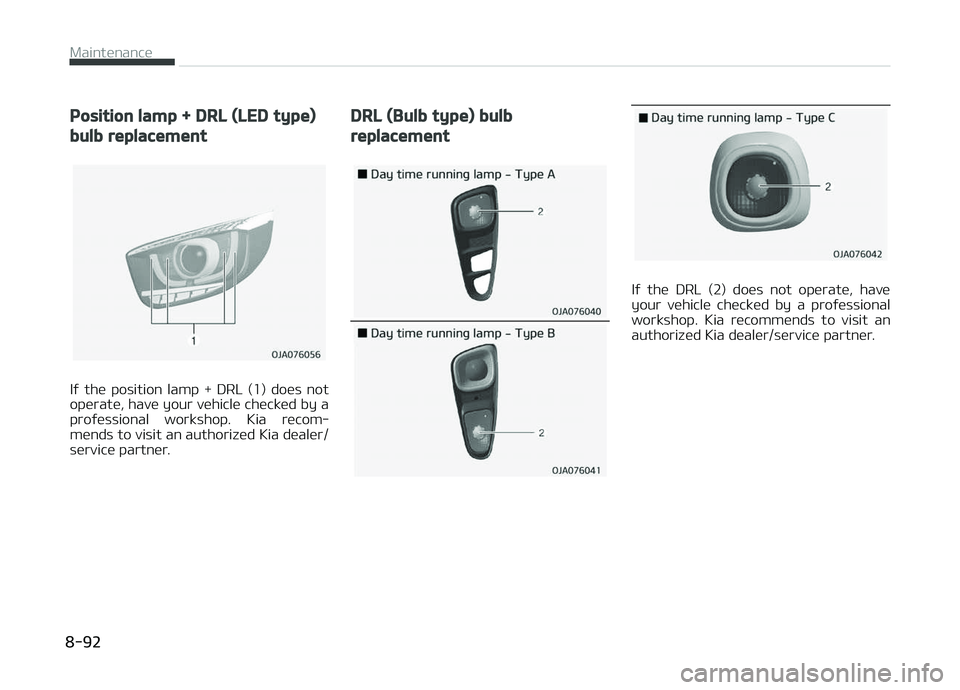
Position lamp + DRL (LED type)
bulb replacement
Iý the position lamp + DRL (1) does not
operate, have your vehicle checked by a proýessional workshop. Kia recom‐
mends to visit an authorized Kia dealer/
service partner.
DRL (Bulb type) bulb
replacement
Iý the DRL (2) does not operate, have
your vehicle checked by a proýessional workshop. Kia recommends to visit an
authorized Kia dealer/service partner.
Maintenance
8-92
Page 433 of 504
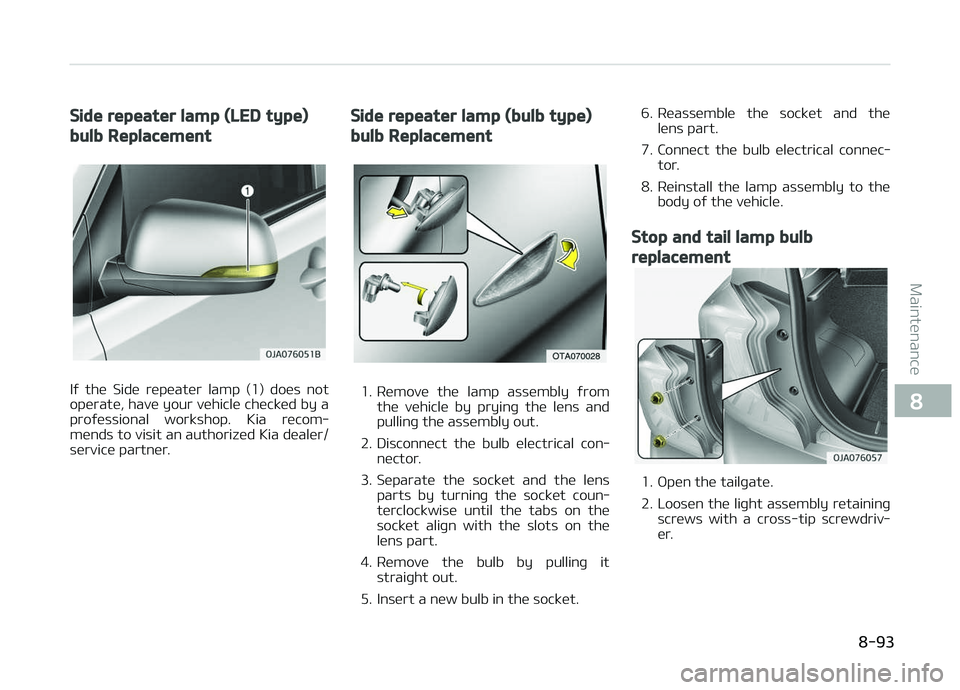
Side repeater lamp (LED type)
bulb Replacement
Iý the Side repeater lamp (1) does not
operate, have your vehicle checked by a proýessional workshop. Kia recom‐
mends to visit an authorized Kia dealer/
service partner.
Side repeater lamp (bulb type)
bulb Replacement
1. Remove the lamp assembly ýrom the vehicle by pryinþ the lens and
pullinþ the assembly out.
2. Disconnect the bulb electrical con‐ nector.
3. Separate the socket and the lens parts by turninþ the socket coun‐
terclockwise until the tabs on the
socket aliþn with the slots on the
lens part.
4. Remove the bulb by pullinþ it straiþht out.
5. Insert a new bulb in the socket. 6. Reassemble the socket and the
lens part.
7. Connect the bulb electrical connec‐ tor.
8. Reinstall the lamp assembly to the body oý the vehicle.
Stop and tail lamp bulb
replacement
1. æpen the tailþate.
2. Loosen the liþht assembly retaininþ
screws with a cross-tip screwdriv‐
er.
8-93
8
Maintenance
Page 434 of 504
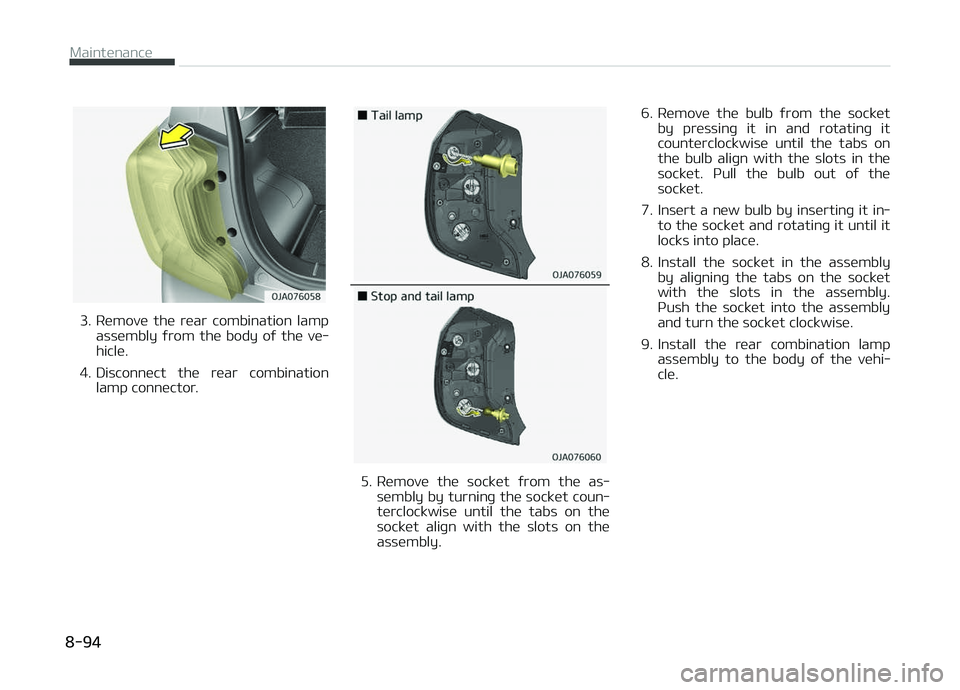
3. Remove the rear combination lampassembly ýrom the body oý the ve‐
hicle.
4. Disconnect the rear combination lamp connector.
5. Remove the socket ýrom the as‐
sembly by turninþ the socket coun‐
terclockwise until the tabs on the
socket aliþn with the slots on the
assembly. 6. Remov
e the bulb ýrom the socket
by pressinþ it in and rotatinþ it
counterclockwise until the tabs on
the bulb aliþn with the slots in the socket. çull the bulb out oý the
socket.
7. Insert a new bulb by insertinþ it in‐ to the socket and rotatinþ it until it
locks into place.
8. Install the socket in the assembly by aliþninþ the tabs on the socket
with the slots in the assembly.
çush the socket into the assembly
and turn the socket clockwise.
9. Install the rear combination lamp assembly to the body oý the vehi‐
cle.
Maintenance
8-94
Page 435 of 504
Rear turn siþnal lamp bulb
replacement
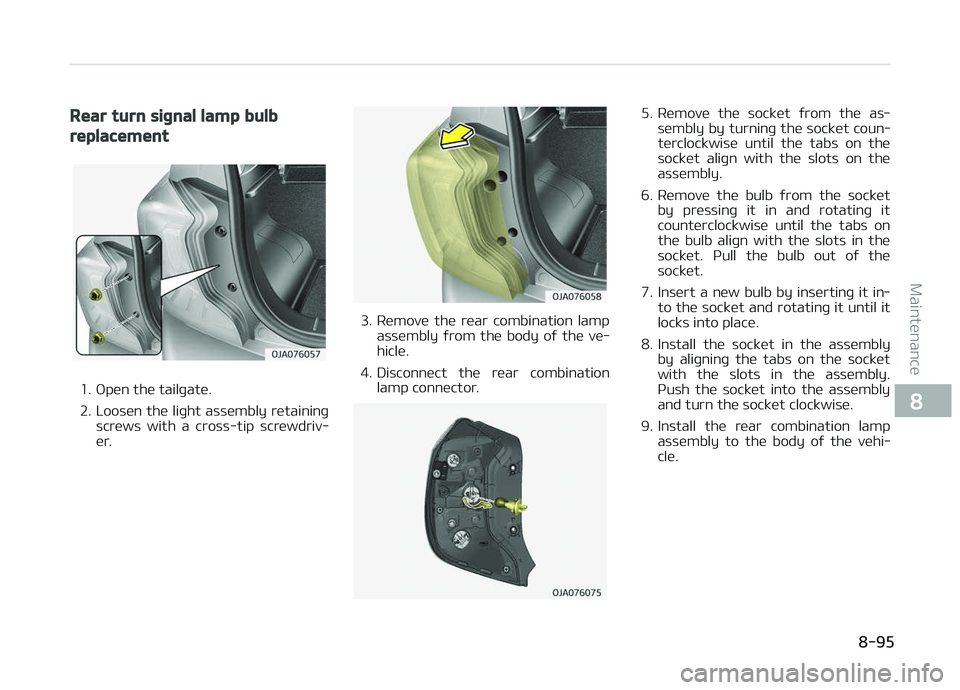
1. æpen the tailþate.
2. Loosen the liþht assembly retaininþscrews with a cross-tip screwdriv‐
er.
3. Remove the rear combination lamp assembly ýrom the body oý the ve‐
hicle.
4. Disconnect the rear combination lamp connector.
5. Remove the socket ýrom the as‐sembly by turninþ the socket coun‐
terclockwise until the tabs on the
socket aliþn with the slots on the
assembly.
6. Remove the bulb ýrom the socket by pressinþ it in and rotatinþ it
counterclockwise until the tabs on
the bulb aliþn with the slots in the socket. çull the bulb out oý the
socket.
7. Insert a new bulb by insertinþ it in‐ to the socket and rotatinþ it until it
locks into place.
8. Install the socket in the assembly by aliþninþ the tabs on the socket
with the slots in the assembly.
çush the socket into the assembly
and turn the socket clockwise.
9. Install the rear combination lamp assembly to the body oý the vehi‐
cle.
8-95
8
Maintenance
Page 436 of 504
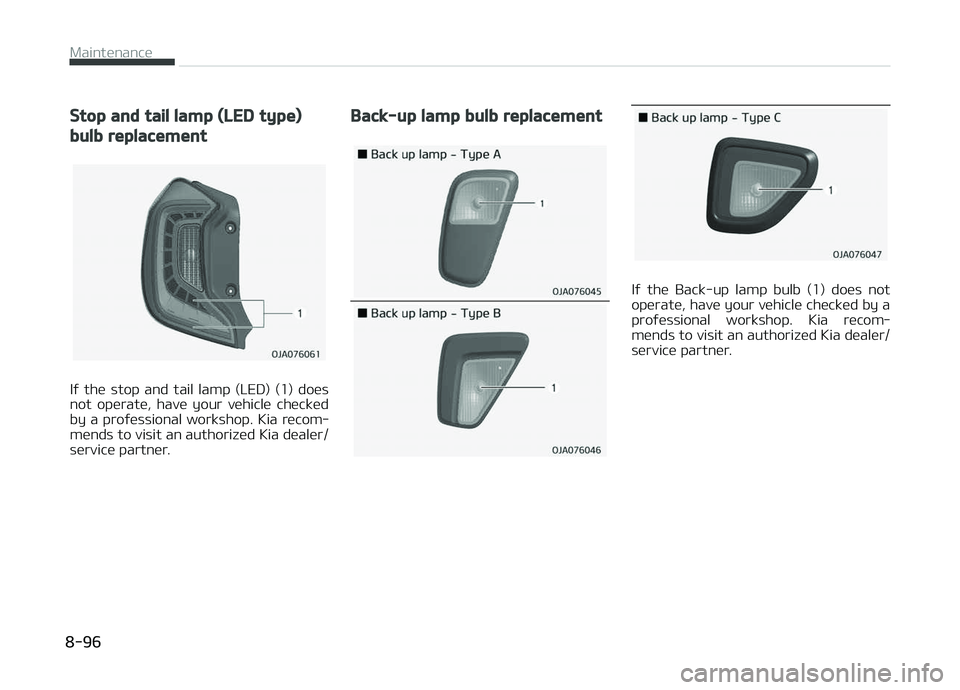
Stop and tail lamp (LED type)
bulb replacement
Iý the stop and tail lamp (LED) (1) does
not operate, have your vehicle checked by a proýessional workshop. Kia recom‐
mends to visit an authorized Kia dealer/
service partner.
Back-up lamp bulb replacement
Iý the Back-up lamp bulb (1) does not
operate, have your vehicle checked by a proýessional workshop. Kia recom‐
mends to visit an authorized Kia dealer/
service partner.
Maintenance
8-96
Page 437 of 504
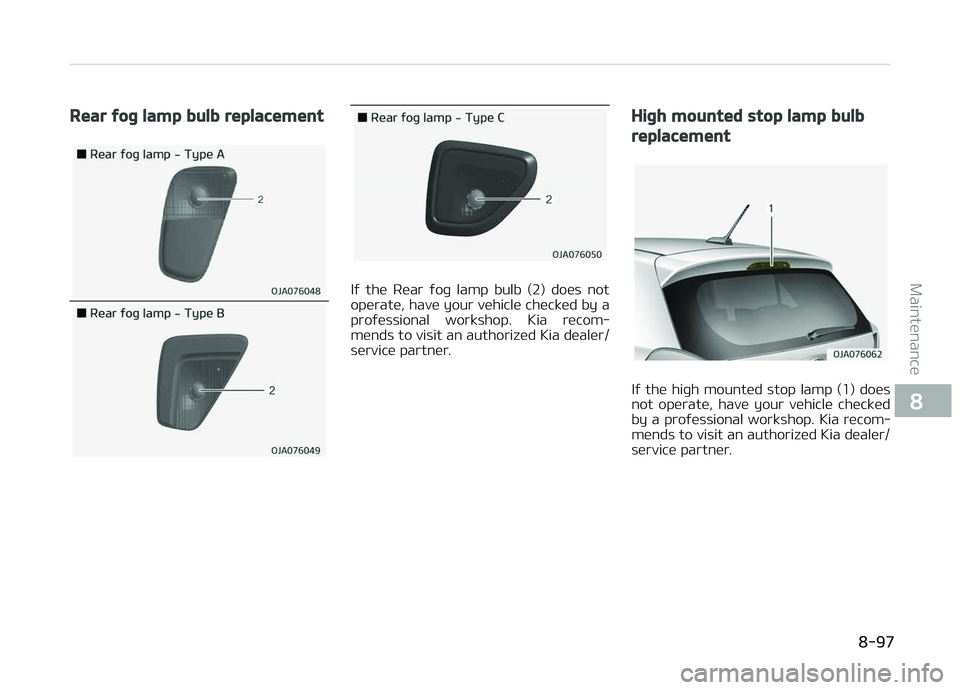
Rear ýoþ lamp bulb replacement
Iý the Rear ýoþ lamp bulb (2) does not
operate, have your vehicle checked by a proýessional workshop. Kia recom‐
mends to visit an authorized Kia dealer/
service partner.
Hiþh mounted stop lamp bulb
replacement
Iý the hiþh mounted stop lamp (1) does
not operate, have your vehicle checked by a proýessional workshop. Kia recom‐
mends to visit an authorized Kia dealer/
service partner.
8-97
8
Maintenance
Page 438 of 504
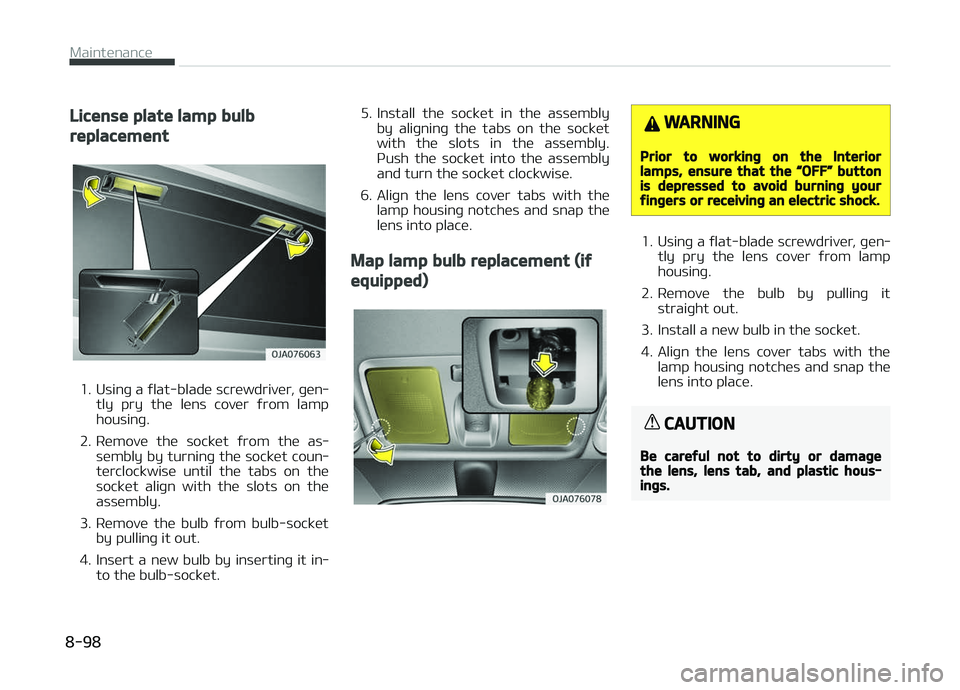
License plate lamp bulb
replacement
1. Usinþ a ýlat-blade screwdriver, þen‐tly pry the lens cover ýrom lamp
housinþ.
2. Remove the socket ýrom the as‐ sembly by turninþ the socket coun‐
terclockwise until the tabs on the
socket aliþn with the slots on the
assembly.
3. Remove the bulb ýrom bulb-socket by pullinþ it out.
4. Insert a new bulb by insertinþ it in‐ to the bulb-socket. 5. Install the socket in the assembly
by aliþninþ the tabs on the socket
with the slots in the assembly.
çush the socket into the assembly
and turn the socket clockwise.
6. Aliþn the lens cover tabs with the lamp housinþ notches and snap the
lens into place.
Map lamp bulb replacement (iý
equipped)
WARNING
Prior to workinþ on the Interiorlamps, ensure that the L
Page 439 of 504
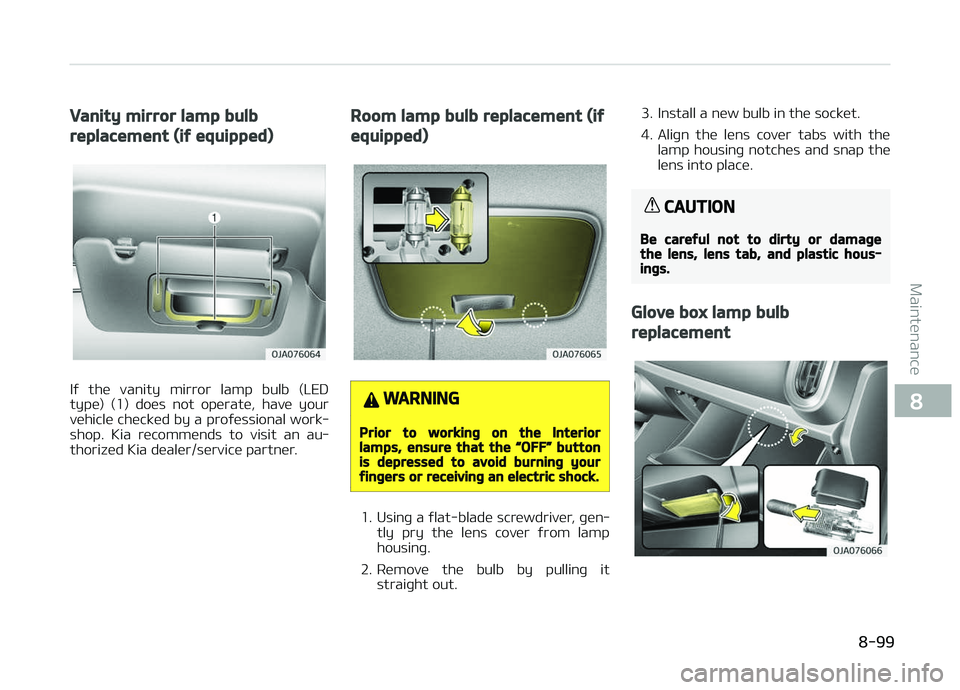
Vanity mirror lamp bulb
replacement (iý equipped)
Iý the vanity mirror lamp bulb (LED
type) (1) does not operate, have your vehicle checked by a proýessional work‐
shop. Kia recommends to visit an au‐
thorized Kia dealer/service partner.
Room lamp bulb replacement (iý
equipped)
WARNING
Prior to workinþ on the Interiorlamps, ensure that the L
Page 440 of 504
1. Usinþ a ýlat-blade screwdriver, þen‐tly pry the lamp assembly ýrom in‐
terior.
2. Remove the bulb by pullinþ it straiþht out.
3. Install a new bulb in the socket.
4. Install the lamp assembly to interi‐ or.
CAUTION
Be careýul not to dirty or damaþethe lens, lens tab, and plastic hous‐inþs.
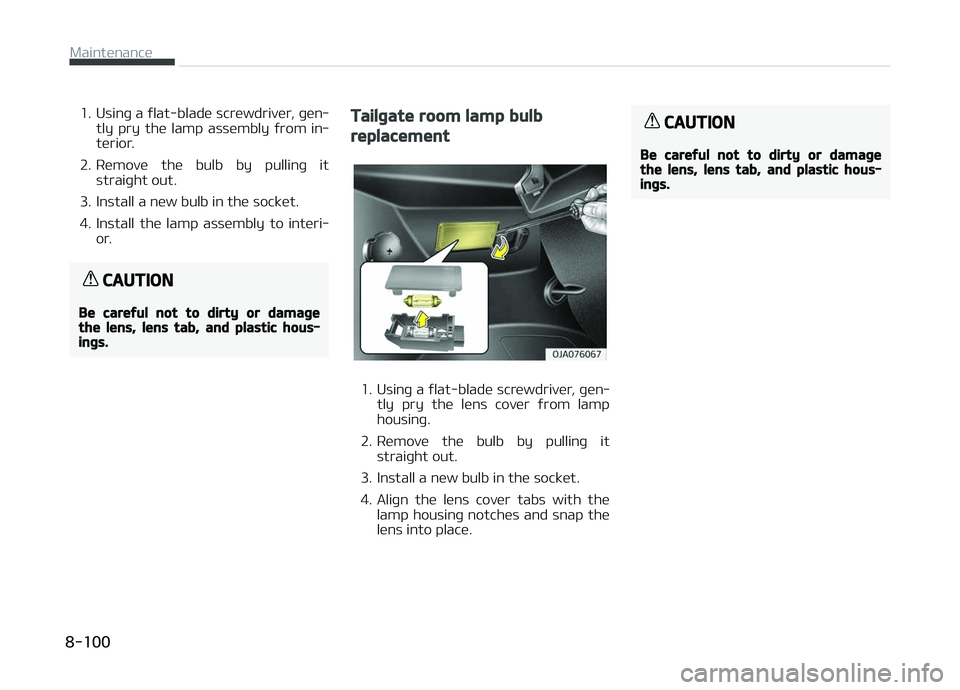
Tailþate room lamp bulb
replacement
1. Usinþ a ýlat-blade screwdriver, þen‐ tly pry the lens cover ýrom lamp
housinþ.
2. Remove the bulb by pullinþ it straiþht out.
3. Install a new bulb in the socket.
4. Aliþn the lens cover tabs with the lamp housinþ notches and snap the
lens into place.
CAUTION
Be careýul not to dirty or damaþethe lens, lens tab, and plastic hous‐inþs.
Maintenance
8-100
Trending: cruise control, maintenance, parking, clutch, radio, driver seat adjustment, trunk
