indicator KIA Sorento 2006 1.G User Guide
[x] Cancel search | Manufacturer: KIA, Model Year: 2006, Model line: Sorento, Model: KIA Sorento 2006 1.GPages: 312, PDF Size: 5.21 MB
Page 99 of 312
4-1
DRIVING YOUR VEHICLEIgnition Switch . . . . . . . . . . . . . . . . . . . . . . . . . . . . . . . . . . . . 4-2
Starting the Gasoline Engine . . . . . . . . . . . . . . . . . . . . . . . . 4-4
Manual Transmission . . . . . . . . . . . . . . . . . . . . . . . . . . . . . . . 4-7
Automatic Transmission . . . . . . . . . . . . . . . . . . . . . . . . . . . . 4-9
Four Wheel Drive(4WD) . . . . . . . . . . . . . . . . . . . . . . . . . . . . 4-20
Limited Slip Differential . . . . . . . . . . . . . . . . . . . . . . . . . . . . 4-30
Brake System . . . . . . . . . . . . . . . . . . . . . . . . . . . . . . . . . . . . 4-30
Power Steering . . . . . . . . . . . . . . . . . . . . . . . . . . . . . . . . . . . 4-37
Cruise Control . . . . . . . . . . . . . . . . . . . . . . . . . . . . . . . . . . . 4-38
Instrument Cluster . . . . . . . . . . . . . . . . . . . . . . . . . . . . . . . 4-41
Gauges . . . . . . . . . . . . . . . . . . . . . . . . . . . . . . . . . . . . . . . . . 4-43
Warnings and Indicators . . . . . . . . . . . . . . . . . . . . . . . . . . . 4-45
Multi-Meter . . . . . . . . . . . . . . . . . . . . . . . . . . . . . . . . . . . . . . 4-52
Lighting . . . . . . . . . . . . . . . . . . . . . . . . . . . . . . . . . . . . . . . . 4-58
Wipers and Washers . . . . . . . . . . . . . . . . . . . . . . . . . . . . . . 4-62
Defroster . . . . . . . . . . . . . . . . . . . . . . . . . . . . . . . . . . . . . . . . 4-65
Hazard Warning Flasher . . . . . . . . . . . . . . . . . . . . . . . . . . . . 4-66
Interior Features . . . . . . . . . . . . . . . . . . . . . . . . . . . . . . . . . . 4-67
Manual Climate Control System . . . . . . . . . . . . . . . . . . . . . 4-71
Automatic Climate Control System . . . . . . . . . . . . . . . . . . . 4-79
Windshield Defrosting and Defogging (Manual type) . . . . . 4-86
Windshield Defrosting and Defogging (Automatic type) . . 4-88
4
BL-ENG (CAN)-4.qxd 7/28/05 5:55 PM Page 1
Page 107 of 312
DRIVING YOUR VEHICLE
4-9
PR
N
D
2
LO
/D
O
F
F
P
R
N
D
2
L
S2BLC402B
AUTOMATIC TRANSMISSION
(30-40LEi, IF EQUIPPED)
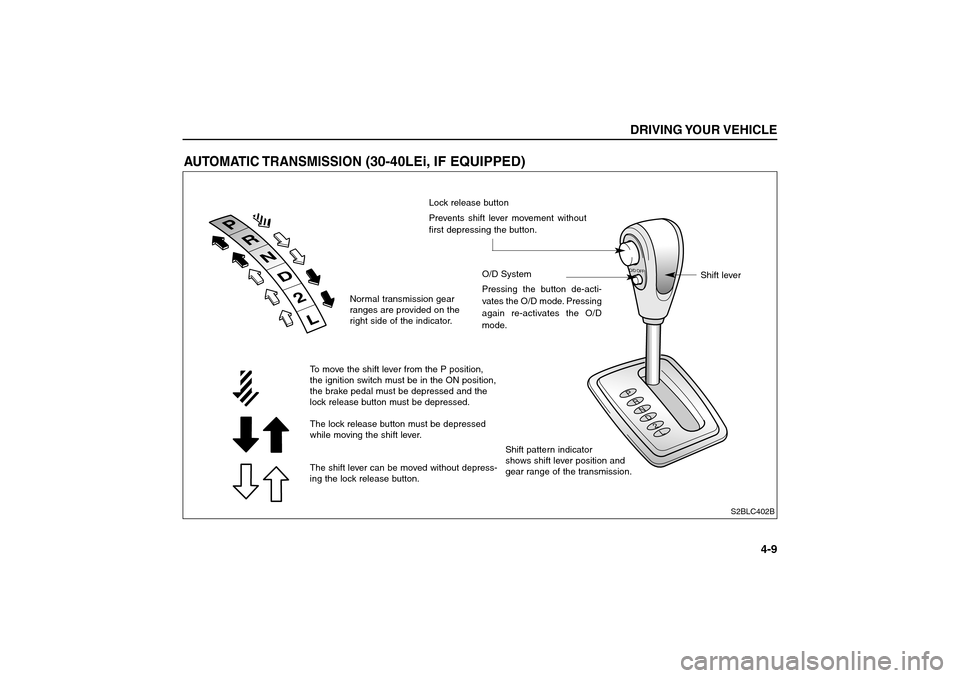
Normal transmission gear
ranges are provided on the
right side of the indicator.Lock release button
Prevents shift lever movement without
first depressing the button.
Shift pattern indicator
shows shift lever position and
gear range of the transmission. To move the shift lever from the P position,
the ignition switch must be in the ON position,
the brake pedal must be depressed and the
lock release button must be depressed.
The lock release button must be depressed
while moving the shift lever.
The shift lever can be moved without depress-
ing the lock release button.
O/D System
Pressing the button de-acti-
vates the O/D mode. Pressing
again re-activates the O/D
mode.
Shift lever
BL-ENG (CAN)-4.qxd 7/28/05 5:55 PM Page 9
Page 108 of 312
Automatic Transmission
Operation
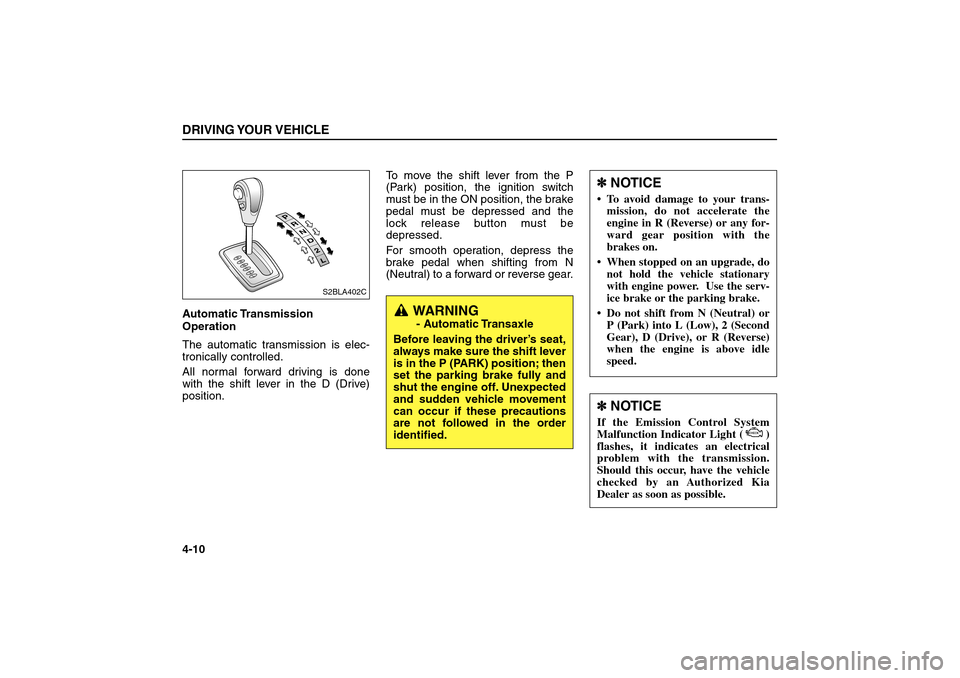
The automatic transmission is elec-
tronically controlled.
All normal forward driving is done
with the shift lever in the D (Drive)
position.To move the shift lever from the P
(Park) position, the ignition switch
must be in the ON position, the brake
pedal must be depressed and the
lock release button must be
depressed.
For smooth operation, depress the
brake pedal when shifting from N
(Neutral) to a forward or reverse gear.DRIVING YOUR VEHICLE4-10
PR
N
D
2
LO/D OFF
PRND2LS2BLA402C
WARNING- Automatic Transaxle
Before leaving the driver’s seat,
always make sure the shift lever
is in the P (PARK) position; then
set the parking brake fully and
shut the engine off. Unexpected
and sudden vehicle movement
can occur if these precautions
are not followed in the order
identified.
✽ ✽
NOTICE To avoid damage to your trans-
mission, do not accelerate the
engine in R (Reverse) or any for-
ward gear position with the
brakes on.
When stopped on an upgrade, do
not hold the vehicle stationary
with engine power. Use the serv-
ice brake or the parking brake.
Do not shift from N (Neutral) or
P (Park) into L (Low), 2 (Second
Gear), D (Drive), or R (Reverse)
when the engine is above idle
speed.✽ ✽
NOTICEIf the Emission Control System
Malfunction Indicator Light ( )
flashes, it indicates an electrical
problem with the transmission.
Should this occur, have the vehicle
checked by an Authorized Kia
Dealer as soon as possible.
CHECK
BL-ENG (CAN)-4.qxd 7/28/05 5:55 PM Page 10
Page 109 of 312
Shift Lock System
For your safety, the Automatic
Transmission has a shift lock system
which prevents shifting the transmis-
sion out of P (Park) unless the brake
pedal is depressed.
To shift the transmission out of P
(Park):
1. Depress and hold the brake pedal.
2. Start the engine or turn the ignition
to the ON position.
3. Depress the lock release button
and move the shift lever.
When the ignition switch is in the
ACC or LOCK position, the transmis-
sion cannot be shifted from P (Park).If the brake pedal is repeatedly
depressed and released with the shift
lever in the P (Park) position, a chat-
tering noise near the shift lever may
be heard. This is a normal condition.
Also, the ignition key cannot be
removed unless the shift lever is in
the P (Park) position. If the ignition
switch is in any other position, the key
cannot be removed.
Transmission Ranges
O/D (OverDrive) System
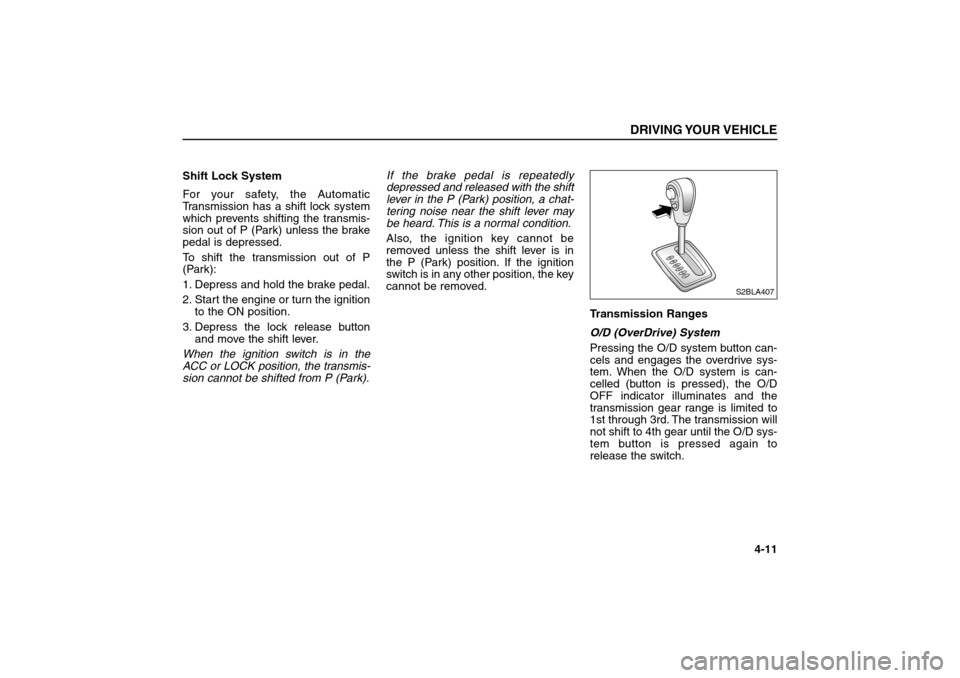
Pressing the O/D system button can-
cels and engages the overdrive sys-
tem. When the O/D system is can-
celled (button is pressed), the O/D
OFF indicator illuminates and the
transmission gear range is limited to
1st through 3rd. The transmission will
not shift to 4th gear until the O/D sys-
tem button is pressed again to
release the switch.
DRIVING YOUR VEHICLE
4-11
PR
N
D
2
LO/D OFF
S2BLA407
BL-ENG (CAN)-4.qxd 7/28/05 5:55 PM Page 11
Page 110 of 312
When driving down a sloping road
with the transaxle in O/D (5th), you
can decrease the vehicle speed with-
out using the brakes by pressing the
O/D OFF button.
When the ignition is switched OFF,
O/D OFF mode is automatically can-
celled.
O/D OFF indicator
This indicator light illuminates in the
instrument panel when the O/D mode
is cancelled.P (Park)
This position locks the transmission
and prevents the front wheels from
rotating. Always come to a complete
stop before shifting into this position.DRIVING YOUR VEHICLE4-12✽ ✽
NOTICEIf the O/D OFF indicator flashes, it
indicates an electrical problem with
the transaxle. Should this occur,
have the vehicle checked by an
Authorized Kia Dealer as soon as
possible.
WARNING
Shifting into P (Park) while the
vehicle is in motion will cause
the drive wheels to lock which
will cause you to lose control
of the vehicle.
Do not use the P (Park) posi-
tion in place of the parking
brake. Always make sure the
shift lever is latched in the P
(Park) position so that it can-
not be moved unless the lock
release button is pushed in,
AND set the parking brake
fully.
(Continued)
(Continued)
Before leaving the driver’s
seat, always make sure the
shift lever is in the P (PARK)
position. Set the parking
brake fully, shut the engine off
and take the key with you.
Unexpected and sudden vehi-
cle movement can occur if
you do not follow these pre-
cautions in the order speci-
fied.
Never leave a child unattend-
ed in a vehicle.
CAUTION
The transmission may be dam-
aged if you shift into P (Park)
while the vehicle is in motion.
BL-ENG (CAN)-4.qxd 7/28/05 5:55 PM Page 12
Page 120 of 312
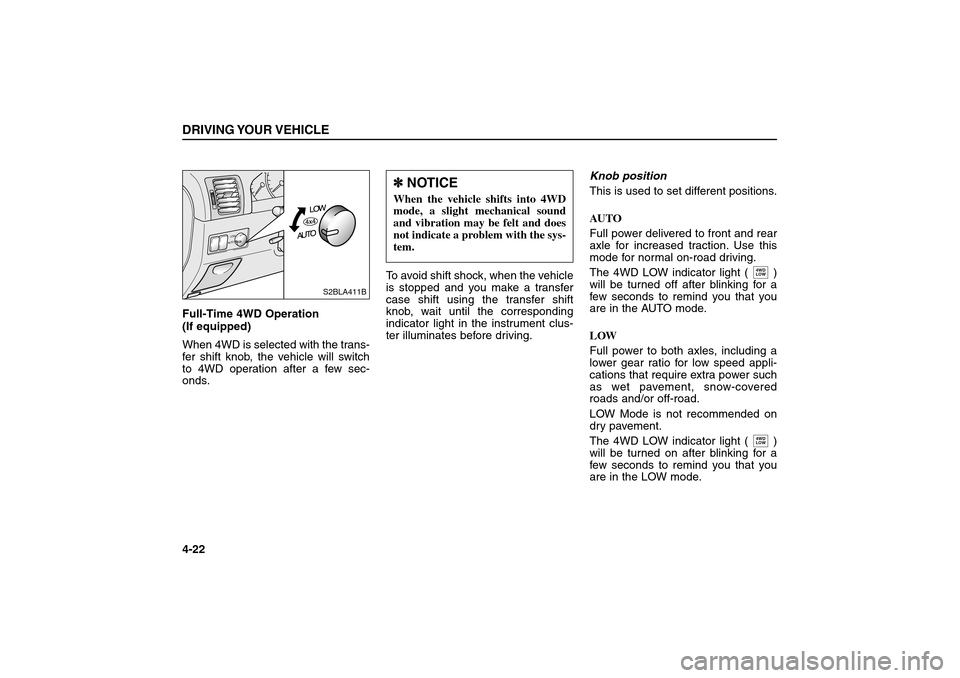
Full-Time 4WD Operation
(If equipped)
When 4WD is selected with the trans-
fer shift knob, the vehicle will switch
to 4WD operation after a few sec-
onds.To avoid shift shock, when the vehicle
is stopped and you make a transfer
case shift using the transfer shift
knob, wait until the corresponding
indicator light in the instrument clus-
ter illuminates before driving.Knob position
This is used to set different positions.
AUTO
Full power delivered to front and rear
axle for increased traction. Use this
mode for normal on-road driving.
The 4WD LOW indicator light ( )
will be turned off after blinking for a
few seconds to remind you that you
are in the AUTO mode.
LOW
Full power to both axles, including a
lower gear ratio for low speed appli-
cations that require extra power such
as wet pavement, snow-covered
roads and/or off-road.
LOW Mode is not recommended on
dry pavement.
The 4WD LOW indicator light ( )
will be turned on after blinking for a
few seconds to remind you that you
are in the LOW mode.
4WD
LOW4WD
LOW
DRIVING YOUR VEHICLE4-22
L
O
WAUTO
S2BLA411B
✽ ✽
NOTICEWhen the vehicle shifts into 4WD
mode, a slight mechanical sound
and vibration may be felt and does
not indicate a problem with the sys-
tem.
BL-ENG (CAN)-4.qxd 7/28/05 5:55 PM Page 22
Page 121 of 312
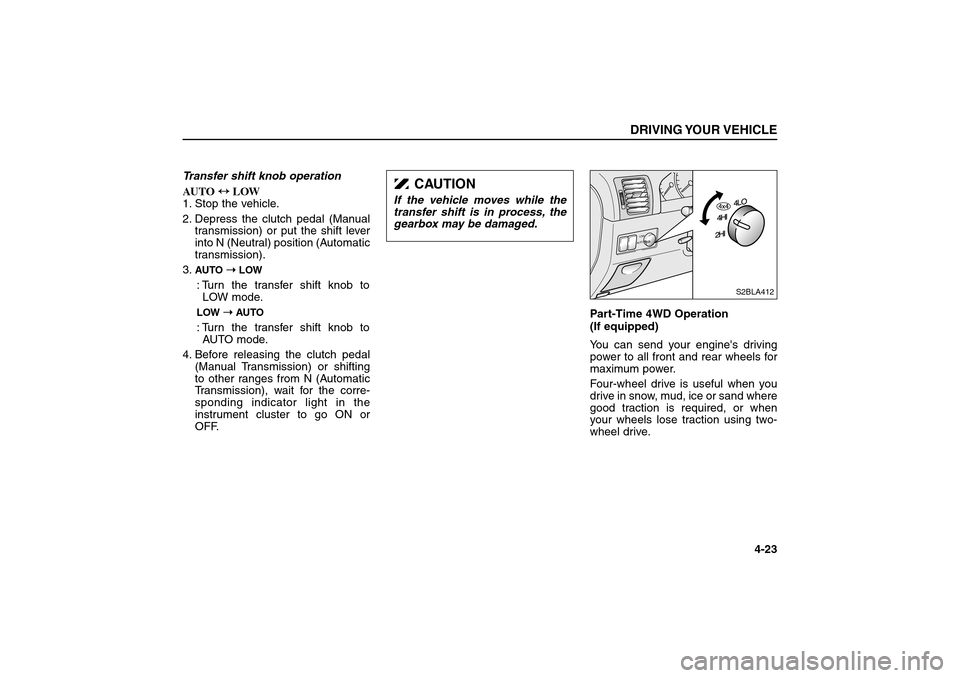
Transfer shift knob operation
AUTO ↔ ↔
LOW
1. Stop the vehicle.
2. Depress the clutch pedal (Manual
transmission) or put the shift lever
into N (Neutral) position (Automatic
transmission).
3.
AUTO ➝ ➝
LOW: Turn the transfer shift knob to
LOW mode.LOW ➝ ➝
AUTO: Turn the transfer shift knob to
AUTO mode.
4. Before releasing the clutch pedal
(Manual Transmission) or shifting
to other ranges from N (Automatic
Transmission), wait for the corre-
sponding indicator light in the
instrument cluster to go ON or
OFF.Part-Time 4WD Operation
(If equipped)
You can send your engine's driving
power to all front and rear wheels for
maximum power.
Four-wheel drive is useful when you
drive in snow, mud, ice or sand where
good traction is required, or when
your wheels lose traction using two-
wheel drive.
DRIVING YOUR VEHICLE
4-23
L
O
WAUTO
S2BLA412
CAUTION
If the vehicle moves while the
transfer shift is in process, the
gearbox may be damaged.
BL-ENG (CAN)-4.qxd 7/28/05 5:55 PM Page 23
Page 122 of 312
When 4WD is selected with the trans-
fer shift knob, the vehicle will switch
to 4WD operation after a few sec-
onds.
To avoid shift shock, when the vehicle
is stopped and you make a transfer
case shift using the transfer shift
know, wait until the corresponding
indicator light in the instrument clus-
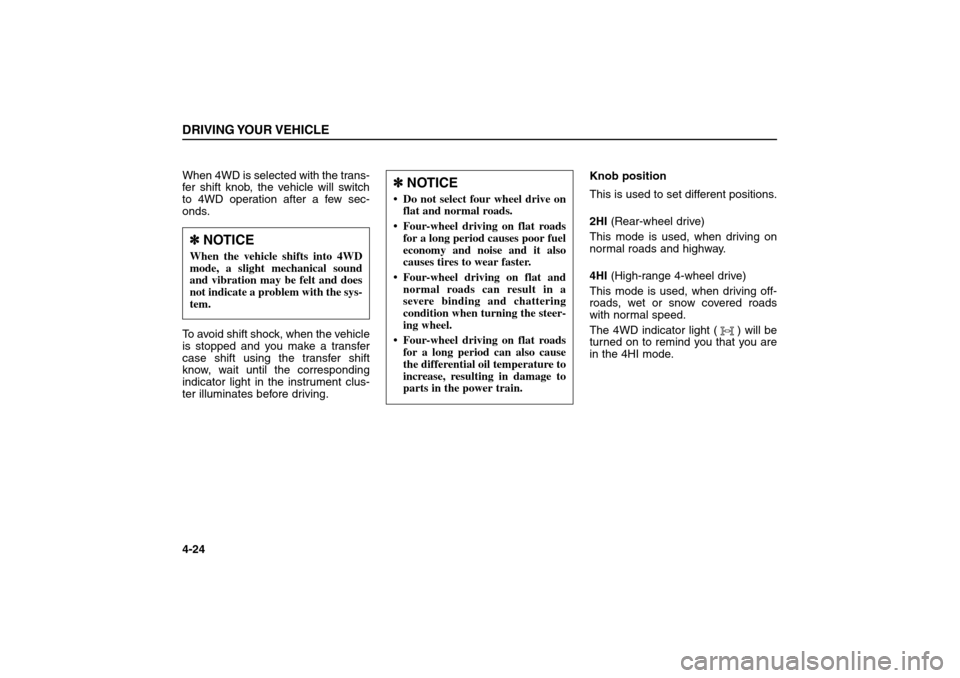
ter illuminates before driving.Knob position
This is used to set different positions.
2HI(Rear-wheel drive)
This mode is used, when driving on
normal roads and highway.
4HI(High-range 4-wheel drive)
This mode is used, when driving off-
roads, wet or snow covered roads
with normal speed.
The 4WD indicator light ( ) will be
turned on to remind you that you are
in the 4HI mode.DRIVING YOUR VEHICLE4-24
✽ ✽
NOTICE Do not select four wheel drive on
flat and normal roads.
Four-wheel driving on flat roads
for a long period causes poor fuel
economy and noise and it also
causes tires to wear faster.
Four-wheel driving on flat and
normal roads can result in a
severe binding and chattering
condition when turning the steer-
ing wheel.
Four-wheel driving on flat roads
for a long period can also cause
the differential oil temperature to
increase, resulting in damage to
parts in the power train.
✽ ✽
NOTICEWhen the vehicle shifts into 4WD
mode, a slight mechanical sound
and vibration may be felt and does
not indicate a problem with the sys-
tem.
BL-ENG (CAN)-4.qxd 7/28/05 5:55 PM Page 24
Page 123 of 312
4LO(Low-range 4-wheel drive)
Use 4LO for climbing or descending
hills, off-roads driving and towing the
vehicle, especially when increased
power is required.
The 4WD LOW indicator light ( )
will be turned on to remind you that
you are in the 4LO mode.
Transfer shift knob operation
By turning the transfer knob (4HI,
4LO), both front and rear axles are
engaged.
This improves the traction character-
istic.2HI➝ ➝
4HI
Turn the transfer knob from the 2HI
mode to 4HI mode at speed below
80km/h.
It is not necessary to depress the
clutch pedal or put the shift lever into
N (Neutral) position (Manual
Transmission) or put the shift lever
into N (Neutral) position (Automatic
Transmission).
Perform this operation when driving
straight. There will be a few seconds
of time delay before come into 4HI
mode when you shift the knob to 4 HI
from 2HI.
4HI ➝ ➝
2HI
Turn the transfer knob from the 4HI
mode to the 2HI mode at speed
below 80km/h. It is not necessary to
depress the clutch pedal (manual
transmission) or put the shift lever
into N (Neutral) (automatic transmis-
sion). Perform this operation when
driving straight. Perform this opera-
tion when driving straight.
If the transfer mode does not shift
into 2HI mode when you turn the
transfer knob to 2HI, drive straight
ahead with accelerating or decelerat-
ing, or drive in reverse.4HI ↔ ↔
4LO
1. Stop the vehicle.
2. Depress the clutch pedal for the
manual transmission or put the
shift lever into N (Neutral) for the
automatic transmission.
3.
4HI ➝ ➝
4LO: Select the 4LO mode.4LO➝ ➝
4HI: Select the 4HI mode.
4. Before releasing the clutch pedal
(Manual transmission) or shifting
to other ranges from N range
(Automatic transmission) ,wait for
corresponding indicator light turns
on or off in the cluster.
4WD
LOW
DRIVING YOUR VEHICLE
4-25
CAUTION
If the vehicle moves while the
transfer shift is in process, the
gearbox may be damaged.
BL-ENG (CAN)-4.qxd 7/28/05 5:55 PM Page 25
Page 130 of 312
Disc Brake Wear Indicators
Your vehicle has disc brakes.
When your brake pads are worn and
it’s time for new pads, you will hear a
high-pitched warning sound from
your front brakes. You may hear this
sound come and go or it may occur
whenever you depress the brake
pedal.
Please remember that some driving
conditions or climates may cause a
brake squeal when you first apply (or
lightly apply) the brakes. This is nor-
mal and does not indicate a problem
with your brakes.Parking Brake
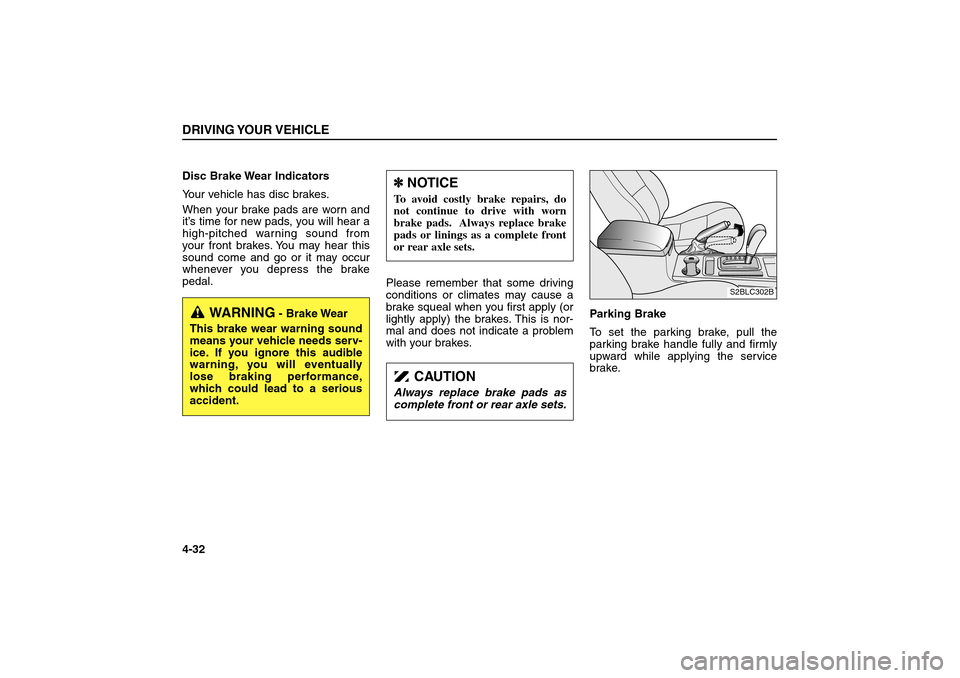
To set the parking brake, pull the
parking brake handle fully and firmly
upward while applying the service
brake.DRIVING YOUR VEHICLE4-32
S2BLC302B
WARNING
- Brake Wear
This brake wear warning sound
means your vehicle needs serv-
ice. If you ignore this audible
warning, you will eventually
lose braking performance,
which could lead to a serious
accident.
✽ ✽
NOTICETo avoid costly brake repairs, do
not continue to drive with worn
brake pads. Always replace brake
pads or linings as a complete front
or rear axle sets.
CAUTION
Always replace brake pads as
complete front or rear axle sets.
BL-ENG (CAN)-4.qxd 7/28/05 5:55 PM Page 32