KIA SORENTO 2014 Navigation System Quick Reference Guide
Manufacturer: KIA, Model Year: 2014, Model line: SORENTO, Model: KIA SORENTO 2014Pages: 236, PDF Size: 7.61 MB
Page 61 of 236
USB Mode
Audio l
2-37
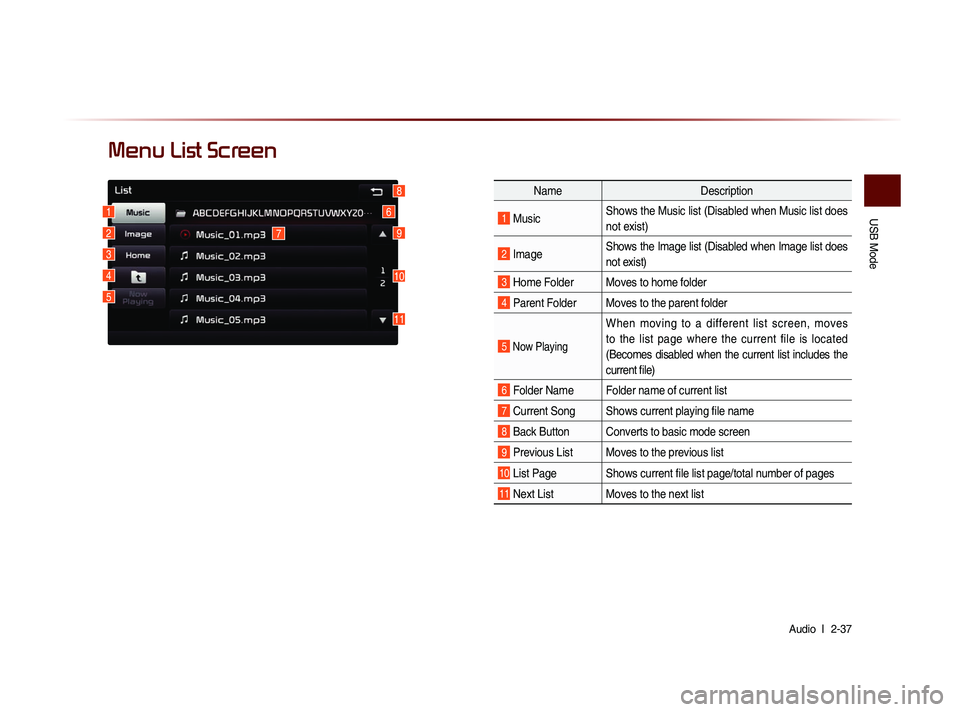
Menu List Screen
Name Description
1 MusicShows the Music list (Disabled when Music list does
not exist)
2 ImageShows the Image list (Disabled when Image list does
not exist)
3 Home Folder Moves to home folder
4 Parent Folder Moves to the parent folder
5 Now Playing
When moving to a different list screen, moves
to the list page where the current file is located
(Becomes disabled when the current list includes the
current file)
6 Folder Name Folder name of current list
7 Current Song Shows current playing file name
8 Back Button Converts to basic mode screen
9 Previous List Moves to the previous list
10 List Page Shows current file list page/total number of pages
11 Next List Moves to the next list
16
7
10
9
8
11
2
3
4
5
Page 62 of 236
2-38
USB Mode
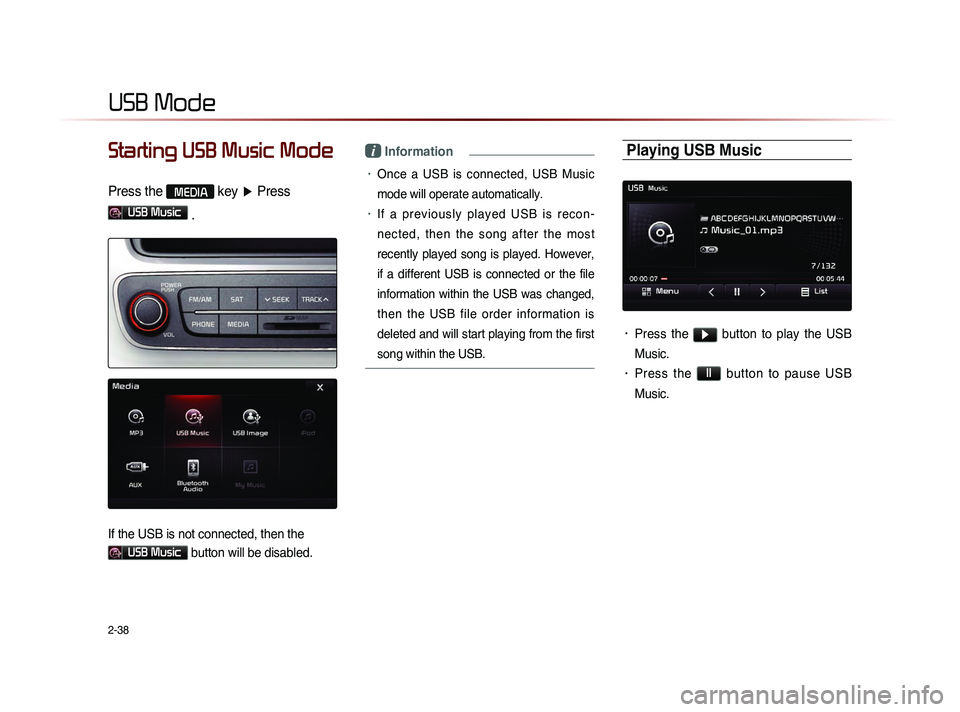
Starting USB Music Mode
Press the MEDIA key ▶ Press
USB Music
.
If the USB is not connected, then the
USB Music button will be disabled.
i Information
• Once a USB is connected, USB Music
mode will operate automatically.
• If a previously played USB is recon -
nected, then the song after the most
recently played song is played. However,
if a different USB is connected or the file
information within the USB was changed,
then the USB file order information is
deleted and will start playing from the first
song within the USB.
Playing USB Music
• Press the ▶ button to play the USB
Music.
• Press the ll button to pause USB
Music.
Page 63 of 236
USB Mode
Audio l
2-39
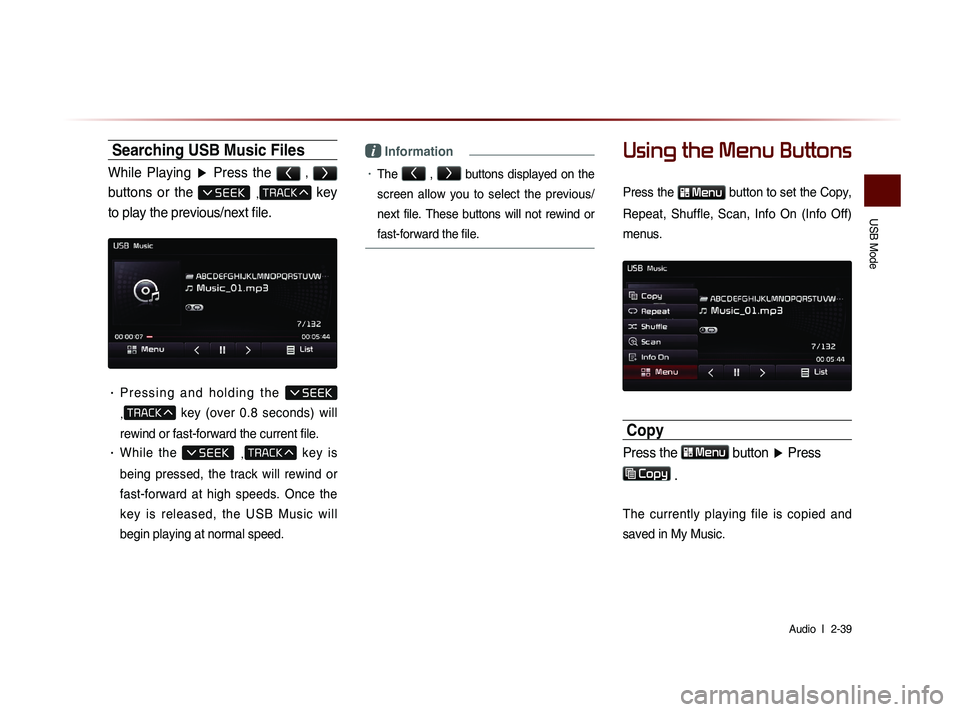
Searching USB Music Files
While Playing ▶ Press the < , >
buttons or the , key
to play the previous/next file.
• P r e s s i n g a n d h o l d i n g t h e
,
key (over 0.8 seconds) will
rewind or fast-forward the current file.
• While the ,
key is
being pressed, the track will rewind or
fast-forward at high speeds. Once the
key is released, the USB Music will
begin playing at normal speed.
i Information
• The < , >
buttons displayed on the
screen allow you to select the previous/
next file. These buttons will not rewind or
fast-forward the file.
Using the Menu Buttons
Press the Menu button to set the Copy,
Repeat, Shuffle, Scan, Info On (Info Off)
menus.
Copy
Press the Menu button ▶ Press
Copy
.
The currently playing file is copied and
saved in My Music.
Page 64 of 236
2-40
USB Mode
i Information
• Copied and saved files can be played
within My Music mode.
NOTICE
• Time required to copy files into My Music
is approximately 3 seconds per 1 USB
MP3 file (4mb), yet this may slightly differ
depending on the file size and system con-
ditions.
• Time required to copy files into My Music
is approximately 1 minute and 17 seconds
per 1 CD MP3 file, yet this may slightly dif-
fer depending on the file size and system
conditions.
• When copying is in progress, AV, Bluetooth
and Voice Recognition features cannot be
used.
• When copying is in progress, AV and
Bluetooth features cannot be used.
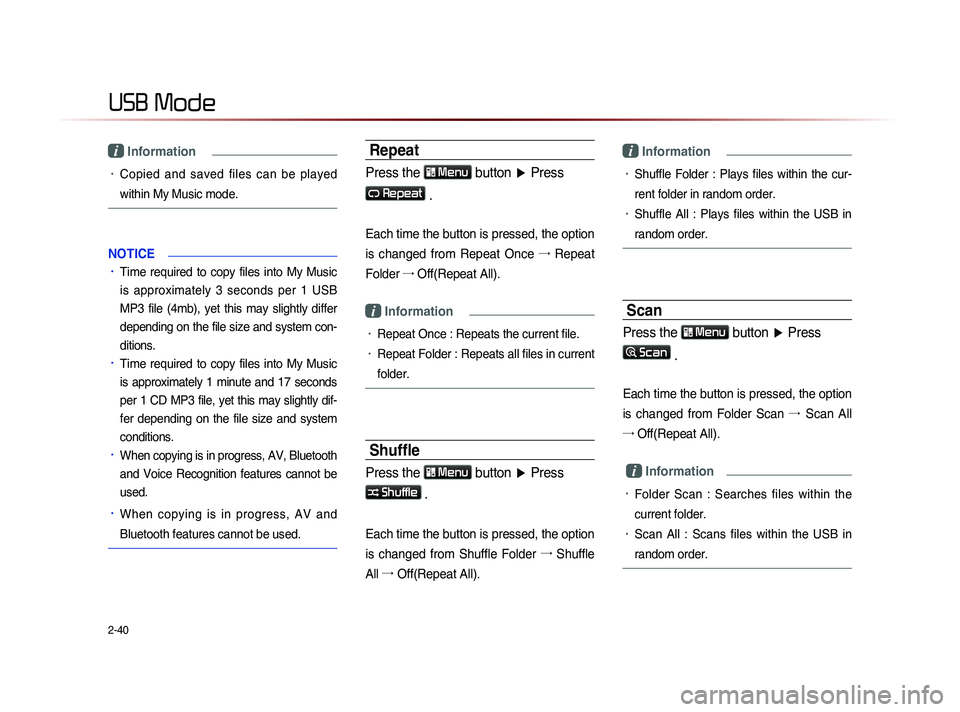
Repeat
Press the Menu button ▶ Press
Repeat
.
Each time the button is pressed, the option
is changed from Repeat Once →
Repeat
Folder →
Off(Repeat All).
i Information
• Repeat Once : Repeats the current file.
• Repeat Folder : Repeats all files in current
folder.
Shuffle
Press the Menu
button ▶ Press
Shuffle .
Each time the button is pressed, the option
is changed from Shuffle Folder →
Shuffle
All →
Of
f(Repeat All).
i Information
• Shuffle Folder : Plays files within the cur-
rent folder in random order.
• Shuffle All : Plays files within the USB in
random order.
Scan
Press the Menu button ▶ Press
Scan
.
Each time the button is pressed, the option
is changed from Folder Scan →
Sc
an All
→ Off(Repeat All).
i Information
• Folder Scan : Searches files within the
current folder.
• Scan All : Scans files within the USB in
random order.
Page 65 of 236
USB Mode
Audio l
2-41
Info On/Info Off
Press the Menu
button ▶ Press
Info On .
The screen display can be set differently
depending on user selection.
W h e n t h e t i t l e , a r t i s t , a n d a l b u m i n f o
are displayed, the button is changed to
Info Off .
Press
Info Off to restore the previous
information display setting.
i Information
• The title, artist, and album info are dis-
played only when such information is
recorded within the MP3 file ID3 tag.
NOTICE
• The title, artist and album info are dis-
pl
ayed only when such information is
recorded within the MP3 file ID3 tag.
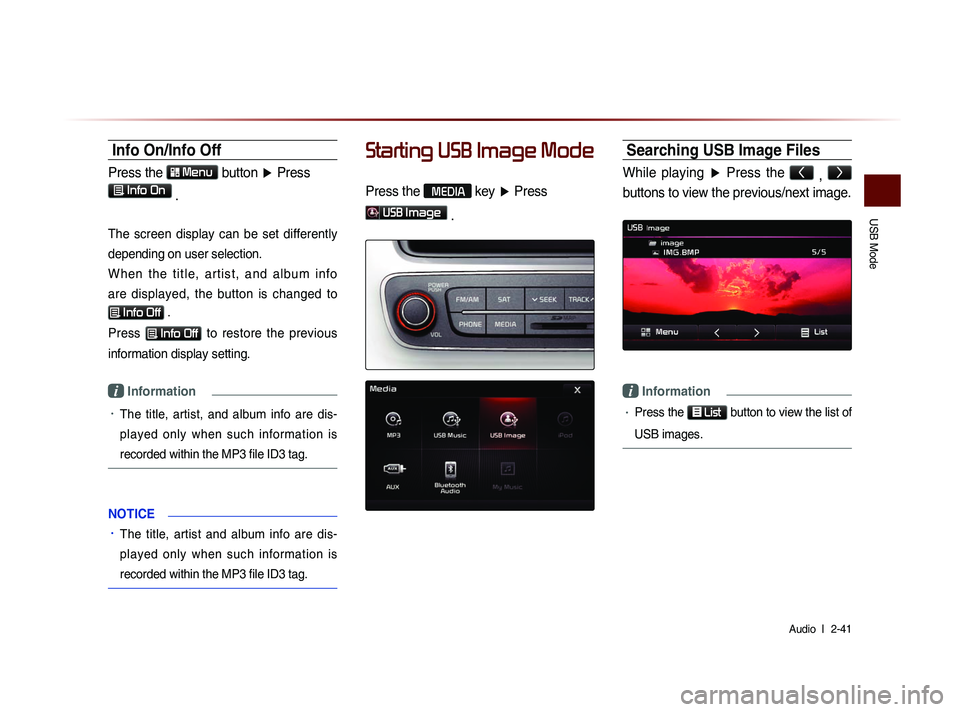
Starting USB Image Mode
Press the MEDIA key ▶ Press
USB Image
.
Searching USB Image Files
While playing ▶ Press the <
, >
buttons to view the previous/next image.
i Information
• Press the
List button to view the list of
USB images.
Page 66 of 236
2-42
USB Mode
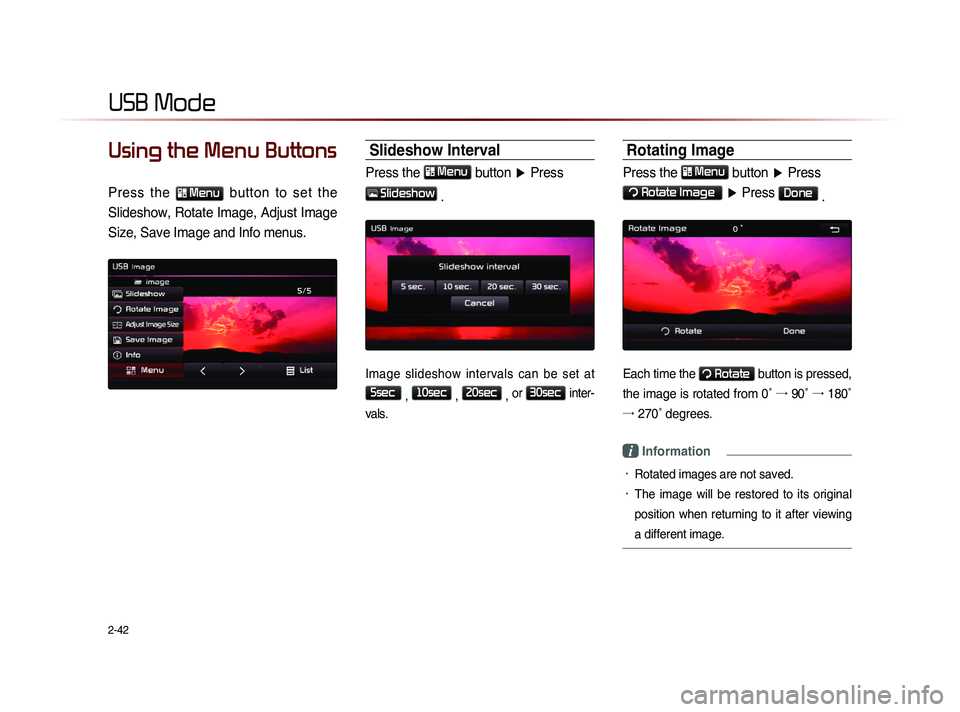
Using the Menu Buttons
Press the Menu button to set the
Slideshow, Rotate Image, Adjust Image
Size, Save Image and Info menus.
Slideshow Interval
Press the Menu
button ▶ Press
Slideshow
.
Image slideshow intervals can be set at
5sec
, 10sec
, 20sec
, or
30sec inter-
vals.
Rotating Image
Press the Menu
button ▶ Press
Rotate Image
▶ Press Done
.
Each time the Rotate button is pressed,
the image is rotated from 0˚ →
90˚ →
180˚
→
27
0˚ degrees.
i Information
• Rotated images are not saved.
• The image will be restored to its original
position when returning to it after viewing
a different image.
Page 67 of 236
USB Mode
Audio l
2-43
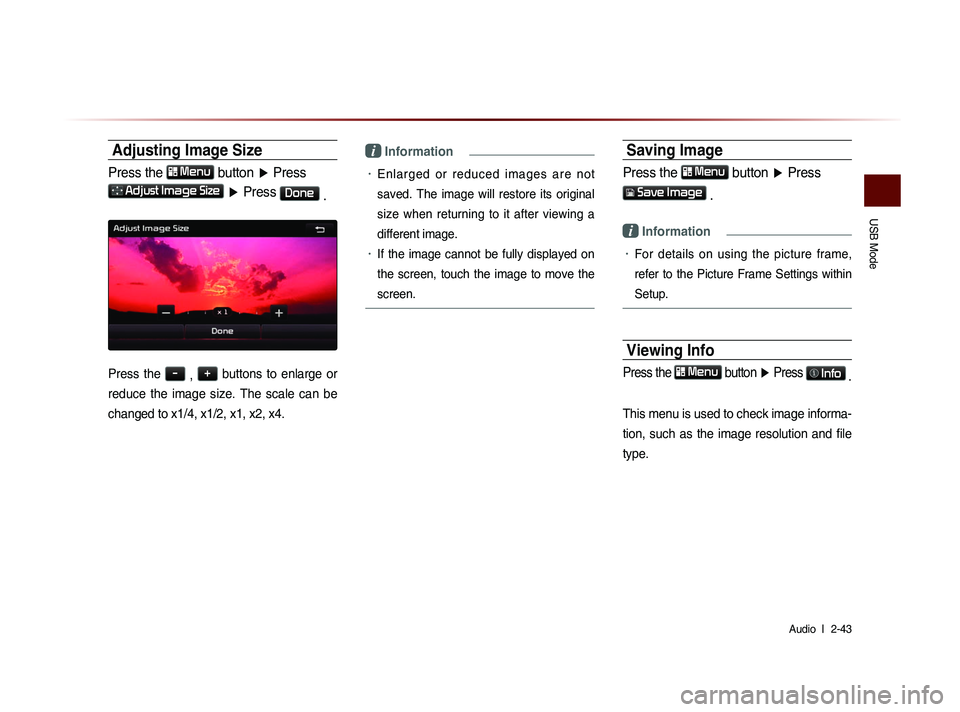
Adjusting Image Size
Press the Menu
button ▶ Press
Adjust Image Size ▶ Press Done
.
Press the -
, +
buttons to enlarge or
reduce the image size. The scale can be
changed to x1/4, x1/2, x1, x2, x4.
i Information
• Enlarged or reduced images are not
saved. The image will restore its original
size when returning to it after viewing a
different image.
• If the image cannot be fully displayed on
the screen, touch the image to move the
screen.
Saving Image
Press the Menu button ▶ Press
Save Image
.
i Information
• For details on using the picture frame,
refer to the Picture Frame Settings within
Setup.
Viewing Info
Press the Menu
button ▶ Press Info
.
This menu is used to check image informa-
tion, such as the image resolution and file
type.
Page 68 of 236
2-44
iPod Mode
Using iPod Devices
iPod® is a registered trademark of Apple Inc.
iPod mode will not operate if the connected iPod cannot be recognized due to operation of unsupported versions that do not support related
protocols, iPod abnormalities, or iPod device defects. Some iPods with
unsupported communication protocols may not properly operate with
the Navigation system.
For fifth generation iPod Nano devices, the iPod may not be recog-nized when the battery level is low. Please charge the iPod for use.
Search/play orders shown within the iPod device may differ with the orders shown within the Navigation system.
If the iPod malfunctions due to an iPod device defect, reset the iPod and try again. (To learn more, refer to your iPod manual)
For some iPod Touch and iPhone devices, connecting Bluetooth®
while the iPod is operating may result in discontinued iPod sound.
When such devices with Bluetooth
® support are connected, this prob-
lem occurs as the sound source is changed from the Dock Connector
(USB connector cable) to Bluebird. (Bluetooth
® Module)
To listen to the iPod sound, reconnect the USB cable or exit then re- enter iPod mode.
In order to use the iPod while operating the keys, you must use a dedi-cated iPod cable. (the cable that is supplied when purchasing iPod/
iPhone products)
※
Du
ring ACC ON state, connecting the iPod through the iPod cable
(The cable that is supplied when purchasing iPod/iPhone product.)
will charge the iPod through the head unit.
※ The use of genuine iPod cables supplied by Apple is recom-
mended. (The use of other products may result in noise
or abnormal operation.)
When connecting with the iPod cable, make sure to fully insert the jack
to prevent communication interference. If the iPod is connected to the
vehicle while it is playing, a high pitch tone may sound for about 1~2
seconds immediately after connection. If possible, connect the iPod to
the vehicle with the iPod stopped/paused.
Within iPhones, streaming audio and iPod control may occasionally conflict. If problems persist, remove the iPhone and connect again.
Some iPod versions may not sync with the system. In such cases, the system may not properly restore the previously operated mode. (For
iPads, battery charging is not supported.)
Applications that are not exclusively used as iPod Applications
within iPhone/iPod Touch devices are not supported.
iPod
Page 69 of 236

iPod
Mode
Audio l
2-45
Steps upon Initial Connection
Search Steps may differ depending on the type of iPod device.
Supported iPod Devices
• Operation is supported and Apple Inc. certified : ○
• Operation is supported but uncertified : △
1 Step 2 Step 3 Step 4 Step 5 Step
Play List Play List Play List name (category is same as iPod)
Artist Artist Artist Album
Name Song
Name
Album Album Album
Name Song
Name
Genre Genre Genre
Name Artist
Name Album
Name Song
Name
Song Song Song Name
Composer Composer Composer
Name Album
Name Song
Name
Device/
Generation1st 2st 3st 4st 5st 6st
iPod Mini Not Supported
iPod Shuffle Not Supported
iPod
Nano ○ ○ ○ ○ ○ ○
iPod Touch ○ ○ ○ ○
Not Released
iPod Classic Not Supported ○
(iPod with video) ○
(iPod
Classic)
iPad △ △ △
Not Released
Device/Type 3GS 4G 4S 5G
iPhone ○
○△ △
Page 70 of 236

2-46
iPod Mode
Basic Mode Screen
NameDescription
1 Mode Displays currently operating mode
2 Title Displays name of current title
3 Artist Info Artist name
4 Album Info Album name
5 Repeat/Shuffle From Repeat/Shuffle, displays the currently oper at ing
function
6 File Index Shows the current file/total files within the iPod
7 Play Time Displays the current play time/total play time
8 Repeat Repeats the currently playing file
9 Shuffle Plays files in random order
10 Info Off
(Info On) Changes the display method between Info Off/Info On • Info Off : Shows title, artist, and album Info• Info On : Shows title, artist, album, genre, and
composer info
11 Menu Displays Repeat, Shuffle, and Info On (Info Off) menus
12 Previous File Moves to the previous file
13 Play/Pause Plays/pauses the current file
14 Next File Moves to the next file
15 List
Moves to the list screen
1
11
8
9
10
15
121314
4
56
3
2
7