engine Lancia Delta 2011 Owner handbook (in English)
[x] Cancel search | Manufacturer: LANCIA, Model Year: 2011, Model line: Delta, Model: Lancia Delta 2011Pages: 290, PDF Size: 8.36 MB
Page 47 of 290
46KNOWING YOUR CAR
IGNITION DEVICE
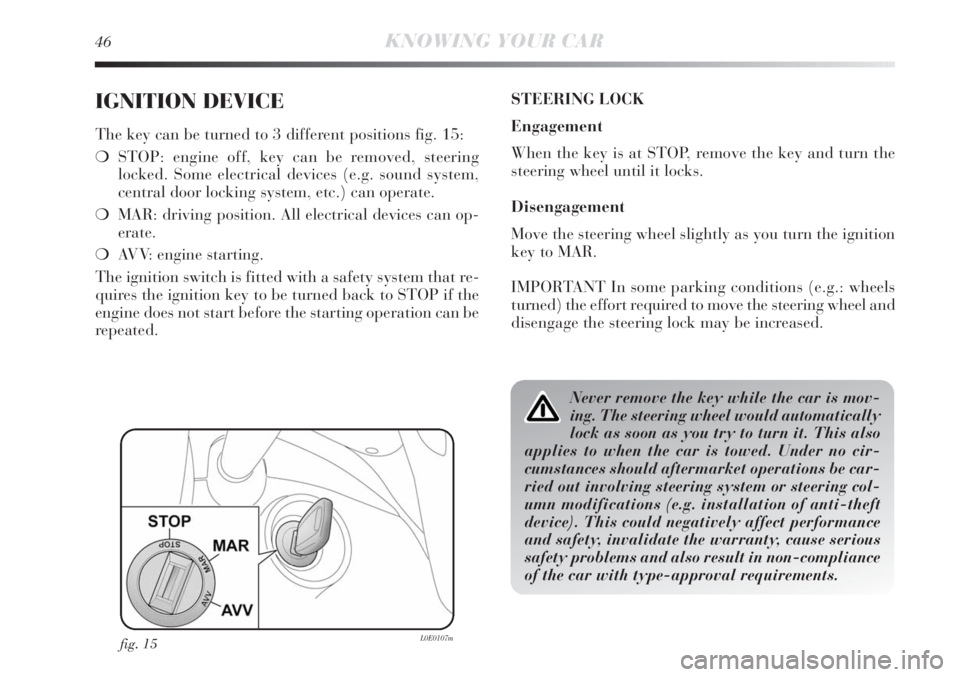
The key can be turned to 3 different positions fig. 15:
❍STOP: engine off, key can be removed, steering
locked. Some electrical devices (e.g. sound system,
central door locking system, etc.) can operate.
❍MAR: driving position. All electrical devices can op-
erate.
❍AVV: engine starting.
The ignition switch is fitted with a safety system that re-
quires the ignition key to be turned back to STOP if the
engine does not start before the starting operation can be
repeated.STEERING LOCK
Engagement
When the key is at STOP, remove the key and turn the
steering wheel until it locks.
Disengagement
Move the steering wheel slightly as you turn the ignition
key to MAR.
IMPORTANT In some parking conditions (e.g.: wheels
turned) the effort required to move the steering wheel and
disengage the steering lock may be increased.
fig. 15L0E0107m
Never remove the key while the car is mov-
ing. The steering wheel would automatically
lock as soon as you try to turn it. This also
applies to when the car is towed. Under no cir-
cumstances should aftermarket operations be car-
ried out involving steering system or steering col-
umn modifications (e.g. installation of anti-theft
device). This could negatively affect performance
and safety, invalidate the warranty, cause serious
safety problems and also result in non-compliance
of the car with type-approval requirements.
Page 51 of 290
50KNOWING YOUR CAR
HEADREST
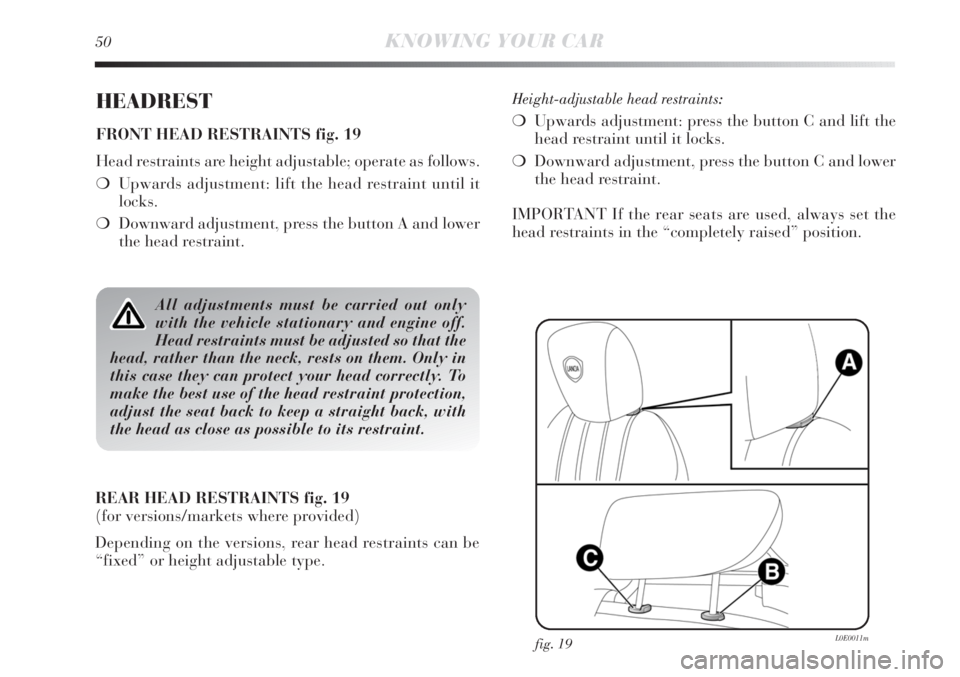
FRONT HEAD RESTRAINTS fig. 19
Head restraints are height adjustable; operate as follows.
❍Upwards adjustment: lift the head restraint until it
locks.
❍Downward adjustment, press the button A and lower
the head restraint.
fig. 19L0E0011m
Height-adjustable head restraints:
❍Upwards adjustment: press the button C and lift the
head restraint until it locks.
❍Downward adjustment, press the button C and lower
the head restraint.
IMPORTANT If the rear seats are used, always set the
head restraints in the “completely raised” position.
All adjustments must be carried out only
with the vehicle stationary and engine off.
Head restraints must be adjusted so that the
head, rather than the neck, rests on them. Only in
this case they can protect your head correctly. To
make the best use of the head restraint protection,
adjust the seat back to keep a straight back, with
the head as close as possible to its restraint.
REAR HEAD RESTRAINTS fig. 19
(for versions/markets where provided)
Depending on the versions, rear head restraints can be
“fixed” or height adjustable type.
Page 52 of 290
1
KNOWING YOUR CAR51
STEERING WHEEL
It can be adjusted vertically (and axially).
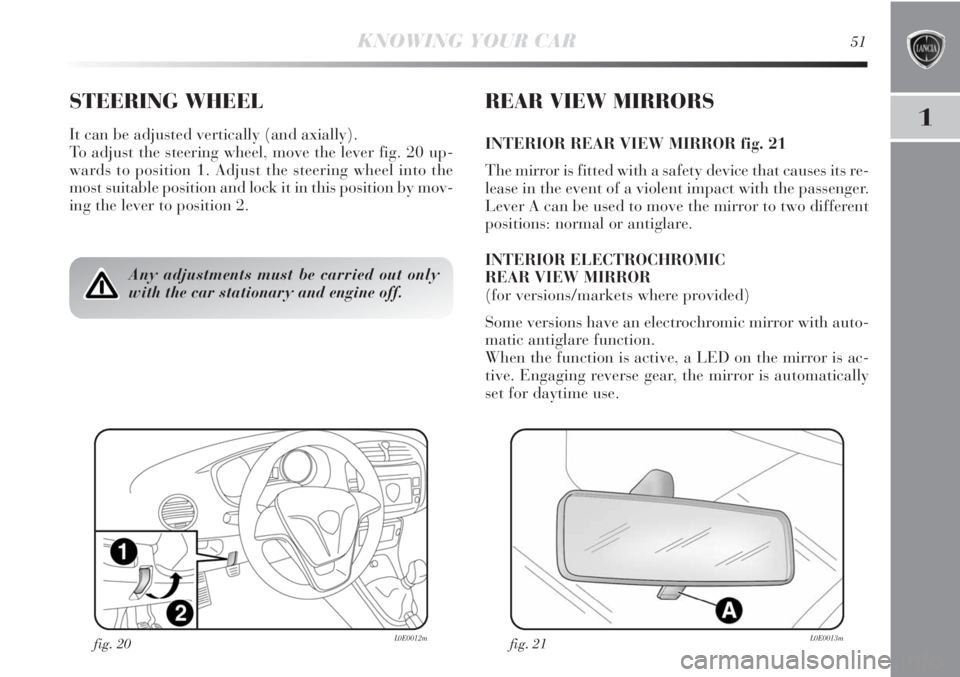
To adjust the steering wheel, move the lever fig. 20 up-
wards to position 1. Adjust the steering wheel into the
most suitable position and lock it in this position by mov-
ing the lever to position 2.
REAR VIEW MIRRORS
INTERIOR REAR VIEW MIRROR fig. 21
The mirror is fitted with a safety device that causes its re-
lease in the event of a violent impact with the passenger.
Lever A can be used to move the mirror to two different
positions: normal or antiglare.
INTERIOR ELECTROCHROMIC
REAR VIEW MIRROR
(for versions/markets where provided)
Some versions have an electrochromic mirror with auto-
matic antiglare function.
When the function is active, a LED on the mirror is ac-
tive. Engaging reverse gear, the mirror is automatically
set for daytime use.
Any adjustments must be carried out only
with the car stationary and engine off.
fig. 21L0E0013mfig. 20L0E0012m
Page 58 of 290

1
KNOWING YOUR CAR57
SWITCHING ON THE CLIMATE
CONTROL SYSTEM
The system can be activated by pressing any of the but-
tons; it is, however, advisable to set the desired temper-
atures on the display, then press the AUTO button.
The climate control system allows you to customise the
temperatures (driver side and passenger side) with a max-
imum difference of 7 °C.
The climate control system compressor works only with
the engine running and with an outside temperature of
above 4 °C.
It is advisable not to use the air recircula-
tion function when the outside temperature
is low to prevent the windows from rapidly
misting up.
Automatic climate control operation
(AUTO function) A-fig. 26
Press the AUTO button; the system will automatically
adjust:
❍the amount of air introduced into the passenger com-
partment;
❍the distribution of air inside the passenger compart-
ment;
cancelling any previous manual settings.
During climate control system automatic operation, the
words FULL AUTO appear on the display.
During automatic operation it is still possible to adjust
the set temperature and carry out the following opera-
tions manually:
❍adjust fan speed;
❍select air distribution;
❍switch internal air recirculation and AQS function
on/off;
❍switch on the climate control system compressor.
Page 63 of 290

62KNOWING YOUR CAR
Switching the climate control compressor on/off
I-fig. 26
Press button
❄to switch on the climate control system
compressor.
Compressor engagement
❍the LED on button
❄is lit up;
❍symbol
❄is shown on the display.
Compressor off
❍the LED on button
❄is off;
❍symbol
❄off on the display;
❍internal air recirculation is excluded;
❍the AQS function is disabled.
With the climate control compressor switched off, air can-
not be introduced into the passenger compartment at
a lower temperature than the outside temperature; in this
case the
❄symbol on the display will flash.
The deactivation of the climate control compressor is
memorised even after the engine has stopped. To turn the
climate control compressor back on, press button
❄again
or press AUTO: if you press AUTO, the other manual set-
tings will be cancelled.
EXTERNAL LIGHTS
The left-hand stalk operates most of the external lights.
The ignition key has to be in the MAR position for the ex-
terior lights to come on. The instrument panel and the
various dashboard controls will come on with the exter-
nal lights.
DAYTIME RUNNING LIGHTS (DRL)
(for versions/markets where provided)
With the ignition key turned to MAR and the twist switch
turned to position Othe daytime running lights are au-
tomatically activated; the other lights and interior light-
ing remain off. The automatic operation of the day lights
can be activated/deactivated via the display menu (see
“Display” paragraph in this chapter). If the daytime run-
ning lights are deactivated, no light comes on when the
twist switch is turned to O.
fig. 27L0E0019m
Page 66 of 290
1
KNOWING YOUR CAR65
LANE CHANGE FUNCTION
If you wish to signal a lane change, place the left lever
in the unstable position for less than half a second. The
direction indicator on the side selected will flash five
times and then switch off automatically.
“FOLLOW ME HOME” DEVICE
This allows the space surrounding the car to be lit up for
a certain period of time.
Activation
With the ignition key in the STOP position or extracted,
pull the stalk towards the steering wheel and move it
within 2 minutes of the engine switching off. At each sin-
gle movement of the stalk, the lights will remain on for
an extra 30 seconds up to a maximum of 210 seconds;
then the lights are switched off automatically. Each time
the lever is operated, the warning light 3 on the instru-
ment panel comes on and the display shows how long the
function will remain active. The warning light comes on
when the stalk is pulled for the first time and stays lit un-
til the function switches itself off automatically. Each time
the stalk is activated the time will extend the time that
the lights remain on.
Deactivation
Keep the stalk pulled towards the steering wheel for more
than 2 seconds.WINDOW WASHING
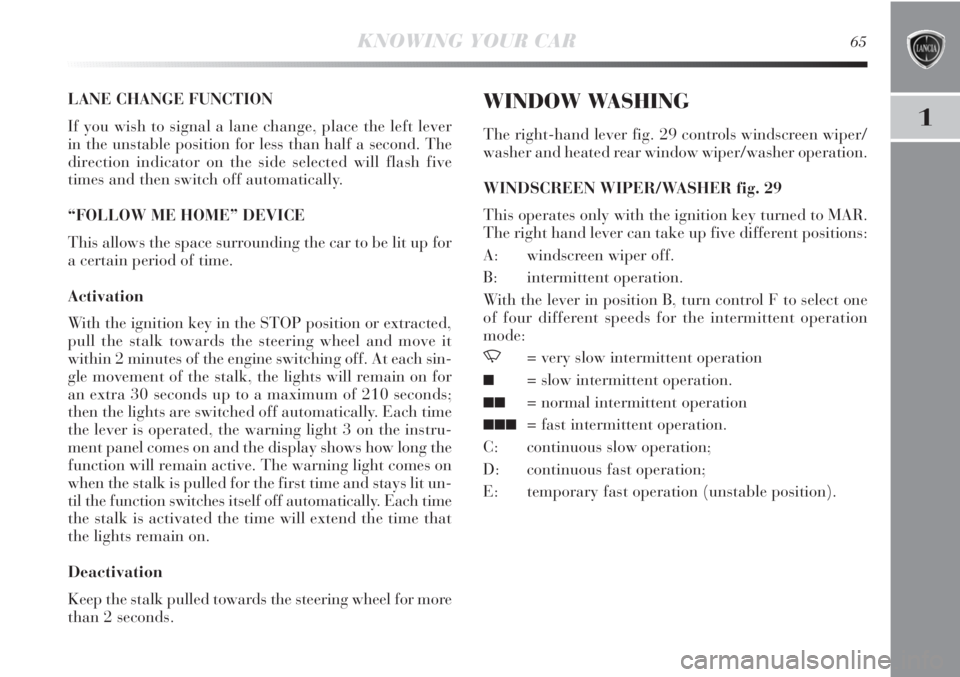
The right-hand lever fig. 29 controls windscreen wiper/
washer and heated rear window wiper/washer operation.
WINDSCREEN WIPER/WASHER fig. 29
This operates only with the ignition key turned to MAR.
The right hand lever can take up five different positions:
A: windscreen wiper off.
B: intermittent operation.
With the lever in position B, turn control F to select one
of four different speeds for the intermittent operation
mode:
,= very slow intermittent operation
■= slow intermittent operation.
■■= normal intermittent operation
■■■= fast intermittent operation.
C: continuous slow operation;
D: continuous fast operation;
E: temporary fast operation (unstable position).
Page 72 of 290
1
KNOWING YOUR CAR71
On the roof light, some bulbs light the car interior when
the main beam headlamps or dipped headlamps are on.
IMPORTANT The roof light in fig. 32, for some versions,
may also be in a rear central position (electric sun roof
version).
IMPORTANT Before getting out of the car, make sure
that both switches are in the middle position; when the
doors are closed, the lights switch off preventing a pos-
sible battery discharging. In any case, if the switch is left
in on position, the roof light switches off automatically
15 minutes after the engine switching off.
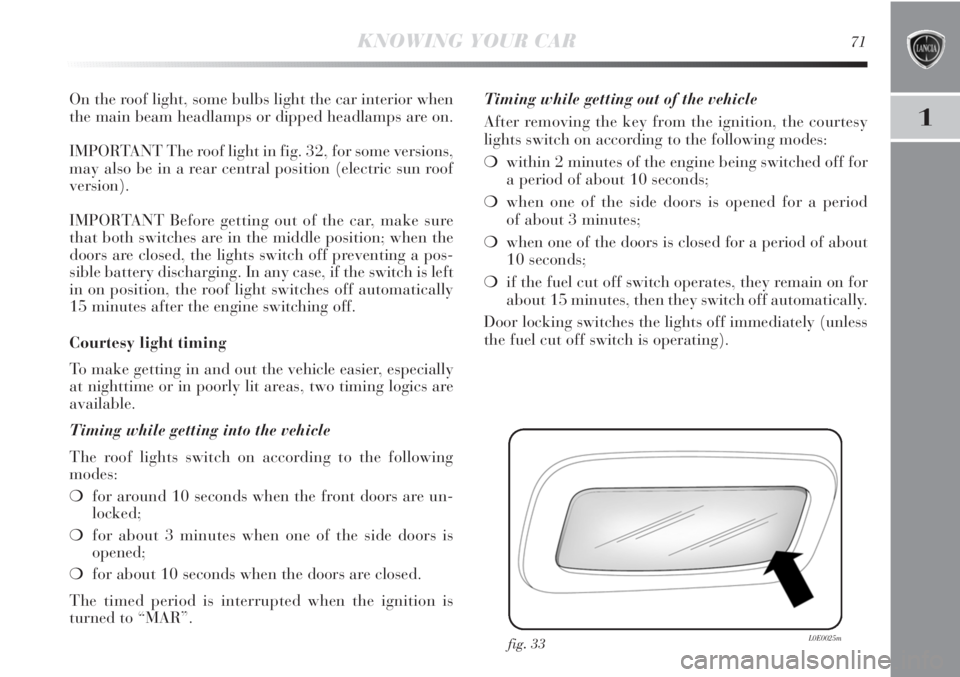
Courtesy light timing
To make getting in and out the vehicle easier, especially
at nighttime or in poorly lit areas, two timing logics are
available.
Timing while getting into the vehicle
The roof lights switch on according to the following
modes:
❍for around 10 seconds when the front doors are un-
locked;
❍for about 3 minutes when one of the side doors is
opened;
❍for about 10 seconds when the doors are closed.
The timed period is interrupted when the ignition is
turned to “MAR”.Timing while getting out of the vehicle
After removing the key from the ignition, the courtesy
lights switch on according to the following modes:
❍within 2 minutes of the engine being switched off for
a period of about 10 seconds;
❍when one of the side doors is opened for a period
of about 3 minutes;
❍when one of the doors is closed for a period of about
10 seconds;
❍if the fuel cut off switch operates, they remain on for
about 15 minutes, then they switch off automatically.
Door locking switches the lights off immediately (unless
the fuel cut off switch is operating).
fig. 33L0E0025m
Page 76 of 290

1
KNOWING YOUR CAR75
FUEL CUT-OFF SYSTEM
This intervenes in the case of an impact causing:
❍cut off of fuel supply with resultant engine shut down;
❍automatic door lock release;
❍activation of all lights inside the car.
When the system has been triggered, the message “Fuel
cut off, see handbook” is displayed.
Carefully check the car for fuel leaks, for instance in the
engine compartment, under the car or near the tank area.
Following a collision, turn the ignition key to STOP
to avoid draining the battery.To restore correct car operation, follow this procedure:
❍turn the ignition key to MAR;
❍activate the right hand indicator;
❍deactivate the right hand indicator;
❍activate the left hand indicator;
❍deactivate the left hand indicator;
❍activate the right hand indicator;
❍deactivate the right hand indicator;
❍activate the left hand indicator;
❍deactivate the left hand indicator;
❍turn the key to STOP.
If, after a crash, you smell fuel or notice
leaks from the fuel system, do not reactivate
the system to avoid the risk of fire.
Page 90 of 290

1
KNOWING YOUR CAR89
Anti-crush safety device
The vehicle is equipped with an anti-pinch safety device
for the raising of the front windows.
This safety system detects the presence of an obstacle
during the window closing travel and cuts in by stopping
and reversing the window travel, depending on its posi-
tion. This device is also useful if the windows are acti-
vated accidentally by children on board the vehicle.
The anti-pinch function is active both during manual and
automatic operation of the electric windows. Following
the intervention of the anti-pinch system, the window
travel is immediately interrupted and subsequently re-
versed until the lower end of travel is reached. The win-
dow cannot be operated in any way during this time.IMPORTANT If the anti-pinch protection intervenes 5
consecutive times within a minute or is faulty, the auto-
matic closing operation of the window is inhibited, only
allowing it in steps of half a second; the button is released
for the subsequent manoeuvre.
In order to restore the correct operation of the system, one
of the following manoeuvres must be performed:
❍switch off and restart the engine;
❍fully lower the window concerned.
IMPORTANT With ignition key at STOP or removed, the
electric windows remain active for about 3 minutes and
are deactivated when a door is opened.
Page 101 of 290

100KNOWING YOUR CAR
With hot engine, proceed with the utmost
care inside the engine compartment to avoid
burns. Do not place your hands close to the
fan: it might start working even with the ignition
key removed. Wait for the engine to cool.
Pay attention to scarves, ties and other loose
fitting garments. If they accidentally touch
moving parts, they may easily get caught up
with serious risks for those who wear them.
CLOSING fig. 65
Proceed as follows:
❍Hold the bonnet up with one hand and with the other
remove rod C from housing D and put it back into its
catch;
❍Lower the bonnet to approximately 20 centimetres
from the engine compartment and let it drop. Make
sure that the bonnet is completely closed and not only
fastened by the safety catch by trying to open it. In
this case, do not press the bonnet down, rather lift
it again and repeat the procedure.
For safety reasons, the bonnet must always
be properly closed while the car is travel-
ling. Make sure that the bonnet is properly
closed and that the lock is engaged. Should you no-
tice that the bonnet is not properly secured while
travelling, stop the car immediately and close the
bonnet safely.