Lancia Flavia 2012 Owner handbook (in English)
Manufacturer: LANCIA, Model Year: 2012, Model line: Flavia, Model: Lancia Flavia 2012Pages: 233, PDF Size: 2.61 MB
Page 161 of 233
REPLACEMENT TIRES
The tires on your new vehicle provide
a balance of many characteristics.
They should be inspected regularly
for wear and correct cold tire inflation
pressure. The manufacturer strongly
recommends that you use tires
equivalent to the originals in size,
quality and performance when re-
placement is needed (refer to the
paragraph on “Tread Wear Indica-
tors”). Refer to the “Tire and Loading
Information” placard for the size des-
ignation of your tire. The Load Index
and Speed Symbol for your tire will be
found on registration Document/log
book.
It is recommended to replace the two
front tires or two rear tires as a pair.
Replacing just one tire can seriously
affect your vehicle’s handling. If you
ever replace a wheel, make sure that
the wheel’s specifications match those
of the original wheels.It is recommended you contact your
original equipment or an authorized
tire dealer with any questions you may
have on tire specifications or capability.
Failure to use equivalent replacementtires may adversely affect the safety,
handling, and ride of your vehicle.
WARNING!
Do not use a tire, wheel size or
rating other than that specified
for your vehicle. Some combina-
tions of unapproved tires and
wheels may change suspension di-
mensions and performance char-
acteristics, resulting in changes to
steering, handling, and braking of
your vehicle. This can cause un-
predictable handling and stress to
steering and suspension compo-
nents. You could lose control and
have a collision resulting in seri-
ous injury or death. Use only the
tire and wheel sizes with load rat-
ings approved for your vehicle.
Never use a tire with a smaller
load index or capacity, other than
what was originally equipped on
your vehicle. Using a tire with a
smaller load index could result in
tire overloading and failure. You
could lose control and have a col-
lision.
(Continued)
WARNING!(Continued)
Failure to equip your vehicle with
tires having adequate speed capa-
bility can result in sudden tire fail-
ure and loss of vehicle control.CAUTION!
Replacing original tires with tires of
a different size may result in false
speedometer and odometer read-
ings.
TIRE CHAINS
Use of Security Chain Company
(SCC) Super Z6 low profile (P/N SZ-
139) or equivalent are recommended
on 215/55 R18 95H tires with 18 x
7.0 wheels, 40 mm offset.
154
Page 162 of 233
CAUTION!
To avoid damage to your vehicle or
tires, observe the following precau-
tions:
Because of restricted chain clear-ance between tires and other sus-
pension components, it is impor-
tant that only chains in good
condition are used. Broken chains
can cause serious damage. Stop
the vehicle immediately if noise
occurs that could indicate chain
breakage. Remove the damaged
parts of the chain before further
use.
Do not exceed 70 km/h.
Drive cautiously and avoid severe
turns and large bumps, especially
with a loaded vehicle.
Install chains on the front wheels
as tightly as possible and then re-
tighten after driving about
0.8 km.
Do not drive for prolonged periods
of time on dry pavement.
(Continued)
CAUTION!(Continued)
Observe the tire chain manufac-
tur er's instructions on the method
of installation, operating speed,
and conditions for use. Always use
the lower suggested operating
speed of the chain manufacturer,
if different from the speed r ecom-
mended by the vehicle manufac-
turer.
This notice applies to all chain trac-
tion devices, including link and cable
(radial) chains.
TIRE ROTATION
RECOMMENDATIONS
Tires on the front and rear axles of
vehicles operate at different loads and
perform different steering, driving,
and braking functions. For these rea-
sons, they wear at unequal rates.
These effects can be reduced by
timely rotation of tires. The benefits
of rotation are especially worthwhile
with aggressive tread designs such as
those on all season type tires. Rotation
will increase tread life, help to main- tain mud, snow and wet traction lev-
els, and contribute to a smooth, quiet
ride.
Refer to the “Maintenance Schedule”
for the proper maintenance intervals.
The reasons for any rapid or unusual
wear should be corrected prior to ro-
tation being performed.
TIRE PRESSURE
MONITOR SYSTEM
(TPMS)
The Tire Pressure Monitor System
(TPMS) will warn the driver of a low
tire pressure based on the vehicle rec-
ommended cold placard pressure.
The tire pressure will vary with tem-
perature by about 7 kPa for every
7°C. This means that when the out-
side temperature decreases, the tire
pressure will decrease. Tire pressure
should always be set based on cold
inflation tire pressure. This is defined
as the tire pressure after the vehicle
has not been driven for at least three
hours, or driven less than 1.6 km after
a three hour period. The cold tire in-
flation pressure must not exceed the
maximum inflation pressure molded
155
Page 163 of 233
into the tire sidewall. Refer to “Tires –
General Information” in “Starting
and Operating” for information on
how to properly inflate the vehicle’s
tires. The tire pressure will also in-
crease as the vehicle is driven - this is
normal and there should be no adjust-
ment for this increased pressure.
The TPM System will warn the driver
of a low tire pressure if the tire pres-
sure falls below the low-pressure
warning limit for any reason, includ-
ing low temperature effects and natu-
ral pressure loss through the tire.
The TPM System will continue to
warn the driver of low tire pressure as
long as the condition exists, and will
not turn off until the tire pressure is at
or above the recommended cold plac-
ard pressure. Once the low tire pres-
sure warning (Tire Pressure Monitor-
ing Telltale Light) illuminates, you
must increase the tire pressure to the
recommended cold placard pressure
in order for the “Tire Pressure Moni-
toring Telltale Light” to turn off. The
system will automatically update and
the “Tire Pressure Monitoring Telltale
Light” will turn off once the systemreceives the updated tire pressures.
The vehicle may need to be driven for
up to 20 minutes above 24 km/h in
order for the TPMS to receive this
information.
For example, your vehicle may have a
recommended cold (parked for more
than three hours) placard pressure of
207 kPa. If the ambient temperature
is 20°C and the measured tire pres-
sure is 186 kPa, a temperature drop to
7°C will decrease the tire pressure to
approximately 158 kPa. This tire
pressure is sufficiently low enough to
turn ON the “Tire Pressure Monitor-
ing Telltale Light.” Driving the ve-
hicle may cause the tire pressure to
rise to approximately 186 kPa, but
the “Tire Pressure Monitoring Telltale
Light” will still be ON. In this situa-
tion, the “Tire Pressure Monitoring
Telltale Light” will turn OFF only
after the tires are inflated to the vehi-
cle’s recommended cold placard pres-
sure value.
CAUTION!
The TPMS has been optimized for
the original equipment tires and
wheels. TPMS pressures and
warning have been established for
the tire size equipped on your ve-
hicle. Undesirable system opera-
tion or sensor damage may result
when using replacement equip-
ment that is not of the same size,
type, and/or style. Aftermarket
wheels can cause sensor damage.
Do not use aftermarket tire seal-
ants or balance beads if your ve-
hicle is equipped with a TPMS, as
damage to the sensors may result.
After inspecting or adjusting the
tire pressure, always reinstall the
valve stem cap. This will prevent
moisture and dirt from entering
the valve stem, which could dam-
age the Tire Pressure Monitoring
Sensor.
156
Page 164 of 233
NOTE:
The TPMS is not intended to re-
place normal tire care and main-
tenance, or to provide warning of
a tire failure or condition. The TPMS should not be used asa tire pressure gauge while ad-
justing your tire pressure.
Driving on a significantly under-
inflated tire causes the tire to
overheat and can lead to tire fail-
ure. Under-inflation also reduces
fuel efficiency and tire tread life,
and may affect the vehicle’s han-
dling and stopping ability.The TPMS is not a substitute for
proper tire maintenance, and it is
the driver’s responsibility to
maintain correct tire pressure us-
ing an accurate tire pressure
gauge, even if under-inflation has
not reached the level to trigger
illumination of the “Tire Pres-
sure Monitoring Telltale Light.” Seasonal temperature changes will affect tire pressure, and the
TPMS will monitor the actual
tire pressure in the tire. PREMIUM SYSTEM
The Tire Pressure Monitor System
(TPMS) uses wireless technology with
wheel rim mounted electronic sensors
to monitor tire pressure levels. Sen-
sors, mounted to each wheel as part of
the valve stem, transmit tire pressure
readings to the Receiver Module.
NOTE:
It is particularly important for you
to check the tire pressure in all of
the tires on your vehicle monthly
and to maintain the proper pres-
sure.
The TPMS consists of the following
components:
Receiver Module
Four Tire Pressure Monitoring Sen-
sors
Three Trigger Modules (mounted in three of the four wheel-wells)
Various Tire Pressure Monitoring System Messages, which display in
the Electronic Vehicle Information
Center (EVIC)
Tire Pressure Monitoring Telltale Light Tire Pressure Monitoring Low
Pressure Warnings
The “Tire Pressure Monitoring
Telltale Light” will illuminate
in the instrument cluster and a
chime will sound when tire pressure is
low in one or more of the four active
road tires. In addition, the Electronic
Vehicle Information Center (EVIC)
will display a graphic showing the
pressure values of each tire with the
low tire pressure values flashing.
Should this occur, you should stop as
soon as possible, and inflate all tires
with low pressure (those flashing in
the EVIC graphic) to the vehicle’s rec-
ommended cold placard pressure
value. Once the system receives the
updated tire pressures, the system will
automatically update, the graphic
display in the EVIC will stop flashing,
and the “Tire Pressure Monitoring
Telltale Light” will turn off. The ve-
hicle may need to be driven for up to
20 minutes above 24 km/h in order
for the TPMS to receive this informa-
tion.
157
Page 165 of 233

Check TPMS Warning
When a system fault is detected, a
chime will sound and the “Tire Pres-
sure Monitoring Telltale Light” will
flash on and off for 75 seconds and
then remain on solid. In addition, the
EVIC will display a "CHECK TPM
SYSTEM" message for a minimum of
five seconds and then display dashes
(- -) in place of the pressure value to
indicate which sensor is not being re-
ceived.
If the ignition key is cycled, this se-
quence will repeat, providing the sys-
tem fault still exists. If the system
fault no longer exists, the “Tire Pres-
sure Monitoring Telltale Light” will
no longer flash, and the "CHECK
TPM SYSTEM" message will no lon-
ger display, and a pressure value will
display in place of the dashes. A sys-
tem fault can occur due to any of the
following:
1. Jamming due to electronic devices
or driving next to facilities emitting
the same Radio Frequencies as the
TPM sensors.2. Installing some form of aftermar-
ket window tinting that affects radio
wave signals.
3. Lots of snow or ice around the
wheels or wheel housings.
4. Using tire chains on the vehicle.
5. Using wheels/tires not equipped
with TPM sensors.
The EVIC will also display a
"CHECK TPM SYSTEM" message
for a minimum of five seconds when a
system fault related to an incorrect
sensor location fault is detected. In
this case, the "CHECK TPM SYS-
TEM" message is then followed with a
graphic display with pressure values
still shown. This indicates that the
pressure values are still being received
from the TPM sensors but they may
not be located in the correct vehicle
position. The system still needs to be
serviced as long as the "CHECK TPM
SYSTEM" message is displayed.
FUEL REQUIREMENTS
All engines are designed to meet all
emissions regulations and provide ex-
cellent fuel economy and performance
when using high quality unleaded
gasoline with a minimum research oc-
tane rating of 91.
Light spark knock at low engine speeds
is not harmful to your engine. How-
ever, continued heavy spark knock at
high speeds can cause damage and im-
mediate service is required. Poor qual-
ity gasoline can cause problems such as
hard starting, stalling, and hesitations.
If you experience these symptoms, try
another brand of gasoline before con-
sidering service for the vehicle.Over 40 auto manufactur
er's world
wide have issued and endorsed con-
sistent gasoline specifications (the
Worldwide Fuel Charter, WWFC)
which define fuel properties necessary
to deliver enhanced emissions, perfor-
mance, and durability for your ve-
hicle. The manufacturer recommends
the use of gasoline that meets the
WWFC specifications if they are
available.
158
Page 166 of 233

METHANOL
(Methyl or Wood Alcohol) is used in a
variety of concentrations when
blended with unleaded gasoline. You
may find fuels containing 3% or more
methanol along with other alcohols
called cosolvents. Problems that re-
sult from using methanol/gasoline or
E-85 Ethanol blends are not the re-
sponsibility of the manufacturer.
While MTBE is an oxygenate made
from Methanol, it does not have the
negative effects of Methanol.CAUTION!
Do not use gasolines containing
Methanol or E-85 Ethanol. Use of
these blends may result in starting
and driveability problems and may
damage critical fuel system compo-
nents.
ETHANOL
The manufacturer recommends that
your vehicle be operated on fuel con-
taining no more than 10% ethanol.
Purchasing your fuel from a reputable
supplier may reduce the risk of ex-
ceeding this 10% limit and/or of re-
ceiving fuel with abnormal properties. It should also be noted that an in-
crease in fuel consumption should be
expected when using ethanol-blended
fuels, due to the lower energy content
of ethanol. Problems that result from
using methanol/gasoline or E-85
ethanol blends are not the responsibil-
ity of the manufacturer. While MTBE
is an oxygenate made from Methanol,
it does not have the negative effects of
Methanol.
CAUTION!
Use of fuel with Ethanol content
higher than 10% may result in en-
gine malfunction, starting and oper-
ating difficulties, and materials deg-
radation. These adverse effects
could result in permanent damage to
your vehicle.
CLEAN AIR GASOLINE
Many gasolines are now being
blended to contribute to cleaner air,
especially in those areas where air
pollution levels are high. These new
blends provide a cleaner burning fuel
and some are referred to as “reformu-
lated gasoline.” The manufacturer supports these ef-
forts toward cleaner air. You can help
by using these blends as they become
available.
MMT IN GASOLINE
MMT is a manganese containing me-
tallic additive that is blended into
some gasoline to increase octane.
Gasoline blended with MMT provides
no performance advantage beyond
gasoline of the same octane number
without MMT. Gasoline blended with
MMT reduces spark plug life and re-
duces emission system performance in
some vehicles. The manufacturer rec-
ommends that gasoline without MMT
be used in your vehicle. The MMT
content of gasoline may not be indi-
cated on the gasoline pump; therefore,
you should ask your gasoline retailer
whether or not his/her gasoline con-
tains MMT.
159
Page 167 of 233

MATERIALS ADDED TO
FUEL
Besides using unleaded gasoline with
the proper octane rating, gasolines
that contain detergents, corrosion and
stability additives are recommended.
Using gasolines that have these addi-
tives will help improve fuel economy,
reduce emissions, and maintain ve-
hicle performance.
Indiscriminate use of fuel system
cleaning agents should be avoided.
Many of these materials intended for
gum and varnish removal may con-
tain active solvents or similar ingredi-
ents. These can harm fuel system gas-
ket and diaphragm materials.WARNING!
Carbon monoxide (CO) in exhaust
gases is deadly. Follow the precau-
tions below to prevent carbon mon-
oxide poisoning:(Continued)
WARNING!(Continued)
Do not inhale exhaust gases. They
contain carbon monoxide, a color-
less and odorless gas, which can
kill. Never run the engine in a
closed area, such as a garage, and
never sit in a parked vehicle with
the engine running for an ex-
tended period. If the vehicle is
stopped in an open area with the
engine running for more than a
short period, adjust the ventila-
tion system to force fresh, outside
air into the vehicle.
Guard against carbon monoxide
with proper maintenance. Have the
exhaust system inspected every
time the vehicle is raised. Have any
abnormal conditions repaired
promptly. Until repaired, drive
with all side windows fully open.
ADDING FUEL
FUEL FILLER CAP (GAS
CAP)
The gas cap is behind the fuel filler
door, on the left rear quarter panel of
the vehicle. If the gas cap is lost or damaged, be sure the replacement cap
is for use with this vehicle.
After removing the gas cap, place the
gas cap tether cable over a hook on
the inside of the fuel door. This keeps
the gas cap suspended away from and
protects the
vehicle's surface.
Fuel Filler DoorTether Cable
160
Page 168 of 233

NOTE:
If the gas cap is lost or damaged, be
sure the replacement cap is for use
with this vehicle.CAUTION!
Damage to the fuel system oremission control system could r e-
sult from using an improper fuel
tank filler tube cap (gas cap).
A poorly fitting gas cap may cause
the “Malfunction Indicator Light
(MIL)” to turn on.
To avoid fuel spillage and overfill-
ing, do not “top off” the fuel tank
after filling. When the fuel nozzle
“clicks” or shuts off, the fuel tank
is full.WARNING!
Never have any smoking materi-als lit in or near the vehicle when
the gas cap is removed or the tank
is being filled.
(Continued)
WARNING!(Continued)
A fire may result if gasoline is
pumped into a portable container
that is inside of a vehicle. You
could be burned. Always place gas
containers on the ground while
filling.
NOTE:
Tighten the gas cap until you hear a “clicking” sound. This is
an indication that the gas cap is
tightened properly. The MIL in
the instrument cluster may turn
on if the gas cap is not secured
properly. Make sure that the gas
cap is tightened each time the
vehicle is refueled.
When the fuel nozzle “clicks” or shuts off, the fuel tank is full.
LOOSE FUEL FILLER CAP
MESSAGE
If the vehicle diagnostic system deter-
mines that the fuel filler cap is loose,
improperly installed, or damaged, a
“CHECK GAS CAP” message will be
displayed in the EVIC (Electronic Ve-
hicle Information Center). Refer to “Electronic Vehicle Information Cen-
ter” in “Understanding Your Instru-
ment Panel” for further information.
Tighten the fuel filler cap properly
and press the odometer reset button to
turn the message off. If the problem
continues, the message will appear
the next time the vehicle is started.
Refer to “Onboard Diagnostic Sys-
tem” in “Maintaining Your Vehicle”
for further information.
NOTE:
If the gas cap is lost or damaged, be
sure the replacement cap is for use
with this vehicle.
VEHICLE LOADING
VEHICLE CERTIFICATION
LABEL
Your vehicle has a certification label
attached to the rear of the
driver's
door.
The label contains the following infor -
mation:
Name of manufacturer
Month and year of manufacture
161
Page 169 of 233
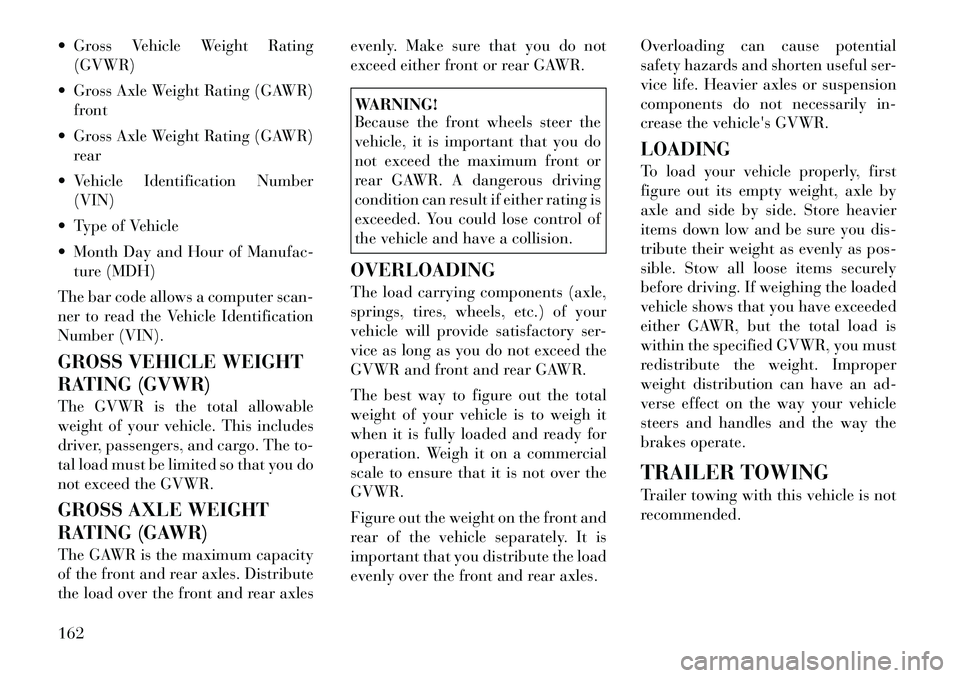
Gross Vehicle Weight Rating(GVWR)
Gross Axle Weight Rating (GAWR) front
Gross Axle Weight Rating (GAWR) rear
Vehicle Identification Number (VIN)
Type of Vehicle
Month Day and Hour of Manufac- ture (MDH)
The bar code allows a computer scan-
ner to read the Vehicle Identification
Number (VIN).
GROSS VEHICLE WEIGHT
RATING (GVWR)
The GVWR is the total allowable
weight of your vehicle. This includes
driver, passengers, and cargo. The to-
tal load must be limited so that you do
not exceed the GVWR.
GROSS AXLE WEIGHT
RATING (GAWR)
The GAWR is the maximum capacity
of the front and rear axles. Distribute
the load over the front and rear axles evenly. Make sure that you do not
exceed either front or rear GAWR.
WARNING!
Because the front wheels steer the
vehicle, it is important that you do
not exceed the maximum front or
rear GAWR. A dangerous driving
condition can result if either rating is
exceeded. You could lose control of
the vehicle and have a collision.
OVERLOADING
The load carrying components (axle,
springs, tires, wheels, etc.) of your
vehicle will provide satisfactory ser-
vice as long as you do not exceed the
GVWR and front and rear GAWR.
The best way to figure out the total
weight of your vehicle is to weigh it
when it is fully loaded and ready for
operation. Weigh it on a commercial
scale to ensure that it is not over the
GVWR.
Figure out the weight on the front and
rear of the vehicle separately. It is
important that you distribute the load
evenly over the front and rear axles. Overloading can cause potential
safety hazards and shorten useful ser-
vice life. Heavier axles or suspension
components do not necessarily in-
crease the
vehicle's GVWR.
LOADING
To load your vehicle properly, first
figure out its empty weight, axle by
axle and side by side. Store heavier
items down low and be sure you dis-
tribute their weight as evenly as pos-
sible. Stow all loose items securely
before driving. If weighing the loaded
vehicle shows that you have exceeded
either GAWR, but the total load is
within the specified GVWR, you must
redistribute the weight. Improper
weight distribution can have an ad-
verse effect on the way your vehicle
steers and handles and the way the
brakes operate.
TRAILER TOWING
Trailer towing with this vehicle is not
recommended.
162
Page 170 of 233

RECREATIONAL TOWING (BEHIND MOTORHOME, ETC.)
TOWING THIS VEHICLE BEHIND ANOTHER VEHICLE
Towing ConditionWheels OFF the
Ground All Models
Flat Tow NONE NOT ALLOWED
Dolly Tow Front
OK
Rear NOT ALLOWED
On Trailer ALL OK
RECREATIONAL TOWING –
ALL MODELS
Recreational towing is allowed ONLY
if the front wheels are OFF the
ground. This may be accomplished
using a tow dolly or vehicle trailer. If
using a tow dolly, follow this proce-
dure:
1. Properly secure the dolly to the
tow vehicle, following the dolly
manufactur er's instructions. 2. Drive the front wheels onto the tow
dolly.
3. Firmly apply the parking brake.
Place the transmission in PARK.
4. Properly secure the front wheels to
the dolly, following the dolly
manu-
factur er's instructions.
CAUTION!
DO NOT flat tow this vehicle.
Damage to the drivetrain will r e-
sult.
Towing this vehicle in violation of
the above requirements can cause
severe transmission damage.
Damage from improper towing is
not covered under the New Ve-
hicle Limited Warranty.
163