key Lancia Thema 2014 Owner handbook (in English)
[x] Cancel search | Manufacturer: LANCIA, Model Year: 2014, Model line: Thema, Model: Lancia Thema 2014Pages: 332, PDF Size: 3.46 MB
Page 92 of 332
Making A Second Call While
Current Call Is In Progress
You can place a call on hold by touch-
ing the Hold soft-key on the Phone
main screen, then dial a number from
the dialpad, recent calls, SMS Inbox
or from the phonebooks. To go back
to the first call, refer to “Toggling
Between Calls” in this section. To
combine two calls, refer to “Join
Calls” in this section.
Place/Retrieve A Call From Hold
During an active call, touch the
“Hold” soft-key on the Phone main
screen.
Toggling Between Calls
If two calls are in progress (one active
and one on hold), touch the “Swap”
soft-key on the Phone main screen.
Only one call can be placed on hold at
a time.
You can also press the
button to
toggle between the active and held
phone call. Join Calls
When two calls are in progress (one
active and one on hold), touch the
“Join Calls” soft-key on the Phone
main screen to combine all calls into a
Conference Call.
Call Termination
To end a call in progress, momentarily
press the
button or the end soft-
key. Only the active call(s) will be
terminated and if there is a call on
hold, it will become the new active
call.
Redial
Press the “Redial” soft-key, or press
the
and after the “Listening”
prompt and the following beep, say
“Redial.”
The Uconnect® Phone will call the
last number that was dialed from your
mobile phone.
Call Continuation
Call continuation is the progression of
a phone call on the Uconnect® Phone
after the vehicle ignition key has been
switched to OFF. NOTE: The call will remain
within the vehicle audio system
until the phone becomes out of
range for the Bluetooth® connec-
tion. It is recommended to press
the “transfer” soft-key when leav-
ing the vehicle.
UCONNECT® PHONE
FEATURES
Language Selection
To change the language that the
Uconnect® Phone is using:
Press the
button to begin.
After the “Ready” prompt and the following beep, say the name of the
language you wish to switch to
(English, Dutch, French, German,
Italian, or Spanish, if so equipped).
Continue to follow the system prompts to complete language se-
lection.
After selecting one of the languages,
all prompts and voice commands will
be in that language.
86
Page 94 of 332
Working With Automated Systems
This method is used in instances
where one generally has to press num-
bers on the mobile phone keypad
while navigating through an auto-
mated telephone system.
You can use your Uconnect® Phone to
access a voice mail system or an auto-
mated service, such as a paging ser-
vice or automated customer service
line. Some services require immediate
response selection. In some instances,
that may be too quick for use of the
Uconnect® Phone.
When calling a number with your
Uconnect® Phone that normally re-
quires you to enter in a touch-tone
sequence on your mobile phone key-
pad, you can utilize the touchscreen
or press the
button and say the
word “Send” then the sequence you
wish to enter. For example, if required
to enter your PIN followed with a
pound, (3746#),youcanpressthe
button and say, “Send3746#.”
Saying “Send” followed by a number,
or sequence of numbers, is also to be used for navigating through an auto-
mated customer service center menu
structure, and to leave a number on a
pager.
You can also send stored mobile
phonebook entries as tones for fast
and easy access to voice mail and
pager entries. For example, if you pre-
viously created a Phonebook entry
with First and/or Last Name as
“Voicemail Password”, then if you
press the
button and say “Send
Voicemail Password” the Uconnect®
Phone will then send the correspond-
ing phone number associated with the
phonebook entry, as tones over the
phone.
NOTE:
The first number encountered for that contact will be sent. All
other numbers entered for that
contact will be ignored.
You may not hear all of the tones due to mobile phone network
configurations. This is normal. Some paging and voice mail sys-
tems have system time out set-
tings that are too short and may
not allow the use of this feature.
Pauses, wait or other characters that are supported by some
phones are not supported over
Bluetooth®. These additional
symbols will be ignored in the
dialing a numbered sequence.
Barge In — Overriding Prompts
The
button can be used when
you wish to skip part of a prompt and
issue your voice command immedi-
ately. For example, if a prompt is ask-
ing “There are two numbers with the
name John. Say the full name” you
could press the
button and say,
“John Smith” to select that option
without having to listen to the rest of
the voice prompt.
88
Page 95 of 332
Voice Response Length
It is possible for you to choose be-
tween Brief and Detailed Voice Re-
sponse Length.
1. Touch the “More” soft-key (where
available), then touch the “Settings”
soft-key,
2. Touch the “Display” soft-key, then
scroll down to Voice Response
Length,
3. Select either “Brief” or “Detailed”
by touching the box next to the selec-
tion. A check-mark will appear to
show your selection.
Phone And Network Status
Indicators
Uconnect® Phone will provide notifi-
cation to inform you of your phone
and network status when you are at-
tempting to make a phone call using
Uconnect® Phone. The status is given
for network signal strength and phone
battery strength.Dialing Using The Mobile Phone
Keypad
WARNING!
Your new vehicle has many features
for the comfort and convenience of
you and your passengers. Only use
such features when it is safe to do
so. Failure to follow this Warning
may result in an accident involving
serious injury or death.
You can dial a phone number with
your mobile phone keypad and still
use the Uconnect® Phone (while dial-
ing via the mobile phone keypad, the
user must exercise caution and take
precautionary safety measures). By
dialing a number with your paired
Bluetooth® mobile phone, the audio
will be played through your vehicle's
audio system. The Uconnect® Phone
will work the same as if you dial the
number using voice a command. NOTE: Certain brands of mobile
phones do not send the dial ring to
the Uconnect® Phone to play it on
the vehicle audio system, so you
will not hear it. Under this situa-
tion, after successfully dialing a
number the user may feel that the
call did not go through even
though the call is in progress. Once
your call is answered, you will
hear the audio.
Mute/Un-Mute (Mute ON/OFF)
When you mute the Uconnect®
Phone, you will still be able to hear
the conversation coming from the
other party, but the other party will
not be able to hear you. To mute the
Uconnect® Phone simply touch the
Mute button on the Phone main
screen.
ADVANCED PHONE
CONNECTIVITY
Transfer Call To And From
Mobile Phone
The Uconnect® Phone allows ongo-
ing calls to be transferred from your
mobile phone to the Uconnect®
89
Page 97 of 332
Echo at the far end can sometimesbe reduced by lowering the in-
vehicle audio volume.
In a convertible vehicle, system per- formance may be compromised
with the convertible top down.
Voice Text Reply
Uconnect® Phone can read or send
new messages on your phone.
Your phone must support SMS over
Bluetooth® in order to use this fea-
ture. If the Uconnect® Phone deter-
mines your phone is not compatible
with SMS messaging over Bluetooth®
the “Messaging” button will be
grayed out and the feature will not be
available for use.
NOTE: Uconnect® Phone SMS is
only available when the vehicle is
not moving. Read Messages:
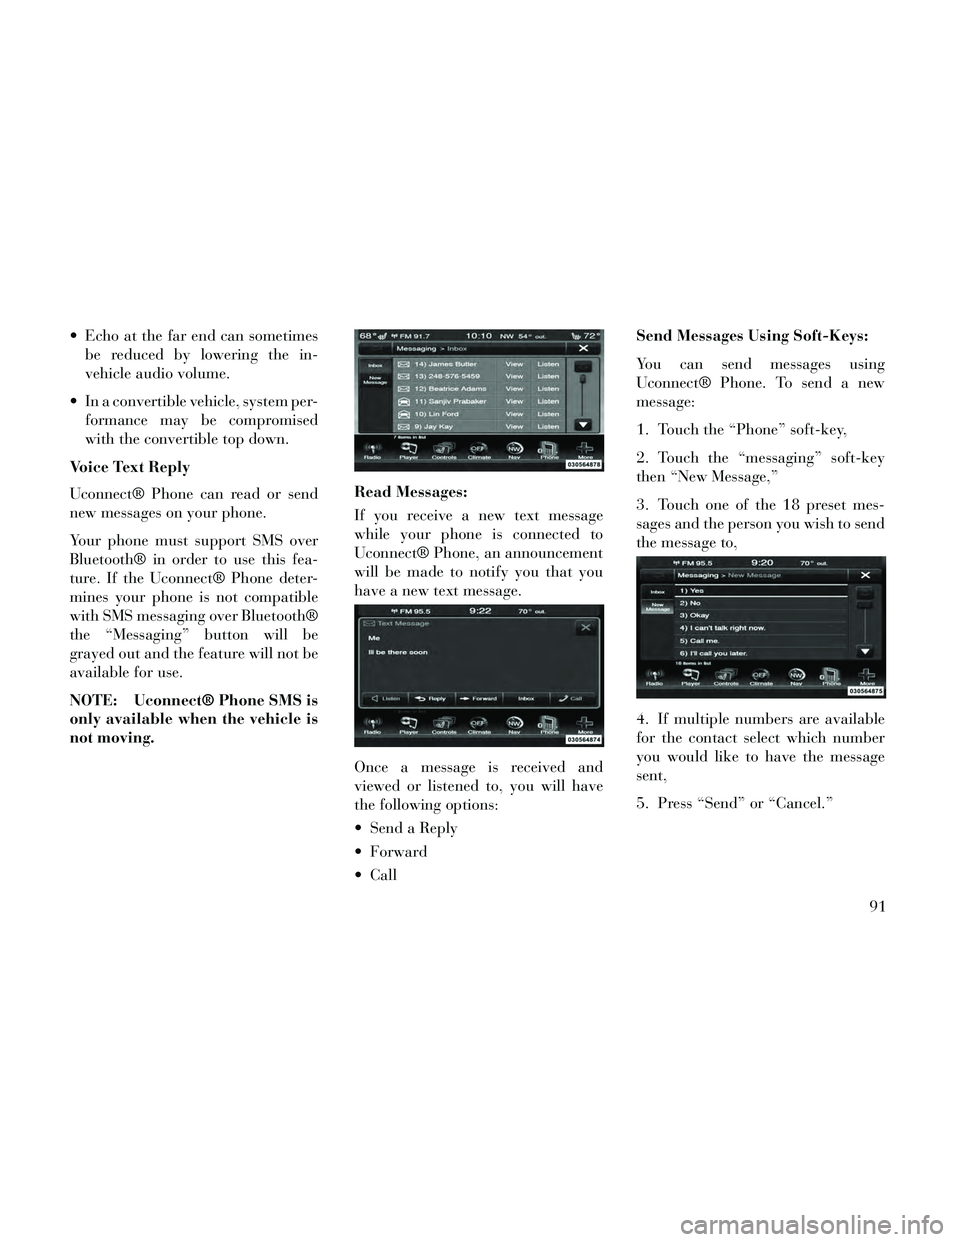
If you receive a new text message
while your phone is connected to
Uconnect® Phone, an announcement
will be made to notify you that you
have a new text message.
Once a message is received and
viewed or listened to, you will have
the following options:
Send a Reply
Forward
CallSend Messages Using Soft-Keys:
You can send messages using
Uconnect® Phone. To send a new
message:
1. Touch the “Phone” soft-key,
2. Touch the “messaging” soft-key
then “New Message,”
3. Touch one of the 18 preset mes-
sages and the person you wish to send
the message to,
4. If multiple numbers are available
for the contact select which number
you would like to have the message
sent,
5. Press “Send” or “Cancel.”
91
Page 98 of 332
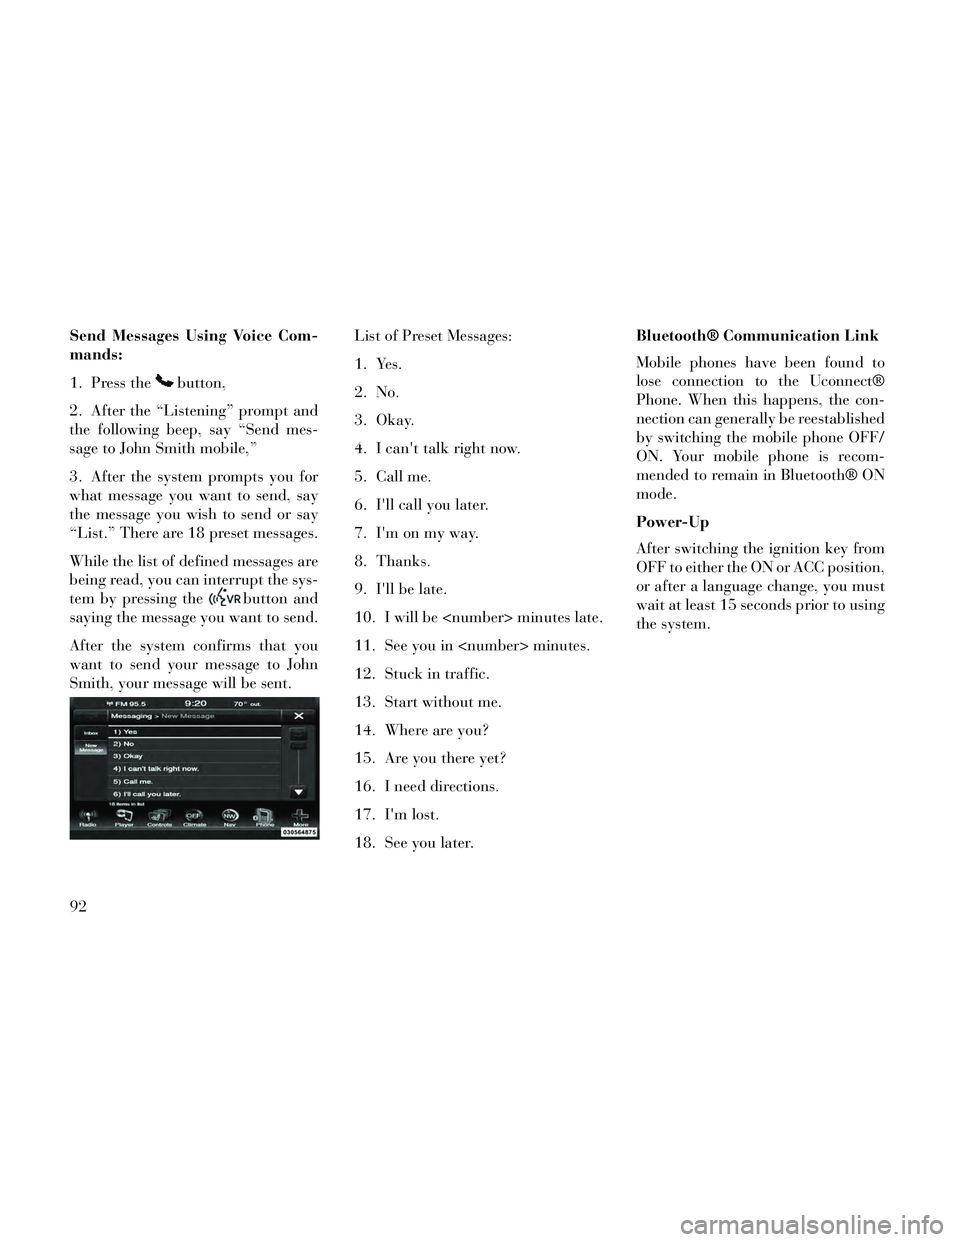
Send Messages Using Voice Com-
mands:
1. Press the
button,
2. After the “Listening” prompt and
the following beep, say “Send mes-
sage to John Smith mobile,”
3. After the system prompts you for
what message you want to send, say
the message you wish to send or say
“List.” There are 18 preset messages.
While the list of defined messages are
being read, you can interrupt the sys-
tem by pressing the
button and
saying the message you want to send.
After the system confirms that you
want to send your message to John
Smith, your message will be sent. List of Preset Messages:
1. Yes.
2. No.
3. Okay.
4. I can't talk right now.
5. Call me.
6. I'll call you later.
7. I'm on my way.
8. Thanks.
9. I'll be late.
10. I will be
11. See you in
12. Stuck in traffic.
13. Start without me.
14. Where are you?
15. Are you there yet?
16. I need directions.
17. I'm lost.
18. See you later.Bluetooth® Communication Link
Mobile phones have been found to
lose connection to the Uconnect®
Phone. When this happens, the con-
nection can generally be reestablished
by switching the mobile phone OFF/
ON. Your mobile phone is recom-
mended to remain in Bluetooth® ON
mode.
Power-Up
After switching the ignition key from
OFF to either the ON or ACC position,
or after a language change, you must
wait at least 15 seconds prior to using
the system.
92
Page 111 of 332
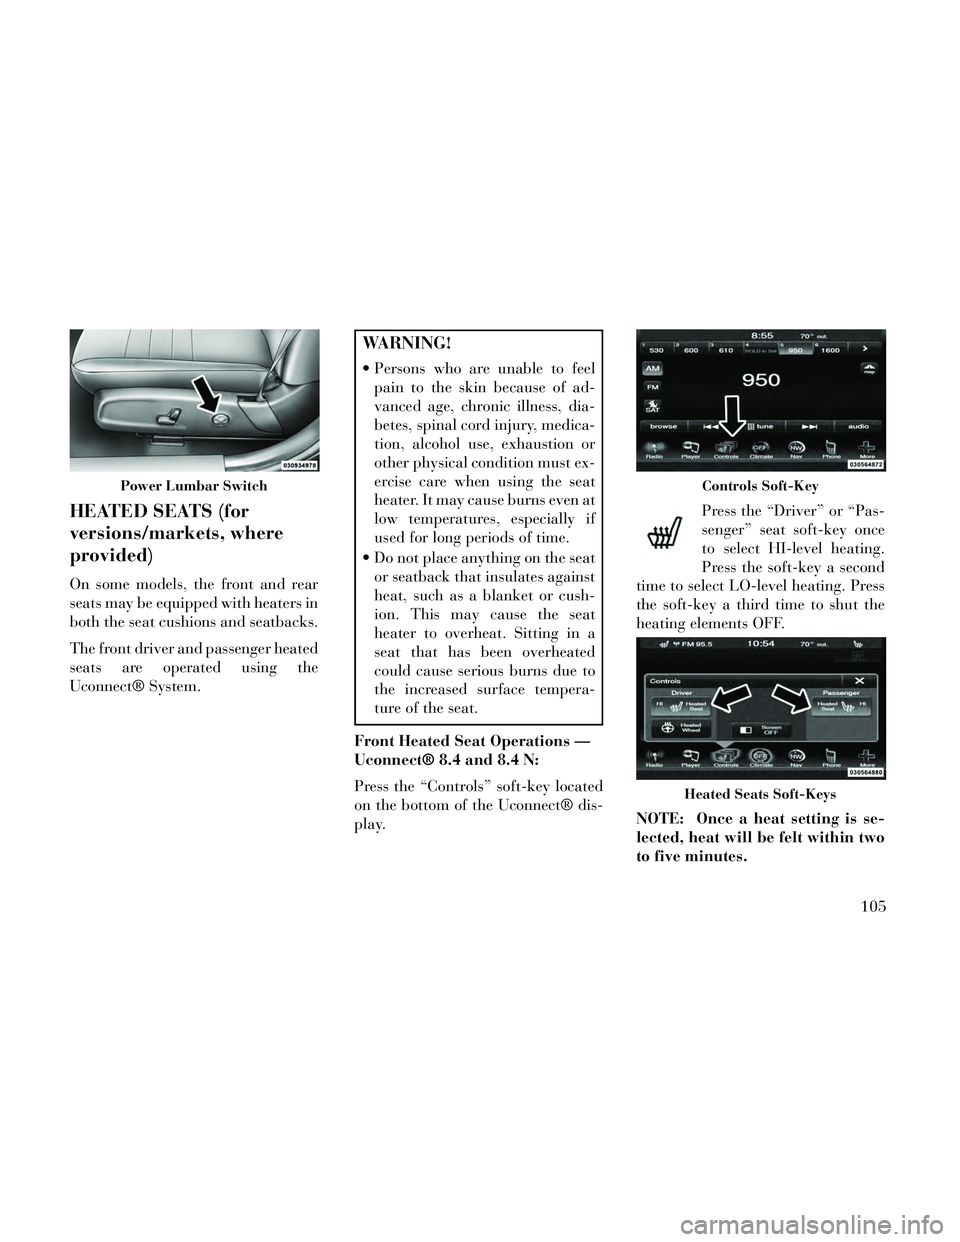
HEATED SEATS (for
versions/markets, where
provided)
On some models, the front and rear
seats may be equipped with heaters in
both the seat cushions and seatbacks.
The front driver and passenger heated
seats are operated using the
Uconnect® System.
WARNING!
Persons who are unable to feelpain to the skin because of ad-
vanced age, chronic illness, dia-
betes, spinal cord injury, medica-
tion, alcohol use, exhaustion or
other physical condition must ex-
ercise care when using the seat
heater. It may cause burns even at
low temperatures, especially if
used for long periods of time.
Do not place anything on the seat or seatback that insulates against
heat, such as a blanket or cush-
ion. This may cause the seat
heater to overheat. Sitting in a
seat that has been overheated
could cause serious burns due to
the increased surface tempera-
ture of the seat.
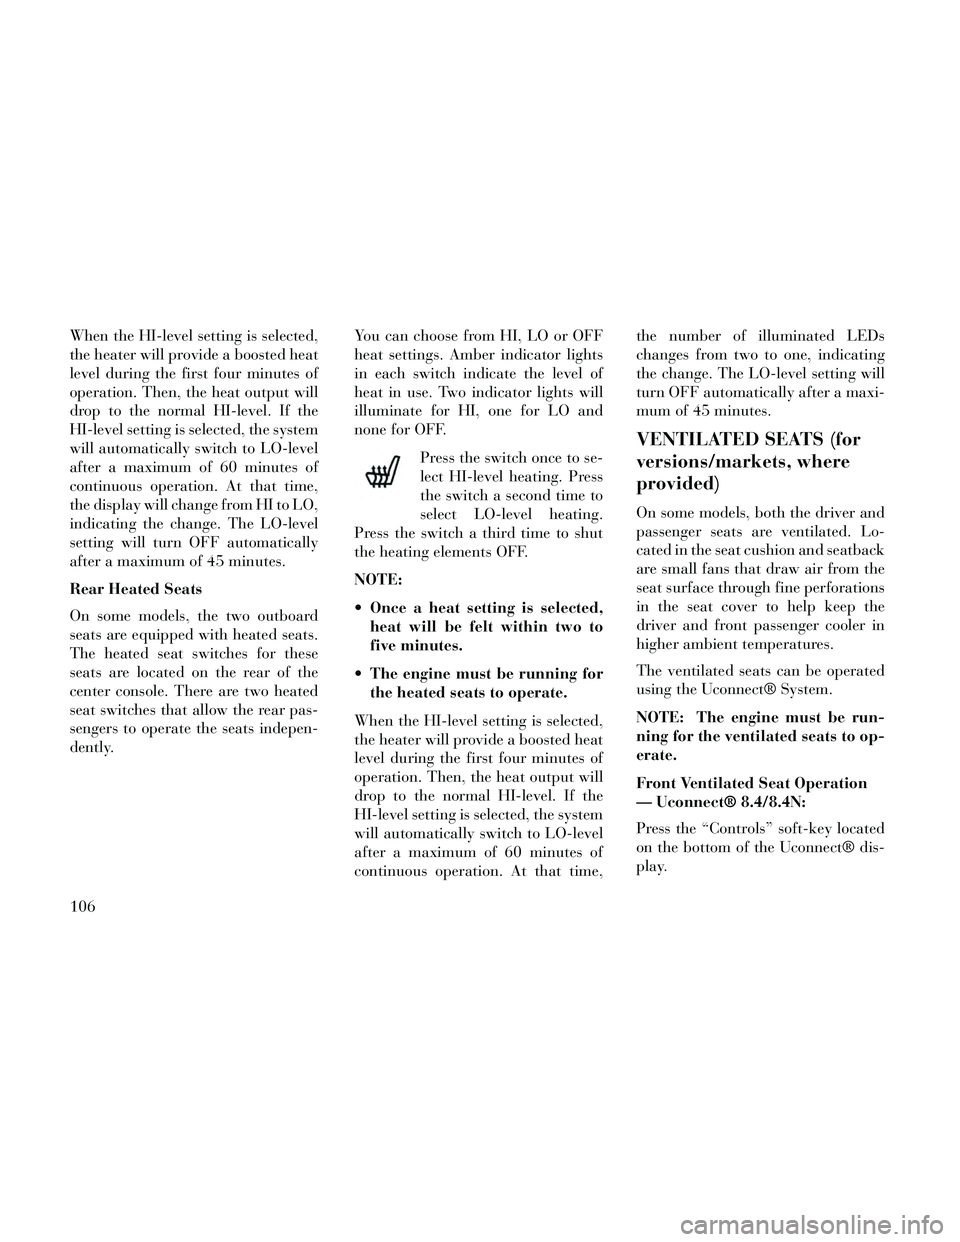
Front Heated Seat Operations —
Uconnect® 8.4 and 8.4 N:
Press the “Controls” soft-key located
on the bottom of the Uconnect® dis-
play. Press the “Driver” or “Pas-
senger” seat soft-key once
to select HI-level heating.
Press the soft-key a second
time to select LO-level heating. Press
the soft-key a third time to shut the
heating elements OFF.
NOTE: Once a heat setting is se-
lected, heat will be felt within two
to five minutes.
Power Lumbar SwitchControls Soft-Key
Heated Seats Soft-Keys
105
Page 112 of 332
When the HI-level setting is selected,
the heater will provide a boosted heat
level during the first four minutes of
operation. Then, the heat output will
drop to the normal HI-level. If the
HI-level setting is selected, the system
will automatically switch to LO-level
after a maximum of 60 minutes of
continuous operation. At that time,
the display will change from HI to LO,
indicating the change. The LO-level
setting will turn OFF automatically
after a maximum of 45 minutes.
Rear Heated Seats
On some models, the two outboard
seats are equipped with heated seats.
The heated seat switches for these
seats are located on the rear of the
center console. There are two heated
seat switches that allow the rear pas-
sengers to operate the seats indepen-
dently.You can choose from HI, LO or OFF
heat settings. Amber indicator lights
in each switch indicate the level of
heat in use. Two indicator lights will
illuminate for HI, one for LO and
none for OFF.
Press the switch once to se-
lect HI-level heating. Press
the switch a second time to
select LO-level heating.
Press the switch a third time to shut
the heating elements OFF.
NOTE:
Once a heat setting is selected, heat will be felt within two to
five minutes.
The engine must be running for the heated seats to operate.
When the HI-level setting is selected,
the heater will provide a boosted heat
level during the first four minutes of
operation. Then, the heat output will
drop to the normal HI-level. If the
HI-level setting is selected, the system
will automatically switch to LO-level
after a maximum of 60 minutes of
continuous operation. At that time, the number of illuminated LEDs
changes from two to one, indicating
the change. The LO-level setting will
turn OFF automatically after a maxi-
mum of 45 minutes.
VENTILATED SEATS (for
versions/markets, where
provided)
On some models, both the driver and
passenger seats are ventilated. Lo-
cated in the seat cushion and seatback
are small fans that draw air from the
seat surface through fine perforations
in the seat cover to help keep the
driver and front passenger cooler in
higher ambient temperatures.
The ventilated seats can be operated
using the Uconnect® System.
NOTE: The engine must be run-
ning for the ventilated seats to op-
erate.
Front Ventilated Seat Operation
— Uconnect® 8.4/8.4N:
Press the “Controls” soft-key located
on the bottom of the Uconnect® dis-
play.
106
Page 113 of 332
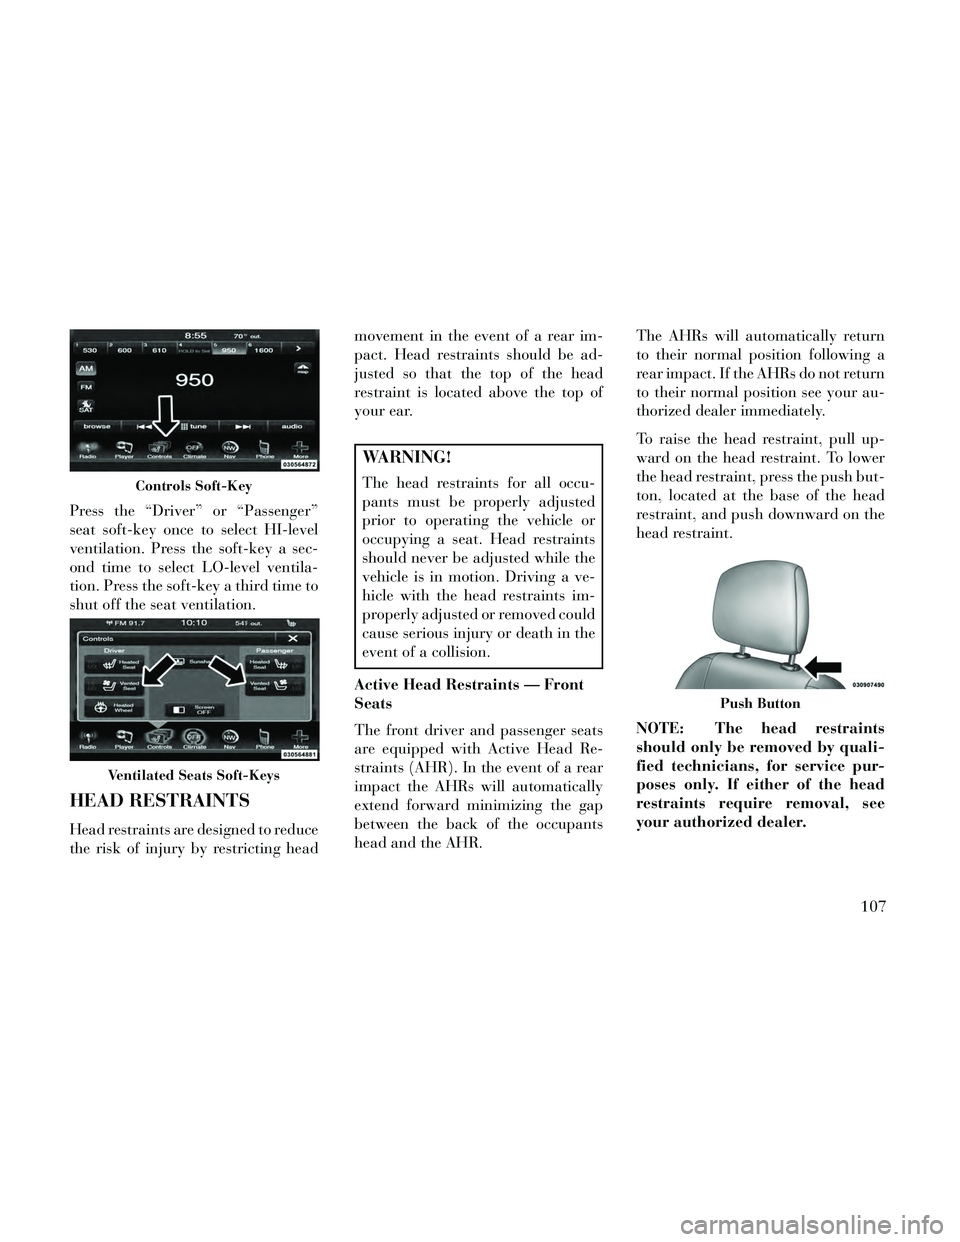
Press the “Driver” or “Passenger”
seat soft-key once to select HI-level
ventilation. Press the soft-key a sec-
ond time to select LO-level ventila-
tion. Press the soft-key a third time to
shut off the seat ventilation.
HEAD RESTRAINTS
Head restraints are designed to reduce
the risk of injury by restricting headmovement in the event of a rear im-
pact. Head restraints should be ad-
justed so that the top of the head
restraint is located above the top of
your ear.
WARNING!
The head restraints for all occu-
pants must be properly adjusted
prior to operating the vehicle or
occupying a seat. Head restraints
should never be adjusted while the
vehicle is in motion. Driving a ve-
hicle with the head restraints im-
properly adjusted or removed could
cause serious injury or death in the
event of a collision.
Active Head Restraints — Front
Seats
The front driver and passenger seats
are equipped with Active Head Re-
straints (AHR). In the event of a rear
impact the AHRs will automatically
extend forward minimizing the gap
between the back of the occupants
head and the AHR. The AHRs will automatically return
to their normal position following a
rear impact. If the AHRs do not return
to their normal position see your au-
thorized dealer immediately.
To raise the head restraint, pull up-
ward on the head restraint. To lower
the head restraint, press the push but-
ton, located at the base of the head
restraint, and push downward on the
head restraint.
NOTE: The head restraints
should only be removed by quali-
fied technicians, for service pur-
poses only. If either of the head
restraints require removal, see
your authorized dealer.Controls Soft-Key
Ventilated Seats Soft-Keys
Push Button
107
Page 115 of 332
WARNING!
Be certain that the seatback issecurely locked into position. If
the seatback is not securely
locked into position, the seat will
not provide the proper stability
for child seats and/or passengers.
An improperly latched seat could
cause serious injury.
The cargo area in the rear of the vehicle (with the rear seatbacks
in the locked-up or folded down
position) should not be used as a
play area by children when the
vehicle is in motion. They could
be seriously injured in a collision.
Children should be seated and us-
ing the proper restraint system.
DRIVER MEMORY SEAT
(for versions/markets,
where provided)
This feature allows the driver to store
up to two different memory profiles
for easy recall through a memory
switch. Each memory profile contains
desired position settings for the driver seat, side mirrors, adjustable pedals
(for versions/markets, where pro-
vided), and power tilt and telescopic
steering column (for versions/
markets, where provided) and a set of
desired radio station presets. Your Re-
mote Keyless Entry (RKE) transmit-
ter can also be programmed to recall
the same positions when the UN-
LOCK button is pressed.
NOTE:
Only one RKE transmitter can
be linked to each of the memory
positions.
Passive Entry door handles can- not be linked to the memory
function. Use either the memory
recall switch or the RKE trans-
mitter (if linked to the memory
feature) to recall memory posi-
tions 1 or 2.
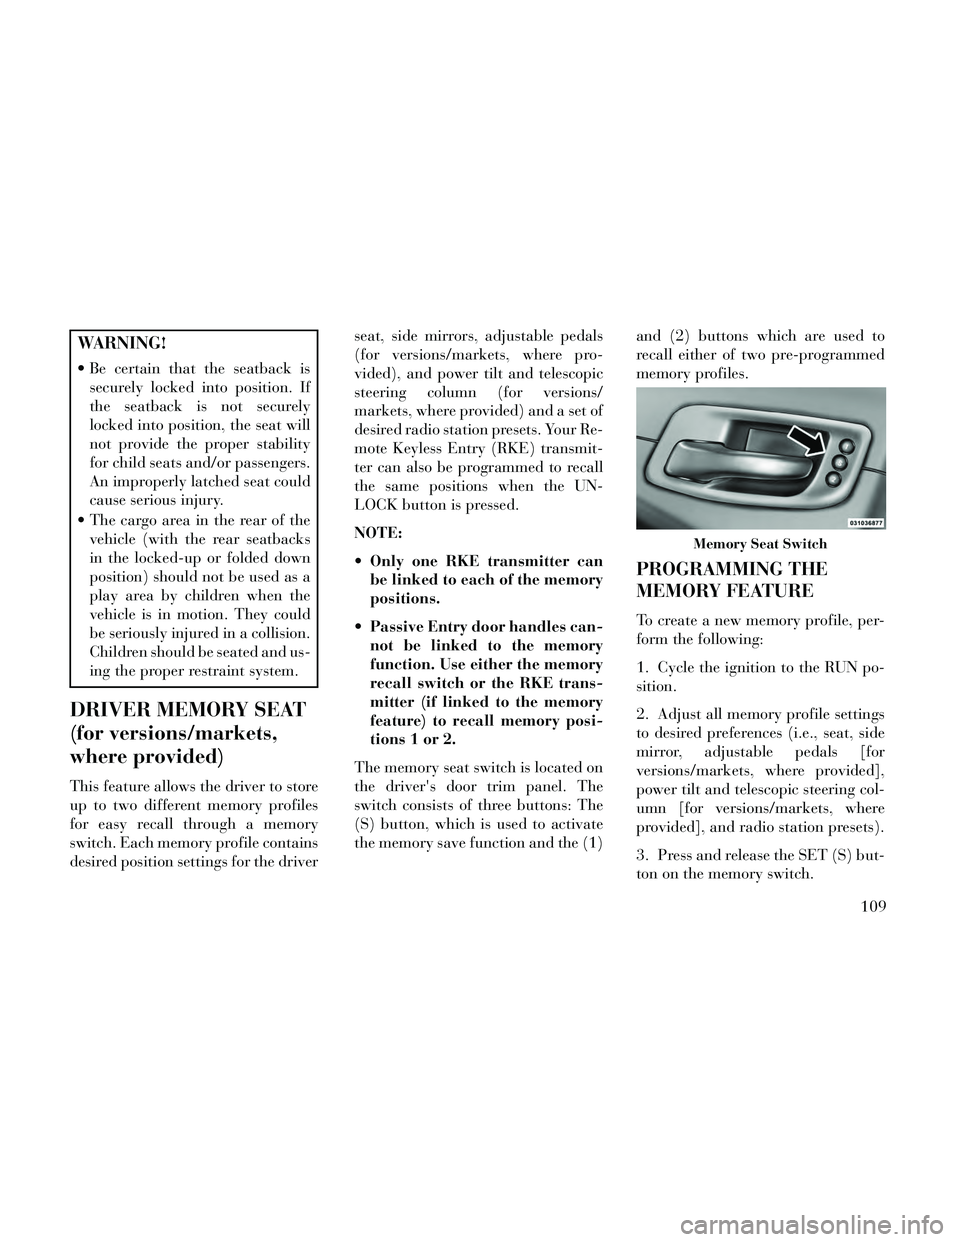
The memory seat switch is located on
the driver's door trim panel. The
switch consists of three buttons: The
(S) button, which is used to activate
the memory save function and the (1) and (2) buttons which are used to
recall either of two pre-programmed
memory profiles.
PROGRAMMING THE
MEMORY FEATURE
To create a new memory profile, per-
form the following:
1. Cycle the ignition to the RUN po-
sition.
2. Adjust all memory profile settings
to desired preferences (i.e., seat, side
mirror, adjustable pedals [for
versions/markets, where provided],
power tilt and telescopic steering col-
umn [for versions/markets, where
provided], and radio station presets).
3. Press and release the SET (S) but-
ton on the memory switch.
Memory Seat Switch
109
Page 116 of 332
4. Within five seconds, press and re-
lease the MEMORY button 1 or 2. The
Electronic Vehicle Information Center
will display which memory position
has been set.
NOTE:
Memory profiles can be set with-out the vehicle in PARK, but the
vehicle must be in PARK to re-
call a memory profile.
The Recall Memory with Remote Key Unlock feature can be
turned on and off using the
Uconnect® System, refer to
“Uconnect® Settings” in “Un-
derstanding Your Instrument
Panel” for further information.
LINKING AND UNLINKING
THE REMOTE KEYLESS
ENTRY TRANSMITTER TO
MEMORY
Your RKE transmitters can be pro-
grammed to recall one of two pre-
programmed memory profiles by
pressing the UNLOCK button on the
RKE transmitter. NOTE: Before programming your
RKE transmitters you must select
the “Memory To FOB” feature
through the Uconnect® system
screen. Refer to “Customer- Pro-
grammable Features —
Uconnect® Access 8.4 Settings ” in
“Understanding Your Instrument
Panel” for further information.
To program your RKE transmitters,
perform the following:
1. Cycle the ignition to the OFF posi-
tion.
2. Select desired memory profile (1)
or (2).
3. Once the profile has been recalled,
press and release the SET (S) button
on the memory switch, then press and
release button (1) or (2) accordingly.
“Memory Profile Set” (1 or 2) will
display in the instrument cluster on
vehicles equipped with the EVIC.
4. Press and release the LOCK but-
ton on the RKE transmitter within 10
seconds.
NOTE: Your RKE transmitters
can be unlinked to your memory
settings by pressing the SET (S)
button followed by the UNLOCK
button on the RKE transmitter in
Step 4 above.
MEMORY POSITION
RECALL
NOTE: The vehicle must be in
PARK to recall memory positions.
If a recall is attempted when the
vehicle is not in PARK, a message
will display in the EVIC.
To recall the memory settings for
driver, press MEMORY button num-
ber (1) on the driver's door or the
UNLOCK button on the RKE trans-
mitter linked to memory position 1.
To recall the memory setting for
driver, press MEMORY button num-
ber (2) on the driver's door or the
UNLOCK button on the RKE trans-
mitter linked to memory position 2.
A recall can be cancelled by pressing
any of the MEMORY buttons (S, 1, or
2) on the driver's door during a recall.
When a recall is cancelled, the driver
110