headlight Lancia Ypsilon 2011 Owner handbook (in English)
[x] Cancel search | Manufacturer: LANCIA, Model Year: 2011, Model line: Ypsilon, Model: Lancia Ypsilon 2011Pages: 299, PDF Size: 13.35 MB
Page 11 of 299

DISPLAYThe car may be provided with a multifunction/
reconfigurable multifunction display that shows
useful information, according to the previous
settings, when driving.
With the ignition key removed, the display
activates and shows the time and total milometer
reading (in km or miles) for a few seconds when
a door is opened/closed.MULTIFUNCTION DISPLAY "STANDARD"
SCREEN
The following information is shown on the display
fig. 5 :
ADateBGear Shift Indicator (for versions/markets,
where provided)CStart&Stop function indication (for versions/
markets, where provided)D
Time (always displayed, even with key removed
and doors closed)
EMilometer (display of distance travelled in
kilometres/miles)FOutside temperatureG
Headlamp alignment position (only with dipped
headlights on)
H
Activation of Dualdrive electric power steering
(CITY indication) or of ECO driving mode
(ECO indication)
fig. 5
L0F1008
9GETTING TO
KNOW YOUR CARSAFETY
STARTING
AND
DRIVING
WARNING LIGHTS
AND MESSAGES
IN AN EMERGENCY
SERVICING AND
MAINTENANCE
TECHNICAL
SPECIFICATIONS
INDEX
Page 12 of 299

RECONFIGURABLE MULTIFUNCTION
DISPLAY "STANDARD" SCREEN
The following information is shown on the display
fig. 6 :ATimeBDate or trip distance display in kilometres (or
miles)CGear Shift Indicator (for versions/markets,
where provided)D
Start&Stop function indication (for versions/
markets, where provided)
EMilometer (display of distance travelled in
kilometres/miles)FHeadlamp alignment position (only with dipped
headlights on)G
Outside temperature
H
Car status indications (e.g. doors open, possible
ice on road, etc.)On some versions the display shows the turbine
pressure.
GEAR SHIFT INDICATOR
The GSI (Gear Shift Indicator) system advises the
driver to change gear through a specific indication
on the control panel fig. 7. Through the GSI, the
driver is notified that changing gear will allow
a reduction in fuel consumption.
When the SHIFT UP icon (
SHIFT) is shown on
the display, the GSI is advising the driver to
engage a higher gear, while the SHIFT DOWN (
SHIFT) icon advises the driver to engage a
lower gear.
The indication in the instrument panel remains on
until the driver changes gear or the driving
conditions return to a situation where changing
gear is not required to improve consumption.
fig. 6
L0F1007
fig. 7
L0F1010
10GETTING TO
KNOW YOUR CAR
SAFETY
STARTING
AND
DRIVING
WARNING LIGHTS
AND MESSAGES
IN AN EMERGENCY
SERVICING AND
MAINTENANCE
TECHNICAL
SPECIFICATIONS
INDEX
Page 16 of 299

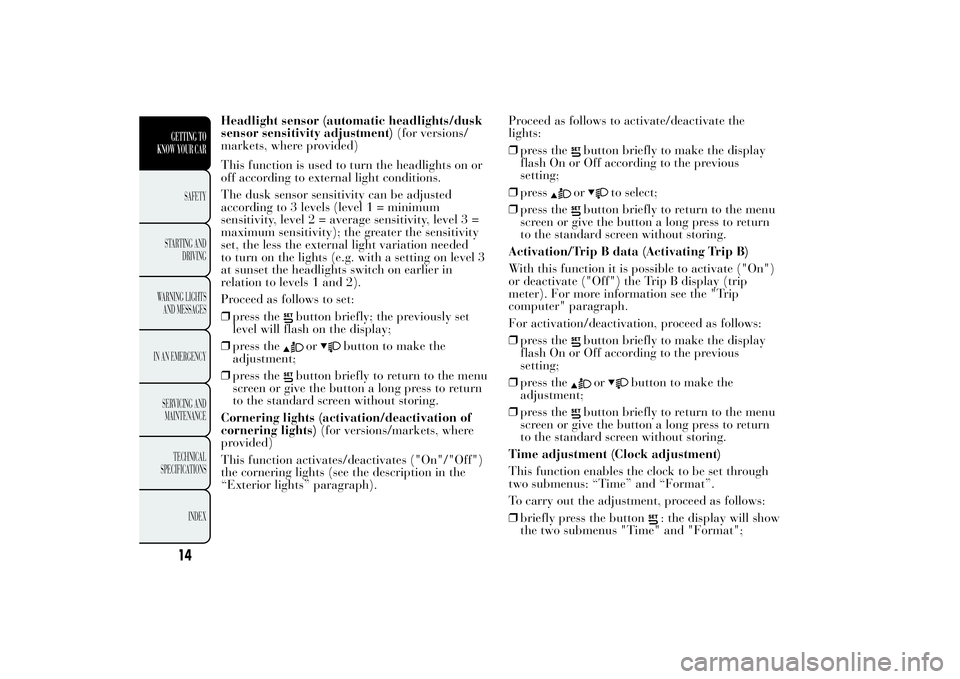
Headlight sensor (automatic headlights/dusk
sensor sensitivity adjustment)(for versions/
markets, where provided)
This function is used to turn the headlights on or
off according to external light conditions.
The dusk sensor sensitivity can be adjusted
according to 3 levels (level 1 = minimum
sensitivity, level 2 = average sensitivity, level 3 =
maximum sensitivity); the greater the sensitivity
set, the less the external light variation needed
to turn on the lights (e.g. with a setting on level 3
at sunset the headlights switch on earlier in
relation to levels 1 and 2).
Proceed as follows to set:
❒press the
button briefly; the previously set
level will flash on the display;
❒press theor
button to make the
adjustment;
❒press the
button briefly to return to the menu
screen or give the button a long press to return
to the standard screen without storing.
Cornering lights (activation/deactivation of
cornering lights)(for versions/markets, where
provided)
This function activates/deactivates ("On"/"Off")
the cornering lights (see the description in the
“Exterior lights” paragraph).Proceed as follows to activate/deactivate the
lights:
❒press the
button briefly to make the display
flash On or Off according to the previous
setting;
❒pressor
to select;
❒press the
button briefly to return to the menu
screen or give the button a long press to return
to the standard screen without storing.
Activation/Trip B data (Activating Trip B)
With this function it is possible to activate ("On")
or deactivate ("Off") the Trip B display (trip
meter). For more information see the "Trip
computer" paragraph.
For activation/deactivation, proceed as follows:
❒press thebutton briefly to make the display
flash On or Off according to the previous
setting;
❒press theor
button to make the
adjustment;
❒press the
button briefly to return to the menu
screen or give the button a long press to return
to the standard screen without storing.
Time adjustment (Clock adjustment)
This function enables the clock to be set through
two submenus: “Time” and “Format”.
To carry out the adjustment, proceed as follows:
❒briefly press the button
: the display will show
the two submenus "Time" and "Format";
14GETTING TO
KNOW YOUR CAR
SAFETY
STARTING
AND
DRIVING
WARNING LIGHTS
AND MESSAGES
IN AN EMERGENCY
SERVICING AND
MAINTENANCE
TECHNICAL
SPECIFICATIONS
INDEX
Page 49 of 299

EXTERNAL LIGHTSThe left-hand stalk operates most of the external
lights.
The ignition key has to be in the MAR position for
the exterior lights to come on.
The instrument panel and the various dashboard
controls will come on with the external lights.
DAY LIGHTS (DRL)
″Daytime Running Lights″
(for versions/markets, where provided)
With the ignition key turned to MAR and the ring
nut A fig. 34 turned to positionOthe daytime
running lights are automatically activated; the
other lights and interior lighting remain off. If the
daytime running lights are deactivated, no light
switches on when the ring nut A is turned toO.
WARNING
The daytime running lights are an
alternative to the
dipped beam
headlights for driving during the daytime in
countries where it is compulsory to have
lights on during the day, and they are also
permitted in those countries where this not
obligatory.
WARNING
Daytime running lights cannot
replace dipped headlights
when
driving at night or through tunnels. The use
of daytime running lights is governed by
the highway code of the country in which
you are driving. Comply with legal
requirements.
SIDE LIGHTS AND DIPPED BEAM
HEADLIGHTS
With the ignition key turned to MAR, turn the ring
nut A fig. 34 to
. If dipped beams are
activated, the daytime running lights go out and
the side lights and dipped headlights come on.
The
warning light will come on in the
instrument panel.
fig. 34
L0F0127
47GETTING TO
KNOW YOUR CARSAFETY
STARTING
AND
DRIVING
WARNING LIGHTS
AND MESSAGES
IN AN EMERGENCY
SERVICING AND
MAINTENANCE
TECHNICAL
SPECIFICATIONS
INDEX
Page 50 of 299

When the ignition key is turned to STOP or
removed and the ring nut is turned from O to
,
all the side lights and number plate lights switch
on. The
warning light will come on in the
instrument panel.
PARKING LIGHTS
These lights can only be turned on with ignition
key in STOP position or removed, by moving
the ring nut A first to positionOand then to
position.
The warning light
switches on on the
instrument panel. When the direction indicator
stalk is activated the side for the lights (left or
right) can be selected.
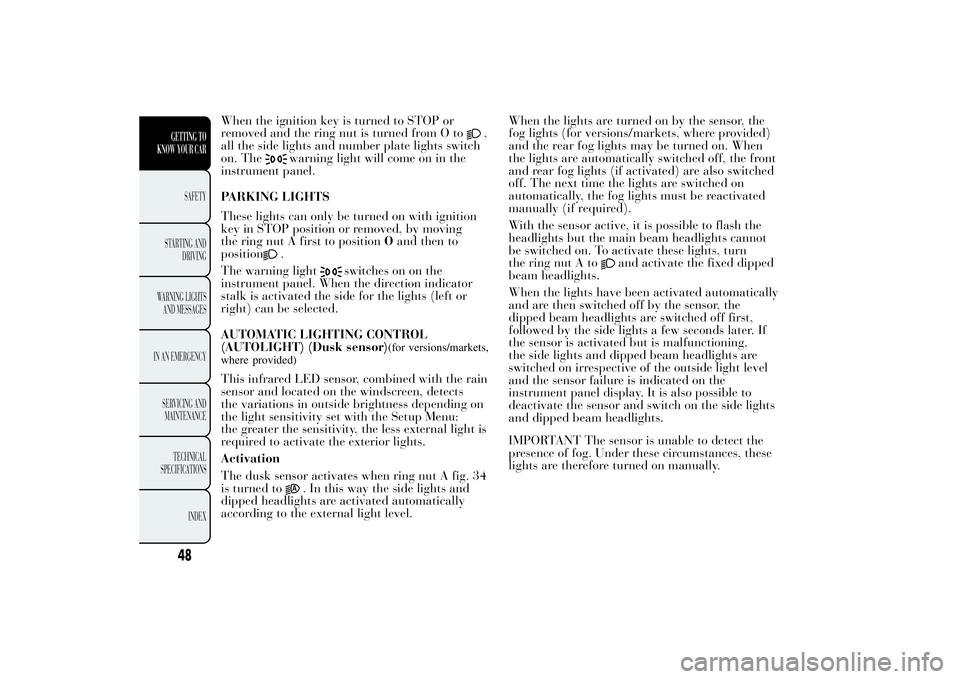
AUTOMATIC LIGHTING CONTROL
(AUTOLIGHT) (Dusk sensor)
(for versions/markets,
where provided)
This infrared LED sensor, combined with the rain
sensor and located on the windscreen, detects
the variations in outside brightness depending on
the light sensitivity set with the Setup Menu:
the greater the sensitivity, the less external light is
required to activate the exterior lights.
Activation
The dusk sensor activates when ring nut A fig. 34
is turned to
. In this way the side lights and
dipped headlights are activated automatically
according to the external light level.When the lights are turned on by the sensor, the
fog lights (for versions/markets, where provided)
and the rear fog lights may be turned on. When
the lights are automatically switched off, the front
and rear fog lights (if activated) are also switched
off. The next time the lights are switched on
automatically, the fog lights must be reactivated
manually (if required).
With the sensor active, it is possible to flash the
headlights but the main beam headlights cannot
be switched on. To activate these lights, turn
the ring nut A to
and activate the fixed dipped
beam headlights.
When the lights have been activated automatically
and are then switched off by the sensor, the
dipped beam headlights are switched off first,
followed by the side lights a few seconds later. If
the sensor is activated but is malfunctioning,
the side lights and dipped beam headlights are
switched on irrespective of the outside light level
and the sensor failure is indicated on the
instrument panel display. It is also possible to
deactivate the sensor and switch on the side lights
and dipped beam headlights.
IMPORTANT The sensor is unable to detect the
presence of fog. Under these circumstances, these
lights are therefore turned on manually.
48GETTING TO
KNOW YOUR CAR
SAFETY
STARTING
AND
DRIVING
WARNING LIGHTS
AND MESSAGES
IN AN EMERGENCY
SERVICING AND
MAINTENANCE
TECHNICAL
SPECIFICATIONS
INDEX
Page 51 of 299

MAIN BEAM HEADLIGHTS
To switch on the main beam headlights, with ring
nut in position
, push the stalk forward toward
the dashboard (unstable position). The
warning light will come on in the instrument
panel.
When the stalk is released, the lights deactivate,
the main beam headlights reactivate and thewarning light switches off.
It is not possible to switch on the main beam
headlights in fixed mode if the automatic lighting
control system is active.
FLASHING
You can flash the headlights by pulling the stalk
towards the wheel (unstable position). Thewarning light will come on in the instrument
panel.
DIRECTION INDICATORS
Bring the stalk to the (stable) position:
upwards:right-hand direction indicator
activation;
downwards:left-hand direction indicator
activation.
Warning light
or
should flash in the
instrument panel. The indicators switch off
automatically when the steering wheel is
straightened.Lane change function
If you wish to signal a lane change, put the left
stalk in the unstable position for less than half a
second. The direction indicator on the selected
side flashes three times and then switches off
automatically.
“FOLLOW ME HOME” DEVICE
This allows the space in front of the car to be lit
up for a certain period of time.
Activation:with the ignition key on STOP or
removed, pull the stalk towards the steering wheel
within 2 minutes from when the engine is turned
off.
At each single movement of the stalk, the lights
will remain on for an extra 30 seconds up to a
maximum of 210 seconds; then the lights are
switched off automatically.
Each time the stalk is operated, the
warning
light on the instrument panel switches on and the
display also shows a message and how long the
function will remain active.
The
warning light switches on when the stalk
is first moved and stays on until the function is
automatically deactivated. Each time the stalk is
activated it increases the time that the lights
remain on.
Deactivation:keep the stalk pulled towards the
steering wheel for more than two seconds.
49GETTING TO
KNOW YOUR CARSAFETY
STARTING
AND
DRIVING
WARNING LIGHTS
AND MESSAGES
IN AN EMERGENCY
SERVICING AND
MAINTENANCE
TECHNICAL
SPECIFICATIONS
INDEX
Page 52 of 299

EXTERNAL COURTESY LIGHTS
This function lights up the car and the space
around it when the doors are unlocked.
Activation:when the car is parked and the doors
are unlocked by pressing the
button on the
remote control (or the luggage compartment is
unlocked by pressing
), the dipped beam
headlights, side lights and number plate lights are
activated.
The lights remain lit for approximately 25 seconds
unless the doors and boot are locked again with
the remote control or the doors or boot are opened
and reclosed. In these cases they go out after 5
seconds.
The exterior courtesy lights can be enabled/
disabled using the Setup Menu (see the paragraph
“Menu Items” in this chapter).
WINDOW CLEANINGThe right stalk controls windscreen wiper/washer
and heated rear window wiper/washer operation.
WINDSCREEN WASHER/WIPER
They can be operated only with the ignition key
turned to MAR.
The ring nut A fig. 35 can be moved to four
different positions:
windscreen wiper off.intermittent operation.continuous slow operation.continuous fast operation.
fig. 35
L0F0126
50GETTING TO
KNOW YOUR CAR
SAFETY
STARTING
AND
DRIVING
WARNING LIGHTS
AND MESSAGES
IN AN EMERGENCY
SERVICING AND
MAINTENANCE
TECHNICAL
SPECIFICATIONS
INDEX
Page 58 of 299

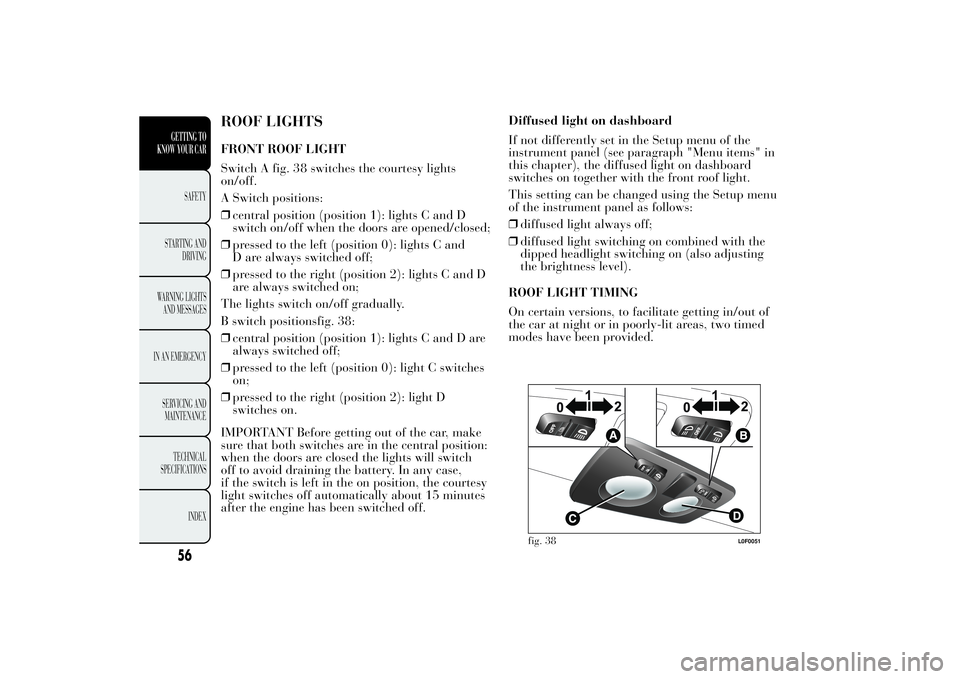
ROOF LIGHTSFRONT ROOF LIGHT
Switch A fig. 38 switches the courtesy lights
on/off.
A Switch positions:
❒central position (position 1): lights C and D
switch on/off when the doors are opened/closed;
❒pressed to the left (position 0): lights C and
D are always switched off;
❒pressed to the right (position 2): lights C and D
are always switched on;
The lights switch on/off gradually.
B switch positionsfig. 38:
❒central position (position 1): lights C and D are
always switched off;
❒pressed to the left (position 0): light C switches
on;
❒pressed to the right (position 2): light D
switches on.
IMPORTANT Before getting out of the car, make
sure that both switches are in the central position:
when the doors are closed the lights will switch
off to avoid draining the battery. In any case,
if the switch is left in the on position, the courtesy
light switches off automatically about 15 minutes
after the engine has been switched off.Diffused light on dashboard
If not differently set in the Setup menu of the
instrument panel (see paragraph "Menu items" in
this chapter), the diffused light on dashboard
switches on together with the front roof light.
This setting can be changed using the Setup menu
of the instrument panel as follows:
❒diffused light always off;
❒diffused light switching on combined with the
dipped headlight switching on (also adjusting
the brightness level).
ROOF LIGHT TIMING
On certain versions, to facilitate getting in/out of
the car at night or in poorly-lit areas, two timed
modes have been provided.
fig. 38
L0F0051
56GETTING TO
KNOW YOUR CAR
SAFETY
STARTING
AND
DRIVING
WARNING LIGHTS
AND MESSAGES
IN AN EMERGENCY
SERVICING AND
MAINTENANCE
TECHNICAL
SPECIFICATIONS
INDEX
Page 61 of 299

CONTROLSHAZARD WARNING LIGHTS
Press the buttonfig. 43 to switch the lights on/off.
Warning lights
and
on the instrument panel
switch on and switch A flashes when the lights are
on.
IMPORTANT The use of hazard warning lights is
governed by the highway code of the country
you are driving in: comply with legal
requirements.
Emergency braking
In the event of emergency braking the hazard
warning lights switch on automatically as well as
warning lights
and
in the instrument panel.
The lights switch off automatically when
emergency braking ceases.FOG LIGHTS
(for versions/markets, where provided)
Press button
fig. 44 to switch the lights on/off.
Press the button again to switch the lights off.
With lights on, warning light
on the instrument
panel will switch on.
REAR FOG LIGHTS
Press button
fig. 44 to switch the lights on/off.
The rear fog lights are only switched on with
the dipped headlights or front fog lights on. Press
the button again to switch the lights off, or switch
off the dipped headlights or the front fog lights
(for versions/markets, where provided).
With the lights on, warning light
in the
instrument panel switches on.
fig. 43
L0F0191
fig. 44
L0F0192
59GETTING TO
KNOW YOUR CARSAFETY
STARTING
AND
DRIVING
WARNING LIGHTS
AND MESSAGES
IN AN EMERGENCY
SERVICING AND
MAINTENANCE
TECHNICAL
SPECIFICATIONS
INDEX
Page 79 of 299

WARNING
Evenly distribute the load and take
into account, when
driving, the
increased effect of side wind on the car.Fully comply with the regulations in
force concerning maximum clearance.
HEADLIGHTSLIGHT BEAM DIRECTION
The correct alignment of the headlights is
important for the comfort and safety of not only
the driver but all other road users. This is also
covered by a specific rule of the highway code.
The headlights must be correctly aimed to
guarantee the best visibility conditions for all
drivers while travelling with headlights on.
Contact a Lancia Dealership to have the
headlights properly adjusted.
Check beam alignment every time the load or its
distribution changes.
IMPORTANT When the gas discharge (Xenon)
headlamps (for versions/markets, where provided)
are switched on, normally parabolas and light
beam move vertically for about 2 seconds until
headlamp alignment has stabilised.
77GETTING TO
KNOW YOUR CARSAFETY
STARTING
AND
DRIVING
WARNING LIGHTS
AND MESSAGES
IN AN EMERGENCY
SERVICING AND
MAINTENANCE
TECHNICAL
SPECIFICATIONS
INDEX