warning LAND ROVER DISCOVERY 2002 Manual Online
[x] Cancel search | Manufacturer: LAND ROVER, Model Year: 2002, Model line: DISCOVERY, Model: LAND ROVER DISCOVERY 2002Pages: 1672, PDF Size: 46.1 MB
Page 678 of 1672

CLUTCH - V8
ADJUSTMENTS 33-2-11
ADJUST ME NTS
Clutch hydraulic system - bleed
$% 33.15.01
CAUTION: Ensure the fluid in the reservoir is
maintained between the minimum and maximum
levels throughout the bleed procedure using new
brake fluid.
CAUTION: Brake fluid will damage paint finished
surfaces. If spilled, immediately remove fluid and
clean area with water.
Bleeding
1.Top up reservoir.
2.Raise the front of the vehicle.
WARNING: Do not work on or under a
vehicle supported only by a jack. Always
support the vehicle on safety stands.
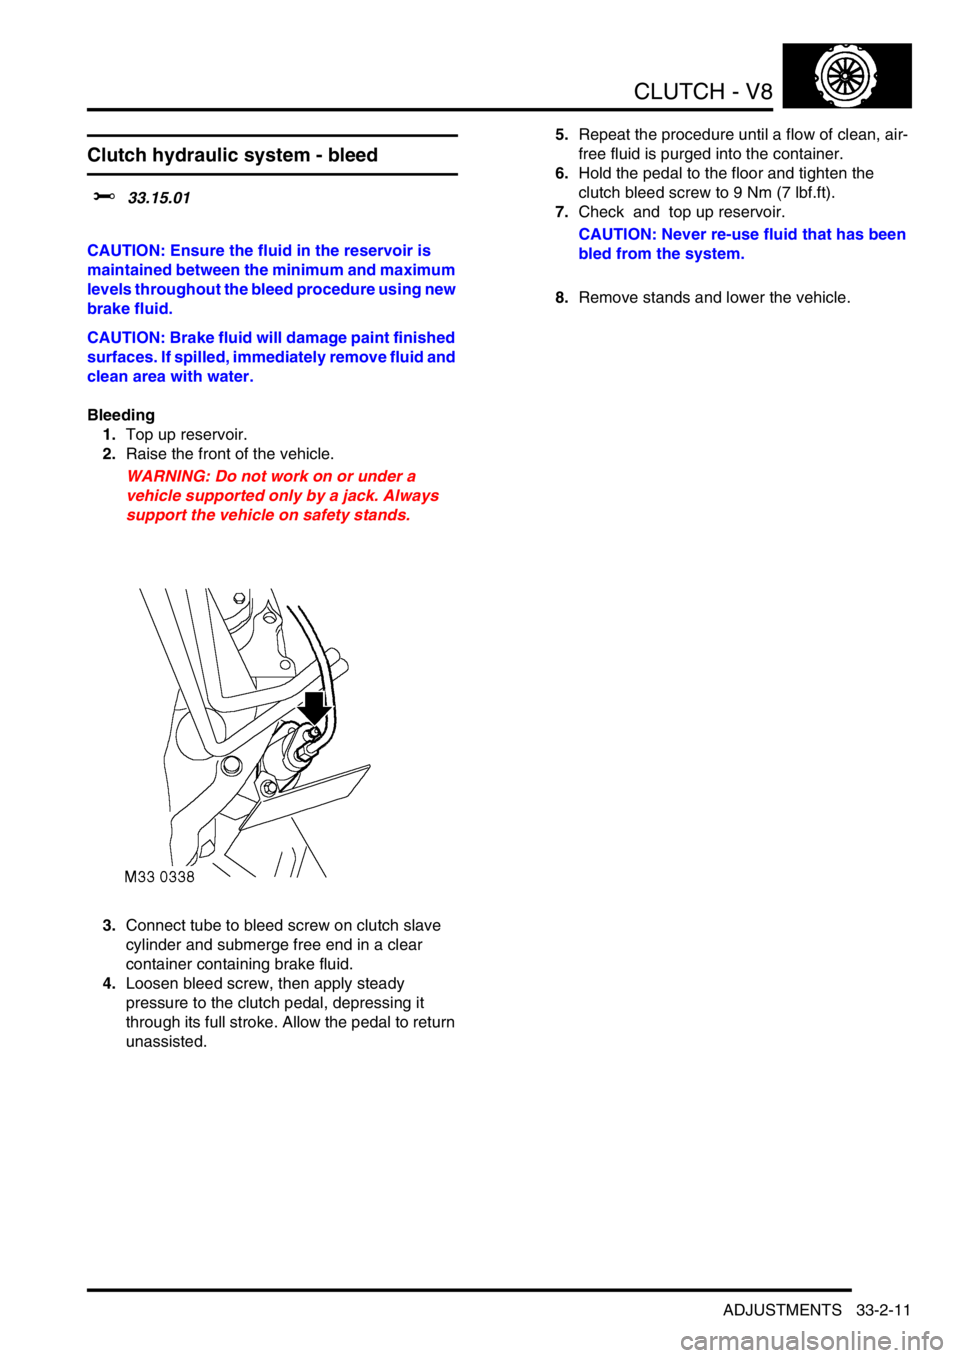
3.Connect tube to bleed screw on clutch slave
cylinder and submerge free end in a clear
container containing brake fluid.
4.Loosen bleed screw, then apply steady
pressure to the clutch pedal, depressing it
through its full stroke. Allow the pedal to return
unassisted.5.Repeat the procedure until a flow of clean, air-
free fluid is purged into the container.
6.Hold the pedal to the floor and tighten the
clutch bleed screw to 9 Nm (7 lbf.ft).
7.Check and top up reservoir.
CAUTION: Never re-use fluid that has been
bled from the system.
8.Remove stands and lower the vehicle.
Page 681 of 1672

CLUTCH - V8
33-2-14 REPAIRS
Master cylinder
$% 33.20.01
CAUTION: Brake fluid will damage paint finished
surfaces. If spilled, immediately remove fluid and
clean area with water.
Remove
1.Raise front of vehicle.
WARNING: Do not work on or under a
vehicle supported only by a jack. Always
support the vehicle on safety stands.
2.Release spring clip securing clutch pedal
clevis pin and remove pin from push rod and
clutch pedal.
3.Position container to catch spillage. Disconnect
hydraulic pipe from clutch master cylinder.
CAUTION: Always fit plugs to open
connections to prevent contamination.4.Release clip and remove connecting hose from
clutch master cylinder.
5.Remove 2 bolts securing clutch master
cylinder to pedal box and remove clutch master
cylinder.
Refit
1.Clean master cylinder and pedal box mating
faces.
2.Position clutch master cylinder to pedal box, fit
bolts and tighten to 25 Nm (18 lbf.ft).
3.Position clevis pin to push-rod and clutch pedal
and secure with spring clip.
4.Fit connecting hose to brake master cylinder
and tighten clip.
5.Position hydraulic pipe and tighten union to 18
Nm (13 lbf.ft).
6.Bleed clutch.
+ CLUTCH - V8, ADJUSTMENTS,
Clutch hydraulic system - bleed.
7.Remove stand(s) and lower vehicle.
Page 682 of 1672

CLUTCH - V8
REPAIRS 33-2-15
Bearing and lever - clutch release
$% 33.25.12
Remove
1.Remove gearbox assembly.
+ MANUAL GEARBOX - R380,
REPAIRS, Gearbox - V8.
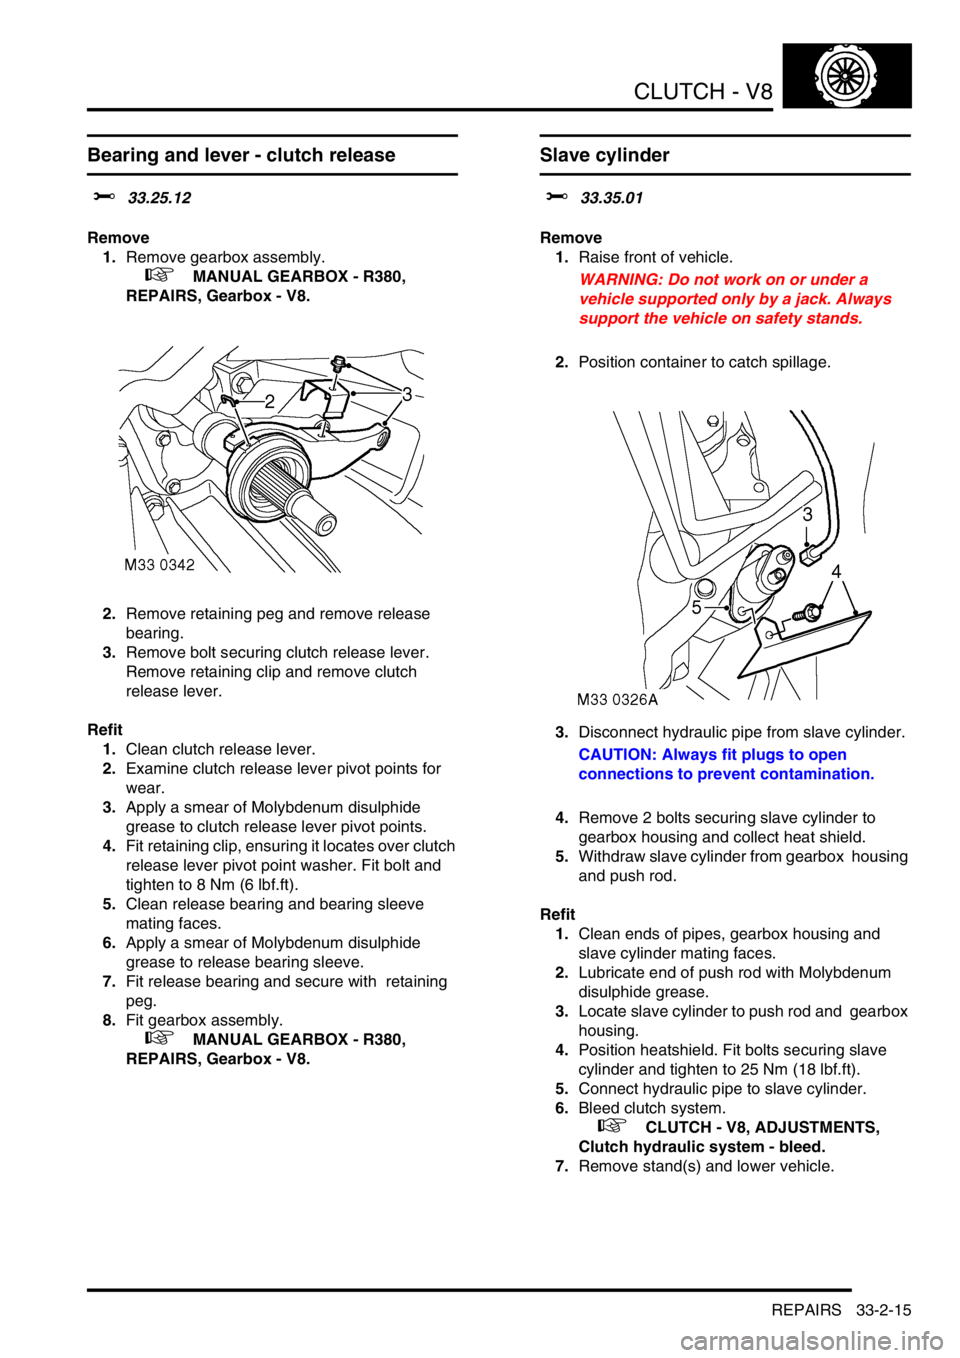
2.Remove retaining peg and remove release
bearing.
3.Remove bolt securing clutch release lever.
Remove retaining clip and remove clutch
release lever.
Refit
1.Clean clutch release lever.
2.Examine clutch release lever pivot points for
wear.
3.Apply a smear of Molybdenum disulphide
grease to clutch release lever pivot points.
4.Fit retaining clip, ensuring it locates over clutch
release lever pivot point washer. Fit bolt and
tighten to 8 Nm (6 lbf.ft).
5.Clean release bearing and bearing sleeve
mating faces.
6.Apply a smear of Molybdenum disulphide
grease to release bearing sleeve.
7.Fit release bearing and secure with retaining
peg.
8.Fit gearbox assembly.
+ MANUAL GEARBOX - R380,
REPAIRS, Gearbox - V8.
Slave cylinder
$% 33.35.01
Remove
1.Raise front of vehicle.
WARNING: Do not work on or under a
vehicle supported only by a jack. Always
support the vehicle on safety stands.
2.Position container to catch spillage.
3.Disconnect hydraulic pipe from slave cylinder.
CAUTION: Always fit plugs to open
connections to prevent contamination.
4.Remove 2 bolts securing slave cylinder to
gearbox housing and collect heat shield.
5.Withdraw slave cylinder from gearbox housing
and push rod.
Refit
1.Clean ends of pipes, gearbox housing and
slave cylinder mating faces.
2.Lubricate end of push rod with Molybdenum
disulphide grease.
3.Locate slave cylinder to push rod and gearbox
housing.
4.Position heatshield. Fit bolts securing slave
cylinder and tighten to 25 Nm (18 lbf.ft).
5.Connect hydraulic pipe to slave cylinder.
6.Bleed clutch system.
+ CLUTCH - V8, ADJUSTMENTS,
Clutch hydraulic system - bleed.
7.Remove stand(s) and lower vehicle.
Page 698 of 1672

MANUAL GEARBOX - R380
REPAIRS 37-15
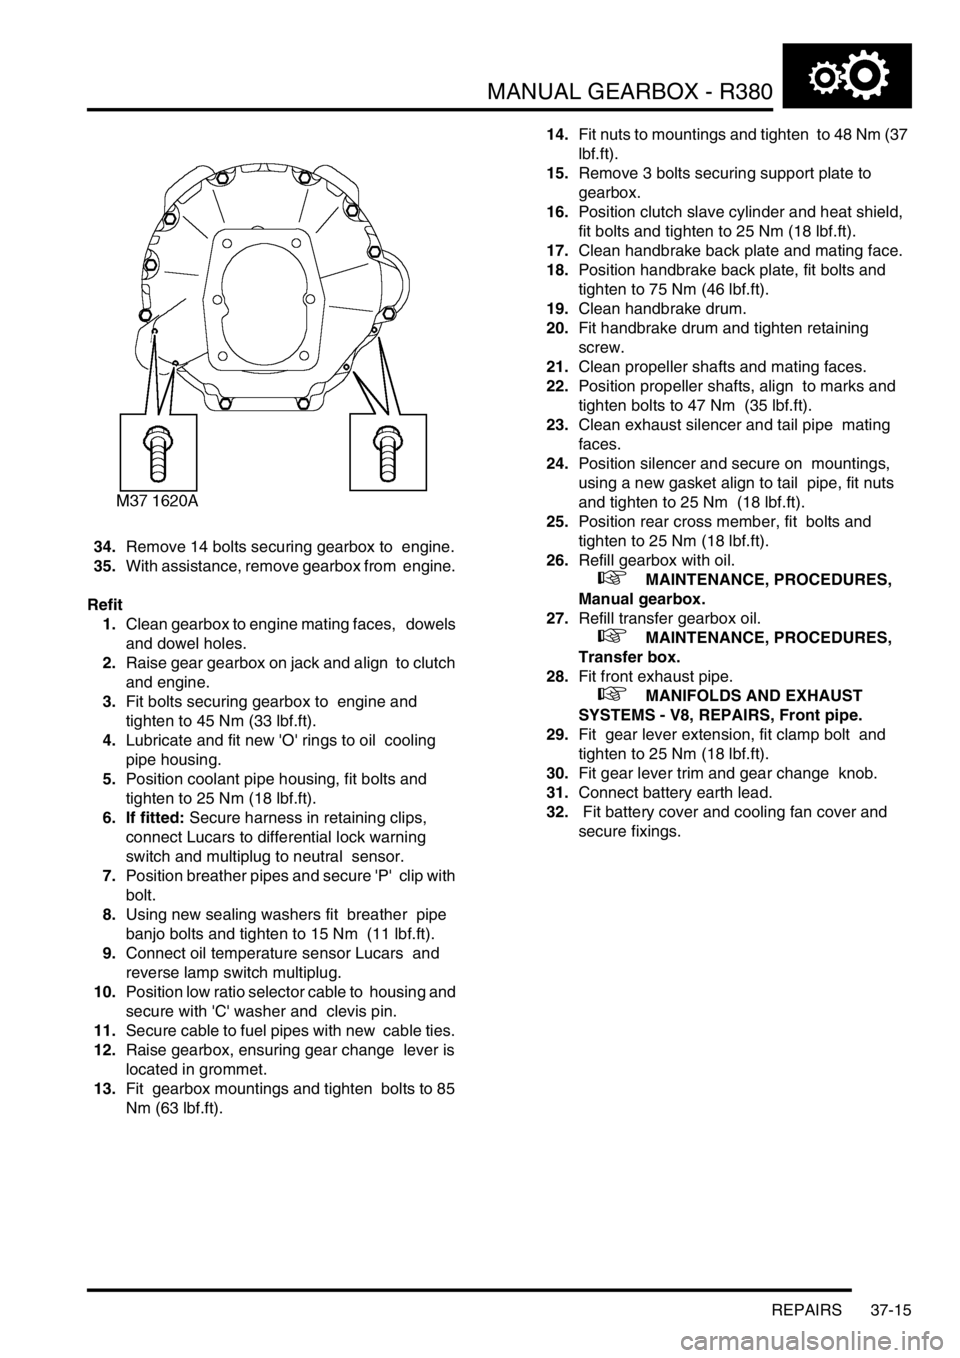
34.Remove 14 bolts securing gearbox to engine.
35.With assistance, remove gearbox from engine.
Refit
1.Clean gearbox to engine mating faces, dowels
and dowel holes.
2.Raise gear gearbox on jack and align to clutch
and engine.
3.Fit bolts securing gearbox to engine and
tighten to 45 Nm (33 lbf.ft).
4.Lubricate and fit new 'O' rings to oil cooling
pipe housing.
5.Position coolant pipe housing, fit bolts and
tighten to 25 Nm (18 lbf.ft).
6. If fitted: Secure harness in retaining clips,
connect Lucars to differential lock warning
switch and multiplug to neutral sensor.
7.Position breather pipes and secure 'P' clip with
bolt.
8.Using new sealing washers fit breather pipe
banjo bolts and tighten to 15 Nm (11 lbf.ft).
9.Connect oil temperature sensor Lucars and
reverse lamp switch multiplug.
10.Position low ratio selector cable to housing and
secure with 'C' washer and clevis pin.
11.Secure cable to fuel pipes with new cable ties.
12.Raise gearbox, ensuring gear change lever is
located in grommet.
13.Fit gearbox mountings and tighten bolts to 85
Nm (63 lbf.ft). 14.Fit nuts to mountings and tighten to 48 Nm (37
lbf.ft).
15.Remove 3 bolts securing support plate to
gearbox.
16.Position clutch slave cylinder and heat shield,
fit bolts and tighten to 25 Nm (18 lbf.ft).
17.Clean handbrake back plate and mating face.
18.Position handbrake back plate, fit bolts and
tighten to 75 Nm (46 lbf.ft).
19.Clean handbrake drum.
20.Fit handbrake drum and tighten retaining
screw.
21.Clean propeller shafts and mating faces.
22.Position propeller shafts, align to marks and
tighten bolts to 47 Nm (35 lbf.ft).
23.Clean exhaust silencer and tail pipe mating
faces.
24.Position silencer and secure on mountings,
using a new gasket align to tail pipe, fit nuts
and tighten to 25 Nm (18 lbf.ft).
25.Position rear cross member, fit bolts and
tighten to 25 Nm (18 lbf.ft).
26.Refill gearbox with oil.
+ MAINTENANCE, PROCEDURES,
Manual gearbox.
27.Refill transfer gearbox oil.
+ MAINTENANCE, PROCEDURES,
Transfer box.
28.Fit front exhaust pipe.
+ MANIFOLDS AND EXHAUST
SYSTEMS - V8, REPAIRS, Front pipe.
29.Fit gear lever extension, fit clamp bolt and
tighten to 25 Nm (18 lbf.ft).
30.Fit gear lever trim and gear change knob.
31.Connect battery earth lead.
32. Fit battery cover and cooling fan cover and
secure fixings.
Page 702 of 1672

MANUAL GEARBOX - R380
REPAIRS 37-19
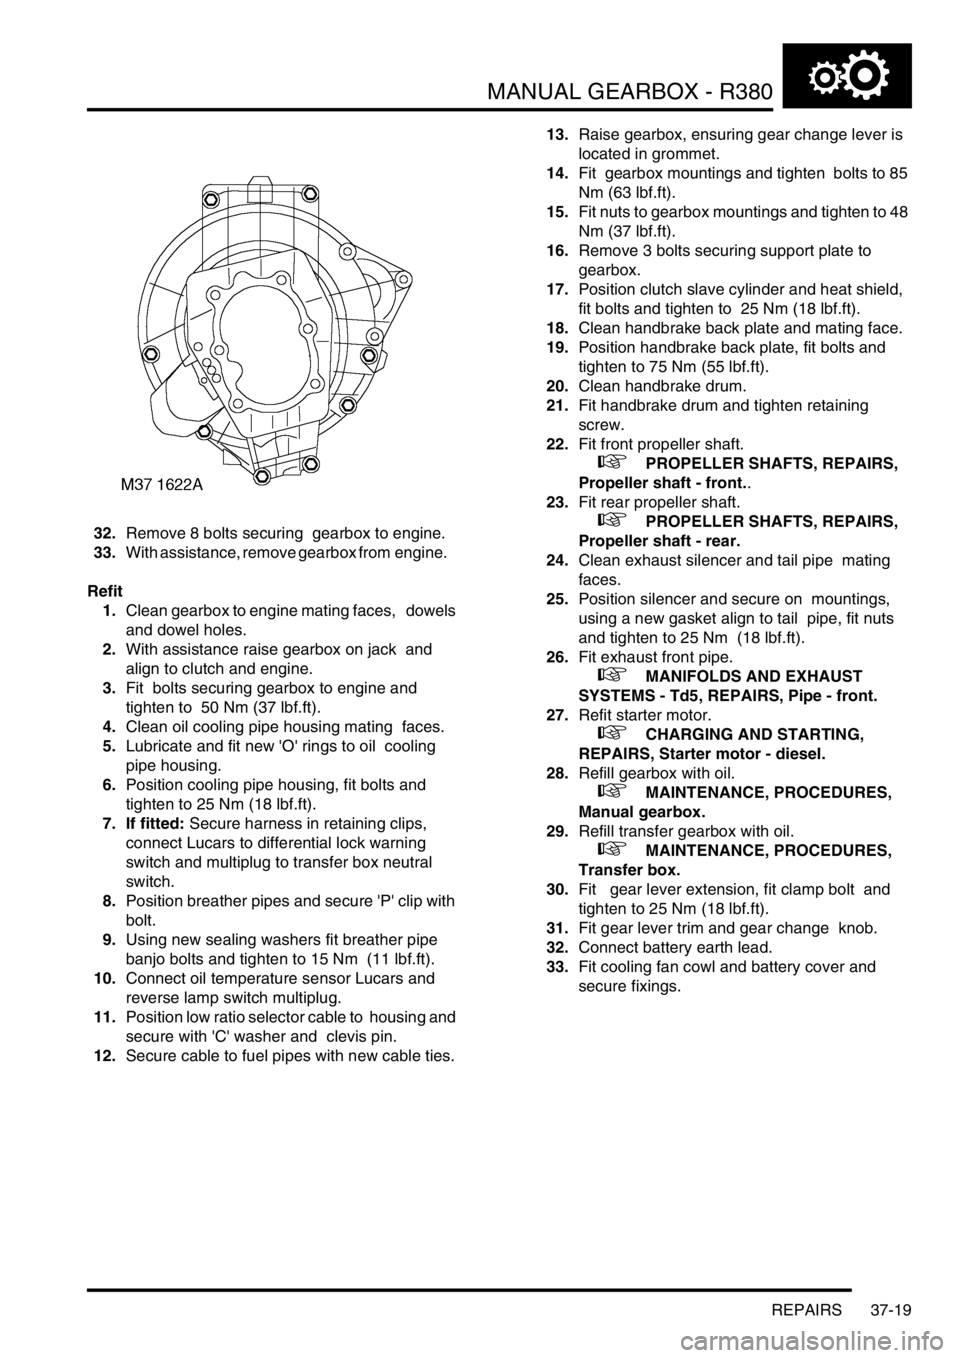
32.Remove 8 bolts securing gearbox to engine.
33.With assistance, remove gearbox from engine.
Refit
1.Clean gearbox to engine mating faces, dowels
and dowel holes.
2.With assistance raise gearbox on jack and
align to clutch and engine.
3.Fit bolts securing gearbox to engine and
tighten to 50 Nm (37 lbf.ft).
4.Clean oil cooling pipe housing mating faces.
5.Lubricate and fit new 'O' rings to oil cooling
pipe housing.
6.Position cooling pipe housing, fit bolts and
tighten to 25 Nm (18 lbf.ft).
7. If fitted: Secure harness in retaining clips,
connect Lucars to differential lock warning
switch and multiplug to transfer box neutral
switch.
8.Position breather pipes and secure 'P' clip with
bolt.
9.Using new sealing washers fit breather pipe
banjo bolts and tighten to 15 Nm (11 lbf.ft).
10.Connect oil temperature sensor Lucars and
reverse lamp switch multiplug.
11.Position low ratio selector cable to housing and
secure with 'C' washer and clevis pin.
12.Secure cable to fuel pipes with new cable ties. 13.Raise gearbox, ensuring gear change lever is
located in grommet.
14.Fit gearbox mountings and tighten bolts to 85
Nm (63 lbf.ft).
15.Fit nuts to gearbox mountings and tighten to 48
Nm (37 lbf.ft).
16.Remove 3 bolts securing support plate to
gearbox.
17.Position clutch slave cylinder and heat shield,
fit bolts and tighten to 25 Nm (18 lbf.ft).
18.Clean handbrake back plate and mating face.
19.Position handbrake back plate, fit bolts and
tighten to 75 Nm (55 lbf.ft).
20.Clean handbrake drum.
21.Fit handbrake drum and tighten retaining
screw.
22.Fit front propeller shaft.
+ PROPELLER SHAFTS, REPAIRS,
Propeller shaft - front..
23.Fit rear propeller shaft.
+ PROPELLER SHAFTS, REPAIRS,
Propeller shaft - rear.
24.Clean exhaust silencer and tail pipe mating
faces.
25.Position silencer and secure on mountings,
using a new gasket align to tail pipe, fit nuts
and tighten to 25 Nm (18 lbf.ft).
26.Fit exhaust front pipe.
+ MANIFOLDS AND EXHAUST
SYSTEMS - Td5, REPAIRS, Pipe - front.
27.Refit starter motor.
+ CHARGING AND STARTING,
REPAIRS, Starter motor - diesel.
28.Refill gearbox with oil.
+ MAINTENANCE, PROCEDURES,
Manual gearbox.
29.Refill transfer gearbox with oil.
+ MAINTENANCE, PROCEDURES,
Transfer box.
30.Fit gear lever extension, fit clamp bolt and
tighten to 25 Nm (18 lbf.ft).
31.Fit gear lever trim and gear change knob.
32.Connect battery earth lead.
33.Fit cooling fan cowl and battery cover and
secure fixings.
Page 737 of 1672

TRANSFER BOX - LT230SE
41-4 DESCRIPTION AND OPERATION
Main casing components – Vehicles up
to 03 model year
1Retaining plate
2Stake nut - intermediate shaft
3Bolt - retaining plate
4'O' rings - intermediate shaft
5Bearings and outer tracks - mainshaft input
gear
6Mainshaft input gear bearing housing
7Cover plate
8Bolt - cover plate
9Selective shim
10Mainshaft input gear
11Oil filler/level plug
12Oil temperature switch - if fitted
13Bearings and outer tracks - intermediate gears
14Circlips
15Intermediate gears
16Bottom cover plate
17Bolt - bottom cover plate
18Selective spacer
19Mainshaft oil seal20Oil drain plug
21Main casing
22Intermediate shaft
23Locating dowel
24Detent ball - high/low selector
25Detent spring - high/low selector
26Detent plug - high/low selector
27Neutral warning switch - Automatic gearbox
only - North America and Japan
28Bolt - interlock solenoid cover - Automatic
gearbox only - North America and Japan
29Cover - interlock solenoid - Automatic gearbox
only - North America and Japan
30Belleville washer - Automatic gearbox only -
North America and Japan
31Interlock solenoid - Automatic gearbox only -
North America and Japan
Page 738 of 1672

TRANSFER BOX - LT230SE
DESCRIPTION AND OPERATION 41-5
Main casing components – Vehicles
from 03 model year
1Retaining plate
2Stake nut - intermediate shaft
3Bolt - retaining plate
4'O' rings - intermediate shaft
5Bearings and outer tracks - mainshaft input
gear
6Mainshaft input gear bearing housing
7Cover plate
8Bolt - cover plate
9Selective shim
10Mainshaft input gear
11Oil filler/level plug
12Oil temperature switch - if fitted
13Bearings and outer tracks - intermediate gears14Intermediate gears
15Bottom cover plate
16Bolt - bottom cover plate
17Selective spacer
18Mainshaft oil seal
19Oil drain plug
20Main casing
21Intermediate shaft
22Locating dowel
23Detent ball - high/low selector
24Detent spring - high/low selector
25Detent plug - high/low selector
26Neutral warning switch - Automatic gearbox
only - North America and Japan
Page 742 of 1672

TRANSFER BOX - LT230SE
DESCRIPTION AND OPERATION 41-9
1Breather pipe, banjo bolt and sealing washers
2Bolt - high/low cross shaft housing and
abutment bracket
3Selector cable abutment bracket
4Multiplug bracket
5Hollow plug
6High/low cross shaft housing
7'O' ring
8High/low cross shaft and lever
9Front output shaft - Differential lock - If fitted
10Dog clutch - Differential lock - If fitted
11Warning lamp switch - Differential lock - If fitted
12Detent plug - Differential lock - If fitted
13Detent spring - Differential lock - If fitted
14Selector shaft - Differential lock - If fitted
15Detent ball - Differential lock - If fitted
16Threaded spacer - Differential lock - If fitted
17Front output housing
18Spring and clips - Differential lock - If fitted
19Bolt - cover plate
20Cover plate21Selector fork - Differential lock - If fitted
22Bolt - front output housing
23Hollow plug
24Circlip
25Front output flange
26Steel washer
27Self-locking nut
28Felt washer
29Oil seal
30Output shaft bearing
31Bearing spacer
32High/low detect switch
33Selector finger and shaft - Differential lock - If
fitted
34'O' rings - Differential lock - If fitted
35Bolt - selector housing - Differential lock - If
fitted
36Selector housing - Differential lock - If fitted
37High/low selector finger
38Front output shaft - Vehicles not fitted with
differential lock
Page 744 of 1672

TRANSFER BOX - LT230SE
DESCRIPTION AND OPERATION 41-11
1Breather pipe, banjo bolt and sealing washers
2Bolt - high/low cross shaft housing and
abutment bracket
3Selector cable abutment bracket
4Multiplug bracket
5Hollow plug
6High/low cross shaft housing
7'O' ring
8High/low cross shaft and lever
9Front output shaft - Differential lock - If fitted
10Dog clutch - Differential lock - If fitted
11Warning lamp switch - Differential lock - If fitted
12Detent plug - Differential lock - If fitted
13Detent spring - Differential lock - If fitted
14Selector shaft - Differential lock - If fitted
15Detent ball - Differential lock - If fitted
16Threaded spacer - Differential lock - If fitted
17Front output housing
18Spring and clips - Differential lock - If fitted
19Bolt - cover plate
20Cover plate
21Selector fork - Differential lock - If fitted
22Bolt - front output housing23Aluminium washer
24Warning lamp switch - Differential lock - If fitted
25Circlip
26Front output flange
27Steel washer
28Self-locking nut
29Felt washer
30Oil seal
31Output shaft bearing
32Bearing spacer
33High/low detect switch
34Selector finger and shaft - Differential lock - If
fitted
35'O' rings - Differential lock - If fitted
36Bolt - selector housing - Differential lock - If
fitted
37Selector housing - Differential lock - If fitted
38High/low selector finger
39Front output shaft - Vehicles not fitted with
differential lock
40Washer
41Nut
Page 746 of 1672

TRANSFER BOX - LT230SE
DESCRIPTION AND OPERATION 41-13
Description
General
The LT 230SE transfer box is mounted at the rear of the gearbox and transmits drive via high or low reduction ratios
to the front and rear axles via the propeller shafts. The high/low ratios are 1.211:1 and 3.32:1 respectively.
Transfer boxes fitted to this model have the prefixes 41D and 42D to the unit serial number. Prefix 41D denotes that
the unit is not fitted with interlock whilst 42D denotes that interlock is fitted.
Vehicles up to 03 model year – Whilst similar to LT230Q transfer boxes fitted to other models, the LT230SE transfer
box has certain engineering modifications incorporated which are as follows:
lUprated torque capacity
lModified front and rear output and cross shaft housings
lIntermediate gear bearing pre-load now controlled by a selective, non-collapsible spacer
lSpeedometer drive and driven gears not fitted for this application
lModified high/low sleeve
lModified front output flange and mud shield
lDifferential lock fitted to certain vehicles, but no longer driver operated
lFixed setting of differential lock warning lamp switch on vehicles fitted with differential lock
Vehicles from 03 model year – The LT230SE transfer box is as described above for vehicles up to 03 model year
with the following modifications:
The following items are introduced on vehicles from 03 model year
lRibs added to main casing to reduce operating noise
lBearing retaining nut on the differential carrier has patchlock added to the threads
lInterlock solenoid moved from main casing to selector lever assembly
lIntermediate gears modified with machined internal shoulder and bearing circlips deleted
The following items are introduced later in the 03 model year build programme and therefore may not appear on all
03 model year vehicles
lDriver operated differential lock (if fitted)
lHigh/Low selector shaft fitted with spring assist
lExisting differential lock switch replaced by new design switch.
lNew secondary differential lock switch installed in the front output housing
Construction
The transfer box comprises three main assemblies; the main casing, the front output housing and the rear output
housing. Both output housings and all cover plates are sealed to the main casing by sealant; mud and water ingress
being prevented by mud shields located on the output flanges.
Main casing
The main casing carries the mainshaft input gear, the intermediate gears and the differential, together with the high/
low range gears, selector shaft and fork. The front and rear output housings are bolted to either side of the main
casing.
Transmission neutral sensor
A transmission neutral sensor is fitted on automatic gearbox vehicles for North America and Japan. The sensor is
connected to the BCU and is normally in the open position. The sensor provides an earth path for the BCU which then
interprets the signal and activates an audible warning generated by the IDM if neutral is selected on the transfer box
when the ignition is on.