warning light LAND ROVER FREELANDER 2001 User Guide
[x] Cancel search | Manufacturer: LAND ROVER, Model Year: 2001, Model line: FREELANDER, Model: LAND ROVER FREELANDER 2001Pages: 1007, PDF Size: 23.47 MB
Page 560 of 1007
BRAKES
REPAIRS 70-11
Cable - handbrake
$% 70.35.25
Remove
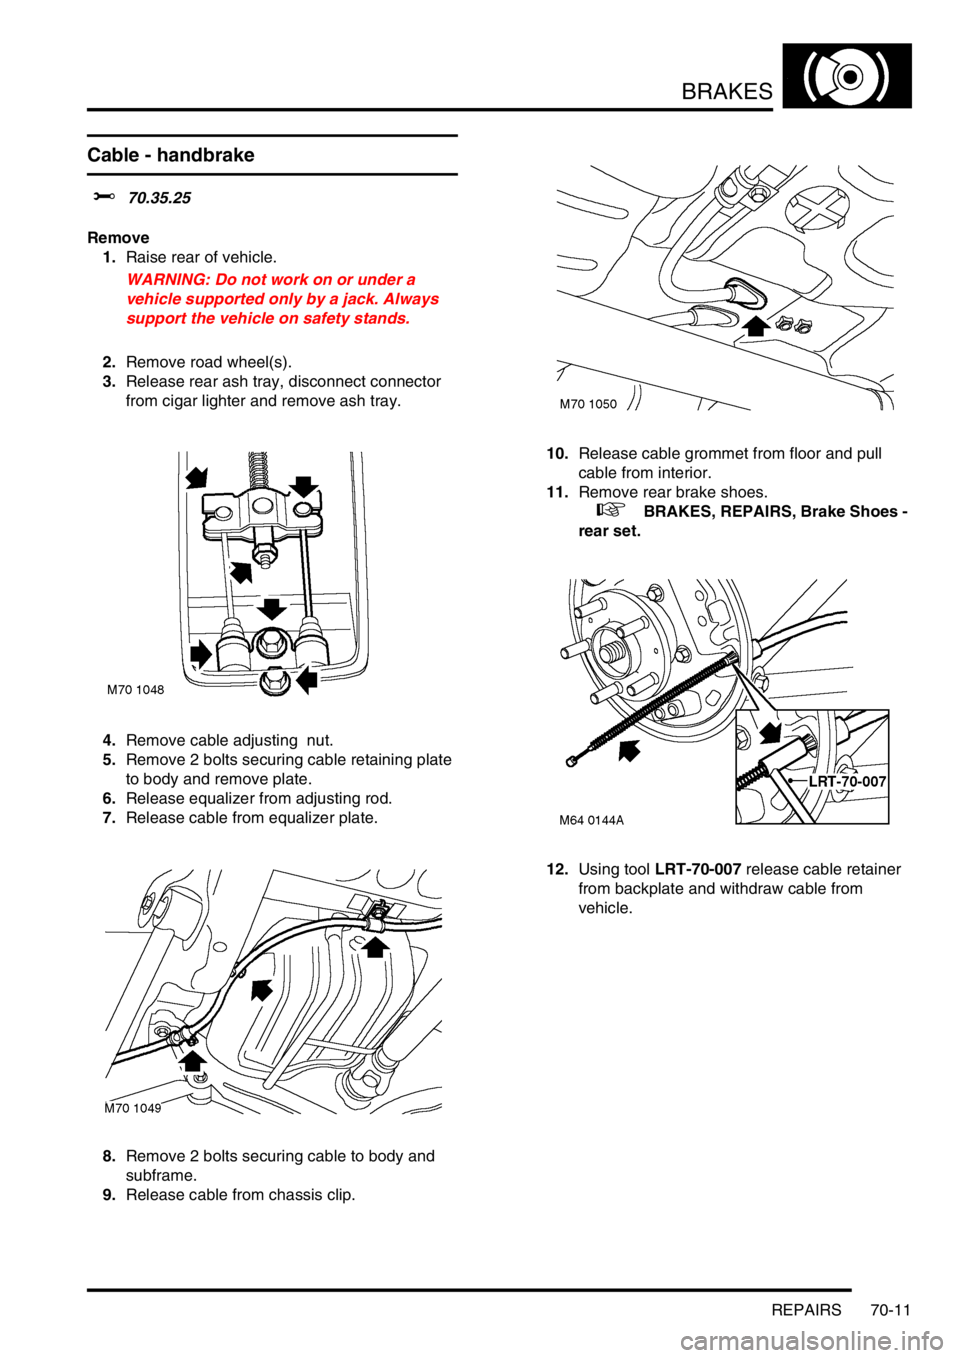
1.Raise rear of vehicle.
WARNING: Do not work on or under a
vehicle supported only by a jack. Always
support the vehicle on safety stands.
2.Remove road wheel(s).
3.Release rear ash tray, disconnect connector
from cigar lighter and remove ash tray.
4.Remove cable adjusting nut.
5.Remove 2 bolts securing cable retaining plate
to body and remove plate.
6.Release equalizer from adjusting rod.
7.Release cable from equalizer plate.
8.Remove 2 bolts securing cable to body and
subframe.
9.Release cable from chassis clip.10.Release cable grommet from floor and pull
cable from interior.
11.Remove rear brake shoes.
+ BRAKES, REPAIRS, Brake Shoes -
rear set.
12.Using tool LRT-70-007 release cable retainer
from backplate and withdraw cable from
vehicle.
Page 561 of 1007
BRAKES
70-12 REPAIRS
Refit
1.Manoeuvre cable into position and secure floor
grommet.
2.Fit and secure handbrake cable to backplate.
3.Fit brake shoes.
+ BRAKES, REPAIRS, Brake Shoes -
rear set.
4.Align cable clips, fit bolts and tighten to 22 Nm
(16 lbf.ft).
5.Secure cable in chassis clip.
6.Connect handbrake cable to equalizer.
7.Ensure spring is in place and fit equalizer to
adjusting rod.
8.Fit cable adjusting nut.
9.Fit cable retaining plate, fit bolts and tighten to
22 Nm (16 lbf.ft).
10.Adjust handbrake cable.
+ BRAKES, ADJUSTMENTS, Cable -
handbrake - check and adjust.
11.Fit ash tray and cigar lighter to rear console.
12.Fit road wheel(s).
13.Remove stands and lower vehicle.
Switch - handbrake warning
$% 70.35.40
Remove
1.Remove rear console.
+ INTERIOR TRIM COMPONENTS,
REPAIRS, Console - rear.
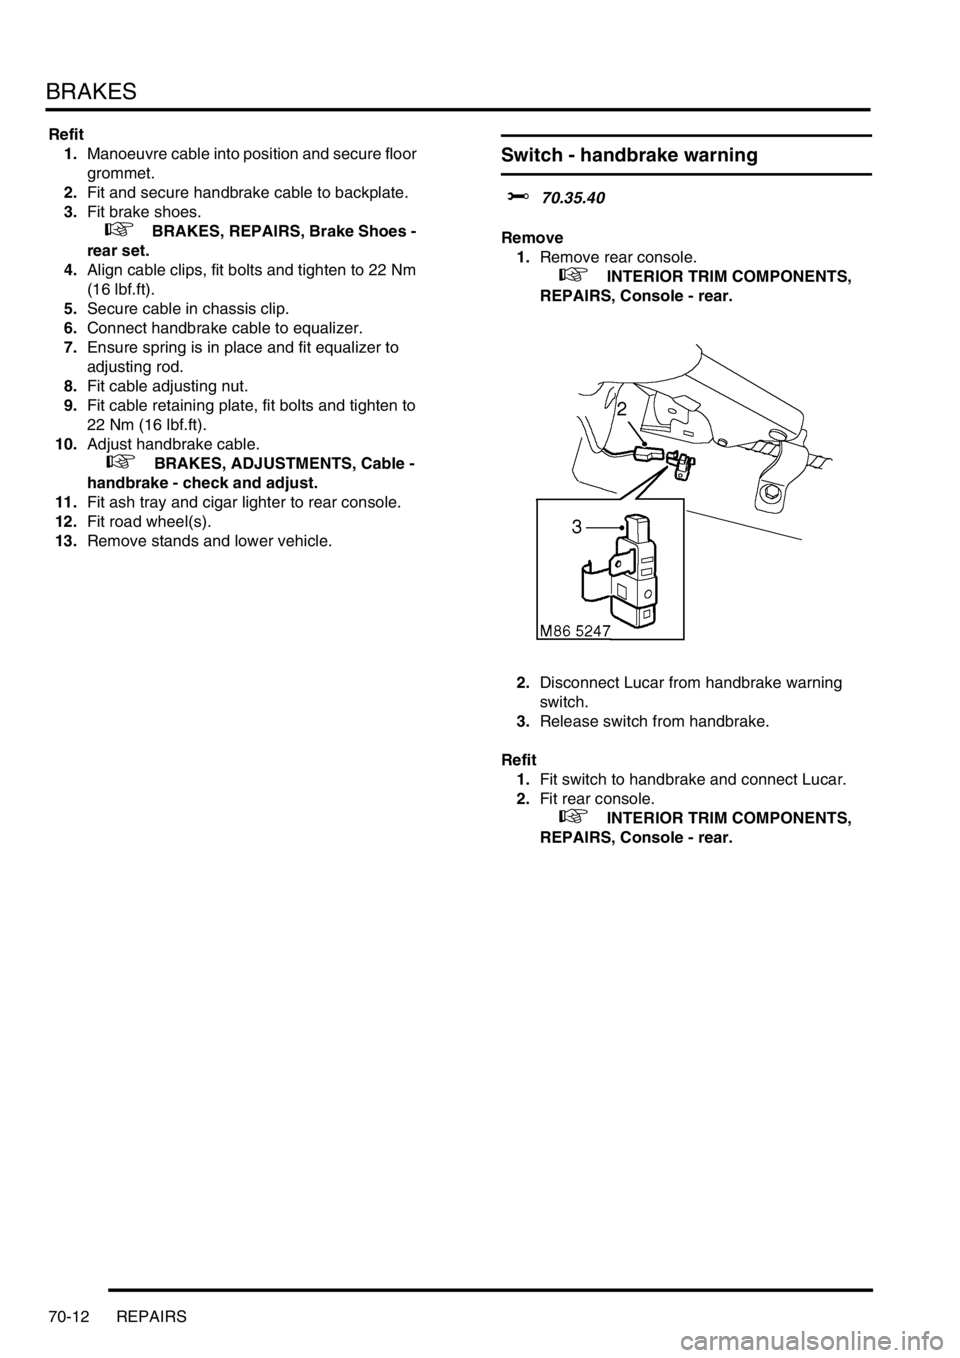
2.Disconnect Lucar from handbrake warning
switch.
3.Release switch from handbrake.
Refit
1.Fit switch to handbrake and connect Lucar.
2.Fit rear console.
+ INTERIOR TRIM COMPONENTS,
REPAIRS, Console - rear.
Page 715 of 1007
SUNROOF
76-6-2 REPAIRS
11.Using suitable cutting wire, cut through PU
sealer securing sun roof to roof.
NOTE: If multi-strand cutting wire is used, a
sawing action can be used to cut through heavy
sealant deposits around corners.
12.Remove sun roof.
Refit
1.Clean surrounding area with solvent.
WARNING: Wear protective gloves when
handling glass, solvents and primers.
2.Use a vacuum cleaner to clear away any waste.
3.Cut sealer on roof flange down to a smooth
even finish.
4.Etch prime and paint any damaged areas.
5.Apply primer over etch primer on flange.
6.Apply activator over old sealer on flange.
7.Allow activator to cure.
8.Fit pre-cut nozzle to sealer cartridge, remove
lid, shake out crystals and fit cartridge to
applicator gun. If necessary modify the nozzle
to achieve required bead section.
9.Apply a continuous bead of sealer around roof
flange. Make bead slightly thicker at the
corners.
10.Check for breaks and air bubbles in sealer.
11.With assistance position sunroof and align to
roof aperture.
12.Fit sunroof tray seal.
+ SUNROOF, REPAIRS, Seal - tray -
sun /sliding roof - front.
13.Position sunroof clamping plates, fit and tighten
screws.
14.Connect drain tubes and secure with new cable
ties.
15.Remove body and trim protection.
16.Position wind deflectors, fit and tighten screws.
17.Fit 'T' bar and glass panels.
18.Fit headlining.
+ INTERIOR TRIM COMPONENTS,
REPAIRS, Headlining - 3 door.
Wind deflector - sun/sliding roof - 3 door
$% 76.83.28
Remove
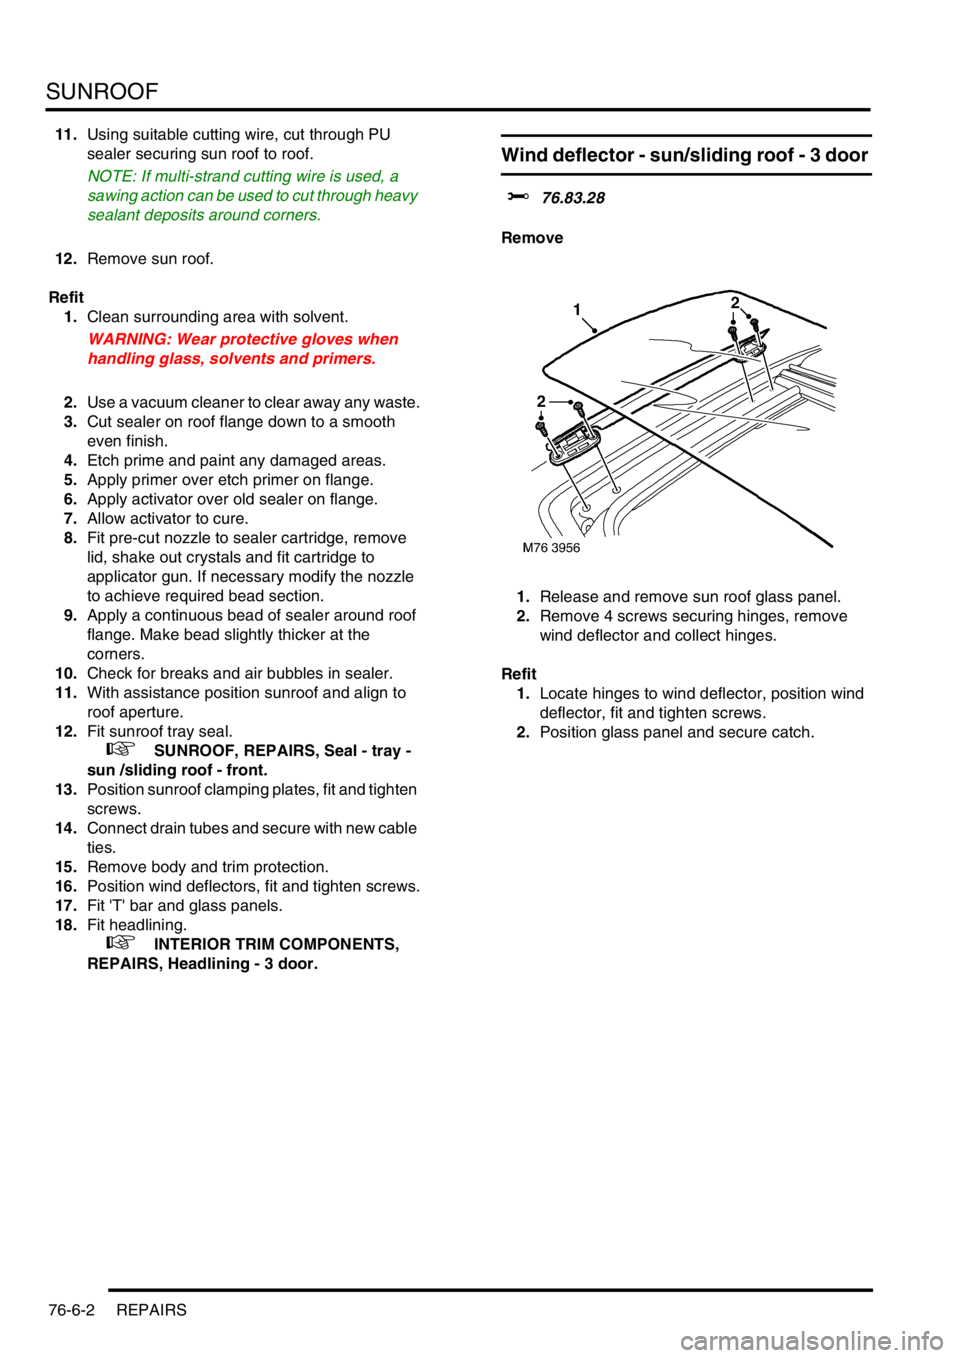
1.Release and remove sun roof glass panel.
2.Remove 4 screws securing hinges, remove
wind deflector and collect hinges.
Refit
1.Locate hinges to wind deflector, position wind
deflector, fit and tighten screws.
2.Position glass panel and secure catch.
Page 941 of 1007
LIGHTING
86-2-10 REPAIRS
Switch - hazard warning
$% 86.65.50
Remove
1.Remove radio.
+ IN CAR ENTERTAINMENT,
REPAIRS, Radio - up to 04MY.
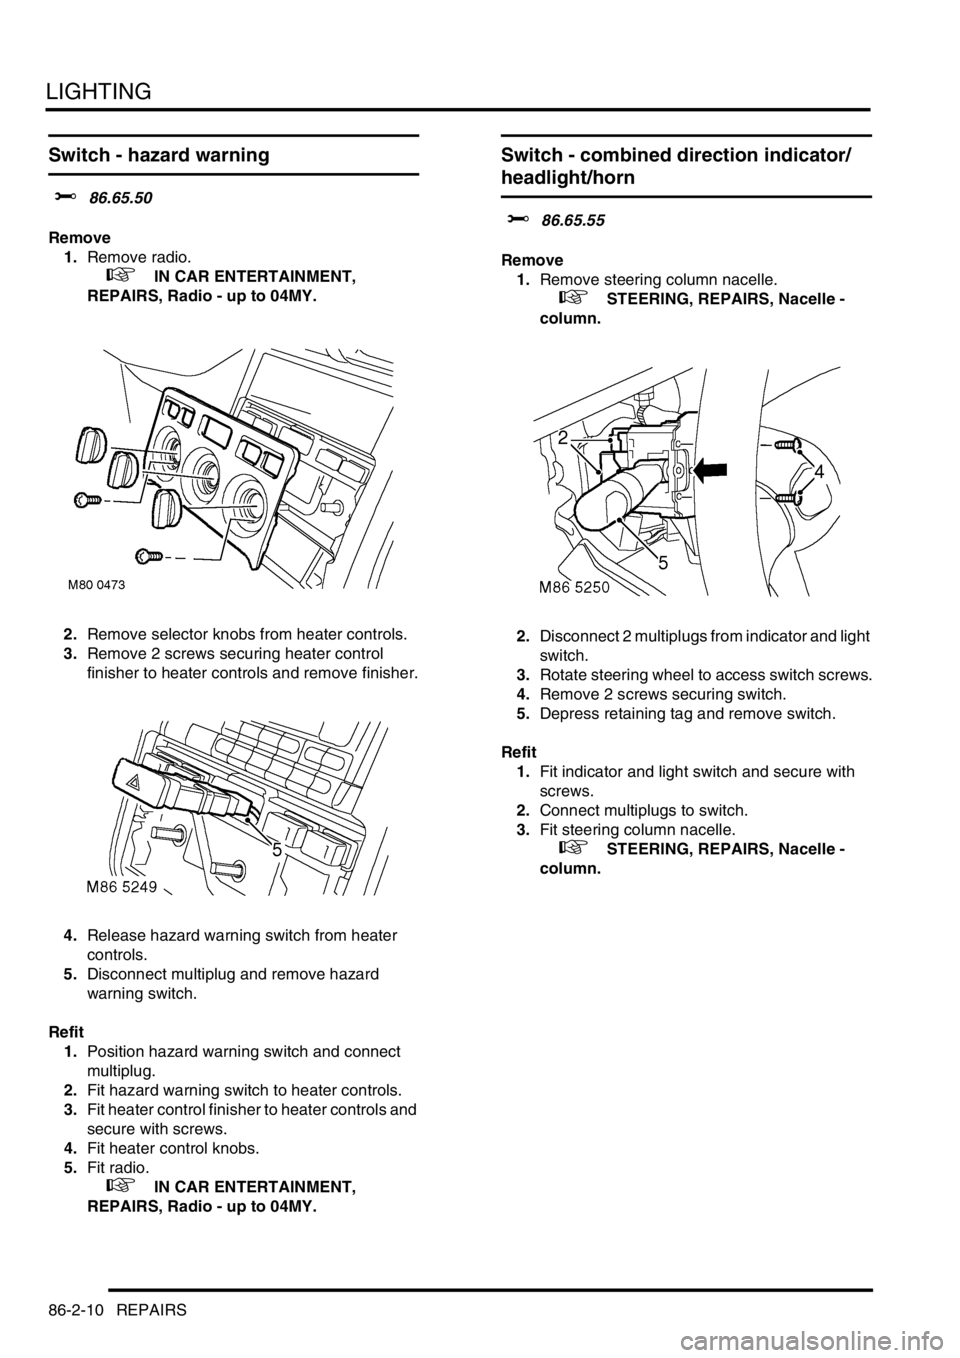
2.Remove selector knobs from heater controls.
3.Remove 2 screws securing heater control
finisher to heater controls and remove finisher.
4.Release hazard warning switch from heater
controls.
5.Disconnect multiplug and remove hazard
warning switch.
Refit
1.Position hazard warning switch and connect
multiplug.
2.Fit hazard warning switch to heater controls.
3.Fit heater control finisher to heater controls and
secure with screws.
4.Fit heater control knobs.
5.Fit radio.
+ IN CAR ENTERTAINMENT,
REPAIRS, Radio - up to 04MY.
Switch - combined direction indicator/
headlight/horn
$% 86.65.55
Remove
1.Remove steering column nacelle.
+ STEERING, REPAIRS, Nacelle -
column.
2.Disconnect 2 multiplugs from indicator and light
switch.
3.Rotate steering wheel to access switch screws.
4.Remove 2 screws securing switch.
5.Depress retaining tag and remove switch.
Refit
1.Fit indicator and light switch and secure with
screws.
2.Connect multiplugs to switch.
3.Fit steering column nacelle.
+ STEERING, REPAIRS, Nacelle -
column.
Page 995 of 1007
DRIVER CONTROLS
86-8-4 REPAIRS
Switch - hazard warning - from 04MY
$% 86.65.50
Remove
1.Remove fascia cup holder.
+ INTERIOR TRIM COMPONENTS,
REPAIRS, Cup holder - fascia - from 04MY.
2.Release hazard switch from fascia carrier.
3.Disconnect multiplug and remove hazard
warning switch.
Refit
1.Position hazard warning switch and connect
multiplug.
2.Fit switch to fascia carrier.
3.Fit fascia cup holder.
+ INTERIOR TRIM COMPONENTS,
REPAIRS, Cup holder - fascia - from 04MY.
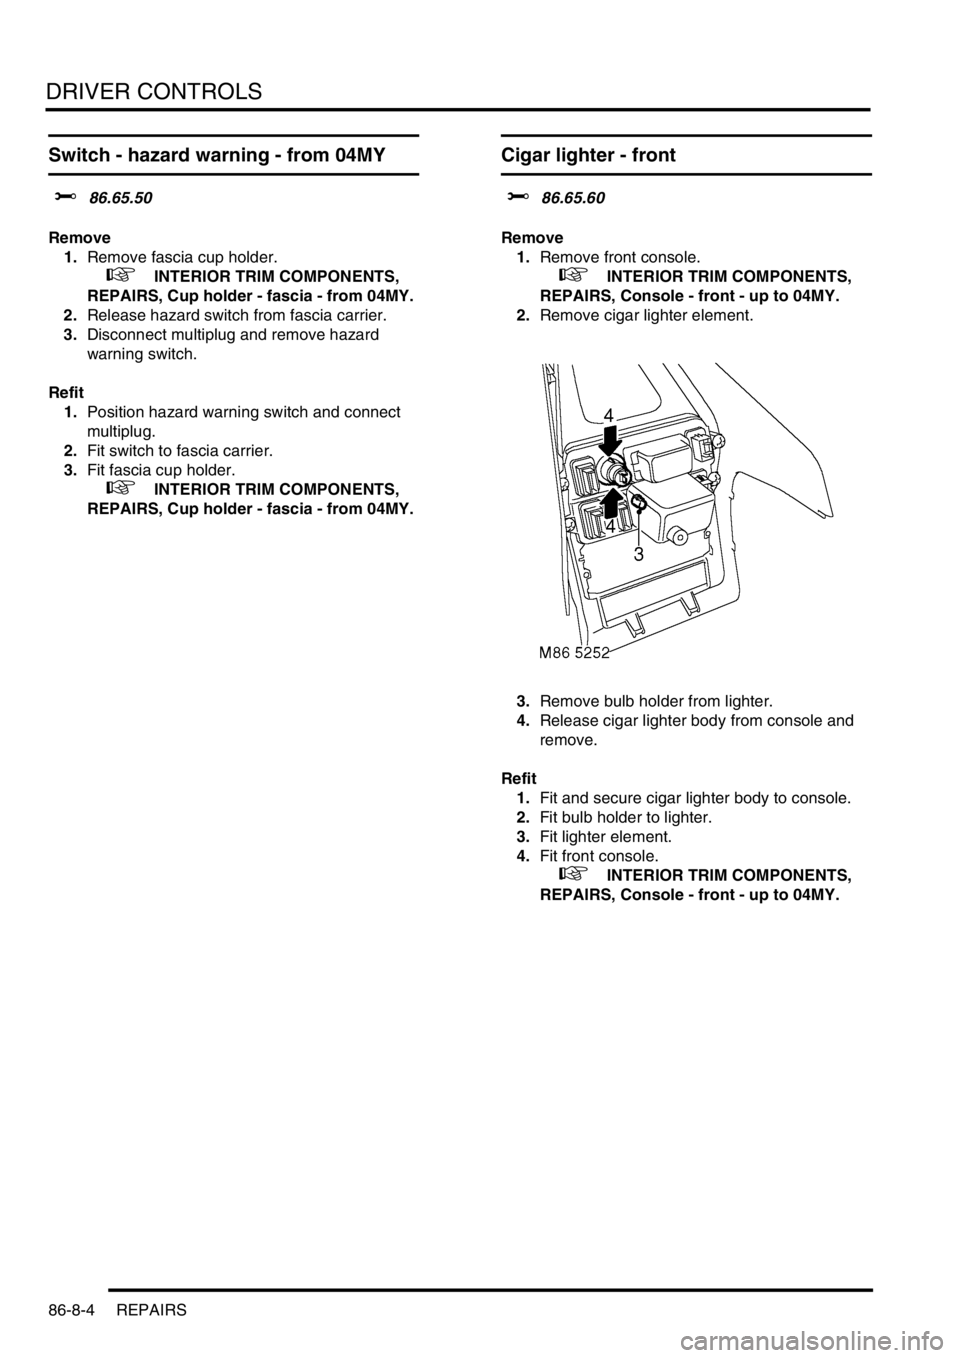
Cigar lighter - front
$% 86.65.60
Remove
1.Remove front console.
+ INTERIOR TRIM COMPONENTS,
REPAIRS, Console - front - up to 04MY.
2.Remove cigar lighter element.
3.Remove bulb holder from lighter.
4.Release cigar lighter body from console and
remove.
Refit
1.Fit and secure cigar lighter body to console.
2.Fit bulb holder to lighter.
3.Fit lighter element.
4.Fit front console.
+ INTERIOR TRIM COMPONENTS,
REPAIRS, Console - front - up to 04MY.