USB Lexus CT200h 2014 Navigation manual (in English)
[x] Cancel search | Manufacturer: LEXUS, Model Year: 2014, Model line: CT200h, Model: Lexus CT200h 2014Pages: 410, PDF Size: 42.88 MB
Page 9 of 410
1
2
3
4
5
6
7
9
CT200h_Navi_OM76113E_(EE)
13.12.06 15:15
8
6. TIPS FOR THE NAVIGATION
SYSTEM .......................................... 184
GPS (GLOBAL POSITIONING
SYSTEM).......................................... 184
MAP DATABASE VERSION
AND COVERED AREA .................. 187
1. BASIC OPERATION ........................ 192
QUICK REFERENCE ......................... 192
SOME BASICS ................................... 194
2. RADIO OPERATION ....................... 202
AM/FM/DAB RADIO ......................... 202
3. MEDIA OPERATION ....................... 209
CD ........................................................ 209
DVD..................................................... 215
USB MEMORY .................................. 222
iPod ...................................................... 230
Bluetooth
® AUDIO ............................. 237
AUX..................................................... 244
VTR ..................................................... 247
4. AUDIO/VISUAL REMOTE
CONTROLS .................................... 250
STEERING SWITCHES ..................... 250
5. SETUP ............................................... 253
AUDIO SETTINGS ............................ 253
6. TIPS FOR OPERATING THE
AUDIO/VISUAL SYSTEM ............ 263
OPERATING INFORMATION.......... 263
1. SPEECH COMMAND SYSTEM
OPERATION .................................. 280
SPEECH COMMAND SYSTEM........280
COMMAND LIST ...............................288
1. LEXUS PARKING ASSIST
MONITOR ...................................... 292
LEXUS PARKING ASSIST
MONITOR ........................................292
PERPENDICULAR PARKING
(ESTIMATED COURSE LINE
DISPLAY MODE) ............................299
PERPENDICULAR PARKING
(PARKING ASSIST GUIDE LINE
DISPLAY MODE) ............................301
PARALLEL PARKING ......................303
LEXUS PARKING ASSIST
MONITOR PRECAUTIONS ............312
THINGS YOU SHOULD KNOW.......317
4AUDIO/VISUAL SYSTEM
5SPEECH COMMAND
6PERIPHERAL MONITORING
SYSTEM
Page 23 of 410
23
2. QUICK REFERENCE
1
QUICK GUIDE
CT200h_Navi_OM76113E_(EE)
13.12.06 15:15
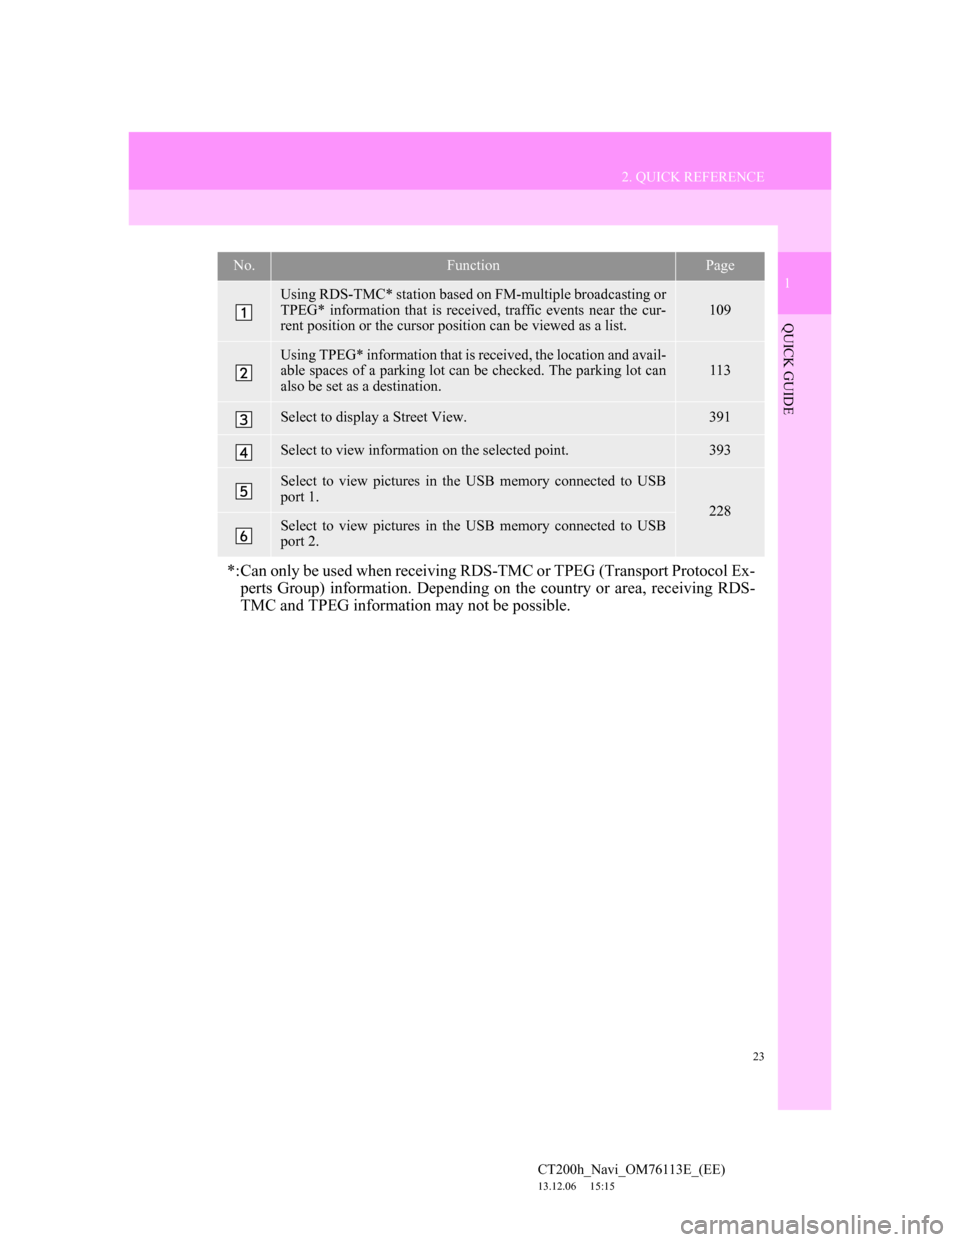
No.FunctionPage
Using RDS-TMC* station based on FM-multiple broadcasting or
TPEG* information that is received, traffic events near the cur-
rent position or the cursor position can be viewed as a list.
109
Using TPEG* information that is received, the location and avail-
able spaces of a parking lot can be checked. The parking lot can
also be set as a destination.113
Select to display a Street View. 391
Select to view information on the selected point. 393
Select to view pictures in the USB memory connected to USB
port 1.
228Select to view pictures in the USB memory connected to USB
port 2.
*:Can only be used when receiving RDS-TMC or TPEG (Transport Protocol Ex-
perts Group) information. Depending on the country or area, receiving RDS-
TMC and TPEG information may not be possible.
Page 79 of 410
79
3. OTHER SETTINGS
CT200h_Navi_OM76113E_(EE)
13.12.06 15:16
2
BASIC FUNCTION
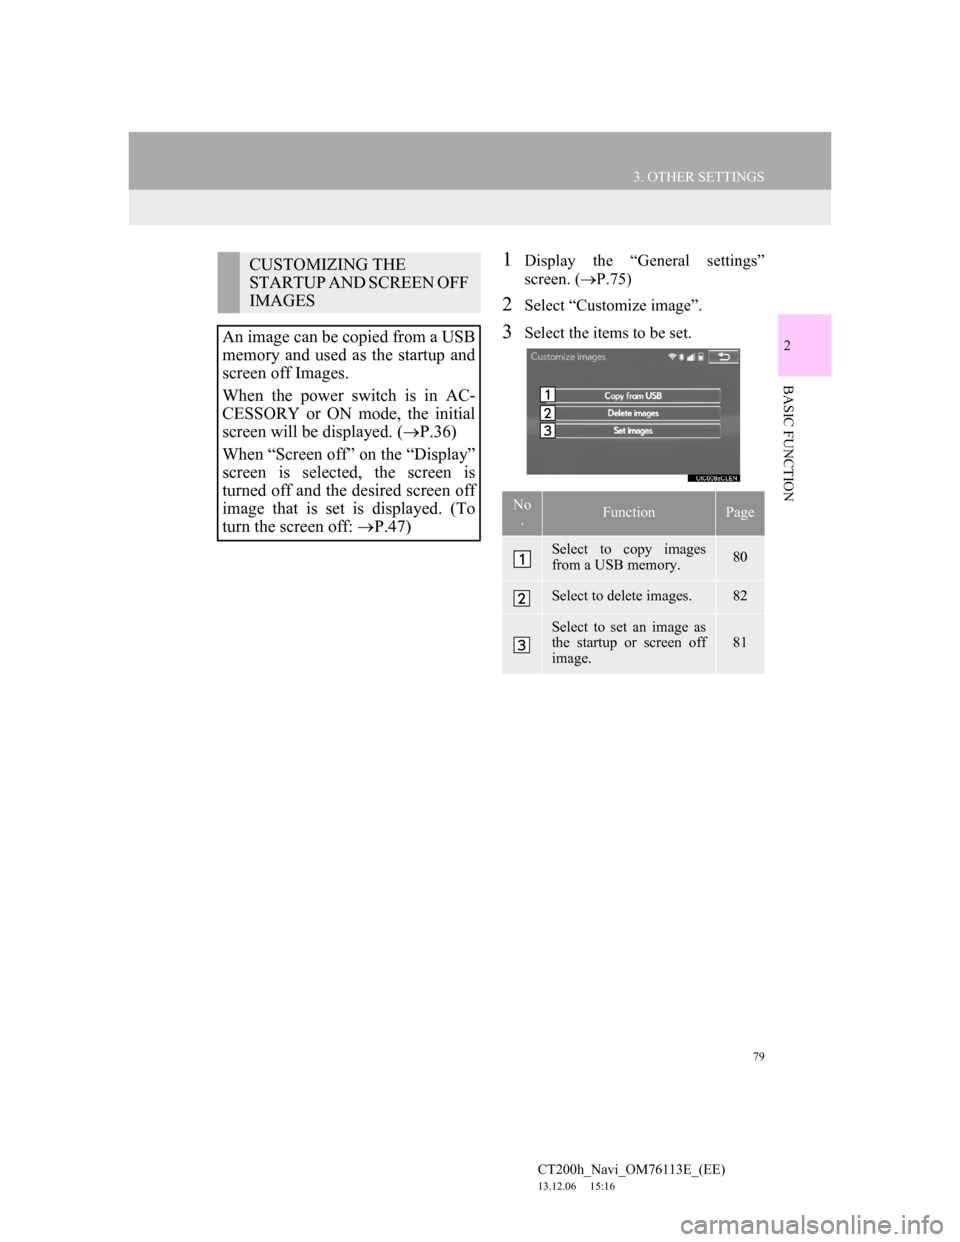
1Display the “General settings”
screen. (P.75)
2Select “Customize image”.
3Select the items to be set.
CUSTOMIZING THE
STARTUP AND SCREEN OFF
IMAGES
An image can be copied from a USB
memory and used as the startup and
screen off Images.
When the power switch is in AC-
CESSORY or ON mode, the initial
screen will be displayed. (P.36)
When “Screen off” on the “Display”
screen is selected, the screen is
turned off and the desired screen off
image that is set is displayed. (To
turn the screen off: P.47)
No
.FunctionPage
Select to copy images
from a USB memory.80
Select to delete images.82
Select to set an image as
the startup or screen off
image.
81
Page 80 of 410
80
3. OTHER SETTINGS
CT200h_Navi_OM76113E_(EE)
13.12.06 15:16
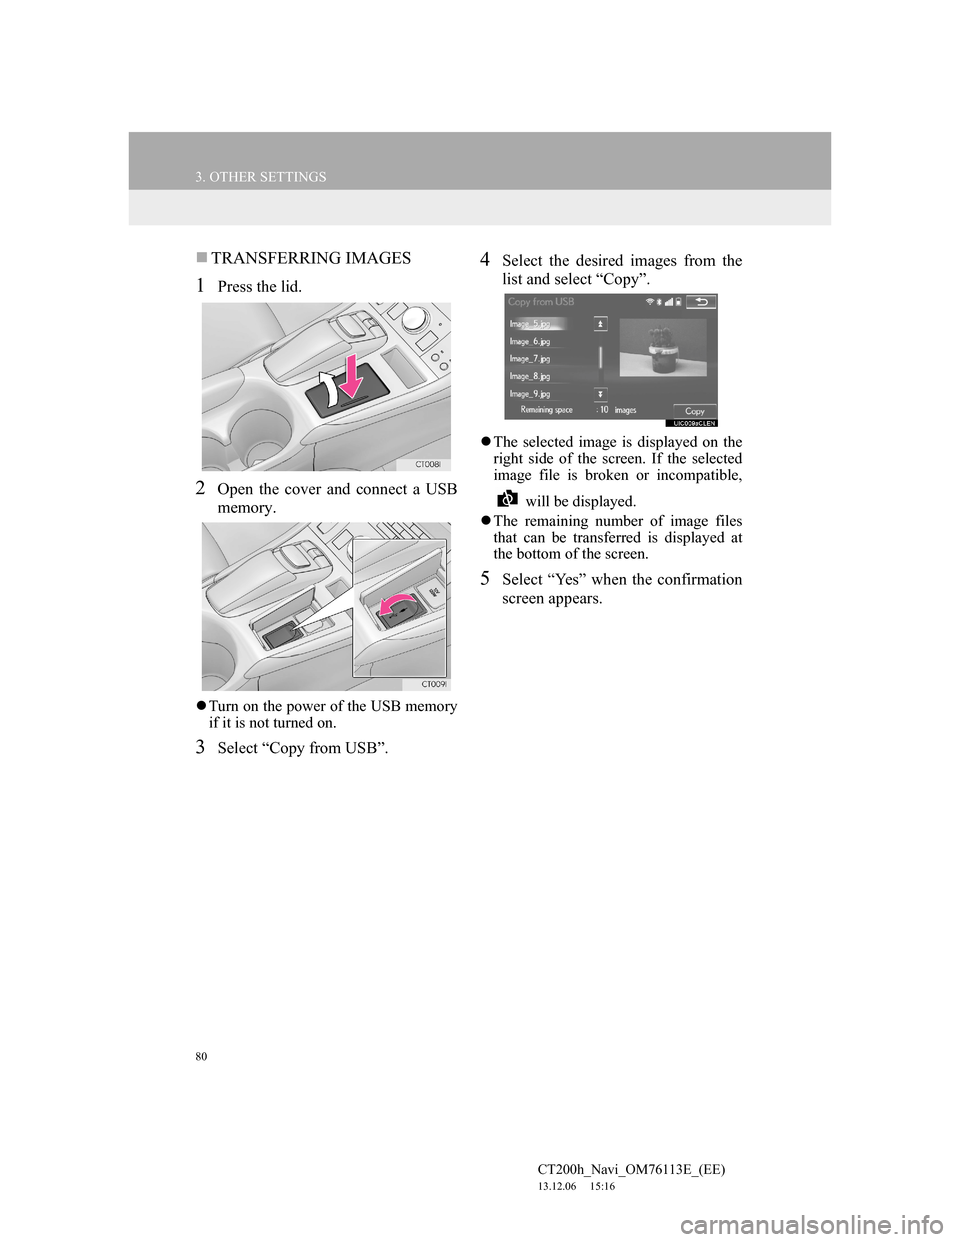
TRANSFERRING IMAGES
1Press the lid.
2Open the cover and connect a USB
memory.
Turn on the power of the USB memory
if it is not turned on.
3Select “Copy from USB”.
4Select the desired images from the
list and select “Copy”.
The selected image is displayed on the
right side of the screen. If the selected
image file is broken or incompatible,
will be displayed.
The remaining number of image files
that can be transferred is displayed at
the bottom of the screen.
5Select “Yes” when the confirmation
screen appears.
Page 81 of 410
81
3. OTHER SETTINGS
CT200h_Navi_OM76113E_(EE)
13.12.06 15:16
2
BASIC FUNCTION
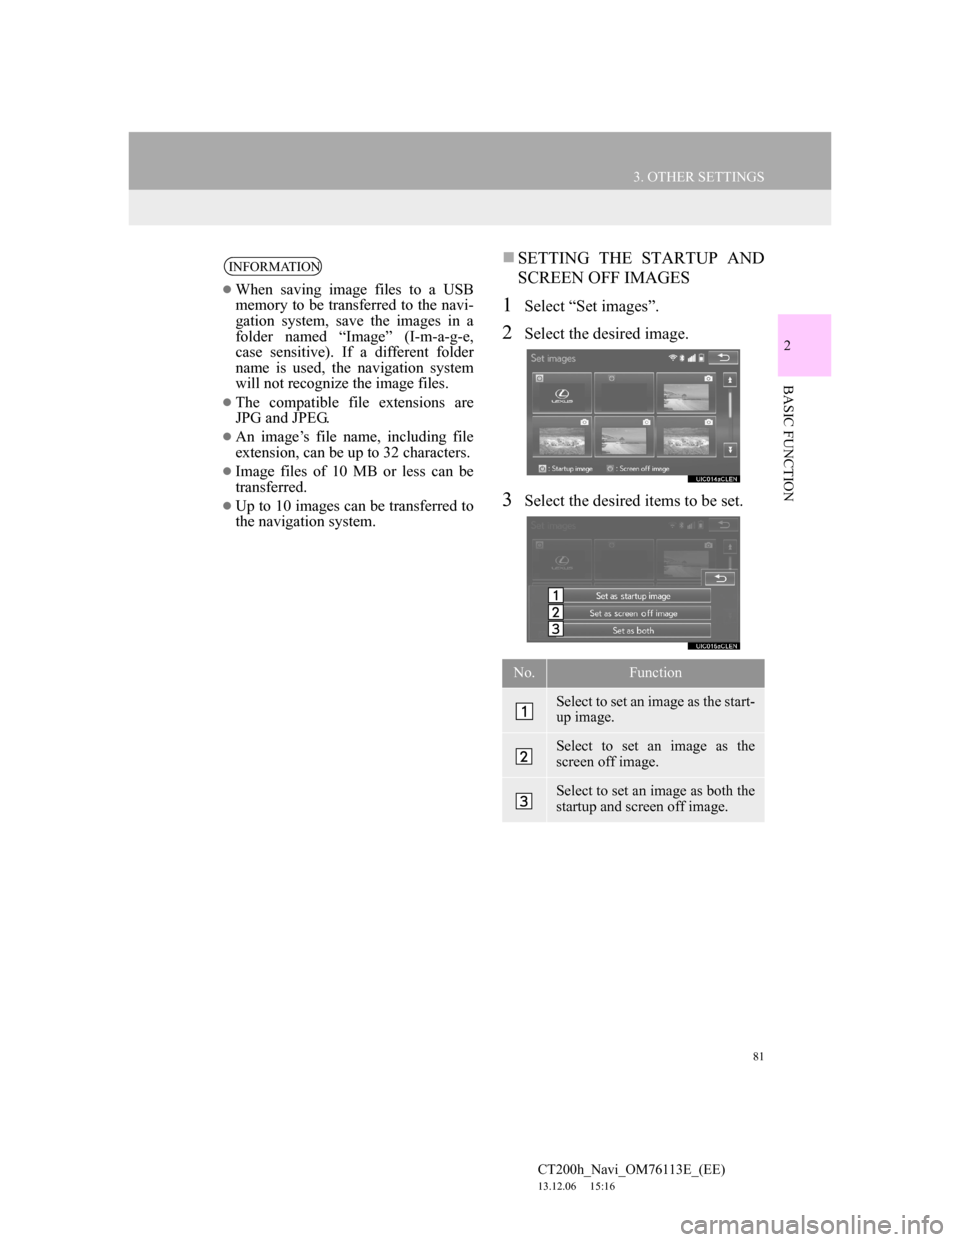
SETTING THE STARTUP AND
SCREEN OFF IMAGES
1Select “Set images”.
2Select the desired image.
3Select the desired items to be set.
INFORMATION
When saving image files to a USB
memory to be transferred to the navi-
gation system, save the images in a
folder named “Image” (I-m-a-g-e,
case sensitive). If a different folder
name is used, the navigation system
will not recognize the image files.
The compatible file extensions are
JPG and JPEG.
An image’s file name, including file
extension, can be up to 32 characters.
Image files of 10 MB or less can be
transferred.
Up to 10 images can be transferred to
the navigation system.
No.Function
Select to set an image as the start-
up image.
Select to set an image as the
screen off image.
Select to set an image as both the
startup and screen off image.
Page 91 of 410
91
1
2
3
4
5
6
7
CT200h_Navi_OM76113E_(EE)
13.12.06 15:16
8
1. MY MEMORY SETTINGS ............ 150
SETTING UP HOME ............................ 151
SETTING UP QUICK ACCESS ........... 153
SETTING UP MEMORY POINTS ....... 155
SETTING UP AREA TO AVOID ......... 162
SETTING UP ROUTE TRACE............. 165
BACKUP TO A USB MEMORY.......... 167
COPYING FROM A USB MEMORY .. 169
1. NAVIGATION SETTINGS ............ 170
NAVIGATION SETTINGS SCREEN .. 171
2. TRAFFIC AND PARKING
SETTINGS .................................... 175
TRAFFIC AND PARKING SETTINGS
SCREEN .............................................. 176
1. GPS (GLOBAL POSITIONING
SYSTEM)...................................... 184
LIMITATIONS OF THE NAVIGATION
SYSTEM .............................................. 184
2. MAP DATABASE VERSION
AND COVERED AREA .............. 187
MAP DATA............................................ 187
ABOUT THE MAP DATA .................... 188
4MY MEMORY
5SETUP
6TIPS FOR THE NAVIGATION
SYSTEM
Page 151 of 410
151
4. MY MEMORY
CT200h_Navi_OM76113E_(EE)
13.12.06 15:16
3
NAVIGATION SYSTEM
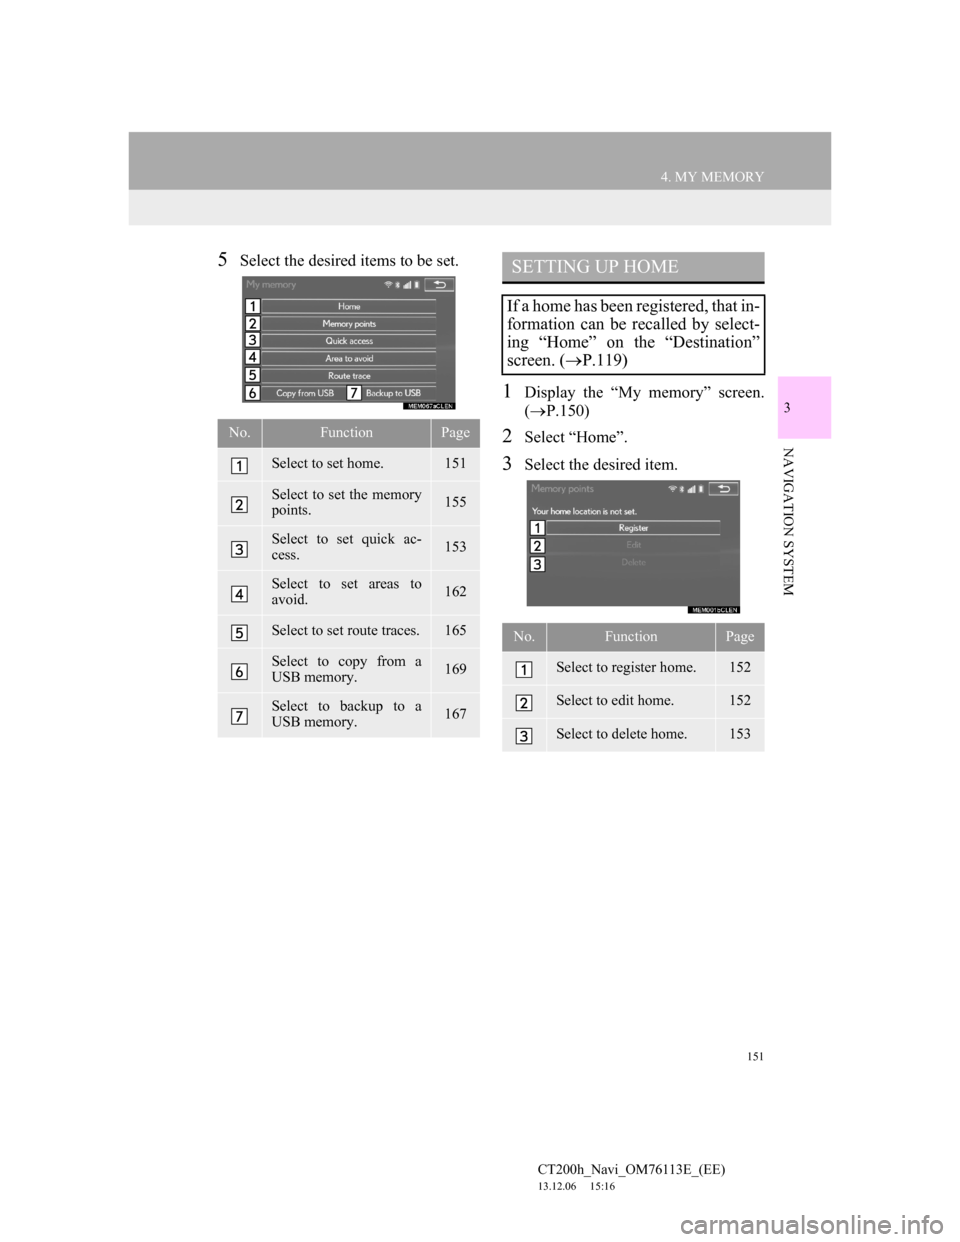
5Select the desired items to be set.
1Display the “My memory” screen.
(P.150)
2Select “Home”.
3Select the desired item.
No.FunctionPage
Select to set home.151
Select to set the memory
points.155
Select to set quick ac-
cess.153
Select to set areas to
avoid.162
Select to set route traces.165
Select to copy from a
USB memory.169
Select to backup to a
USB memory.167
SETTING UP HOME
If a home has been registered, that in-
formation can be recalled by select-
ing “Home” on the “Destination”
screen. (P.119)
No.FunctionPage
Select to register home.152
Select to edit home.152
Select to delete home.153
Page 167 of 410
167
4. MY MEMORY
CT200h_Navi_OM76113E_(EE)
13.12.06 15:16
3
NAVIGATION SYSTEM
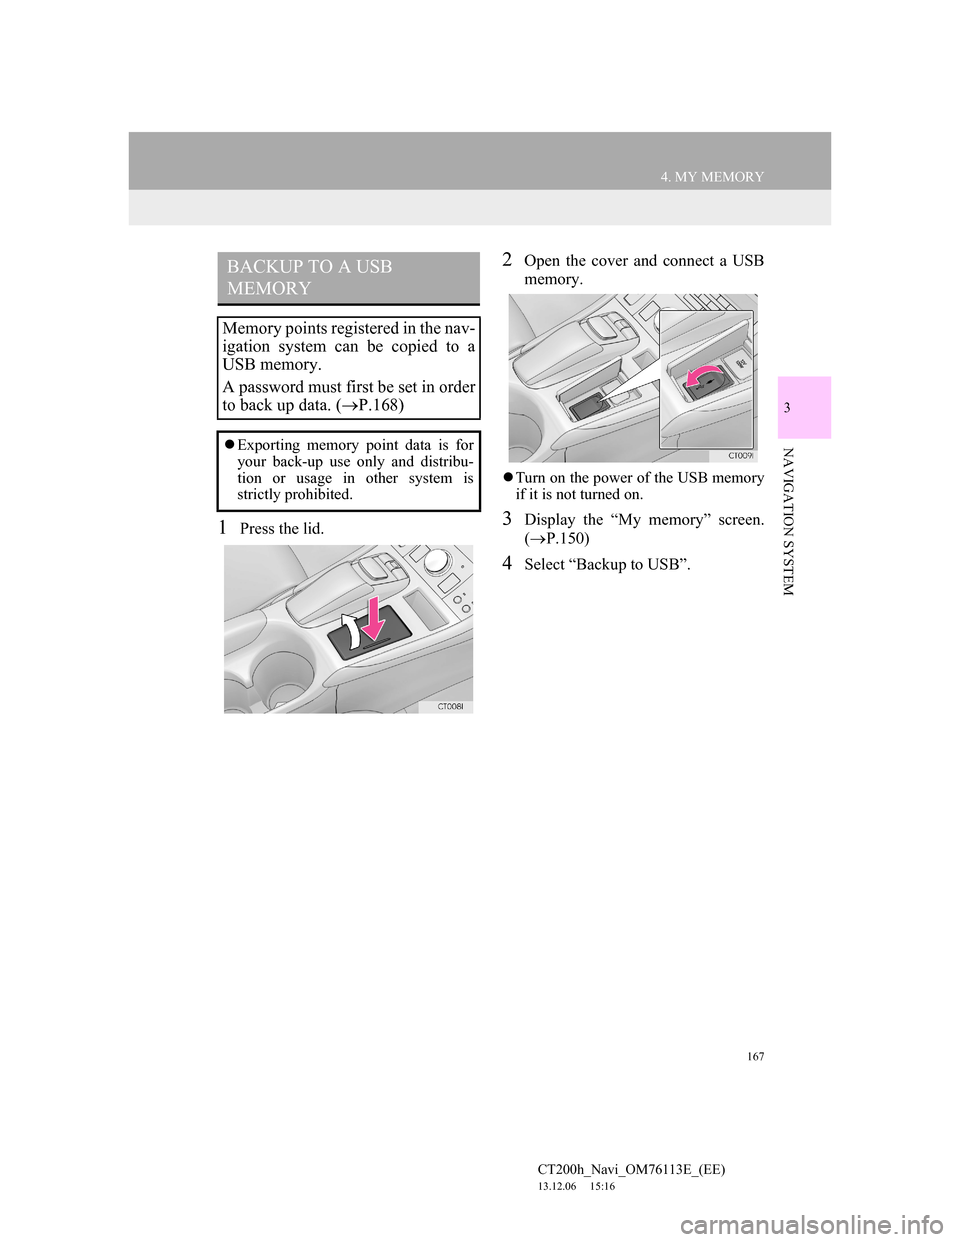
1Press the lid.
2Open the cover and connect a USB
memory.
Turn on the power of the USB memory
if it is not turned on.
3Display the “My memory” screen.
(P.150)
4Select “Backup to USB”.
BACKUP TO A USB
MEMORY
Memory points registered in the nav-
igation system can be copied to a
USB memory.
A password must first be set in order
to back up data. (P.168)
Exporting memory point data is for
your back-up use only and distribu-
tion or usage in other system is
strictly prohibited.
Page 168 of 410
168
4. MY MEMORY
CT200h_Navi_OM76113E_(EE)
13.12.06 15:16
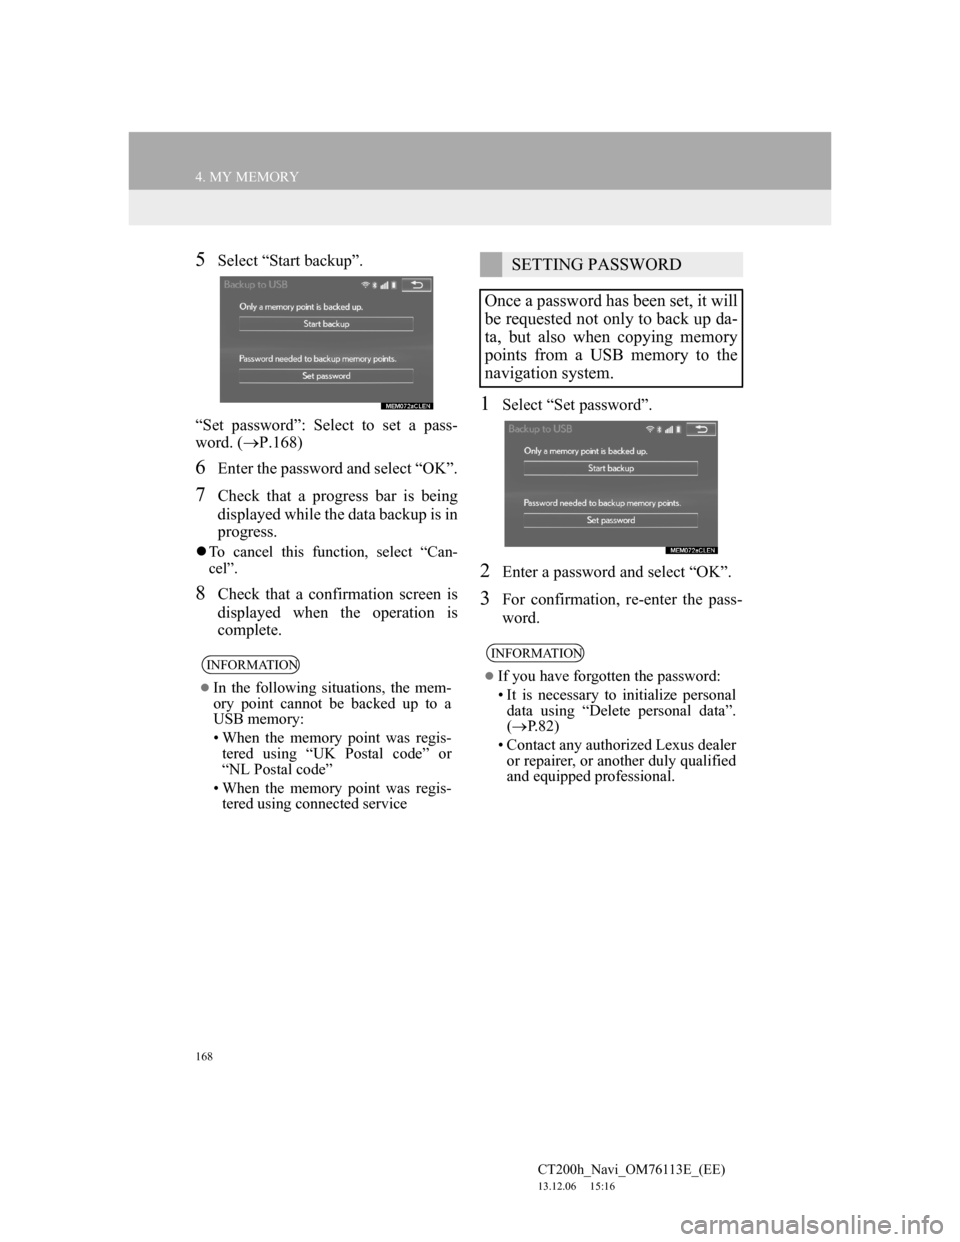
5Select “Start backup”.
“Set password”: Select to set a pass-
word. (P.168)
6Enter the password and select “OK”.
7Check that a progress bar is being
displayed while the data backup is in
progress.
To cancel this function, select “Can-
cel”.
8Check that a confirmation screen is
displayed when the operation is
complete.
1Select “Set password”.
2Enter a password and select “OK”.
3For confirmation, re-enter the pass-
word.
INFORMATION
In the following situations, the mem-
ory point cannot be backed up to a
USB memory:
• When the memory point was regis-
tered using “UK Postal code” or
“NL Postal code”
• When the memory point was regis-
tered using connected service
SETTING PASSWORD
Once a password has been set, it will
be requested not only to back up da-
ta, but also when copying memory
points from a USB memory to the
navigation system.
INFORMATION
If you have forgotten the password:
• It is necessary to initialize personal
data using “Delete personal data”.
(P.82)
• Contact any authorized Lexus dealer
or repairer, or another duly qualified
and equipped professional.
Page 169 of 410
169
4. MY MEMORY
CT200h_Navi_OM76113E_(EE)
13.12.06 15:16
3
NAVIGATION SYSTEM
1Display the “My memory” screen.
(P.150)
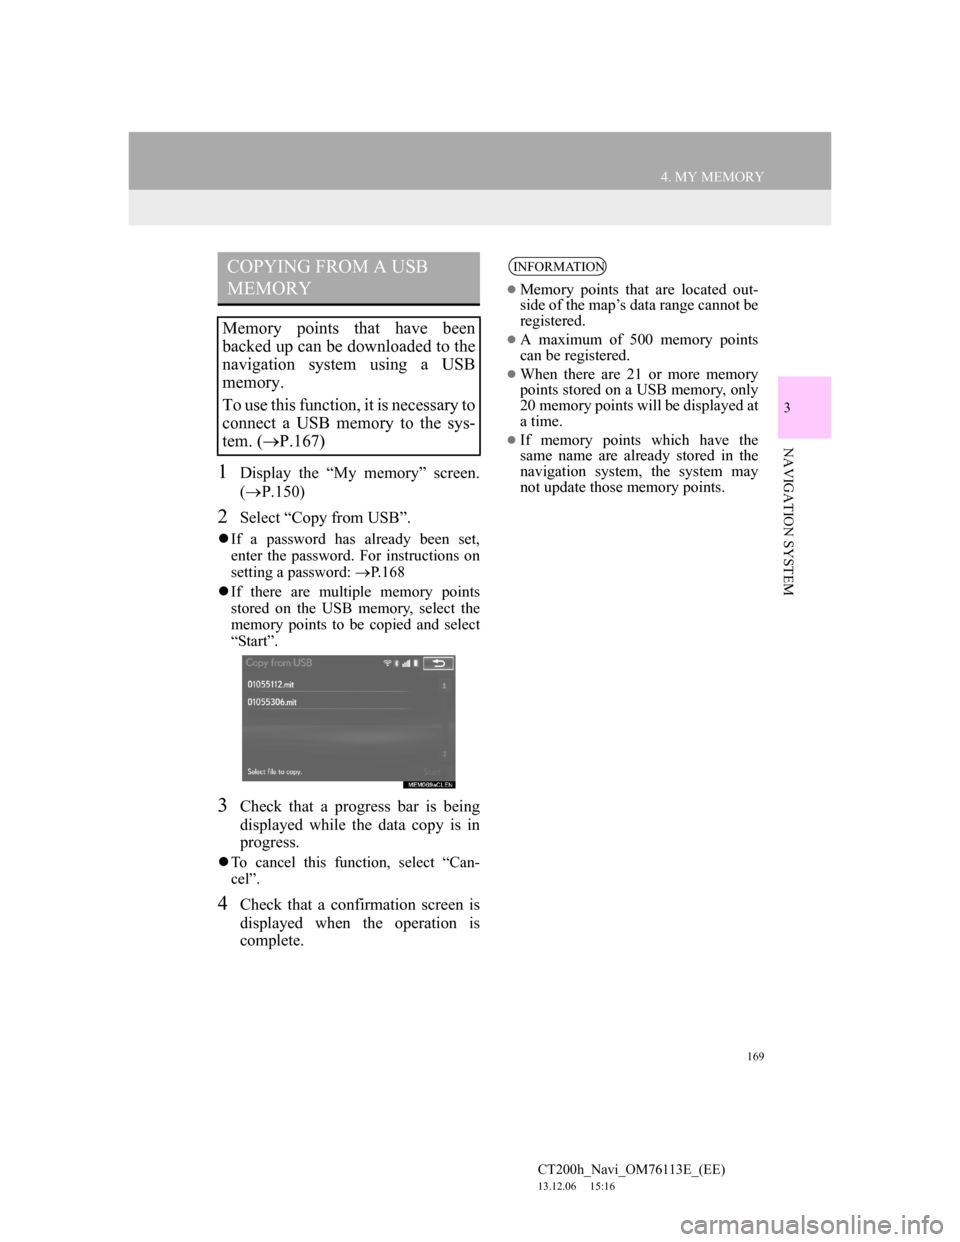
2Select “Copy from USB”.
If a password has already been set,
enter the password. For instructions on
setting a password: P.168
If there are multiple memory points
stored on the USB memory, select the
memory points to be copied and select
“Start”.
3Check that a progress bar is being
displayed while the data copy is in
progress.
To cancel this function, select “Can-
cel”.
4Check that a confirmation screen is
displayed when the operation is
complete.
COPYING FROM A USB
MEMORY
Memory points that have been
backed up can be downloaded to the
navigation system using a USB
memory.
To use this function, it is necessary to
connect a USB memory to the sys-
tem. (P.167)
INFORMATION
Memory points that are located out-
side of the map’s data range cannot be
registered.
A maximum of 500 memory points
can be registered.
When there are 21 or more memory
points stored on a USB memory, only
20 memory points will be displayed at
a time.
If memory points which have the
same name are already stored in the
navigation system, the system may
not update those memory points.