Lexus GS450h 2010 Using The Audio System / LEXUS 2010 GS450H (OM30C81U) Workshop Manual
GS450h 2010
Lexus
Lexus
https://www.carmanualsonline.info/img/36/15358/w960_15358-0.png
Lexus GS450h 2010 Using The Audio System / LEXUS 2010 GS450H (OM30C81U) Workshop Manual
Page 257 of 644
257
3-1. Using the touch screen
3
Interior features
GS_HV_U (OM30C81U)
January 28, 2010 10:42 am
●Changing the passcode
Touch “Edit”.
Enter the desired passcode.
The passcode can be between 4 and 8 characters in length, and is set
to “0000” by default.
●Changing the device name
Touch “Edit”.
Enter the desired name.
●Restoring the default settings
Touch “Default”.
A confirmation screen will be displayed, touch “Yes” to restore
the default settings.
■When setting the connection method to “From Portable Player”
●Connection methods differ depending on the audio player. Consult your audio
player’s manual.
●Automatic connection cannot be set to “On”.
■When using Bluetooth® audio
A confirmation screen will be displayed if an attempt is made to remove a portable
player.
Touch “Yes” to disconnect and remove the player.
STEP1
STEP2
STEP1
STEP2
STEP1
STEP2
Page 258 of 644
258
3-1. Using the touch screen
GS_HV_U (OM30C81U)
January 28, 2010 10:42 am
Vehicle settings
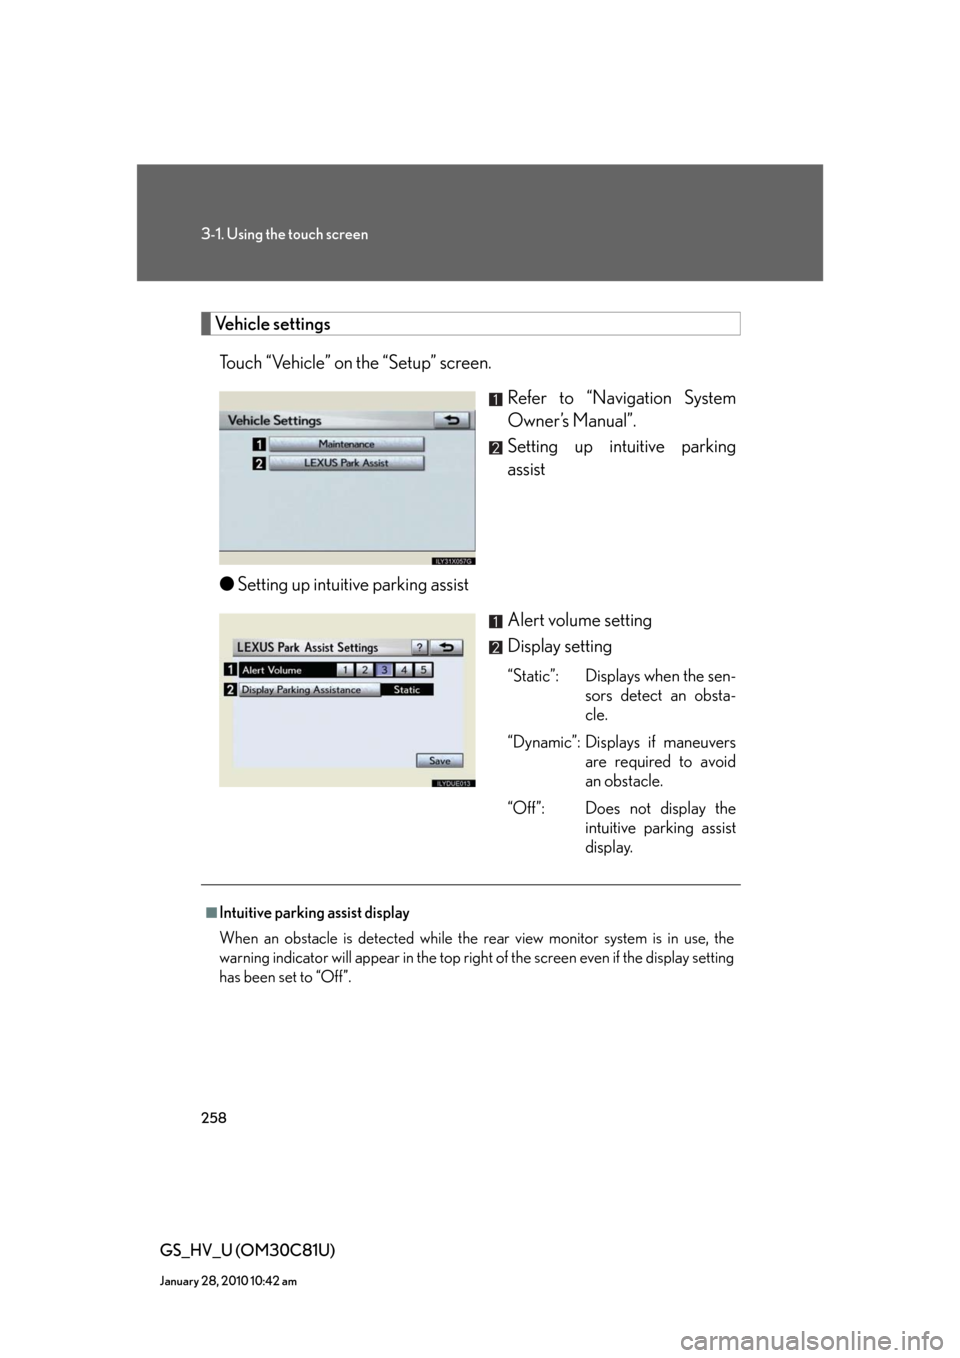
Touch “Vehicle” on the “Setup” screen.
Refer to “Navigation System
Owner’s Manual”.
Setting up intuitive parking
assist
●Setting up intuitive parking assist
Alert volume setting
Display setting
“Static”: Displays when the sen-
sors detect an obsta-
cle.
“Dynamic”: Displays if maneuvers
are required to avoid
an obstacle.
“Off”: Does not display the
intuitive parking assist
display.
■Intuitive parking assist display
When an obstacle is detected while the rear view monitor system is in use, the
warning indicator will appear in the top right of the screen even if the display setting
has been set to “Off”.
Page 259 of 644
259
3
Interior features
GS_HV_U (OM30C81U)
October 13, 2015 12:41 pm
3-2. Using the air conditioning system and defogger
Automatic air conditioning system
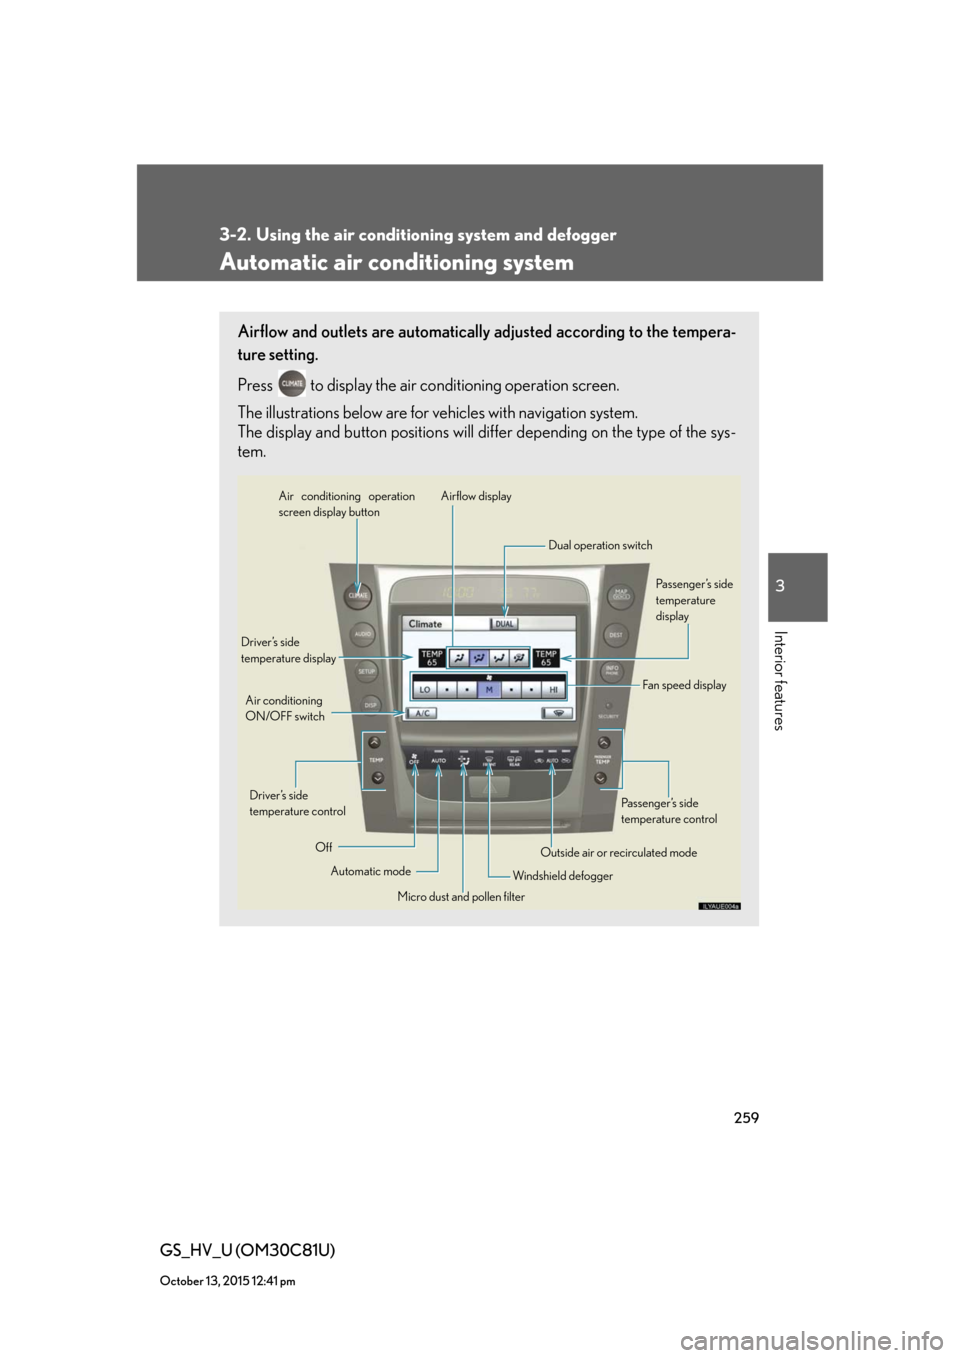
Airflow and outlets are automatically adjusted according to the tempera-
ture setting.
Press
to display the air conditioning operation screen.
The illustrations below are for vehicles with navigation system.
The display and button positions will differ depending on the type of the sys-
tem.
Automatic mode Driver’s side
temperature display
Fan speed display
OffAirflow display Air conditioning operation
screen display button
Passenger’s side
temperature
display
Micro dust and pollen filter Driver’s side
temperature control Air conditioning
ON/OFF switch
Outside air or recirculated mode
Windshield defoggerPassenger’s side
temperature control Dual operation switch
Page 270 of 644
270
GS_HV_U (OM30C81U)
January 28, 2010 1:22 pm
3-3. Using the audio system
Audio system type
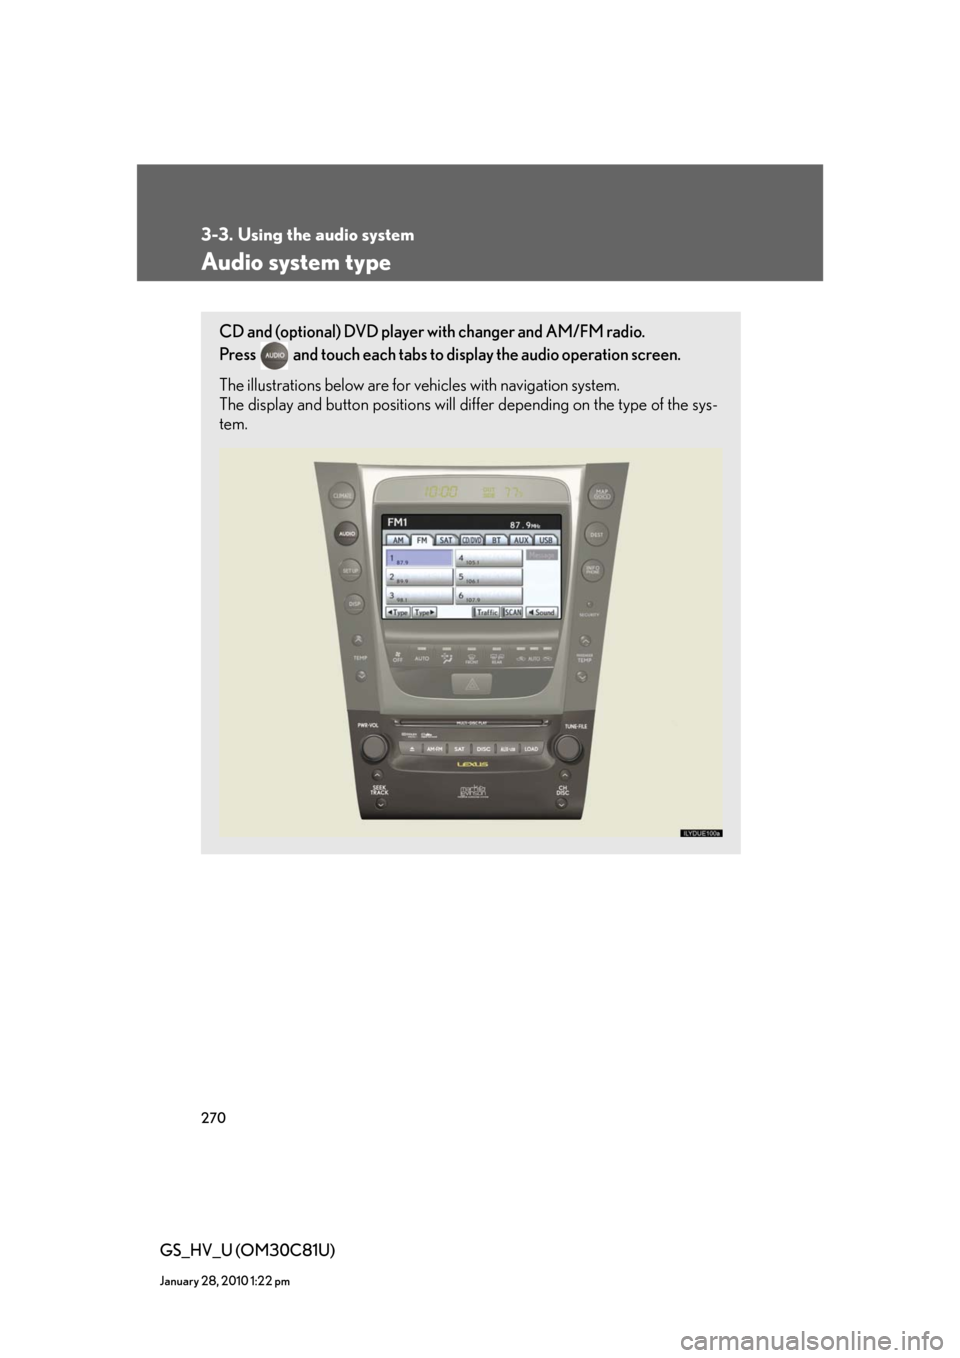
CD and (optional) DVD player with changer and AM/FM radio.
Press
and touch each tabs to display the audio operation screen.
The illustrations below are for vehicles with navigation system.
The display and button positions will differ depending on the type of the sys-
tem.
Page 273 of 644
273
3-3. Using the audio system
3
Interior features
GS_HV_U (OM30C81U)
January 28, 2010 1:22 pm
Using the radio
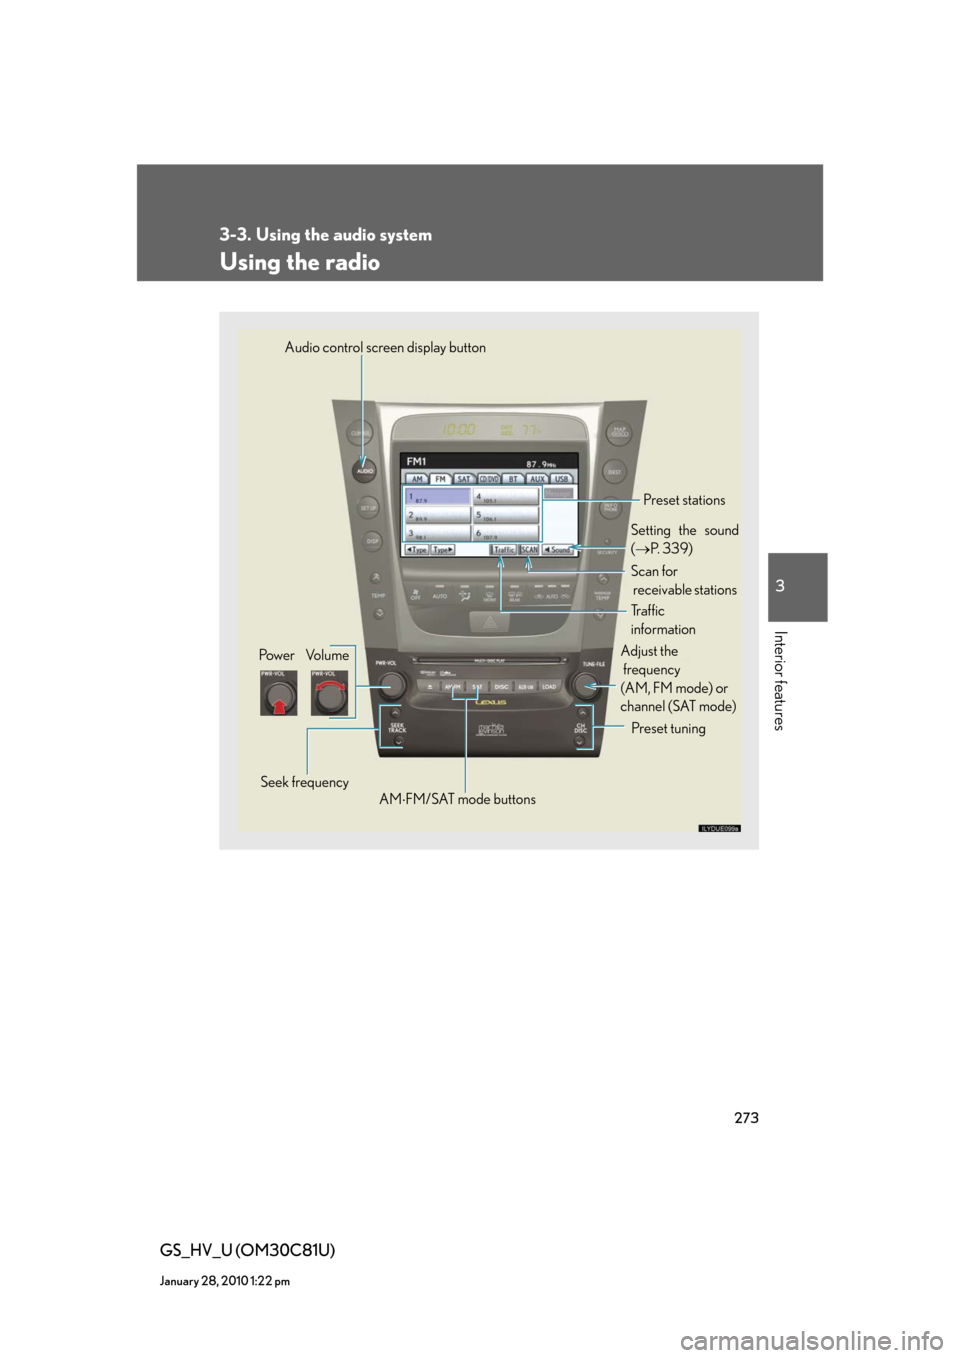
Audio control screen display button
Pow e r Vo l u m e
Seek frequencyPreset tuning Adjust the
frequency
(AM, FM mode) or
channel (SAT mode)
AMFM/SAT mode buttonsPreset stations
Setting the sound
(P. 3 3 9 )
Scan for
receivable stations
Tr a f f i c
information
Page 276 of 644
276
3-3. Using the audio system
GS_HV_U (OM30C81U)
January 28, 2010 1:22 pm
Touch “Type Seek” on the screen.
The radio seeks or scans for stations by the relevant program type.
If no radio station of that type is found, “Nothing” appears on the screen.
■Displaying radio text messages
If “Message” appears on the screen, a text message may be displayed.
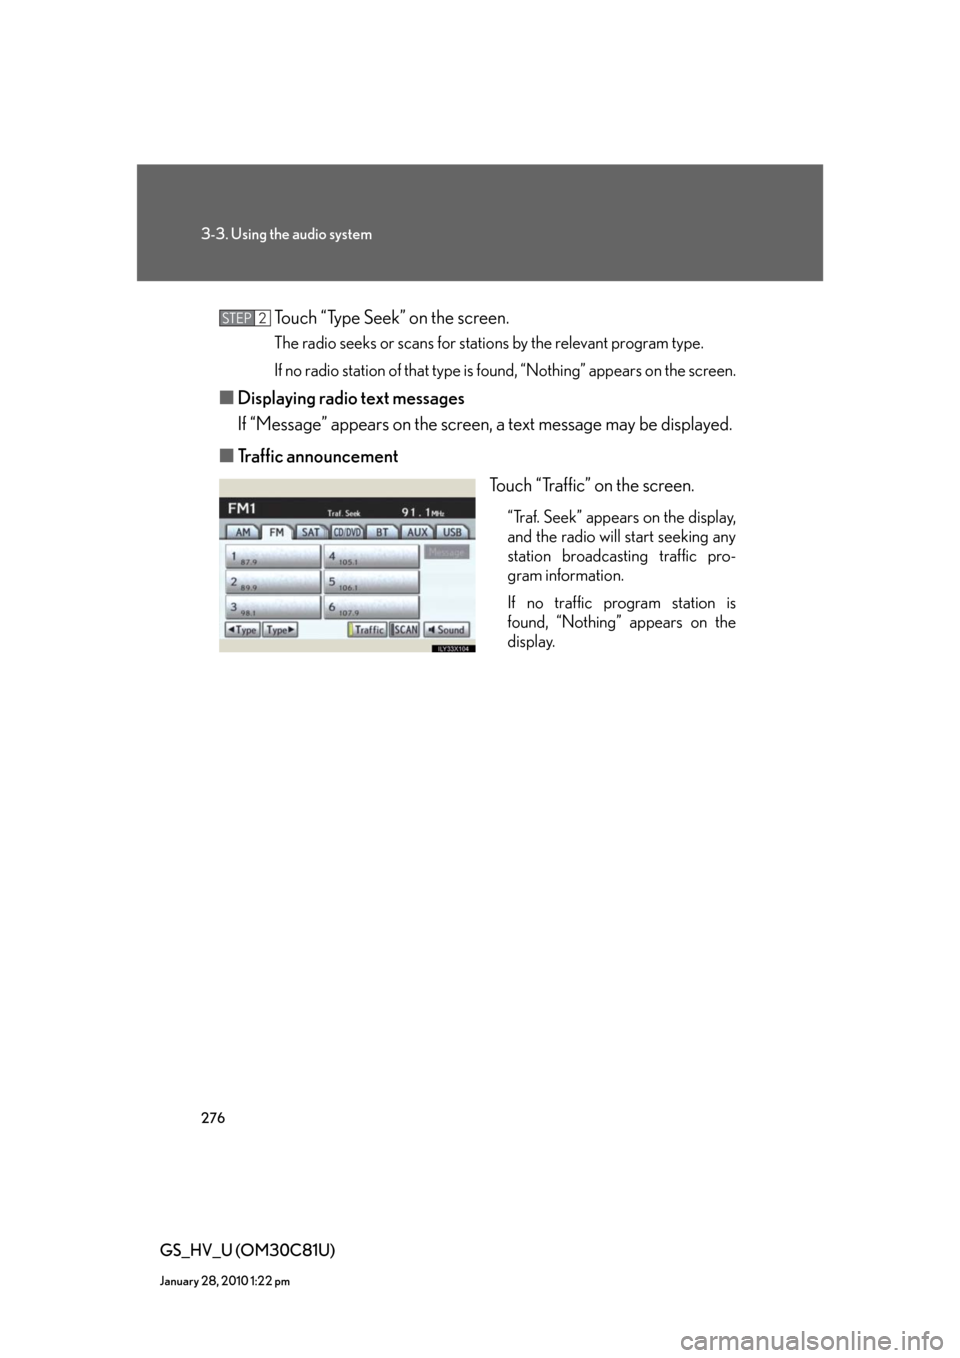
■Traffic announcement
Touch “Traffic” on the screen.
“Traf. Seek” appears on the display,
and the radio will start seeking any
station broadcasting traffic pro-
gram information.
If no traffic program station is
found, “Nothing” appears on the
display.
STEP2
Page 277 of 644
277
3-3. Using the audio system
3
Interior features
GS_HV_U (OM30C81U)
January 28, 2010 1:22 pm
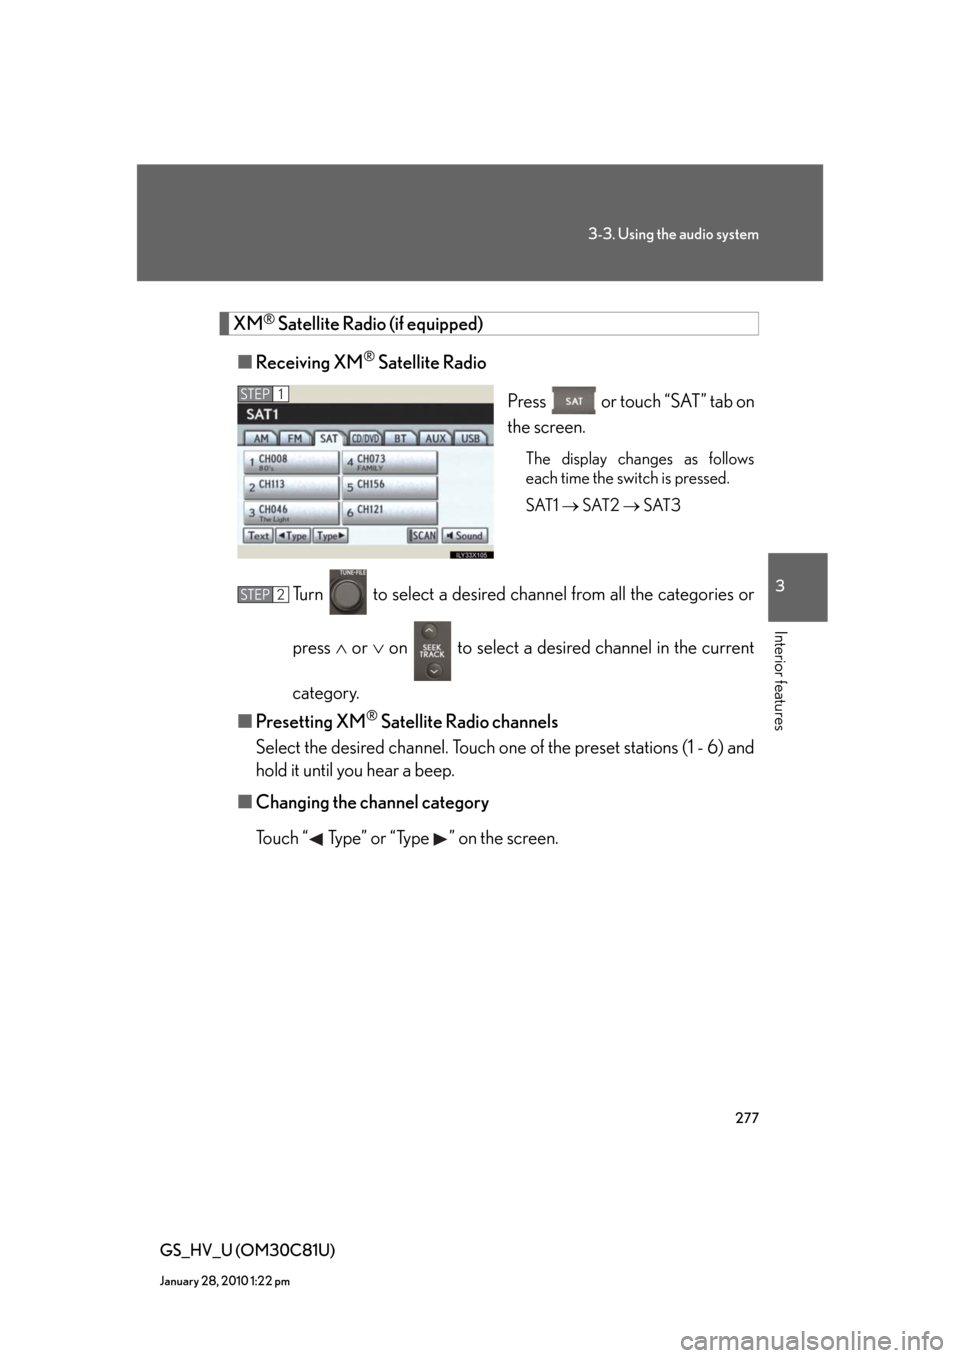
XM® Satellite Radio (if equipped)
■Receiving XM
® Satellite Radio
Press or touch “SAT” tab on
the screen.
The display changes as follows
each time the switch is pressed.
SAT1 SAT2 SAT3
Turn to select a desired channel from all the categories or
press or on to select a desired channel in the current
category.
■Presetting XM
® Satellite Radio channels
Select the desired channel. Touch one of the preset stations (1 - 6) and
hold it until you hear a beep.
■Changing the channel category
Touch “ Type” or “Type ” on the screen.
STEP1
STEP2
Page 278 of 644
278
3-3. Using the audio system
GS_HV_U (OM30C81U)
January 28, 2010 1:22 pm
■Scanning XM® Satellite Radio channels
●Scanning channels in the current category
Touch “SCAN” on the screen.
“SCAN” appears on the screen.
When the desired channel is reached, touch “SCAN” once
again.
●Scanning preset channels
Touch “SCAN” on the screen and hold it until you hear a
beep.
“PSCAN” appears on the screen.
When the desired channel is reached, touch “SCAN” once
again.
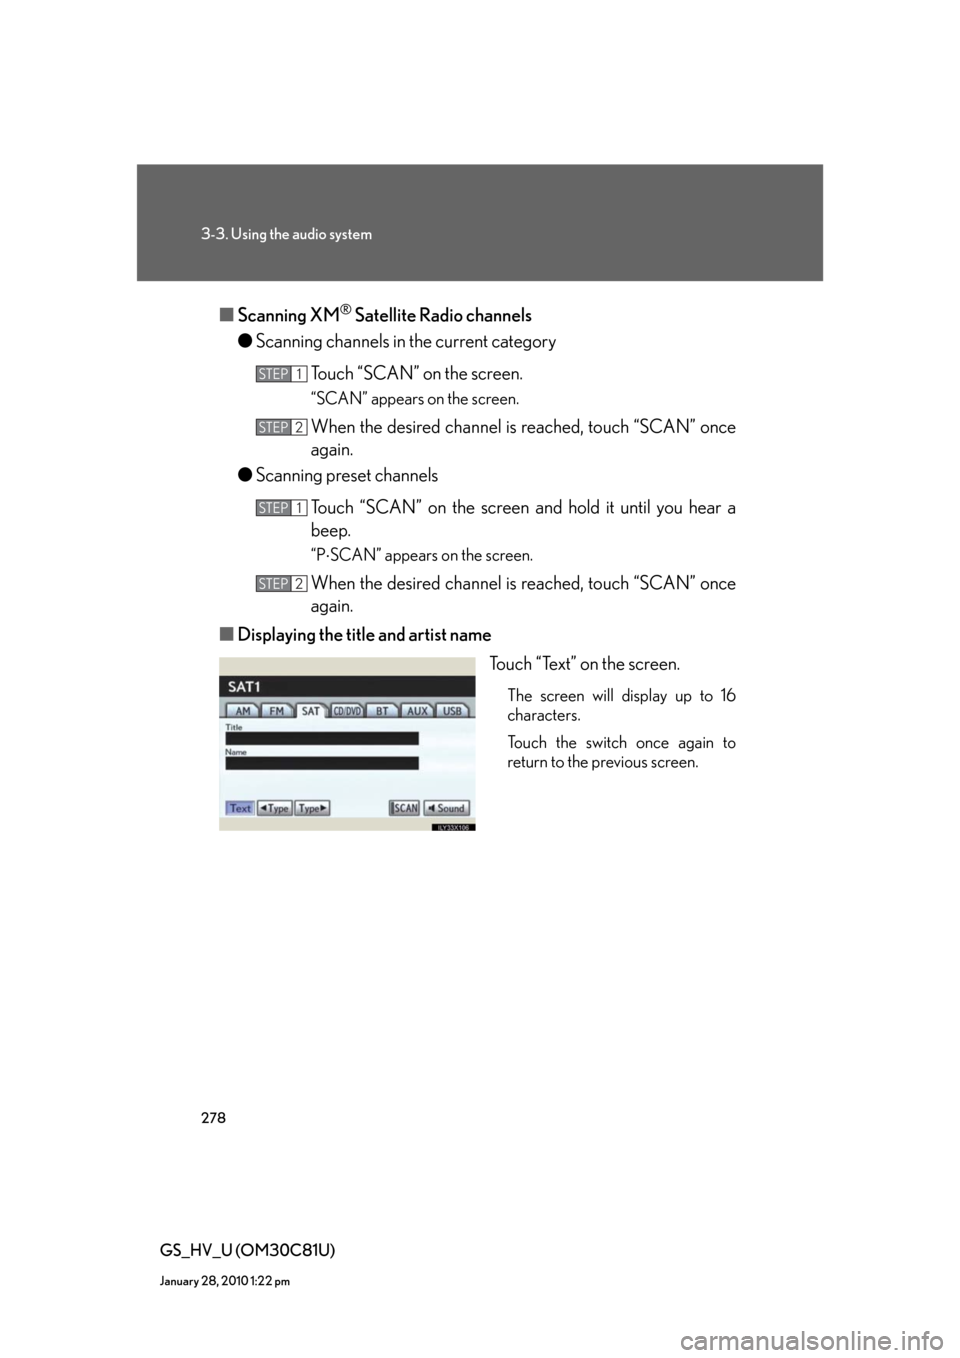
■Displaying the title and artist name
Touch “Text” on the screen.
The screen will display up to 16
characters.
Touch the switch once again to
return to the previous screen.
STEP1
STEP2
STEP1
STEP2
Page 282 of 644
282
3-3. Using the audio system
GS_HV_U (OM30C81U)
January 28, 2010 1:22 pm
Using the CD/DVD player
Select discDisc slot Disc selection
Po w e r Vo l u m e
Disc eject
Playback Track selection
Disc load Audio/video control screen display button
Setting the sound
(P. 3 3 9 )
Page 284 of 644
284
3-3. Using the audio system
GS_HV_U (OM30C81U)
January 28, 2010 1:22 pm
Selecting a disc
■To select a disc to play
Touch “Change Discs” on the screen.
Touch the desired disc on the
screen or press or on .
STEP1
STEP2
■When loading a disc
If you do not insert a disc within 15 seconds, loading will be canceled automatically.
■Vehicles with DVD player
This screen appears when the video screen is
first displayed after the “POWER” switch in
ACCESSORY or ON mode.

