LEXUS LS430 2006 Owners Manual
LS430 2006
LEXUS
LEXUS
https://www.carmanualsonline.info/img/36/57996/w960_57996-0.png
LEXUS LS430 2006 Owners Manual
Trending: transmission fluid, jump start, wiper size, brakes, clock, fuel fill door release, clock reset
Page 241 of 419
225
3-5. Other interior features
3
Interior features
Sunshades
■Rear power sunshade operating conditions
The ignition switch must be in the ON position
■Automatic operation
●When the transmission selector lever is shifted into the “R” position while the
sunshade is up, the sunshade will be automatically lowered.
●To raise the sunshade again, perform any of the following operations:
• Shift the transmission selector lever in “P” position
• Push the switch again
• Move the transmission selector lever out of
“R” position and drive your vehi-
cle over 9 mph (15 km/h)
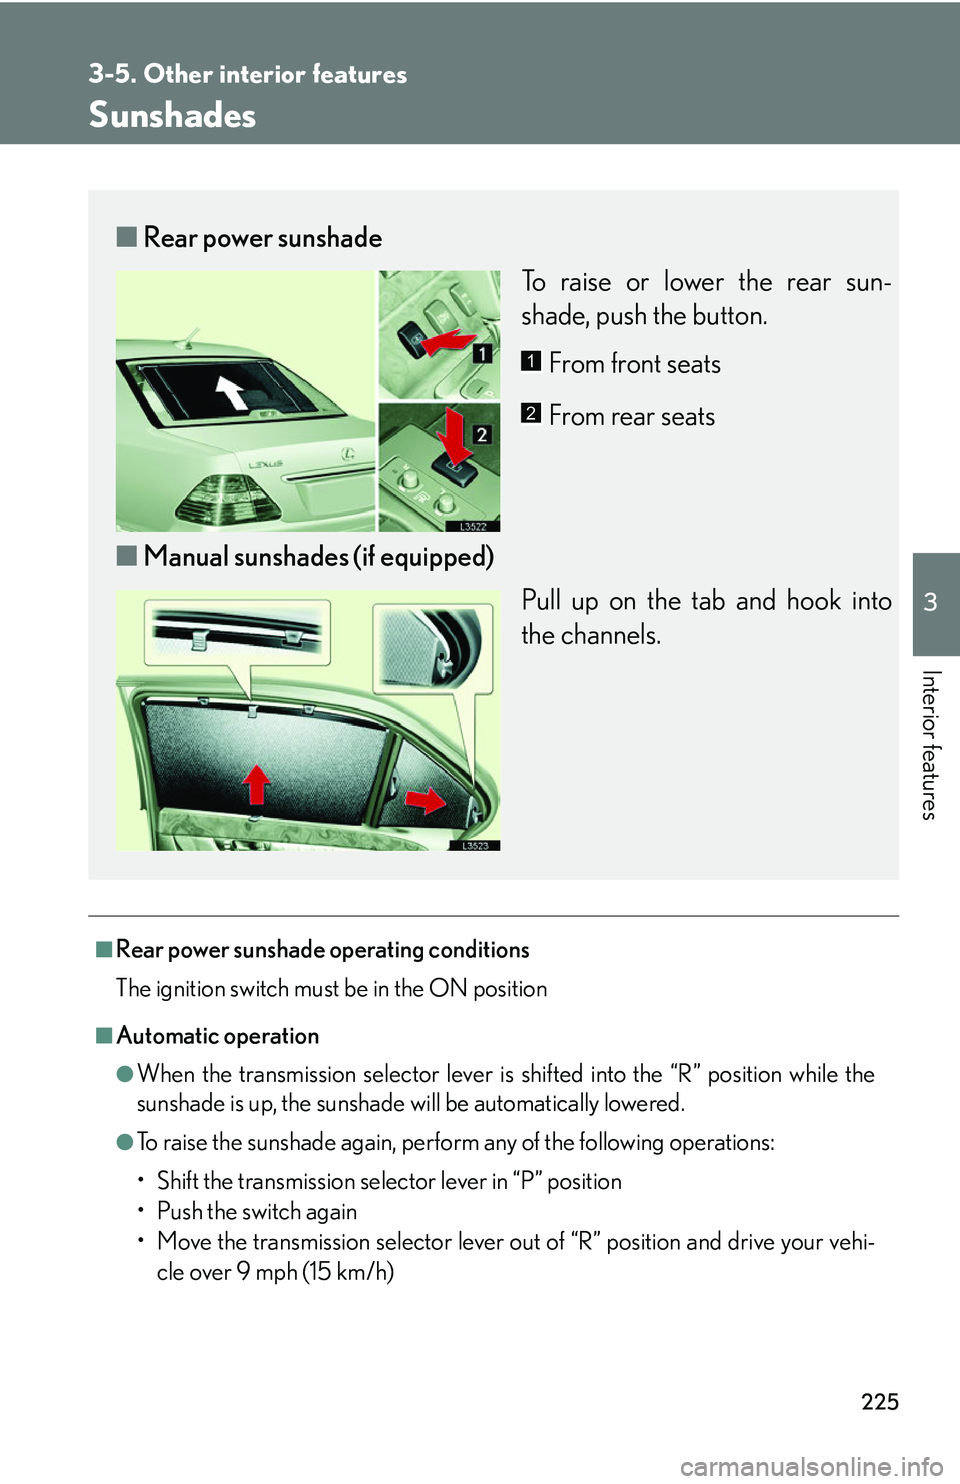
■ Rear power sunshade
To raise or lower the rear sun-
shade, push the button.
From front seats
From rear seats
■ Manual sunshades (if equipped)
Pull up on the tab and hook into
the channels.
1
2
Page 242 of 419
226
3-5. Other interior features
■Retained accessory power
The rear power sunshade can be operated for approximately 60 seconds after the
ignition switch is turned to ACC or LOCK position.
CAUTION
■To a v o i d i n j u r y
●Do not touch the brackets fastening the power sunshade.
●Do not put your fingers in the power sunshade groove during operation.
NOTICE
■To prevent the battery from being discharged
Always operate the shade while the engine is running.
■To avoid damage or malfunction
●Do not overload the shade motor and othe r parts (for instance by pushing down
on the sunshade bracket during operation).
●Do not place objects where they may hinder the opening/closing of the shade.
●Do not affix anything to the shade.
●Clean the shade groove if there is any foreign matter or dust on it.
●Do not operate the power sunshade repeatedly for a long time.
■To avoid damage to the sunshade
Do not place anything in the sunshade groove.
Page 243 of 419
227
3-5. Other interior features
3
Interior features
Trunk features
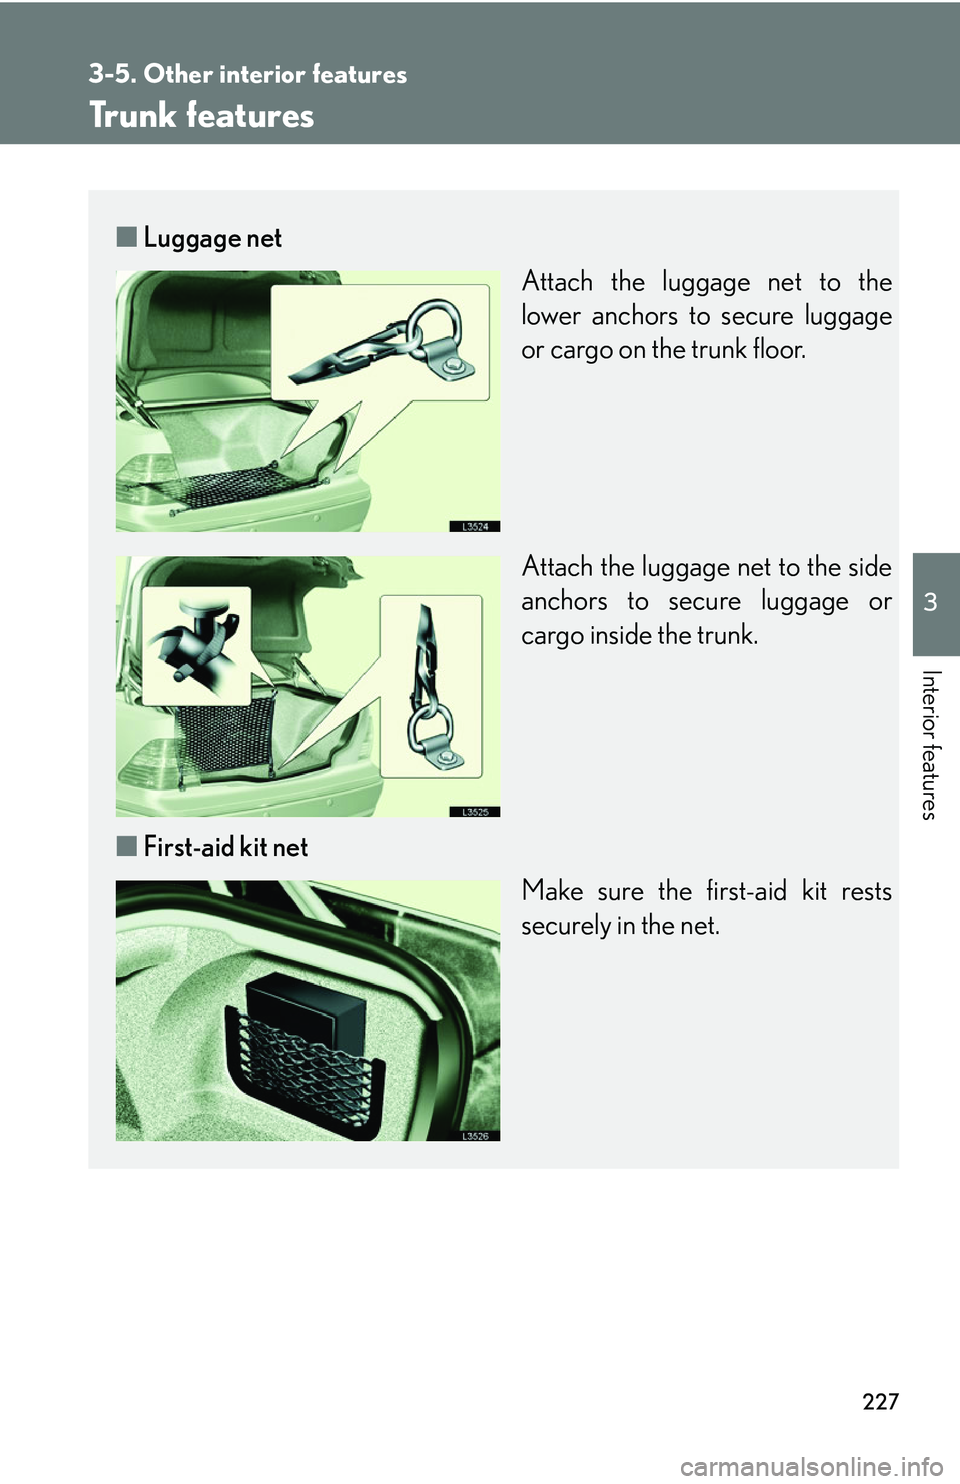
■Luggage net
Attach the luggage net to the
lower anchors to secure luggage
or cargo on the trunk floor.
Attach the luggage net to the side
anchor
s to secure luggage or
cargo inside the trunk.
■ First
-aid kit net
Make sure the first-aid kit rests
secur
ely in the net.
Page 244 of 419
228
3-5. Other interior features
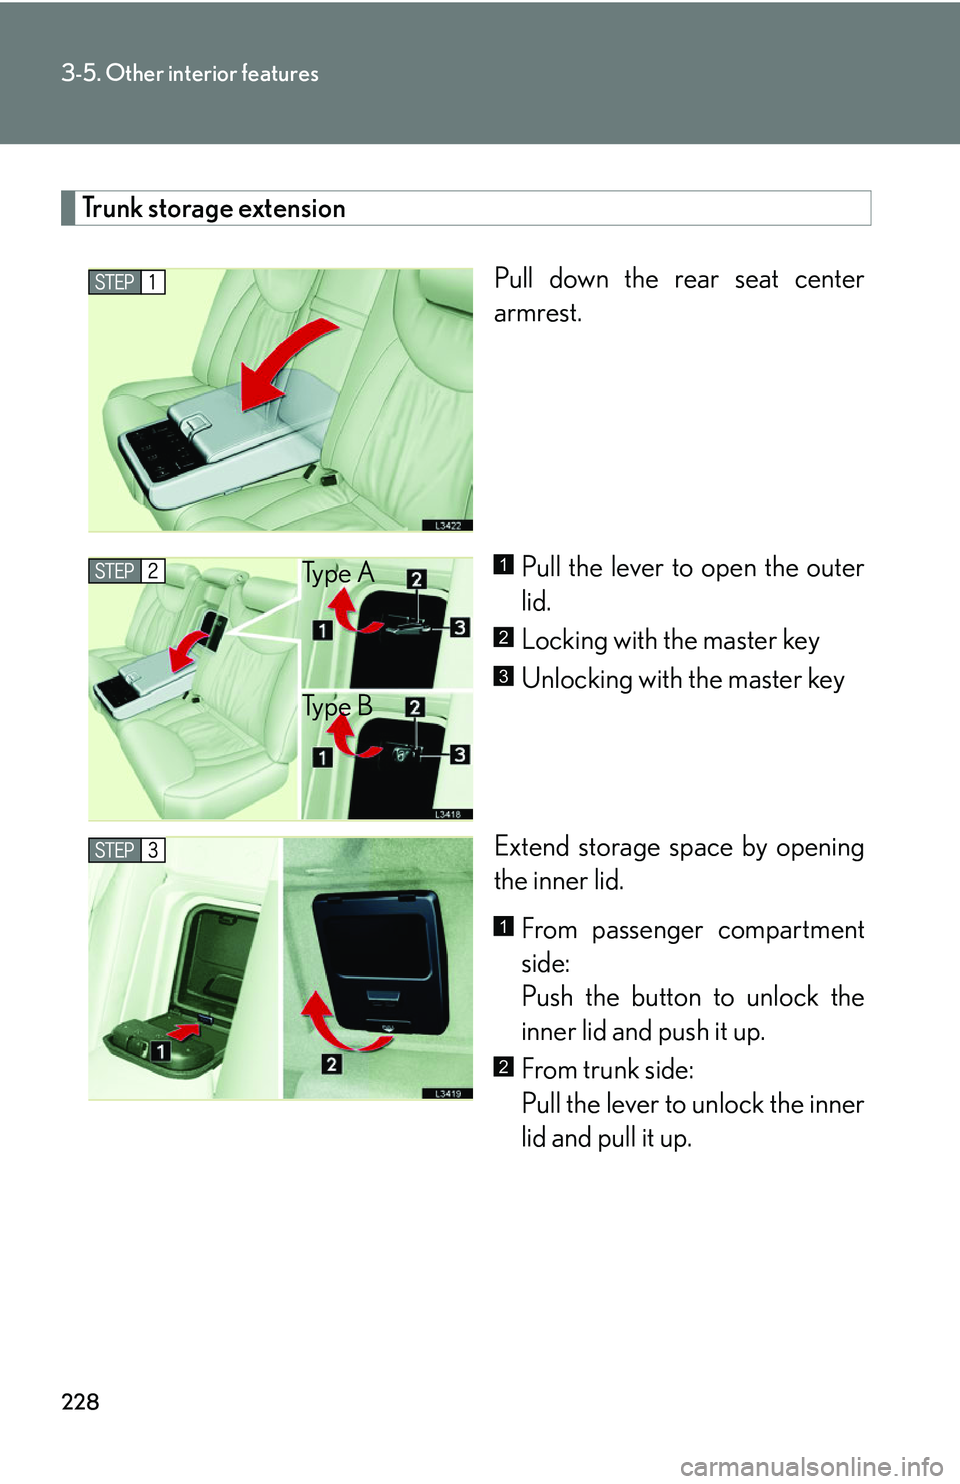
Trunk storage extension
Pull down the rear seat center
armrest.Pull the lever to open the outer
lid.
Locking with the master key
Unlocking with the master key
Extend storage space by opening
the inner lid. From passenger compartment
side:
Push the button to unlock the
inner lid and push it up
.
From trunk side:
Pull the lever to unlock the inner
lid and pull it up
.
Ty p e A
Ty p e B1
2
3
1
2
Page 245 of 419
229
3-5. Other interior features
3
Interior features
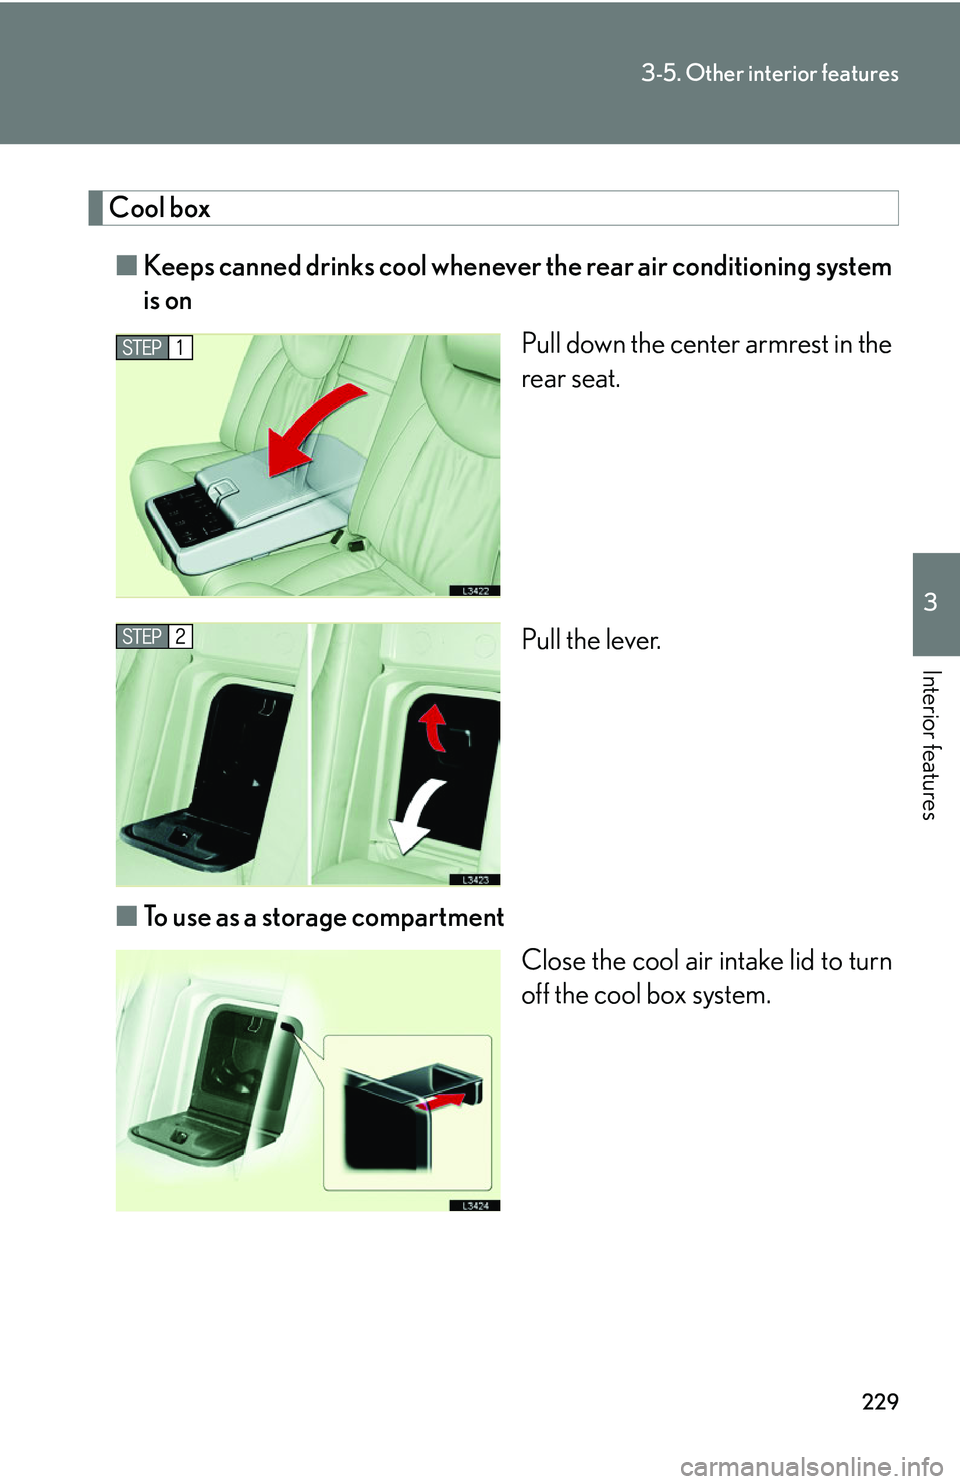
Cool box
■Keeps canned drinks cool whenever the rear air conditioning system
is on
Pull down the center armrest in the
re
ar seat.
Pull the lever.
■ T
o use as a storage compartment
Close the cool air intake lid to turn
of
f the cool box system.
Page 246 of 419
230
3-5. Other interior features
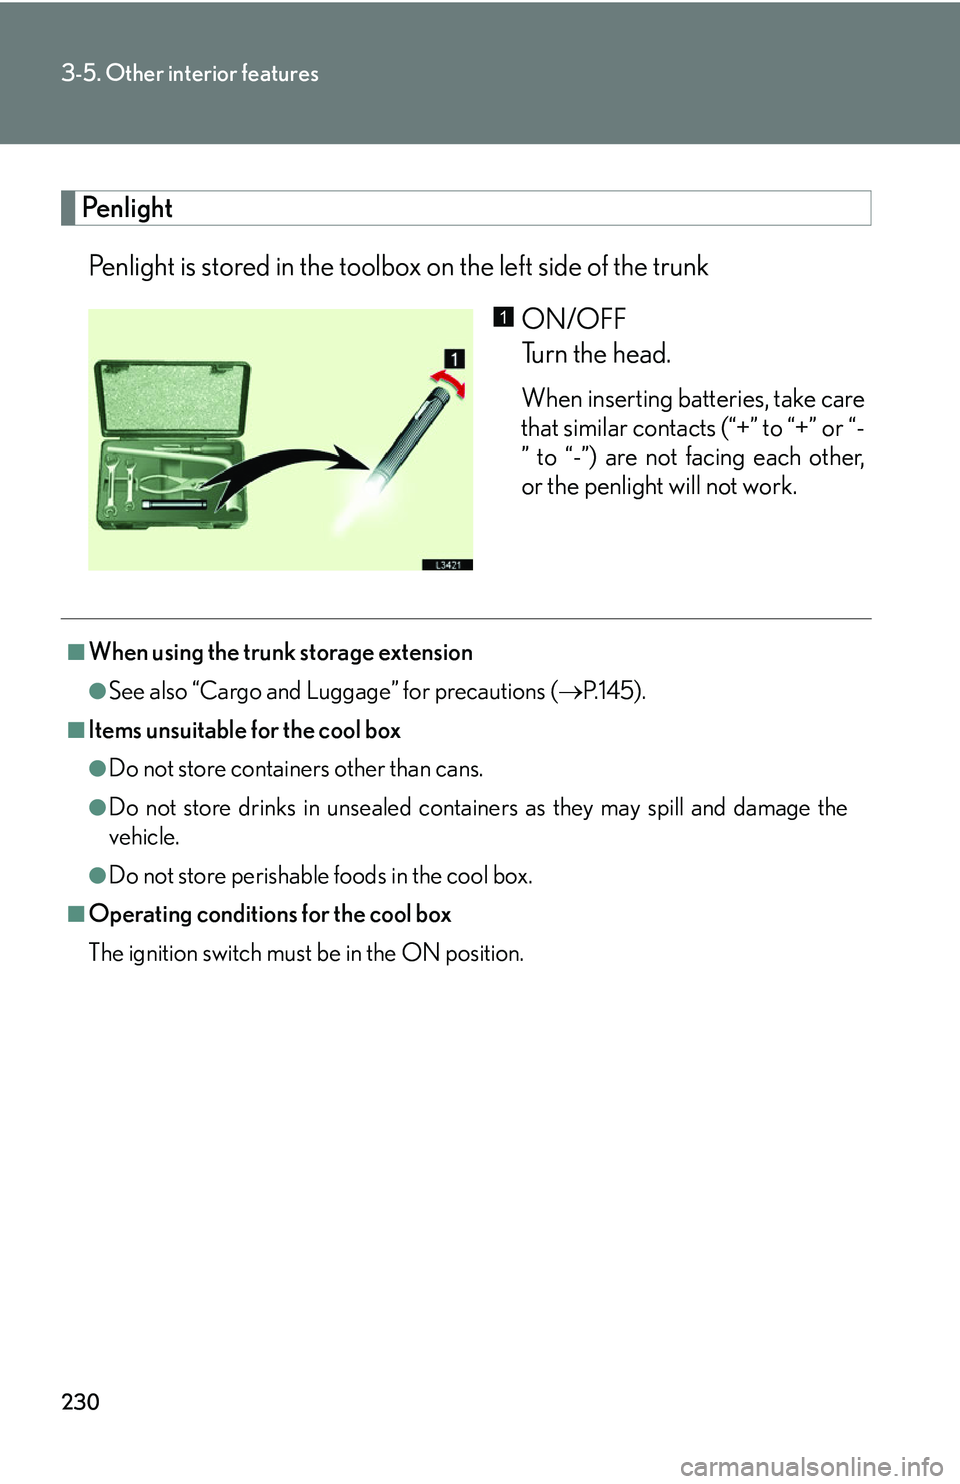
Penlight
Penlight is stored in the toolbox on the left side of the trunkON/OFF
Turn the head.
When inserting batteries, take care
that similar contacts (“+” to “+” or “-
” to “-”) are not facing each other,
or the penlight will not work.
1
■When using the trunk storage extension
●See also “Cargo and Luggage” for precautions ( P.145 ).
■Items unsuitable for the cool box
●Do not store containers other than cans.
●Do not store drinks in unsealed containers as they may spill and damage the
vehicle.
●Do not store perishable foods in the cool box.
■Operating conditions for the cool box
The ignition switch must be in the ON position.
Page 247 of 419
231
3-5. Other interior features
3
Interior features
CAUTION
■Caution while driving
●To avoid injury, always return the cargo net hooks to their positions under the car-
pet when they are not being used.
●Always keep the cool box and trunk stor age extension doors closed to reduce
the chance of injury in case of accident or sudden stop.
NOTICE
■To avoid damage to the net
●Do not use to secure sharp or heavy objects.
●Take care not to twist the strap or net when securing luggage.
Page 248 of 419
232
3-5. Other interior features
Garage door opener
The garage door opener (HomeLink Universal Transceiver) is manufactured
under license from HomeLink.
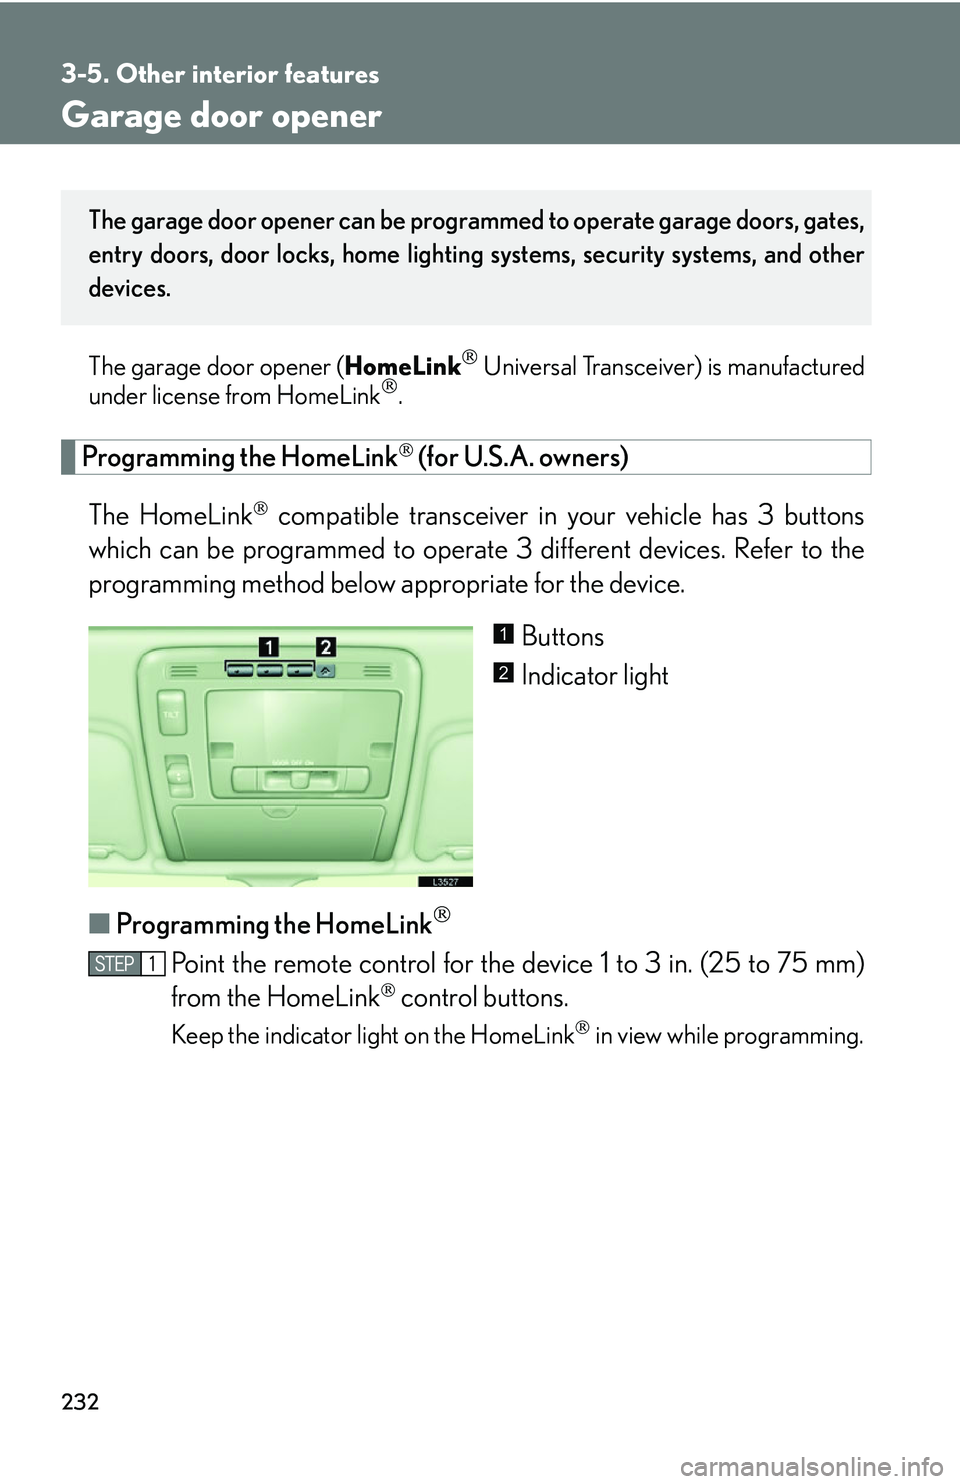
Programming the HomeLink (for U.S.A. owners)
The HomeLink
compatible transceiver in your vehicle has 3 buttons
which can be programmed to operate 3 different devices. Refer to the
programming method below appropriate for the device.
Buttons
Indicator light
■ P
rogramming the HomeLink
Point the remote control for the device 1 to 3 in. (25 to 75 mm)
from the HomeLink
control buttons.
Keep the indicator light on the HomeLink in view while programming.
The garage door opener can be programmed to operate garage doors, gates,
entry doors, door locks, home lighting systems, security systems, and other
devices.
1
2
Page 249 of 419
233
3-5. Other interior features
3
Interior features
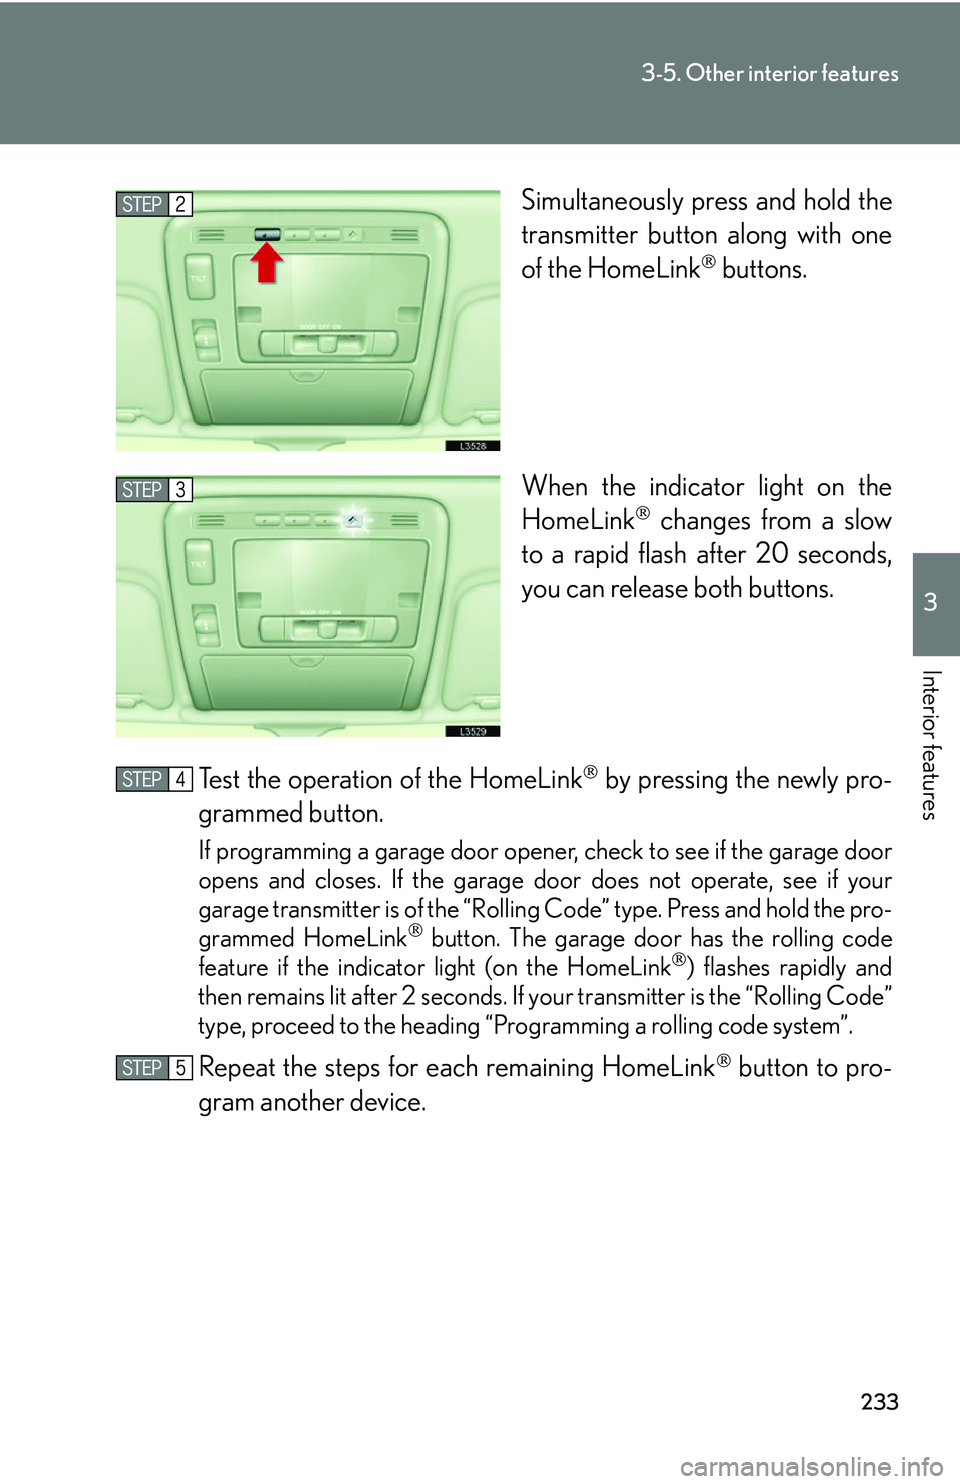
Simultaneously press and hold the
transmitter button along with one
of the HomeLink
buttons.
When the indicator light on the
Ho
meLink changes from a slow
to a rapid flash after 20 seconds,
you can release both buttons.
Test the operation of the HomeLink
by pressing the newly pro -
grammed button.
If programming a garage door opener, check to see if the garage door
opens and closes. If the garage door does not operate, see if your
garage transmitter is of the “Rolling Code” type. Press and hold the pro-
grammed HomeLink
button. The garage door has the rolling code
feature if the indicator light (on the HomeLink) flashes rapidly and
then remains lit after 2 seconds. If your transmitter is the “Rolling Code”
type, proceed to the heading “Pro gramming a rolling code system”.
Repeat the steps for each remaining HomeLink button to pro-
gram another device.
Page 250 of 419
234
3-5. Other interior features
■Programming a Rolling Code system (for U.S.A. owners)
If your device is “Rolling Code” equipped, follo
w the steps under the
heading “Programming the HomeLink
” before proceeding with the
steps listed below.
Locate the “training” button on the ceiling mounted gar
age door
opener motor. The exact location and color of the button may
v
ary by brand of garage door opener.
Refer to the owner’s guide supplied by the garage door opener manu-
facturer for the location of
the “training” button.
Press the “training” button on th e ceiling mounted garage door
opener motor.
Press and release the vehi cle
’s programmed HomeLink button
twice. The garage door may open.
If the garage door opens, the programming process is complete. If the
door does not open, press and release the button a third time. This third
press and release will complete the programming process by opening
the garage door.
The ceiling mounted garage door op ener motor should no
w recognize
the HomeLink transceiver and operate the garage door.
Repeat the steps for each remaining HomeLink button to pro-
gram another rolling code system.
Trending: tire pressure reset, snow chains, turn signal bulb, roof, jump start terminals, maintenance schedule, power steering fluid
