engine LINCOLN AVIATOR 2021 User Guide
[x] Cancel search | Manufacturer: LINCOLN, Model Year: 2021, Model line: AVIATOR, Model: LINCOLN AVIATOR 2021Pages: 667, PDF Size: 7.01 MB
Page 74 of 667
Wait at least five seconds before remote
starting after the engine stops running.
Turning Your Vehicle Off After Remote
Starting
Press the button once. Your
vehicle and the parking lamps turn
off.
Due to ground reflection and the added
noise of your vehicle running, you might
need to move closer to the vehicle when
using remote start to switch it on or off. You
can switch this feature on or off using the
touchscreen. See Settings (page 540).
Memory Feature
You can program your passive key to recall
memory positions.
See Memory Function
(page 186). REPLACING A LOST KEY OR
REMOTE CONTROL
Replacement keys or remote controls can
be purchased from an authorized dealer.
Authorized dealers can program remote
controls for your vehicle.
71
Aviator (CTV) Canada/United States of America, enUSA, Edition date: 202007, Second-Printing Keys and Remote ControlsE138625
Page 80 of 667
Note:
Not every feature applies to every
vehicle in every market. When they are
available for your vehicle, then they appear
in your information display, providing choices
to switch them on or off, or to select a more
specific setting.
• Various vehicle speed limits so the
MyKey driver cannot exceed certain
speeds. The information display shows
warnings followed by an audible tone
when the MyKey driver reaches the set
speed. You cannot override the set
speed by fully depressing the accelerator
pedal. WARNING: Do not set MyKey
maximum speed limit to a limit that will
prevent the driver from maintaining a safe
speed considering posted speed limits and
prevailing road conditions. The driver is
always responsible to drive in accordance
with local laws and prevailing conditions.
Failure to do so could result in accident or
injury. •
Various vehicle speed reminders so
MyKey drivers know when their vehicle
speed approaches the limits. Warnings
appear in your information display and a
tone sounds when the MyKey drivers
exceed the set vehicle speed.
• The audio system's maximum volume
limits to 45% so MyKey drivers can
concentrate on the road. A message
appears in the information display when
MyKey drivers attempt to exceed the
limited volume. MyKey also disables the
automatic volume control.
Note: If your
vehicle includes an AM/FM radio or a
very basic audio system, then the radio
may not limit.
• Always on setting. This setting forces
certain features to remain on and active
for MyKey drivers. For example, E911 or
emergency assistance and the do not
disturb features stay on even if a MyKey
driver uses the feature's control to switch
it off. When selected, you will not be able
to turn off Advance Trac or traction
control (if your vehicle has this feature). CREATING A MYKEY
Use the touchscreen to create a MyKey:
1. Insert the key you want to program into
the ignition. If your vehicle has a
push-button start, place the remote
control into the backup slot. See Starting
a Gasoline Engine
(page 209).
2. Switch the ignition on.
3. Access the main menu in the touchscreen and then scroll through the
menus to change the settings of your
MyKey. From the MyKey menu, select the
option Create MyKey.
See Settings
(page 540).
4. Press Yes if you want to create the key as a MyKey. A confirmation message
appears on the screen.
5. Switch the ignition off.
You have successfully created a MyKey.
Make sure you label it so you can distinguish
it from the admin keys.
You can also program configurable settings
for the key.
77
Aviator (CTV) Canada/United States of America, enUSA, Edition date: 202007, Second-Printing MyKey™
Page 82 of 667
Number of MyKeys
Indicates the number of MyKeys you have
programmed to your vehicle. Use this feature
to detect how many MyKeys you have for
your vehicle and determine when you have
deleted all MyKeys.
Number of Admin Keys
Indicates how many admin keys you have
programmed to your vehicle. Use this feature
to determine how many admin keys you have
for your vehicle, and detect if an additional
MyKey has been programmed.
USING MYKEY WITH REMOTE
START SYSTEMS
MyKey is not compatible with non
Ford-approved, aftermarket remote start
systems. If you choose to install a remote
start system, see an authorized dealer for a
Ford-approved remote start system.
MYKEY – TROUBLESHOOTING Potential causes
Condition
· The key or transmitter used to start the vehicle does not have admin
privileges.
I cannot create a MyKey.
· Vehicles with keyless start: Make sure you place the transmitter into
the backup slot. See Starting a Gasoline Engine (page 209).
· The key or transmitter used to start the vehicle is the only admin key.
There always has to be at least one admin key.
· SecuriLock passive anti-theft system is disabled or in unlimited mode.
· The key or transmitter used to start the vehicle does not have admin
privileges.
I cannot program the configurable settings.
79
Aviator (CTV) Canada/United States of America, enUSA, Edition date: 202007, Second-Printing MyKey™
Page 83 of 667
Potential causes
Condition
· There are no MyKeys programmed to the vehicle. See Creating a
MyKey (page 77).
· The key or transmitter used to start the vehicle does not have admin
privileges.
I cannot clear the MyKeys.
· No MyKeys are created.
See Creating a MyKey (page 77).
· Purchase a new key or transmitter from your authorized dealer.
I lost the only admin key.
· Program a spare key or transmitter. You may need to see your
authorized dealer.
See Starting a Gasoline Engine (page 209).
I lost a key.
· The MyKey user is not using the MyKey.
MyKey distances do not accumulate.
· An admin key holder cleared the MyKeys and created new MyKeys.
· The key system has been reset.
80
Aviator (CTV) Canada/United States of America, enUSA, Edition date: 202007, Second-Printing MyKey™
Page 100 of 667
PASSIVE ANTI-THEFT SYSTEM
Note:
The system is not compatible with
non-Ford aftermarket remote start systems.
Use of these systems may result in vehicle
starting problems and a loss of security
protection.
Note: Metallic objects, electronic devices or
a second coded key on the same key chain
may cause vehicle starting problems if they
are too close to the key when starting the
engine. Prevent these objects from touching
the coded key while starting the engine.
Switch the ignition off, move all objects on
the key chain away from the coded key and
restart the engine if a problem occurs.
Note: Do not leave a duplicate coded key
in the vehicle. Always take your keys and
lock all doors when leaving the vehicle. SecuriLock®
The system is an engine immobilization
system. It is designed to help prevent the
engine from being started unless a coded
key programmed to your vehicle is used.
Using the wrong key may prevent the engine
from starting. A message may appear in the
information display.
If you are unable to start the engine with a
correctly coded key, a malfunction has
happened and a message may appear in the
information display.
Automatic Arming
The vehicle arms immediately after you
switch the ignition off.
Automatic Disarming
Switching the ignition on with a coded key
disarms the vehicle.
Replacement Keys
Note:
Your vehicle comes equipped with two
intelligent access keys. The intelligent access key functions as a
programmed key that operates the driver
door lock and activates the intelligent access
with push button start system, as well as a
remote control.
If your programmed transmitters are lost or
stolen and you do not have an extra coded
key, you will need to have your vehicle
towed to an authorized dealer. You need to
erase the key codes from your vehicle and
program new coded keys.
Store an extra programmed key away from
the vehicle in a safe place to help prevent
any inconveniences. See your authorized
dealer to purchase additional spare or
replacement keys.
Programming a Spare Intelligent Access
Key
See your authorized dealer to have
additional keys programmed to your vehicle.
97
Aviator (CTV) Canada/United States of America, enUSA, Edition date: 202007, Second-Printing Security
Page 107 of 667
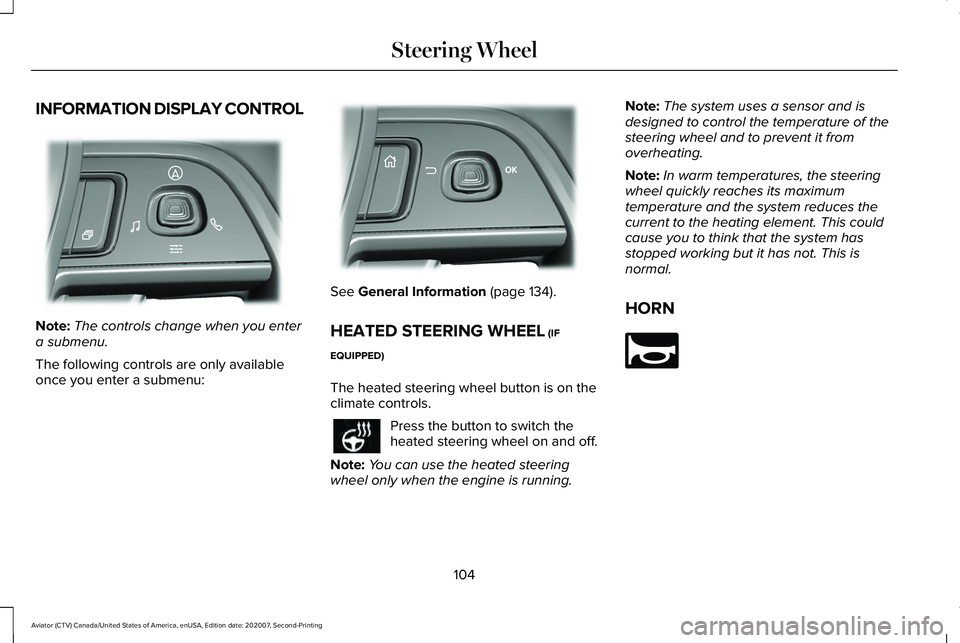
INFORMATION DISPLAY CONTROL
Note:
The controls change when you enter
a submenu.
The following controls are only available
once you enter a submenu: See General Information (page 134).
HEATED STEERING WHEEL
(IF
EQUIPPED)
The heated steering wheel button is on the
climate controls. Press the button to switch the
heated steering wheel on and off.
Note: You can use the heated steering
wheel only when the engine is running. Note:
The system uses a sensor and is
designed to control the temperature of the
steering wheel and to prevent it from
overheating.
Note: In warm temperatures, the steering
wheel quickly reaches its maximum
temperature and the system reduces the
current to the heating element. This could
cause you to think that the system has
stopped working but it has not. This is
normal.
HORN 104
Aviator (CTV) Canada/United States of America, enUSA, Edition date: 202007, Second-Printing Steering WheelE281220 E299701 E270945
Page 122 of 667
POWER WINDOWS
WARNING: Do not leave children
unattended in your vehicle and do not let
them play with the power windows. Failure
to follow this instruction could result in
personal injury. WARNING:
When closing the power
windows, verify they are free of obstruction
and make sure that children and pets are
not in the proximity of the window
openings. Note:
You may hear a pulsing noise when
just one of the windows is open. Lower the
opposite window slightly to reduce this
noise.
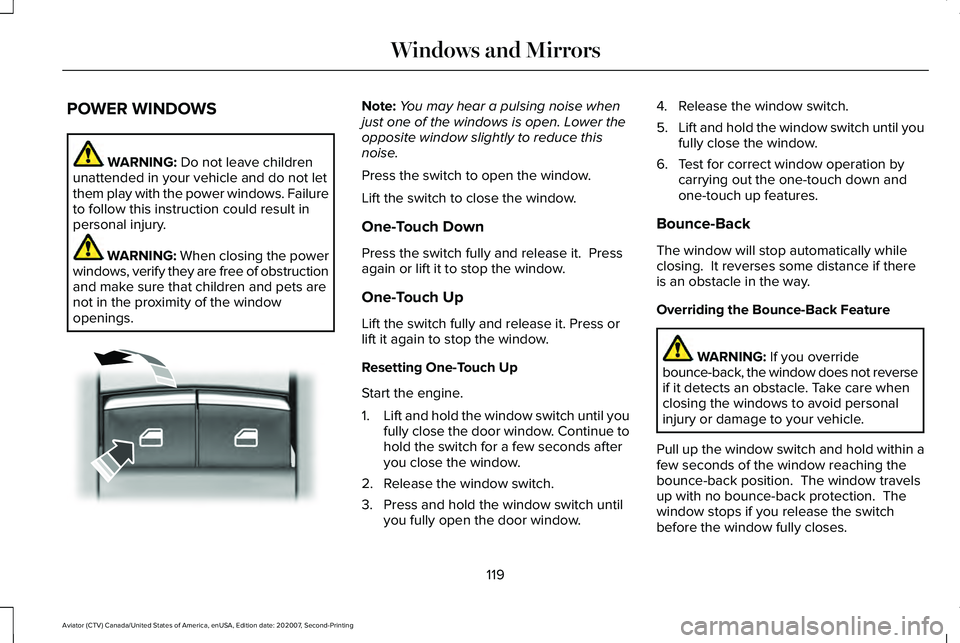
Press the switch to open the window.
Lift the switch to close the window.
One-Touch Down
Press the switch fully and release it. Press
again or lift it to stop the window.
One-Touch Up
Lift the switch fully and release it. Press or
lift it again to stop the window.
Resetting One-Touch Up
Start the engine.
1. Lift and hold the window switch until you
fully close the door window. Continue to
hold the switch for a few seconds after
you close the window.
2. Release the window switch.
3. Press and hold the window switch until you fully open the door window. 4. Release the window switch.
5.
Lift and hold the window switch until you
fully close the window.
6. Test for correct window operation by carrying out the one-touch down and
one-touch up features.
Bounce-Back
The window will stop automatically while
closing. It reverses some distance if there
is an obstacle in the way.
Overriding the Bounce-Back Feature WARNING:
If you override
bounce-back, the window does not reverse
if it detects an obstacle. Take care when
closing the windows to avoid personal
injury or damage to your vehicle.
Pull up the window switch and hold within a
few seconds of the window reaching the
bounce-back position. The window travels
up with no bounce-back protection. The
window stops if you release the switch
before the window fully closes.
119
Aviator (CTV) Canada/United States of America, enUSA, Edition date: 202007, Second-Printing Windows and MirrorsE295317
Page 124 of 667
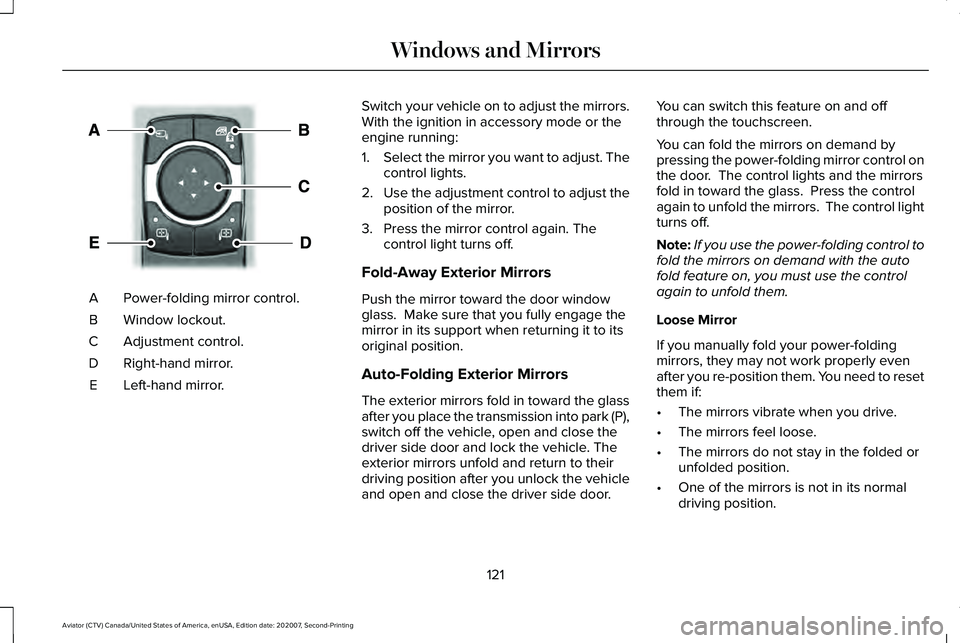
Power-folding mirror control.
A
Window lockout.
B
Adjustment control.
C
Right-hand mirror.
D
Left-hand mirror.
E Switch your vehicle on to adjust the mirrors.
With the ignition in accessory mode or the
engine running:
1.
Select the mirror you want to adjust. The
control lights.
2. Use the adjustment control to adjust the
position of the mirror.
3. Press the mirror control again. The control light turns off.
Fold-Away Exterior Mirrors
Push the mirror toward the door window
glass. Make sure that you fully engage the
mirror in its support when returning it to its
original position.
Auto-Folding Exterior Mirrors
The exterior mirrors fold in toward the glass
after you place the transmission into park (P),
switch off the vehicle, open and close the
driver side door and lock the vehicle. The
exterior mirrors unfold and return to their
driving position after you unlock the vehicle
and open and close the driver side door. You can switch this feature on and off
through the touchscreen.
You can fold the mirrors on demand by
pressing the power-folding mirror control on
the door. The control lights and the mirrors
fold in toward the glass. Press the control
again to unfold the mirrors. The control light
turns off.
Note:
If you use the power-folding control to
fold the mirrors on demand with the auto
fold feature on, you must use the control
again to unfold them.
Loose Mirror
If you manually fold your power-folding
mirrors, they may not work properly even
after you re-position them. You need to reset
them if:
• The mirrors vibrate when you drive.
• The mirrors feel loose.
• The mirrors do not stay in the folded or
unfolded position.
• One of the mirrors is not in its normal
driving position.
121
Aviator (CTV) Canada/United States of America, enUSA, Edition date: 202007, Second-Printing Windows and MirrorsE295322
Page 130 of 667
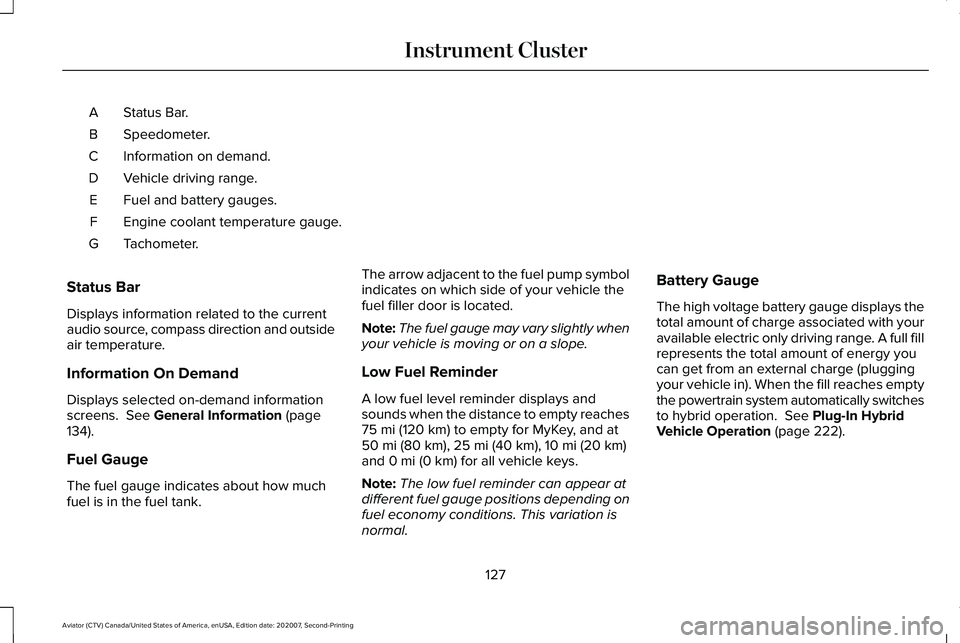
Status Bar.
A
Speedometer.
B
Information on demand.
C
Vehicle driving range.
D
Fuel and battery gauges.
E
Engine coolant temperature gauge.
F
Tachometer.
G
Status Bar
Displays information related to the current
audio source, compass direction and outside
air temperature.
Information On Demand
Displays selected on-demand information
screens. See General Information (page
134).
Fuel Gauge
The fuel gauge indicates about how much
fuel is in the fuel tank. The arrow adjacent to the fuel pump symbol
indicates on which side of your vehicle the
fuel filler door is located.
Note:
The fuel gauge may vary slightly when
your vehicle is moving or on a slope.
Low Fuel Reminder
A low fuel level reminder displays and
sounds when the distance to empty reaches
75 mi (120 km) to empty for MyKey, and at
50 mi (80 km), 25 mi (40 km), 10 mi (20 km)
and 0 mi (0 km) for all vehicle keys.
Note: The low fuel reminder can appear at
different fuel gauge positions depending on
fuel economy conditions. This variation is
normal. Battery Gauge
The high voltage battery gauge displays the
total amount of charge associated with your
available electric only driving range. A full fill
represents the total amount of energy you
can get from an external charge (plugging
your vehicle in). When the fill reaches empty
the powertrain system automatically switches
to hybrid operation.
See Plug-In Hybrid
Vehicle Operation (page 222).
127
Aviator (CTV) Canada/United States of America, enUSA, Edition date: 202007, Second-Printing Instrument Cluster
Page 131 of 667
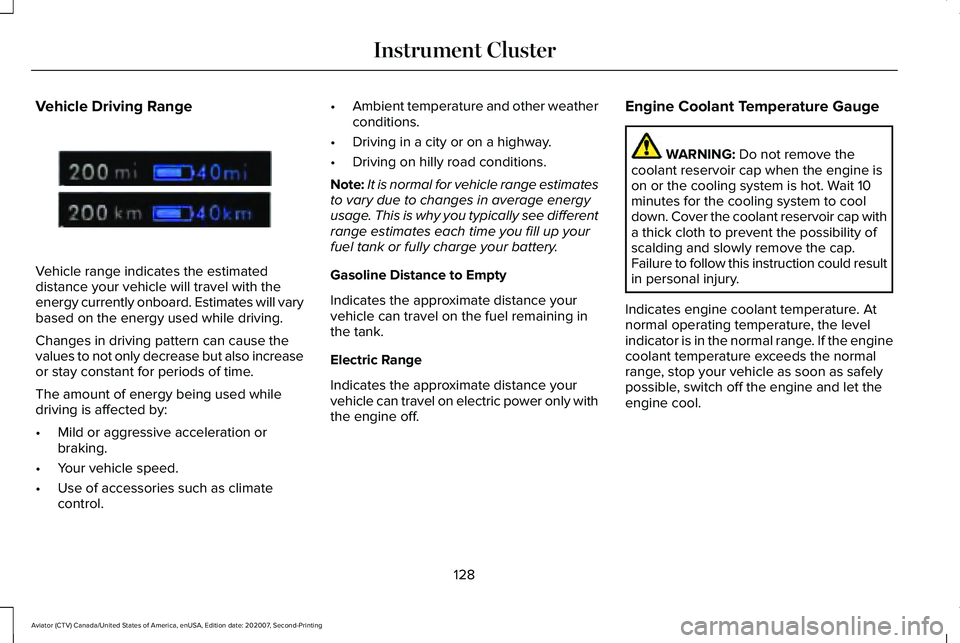
Vehicle Driving Range
Vehicle range indicates the estimated
distance your vehicle will travel with the
energy currently onboard. Estimates will vary
based on the energy used while driving.
Changes in driving pattern can cause the
values to not only decrease but also increase
or stay constant for periods of time.
The amount of energy being used while
driving is affected by:
•
Mild or aggressive acceleration or
braking.
• Your vehicle speed.
• Use of accessories such as climate
control. •
Ambient temperature and other weather
conditions.
• Driving in a city or on a highway.
• Driving on hilly road conditions.
Note: It is normal for vehicle range estimates
to vary due to changes in average energy
usage. This is why you typically see different
range estimates each time you fill up your
fuel tank or fully charge your battery.
Gasoline Distance to Empty
Indicates the approximate distance your
vehicle can travel on the fuel remaining in
the tank.
Electric Range
Indicates the approximate distance your
vehicle can travel on electric power only with
the engine off. Engine Coolant Temperature Gauge WARNING: Do not remove the
coolant reservoir cap when the engine is
on or the cooling system is hot. Wait 10
minutes for the cooling system to cool
down. Cover the coolant reservoir cap with
a thick cloth to prevent the possibility of
scalding and slowly remove the cap.
Failure to follow this instruction could result
in personal injury.
Indicates engine coolant temperature. At
normal operating temperature, the level
indicator is in the normal range. If the engine
coolant temperature exceeds the normal
range, stop your vehicle as soon as safely
possible, switch off the engine and let the
engine cool.
128
Aviator (CTV) Canada/United States of America, enUSA, Edition date: 202007, Second-Printing Instrument ClusterE307728