tow LINCOLN AVIATOR 2023 Manual PDF
[x] Cancel search | Manufacturer: LINCOLN, Model Year: 2023, Model line: AVIATOR, Model: LINCOLN AVIATOR 2023Pages: 681, PDF Size: 9.33 MB
Page 411 of 681
If you tow a trailer with your vehicle, the
engine may temporarily reach a higher
temperature during severe operating
conditions, for example ascending a long or
steep grade in high ambient temperatures.
At this time, you may notice the coolant
temperature gauge moves toward the red
zone and a message may appear in the
information display.
You may notice a reduction in vehicle speed
caused by reduced engine power in order
to manage the engine coolant temperature.
Your vehicle may enter this mode if certain
high-temperature and high-load conditions
take place. The amount of speed reduction
depends on vehicle loading, grade and
ambient temperature. If this occurs, there is
no need to stop your vehicle. You can
continue to drive.
The air conditioning may automatically turn
on and off during severe operating
conditions to protect the engine from
overheating. When the coolant temperature
decreases to the normal operating
temperature, the air conditioning turns on.If the coolant temperature gauge moves fully
into the red zone, or if the coolant
temperature warning or service engine soon
messages appear in your information display,
do the following:
1. Stop your vehicle as soon as it is safe to
do so. Fully apply the parking brake, shift
into park (P) or neutral (N).
2. Leave the engine running until the
coolant temperature gauge needle
returns to the normal position. If the
temperature does not drop after several
minutes, follow the remaining steps.
3. Switch the engine off and wait for it to
cool. Check the coolant level.
4. If the coolant level is at or below the
minimum mark, add prediluted coolant
immediately.
5. If the coolant level is normal, restart the
engine and continue.AUTOMATIC TRANSMISSION
FLUID CHECK
If required, have an authorized dealer check
and change the transmission fluid at the
correct service interval. See Scheduled
Maintenance (page 579).
The automatic transmission does not have
a transmission fluid dipstick.
Refer to your scheduled maintenance
information for scheduled intervals for fluid
checks and changes. Your transmission does
not consume fluid. However, if the
transmission slips, shifts slowly or if you
notice a sign of leaking fluid, contact an
authorized dealer.
Do not use supplemental transmission fluid
additives, treatments or cleaning agents. The
use of these materials may affect
transmission operation and result in damage
to internal transmission components.
408
Maintenance
Page 421 of 681
State or local regulations on volatile organic
compounds may restrict the use of methanol,
a common windshield washer antifreeze
additive. Washer fluids containing
non-methanol antifreeze agents should be
used only if they provide cold weather
protection without damaging the vehicle’s
paint finish, wiper blades or washer system.
FUEL FILTER
Your vehicle is equipped with a lifetime fuel
filter that is integrated with the fuel tank.
Regular maintenance or replacement is not
needed.
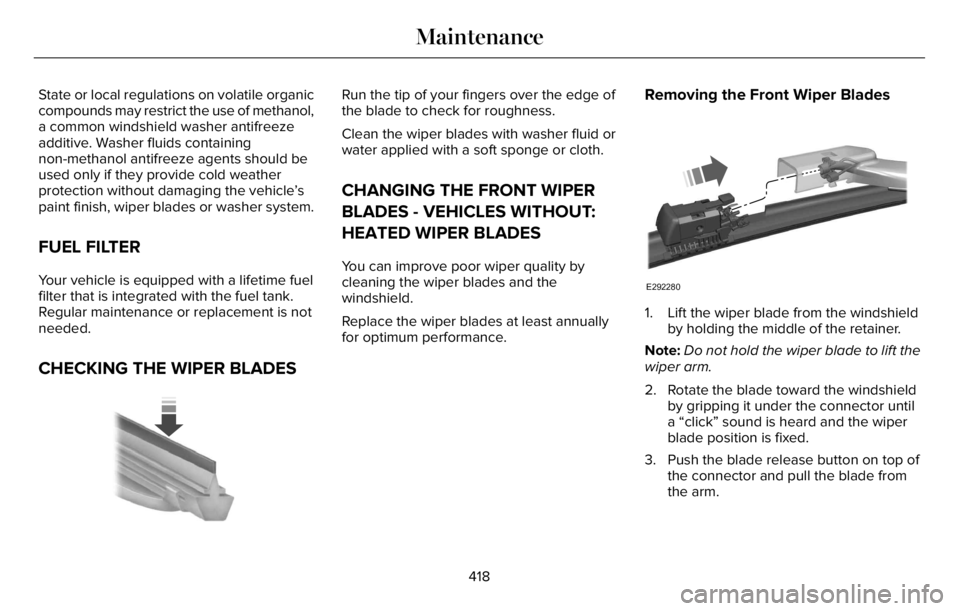
CHECKING THE WIPER BLADES
E142463
Run the tip of your fingers over the edge of
the blade to check for roughness.
Clean the wiper blades with washer fluid or
water applied with a soft sponge or cloth.
CHANGING THE FRONT WIPER
BLADES - VEHICLES WITHOUT:
HEATED WIPER BLADES
You can improve poor wiper quality by
cleaning the wiper blades and the
windshield.
Replace the wiper blades at least annually
for optimum performance.
Removing the Front Wiper Blades
E292280
1. Lift the wiper blade from the windshield
by holding the middle of the retainer.
Note:Do not hold the wiper blade to lift the
wiper arm.
2. Rotate the blade toward the windshield
by gripping it under the connector until
a “click” sound is heard and the wiper
blade position is fixed.
3. Push the blade release button on top of
the connector and pull the blade from
the arm.
418
Maintenance
Page 422 of 681
Note:Make sure that the wiper arm does
not spring back against the glass when the
wiper blade is not attached.
Installing the Front Wiper Blades
1. Line up the wiper blade, water and
electrical connectors with the receptors
on the wiper arm by lifting the arm from
the windshield.
2. Slide the blade into the connector until
a “click” sound is heard.
3. Rotate the blade toward the wiper arm
by gripping it under the connector until
a “click” sound is heard. Verify that the
blade has rotation.
Note:Make sure that the wiper blade locks
into place.
CHANGING THE FRONT WIPER
BLADES - VEHICLES WITH:
HEATED WIPER BLADES
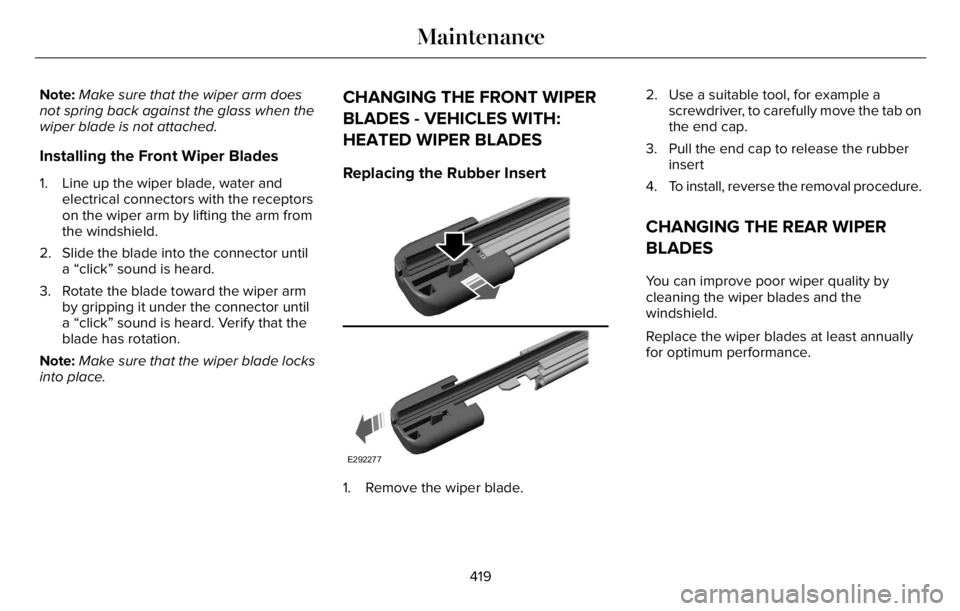
Replacing the Rubber Insert
E292277
1. Remove the wiper blade.2. Use a suitable tool, for example a
screwdriver, to carefully move the tab on
the end cap.
3. Pull the end cap to release the rubber
insert
4. To install, reverse the removal procedure.
CHANGING THE REAR WIPER
BLADES
You can improve poor wiper quality by
cleaning the wiper blades and the
windshield.
Replace the wiper blades at least annually
for optimum performance.
419
Maintenance
Page 425 of 681
Specification Name
Motorcraft® Spot and Stain Remover, ZC-14 (U.S.)
ESR-M14P5-A Motorcraft® Ultra-Clear Spray Glass Cleaner, ZC-23 (U.S.)
Motorcraft® Wheel and Tire Cleaner, ZC-37-A (U.S. & Canada)
CLEANING THE EXTERIOR
Wash your vehicle regularly with cool or
lukewarm water and a neutral pH shampoo,
we recommend Motorcraft Detail Wash.
• Never use strong household detergents
or soap, for example dish washing or
laundry liquid. These products can
discolor and spot painted surfaces.
• Never wash your vehicle when it is hot
to the touch, or during strong or direct
sunlight.
• Dry your vehicle with a chamois or soft
terry cloth towel to eliminate water
spotting.• Immediately remove fuel spillages, bird
droppings, insect deposits and road tar.
These may cause damage to your
vehicle’s paintwork or trim over time. We
recommend Motorcraft Bug and Tar
Remover.
• Remove any exterior accessories, for
example antennas, before entering a car
wash.
• When filling with AdBlue®, remove any
residue on painted surfaces immediately.
Note:Suntan lotions and insect repellents
can damage painted surfaces. If these
substances come in contact with your
vehicle, wash the affected area as soon as
possible.
Cleaning the Exterior Precautions
Immediately remove fuel spillages, AdBlue
residuals, bird droppings, insect deposits
and road tar. These may cause damage to
your vehicle’s paintwork or trim over time.
Remove any exterior accessories, for
example antennas, before entering a car
wash.
Cleaning the Exterior Lamps
Note:Do not scrape the exterior lamps
lenses or use abrasives, alcoholic solvents
or chemical solvents to clean them.
Note:Do not wipe the exterior lamps when
they are dry.
422
Vehicle Care
Page 446 of 681
Safety Practices
WARNING: If your vehicle is
stuck in snow, mud or sand, do not
rapidly spin the tires; spinning the tires
can tear the tire and cause an
explosion. A tire can explode in as little
as three to five seconds.
WARNING: Do not spin the
wheels at over 34 mph (55 km/h). The
tires may fail and injure a passenger
or bystander.
Driving habits have a great deal to do
with your tire mileage and safety.
*Observe posted speed limits
*Avoid fast starts, stops and turns
*Avoid potholes and objects on the road
*Do not run over curbs or hit the tire
against a curb when parkingHighway Hazards
No matter how carefully you drive, there
is always the possibility that you may
eventually have a flat tire on the
highway. Drive slowly to the closest safe
area out of traffic. This may further
damage the flat tire, but your safety is
more important.
If you feel a sudden vibration or ride
disturbance while driving, or you suspect
your tire or vehicle has been damaged,
immediately reduce your speed. Drive
with caution until you can safely pull off
the road. Stop and inspect the tires for
damage. If a tire is under-inflated or
damaged, deflate it, remove wheel and
replace it with your spare tire and wheel.
If you cannot detect a cause, have the
vehicle towed to the nearest repair
facility or tire dealer to have the vehicle
inspected.Tire and Wheel Alignment
A bad jolt from hitting a curb or pothole
can cause the front end of your vehicle
to become misaligned or cause damage
to your tires. If your vehicle seems to
pull to one side when you are driving,
the wheels may be out of alignment.
Have an authorized dealer check the
wheel alignment periodically.
Wheel misalignment in the front or the
rear can cause uneven and rapid
treadwear of your tires and should be
corrected by an authorized dealer.
Front-wheel drive vehicles and those
with an independent rear suspension (if
equipped) may require alignment of all
four wheels.
The tires should also be balanced
periodically. An unbalanced tire and
wheel assembly may result in irregular
tire wear.
443
Wheels and Tires
Page 455 of 681
If you have a dissimilar spare wheel and tire,
then it is intended for temporary use only.
This means that if you need to use it, you
should replace it as soon as possible with a
road wheel and tire assembly that is the
same size and type as the road tires and
wheels that were originally provided by us.
If the dissimilar spare tire or wheel is
damaged, you should replace it rather than
repair it.
A dissimilar spare wheel and tire assembly
is defined as a spare wheel and tire assembly
that is different in brand, size or appearance
from the road tires and wheels and can be
one of three types:
1. T-type mini-spare: This spare tire begins
with the letter T for tire size and may have
Temporary Use Only molded in the sidewall.
2. Full-size dissimilar spare with label on
wheel: This spare tire has a label on the
wheel that states: THIS WHEEL AND TIRE
ASSEMBLY FOR TEMPORARY USE ONLY.
When driving with one of the dissimilar spare
tires listed above, do not:• Exceed 50 mph (80 km/h).
• Load the vehicle beyond maximum
vehicle load rating listed on the Safety
Compliance Label.
• Tow a trailer.
• Use snow chains on the end of the
vehicle with the dissimilar spare tire.
• Use more than one dissimilar spare tire
at a time.
• Use commercial car washing equipment.
• Try to repair the dissimilar spare tire.
Use of one of the dissimilar spare tires listed
above at any one wheel location can lead to
impairment of the following:
• Handling, stability and braking
performance.
• Comfort and noise.
• Ground clearance and parking at curbs.
• Winter weather driving capability.
• Wet weather driving capability.
• All-wheel driving capability.
3. Full-size dissimilar spare without label
on wheel.When driving with the full-size dissimilar
spare wheel and tire assembly, do not:
• Exceed 70 mph (113 km/h).
• Use more than one dissimilar spare
wheel and tire assembly at a time.
• Use commercial car washing equipment.
• Use snow chains on the end of the
vehicle with the dissimilar spare wheel
and tire assembly.
The usage of a full-size dissimilar spare
wheel and tire assembly can lead to
impairment of the following:
• Handling, stability and braking
performance.
• Comfort and noise.
• Ground clearance and parking at curbs.
• Winter weather driving capability.
• Wet weather driving capability.
• All-wheel driving capability.
452
Wheels and Tires
Page 456 of 681
When driving with the full-size dissimilar
spare wheel and tire assembly additional
caution should be given to:
• Towing a trailer.
• Driving vehicles equipped with a camper
body.
• Driving vehicles with a load on the cargo
rack.
Drive cautiously when using a full-size
dissimilar spare wheel and tire assembly and
seek service as soon as possible.
Tire Change Procedure
WARNING: The jack supplied with
this vehicle is only intended for changing
a flat tire in an emergency. Do not attempt
to do any other work on your vehicle when
it is supported by the jack, as your vehicle
could slip off the jack. Failure to follow this
instruction could result in personal injury
or death.
WARNING: To help prevent your
vehicle from moving when changing a
wheel, shift the transmission into park (P),
set the parking brake and use an
appropriate block or wheel chock to
secure the wheel diagonally opposite to
the wheel being changed. For example,
when changing the front left wheel, place
an appropriate block or wheel chock on
the right rear wheel.
WARNING: Only use the jack
provided as original equipment with your
vehicle.
WARNING: Failure to follow these
guidelines could result in an increased risk
of loss of vehicle control, injury or death.
WARNING: Only use the specified
jacking points. If you use any other
locations you could damage vehicle
components, such as brake lines.
WARNING: Never place anything
between the vehicle jack and your vehicle.
WARNING: Never place anything
between the vehicle jack and the ground.
WARNING: Do not attempt to change
a tire on the side of the vehicle close to
moving traffic. Pull far enough off the road
to not obstruct the flow of traffic and avoid
the danger of being hit when operating the
jack or changing the wheel.
Note:Passengers should not remain in your
vehicle when the vehicle is being jacked.
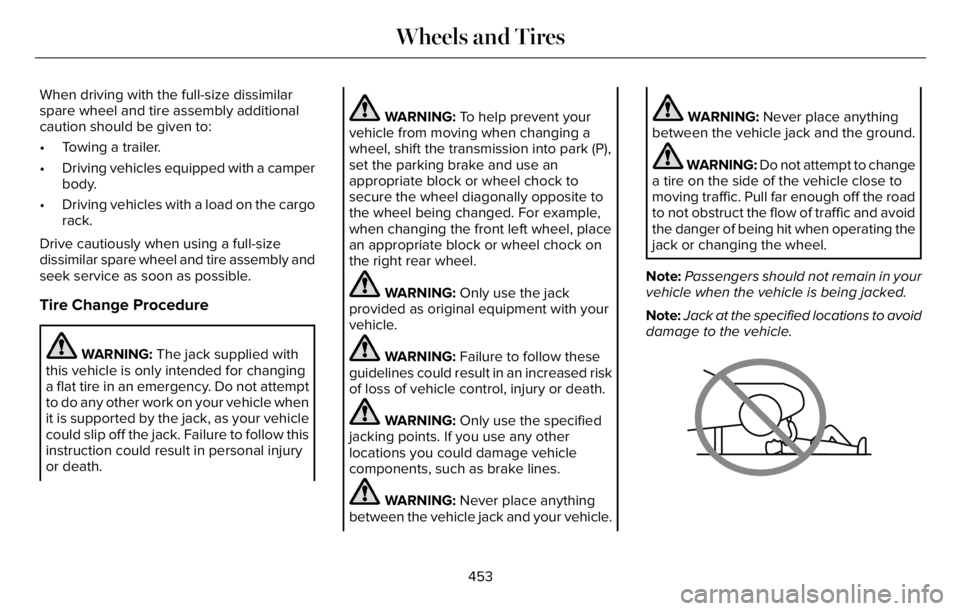
Note:Jack at the specified locations to avoid
damage to the vehicle.
66E166722
453
Wheels and Tires
Page 457 of 681
Note:No maintenance or additional
lubrication of your jack is required over the
service life of your vehicle.
1. Park on a level surface, set the parking
brake and switch on the hazard flashers.
2. Apply the parking brake, place the
transmission in park (P) and turn the
engine off.
3. If your vehicle has air suspension, use
the touch screen to switch on the Air
Suspension Service Mode prior to
jacking.
E142551
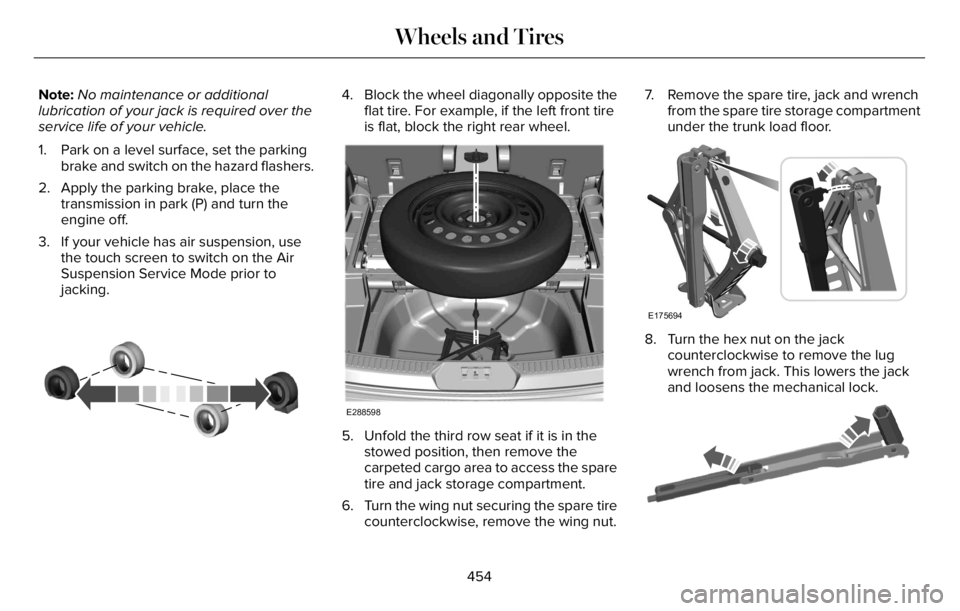
4. Block the wheel diagonally opposite the
flat tire. For example, if the left front tire
is flat, block the right rear wheel.
E288598
5. Unfold the third row seat if it is in the
stowed position, then remove the
carpeted cargo area to access the spare
tire and jack storage compartment.
6. Turn the wing nut securing the spare tire
counterclockwise, remove the wing nut.7. Remove the spare tire, jack and wrench
from the spare tire storage compartment
under the trunk load floor.
E175694
8. Turn the hex nut on the jack
counterclockwise to remove the lug
wrench from jack. This lowers the jack
and loosens the mechanical lock.
E181744E181744
454
Wheels and Tires
Page 460 of 681
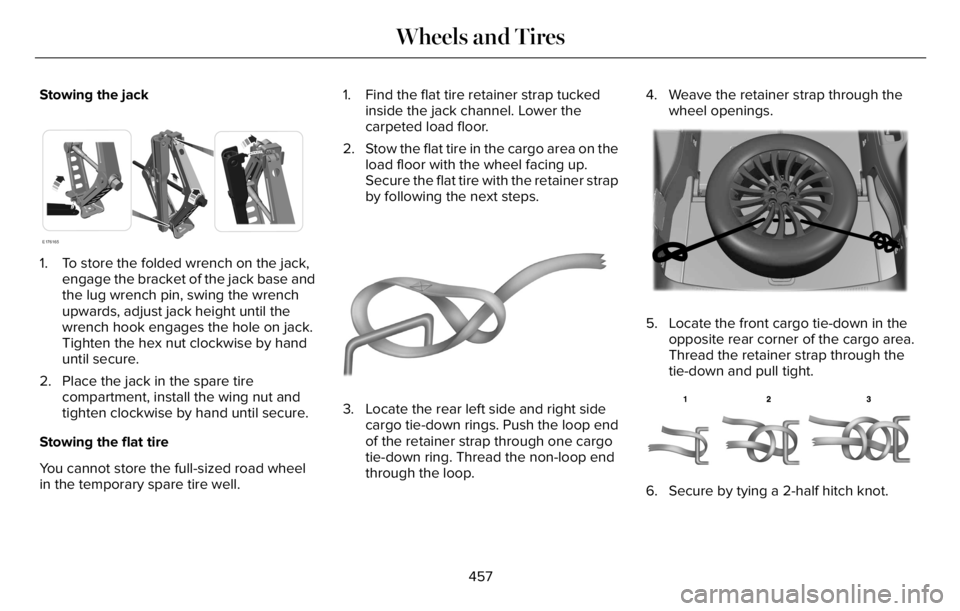
Stowing the jack
E176165
1. To store the folded wrench on the jack,
engage the bracket of the jack base and
the lug wrench pin, swing the wrench
upwards, adjust jack height until the
wrench hook engages the hole on jack.
Tighten the hex nut clockwise by hand
until secure.
2. Place the jack in the spare tire
compartment, install the wing nut and
tighten clockwise by hand until secure.
Stowing the flat tire
You cannot store the full-sized road wheel
in the temporary spare tire well.1. Find the flat tire retainer strap tucked
inside the jack channel. Lower the
carpeted load floor.
2. Stow the flat tire in the cargo area on the
load floor with the wheel facing up.
Secure the flat tire with the retainer strap
by following the next steps.
E142906
3. Locate the rear left side and right side
cargo tie-down rings. Push the loop end
of the retainer strap through one cargo
tie-down ring. Thread the non-loop end
through the loop.4. Weave the retainer strap through the
wheel openings.
E294325EE294E294EE294222929994432533325333222255555E294E294E2E294E294E2E294E294E294E294E294E2944E294E2944E294EE294EE29499994E9994994E2942423253253253253253253232532532532532532525325325323253253232525325355332533555
5. Locate the front cargo tie-down in the
opposite rear corner of the cargo area.
Thread the retainer strap through the
tie-down and pull tight.
E143746
6. Secure by tying a 2-half hitch knot.
457
Wheels and Tires
Page 499 of 681
GENERAL INFORMATION
WARNING: Driving while distracted
can result in loss of vehicle control, crash
and injury. We strongly recommend that
you use extreme caution when using any
device that may take your focus off the
road. Your primary responsibility is the safe
operation of your vehicle. We recommend
against the use of any hand-held device
while driving and encourage the use of
voice-operated systems when possible.
Make sure you are aware of all applicable
local laws that may affect the use of
electronic devices while driving.Radio Frequencies and Reception
Factors
Note:Listening to loud audio for long
periods of time could damage your hearing.
Radio Reception Factors
The further you travel from an AM or FM station, the weaker the signal and the weaker the reception. Distance and strength
Hills, mountains, tall buildings, bridges, tunnels, freeway overpasses, parking garages, dense tree foliage and
thunderstorms can interfere with the reception. Terrain
When you pass a ground-based broadcast repeating tower, a stronger signal may overtake a weaker one and
result in the audio system muting. Station overload
496
Audio System