LINCOLN CONTINENTAL 1997 Owners Manual
Manufacturer: LINCOLN, Model Year: 1997, Model line: CONTINENTAL, Model: LINCOLN CONTINENTAL 1997Pages: 321, PDF Size: 2.37 MB
Page 231 of 321

230
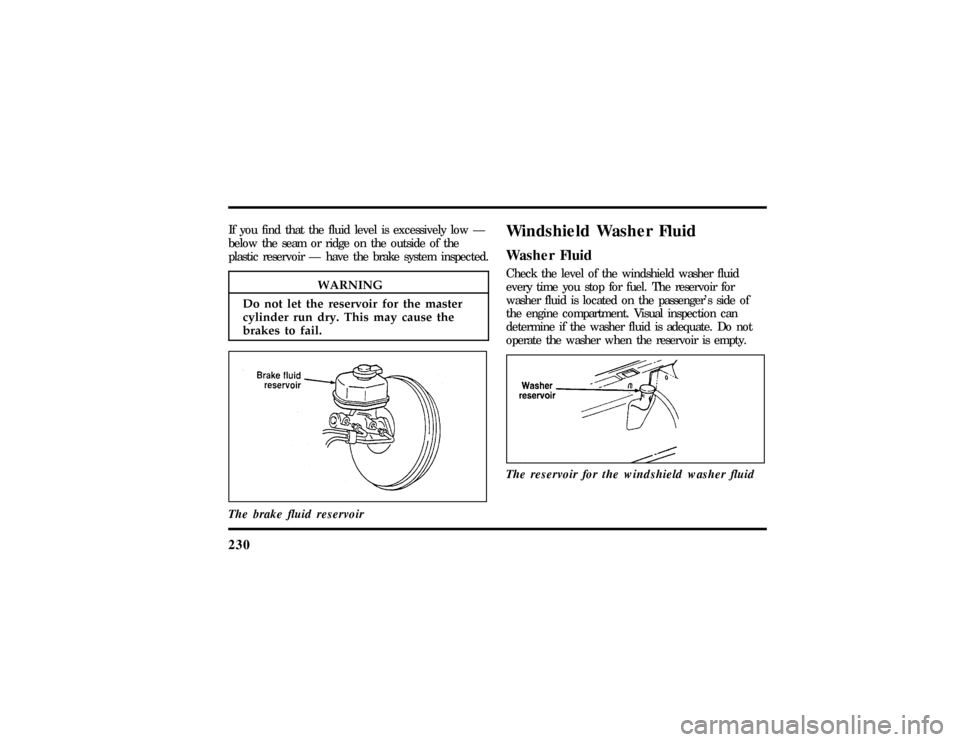
If yo ufin dtha tth e flui dleve lis excessivel ylow Ð
WARNING
Do no tle tth ereservoi rfo rth emaster
Windshiel dWashe rFluid
File:11fnmcc.ex
Page 232 of 321

231
WARNING
Do no tpu twindshiel dwashe rflui din
WARNING
Th ecoolin gfan is automati can dmay
Page 233 of 321

232
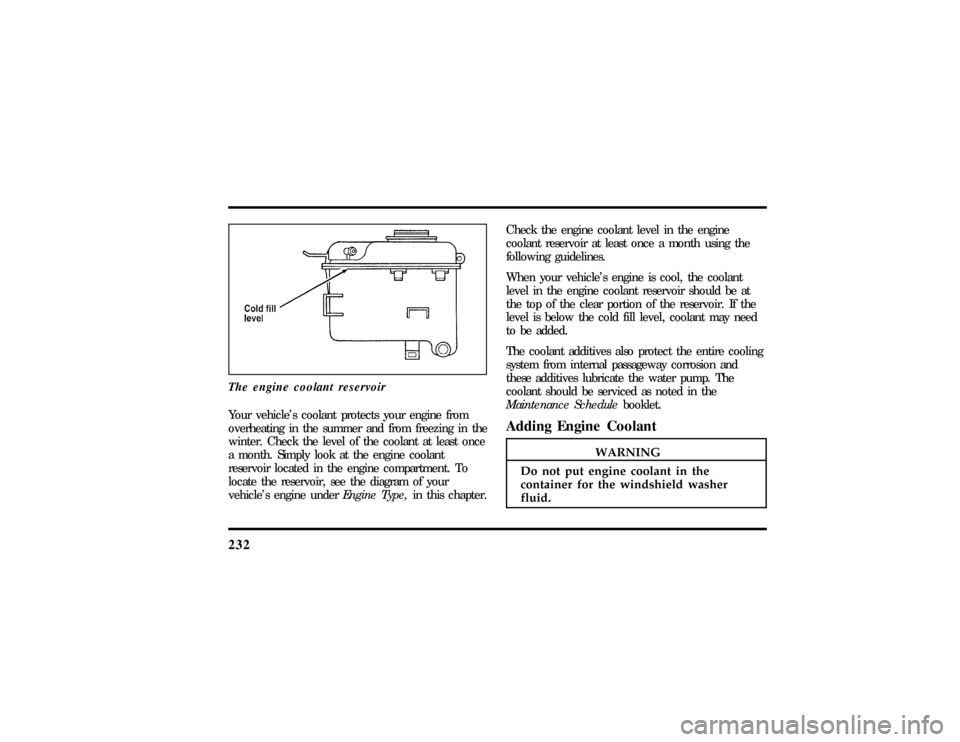
Theengin ecoolan treservoir
You rvehicle' scoolan tprotect syou rengin efrom
WARNING
D o no tpu tengin ecoolan tin the
Page 234 of 321

233
WARNING
Neverremov eth ecoolan trecover ycap
Page 235 of 321

234Do not use alcohol or methanol antifreeze or any
engine coolants mixed with alcohol or methanol
antifreeze. Do not use supplemental coolant
additives in your vehicle. These additives may harm
your engine cooling system. The use of an improper
coolant may void the warranty of your vehicle's
engine cooling system.Recycled engine coolantFord Motor Company recommends that Ford and
Lincoln-Mercury dealers use recycled engine coolant
produced by Ford-approved processes. Not all
coolant recycling processes produce coolant which
meets Ford specification ESE-M97B44-A, and use of
such coolant may harm engine and cooling system
components.
Always dispose of used automotive fluids in a
responsible manner. Follow your community's
regulations and standards for recycling and disposing
of automotive fluids.
Coolant refill capacityTo find out how much fluid your vehicle's cooling
system can hold, refer toRefill capacitiesin the
Capacities and specificationschapter.
Have your dealer check the engine cooling system
for leaks if you have to add more than a quart
(liter) of engine coolant per month.Severe winter climateIf you drive in extremely cold climates (less than
-34ÊF[-36ÊC]), it may benecessary to increase the
coolant concentration above 50%. Refer to the chart
on the coolant container to ensure the coolant
concentration in your vehicle is such that the
coolant will not freeze at the temperature level in
which you drive during winter months. Never
increase the engine coolant concentration above
60%. Leave a 50/50 mixture of engine coolant and
water in your vehicle year-round in non-extreme
climates.
File:11fnmcc.ex
Update:Fri Sep 6 08:51:16 1996
Page 236 of 321

235
Engine Coolant Refill ProcedureProper procedures for a complete coolant drain and
flush of the cooling system can be found in theCar
Service Manual.Following these recommended
procedures will ensure that the specified coolant
level and a 50/50 or appropriate mixture of coolant
and water is maintained.Engine Coolant Refill ProcedureWhen the entire cooling system is drained and
refilled, the following procedure should be used to
ensure a complete fill:
NOTE:It is imperative the following procedure be
adhered to. Failure to do so could result in damage
to your engine.q
Remove coolant reservoir pressure cap.
q
Remove the engine coolant outlet tube fill plug
on the engine.
q
With the engine off and cool, add a 50/50
mixture of recommended cooling system fluid
and water to the coolant outlet tube fill neck
until the reservoir is full.
NOTE:DO NOT FILL COOLANT SYSTEM
THROUGH COOLANT RESERVOIR. COOLANT
WILL NOT ENTER ENGINE, WHICH CAN LEAD
TO ENGINE DAMAGE.
NOTE:Avoid spilling coolant on the front end
accessory drive belt, as this will allow the belt to
slip and become noisy.
q
Reinstall the pressure cap to the coolant
reservoir.
q
Continue filling at the engine coolant tube fill
neck slowly while allowing air to escape.
q
Reinstall the engine coolant tube fill plug when
the system is full.
File:11fnmcc.ex
Update:Fri Sep 6 08:51:16 1996
Page 237 of 321

236q
Select maximum heater temperature and fan
speed settings. Position control to discharge air
at A/C vents in instrument panel.
q
Start engine and allow to idle. While engine is
idling, feel for hot air at A/C vents.
NOTE:IF AIR DISCHARGE REMAINS COOL AND
ENGINE TEMPERATURE GAUGE DOES NOT
MOVE,SHUT ENGINE OFF IMMEDIATELY.
This is an indication of low coolant level and/or air
pockets in coolant system. Allow engine to cool and
repeat the previous steps.
q
Allow to idle until normal operating temperature
is reached. Hot air should discharge from A/C
vents. The engine temperature gauge should
maintain a stabilized reading in the middle of
the ªNORMALº range and the lower radiator
hose should feel hot to the touch.
q
Shut off the engine and allow to cool down.
q
After the engine cools down, recheck the
engine coolant level. Fill reservoir to the
COLD-FULL level as required.
q
Check for leaks at the draincock, block plug
and vent plug.
q
Recheck the engine coolant level, using the
recommended procedure, after one or two
occasions of vehicle use. Fill to COLD-FULL
level as required.
File:11fnmcc.ex
Update:Fri Sep 6 08:51:16 1996
Page 238 of 321

237
Power Steering FluidCheck the level of the power steering fluid at least
twice a year (i.e., every Spring and Fall).Checking and Adding Power Steering
Fluid1. Start the engine and let it run until the power
steering fluid reaches normal operating
temperature. The power steering fluid will be at
the right temperature when the engine coolant
temperature gauge in the instrument cluster is
near the center of the NORMAL operating
temperature range.2. While the engine idles, turn the steering wheel
back and forth several times. Make sure that
the cap assembly is installed at this time.
3. Turn the engine off and check the level on the
power steering reservoir.
4. The fluid level is viewed through the sight
window on the power steering reservoir. If the
power steering fluid is below the middle line,
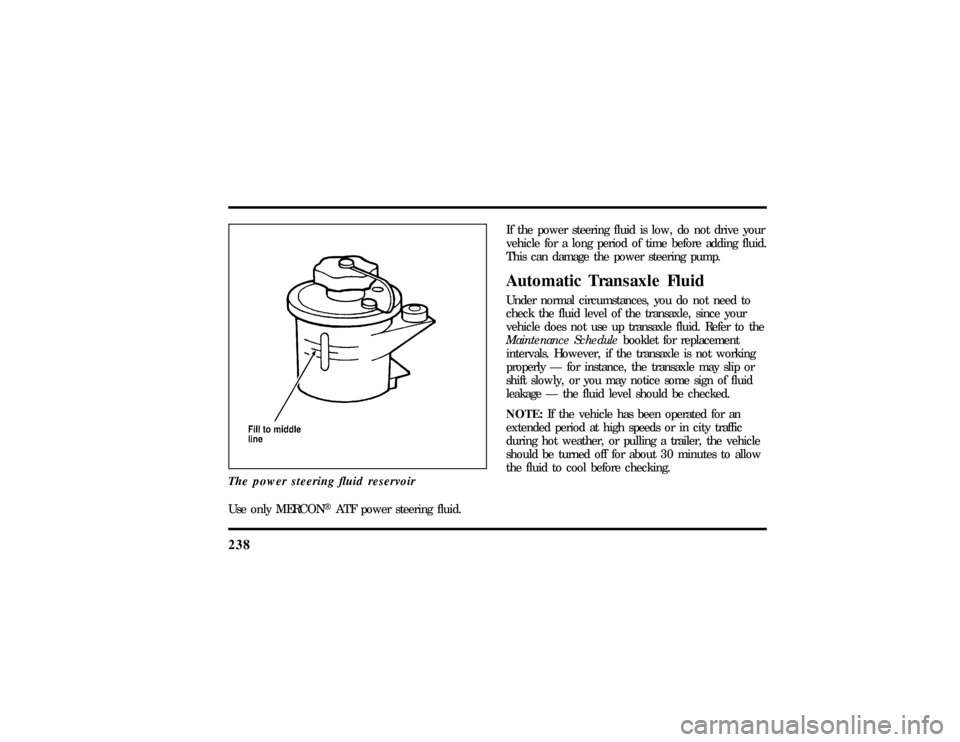
add fluid in small amounts, continuously
checking the level. Do not overfill.
File:11fnmcc.ex
Update:Fri Sep 6 08:51:16 1996
Page 239 of 321

238The power steering fluid reservoirUse only MERCONHATF power steering fluid.If the power steering fluid is low, do not drive your
vehicle for a long period of time before adding fluid.
This can damage the power steering pump.
Automatic Transaxle FluidUnder normal circumstances, you do not need to
check the fluid level of the transaxle, since your
vehicle does not use up transaxle fluid. Refer to the
Maintenance Schedulebooklet for replacement
intervals. However, if the transaxle is not working
properly Ð for instance, the transaxle may slip or
shift slowly, or you may notice some sign of fluid
leakage Ð the fluid level should be checked.
NOTE:If the vehicle has been operated for an
extended period at high speeds or in city traffic
during hot weather, or pulling a trailer, the vehicle
should be turned off for about 30 minutes to allow
the fluid to cool before checking.
File:11fnmcc.ex
Update:Fri Sep 6 08:51:16 1996
Page 240 of 321

239
Checking the Automatic Transaxle
FluidWith the vehicle on a level surface and the brake
fully applied, start the engine and move the gear
shift selector through all of the gears allowing
sufficient time for each position to engage. Securely
latch the gear shift selector in the P (Park) position.
Fully set the parking brake and leave the engine
running.
Wipe off the dipstick cap and pull the dipstick out.
Wipe the indicator end clean. Put the dipstick back
into the filler tube and make sure it is fully seated.
Pull the dipstick out and read the fluid level.
NOTE:Your vehicle should not be driven until
some fluid has been added if the fluid level is
below the bottom dimple on the dipstick and the
outside temperature is above50ÊF(10ÊC). Addonly
enough fluid to bring the level above the bottom
hole.If the vehicle has not been driven and the fluid
level is above the bottom dimple on the dipstick, do
not add fluid. Recheck the fluid level after your
vehicle has reached normal operating temperature.
Normal operating temperature is reached after
driving approximately 20 miles (30 km). The fluid
level should be within the crosshatched area on the
dipstick.
NOTE:If the vehicle has been operated for an
extended period at high speeds, driven in city traffic
during hot weather, or has been pulling a trailer,
the vehicle should be turned off for about 30
minutes to allow the fluid to cool before checking.
File:11fnmcc.ex
Update:Fri Sep 6 08:51:16 1996