LINCOLN MARK VIII 1997 Service Manual
Manufacturer: LINCOLN, Model Year: 1997, Model line: MARK VIII, Model: LINCOLN MARK VIII 1997Pages: 315, PDF Size: 2.18 MB
Page 41 of 315

36CHECK FRT TURN LAMPSÐ This warning
message is displayed when you turn on the front
turn lamps and at least one of them is burned out.
Check the lamps as soon as safely possible, and
have the burned out lamp replaced following the
instructions in theMaintenance and Carechapter.
LOW WASHER FLUIDÐ This warning message
is displayed when there is less than one quarter of
the container of washer fluid remaining. Check the
washer fluid level, and refill the reservoir following
the instructions in theMaintenance and Care
chapter.
TRUNK AJARÐ This warning message is
displayed when the trunk is not completely closed
and the ignition switch is either ON or ACC.CHECK TRACTION CONTROLÐ This warning
message is displayed when the Traction Control
system is not operating properly. If this warning
stays on or comes on, contact your dealer for
service as soon as safely possible. For further
information refer to theTraction Controlsection in
theDrivingchapter.
TRACTION CONTROL DISABLEDÐ This
warning message is displayed when the Traction
Control system is temporarily disabled due to an
overheating condition. This may occur in normal
operation due to a prolonged series of high speed
traction control or braking events. This warning is
removed when the traction control system has
cooled down sufficiently to resume normal
operation. If this warning stays on, contact your
dealer for service as soon as safely possible. For
further information refer to theTraction Control
section in theDrivingchapter.
File:03fnis8.ex
Update:Thu Jun 27 10:00:37 1996
Page 42 of 315

37
AIR RIDE SWITCH OFFÐ This warning message
is displayed when the AIR SUSPENSION SERVICE
SWITCH is in the OFF position. The air suspension
service switch is located in the vehicle trunk in the
jack stowage area on the left side. For more
information refer to theAir Suspensionsection in
theDrivingchapter.
CHECK AIR RIDE SYSTEMÐ This warning
message is displayed when the Air Suspension
System is not operating properly. If this warning
message is displayed while driving, pull off the road
as soon as safely possible. If the vehicle is loaded
beyond the recommended maximum payload, the
ªCHECK AIR RIDE SYSTEMº message may be
displayed. This is a normal condition if the vehicle
is overloaded. To correct this condition, remove or
redistribute the payload per the recommended
maximum requirements. Turn the ignition switch
from ON to OFF to ON again. If the warning
message reappears, turn the Air Suspension Service
Switch (located in the vehicle trunk in the jackstowage area on the left side) OFF and contact your
dealer for service as soon as safely possible. For
further information refer to theAir Suspension
section in theDrivingchapter.
CHANGE OIL SOON/OIL CHANGE
REQUIREDÐ This warning message is displayed
when the engine oil life remaining is 5% or less.
When Oil Life Left is between 5% and 0%, the
ªCHANGE OIL SOONº message will be displayed.
When Oil Life Left reaches 0%, the ªOIL CHANGE
REQUIREDº message will be displayed.
An oil change is required whenever indicated by
the Message Center. USE ONLY RECOMMENDED
ENGINE OILS (seeEngine Oilin the Index).
The Message Center will tell you the percent of oil
left during System Check. This percentage is based
on your driving history and the time since your last
oil change. In order to ensure accurate oil life left
indications, you should only perform the following
OIL CHANGE RESET Procedure after you have the
oil changed.
File:03fnis8.ex
Update:Thu Jun 27 10:00:37 1996
Page 43 of 315

38OIL CHANGE RESET PROCEDURE Ð This
procedure allows you to reset the oil monitoring
system to 100% (or your Personalized Oil Reset
Percentage) after each oil change.
1. Press the VEHICLE SETTINGS control until the
ªOIL CHANGE RESETº display appears.
2. Then press the RESET switch and hold it for 5
seconds while the display counts down to
trigger an oil change reset.
3. After a successful reset the Message Center will
display ªOIL LIFE RESET TO 100%º. If you
have established a Personalized Oil Reset
Percentage, the display will show that
percentage instead of 100%. To ensure accurate
oil life indicators, perform this reset procedure
only after an oil change. For more information
on Personalized Oil Reset Percentage see the
section onPersonalized Oil Reset Percentage.GEAR DISPLAY DATA ERRÐ This warning
message is displayed when the data used to provide
the redundant gear selection display on the
Instrument Cluster is missing or invalid. In this
case, the Instrument cluster redundant gear
selection display is turned off. The driver should use
the mechanical position indication on the center
console gear selector as temporary indication. If this
warning stays on, contact your dealer for service as
soon as safely possible.
File:03fnis8.ex
Update:Thu Jun 27 10:00:37 1996
Page 44 of 315

39
Function/Status Error MessagesFor some functions displayed by the Message
Center, there will be error messages displayed,
instead of the requested information, if that
information is not currently available because of
improper operation of sensor systems, or the vehicle
network communication between electronic
modules. In this case instead of displaying a
warning message which takes control of the display,
a function/status error message will be displayed
when the affected function is requested. These
messages will have 2 formats:
1. Data error messages in the form ªDATA
ERRORº or ªDATA ERRº. These messages
indicate improper operation of the vehicle
network communication between electronics
modules. If these messages occur on a regular
basis contact your dealer for service as soon as
safely possible.2. Invalid sensor operation messages with the form
ªSENSOR OPENº or ªSENSOR SHORTº. These
messages indicate improper operation of vehicle
sensor systems, or vehicle wiring/connectors
between the sensors and Message Center. If
these messages occur on a regular basis contact
your dealer for service as soon as safely
possible.
Electronic CompassThe electronic compass will be displayed when the
COMPASS switch is pressed. The display shows the
direction your car is traveling as one of the
following directions: North, Northeast, East,
Southeast, South, Southwest, West, or Northwest.
If a warning becomes active, the warning message
will override the compass display.
File:03fnis8.ex
Update:Thu Jun 27 10:00:37 1996
Page 45 of 315
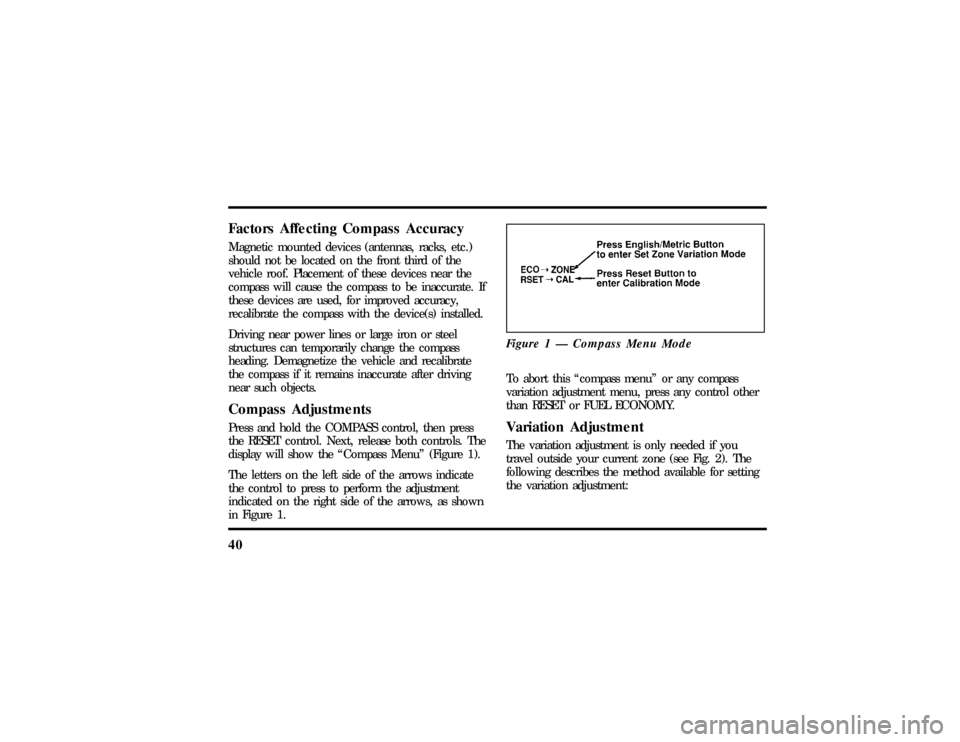
40Factors Affecting Compass AccuracyMagnetic mounted devices (antennas, racks, etc.)
should not be located on the front third of the
vehicle roof. Placement of these devices near the
compass will cause the compass to be inaccurate. If
these devices are used, for improved accuracy,
recalibrate the compass with the device(s) installed.
Driving near power lines or large iron or steel
structures can temporarily change the compass
heading. Demagnetize the vehicle and recalibrate
the compass if it remains inaccurate after driving
near such objects.Compass AdjustmentsPress and hold the COMPASS control, then press
the RESET control. Next, release both controls. The
display will show the ªCompass Menuº (Figure 1).
The letters on the left side of the arrows indicate
the control to press to perform the adjustment
indicated on the right side of the arrows, as shown
in Figure 1.Figure 1 Ð Compass Menu Mode
To abort this ªcompass menuº or any compass
variation adjustment menu, press any control other
than RESET or FUEL ECONOMY.Variation AdjustmentThe variation adjustment is only needed if you
travel outside your current zone (see Fig. 2). The
following describes the method available for setting
the variation adjustment:
File:03fnis8.ex
Update:Thu Jun 27 10:00:37 1996
Page 46 of 315
41
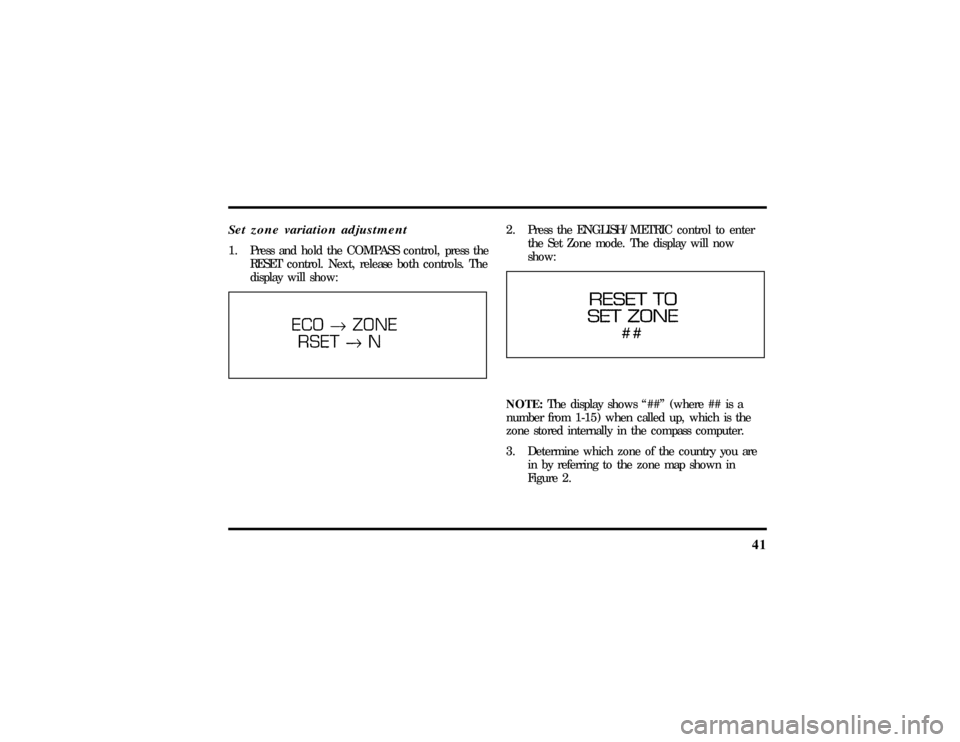
Set zone variation adjustment1. Press and hold the COMPASS control, press the
RESET control. Next, release both controls. The
display will show:
2. Press the ENGLISH/METRIC control to enter
the Set Zone mode. The display will now
show:NOTE:The display shows ª##º (where ## is a
number from 1-15) when called up, which is the
zone stored internally in the compass computer.
3. Determine which zone of the country you are
in by referring to the zone map shown in
Figure 2.
File:03fnis8.ex
Update:Thu Jun 27 10:00:37 1996
Page 47 of 315
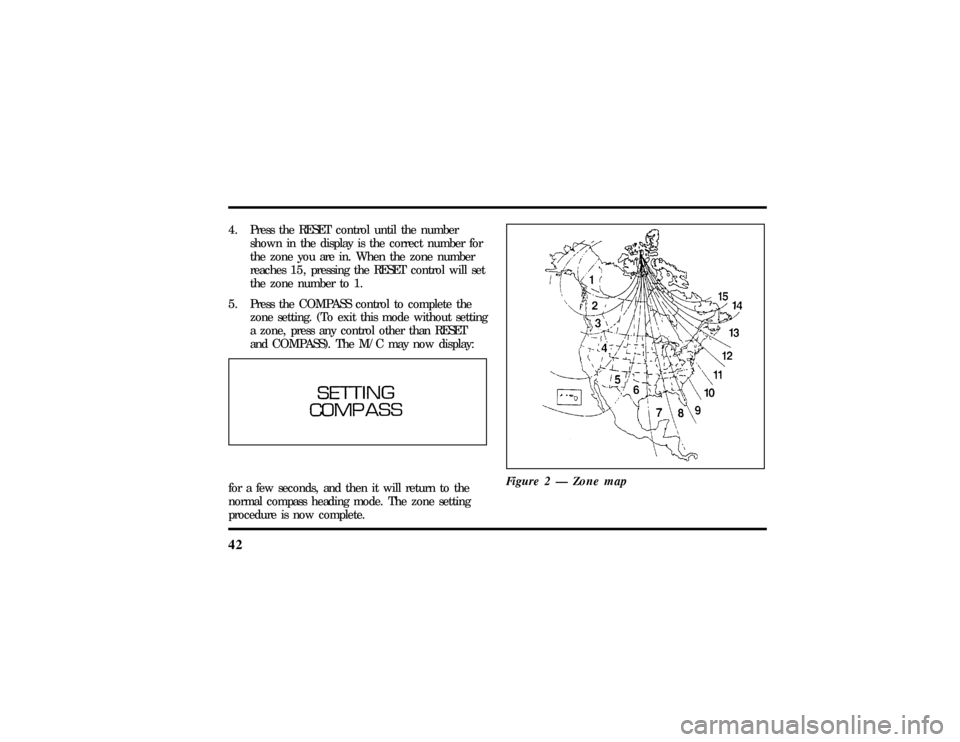
424. Press the RESET control until the number
shown in the display is the correct number for
the zone you are in. When the zone number
reaches 15, pressing the RESET control will set
the zone number to 1.
5. Press the COMPASS control to complete the
zone setting. (To exit this mode without setting
a zone, press any control other than RESET
and COMPASS). The M/C may now display:for a few seconds, and then it will return to the
normal compass heading mode. The zone setting
procedure is now complete.Figure 2 Ð Zone map
File:03fnis8.ex
Update:Thu Jun 27 10:00:37 1996
Page 48 of 315
43
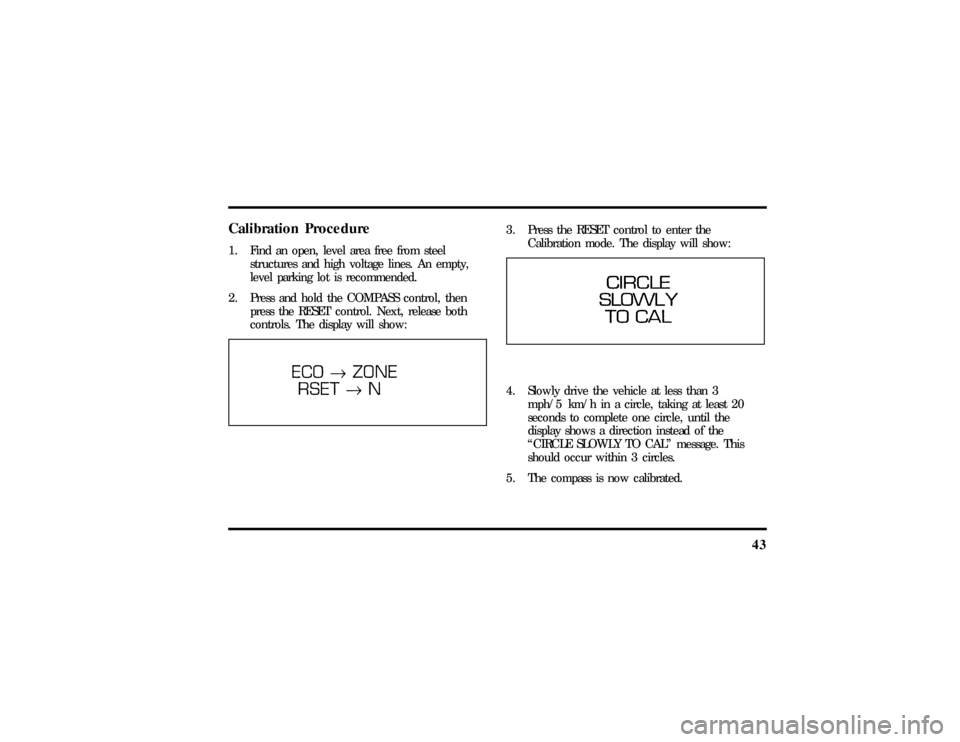
Calibration Procedure1. Find an open, level area free from steel
structures and high voltage lines. An empty,
level parking lot is recommended.
2. Press and hold the COMPASS control, then
press the RESET control. Next, release both
controls. The display will show:
3. Press the RESET control to enter the
Calibration mode. The display will show:4. Slowly drive the vehicle at less than 3
mph/5 km/h in a circle, taking at least 20
seconds to complete one circle, until the
display shows a direction instead of the
ªCIRCLE SLOWLY TO CALº message. This
should occur within 3 circles.
5. The compass is now calibrated.
File:03fnis8.ex
Update:Thu Jun 27 10:00:37 1996
Page 49 of 315

44TroubleshootingIf the display shows the following message during
any of the compass adjustment procedures, contact
your dealer:If the compass always displays one direction while
turning a full 360-degree circle, perform the
Calibration Procedure.
A system of warning lights are located below the
Message Center. Warning lights are used to monitor
the operation of your vehicle.
Safety Belt Warning Light and ChimeThis warning light and chime remind you to fasten
your safety belt. The following conditions will take
place:q
If the driver's safety belt is not buckled when
the ignition is turned to the ON position, the
light will turn on for 1 to 2 minutes and the
chime will sound for 4 to 8 seconds.
q
If the driver's safety belt is buckled while the
light is on and the chime is sounding, the light
and the chime will turn off.
q
If the driver's safety belt is buckled before the
ignition is turned to the ON position, neither
the light nor the chime will turn on.
File:03fnis8.ex
Update:Thu Jun 27 10:00:37 1996
Page 50 of 315
45
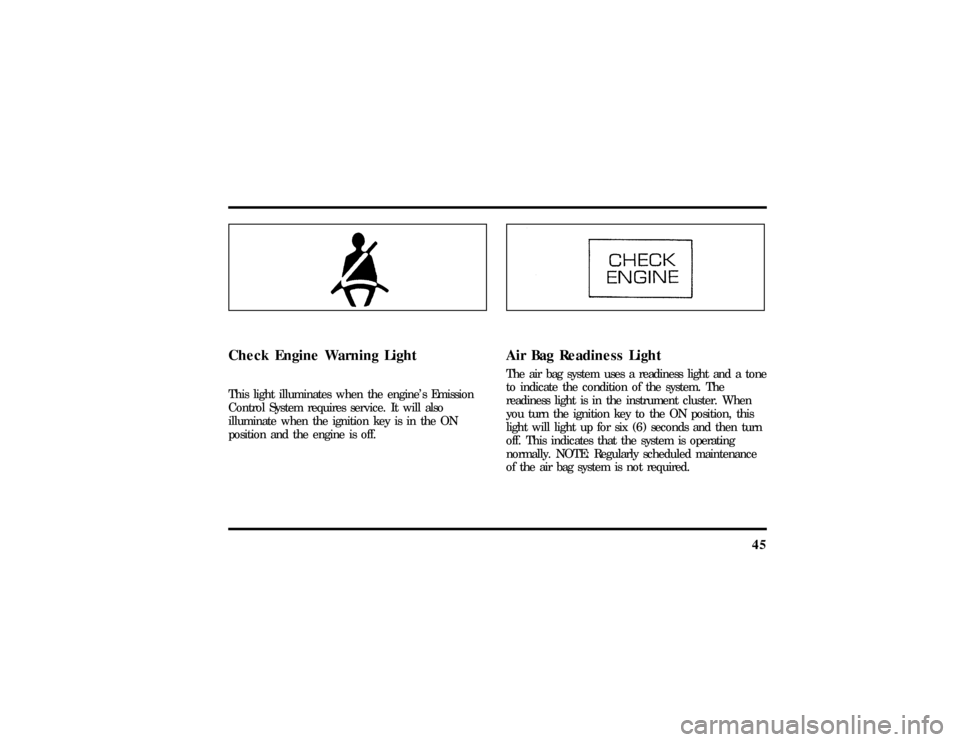
Check Engine Warning LightThis light illuminates when the engine's Emission
Control System requires service. It will also
illuminate when the ignition key is in the ON
position and the engine is off.
Air Bag Readiness LightThe air bag system uses a readiness light and a tone
to indicate the condition of the system. The
readiness light is in the instrument cluster. When
you turn the ignition key to the ON position, this
light will light up for six (6) seconds and then turn
off. This indicates that the system is operating
normally. NOTE: Regularly scheduled maintenance
of the air bag system is not required.
File:03fnis8.ex
Update:Thu Jun 27 10:00:37 1996