LINCOLN MKX 2018 Owners Manual
Manufacturer: LINCOLN, Model Year: 2018, Model line: MKX, Model: LINCOLN MKX 2018Pages: 603, PDF Size: 4.94 MB
Page 341 of 603
Cleaning ProcedureType of Stain
Use lukewarm water and rinse by dabbing with clean water.Indelible pencil, cocoa, chocolate, pastry with cream or chocolate, icecream or mustard.
Use lemon juice, wipe with lukewarm water and rinse by dabbing withclean water.Vinegar, hair gel, tomato sauce or coffee with sugar.
Use ethyl alcohol, then dab with water.Dye transfer and all other stains.
CLEANING THE INSTRUMENT
PANEL AND INSTRUMENT
CLUSTER LENS
WARNING
Do not use chemical solvents or strongdetergents when cleaning the steeringwheel or instrument panel to avoidcontamination of the airbag system.
Note:Follow the same procedure ascleaning leather seats for cleaning leatherinstrument panels and leather interior trimsurfaces. See Cleaning Leather Seats (page339).
Clean the instrument panel and cluster lenswith a clean, damp and soft cloth, then usea clean, dry and soft cloth to dry these areas.
•Avoid cleaners or polishes that increasethe gloss of the upper portion of theinstrument panel. The dull finish in thisarea helps protect you from undesirablewindshield reflection.
•Do not use any household cleaningproducts or glass cleaners as these maydamage the finish of the instrumentpanel, interior trim and cluster lens.
•Wash or wipe your hands clean if youhave been in contact with certainproducts such as insect repellent andsuntan lotion to avoid possible damageto the interior painted surfaces.
•Do not allow air fresheners and handsanitizers to spill onto interior surfaces.If a spill occurs, wipe off immediately.Your warranty may not cover thesedamages.
If a staining liquid like coffee or juice hasbeen spilled on the instrument panel or oninterior trim surfaces:
1.Wipe up spilled liquid using a clean, softcloth as quickly as possible.
338
MKX (CD9) Canada/United States of America, enUSA, Edition date: 201707, First Printing
Vehicle Care
Page 342 of 603
2. Use Motorcraft Premium Leather andVinyl Cleaner or a commercially availableleather cleaning product for automotiveinteriors. Test any cleaner or stainremover on an inconspicuous area.
3. Alternatively, wipe the surface with aclean, soft cloth and a mild soap andwater solution. Dry the area with a clean,soft cloth.
4.If necessary, apply more soap and watersolution or cleaning product to a clean,soft cloth and press it onto the soiledarea. Allow this to set at roomtemperature for 30 minutes.
5. Remove the soaked cloth, then with aclean, damp cloth, use a rubbing motionfor 60 seconds on the soiled area.
6. Dry the area with a clean, soft cloth.
CLEANING LEATHER SEATS
Note:Follow the same procedure ascleaning leather seats for cleaning leatherinstrument panels and leather interior trimsurfaces.
For routine cleaning, wipe the surface witha soft, damp cloth and a mild soap and watersolution. Dry the area with a clean, soft cloth.
For cleaning and removing stains such asdye transfer, use Motorcraft Premium Leatherand Vinyl Cleaner or a commercially availableleather cleaning product for automotiveinteriors.
Note:Test any cleaner or stain remover onan inconspicuous area.
You should:
•Remove dust and loose dirt with avacuum cleaner.
•Clean and treat spills and stains as soonas possible.
Do not use the following products as thesemay damage the leather:
•Oil and petroleum or silicone-basedleather conditioners.
•Household cleaners.
•Alcohol solutions.
•Solvents or cleaners intended specificallyfor rubber, vinyl and plastics.
REPAIRING MINOR PAINT
DAMAGE
Authorized dealers have touch-up paint tomatch your vehicle’s color. Your vehicle colorcode is printed on a sticker on the front,left-hand side door jamb. Take your colorcode to your authorized dealer to make sureyou get the correct color.
Before repairing minor paint damage, use acleaner such as Motorcraft Bug and TarRemover to remove particles such as birddroppings, tree sap, insect deposits, tarspots, road salt and industrial fallout.
Always read the instructions before usingcleaning products.
CLEANING THE WHEELS
Note:Do not apply a cleaning chemical towarm or hot wheel rims and covers.
Note:Some automatic car washes maycause damage to the finish on your wheelrims and covers.
339
MKX (CD9) Canada/United States of America, enUSA, Edition date: 201707, First Printing
Vehicle Care
Page 343 of 603
Note:Industrial-strength or heavy-dutycleaners in combination with brush agitationto remove brake dust and dirt, could wearaway the clear coat finish over a period time.
Note:Do not use hydrofluoric acid-based orhigh caustic-based wheel cleaners, steelwool, fuels or strong household detergents.
Note:If you intend parking your vehicle foran extended period after cleaning thewheels with a wheel cleaner, drive yourvehicle for a few minutes before doing so.This will reduce the risk of increasedcorrosion of the brake discs.
Alloy wheels and wheel covers are coatedwith a clear coat paint finish. To maintaintheir condition we recommend that you:
•Clean the wheels weekly usingMotorcraft Wheel and Tire Cleaner. Applyusing manufacturer's instructions.
•Use a sponge to remove heavy depositsof dirt and brake dust accumulation.
•Rinse thoroughly with a strong stream ofwater when you have completed thecleaning process.
•To remove tar and grease, use MotorcraftBug and Tar Remover.
VEHICLE STORAGE
If you plan on storing your vehicle for 30days or more, read the followingmaintenance recommendations to make sureyour vehicle stays in good operatingcondition.
We engineer and test all motor vehicles andtheir components for reliable, regular driving.Under various conditions, long-term storagemay lead to degraded engine performanceor failure unless you use specific precautionsto preserve engine components.
General
•Store all vehicles in a dry, ventilatedplace.
•Protect from sunlight, if possible.
•If vehicles are stored outside, theyrequire regular maintenance to protectagainst rust and damage.
Body
•Wash your vehicle thoroughly to removedirt, grease, oil, tar or mud from exteriorsurfaces, rear-wheel housing and theunderside of front fenders.
•Periodically wash your vehicle if it isstored in exposed locations.
•Touch-up exposed or primed metal toprevent rust.
•Cover chrome and stainless steel partswith a thick coat of auto wax to preventdiscoloration. Re-wax as necessary whenyou wash your vehicle.
•Lubricate all hood, door and luggagecompartment hinges and latches with alight grade oil.
340
MKX (CD9) Canada/United States of America, enUSA, Edition date: 201707, First Printing
Vehicle Care
Page 344 of 603
•Cover interior trim to prevent fading.
•Keep all rubber parts free from oil andsolvents.
Engine
•Change the engine oil and filter prior tostorage because used engine oil containscontaminates which may cause enginedamage.
•Start the engine every 15 days for aminimum of 15 minutes. Run at fast idlewith the climate controls set to defrostuntil the engine reaches normaloperating temperature.
•With your foot on the brake, shift throughall the gears while the engine is running.
•We recommend that you change theengine oil before you use your vehicleagain.
Fuel system
•Fill the fuel tank with high-quality fueluntil the first automatic shutoff of the fuelpump nozzle.
Cooling system
•Protect against freezing temperatures.
•When removing your vehicle fromstorage, check coolant fluid level.Confirm that there are no cooling systemleaks and that fluid is at therecommended level.
Battery
•Check and recharge as necessary. Keepconnections clean.
•If storing your vehicle for more than 30days without recharging the battery, werecommend that you disconnect thebattery cables to maintain battery chargefor quick starting.
Note:It is necessary to reset memoryfeatures if battery cables are disconnected.
Brakes
•Make sure the brakes and parking brakerelease fully.
Tires
•Maintain recommended air pressure.
Miscellaneous
•Make sure all linkages, cables, levers andpins under your vehicle are covered withgrease to prevent rust.
•Move vehicles at least 25 ft (7.5 m) every15 days to lubricate working parts andprevent corrosion.
Removing Vehicle From Storage
When your vehicle is ready to come out ofstorage, do the following:
•Wash your vehicle to remove any dirt orgrease film build-up on window surfaces.
•Check windshield wipers for anydeterioration.
•Check under the hood for any foreignmaterial that may have collected duringstorage such as mice or squirrel nests.
•Check the exhaust for any foreignmaterial that may have collected duringstorage.
•Check tire pressures and set tire inflationper the Tire Label.
341
MKX (CD9) Canada/United States of America, enUSA, Edition date: 201707, First Printing
Vehicle Care
Page 345 of 603
•Check brake pedal operation. Drive yourvehicle 15 ft (4.5 m) back and forth toremove rust build-up.
•Check fluid levels (including coolant, oiland gas) to make sure there are no leaks,and fluids are at recommended levels.
•If you remove the battery, clean thebattery cable ends and check fordamage.
Contact an authorized dealer if you have anyconcerns or issues.
BODY STYLING KITS
The distance between the underside of yourvehicle and the ground is less than that ofother models. Drive with extreme care toavoid damage to your vehicle.
342
MKX (CD9) Canada/United States of America, enUSA, Edition date: 201707, First Printing
Vehicle Care
Page 346 of 603
GENERAL INFORMATION
Notice to utility vehicle and truckowners
WARNINGS
Utility vehicles have a significantlyhigher rollover rate than other types ofvehicles. To reduce the risk of serious injuryor death from a rollover or other crash youmust avoid sharp turns and abruptmaneuvers, drive at safe speeds for theconditions, keep tires properly inflated, neveroverload or improperly load your vehicle,and make sure every passenger is properlyrestrained.
In a rollover crash, an unbelted personis significantly more likely to die thana person wearing a seat belt. All occupantsmust wear seat belts, and children andinfants must use appropriate restraints tominimize the risk of injury or ejection.
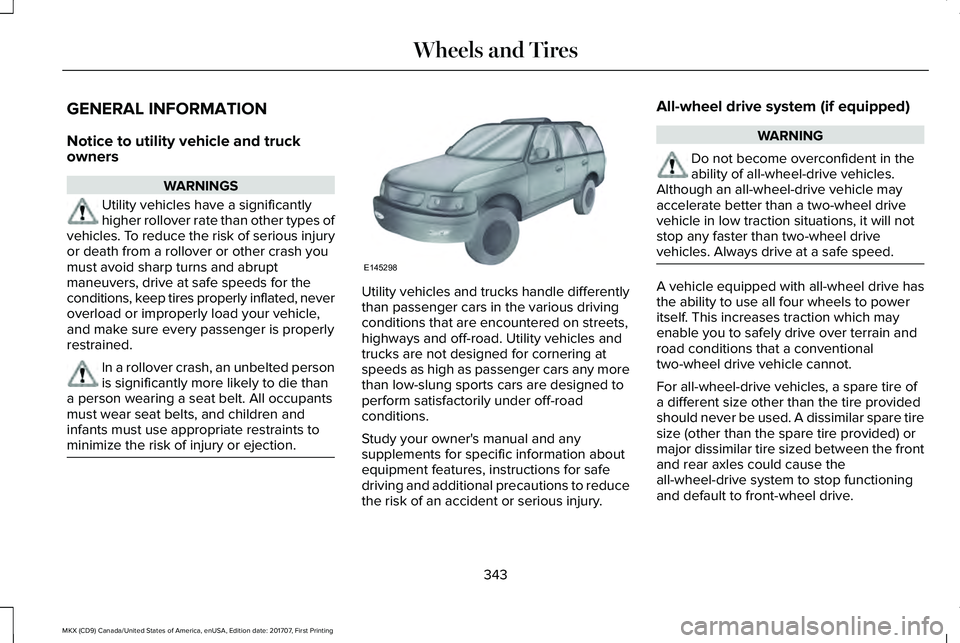
Utility vehicles and trucks handle differentlythan passenger cars in the various drivingconditions that are encountered on streets,highways and off-road. Utility vehicles andtrucks are not designed for cornering atspeeds as high as passenger cars any morethan low-slung sports cars are designed toperform satisfactorily under off-roadconditions.
Study your owner's manual and anysupplements for specific information aboutequipment features, instructions for safedriving and additional precautions to reducethe risk of an accident or serious injury.
All-wheel drive system (if equipped)
WARNING
Do not become overconfident in theability of all-wheel-drive vehicles.Although an all-wheel-drive vehicle mayaccelerate better than a two-wheel drivevehicle in low traction situations, it will notstop any faster than two-wheel drivevehicles. Always drive at a safe speed.
A vehicle equipped with all-wheel drive hasthe ability to use all four wheels to poweritself. This increases traction which mayenable you to safely drive over terrain androad conditions that a conventionaltwo-wheel drive vehicle cannot.
For all-wheel-drive vehicles, a spare tire ofa different size other than the tire providedshould never be used. A dissimilar spare tiresize (other than the spare tire provided) ormajor dissimilar tire sized between the frontand rear axles could cause theall-wheel-drive system to stop functioningand default to front-wheel drive.
343
MKX (CD9) Canada/United States of America, enUSA, Edition date: 201707, First Printing
Wheels and TiresE145298
Page 347 of 603

How your vehicle differs from othervehicles
Sport utility vehicles and trucks can differfrom some other vehicles in a few noticeableways. Your vehicle may be:
•Higher - to allow higher load carryingcapacity and to allow it to travel overrough terrain without getting hung up ordamaging underbody components.
•Shorter - to give it the capability toapproach inclines and drive over thecrest of a hill without getting hung up ordamaging underbody components. Allother things held equal, a shorterwheelbase may make your vehiclequicker to respond to steering inputsthan a vehicle with a longer wheelbase.
•Narrower - to provide greatermaneuverability in tight spaces,particularly in off-road use.
344
MKX (CD9) Canada/United States of America, enUSA, Edition date: 201707, First Printing
Wheels and TiresE145299
Page 348 of 603
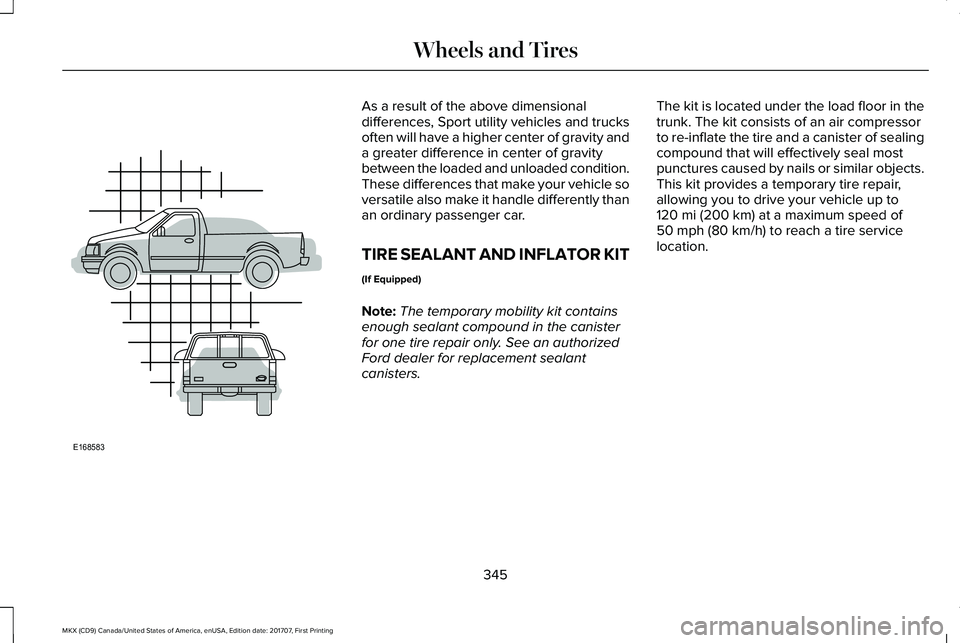
As a result of the above dimensionaldifferences, Sport utility vehicles and trucksoften will have a higher center of gravity anda greater difference in center of gravitybetween the loaded and unloaded condition.These differences that make your vehicle soversatile also make it handle differently thanan ordinary passenger car.
TIRE SEALANT AND INFLATOR KIT
(If Equipped)
Note:The temporary mobility kit containsenough sealant compound in the canisterfor one tire repair only. See an authorizedFord dealer for replacement sealantcanisters.
The kit is located under the load floor in thetrunk. The kit consists of an air compressorto re-inflate the tire and a canister of sealingcompound that will effectively seal mostpunctures caused by nails or similar objects.This kit provides a temporary tire repair,allowing you to drive your vehicle up to120 mi (200 km) at a maximum speed of50 mph (80 km/h) to reach a tire servicelocation.
345
MKX (CD9) Canada/United States of America, enUSA, Edition date: 201707, First Printing
Wheels and TiresE168583
Page 349 of 603
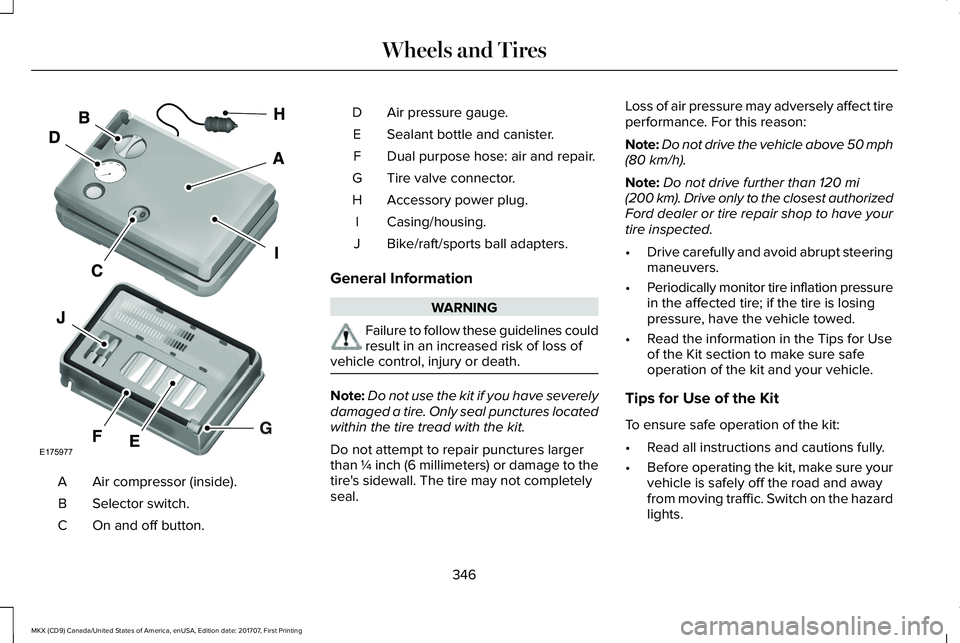
Air compressor (inside).A
Selector switch.B
On and off button.C
Air pressure gauge.D
Sealant bottle and canister.E
Dual purpose hose: air and repair.F
Tire valve connector.G
Accessory power plug.H
Casing/housing.I
Bike/raft/sports ball adapters.J
General Information
WARNING
Failure to follow these guidelines couldresult in an increased risk of loss ofvehicle control, injury or death.
Note:Do not use the kit if you have severelydamaged a tire. Only seal punctures locatedwithin the tire tread with the kit.
Do not attempt to repair punctures largerthan ¼ inch (6 millimeters) or damage to thetire's sidewall. The tire may not completelyseal.
Loss of air pressure may adversely affect tireperformance. For this reason:
Note:Do not drive the vehicle above 50 mph(80 km/h).
Note:Do not drive further than 120 mi(200 km). Drive only to the closest authorizedFord dealer or tire repair shop to have yourtire inspected.
•Drive carefully and avoid abrupt steeringmaneuvers.
•Periodically monitor tire inflation pressurein the affected tire; if the tire is losingpressure, have the vehicle towed.
•Read the information in the Tips for Useof the Kit section to make sure safeoperation of the kit and your vehicle.
Tips for Use of the Kit
To ensure safe operation of the kit:
•Read all instructions and cautions fully.
•Before operating the kit, make sure yourvehicle is safely off the road and awayfrom moving traffic. Switch on the hazardlights.
346
MKX (CD9) Canada/United States of America, enUSA, Edition date: 201707, First Printing
Wheels and TiresE175977
Page 350 of 603
•Always set the parking brake to ensurethe vehicle does not move unexpectedly.
•Do not remove any foreign objects, suchas nails or screws, from the tire.
•When using the kit, leave the enginerunning (only if the vehicle is outdoors orin a well-ventilated area) so thecompressor does not drain the vehicle'sbattery.
•Do not allow the compressor to operatecontinuously for more than 15 minutes.This will help prevent the compressorfrom overheating.
•Never leave the kit unattended duringoperation.
•Sealant compound contains latex. Thosewith latex sensitivities should useappropriate precautions to avoid anallergic reaction.
•Keep the kit away from children.
•Only use the kit when the ambienttemperature is between -22°F (-30°C) and158°F (70°C).
•Only use the sealing compound beforethe use-by date. The use-by date is on alabel on the sealant canister, which youcan see through the rectangular viewingwindow on the bottom of the compressor.Check the use-by date regularly andreplace the canister after four years ofnon-use.
•Do not store the kit unsecured inside thepassenger compartment of the vehicleas it may cause injury during a suddenstop or crash. Always store the kit in itsoriginal location.
•After sealant use, an authorized Forddealer must replace the tire pressuremonitoring system sensor and valve stemon the wheel.
•Operating the kit could cause anelectrical disturbance in radio, CD andDVD player operation.
* When inflation only is required fora tire or other objects, the selectormust be in the Air position.
What to do When a Tire Is Punctured
You can repair a tire puncture within the tire'stread area in two stages with the kit.
•In the first stage, inflate the tire with asealing compound and air. After youinflate the tire, you will need to drive thevehicle a short distance 4 mi (6 km) todistribute the sealant in the tire.
•In the second stage, check the tirepressure and adjust, if necessary, to thevehicle's specified tire inflation pressure.
First Stage: Inflating the Tire withSealing Compound and Air
WARNINGS
Do not stand directly over the kit whileinflating the tire. If you notice anyunusual bulges or deformations in the tire'ssidewall during inflation, stop and callroadside assistance.
If the tire does not inflate to therecommended tire pressure within 15minutes, stop and call roadside assistance.
347
MKX (CD9) Canada/United States of America, enUSA, Edition date: 201707, First Printing
Wheels and TiresE175978