check engine LINCOLN MKZ HYBRID 2014 Owner's Manual
[x] Cancel search | Manufacturer: LINCOLN, Model Year: 2014, Model line: MKZ HYBRID, Model: LINCOLN MKZ HYBRID 2014Pages: 445, PDF Size: 3.8 MB
Page 253 of 445
GENERAL INFORMATION
Have your vehicle serviced regularly to
help maintain its roadworthiness and
resale value. There is a large network of
Ford authorized dealers that are there to
help you with their professional servicing
expertise. We believe that their specially
trained technicians are best qualified to
service your vehicle properly and expertly.
They are supported by a wide range of
highly specialized tools developed
specifically for servicing your vehicle.
To help you service your vehicle, we
provide scheduled maintenance
information which makes tracking routine
service easy. See Scheduled
Maintenance (page 412).
If your vehicle requires professional
service, your authorized dealer can
provide the necessary parts and service.
Check your warranty information to find
out which parts and services are covered.
Use only recommended fuels, lubricants,
fluids and service parts conforming to
specifications. Motorcraft® parts are
designed and built to provide the best
performance in your vehicle.
Precautions
• Do not work on a hot engine.
• Make sure that nothing gets caught in
moving parts. •
Do not work on a vehicle with the
engine running in an enclosed space,
unless you are sure you have enough
ventilation.
• Keep all open flames and other
burning material (such as cigarettes)
away from the battery and all fuel
related parts.
Working with the Engine Off
1. Set the parking brake and shift to
P
(Park).
2. Turn off the engine and remove the key (if equipped).
3. Block the wheels.
Working with the Engine On WARNING
To reduce the risk of vehicle damage
and/or personal burn injuries, do not
start your engine with the air cleaner
removed and do not remove it while the
engine is running. 1. Set the parking brake and shift to
P
(Park).
2. Block the wheels
251
MKZ (CC9) Maintenance
Page 256 of 445
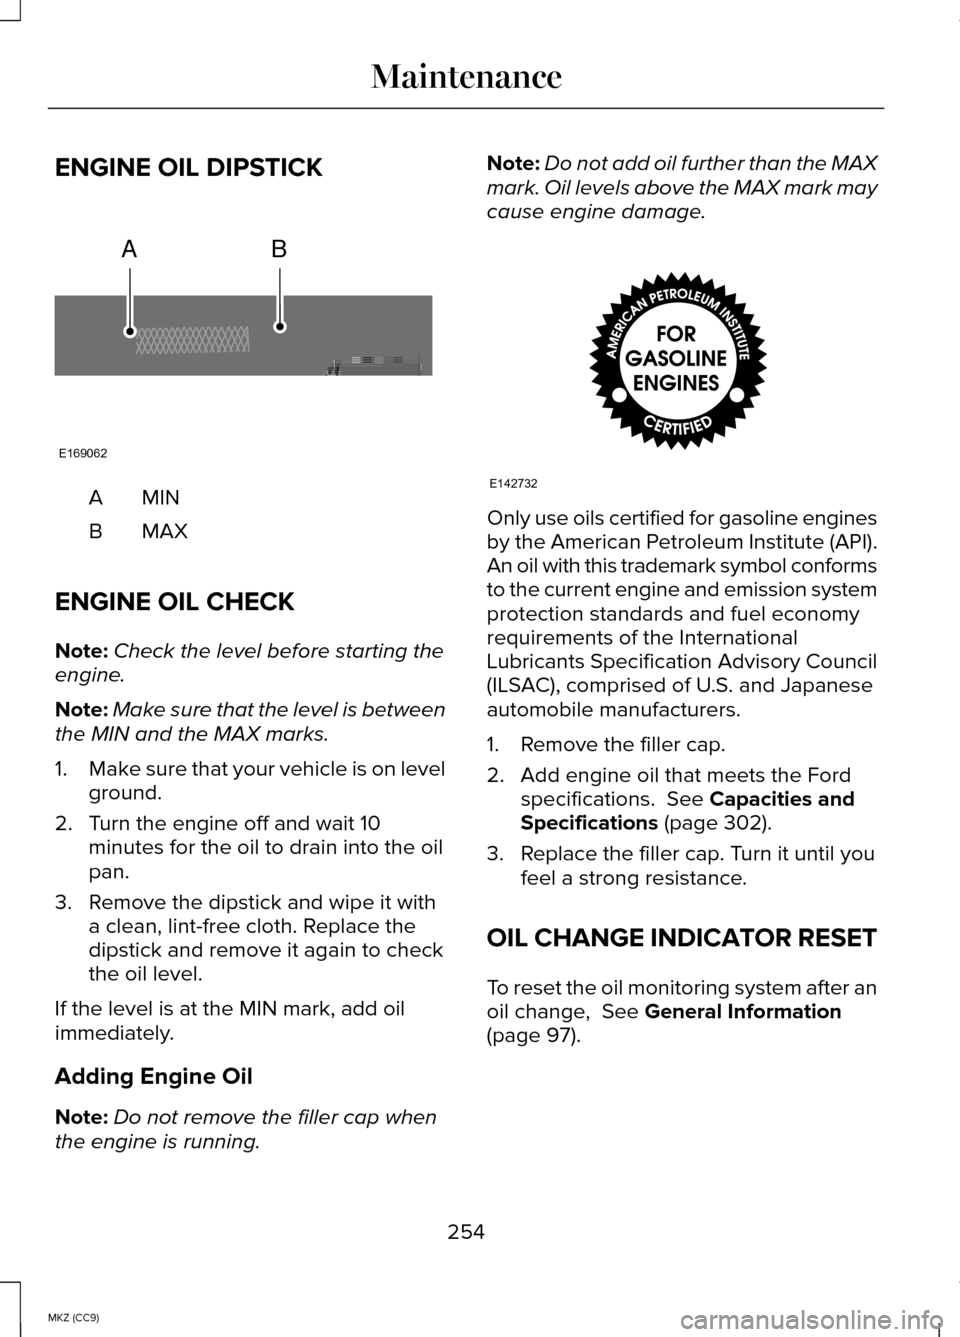
ENGINE OIL DIPSTICK
MINA
MAXB
ENGINE OIL CHECK
Note: Check the level before starting the
engine.
Note: Make sure that the level is between
the MIN and the MAX marks.
1. Make sure that your vehicle is on level
ground.
2. Turn the engine off and wait 10 minutes for the oil to drain into the oil
pan.
3. Remove the dipstick and wipe it with a clean, lint-free cloth. Replace the
dipstick and remove it again to check
the oil level.
If the level is at the MIN mark, add oil
immediately.
Adding Engine Oil
Note: Do not remove the filler cap when
the engine is running. Note:
Do not add oil further than the MAX
mark. Oil levels above the MAX mark may
cause engine damage. Only use oils certified for gasoline engines
by the American Petroleum Institute (API).
An oil with this trademark symbol conforms
to the current engine and emission system
protection standards and fuel economy
requirements of the International
Lubricants Specification Advisory Council
(ILSAC), comprised of U.S. and Japanese
automobile manufacturers.
1. Remove the filler cap.
2. Add engine oil that meets the Ford
specifications. See Capacities and
Specifications (page 302).
3. Replace the filler cap. Turn it until you feel a strong resistance.
OIL CHANGE INDICATOR RESET
To reset the oil monitoring system after an
oil change,
See General Information
(page 97).
254
MKZ (CC9) MaintenanceAB
E169062 E142732
Page 257 of 445
ENGINE COOLANT CHECK
Engine Coolant and Inverter System
Controller Coolant
Your vehicle is equipped with two
separate cooling systems. One is for
cooling the engine and one is for cooling
the inverter system controller that is
specific to the hybrid operating system.
The two systems operate similarly, with
the inverter system controller cooling
system generally operating at a lower
temperature and pressure.
Checking the Engine Coolant
When the engine is cold, check the
concentration and level of the engine
coolant at the intervals listed in the
scheduled maintenance information. See
Scheduled Maintenance (page 412).
Note: Make sure that the level is between
the MIN and MAX marks on the engine
coolant reservoir.
Note: Coolant expands when it is hot. The
level may extend beyond the MAX mark.
Note: If the level is at the MIN mark, below
the MIN mark, or empty, add prediluted
coolant immediately. See
Adding Engine
Coolant in this chapter.
The coolant concentration should be
maintained within 48% to 50%, which
equates to a freeze point between -30°F
(-34°C) and -34°F (-37°C). Note:
For best results, coolant
concentration should be tested with a
refractometer such as Rotunda tool
300-ROB75240 available from your
dealer. Ford does not recommend the use
of hydrometers or coolant test strips for
measuring coolant concentrations.
Note: Automotive fluids are not
interchangeable. Do not use engine
coolant or antifreeze or windshield washer
fluid outside of its specified function and
vehicle location.
Checking the Inverter System
Controller Coolant
When the engine is cold, check the
concentration and level of the inverter
system controller coolant at the intervals
listed in the scheduled maintenance
information. See Scheduled Maintenance
(page
412).
Note: Make sure that the level is between
the MIN and MAX marks on the inverter
system controller coolant reservoir.
Note: Coolant expands when it is hot. The
level may extend beyond the MAX mark.
Note: If the level is at the MIN mark, below
the MIN mark, or empty, add prediluted
coolant immediately. See Adding Inverter
System Controller Coolant in this chapter.
The coolant concentration should be
maintained within 48% to 50%, which
equates to a freeze point between -30°F
(-34°C) and -34°F (-37°C).
255
MKZ (CC9) Maintenance
Page 259 of 445
•
Do not mix different colors or types of
coolant in your vehicle. Make sure the
correct coolant is used. Mixing of
coolants may harm your cooling
system. The use of an improper
coolant may harm the engine, inverter
system controller, and cooling system
components and may void the
warranty.
• In case of emergency, a large amount
of water without engine coolant may
be added to the engine cooling system
only in order to reach a vehicle service
location. In this instance, the engine
cooling system must be drained,
chemically cleaned with Motorcraft
Premium Cooling System Flush, and
refilled with prediluted engine coolant
as soon as possible. Water alone
(without engine coolant) can cause
engine damage from corrosion,
overheating, or freezing. DO NOT use
this method for the inverter system
controller cooling system. The inverter
system controller cooling system
operates close to ambient
temperature, and is susceptible to
freezing in any subfreezing
environment in the absence of coolant.
• Do not use alcohol, methanol, brine or
any engine coolants mixed with alcohol
or methanol antifreeze (coolant).
Alcohol and other liquids can cause
engine damage from overheating or
freezing.
• Do not add extra inhibitors or additives
to the coolant. These can be harmful
and compromise the corrosion
protection of the engine coolant. Adding Engine Coolant
1.
Unscrew the engine coolant reservoir
cap slowly. Any pressure will escape
as you unscrew the cap.
2. Use a funnel to add prediluted engine
coolant to the engine coolant reservoir.
Make sure that the level is between
the MIN and MAX marks on the engine
coolant reservoir. Use prediluted
engine coolant meeting the Ford
specification. See Capacities and
Specifications (page 302).
3. Close the engine coolant reservoir cap.
Whenever you add coolant, check the
coolant level in the engine coolant
reservoir the next few times you drive the
vehicle. If necessary, add enough
prediluted engine coolant to bring the
engine coolant level to the proper level.
Adding Inverter System Controller
Coolant
1. Open the inverter system controller coolant reservoir cap.
2. Use a funnel to add prediluted coolant
to the inverter system controller
coolant reservoir. Make sure that the
level is between the MIN and MAX
marks on the inverter system controller
coolant reservoir. Use prediluted
coolant meeting the Ford specification.
See
Capacities and Specifications
(page 302).
3. Close the inverter system controller coolant reservoir cap.
257
MKZ (CC9) Maintenance
Page 260 of 445
Whenever you add coolant, check the
coolant level in the inverter system
controller coolant reservoir the next few
times you drive the vehicle. If necessary,
add enough prediluted coolant to bring
the inverter system controller coolant level
to the proper level.
Recycled Engine Coolant
Ford Motor Company does not
recommend the use of recycled engine
coolant since a Ford-approved recycling
process is not yet available.
Used engine coolant should be disposed
of in an appropriate manner. Follow your
community’
s regulations and standards for
recycling and disposing of automotive
fluids.
Severe Climates
If you drive in extremely cold climates:
• It may be necessary to have an
authorized Ford dealer increase the
coolant concentration above 50%.
• A coolant concentration of 60% will
provide improved freeze point
protection. Engine coolant
concentrations above 60% will
decrease the overheat protection
characteristics of the engine coolant
and may cause engine damage. If you drive in extremely hot climates:
•
It may be necessary to have an
authorized Ford dealer decrease the
coolant concentration to 40%.
• A coolant concentration of 40% will
provide improved overheat protection.
Engine coolant concentrations below
40% will decrease the corrosion/freeze
protection characteristics of the engine
coolant and may cause engine
damage.
Vehicles driven year-round in non-extreme
climates should use prediluted coolant
meeting the Ford specification for optimum
cooling system and engine protection.
What You Should Know About Fail-
Safe Cooling
If the engine coolant supply is depleted,
this feature allows the vehicle to be driven
temporarily before incremental component
damage is incurred. The “fail-safe ”
distance depends on ambient
temperatures, vehicle load and terrain.
How Fail-Safe Cooling Works
If the engine begins to overheat, the
engine coolant temperature gauge will
move to the red (hot) area and: The coolant temperature
warning light will illuminate.
The service engine soon
indicator will illuminate.
If the engine reaches a preset
over-temperature condition, the engine
will automatically switch to alternating
cylinder operation. Each disabled cylinder
acts as an air pump and cools the engine.
258
MKZ (CC9) Maintenance
Page 261 of 445
When this occurs the vehicle will still
operate. However:
•
The engine power will be limited.
• The air conditioning system will be
disabled.
Continued operation will increase the
engine temperature and the engine will
completely shut down, causing steering
and braking effort to increase.
Once the engine temperature cools, the
engine can be re-started. Take your
vehicle to an authorized dealer as soon
as possible to minimize engine damage.
When Fail-Safe Mode Is Activated WARNINGS
Fail-safe mode is for use during
emergencies only. Operate the
vehicle in fail-safe mode only as long as
necessary to bring the vehicle to rest in a
safe location and seek immediate repairs.
When in fail-safe mode, the vehicle will
have limited power, will not be able to
maintain high-speed operation, and may
completely shut down without warning,
potentially losing engine power, power
steering assist, and power brake assist,
which may increase the possibility of a
crash resulting in serious injury. Never remove the coolant reservoir
cap while the engine is running or
hot. Note:
Driving the vehicle without repairing
the engine problem increases the chance
of engine damage. Take your vehicle to
an authorized dealer as soon as possible. You have limited engine power when in
the fail-safe mode, so drive the vehicle
with caution. The vehicle will not be able
to maintain high-speed operation and the
engine will run rough. Remember that the
engine is capable of completely shutting
down automatically to prevent engine
damage, therefore:
1. Pull off the road as soon as safely
possible and turn off the engine.
2. Arrange for the vehicle to be taken to an authorized dealer.
3. If this is not possible, wait a short period for the engine to cool.
4. Check the coolant level and replenish
if low.
5. Re-start the engine and take your vehicle to an authorized dealer.
AUTOMATIC TRANSMISSION
FLUID CHECK
Note: Transmission fluid should be
checked by an authorized dealer. If
required, fluid should be added by an
authorized dealer.
The automatic transmission does not have
a transmission fluid dipstick.
Have an authorized dealer check and
change the transmission fluid at the
correct service interval. See Scheduled
Maintenance (page 412). Your
transmission does not consume fluid.
However, the fluid level should be
checked if the transmission is not working
properly, (i.e., if the transmission slips or
shifts slowly) or if you notice some sign of
fluid leakage.
259
MKZ (CC9) Maintenance
Page 264 of 445
2. Shift the transmission into P.
3. Turn off all accessories.
4. Step on the brake pedal and start the
vehicle.
5. Run the engine until it reaches normal
operating temperature. While the
engine is warming up, complete the
following: Reset the clock. See Audio
System (page 309). Reset the power
windows bounce-back feature. See
Windows and Mirrors (page 83). Reset
the radio station presets.
See Audio
System (page 309).
6. Allow the engine to idle for at least one
minute. If the engine turns off, step on
the accelerator to start the engine.
7. While the engine is running, step on the brake pedal and shift the
transmission to N.
8. Allow the engine to run for at least one
minute by pressing on the accelerator
pedal.
9. Drive the vehicle at least 10 miles (16 kilometers) to completely relearn the
idle and fuel trim strategy.
Note: If you do not allow the engine to
relearn the idle and fuel trim strategy, the
idle quality of your vehicle may be
adversely affected until the engine
computer eventually relearns the idle trim
and fuel trim strategy.
Note: Always dispose of automotive
batteries in a responsible manner. Follow
your local authorized standards for
disposal. Call your local authorized
recycling center to find out more about
recycling automotive batteries. Note:
It is recommended that the negative
battery cable terminal be disconnected
from the battery if you plan to store your
vehicle for an extended period of time.
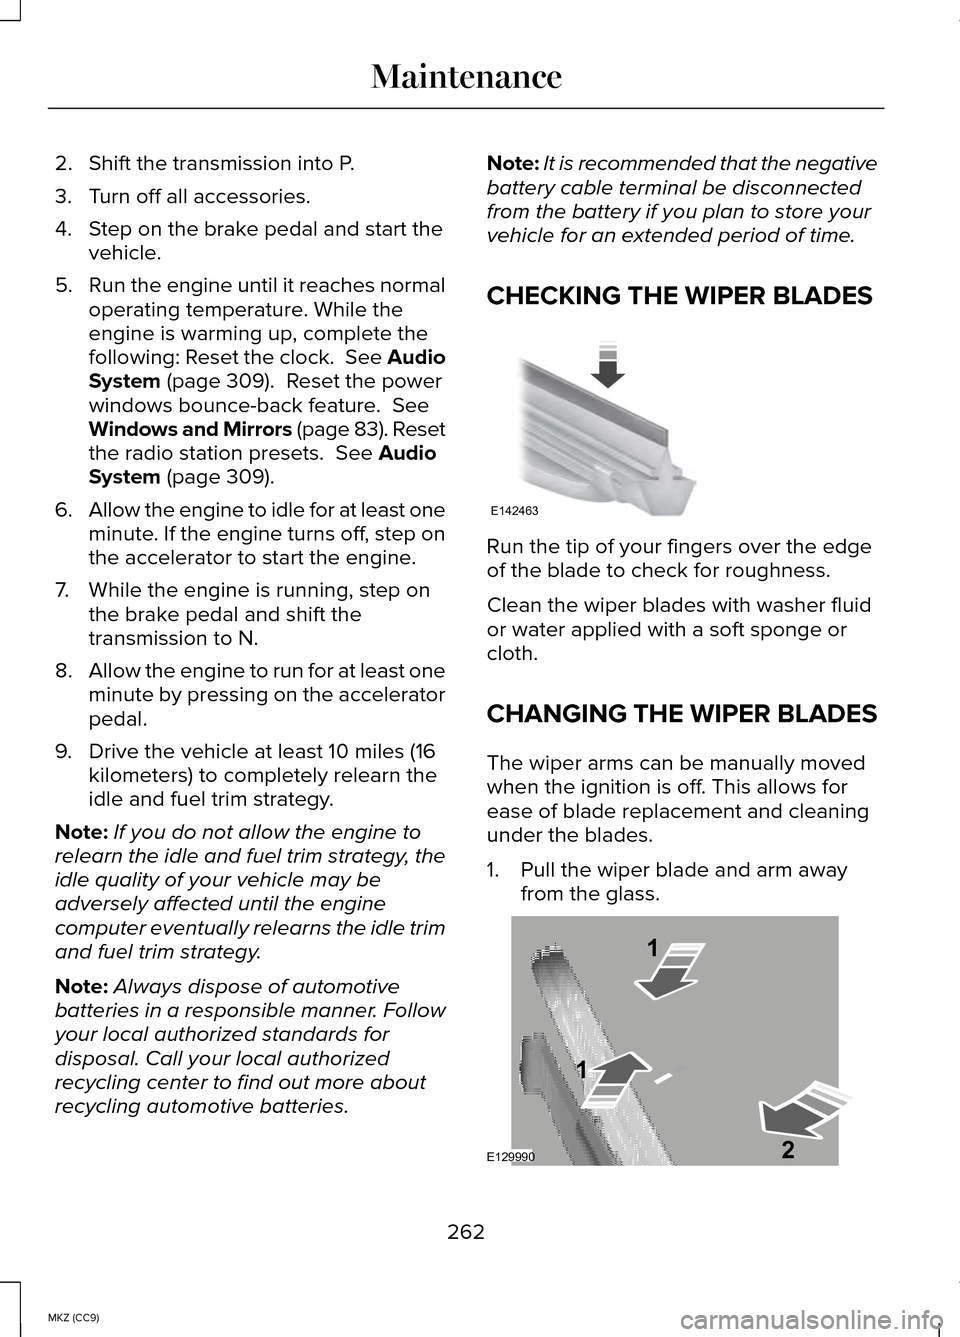
CHECKING THE WIPER BLADES Run the tip of your fingers over the edge
of the blade to check for roughness.
Clean the wiper blades with washer fluid
or water applied with a soft sponge or
cloth.
CHANGING THE WIPER BLADES
The wiper arms can be manually moved
when the ignition is off. This allows for
ease of blade replacement and cleaning
under the blades.
1. Pull the wiper blade and arm away
from the glass. 262
MKZ (CC9) MaintenanceE142463 E129990
1
1 2
Page 276 of 445
Engine
•
The engine oil and filter should be
changed prior to storage, as used
engine oil contain contaminates that
may cause engine damage.
• Start the engine every 15 days. Run at
fast idle until it reaches normal
operating temperature
• With your foot on the brake, shift
through all the gears while the engine
is running.
Fuel system
• Fill the fuel tank with high-quality fuel
until the first automatic shutoff of the
fuel pump nozzle.
Cooling system
• Protect against freezing temperatures.
• When removing your vehicle from
storage, check coolant fluid level.
Confirm there are no cooling system
leaks, and fluid is at the recommended
level.
Battery
• Check and recharge as necessary.
Keep connections clean.
• If storing your vehicle for more than 30
days without recharging the battery, it
may be advisable to disconnect the
battery cables to ensure battery charge
is maintained for quick starting.
Note: If battery cables are disconnected,
it will be necessary to reset memory
features. Brakes
•
Make sure brakes and parking brake
are fully released.
Tires
• Maintain recommended air pressure.
Miscellaneous
• Make sure all linkages, cables, levers
and pins under your vehicle are
covered with grease to prevent rust.
• Move vehicles at least 25 feet (8
meters) every 15 days to lubricate
working parts and prevent corrosion.
Removing Vehicle From Storage
When your vehicle is ready to come out
of storage, do the following:
• Wash your vehicle to remove any dirt
or grease film build-up on window
surfaces.
• Check windshield wipers for any
deterioration.
• Check under the hood for any foreign
material that may have collected
during storage (mice/squirrel nests).
• Check the exhaust for any foreign
material that may have collected
during storage.
• Check tire pressures and set tire
inflation per the Tire Label.
• Check brake pedal operation. Drive
your vehicle 15 feet (4.5 meters) back
and forth to remove rust build-up.
274
MKZ (CC9) Vehicle Care
Page 279 of 445
General Information
WARNING
Failure to follow these guidelines
could result in an increased risk of
loss of vehicle control, injury or death. Note:
Do not use the kit if a tire has
become severely damaged by driving the
vehicle with a tire that has insufficient air
pressure. Only punctured areas located
within the tire tread can be sealed with
the kit.
Do not attempt to repair punctures larger
than 1/4 inch (6 millimeters) or damage to
the tire's sidewall. The tire may not
completely seal.
Loss of air pressure may adversely affect
tire performance. For this reason:
Note: Do not drive the vehicle above 50
mph (80 km/h).
Note: Do not drive further than 120 miles
(200 kilometers). Drive only to the closest
Ford Motor Company authorized dealer
or tire repair shop to have your tire
inspected.
• Drive carefully and avoid abrupt
steering maneuvers.
• Periodically monitor tire inflation
pressure in the affected tire; if the tire
is losing pressure, have the vehicle
towed.
• Read the information in the Tips for
Use of the Kit section to make sure
safe operation of the kit and your
vehicle. Tips for Use of the Kit
Read the following list of tips to ensure
safe operation of the kit:
•
Before operating the kit, make sure
your vehicle is safely off the road and
away from moving traffic. Turn on the
hazard lights.
• Always set the parking brake to ensure
the vehicle doesn't move
unexpectedly.
• Do not remove any foreign objects,
such as nails or screws, from the tire.
• When using the kit, leave the engine
running (only if the vehicle is outdoors
or in a well-ventilated area) so the
compressor doesn't drain the vehicle's
battery.
• Do not allow the compressor to
operate continuously for more than 15
minutes; this will help prevent the
compressor from overheating.
• Never leave the kit unattended when
it is operating.
• Sealant compound contains latex.
Make sure that you use the non-latex
gloves provided to avoid an allergic
reaction.
• Keep the kit away from children.
• Only use the kit when the ambient
temperature is between -22°F (–30°C)
and 158°F (70°C).
• Only use the sealing compound before
the use by date. The use by date is on
the lower right hand corner of the label
located on the sealant canister (bottle).
Check the use by date regularly and
replace the canister after four years.
277
MKZ (CC9) Wheels and Tires
Page 280 of 445
•
Do not store the kit unsecured inside
the passenger compartment of the
vehicle as it may cause injury during a
sudden stop or crash. Always store the
kit in its original location.
• After sealant use, the tire pressure
monitoring system sensor and valve
stem on the wheel must be replaced
by an authorized Ford dealer.
• When inflating a tire or other objects,
use the black air hose only. Do not use
the transparent hose which is designed
for sealant application only.
• Operating the kit could cause an
electrical disturbance in radio, CD, and
DVD player operation.
What to do when a Tire Is Punctured
A tire puncture within the tire's tread area
can be repaired in two stages with the kit.
• In the first stage, the tire will be
reinflated with a sealing compound
and air. After the tire has been
reinflated, you will need to drive the
vehicle a short distance (about 4 miles
[6 kilometers]) to distribute the sealant
in the tire.
• In the second stage, you will need to
check the tire pressure and adjust, if
necessary, to the vehicle's tire inflation
pressure. First Stage: Reinflating the Tire with
Sealing Compound and Air WARNINGS
Do not stand directly over the kit
while inflating the tire. If you notice
any unusual bulges or deformations in the
tire's sidewall during inflation, stop and call
roadside assistance. If the tire doesn't inflate to the
recommended tire pressure within
15 minutes, stop and call roadside
assistance. Preparation: Park the vehicle in a safe,
level and secure area, away from moving
traffic. Turn the hazard lights on. Apply the
parking brake and turn the engine off.
Inspect the flat tire for visible damage.
Sealant compound contains latex. To avoid
any allergic reactions, use the non-latex
gloves located in the accessory box on
the underside of the kit housing.
Do not remove any foreign object that has
pierced the tire. If a puncture is located in
the tire sidewall, stop and call roadside
assistance.
1. Remove the valve cap from the tire
valve.
2. Unwrap the clear tube from the compressor housing.
3. Remove the tube cap and fasten the metal connector of the tube to the tire
valve, turning clockwise. Make sure
the connection is tightly fastened.
278
MKZ (CC9) Wheels and Tires