LINCOLN NAUTILUS 2021 Owners Manual
Manufacturer: LINCOLN, Model Year: 2021, Model line: NAUTILUS, Model: LINCOLN NAUTILUS 2021Pages: 579, PDF Size: 6.9 MB
Page 421 of 579
WHAT IS A CONNECTED VEHICLE
A connected vehicle has technology that
allows your vehicle to connect to a mobile
network and for you to access a range of
features. When used in conjunction with the
Lincoln Way app, it could allow you to
monitor and control your vehicle further, for
example checking the tire pressures, and
the vehicle location. For additional
information, refer to the local Lincoln website.
CONNECTED VEHICLE
REQUIREMENTS
Connected service and related feature
functionality requires a compatible vehicle
network.
Some remote features require a subscription.
For additional information, see the Lincoln
Way app. Some restrictions, third party terms
and message or data rates may apply.
CONNECTED VEHICLE
LIMITATIONS
Evolving technology, cellular networks, or
regulations could affect functionality and
availability, or continued provision of some
features. These changes could even stop
some features from functioning.
CONNECTING THE VEHICLE TO A
MOBILE NETWORK
What Is the Modem
The modem allows access to a
range of features built into your
vehicle.
Enabling and Disabling the Modem
1. Press Settings.
2. Press
Lincoln Connect.
3. Press
Connectivity Settings.
4. Switch connectivity features on or off. Connecting Lincoln Way to the Modem
1. Make sure that the modem is enabled
using the vehicle settings menu.
2. Open the Lincoln way app on your device
and log in.
3. Add your vehicle or select your vehicle if already added.
4. Select the option for vehicle details.
5. Select the option to activate your vehicle.
6. Make sure that the name on the screen matches the name shown in your Lincoln
Way account.
7. Confirm that your Lincoln Way account is connected to the modem.
CONNECTING THE VEHICLE TO A
WI-FI NETWORK
1. Press
Settings.
2. Press
Wi-Fi.
3. Switch
Wi-Fi on.
4. Press
View Available Networks.
417
2021 Nautilus (CD9) Canada/United States of America, enUSA, Edition date: 202011, First-Printing Connected Vehicle
Page 422 of 579
5. Select an available Wi-Fi network.
Note:Enter the network password to
connect to a secure network.
CONNECTED VEHICLE – TROUBLESHOOTING
Connected Vehicle – Frequently Asked Questions - Vehicles With: Modem Possible Cause and Resolution
Symptom
I cannot confirm the connection of my Lincoln
Way account to the modem. –
Modem is not enabled.
•Switch connectivity features on.
– Weak network signal.
•Move your vehicle closer to a place where the network signal is not obst\
ructed.
418
2021 Nautilus (CD9) Canada/United States of America, enUSA, Edition date: 202011, First-Printing Connected Vehicle
Page 423 of 579
Connected Vehicle – Frequently Asked Questions - Vehicles With: SYNC 4
Possible Cause and Resolution
Symptom
I cannot connect to a Wi-Fi network. –Password error.
•Enter the correct network password.
– Weak network signal.
•Move your vehicle closer to the Wi-Fi hotspot or to a place where the ne\
twork signal
is not obstructed.
– Multiple access points in range with the same SSID.
•Use a unique name for your SSID. Do not use the default name unless it contains a
unique identifier, for example as part of the MAC address.
The Wi-Fi connection disconnects after
successful connection. –
Weak network signal.
•Move your vehicle closer to the Wi-Fi hotspot or to a place where the ne\
twork signal
is not obstructed.
I am close to a Wi-Fi hotspot but the network
signal strength is weak. –
Obstructed network signal.
•If your vehicle has a heated windshield, position your vehicle so that t\
he windshield
is not facing the Wi-Fi hotspot.
• If your vehicle has metallic tinting on the windows but not on the winds\
hield, position
your vehicle so that the windshield is facing the Wi-Fi hotspot or open \
the windows
that are facing the hotspot.
• If your vehicle has metallic tinting on the windows and the windshield, \
open the
windows that are facing the hotspot.
419
2021 Nautilus (CD9) Canada/United States of America, enUSA, Edition date: 202011, First-Printing Connected Vehicle
Page 424 of 579
Possible Cause and Resolution
Symptom
If your vehicle is in a garage and you have the garage door closed, open\
the garage
door.
•
I cannot see a network in the list of available
networks that I expect to see. –
Hidden network.
•Make the network visible and try again.
I cannot see the Wi-Fi hotspot name when I
search for Wi-Fi networks on my cell phone
or other device. –
System limitation.
•Make sure Wi-Fi hotspot visibility is on.
• The system does not provide a Wi-Fi hotspot at this time.
– Weak network signal.
•Move your vehicle closer to the Wi-Fi hotspot or to a place where the ne\
twork signal
is not obstructed.
– Wi-Fi hotspot in high demand or has a slow Internet connection.
•Use a more reliable Wi-Fi hotspot.
Software downloads take too long.
–No software update available.
– Wi-Fi network requires a subscription or acceptance of terms and conditi\
ons.
•Test the connection using another device. If the network requires a subscription or
acceptance of terms and conditions, contact the network service provider\
.
The system seems to connect to a Wi-Fi
network and the signal strength is excellent
but the software does not update.
420
2021 Nautilus (CD9) Canada/United States of America, enUSA, Edition date: 202011, First-Printing Connected Vehicle
Page 425 of 579
CREATING A VEHICLE WI-FI
HOTSPOT
You can create a Wi-Fi hotspot in your
vehicle and allow devices to connect to it for
access to the Internet.
Tap the vehicle drawer on the top left of the
screen.
1. Press Settings.
2. Press
Vehicle Hotspot.
Note: The vehicle hotspot default setting is
on.
3. Press Settings under the Vehicle Hotspot
menu.
4. Press
Edit.
5. Switch the Wi-Fi Visibility option on or off.
Note: The Wi-Fi visibility default setting is
on.
Finding the Wi-Fi Hotspot Name and
Password
Tap the vehicle drawer on the top left of the
screen. 1. Press
Settings.
2. Press
Vehicle Hotspot.
3. Press Settings under the Vehicle Hotspot
menu.
Note: The network name is the hotspot
name.
4. Switch the Show Password option on or off.
Connecting a Device to the Wi-Fi
Hotspot
1. On your device, switch Wi-Fi on and select the hotspot from the list of
available Wi-Fi networks.
2. When prompted, enter the password.
Purchasing a Data Plan
1. Connect a device to the hotspot.
Note: The vehicle network carrier’ s portal
opens on your device.
2. If the portal does not open on your device, open a website and it redirects
to the vehicle network carrier’ s portal.
Note: Secure websites do not redirect. 3. Follow the instructions on the carrier
portal to purchase a plan.
Note: If you have an active plan, the system
does not redirect to the vehicle network
carrier’ s portal when you connect a device.
Visit the vehicle network carrier’ s website to
purchase more data.
Note: If data usage information is available
in the vehicle hotspot menu, it is
approximate.
Note: If you carry out a master reset, the
system does not remove your vehicle from
your vehicle network carrier’ s account. To
remove your vehicle from the account,
contact your vehicle network carrier.
Note: The vehicle network carrier provides
Vehicle Hotspot services, subject to your
vehicle network carrier agreement, coverage
and availability.
CHANGING THE VEHICLE WI-FI
HOTSPOT NAME OR PASSWORD
Tap the vehicle drawer on the top left of the
screen.
421
2021 Nautilus (CD9) Canada/United States of America, enUSA, Edition date: 202011, First-Printing Vehicle Wi-Fi Hotspot
Page 426 of 579
1. Press Settings.
2. Press
Vehicle Hotspot.
3. Press Settings under the Vehicle Hotspot
menu.
4. Press
Edit.
5. Press
Change Network Name.
6. Enter your required network name.
7. Press the enter key to save the network name.
8. Press
Change Password.
9. Enter your required password.
10. Press the enter key to save the password.
Changing the Wi-Fi Hotspot Frequency
Note: The Vehicle Hotspot frequency band
is selectable depending upon your device
capabilities. You will be unable to connect
your device to the Vehicle Hotspot if it does
not support the selected frequency band.
Tap the vehicle drawer on the top left of the
screen.
1. Press
Settings. 2. Press
Vehicle Hotspot.
3. Press Settings under the Vehicle Hotspot
menu.
4. Press
Edit.
5. Select a frequency.
6. Press
Done.
422
2021 Nautilus (CD9) Canada/United States of America, enUSA, Edition date: 202011, First-Printing Vehicle Wi-Fi Hotspot
Page 427 of 579
AUDIO SYSTEM PRECAUTIONS
WARNING: Driving while distracted
can result in loss of vehicle control, crash
and injury. We strongly recommend that
you use extreme caution when using any
device that may take your focus off the
road. Your primary responsibility is the safe
operation of your vehicle. We recommend
against the use of any hand-held device
while driving and encourage the use of
voice-operated systems when possible.
Make sure you are aware of all applicable
local laws that may affect the use of
electronic devices while driving.
Listening to loud audio for long periods of
time could damage your hearing.
SWITCHING THE AUDIO UNIT ON
AND OFF Press the button on the volume
control. SELECTING THE AUDIO SOURCE
Audio Unit Press the button to open the media
source menu.
You can press this multiple times to change
to the audio source or scroll through the
media sources.
Touchscreen
Press
Sources on the touchscreen to open
the media source menu.
PLAYING OR PAUSING THE AUDIO
SOURCE
Touchscreen Press to pause playback. Press
again to resume playback.
Note: Not all sources can be paused. ADJUSTING THE VOLUME
Turn to adjust the volume.
Some vehicles may be able to adjust the
volume using buttons on the steering wheel.
423
2021 Nautilus (CD9) Canada/United States of America, enUSA, Edition date: 202011, First-Printing Audio System E308143 E248939
Page 428 of 579
SWITCHING SHUFFLE MODE ON
AND OFF
Press the button on the
touchscreen to switch shuffle
mode on or off.
Note: Not all sources have shuffle mode.
SWITCHING REPEAT MODE ON
AND OFF Press the button on the
touchscreen to switch repeat mode
on or off.
Note: Not all sources have repeat mode.
SETTING A MEMORY PRESET
1. Select a station or channel.
2. Press and hold a memory preset button on the touchscreen.
Note: The audio mutes briefly while the
system saves the preset and returns once it
is stored. Note:
You can save presets from multiple
sources to the memory preset bar.
MUTING THE AUDIO Press the button on the steering
wheel to mute the audio.
Press to mute the signal. Press
again to restore the signal.
ADJUSTING THE SOUND
SETTINGS
Balance and Fade (If Equipped)
1. Press
Settings on the touchscreen.
2. Press
Sound Settings.
3. Press
Balance / Fade.
4. Press the arrows to adjust the settings.
Tone Settings
1. Press
Settings on the touchscreen.
2. Press
Sound Settings. 3. Press
Tone Settings.
4. Press the arrows or slider bar to adjust the settings.
Speed Compensated Volume
1. Press
Settings on the touchscreen.
2. Press
Sound Settings.
3. Press
Speed Compensated Volume.
4. Press a setting.
Occupancy Mode
(If Equipped)
1. Press
Settings on the touchscreen.
2. Press
Sound Settings.
3. Press
Occupancy Mode.
4. Press a setting.
Sound Mode
(If Equipped)
1. Press
Settings on the touchscreen.
2. Press
Sound Settings.
3. Press
Sound Mode.
4. Press a setting.
424
2021 Nautilus (CD9) Canada/United States of America, enUSA, Edition date: 202011, First-Printing Audio System
Page 429 of 579
SETTING THE CLOCK AND DATE
1. Press Settings on the touchscreen.
2. Press
Clock Settings.
3. Set the time.
Note: The
AM and PM options are not
available if 24-hour mode is on.
Switching Automatic Time Updates On
and Off
1. Press
Settings on the touchscreen.
2. Press
Clock Settings.
3. Switch
Automatic time zone update on
or off.
AM/FM RADIO
AM/FM Radio Limitations
The further you travel from an AM or FM
station, the weaker the signal and the weaker
the reception. Hills, mountains, tall buildings, bridges,
tunnels, freeway overpasses, parking
garages, dense tree foliage and
thunderstorms can interfere with the
reception.
When you pass a ground-based broadcast
repeating tower, a stronger signal may
overtake a weaker one and result in the
audio system muting.
Selecting a Radio Station
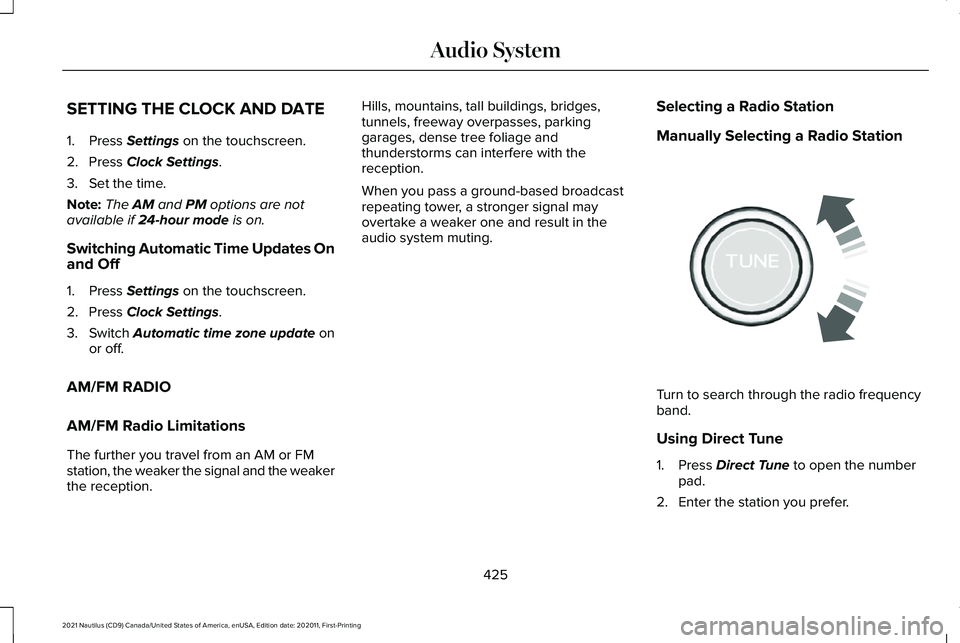
Manually Selecting a Radio Station Turn to search through the radio frequency
band.
Using Direct Tune
1. Press
Direct Tune to open the number
pad.
2. Enter the station you prefer.
425
2021 Nautilus (CD9) Canada/United States of America, enUSA, Edition date: 202011, First-Printing Audio SystemE270235
Page 430 of 579
Note:
You can only enter a valid station for
the audio source you are currently listening
to.
Using Seek Press either button. The system
stops at the first station it finds in
that direction.
Using the Station List
1. Press Browse.
Note: Available on FM radio only.
2. Press a station.
SWITCHING THE DISPLAY ON AND
OFF
Audio Unit Press the button. Touchscreen
To switch the display off:
1. Press
Settings on the touchscreen.
2. Press
Display Settings.
3. Press
Display Off.
Note: The display defaults to on each time
you switch your vehicle on.
To switch the display on, press anywhere on
the touchscreen.
DIGITAL RADIO
What Is Digital Radio
HD Radio ™ technology is the digital evolution
of analog AM/FM radio.
For additional information, visit
www .HDR adio . com .HD Radio Technology is manufactured under
license from iBiquity Digital Corporation and
foreign patents. HD Radio and the HD and
HD Radio logos are proprietary trademarks
of DTS. The vehicle manufacturer and DTS
are not responsible for the content sent using
HD Radio technology. Content may be
changed, added or deleted at any time at
the station owner's discretion.
How Does Digital Radio Work
Your system has a special receiver that
allows it to receive digital broadcasts in
addition to analog broadcasts.
HD1 signifies the main programming status
and is available in both analog and digital
broadcasts. Other multicast stations are only
available digitally and could contain new or
different content.
Note:
When the system first receives an HD1
station, it plays the station in the analog
version until it verifies the station is an HD
Radio station. Then it shifts to the digital
version.
426
2021 Nautilus (CD9) Canada/United States of America, enUSA, Edition date: 202011, First-Printing Audio System E272035