ignition LINCOLN NAVIGATOR 2014 Service Manual
[x] Cancel search | Manufacturer: LINCOLN, Model Year: 2014, Model line: NAVIGATOR, Model: LINCOLN NAVIGATOR 2014Pages: 506, PDF Size: 5.72 MB
Page 144 of 506
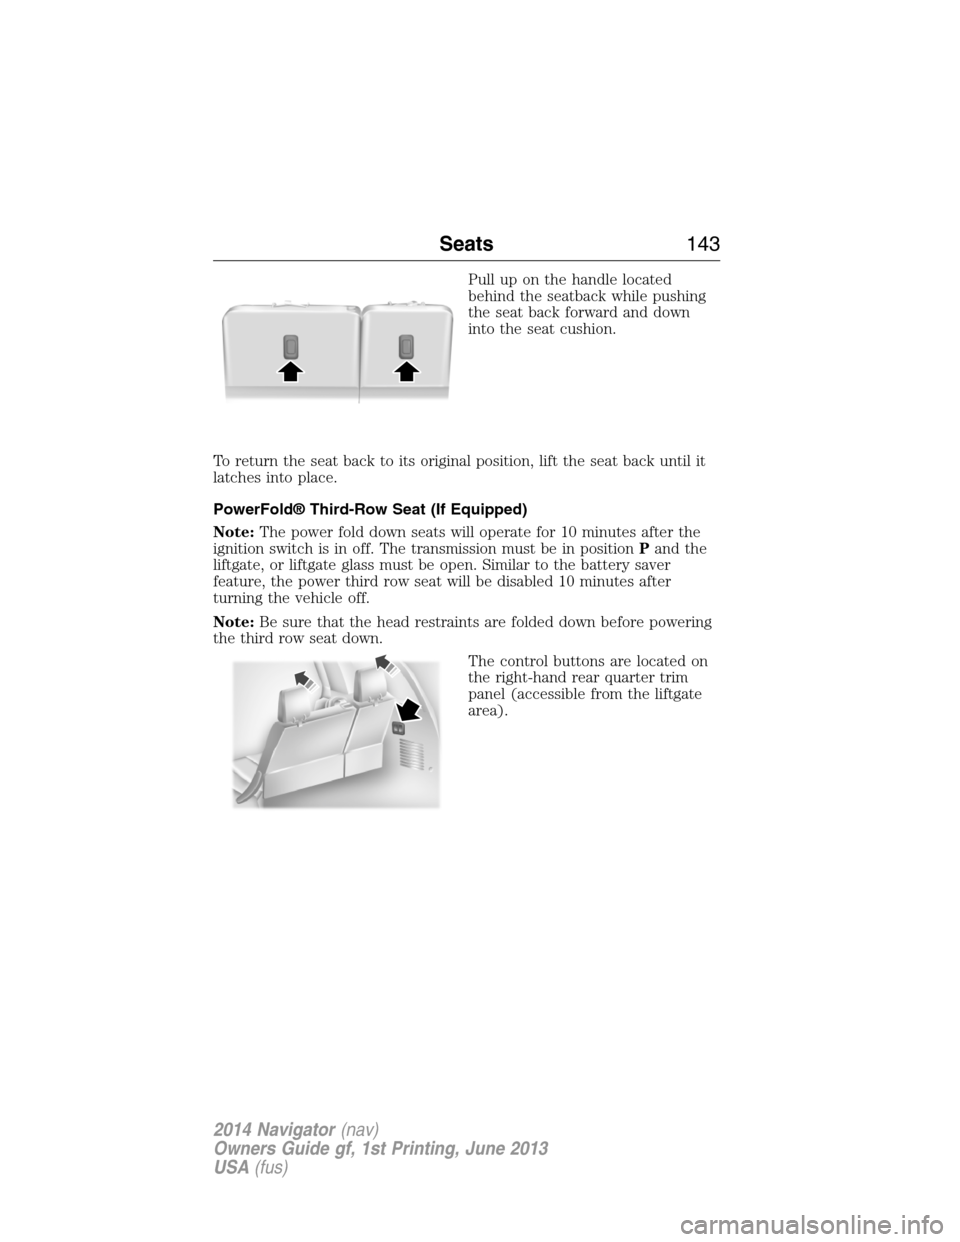
Pull up on the handle located
behind the seatback while pushing
the seat back forward and down
into the seat cushion.
To return the seat back to its original position, lift the seat back until it
latches into place.
PowerFold® Third-Row Seat (If Equipped)
Note:The power fold down seats will operate for 10 minutes after the
ignition switch is in off. The transmission must be in positionPand the
liftgate, or liftgate glass must be open. Similar to the battery saver
feature, the power third row seat will be disabled 10 minutes after
turning the vehicle off.
Note:Be sure that the head restraints are folded down before powering
the third row seat down.
The control buttons are located on
the right-hand rear quarter trim
panel (accessible from the liftgate
area).
Seats143
2014 Navigator(nav)
Owners Guide gf, 1st Printing, June 2013
USA(fus)
Page 145 of 506
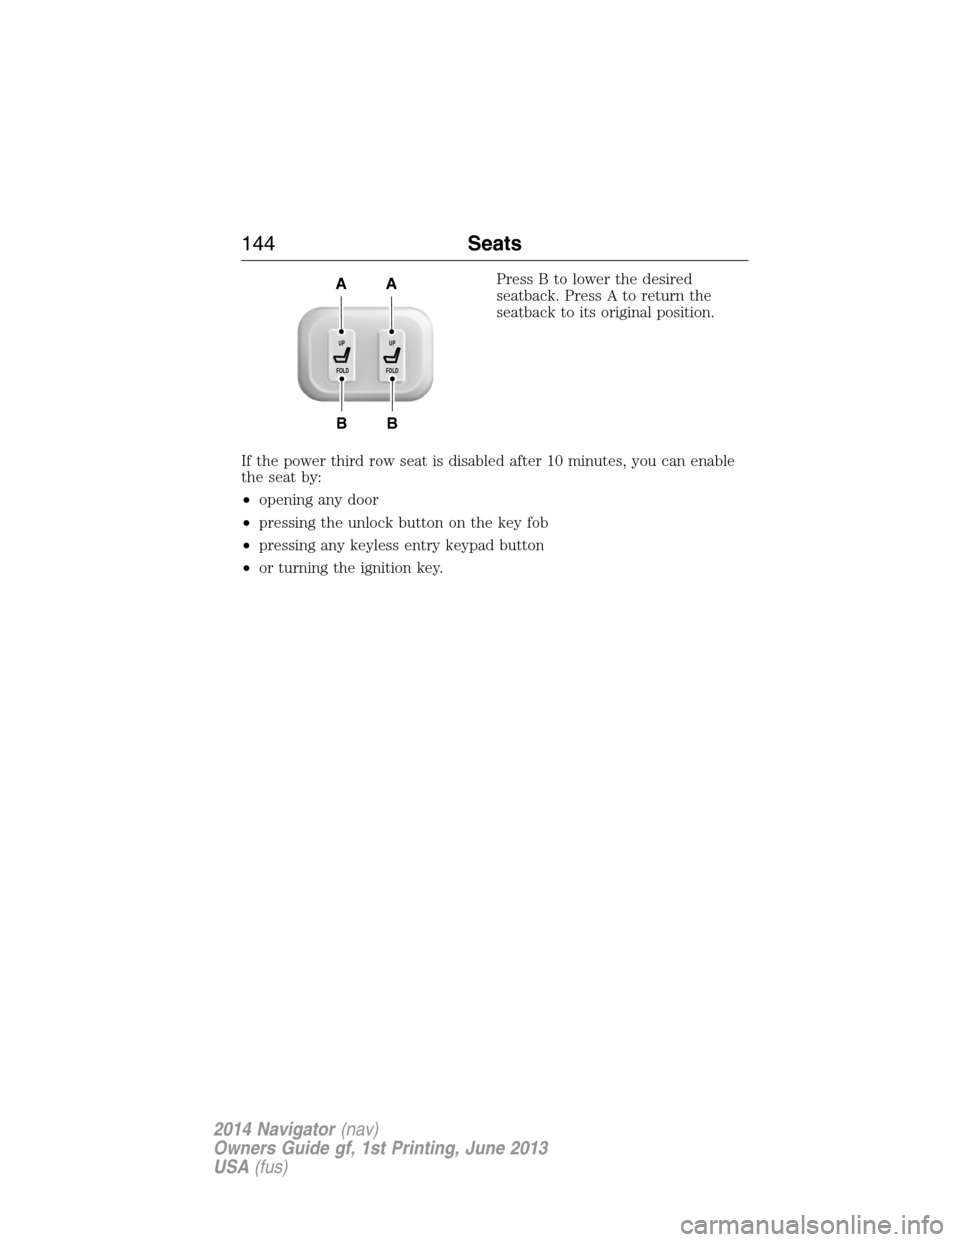
Press B to lower the desired
seatback. Press A to return the
seatback to its original position.
If the power third row seat is disabled after 10 minutes, you can enable
the seat by:
•opening any door
•pressing the unlock button on the key fob
•pressing any keyless entry keypad button
•or turning the ignition key.
B
AA
B
UP
FOLDUP
FOLD
144Seats
2014 Navigator(nav)
Owners Guide gf, 1st Printing, June 2013
USA(fus)
Page 148 of 506
Rolling Code Programming
Note:If you do not follow the time-sensitive instructions, the device will
time out and you will have to repeat the complete procedure.
Note:It may be helpful to have another person assist you in
programming the transmitter.
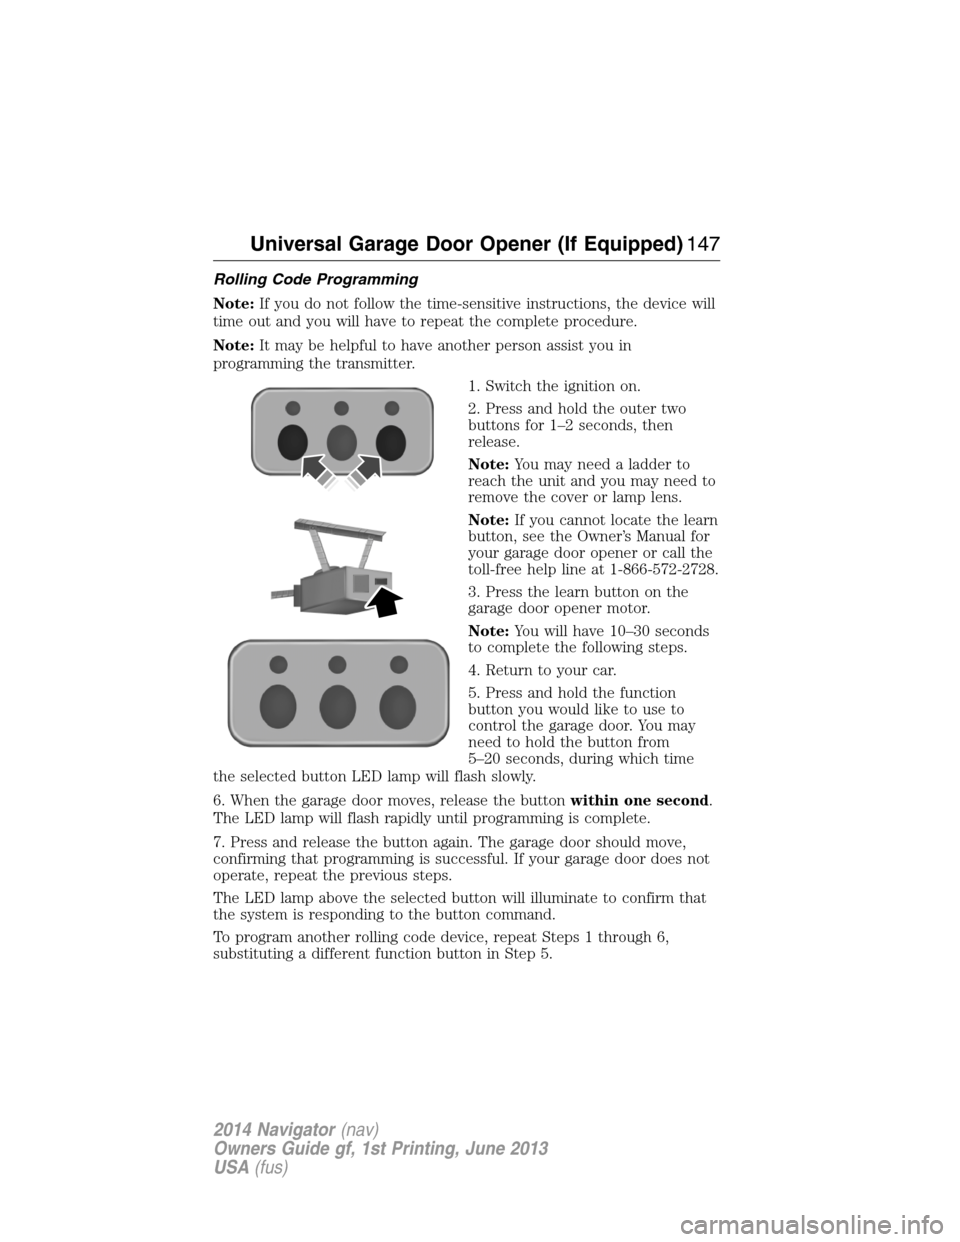
1. Switch the ignition on.
2. Press and hold the outer two
buttons for 1–2 seconds, then
release.
Note:You may need a ladder to
reach the unit and you may need to
remove the cover or lamp lens.
Note:If you cannot locate the learn
button, see the Owner’s Manual for
your garage door opener or call the
toll-free help line at 1-866-572-2728.
3. Press the learn button on the
garage door opener motor.
Note:You will have 10–30 seconds
to complete the following steps.
4. Return to your car.
5. Press and hold the function
button you would like to use to
control the garage door. You may
need to hold the button from
5–20 seconds, during which time
the selected button LED lamp will flash slowly.
6. When the garage door moves, release the buttonwithin one second.
The LED lamp will flash rapidly until programming is complete.
7. Press and release the button again. The garage door should move,
confirming that programming is successful. If your garage door does not
operate, repeat the previous steps.
The LED lamp above the selected button will illuminate to confirm that
the system is responding to the button command.
To program another rolling code device, repeat Steps 1 through 6,
substituting a different function button in Step 5.
Universal Garage Door Opener (If Equipped)147
2014 Navigator(nav)
Owners Guide gf, 1st Printing, June 2013
USA(fus)
Page 149 of 506

Fixed Code Programming
Note:It may be helpful to have another person assist you in
programming the transmitter.
To program units with fixed code
DIP switches, you will need the
garage door hand-held transmitter,
paper and a pen or pencil.
1. Switch the ignition on.
2. Open the battery cover and note
all the switch settings from left to
right.
When the switch is in the up, on, or + position, mark down “left button”.
When the switch is in the middle, neutral, or 0 position, mark down
“middle button”.
When the switch is in the down, off, or – position, mark down “right
button”.
3. Press all three function buttons
simultaneously for a few seconds
and then release. The LED lamps
will flash slowly.
Note:The following step must be
completed within 2.5 minutes.
4. Enter the corresponding DIP switch settings from left to right into
the system by pressing and releasing the buttons corresponding to the
settings you noted.
5. Simultaneously press and release all three function buttons. The LED
lamps will illuminate.
6. Press and hold the function
button you would like to use to
control the garage door.
Note:You may need to hold the
button from 5–55 seconds before
observing movement of the garage
door.
7. When the garage door moves, release the button within one second.
When the button is released, the LED lamp will flash slowly.
148Universal Garage Door Opener (If Equipped)
2014 Navigator(nav)
Owners Guide gf, 1st Printing, June 2013
USA(fus)
Page 151 of 506
Note:We recommend that upon the sale or lease termination of your
vehicle, you erase the programmed function buttons for security reasons.
SeeErasing the function button codeslater in this section.
Note:You can program a maximum of three devices. To change or
replace any of the three devices after it has been initially programmed,
you must first erase the current settings. SeeErasing the function
button codeslater in this section.
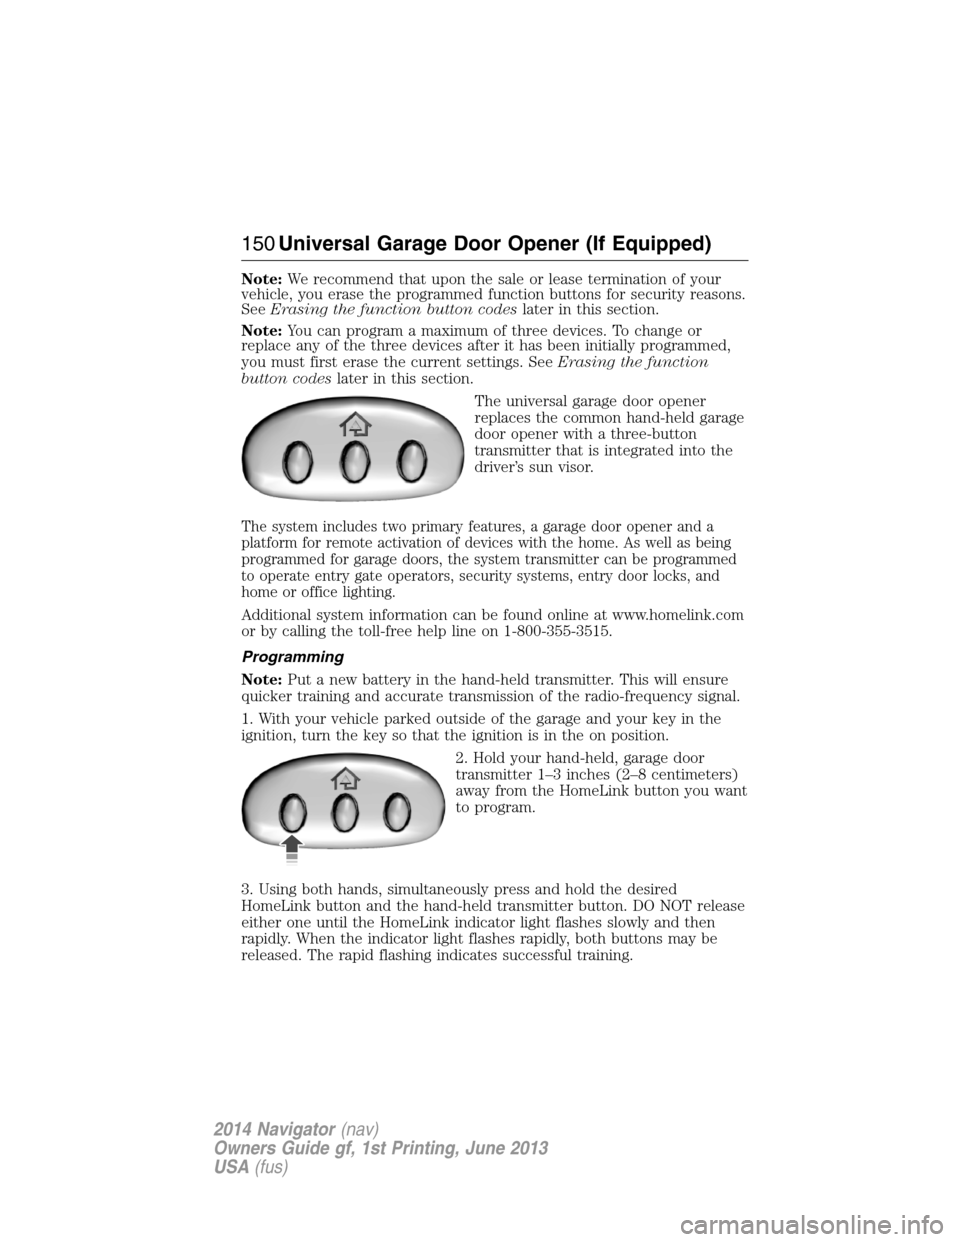
The universal garage door opener
replaces the common hand-held garage
door opener with a three-button
transmitter that is integrated into the
driver’s sun visor.
The system includes two primary features, a garage door opener and a
platform for remote activation of devices with the home. As well as being
programmed for garage doors, the system transmitter can be programmed
to operate entry gate operators, security systems, entry door locks, and
home or office lighting.
Additional system information can be found online at www.homelink.com
or by calling the toll-free help line on 1-800-355-3515.
Programming
Note:Put a new battery in the hand-held transmitter. This will ensure
quicker training and accurate transmission of the radio-frequency signal.
1. With your vehicle parked outside of the garage and your key in the
ignition, turn the key so that the ignition is in the on position.
2. Hold your hand-held, garage door
transmitter 1–3 inches (2–8 centimeters)
away from the HomeLink button you want
to program.
3. Using both hands, simultaneously press and hold the desired
HomeLink button and the hand-held transmitter button. DO NOT release
either one until the HomeLink indicator light flashes slowly and then
rapidly. When the indicator light flashes rapidly, both buttons may be
released. The rapid flashing indicates successful training.
150Universal Garage Door Opener (If Equipped)
2014 Navigator(nav)
Owners Guide gf, 1st Printing, June 2013
USA(fus)
Page 157 of 506
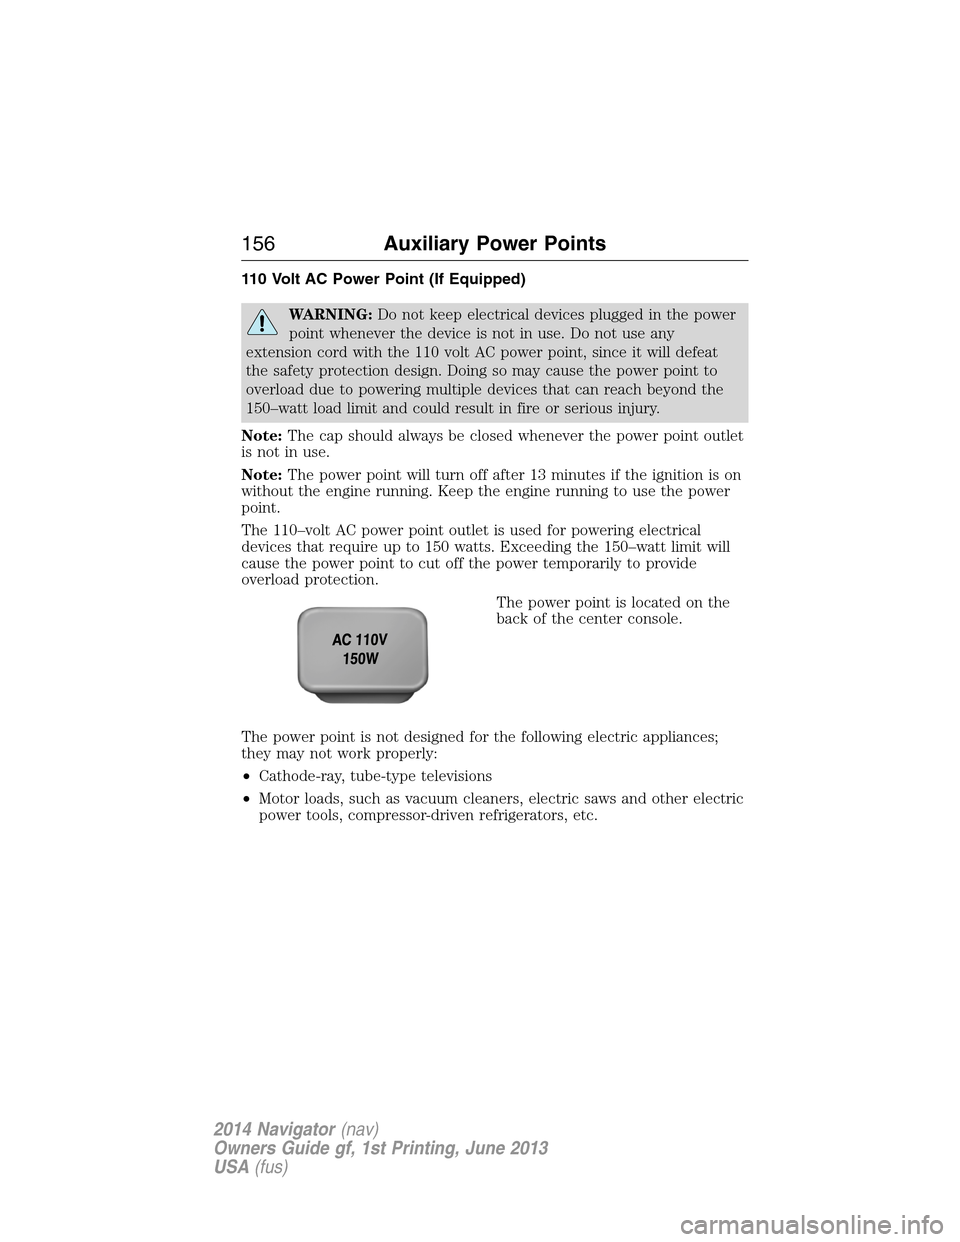
110 Volt AC Power Point (If Equipped)
WARNING:Do not keep electrical devices plugged in the power
point whenever the device is not in use. Do not use any
extension cord with the 110 volt AC power point, since it will defeat
the safety protection design. Doing so may cause the power point to
overload due to powering multiple devices that can reach beyond the
150–watt load limit and could result in fire or serious injury.
Note:The cap should always be closed whenever the power point outlet
is not in use.
Note:The power point will turn off after 13 minutes if the ignition is on
without the engine running. Keep the engine running to use the power
point.
The 110–volt AC power point outlet is used for powering electrical
devices that require up to 150 watts. Exceeding the 150–watt limit will
cause the power point to cut off the power temporarily to provide
overload protection.
The power point is located on the
back of the center console.
The power point is not designed for the following electric appliances;
they may not work properly:
•Cathode-ray, tube-type televisions
•Motor loads, such as vacuum cleaners, electric saws and other electric
power tools, compressor-driven refrigerators, etc.
156Auxiliary Power Points
2014 Navigator(nav)
Owners Guide gf, 1st Printing, June 2013
USA(fus)
Page 158 of 506
•Measuring devices that process precise data, such as medical
equipment, measuring equipment, etc.
•Other appliances requiring an extremely stable power supply:
microcomputer-controlled electric blankets, touch sensor lamps, etc.
The power point can switch to a fault mode when it is overloaded,
overheated or shorted. Unplug your device and turn the ignition off then
on for overloading and shorting conditions. Let the system cool off, then
turn the ignition off then on for an overheating condition.
The power point can provide power whenever the ignition is on and the
indicator light is on. The indicator light is located in the top left corner
of the power point.
When the indicator light is:
•on — power point is ready to supply power
•off — power point power supply is off; ignition is not on
•blinking — power point is in fault mode
Auxiliary Power Points157
2014 Navigator(nav)
Owners Guide gf, 1st Printing, June 2013
USA(fus)
Page 161 of 506
IGNITION SWITCH
Note:Do not store the key in the ignition after the vehicle is turned off
and you have left the vehicle. This could cause a drain on the battery.
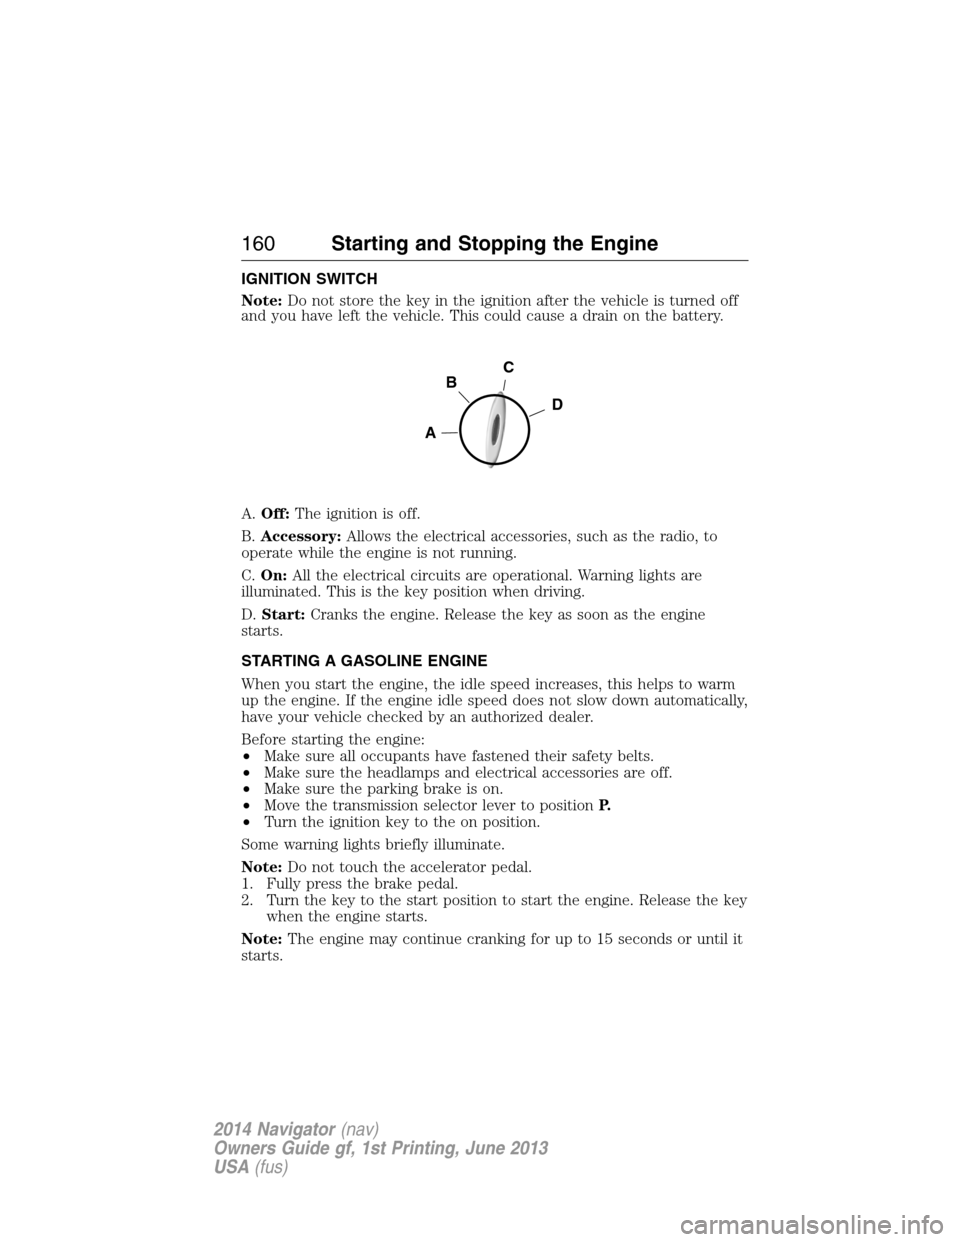
A.Off:The ignition is off.
B.Accessory:Allows the electrical accessories, such as the radio, to
operate while the engine is not running.
C.On:All the electrical circuits are operational. Warning lights are
illuminated. This is the key position when driving.
D.Start:Cranks the engine. Release the key as soon as the engine
starts.
STARTING A GASOLINE ENGINE
When you start the engine, the idle speed increases, this helps to warm
up the engine. If the engine idle speed does not slow down automatically,
have your vehicle checked by an authorized dealer.
Before starting the engine:
•Make sure all occupants have fastened their safety belts.
•Make sure the headlamps and electrical accessories are off.
•Make sure the parking brake is on.
•Move the transmission selector lever to positionP.
•Turn the ignition key to the on position.
Some warning lights briefly illuminate.
Note:Do not touch the accelerator pedal.
1. Fully press the brake pedal.
2. Turn the key to the start position to start the engine. Release the key
when the engine starts.
Note:The engine may continue cranking for up to 15 seconds or until it
starts.
C
D
B
A
160Starting and Stopping the Engine
2014 Navigator(nav)
Owners Guide gf, 1st Printing, June 2013
USA(fus)
Page 162 of 506
Note:If you cannot start the engine on the first try, wait for a short
period and try again.
If you have difficulty starting the engine when the temperature is below
-13°F (-25°C), press the accelerator pedal slightly and try again.
Failure to Start
If you cannot start the engine after three attempts, wait 10 seconds and
follow this procedure:
1. Fully press the brake pedal.
2. Fully press the accelerator pedal and hold it there.
3. Start the engine.
Stopping the Engine When Your Vehicle is Stationary
1. Move the transmission selector lever to positionP.
2. Turn the key to the off position.
Stopping the Engine When Your Vehicle is Moving
WARNING:When you switch off the engine when your vehicle is
still moving, this results in a loss of brake and steering assistance.
The steering does not lock, but higher effort is required. When you
switch off the ignition, some electrical circuits, warning lamps and
indicators may also be off.
1. Move the transmission selector lever to positionNand use the brakes
to bring your vehicle to a safe stop.
2. When your vehicle has stopped, move the transmission selector lever
to positionPand turn the key to the off position.
Cold Weather Starting (Flexible Fuel Vehicles Only)
The starting characteristics of all grades of E-85 ethanol make it
unsuitable for use when ambient temperatures fall below 0°F (-18°C).
Consult your fuel distributor for the availability of winter grade ethanol.
As the outside temperature approaches freezing, ethanol fuel distributors
should supply winter grade ethanol (same as with unleaded gasoline). If
summer grade ethanol is used in cold weather conditions, 0°F to 32°F
(-18°C to 0°C), you may experience increased cranking times, rough idle
or hesitation until the engine has warmed up.
You may experience a decrease in peak performance when the engine is
cold when operating on E-85 ethanol.
Starting and Stopping the Engine161
2014 Navigator(nav)
Owners Guide gf, 1st Printing, June 2013
USA(fus)
Page 169 of 506
RUNNING OUT OF FUEL
Avoid running out of fuel because this situation may have an adverse
effect on powertrain components.
If you have run out of fuel:
•You may need to cycle the ignition from off to on several times after
refueling to allow the fuel system to pump the fuel from the tank to
the engine. On restarting, cranking time will take a few seconds longer
than normal.
•Normally, adding 1 gallon (3.8L) of fuel is enough to restart the
engine. If the vehicle is out of fuel and on a steep grade, more than
1 gallon (3.8L) may be required.
•The service engine soon indicator may come on. For more information
on the service engine soon indicator, refer to theInstrument Cluster
chapter.
SeeSettingsin theInstrument Clusterchapter for information on
calculating DTE (Distance to empty).
Refilling With a Portable Fuel Container
WARNING:Do not insert the nozzle of portable fuel containers
or aftermarket funnels into the Easy Fuel® system. This could
damage the fuel system and its seal, and may cause fuel to run onto the
ground instead of filling the tank, which could result in serious personal
injury.
WARNING:Do not try to pry open or push open the Easy Fuel®
system with foreign objects. This could damage the fuel system
and its seal and cause injury to you or others.
168Fuel and Refueling
2014 Navigator(nav)
Owners Guide gf, 1st Printing, June 2013
USA(fus)