change time MASERATI GHIBLI 2019 User Guide
[x] Cancel search | Manufacturer: MASERATI, Model Year: 2019, Model line: GHIBLI, Model: MASERATI GHIBLI 2019Pages: 384, PDF Size: 13.33 MB
Page 180 of 384
Audio Controls The vehicle is equipped with audio
controls that allow both driver and
front passenger to operate the audio
system. These controls can be used to
adjust audio volume, change radio
station or mode (FM, AM, USB, etc).
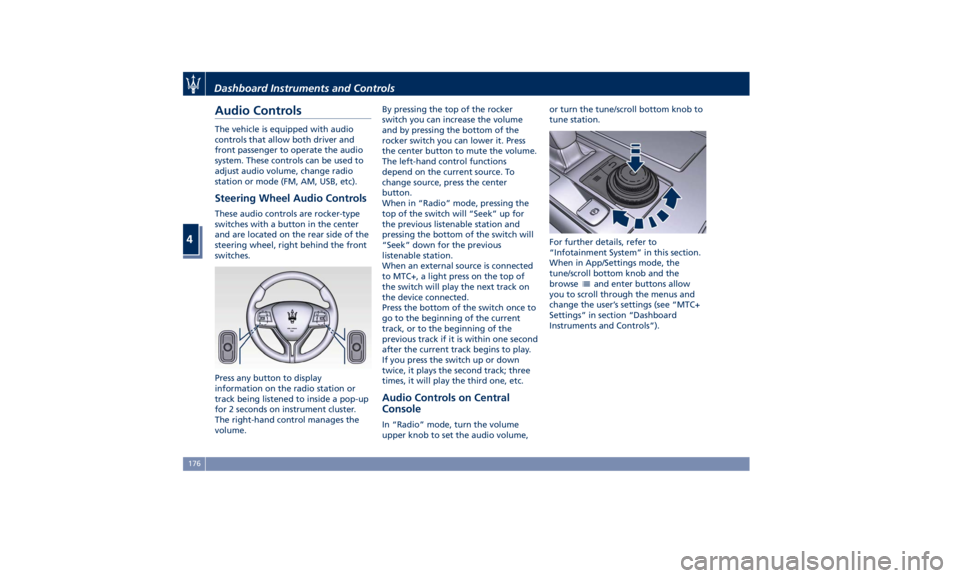
Steering Wheel Audio Controls These audio controls are rocker-type
switches with a button in the center
and are located on the rear side of the
steering wheel, right behind the front
switches.
Press any button to display
information on the radio station or
track being listened to inside a pop-up
for 2 seconds on instrument cluster.
The right-hand control manages the
volume. By pressing the top of the rocker
switch you can increase the volume
and by pressing the bottom of the
rocker switch you can lower it. Press
the center button to mute the volume.
The left-hand control functions
depend on the current source. To
change source, press the center
button.
When in “Radio” mode, pressing the
top of the switch will “Seek” up for
the previous listenable station and
pressing the bottom of the switch will
“Seek” down for the previous
listenable station.
When an external source is connected
to MTC+, a light press on the top of
the switch will play the next track on
the device connected.
Press the bottom of the switch once to
go to the beginning of the current
track, or to the beginning of the
previous track if it is within one second
after the current track begins to play.
If you press the switch up or down
twice, it plays the second track; three
times, it will play the third one, etc.
Audio Controls on Central
Console In “Radio” mode, turn the volume
upper knob to set the audio volume, or turn the tune/scroll bottom knob to
tune station.
For further details, refer to
“Infotainment System” in this section.
When in App/Settings mode, the
tune/scroll bottom knob and the
browse
and enter buttons allow
you to scroll through the menus and
change the user’s settings (see “MTC+
Settings” in section “Dashboard
Instruments and Controls”).Dashboard Instruments and Controls
4
176
Page 186 of 384
in front of you when you are farther
away. This gives you the best
reaction time, though could lead to
some more unwanted warnings.
“Medium” gives instead a little less
time for reacting compared to
“Far”, but at the same time should
lead to less not desired warning.
To change the setting for more
dynamic driving, select the “Near”
setting. This warns you of a possible
collision when you are much closer
to the vehicle or pedestrian (if the
car is equipped with Pedestrian
Emergency Braking - PEB function)in
front of you.
FCW with active braking can be set
to "On" or "Off".
• Surround View Camera
By activating this feature the system
uses four cameras to monitor the
area around the vehicle when
transmission lever is shifted to P
(Park), N (Neutral) or D (Drive)
position.
When activation occurs by pressing
the “Surround Camera” button in
the “Controls” screen or moving the
shift lever in R (Reverse) position,
the initial view will be the default
view (associated with current gear
state). Image will be displayed with active guidelines while in that gear
as long as vehicle speed remains
lower than 8 mph (12 km/h).
When vehicle is shifted into a
different gear, the image will
remain displayed for 10 seconds, or
vehicle is shifted in P (Park), or until
vehicle speed exceeds 8 mph
(12 km/h), at which point it will
immediately cancel and return to
the last-viewed screen.
The feature can be set to “On” or
“Off”. See “Surround View Camera
System (optional)” in section
“Understanding the Vehicle” for
further details.
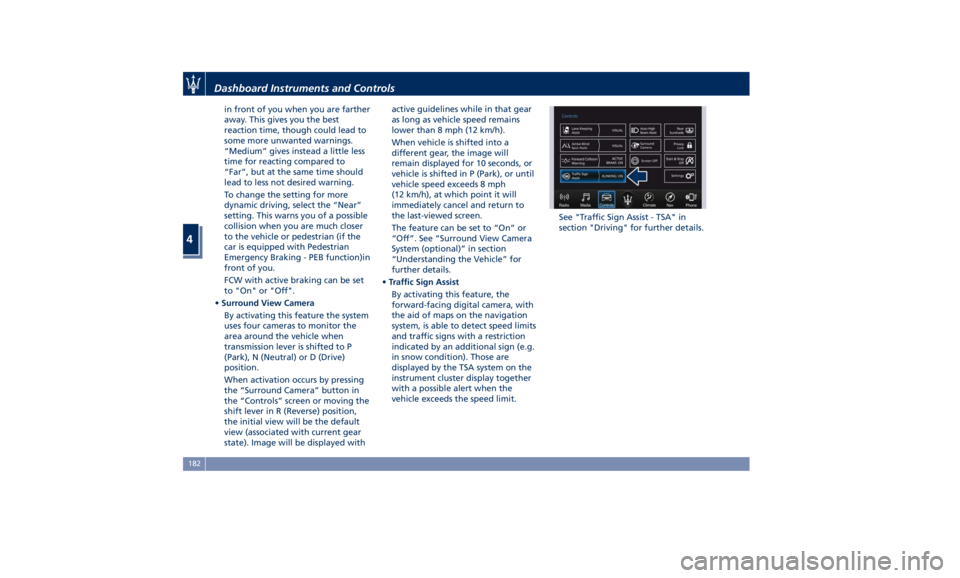
• Traffic Sign Assist
By activating this feature, the
forward-facing digital camera, with
the aid of maps on the navigation
system, is able to detect speed limits
and traffic signs with a restriction
indicated by an additional sign (e.g.
in snow condition). Those are
displayed by the TSA system on the
instrument cluster display together
with a possible alert when the
vehicle exceeds the speed limit. See "Traffic Sign Assist - TSA" in
section "Driving" for further details.Dashboard Instruments and Controls
4
182
Page 187 of 384
MTC+ Settings Customer Programmable
Features The MTC+ System uses a combination
of keys able to access and change the
customer programmable features
present in the “Settings” and
“Controls” page (see also “MTC+
“Controls” Screen” in this section).
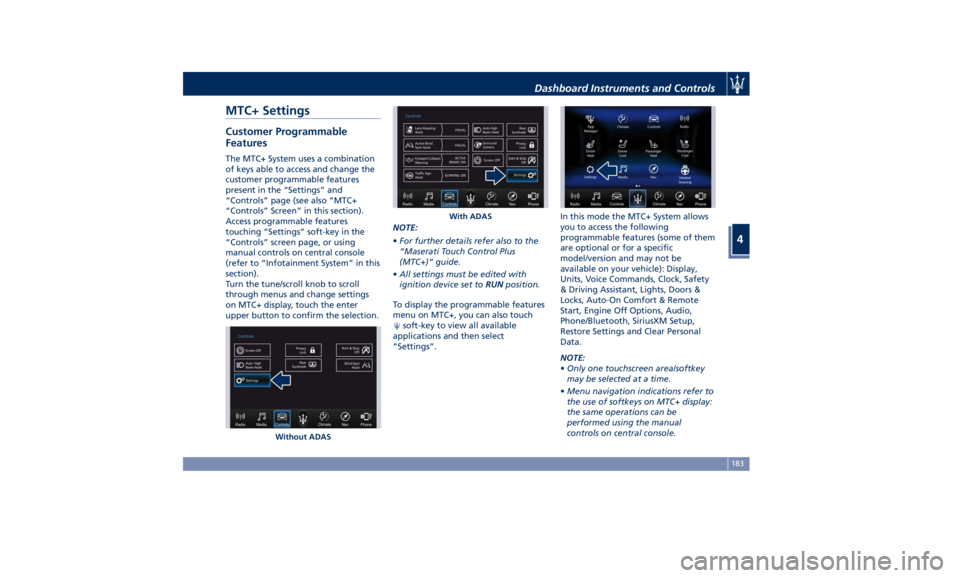
Access programmable features
touching “Settings” soft-key in the
“Controls” screen page, or using
manual controls on central console
(refer to “Infotainment System” in this
section).
Turn the tune/scroll knob to scroll
through menus and change settings
on MTC+ display, touch the enter
upper button to confirm the selection. NOTE:
• For further details refer also to the
“Maserati Touch Control Plus
(MTC+)” guide.
• All settings must be edited with
ignition device set to RUN position.
To display the programmable features
menu on MTC+, you can also touch
soft-key to view all available
applications and then select
“Settings”. In this mode the MTC+ System allows
you to access the following
programmable features (some of them
are optional or for a specific
model/version and may not be
available on your vehicle): Display,
Units, Voice Commands, Clock, Safety
& Driving Assistant, Lights, Doors &
Locks, Auto-On Comfort & Remote
Start, Engine Off Options, Audio,
Phone/Bluetooth, SiriusXM Setup,
Restore Settings and Clear Personal
Data.
NOTE:
• Only one touchscreen area/softkey
may be selected at a time.
• Menu navigation indications refer to
the use of softkeys on MTC+ display:
the same operations can be
performed using the manual
controls on central console.Without ADAS With ADASDashboard Instruments and Controls
4
183
Page 189 of 384
(if equipped). The available
languages are specific to the target
markets.
• Touchscreen Beep
When in this display, you can turn
on or shut off the sound activated
by pressure of a touchscreen
soft-key.
• Controls Screen Time-Out
When this mode is selected, the
“Controls” screen will remain
displayed for 5 seconds. If this mode
is not selected, the screen will
remain displayed until closed
manually.
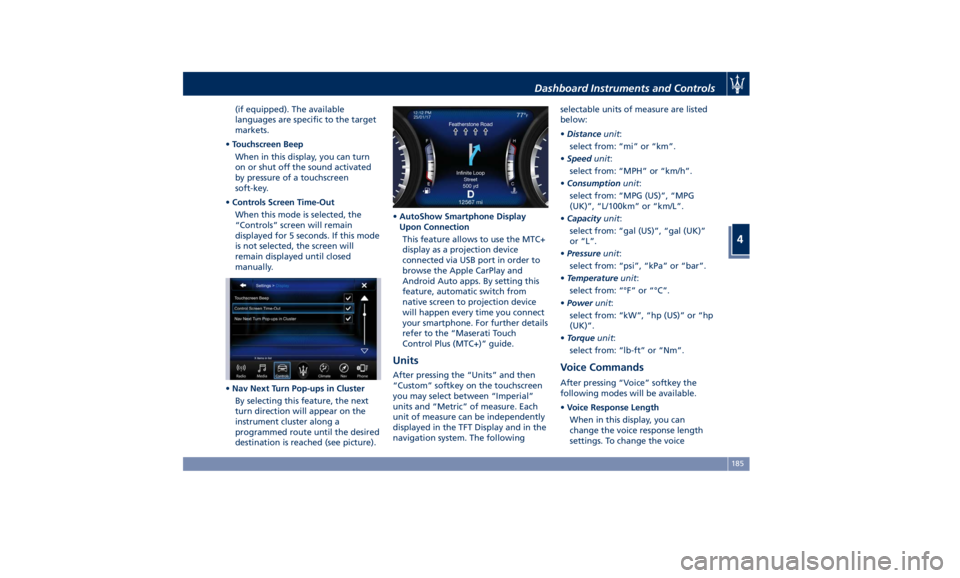
• Nav Next Turn Pop-ups in Cluster
By selecting this feature, the next
turn direction will appear on the
instrument cluster along a
programmed route until the desired
destination is reached (see picture). • AutoShow Smartphone Display
Upon Connection
This feature allows to use the MTC+
display as a projection device
connected via USB port in order to
browse the Apple CarPlay and
Android Auto apps. By setting this
feature, automatic switch from
native screen to projection device
will happen every time you connect
your smartphone. For further details
refer to the “Maserati Touch
Control Plus (MTC+)” guide.
Units After pressing the “Units” and then
“Custom” softkey on the touchscreen
you may select between “Imperial”
units and “Metric” of measure. Each
unit of measure can be independently
displayed in the TFT Display and in the
navigation system. The following selectable units of measure are listed
below:
• Distance unit :
select from: “mi” or “km”.
• Speed unit :
select from: “MPH” or “km/h”.
• Consumption unit :
select from: “MPG (US)”, “MPG
(UK)”, “L/100km” or “km/L”.
• Capacity unit :
select from: “gal (US)”, “gal (UK)”
or “L”.
• Pressure unit :
select from: “psi”, “kPa” or “bar”.
• Temperature unit :
select from: “°F” or “°C”.
• Power unit :
select from: “kW”, “hp (US)” or “hp
(UK)”.
• Torque unit :
select from: “lb-ft” or “Nm”.
Voice Commands After pressing “Voice” softkey the
following modes will be available.
• Voice Response Length
When in this display, you can
change the voice response length
settings. To change the voiceDashboard Instruments and Controls
4
185
Page 190 of 384
response length, touch the “Brief”
or “Detailed” softkey.
• Show Command List
When this feature is selected, it is
possible to select options during a
voice control session. Options for
available controls are: “Always”,
“w/Help” or “Never”.
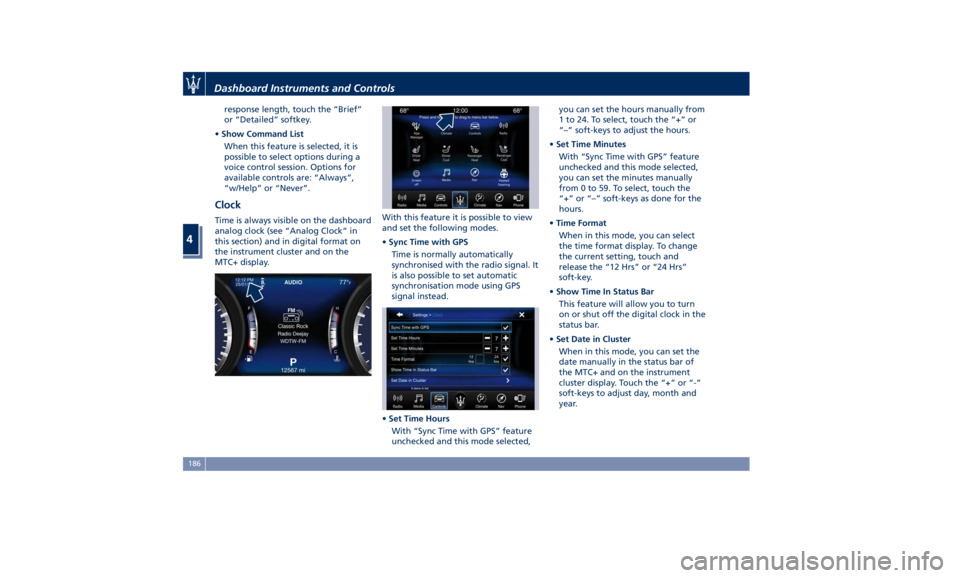
Clock Time is always visible on the dashboard
analog clock (see “Analog Clock” in
this section) and in digital format on
the instrument cluster and on the
MTC+ display. With this feature it is possible to view
and set the following modes.
• Sync Time with GPS
Time is normally automatically
synchronised with the radio signal. It
is also possible to set automatic
synchronisation mode using GPS
signal instead.
• Set Time Hours
With “Sync Time with GPS” feature
unchecked and this mode selected, you can set the hours manually from
1 to 24. To select, touch the “+” or
“–” soft-keys to adjust the hours.
• Set Time Minutes
With “Sync Time with GPS” feature
unchecked and this mode selected,
you can set the minutes manually
from 0 to 59. To select, touch the
“+” or “–” soft-keys as done for the
hours.
• Time Format
When in this mode, you can select
the time format display. To change
the current setting, touch and
release the “12 Hrs” or “24 Hrs”
soft-key.
• Show Time In Status Bar
This feature will allow you to turn
on or shut off the digital clock in the
status bar.
• Set Date in Cluster
When in this mode, you can set the
date manually in the status bar of
the MTC+ and on the instrument
cluster display. Touch the “+” or “-”
soft-keys to adjust day, month and
year.Dashboard Instruments and Controls
4
186
Page 192 of 384
• Rain Sensing Auto Wipers
By selecting this feature, the system
will automatically activate the
windshield wipers if it senses
moisture on the windshield. The
feature can be set to “On” or “Off”.
• Hill Start Assist
This feature allows you to disable
the HSA system. The feature can be
set to “On” or “Off”. See “Brake
and Stability Control System” in
section “Driving” for further details.
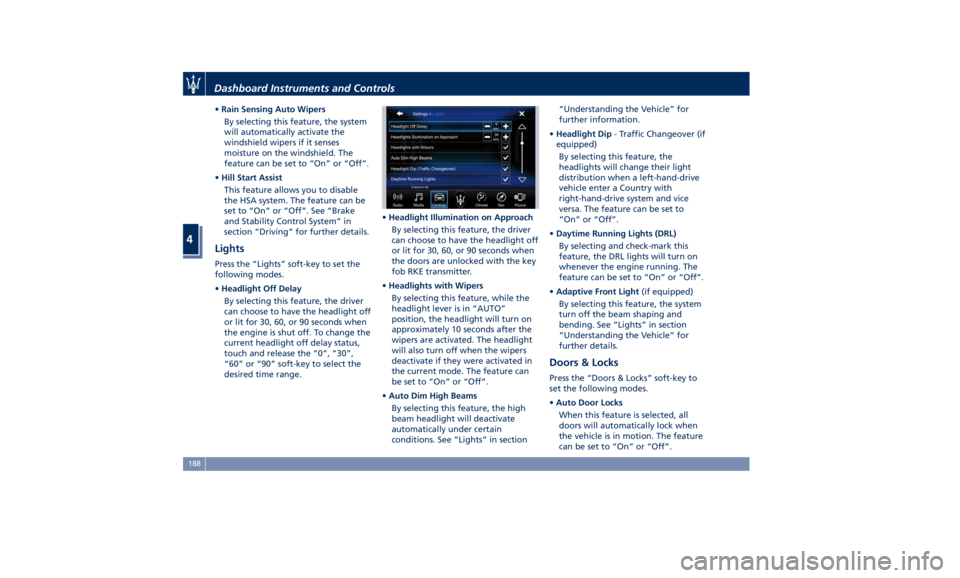
Lights Press the “Lights” soft-key to set the
following modes.
• Headlight Off Delay
By selecting this feature, the driver
can choose to have the headlight off
or lit for 30, 60, or 90 seconds when
the engine is shut off. To change the
current headlight off delay status,
touch and release the “0”, “30”,
“60” or “90” soft-key to select the
desired time range. • Headlight Illumination on Approach
By selecting this feature, the driver
can choose to have the headlight off
or lit for 30, 60, or 90 seconds when
the doors are unlocked with the key
fob RKE transmitter.
• Headlights with Wipers
By selecting this feature, while the
headlight lever is in “AUTO”
position, the headlight will turn on
approximately 10 seconds after the
wipers are activated. The headlight
will also turn off when the wipers
deactivate if they were activated in
the current mode. The feature can
be set to “On” or “Off”.
• Auto Dim High Beams
By selecting this feature, the high
beam headlight will deactivate
automatically under certain
conditions. See “Lights” in section “Understanding the Vehicle” for
further information.
• Headlight Dip - Traffic Changeover (if
equipped)
By selecting this feature, the
headlights will change their light
distribution when a left-hand-drive
vehicle enter a Country with
right-hand-drive system and vice
versa. The feature can be set to
“On” or “Off”.
• Daytime Running Lights (DRL)
By selecting and check-mark this
feature, the DRL lights will turn on
whenever the engine running. The
feature can be set to “On” or “Off”.
• Adaptive Front Light (if equipped)
By selecting this feature, the system
turn off the beam shaping and
bending. See “Lights” in section
“Understanding the Vehicle” for
further details.
Doors & Locks Press the “Doors & Locks” soft-key to
set the following modes.
• Auto Door Locks
When this feature is selected, all
doors will automatically lock when
the vehicle is in motion. The feature
can be set to “On” or “Off”.Dashboard Instruments and Controls
4
188
Page 207 of 384
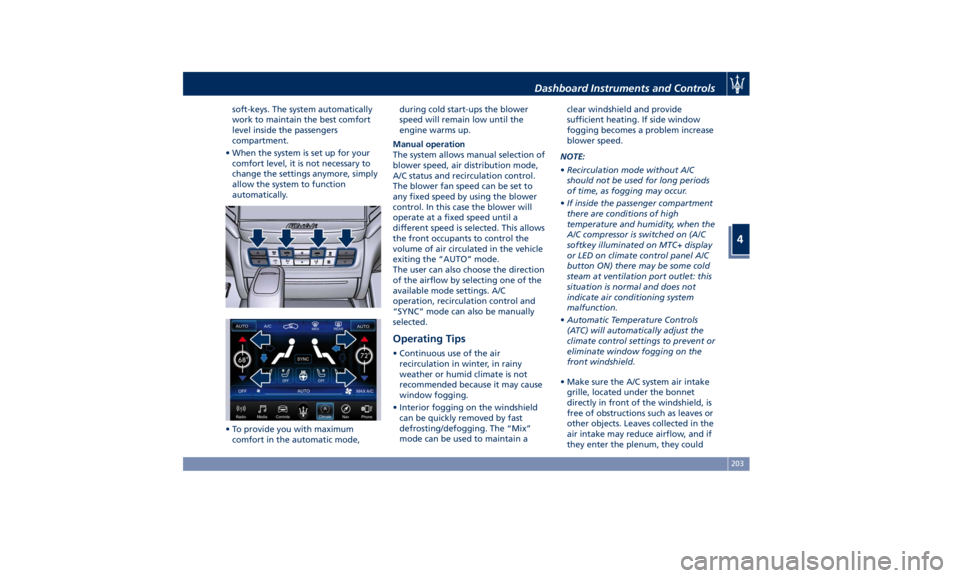
soft-keys. The system automatically
work to maintain the best comfort
level inside the passengers
compartment.
• When the system is set up for your
comfort level, it is not necessary to
change the settings anymore, simply
allow the system to function
automatically.
• To provide you with maximum
comfort in the automatic mode, during cold start-ups the blower
speed will remain low until the
engine warms up.
Manual operation
The system allows manual selection of
blower speed, air distribution mode,
A/C status and recirculation control.
The blower fan speed can be set to
any fixed speed by using the blower
control. In this case the blower will
operate at a fixed speed until a
different speed is selected. This allows
the front occupants to control the
volume of air circulated in the vehicle
exiting the “AUTO” mode.
The user can also choose the direction
of the airflow by selecting one of the
available mode settings. A/C
operation, recirculation control and
“SYNC” mode can also be manually
selected.
Operating Tips • Continuous use of the air
recirculation in winter, in rainy
weather or humid climate is not
recommended because it may cause
window fogging.
• Interior fogging on the windshield
can be quickly removed by fast
defrosting/defogging. The “Mix”
mode can be used to maintain a clear windshield and provide
sufficient heating. If side window
fogging becomes a problem increase
blower speed.
NOTE:
• Recirculation mode without A/C
should not be used for long periods
of time, as fogging may occur.
• If inside the passenger compartment
there are conditions of high
temperature and humidity, when the
A/C compressor is switched on (A/C
softkey illuminated on MTC+ display
or LED on climate control panel A/C
button ON) there may be some cold
steam at ventilation port outlet: this
situation is normal and does not
indicate air conditioning system
malfunction.
• Automatic Temperature Controls
(ATC) will automatically adjust the
climate control settings to prevent or
eliminate window fogging on the
front windshield.
• Make sure the A/C system air intake
grille, located under the bonnet
directly in front of the windshield, is
free of obstructions such as leaves or
other objects. Leaves collected in the
air intake may reduce airflow, and if
they enter the plenum, they couldDashboard Instruments and Controls
4
203
Page 209 of 384
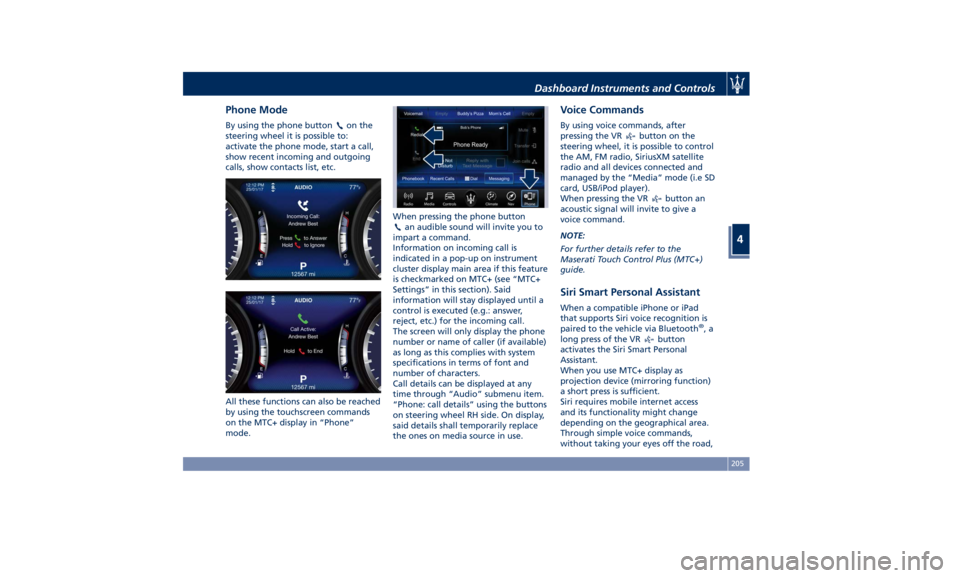
Phone Mode By using the phone button on the
steering wheel it is possible to:
activate the phone mode, start a call,
show recent incoming and outgoing
calls, show contacts list, etc.
All these functions can also be reached
by using the touchscreen commands
on the MTC+ display in “Phone”
mode. When pressing the phone button
an audible sound will invite you to
impart a command.
Information on incoming call is
indicated in a pop-up on instrument
cluster display main area if this feature
is checkmarked on MTC+ (see “MTC+
Settings” in this section). Said
information will stay displayed until a
control is executed (e.g.: answer,
reject, etc.) for the incoming call.
The screen will only display the phone
number or name of caller (if available)
as long as this complies with system
specifications in terms of font and
number of characters.
Call details can be displayed at any
time through “Audio” submenu item.
“Phone: call details” using the buttons
on steering wheel RH side. On display,
said details shall temporarily replace
the ones on media source in use. Voice Commands By using voice commands, after
pressing the VR
button on the
steering wheel, it is possible to control
the AM, FM radio, SiriusXM satellite
radio and all devices connected and
managed by the “Media” mode (i.e SD
card, USB/iPod player).
When pressing the VR
button an
acoustic signal will invite to give a
voice command.
NOTE:
For further details refer to the
Maserati Touch Control Plus (MTC+)
guide.
Siri Smart Personal Assistant When a compatible iPhone or iPad
that supports Siri voice recognition is
paired to the vehicle via Bluetooth ®
,a
long press of the VR
button
activates the Siri Smart Personal
Assistant.
When you use MTC+ display as
projection device (mirroring function)
a short press is sufficient.
Siri requires mobile internet access
and its functionality might change
depending on the geographical area.
Through simple voice commands,
without taking your eyes off the road,Dashboard Instruments and Controls
4
205
Page 214 of 384
Starting with a Cold Engine
Start-off slowly, avoiding sudden
acceleration and rev the engine up at
low medium speeds. High-
performance driving should be
avoided until the engine temperature
reaches 149-158°F (65-70°C).
Engine Turn-Off • With the shift lever in P (Park), D
(Drive) or R (Reverse) positions (see
“Automatic Transmission” in this
section) and vehicle standstill, press
and release the START/STOP button
to switch off the engine. A burst on
the accelerator pedal before turning
off the engine has no purpose and
increases fuel consumption.
• If the shift lever is in N (Neutral) and
the START/STOP button is pressed
once, the instrument cluster will
display a “Vehicle Not in Park”
message and the engine will remain
running.
WARNING!
Never leave a vehicle out of the P
(Park) position, as it could move. NOTE:
If
the ignition switch is left in the ACC
or RUN (engine not running) position
and the transmission is in P (Park), the
system will automatically time out
after 30 minutes of inactivity and the
ignition will switch to OFF position.
Engine Turn Off when in Automatic
Start&Stop
When the engine has been turned off
by the Start&Stop system, press and
release the START/STOP button. The
ignition switch will return to the OFF
position and the vehicle is off.
“Panic Stop” Strategy In panic conditions, if driver stops
engine in any non-standard manner
while driving at a speed over 2 mph
(3 km/h), the “Panic Stop” strategy can
manage the situation by checking
gearchange condition upon engine
cutting, driver’s action on brakes, road
condition (flat or slope) so as to set
gearchange to the most suitable
condition.
The “Panic Stop” strategy considers
that the driver should stop the engine
by pressing the ignition switch at least
3 times or holding it depressed for at
least 2 seconds.Automatic Start&Stop
System The Maserati Start&Stop system allows
the engine to automatically switch off
when the vehicle stops and to restart
when the driver intends to drive. This
feature helps reduce fuel
consumption. During the “Stop
(AutoStop)” phase the ignition is still
on and all security features are
available.
In order for the Start&Stop to activate,
the vehicle must be stationary and the
brake pedal adequately pressed.
NOTE:
If the brake pedal is not sufficiently
pressed the Start&Stop may not
function even if the vehicle is stopped.
When the Start&Stop switches off the
engine, the related light
illuminates on the instrument cluster.
As soon as the brake pedal is released,
the engine turns on.
While the vehicle is stopped, the
transmission can be placed in P (Park)
pressing the “P” button on the shift
lever.
In this case it is possible to release the
brake pedal and the vehicle will
remain in “AutoStop” with engine off.Driving
5
210
Page 218 of 384
Once it is set in the menu bar, the new
menu will be immediately operational.
NOTE:
The yellow LED on the button
indicates the disabled status of
Start&Stop system and vice versa.
If the driving conditions allow it, the
user can re-enable the Start&Stop
function at any time using one of
previous ways.
NOTE:
After user intervention, the Start&Stop
system will automatically update the
status of the function in all contexts
where it can be modified.
Start&Stop System Failure When the indicator light and the
related message illuminate on the TFT
display (see chapter “Instrument
Cluster” in section “Dashboard
Instruments and Controls”) there is a
malfunction in the Start&Stop system
and the engine cannot be switched off
and restarted automatically. To switch
off or restart the engine it is necessary
to push the START/STOP . Have the
vehicle checked at an Authorized
Maserati Dealer .Automatic Transmission The vehicle is equipped with an
electronically controlled 8-speed
automatic transmission, which
automatically changes gear according
to the vehicle's instantaneous usage
parameters (vehicle speed, road
gradient and accelerator pedal
position).
It is possible to change gear manually
thanks to the “M +/-“ (Manual)
position for the shift lever.
The electronic shift lever replaces the
conventional mechanical lever and has
no mechanical connection to the
transmission. The transmission is
operated by electrical actuators on the
hydraulic system and all commands to
the control system are transmitted by
the CAN network. The lever itself
represents a mere user interface. Gear
positions are simulated by solenoids
inside the lever body, which are
computer-controlled and enable or
disable certain positions of the lever.
The solenoids inside the shift lever
prevent the movement of the lever
towards invalid positions.
The electronically-controlled
transmission provides a precise shift
schedule. The transmission electronics
are self-calibrating, therefore the gearshift behaviour could become
perfect as expected after few
hundreds of miles/km.
CAUTION!
In order to properly use the automatic
transmission, it is essential that you
read through the whole chapter, so
that you can understand right from
the start what the correct and granted
operations are.
Damage to the transmission may occur
if the following precautions are not
observed:
• Shift into P (Park) only after the
vehicle has come to a complete stop:
this is the default position of the
lever. After engaged P (Park) it is
possible set the ignition switch to
OFF .
• Shift into or out of R (Reverse) only
after the vehicle has come to a
complete stop and the engine is at
idle speed.
• Do not shift between P (Park), R
(Reverse), N (Neutral) or D (Drive)
when the engine is above idle speed
• To effect any change from vehicle
stop to R (Reverse), D (Drive), 1 st
orDriving
5
214