MAZDA MODEL RX 8 2005 Owners Manual (in English)
Manufacturer: MAZDA, Model Year: 2005, Model line: MODEL RX 8, Model: MAZDA MODEL RX 8 2005Pages: 364
Page 171 of 364

Black plate (171,1)
qOperating Tips for CD Player/In-
Dash CD Changer
Condensation phenomenon
Immediately after turning on the heater
when the vehicle is cold, the CD or
optical components (prism and lens) in the
CD player/changer may become clouded
with condensation. At this time, the CD
will eject immediately when placed in the
unit. A clouded CD can be corrected
simply by wiping it with a soft cloth.
Clouded optical components will clear
naturally in about an hour. Wait for
normal operation to return before
attempting to use the unit.
Handling the CD player/In-dash CD
changer
The following precautions should be
observed.
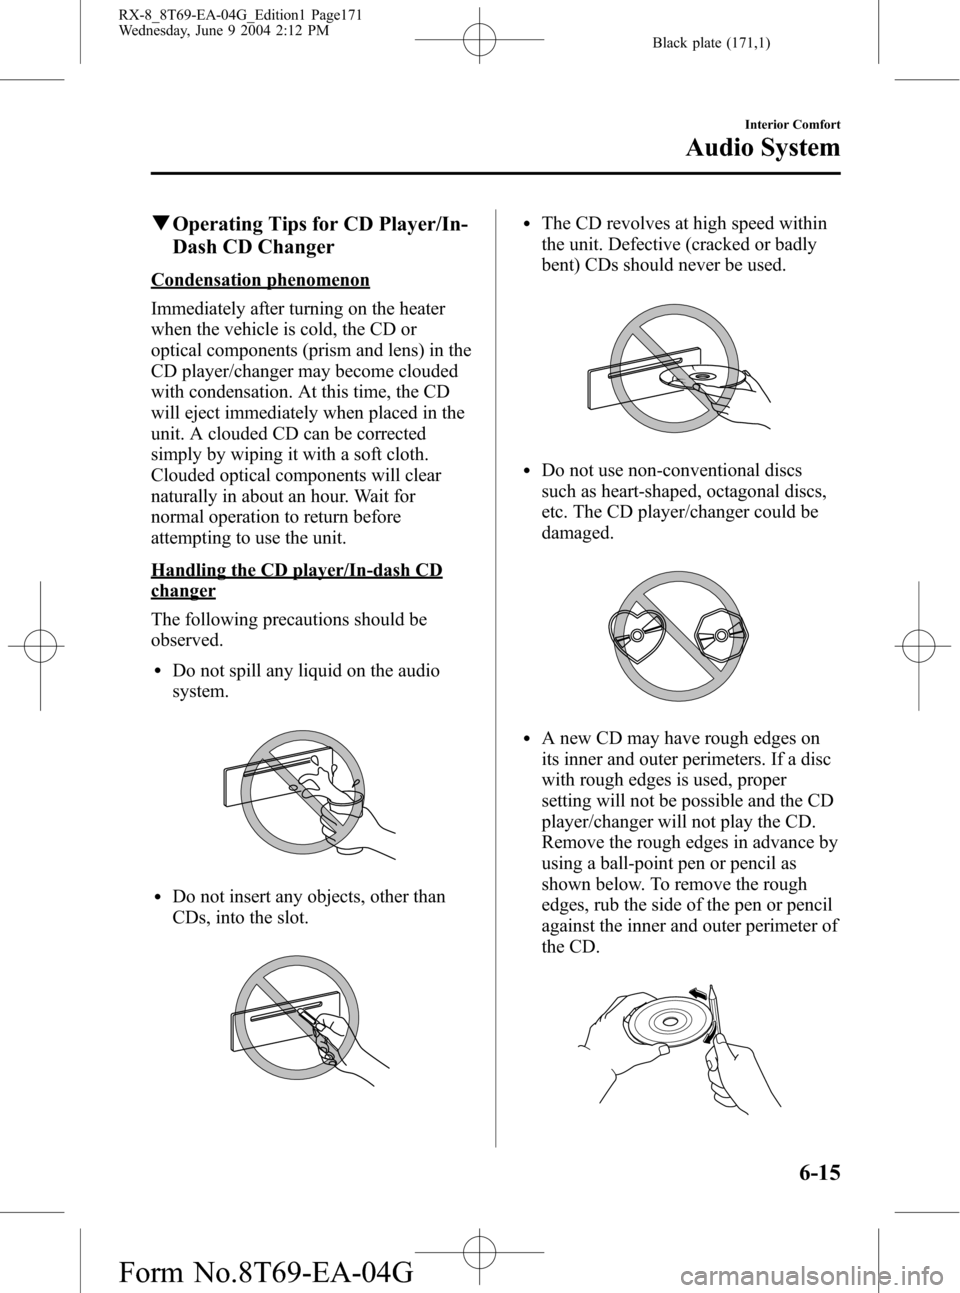
lDo not spill any liquid on the audio
system.
lDo not insert any objects, other than
CDs, into the slot.
lThe CD revolves at high speed within
the unit. Defective (cracked or badly
bent) CDs should never be used.
lDo not use non-conventional discs
such as heart-shaped, octagonal discs,
etc. The CD player/changer could be
damaged.
lA new CD may have rough edges on
its inner and outer perimeters. If a disc
with rough edges is used, proper
setting will not be possible and the CD
player/changer will not play the CD.
Remove the rough edges in advance by
using a ball-point pen or pencil as
shown below. To remove the rough
edges, rub the side of the pen or pencil
against the inner and outer perimeter of
the CD.
Interior Comfort
Audio System
6-15
RX-8_8T69-EA-04G_Edition1 Page171
Wednesday, June 9 2004 2:12 PM
Form No.8T69-EA-04G
Page 172 of 364

Black plate (172,1)
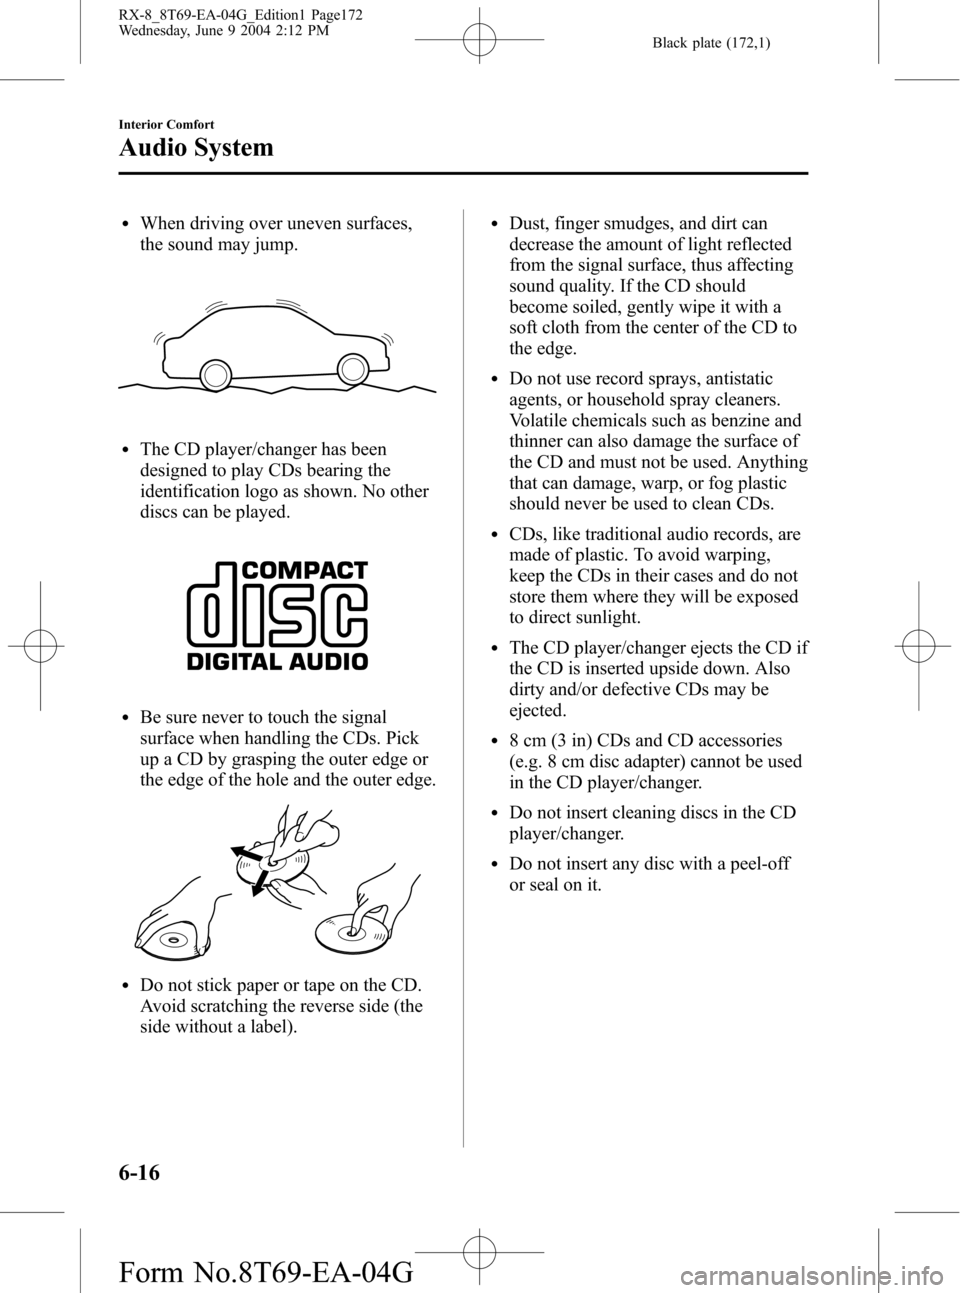
lWhen driving over uneven surfaces,
the sound may jump.
lThe CD player/changer has been
designed to play CDs bearing the
identification logo as shown. No other
discs can be played.
lBe sure never to touch the signal
surface when handling the CDs. Pick
up a CD by grasping the outer edge or
the edge of the hole and the outer edge.
lDo not stick paper or tape on the CD.
Avoid scratching the reverse side (the
side without a label).
lDust, finger smudges, and dirt can
decrease the amount of light reflected
from the signal surface, thus affecting
sound quality. If the CD should
become soiled, gently wipe it with a
soft cloth from the center of the CD to
the edge.
lDo not use record sprays, antistatic
agents, or household spray cleaners.
Volatile chemicals such as benzine and
thinner can also damage the surface of
the CD and must not be used. Anything
that can damage, warp, or fog plastic
should never be used to clean CDs.
lCDs, like traditional audio records, are
made of plastic. To avoid warping,
keep the CDs in their cases and do not
store them where they will be exposed
to direct sunlight.
lThe CD player/changer ejects the CD if
the CD is inserted upside down. Also
dirty and/or defective CDs may be
ejected.
l8 cm (3 in) CDs and CD accessories
(e.g. 8 cm disc adapter) cannot be used
in the CD player/changer.
lDo not insert cleaning discs in the CD
player/changer.
lDo not insert any disc with a peel-off
or seal on it.
6-16
Interior Comfort
Audio System
RX-8_8T69-EA-04G_Edition1 Page172
Wednesday, June 9 2004 2:12 PM
Form No.8T69-EA-04G
Page 173 of 364

Black plate (173,1)
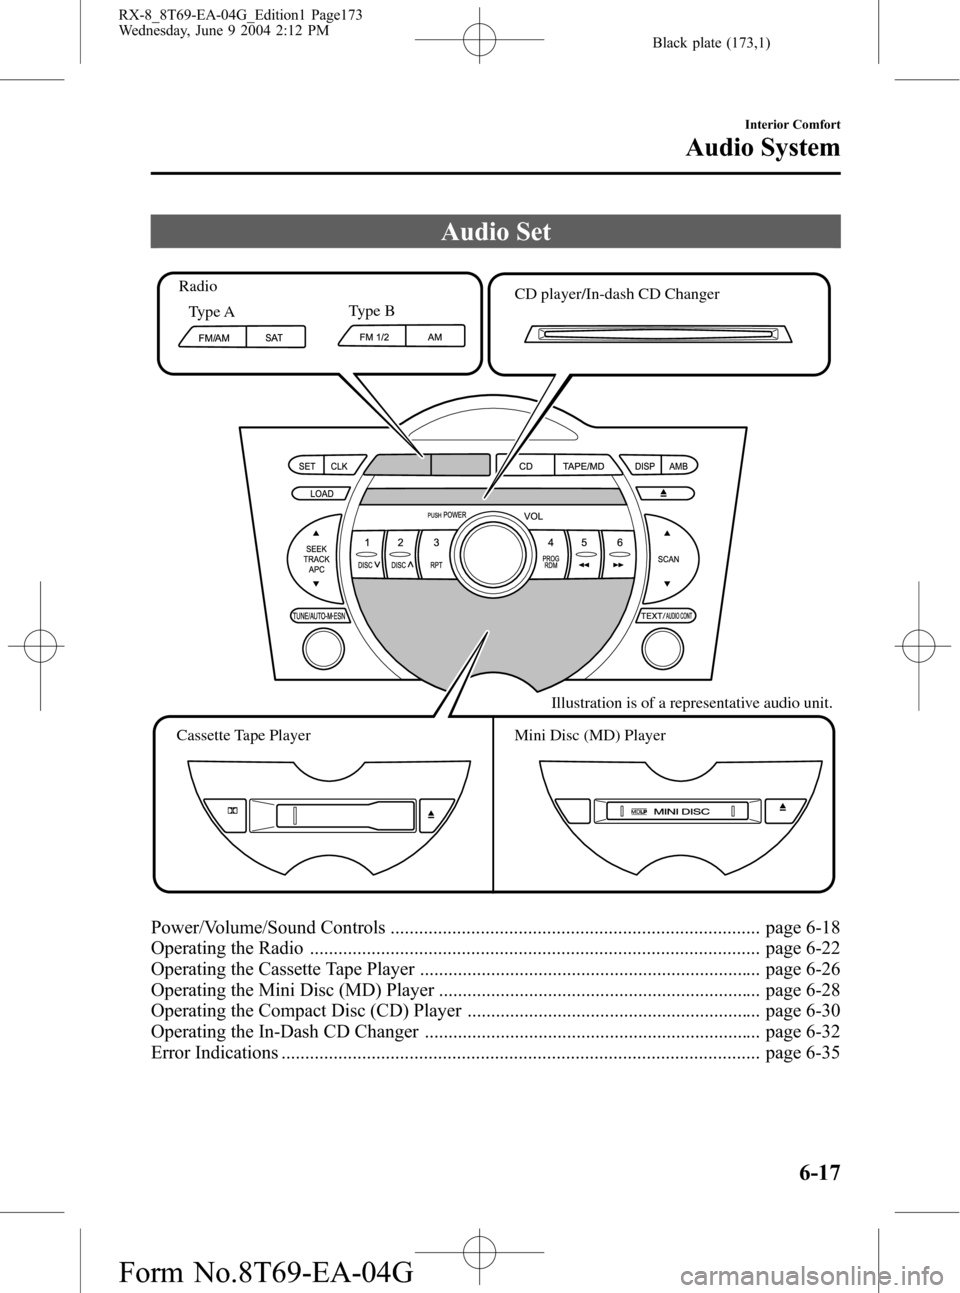
Audio Set
Type AType B RadioCD player/In-dash CD Changer
Cassette Tape Player Mini Disc (MD) PlayerIllustration is of a representative audio unit.
Power/Volume/Sound Controls .............................................................................. page 6-18
Operating the Radio ............................................................................................... page 6-22
Operating the Cassette Tape Player ........................................................................ page 6-26
Operating the Mini Disc (MD) Player .................................................................... page 6-28
Operating the Compact Disc (CD) Player .............................................................. page 6-30
Operating the In-Dash CD Changer ....................................................................... page 6-32
Error Indications ..................................................................................................... page 6-35
Interior Comfort
Audio System
6-17
RX-8_8T69-EA-04G_Edition1 Page173
Wednesday, June 9 2004 2:12 PM
Form No.8T69-EA-04G
Page 174 of 364

Black plate (174,1)
qPower/Volume/Sound Controls
Audio control dial Power/Volume dial
Illustration is of a representative audio unit.
Power ON/OFF
Turn the ignition switch to the ACC or
ON position.
Press the power/volume dial to turn the
audio system on.
Press the power/volume dial again to turn
the audio system off.
NOTE
To prevent the battery from being
discharged, do not leave the audio
system on for a long period of time
when the engine is not running.
Volume adjustment
To adjust the volume, turn the power/
volume dial.Turn the power/volume dial to the right to
increase volume, to the left to decrease it.
Audio sound adjustment
1. Press the audio control dial to select the
function. The selected function will be
indicated.
*
*
Standard audio-
equipped model
6-18
Interior Comfort
Audio System
RX-8_8T69-EA-04G_Edition1 Page174
Wednesday, June 9 2004 2:12 PM
Form No.8T69-EA-04G
Page 175 of 364

Black plate (175,1)
*
* BOSE Sound
System-
equipped model
* Depending on the mode selected, the
indication changes.
2. Turn the audio control dial to adjust the
selected functions as follows:
Standard audio-equipped model
Indication Turn Left Turn Right
Select mode
Decrease
bassIncrease
bass
Decrease
mid-rangeIncrease
mid-range
Decrease
trebleIncrease
treble
Shift the
sound to the
frontShift the
sound to the
rear
Shift the
sound to the
leftShift the
sound to the
right
OFF ON
BOSE Sound System-equipped model
Indication Turn Left Turn Right
OFF ON
Decrease
bassIncrease
bass
Decrease
trebleIncrease
treble
Shift the
sound to the
frontShift the
sound to the
rear
Shift the
sound to the
leftShift the
sound to the
right
OFF ON
NOTE
About 5 seconds after selecting any
mode, the volume function will be
automatically selected. To reset bass,
mid-range, treble, fade, and balance,
press the audio control dial for 2
seconds. The unit will beep and
“CLEAR”will be displayed.
Automatic Level Control (ALC)
(Standard audio-equipped model)
The automatic level control is a feature
that automatically adjusts audio volume
and sound quality according to the vehicle
speed.
The volume increases in accordance with
the increase in vehicle speed, and
decreases as vehicle speed decreases.
Interior Comfort
Audio System
6-19
RX-8_8T69-EA-04G_Edition1 Page175
Wednesday, June 9 2004 2:12 PM
Form No.8T69-EA-04G
Page 176 of 364

Black plate (176,1)
The following four modes are available.
Select the desired mode.
Mode Volume change
No change
Minimum
Medium
Maximum
Turn the audio control dial to select the
ALC OFF, ALC LEVEL1―3 mode. The
selected mode will be indicated.
*AudioPilot (BOSE Sound System-
equipped model)
AudioPilot automatically adjusts audio
volume and sound quality in accordance
with the level of noise entering the vehicle
interior while driving. When AudioPilot is
turned ON, the system automatically
calculates the conditions for optimum
hearing of sound which may be difficult
to hear depending on exterior noise.
* AudioPilot is a registered trademark of
BOSE Corporation.
BEEP setting
The beep-sound when operating the audio
system can be set on or off.
6-20
Interior Comfort
Audio System
RX-8_8T69-EA-04G_Edition1 Page176
Wednesday, June 9 2004 2:12 PM
Form No.8T69-EA-04G
Page 177 of 364

Black plate (177,1)
Interior Comfort
Audio System
6-21
RX-8_8T69-EA-04G_Edition1 Page177
Wednesday, June 9 2004 2:12 PM
Form No.8T69-EA-04G
Page 178 of 364

Black plate (178,1)
qOperating the Radio
Channel preset buttons
Scan button Band selector button
Seek tuning
buttonSatellite button*
*For reception of optional Sirius digital satellite radio.
Used on vehicles equipped with the separately sold Sirius digital satellite radio unit.
For information on use, read the manual accompanying the Sirius unit.
Subscription of Sirius digital satellite radio service is available in the U.S. (Except Alaska and Hawaii).Manual tuning dial
Auto memory button
Electric serial number button* Type A
Manual tuning dial/Auto memory buttonChannel preset buttons
Scan button Band selector buttons
Seek tuning
buttonType B
6-22
Interior Comfort
Audio System
RX-8_8T69-EA-04G_Edition1 Page178
Wednesday, June 9 2004 2:12 PM
Form No.8T69-EA-04G
Page 179 of 364

Black plate (179,1)
Radio ON
(Type A)
Press a band selector button (
)to
turn the radio on.
(Type B)
Press a band selector button (
,)
to turn the radio on.
Band selection
(Type A)
Successively pressing the band selector
button (
) switches the bands as
follows: FM1→FM2→AM.
(Type B)
Choose AM by pressing the AM button
(
) and FM by pressing the FM1/2
button (
).
The selected mode will be indicated. If
FM stereo is being received,“ST”will be
displayed.
NOTE
If the FM broadcast signal becomes
weak, reception automatically changes
from STEREO to MONO for reduced
noise, and the“ST”indicator will go
out.
Tuning
The radio has the following tuning
methods: Manual, Seek, Scan, Preset
channel, and Auto memory tuning. The
easiest way to tune stations is to set them
on preset channels.
NOTE
If the power supply is interrupted (fuse
blows or the battery is disconnected),
the preset channels will be canceled.
Manual tuning
Turning the manual tuning dial will
change the frequency higher or lower.
Seek tuning
Pressing the seek tuning button (
,)
will cause the tuner to seek a higher or
lower frequency automatically.
NOTE
If you continue to press and hold the
button, the frequency will continue
changing without stopping.
Scan tuning
Press the scan button (
,)to
automatically sample strong stations.
Scanning stops at each station for about 5
seconds. To hold a station, press the scan
button (
,) again during this interval.
Preset channel tuning
The 6 preset channels can be used to store
6 AM and 12 FM stations.
1. To set a channel first select AM, FM1,
or FM2. Tune to the desired station.
2. Depress a channel preset button for
about 2 seconds until a beep is heard.
The preset channel number and station
frequency will be displayed. The
station is now held in the memory.
Interior Comfort
Audio System
6-23
RX-8_8T69-EA-04G_Edition1 Page179
Wednesday, June 9 2004 2:12 PM
Form No.8T69-EA-04G
Page 180 of 364

Black plate (180,1)
3. Repeat this operation for the other
stations and bands you want to store.
To tune one in the memory, select AM,
FM1, or FM2 and then press its
channel preset button. The station
frequency and the channel number will
be displayed.
NOTE
If the power supply is interrupted (fuse
blows or the battery is disconnected),
the preset channels will be canceled.
Auto memory tuning
This is especially useful when driving in
an area where the local stations are not
known. Additional AM/FM stations can
be stored without disturbing the
previously set channels.
Press and hold the auto memory button
(
) for about 2 seconds until a beep
is heard; the system will automatically
scan and temporarily store up to 6 stations
with the strongest frequencies in each
selected band in that area.
After scanning is completed, the station
with the strongest frequency will be tuned
and its frequency displayed.
Press and release the auto memory button
(
) to recall stations from the auto-
stored stations. One stored station will be
selected each time; its frequency and
channel number will be displayed.
NOTE
If no stations can be tuned after
scanning operations,“A”will be
displayed.
6-24
Interior Comfort
Audio System
RX-8_8T69-EA-04G_Edition1 Page180
Wednesday, June 9 2004 2:12 PM
Form No.8T69-EA-04G