change time MERCEDES-BENZ C-CLASS CABRIOLET 2016 Owners Manual
[x] Cancel search | Manufacturer: MERCEDES-BENZ, Model Year: 2016, Model line: C-CLASS CABRIOLET, Model: MERCEDES-BENZ C-CLASS CABRIOLET 2016Pages: 377, PDF Size: 6.9 MB
Page 4 of 377
Welcome to the world of Mercedes-Benz
Before you drive off for the first time, read this
Owner's Manual carefully and familiarise your-
self with your vehicle. For your own safety and a longer vehicle life, follow the instructions and
warning notices in this manual. Disregarding
them may lead to damage to the vehicle or per-
sonal injury.
The equipment or model designation of your
vehicle may vary according to:
R Model
R order
R country variant
R availability
The illustrations in this manual show a left-hand- drive vehicle. On right-hand-drive vehicles, the
layout of components and controls differs
accordingly.
Mercedes-Benz is constantly updating its vehi-
cles to the state of the art.
Mercedes-Benz therefore reserves the right to
introduce changes in the following areas:
R Design
R Equipment
R Technical features
Consequently, the description may differ from
your vehicle in some cases.
The following are integral components of the
vehicle:
R Digital Owner's Manual
R Printed Owner's Manual
R Service Booklet
R Equipment-dependent supplements
Keep these documents in the vehicle at all
times. If you sell the vehicle, always pass all
documents on to the new owner.
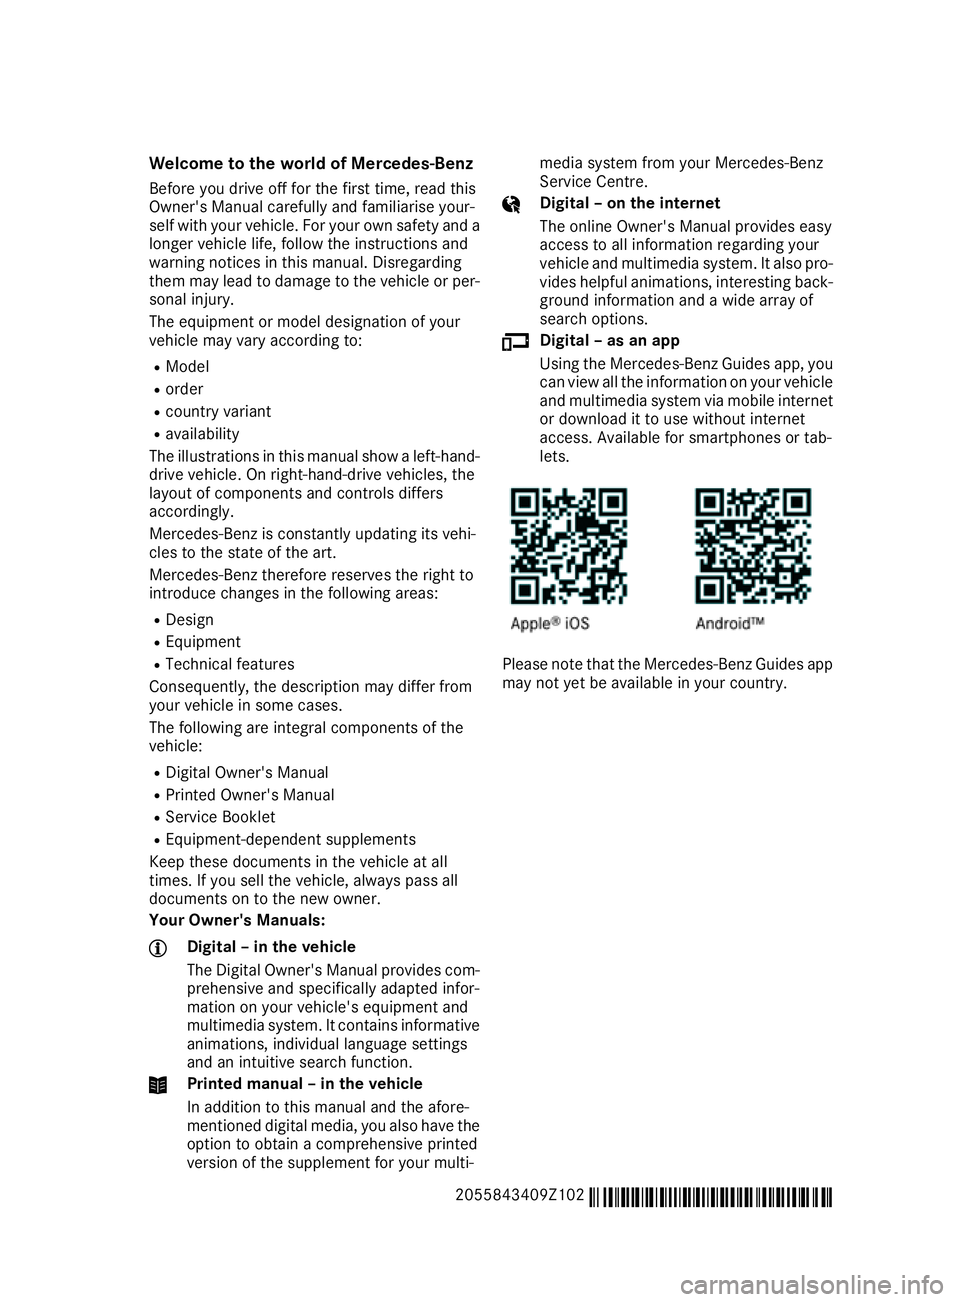
Your Owner's Manuals: Digital – in the vehicle
The Digital Owner's Manual provides com-
prehensive and specifically adapted infor-
mation on your vehicle's equipment and
multimedia system. It contains informative animations, individual language settings
and an intuitive search function. Printed manual – in the vehicle
In addition to this manual and the afore-
mentioned digital media, you also have the option to obtain a comprehensive printed
version of the supplement for your multi- media system from your Mercedes-Benz
Service Centre. Digital – on the internet
The online Owner's Manual provides easy
access to all information regarding your
vehicle and multimedia system. It also pro-
vides helpful animations, interesting back-
ground information and a wide array of
search options. Digital – as an app
Using the Mercedes-Benz Guides app, you
can view all the information on your vehicle and multimedia system via mobile internet or download it to use without internet
access. Available for smartphones or tab-
lets. Please note that the Mercedes-Benz Guides app
may not yet be available in your country.
2055843409Z102 É2055843409Z102ZËÍ
Page 30 of 377
Environmental protection
General notes
H
Environmental note
Daimler's declared policy is one of compre-
hensive environmental protection.
Our objectives are to use the natural resour-
ces which form the basis of our existence on
this planet sparingly and in a manner which
takes the requirements of both nature and
humanity into consideration.
You too can help to protect the environment
by operating your vehicle in an environmen-
tally-responsible manner.
Fuel consumption and the rate of engine,
transmission, brake and tyre wear depend on
the following factors:
R operating conditions of your vehicle
R your personal driving style
You can influence both factors. Therefore,
please bear the following in mind:
Operating conditions:
R avoid short trips, as these increase fuel
consumption.
R observe the correct tyre pressure.
R do not carry any unnecessary weight in the
vehicle.
R remove the roof rack once you no longer
need it.
R a regularly serviced vehicle will contribute
to environmental protection. You should
therefore adhere to the service intervals.
R all maintenance work should be carried out
at a qualified specialist workshop.
Personal driving style:
R do not depress the accelerator pedal when
starting the engine.
R do not warm up the engine when the vehicle
is stationary.
R drive carefully and maintain a safe distance
from the vehicle in front.
R avoid frequent, sudden acceleration and
braking. R
change gear in good time and use each gear
only up to Ôof its maximum engine speed.
R switch off the engine in stationary traffic.
R monitor the vehicle's fuel consumption. Take-back of end-of-life vehicles
EU countries only:
Mercedes-Benz will take back your end-of-life
vehicle for environmentally friendly disposal in
accordance with the European Union (EU) End-
Of-Life Vehicles Directive.
A network of vehicle take-back points and dis-
mantlers has been established for you to return
your vehicle. You can leave it at any of these
points free of charge. This makes an important
contribution to closing the recycling circle and
conserving resources.
For further information about the recycling and
disposal of end-of-life vehicles, and the take-
back conditions, please visit the national
Mercedes-Benz website for your country. Genuine Mercedes-Benz parts
H
Environmental note
Daimler AG also supplies reconditioned
assemblies and parts which are of the same
quality as new parts. For these, the same war-
ranty applies as for new parts.
! Airbags and seat belt tensioners, as well as
control units and sensors for these restraint
systems, may be installed in the following
areas of your vehicle:
R doors
R door pillars
R door sills
R seats
R dashboard
R instrument cluster
R centre console
Do not install accessories such as audio sys-
tems in these areas. Do not carry out repairs or welding. You could impair the operating
efficiency of the restraint systems. Genuine Mercedes-Benz parts
27Introduction Z
Page 31 of 377
Have accessories retrofitted at a qualified
specialist workshop.
You could jeopardise the operating safety of
your vehicle if you use parts, tyres and wheels as
well as accessories relevant to safety that have not been approved by Mercedes-Benz. This
could lead to malfunctions in safety-relevant
systems, e.g. the brake system. Use only genu-
ine Mercedes-Benz parts or parts of equal qual- ity. Use only tyres, wheels and accessories that
have been specifically approved for your vehi-
cle.
Mercedes-Benz tests genuine parts and conver-
sion parts and accessories that have been spe-
cifically approved for your vehicle for their reli-
ability, safety and suitability. Despite ongoing
market research, Mercedes-Benz is unable to
assess other parts. Mercedes-Benz therefore
accepts no responsibility for the use of such
parts in Mercedes-Benz vehicles, even if they
have been officially approved or independently
approved by a testing centre.
In Germany, certain parts are officially approved for installation or modification only if they com-
ply with legal requirements. This also applies to some other countries. All genuine Mercedes-
Benz parts meet the approval requirements. The
use of non-approved parts may invalidate the
vehicle's general operating permit.
This is the case:
R if they cause a change of the vehicle type from
that for which the vehicle's general operating permit was granted
R if other road users could be endangered
R if the emission or noise levels are adversely
affected
Always specify the vehicle identification number (VIN) (Y page 359) when ordering genuine
Mercedes-Benz parts. Owner's Manual
Vehicle equipment
i This Owner's Manual describes all models,
standard and optional equipment for your
vehicle that were available at the time of going to press. Country-specific differences are
possible. Note that your vehicle may not be
fitted with all features described. This is also
the case for systems and functions relevant to safety. Therefore, the equipment on your vehicle may differ from that in the descrip-
tions and illustrations.
The original purchase contract documentation
for your vehicle contains a list of all of the sys-
tems in your vehicle.
Should you have any questions concerning
equipment and operation, please consult a
Mercedes-Benz Service Centre.
The Owner's Manual and Service Booklet are
important documents and should be kept in the vehicle. Operating safety
Important safety notes
G
WARNING
If you do not have the prescribed service/
maintenance work or necessary repairs car-
ried out, this could result in malfunctions or
system failures. There is a risk of an accident.
Always have the prescribed service/mainte-
nance work as well as necessary repairs car-
ried out at a qualified specialist workshop. G
WARNING
Flammable material such as leaves, grass or
twigs may ignite if they come into contact with hot parts of the exhaust system. There is a risk of fire.
When driving off road or on unpaved roads,
check the vehicle's underside regularly. In
particular, remove parts of plants or other
flammable materials which have become
trapped. In the case of damage, contact a
qualified specialist workshop. G
WARNING
Modifications to electronic components, their software as well as wiring could affect their
function and/or the operation of other net-
worked components. This could in particular
also be the case for systems relevant to
safety. They might not function properly any-
more and/or jeopardise the operational
safety of the vehicle. There is an increased
risk of an accident and injury. 28
Operating safetyIntroduction
Page 39 of 377
Multifunction steering wheel
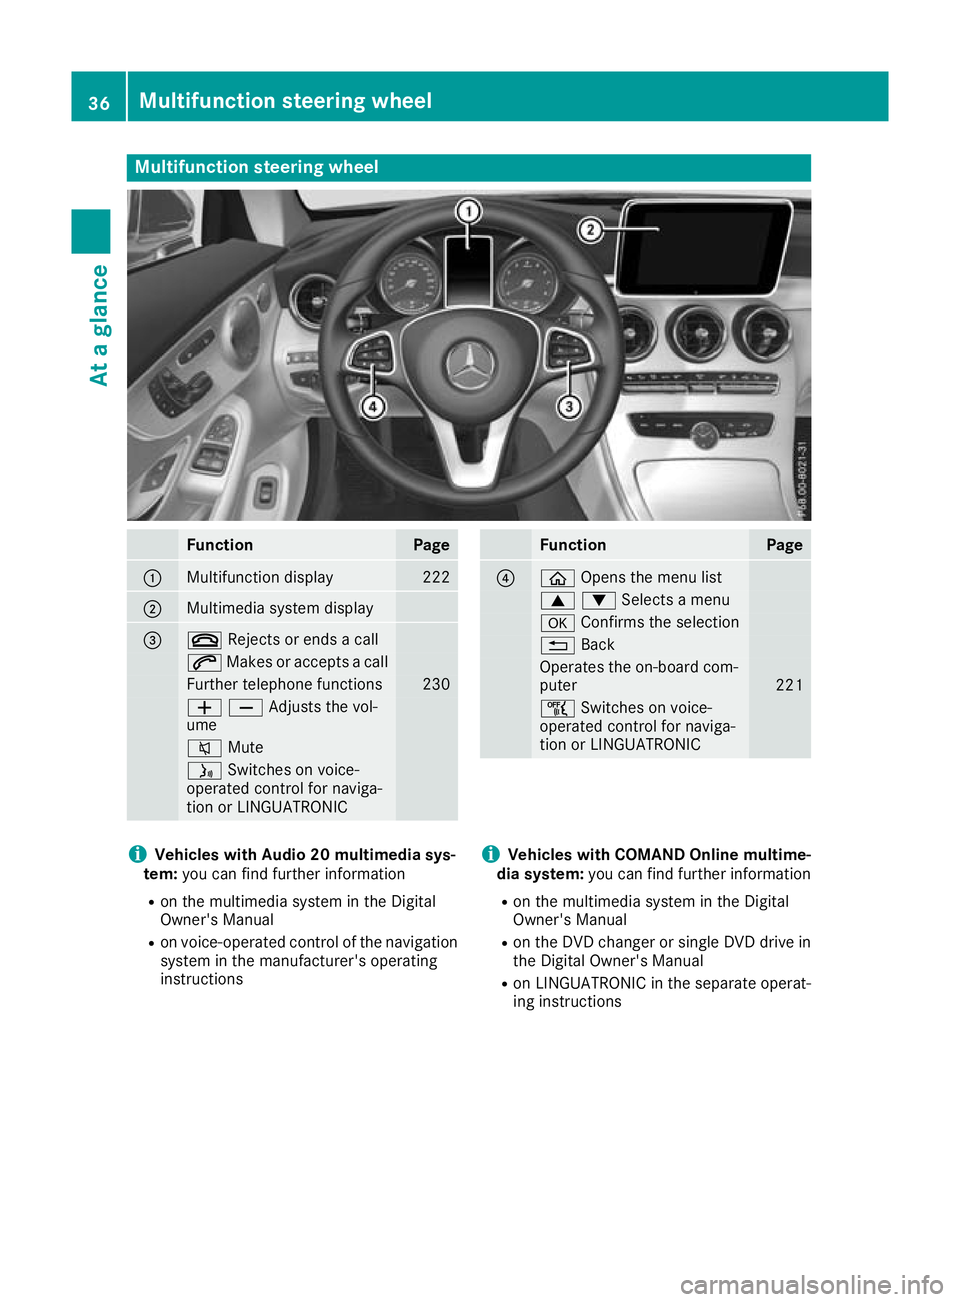
Function Page
:
Multifunction display 222
;
Multimedia system display
=
~
Rejects or ends a call 6
Makes or accepts a call Further telephone functions 230
WXAdjusts the vol-
ume
8
Mute ó
Switches on voice-
operated control for naviga-
tion or LINGUATRONIC Function Page
?
ò
Opens the menu list 9:Selects a menu
a
Confirms the selection %
Back Operates the on-board com-
puter
221
ñ
Switches on voice-
operated control for naviga-
tion or LINGUATRONIC i
Vehicles with Audio 20 multimedia sys-
tem: you can find further information
R on the multimedia system in the Digital
Owner's Manual
R on voice-operated control of the navigation
system in the manufacturer's operating
instructions i
Vehicles with COMAND Online multime-
dia system: you can find further information
R on the multimedia system in the Digital
Owner's Manual
R on the DVD changer or single DVD drive in
the Digital Owner's Manual
R on LINGUATRONIC in the separate operat-
ing instructions 36
Multifunction steering wheelAt a glance
Page 86 of 377

Make sure that you do not touch the inner
surface of the door handle.
X Convenience closing feature: touch
recessed sensor surface ;for an extended
period.
Deactivating and activating If you do not intend to use a key for an extended
period of time, you can deactivate the KEYLESS-
GO function of the key. The key will then use very
little power, thereby conserving battery power.
For the purposes of activation or deactivation,
the vehicle does not have to be nearby.
X To deactivate: press the&button on the
key twice in rapid succession.
The battery indicator lamp (Y page 84) of
the key flashes twice briefly and lights up
once, then KEYLESS-GO is deactivated.
X To activate: press any button on the key.
or X Insert the key into the ignition lock.
KEYLESS-GO and all its associated features
are available again. KEYLESS-GO start function
General notes Bear in mind that the engine can be started by
any of the vehicle occupants if there is a key in
the vehicle (Y
page 135). Changing the settings of the locking
system
You can change the settings of the locking sys-
tem. This means that only the driver's door and
the fuel filler flap are unlocked when the vehicle is unlocked. This is useful if you frequently travel
alone.
X To change the setting: simultaneously press
the % and& buttons for approximately
six seconds until the battery check lamp
(Y page 84) flashes twice.
If the setting of the locking system is changed
within the signal range of the vehicle, pressing
the & or% button:
R locks or
R unlocks the vehicle The key now functions as follows:
X To unlock: press the%button once.
X To unlock centrally: press the%button
twice.
X To lock: press the &button.
The KEYLESS-GO functions can be changed as
follows: X To unlock the driver's door: touch the inner
surface of the door handle on the driver's
door.
X To unlock centrally: touch the inner surface
of the front-passenger door handle.
X To lock centrally: touch the outer sensor
surface on one of the door handles.
X To restore the factory settings: press and
hold the %and& buttons simultane-
ously for approximately six seconds until the
battery check lamp (Y page 84) flashes
twice. Emergency key element
General notes If the vehicle can no longer be unlocked with the
key or KEYLESS-GO, use the emergency key ele-
ment.
If you use the emergency key element to unlock
and open the driver's door, the anti-theft alarm
system will be triggered. Switch off the alarm
(Y page 78).
If you unlock the vehicle using the emergency
key element, the fuel filler flap will not be
unlocked automatically.
X To unlock the fuel filler flap: insert the key
into the ignition lock. Key
83Opening and closing Z
Page 122 of 377

Interior lighting
Overview of interior lighting
Front overhead control panel :
p Left-hand front reading lamp
; c Front interior lighting
= | Automatic interior lighting control
? p Right-hand front reading lamp Interior lighting control
General notes In order to prevent the vehicle's battery from
discharging, the interior lighting functions are
automatically deactivated after some time
except for when the key is in position 2in the
ignition lock.
The colour and brightness of the ambient light-
ing are set using the multimedia system (see
Digital Owner's Manual).
Automatic interior lighting control X
To switch on or off: press the|button.
When the automatic interior lighting control is
switched on, the button is flush with the over- head control panel.
The interior lighting automatically switches on if
you:
R unlock the vehicle
R open a door
R remove the key from the ignition lock
The interior lighting is activated for a short time
when the key is removed from the ignition lock. This delayed switch-off can be adjusted via the
multimedia system (see Digital Owner's Man-
ual). Replacing bulbs
Important safety notes
G
WARNING
Bulbs, lamps and plug connectors can
become very hot during use. When replacing a bulb, you could burn yourself on these com-
ponents. There is a risk of injury.
Allow these components to cool down before replacing the bulb.
Do not use a bulb if it has been dropped or if its
glass tube has been scratched.
The bulb may explode if:
R you touch it
R it is hot
R you drop it
R you scratch it
Use bulbs only in closed lamps that have been
designed for this purpose. Fit only spare bulbs of the same type and the specified voltage.
Marks on the glass tube reduce the service life
of the bulbs. Do not touch the glass tube with
your bare hands. If necessary, clean the glass
tube when cold with alcohol or spirit and rub it
off with a lint-free cloth.
Protect bulbs from moisture during operation.
Do not allow bulbs to come into contact with
liquids.
Replace only the bulbs listed (Y page 120).
Have the bulbs that you cannot change yourself
replaced at a qualified specialist workshop.
If you require assistance replacing bulbs, con-
sult a qualified specialist workshop.
If the new bulb still does not light up, consult a
qualified specialist workshop.
Headlamps and lights are an important aspect of
vehicle safety. You must therefore make sure
that these function correctly at all times. Have
the headlamp setting checked regularly.
Vehicles with LED headlamps: the front and
rear lamp clusters of your vehicle are equipped
with LED bulbs. Do not replace the bulbs your-
self. Contact a qualified specialist workshop
with the necessary specialist knowledge and
tools to carry out the work required. Replacing bulbs
119Lights and windscreen wipers Z
Page 130 of 377
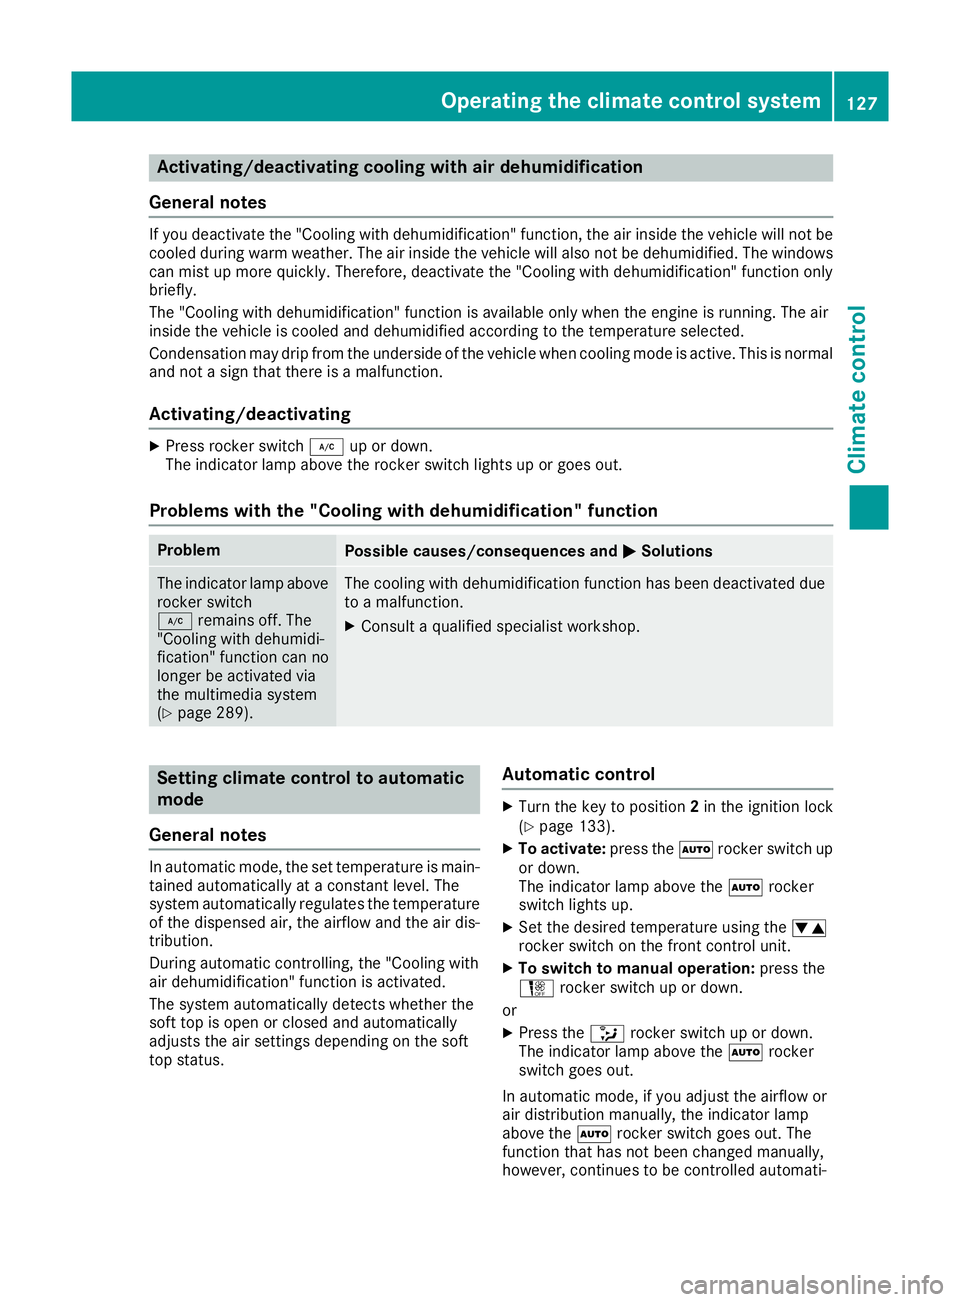
Activating/deactivating cooling with air dehumidification
General notes If you deactivate the "Cooling with dehumidification" function, the air inside the vehicle will not be
cooled during warm weather. The air inside the vehicle will also not be dehumidified. The windows
can mist up more quickly. Therefore, deactivate the "Cooling with dehumidification" function only
briefly.
The "Cooling with dehumidification" function is available only when the engine is running. The air
inside the vehicle is cooled and dehumidified according to the temperature selected.
Condensation may drip from the underside of the vehicle when cooling mode is active. This is normal
and not a sign that there is a malfunction.
Activating/deactivating X
Press rocker switch ¿up or down.
The indicator lamp above the rocker switch lights up or goes out.
Problems with the "Cooling with dehumidification" function Problem
Possible causes/consequences and
M MSolutions The indicator lamp above
rocker switch
¿ remains off. The
"Cooling with dehumidi-
fication" function can no
longer be activated via
the multimedia system
(Y page 289). The cooling with dehumidification function has been deactivated due
to a malfunction.
X Consult a qualified specialist workshop. Setting climate control to automatic
mode
General notes In automatic mode, the set temperature is main-
tained automatically at a constant level. The
system automatically regulates the temperature of the dispensed air, the airflow and the air dis- tribution.
During automatic controlling, the "Cooling with
air dehumidification" function is activated.
The system automatically detects whether the
soft top is open or closed and automatically
adjusts the air settings depending on the soft
top status. Automatic control X
Turn the key to position 2in the ignition lock
(Y page 133).
X To activate: press theÃrocker switch up
or down.
The indicator lamp above the Ãrocker
switch lights up.
X Set the desired temperature using the w
rocker switch on the front control unit.
X To switch to manual operation: press the
H rocker switch up or down.
or
X Press the _rocker switch up or down.
The indicator lamp above the Ãrocker
switch goes out.
In automatic mode, if you adjust the airflow or
air distribution manually, the indicator lamp
above the Ãrocker switch goes out. The
function that has not been changed manually,
however, continues to be controlled automati- Operating the climate control system
127Climate control
Page 131 of 377
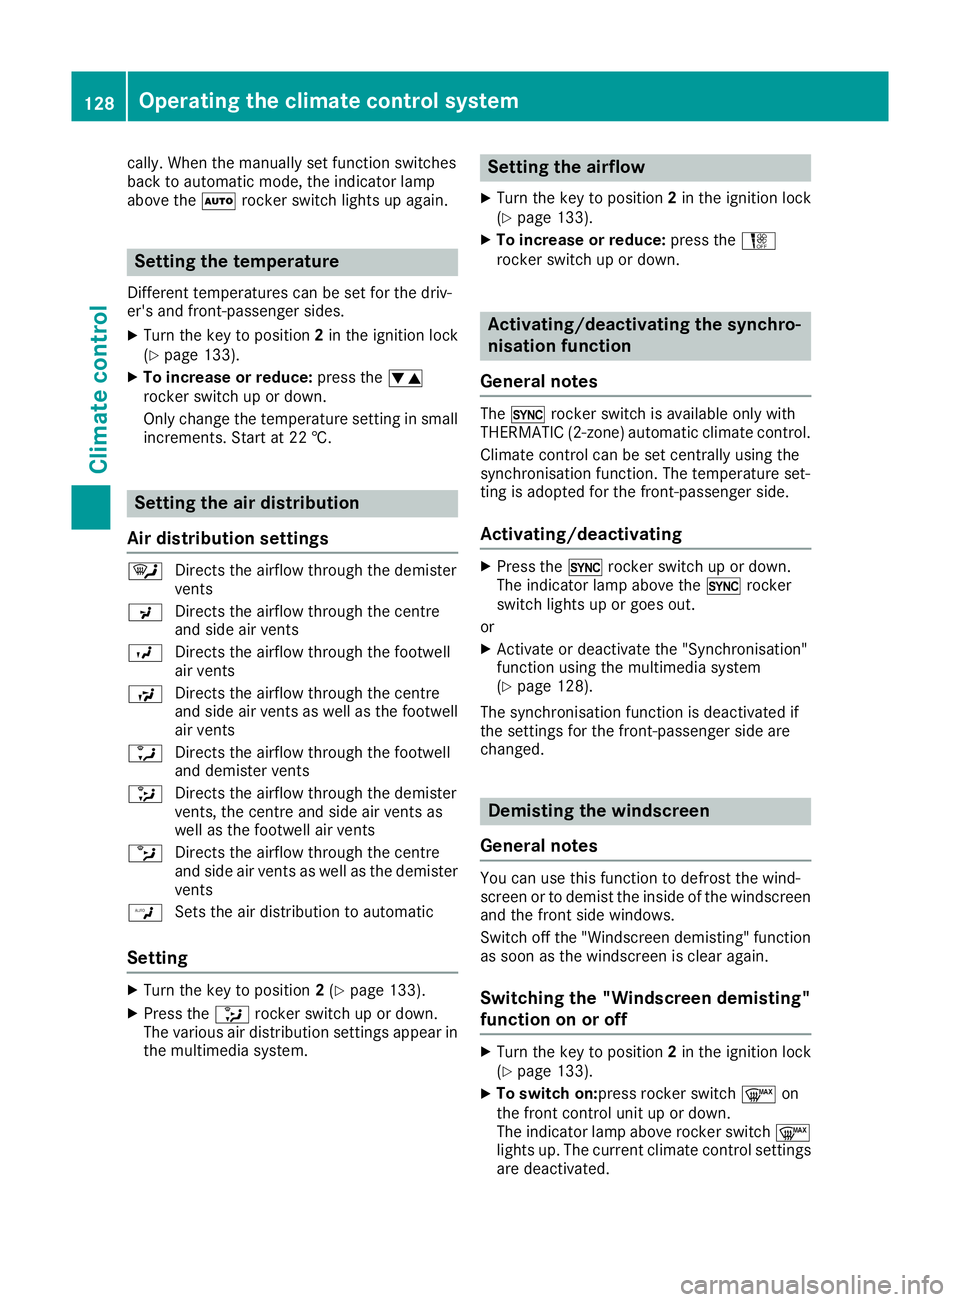
cally. When the manually set function switches
back to automatic mode, the indicator lamp
above the
Ãrocker switch lights up again. Setting the temperature
Different temperatures can be set for the driv-
er's and front-passenger sides.
X Turn the key to position 2in the ignition lock
(Y page 133).
X To increase or reduce: press thew
rocker switch up or down.
Only change the temperature setting in small increments. Start at 22 †. Setting the air distribution
Air distribution settings ¯
Directs the airflow through the demister
vents
P Directs the airflow through the centre
and side air vents
O Directs the airflow through the footwell
air vents
S Directs the airflow through the centre
and side air vents as well as the footwell
air vents
a Directs the airflow through the footwell
and demister vents
_ Directs the airflow through the demister
vents, the centre and side air vents as
well as the footwell air vents
b Directs the airflow through the centre
and side air vents as well as the demister
vents
W Sets the air distribution to automatic
Setting X
Turn the key to position 2(Y page 133).
X Press the _rocker switch up or down.
The various air distribution settings appear in the multimedia system. Setting the airflow
X Turn the key to position 2in the ignition lock
(Y page 133).
X To increase or reduce: press theH
rocker switch up or down. Activating/deactivating the synchro-
nisation function
General notes The
0 rocker switch is available only with
THERMATIC (2-zone) automatic climate control.
Climate control can be set centrally using the
synchronisation function. The temperature set-
ting is adopted for the front-passenger side.
Activating/deactivating X
Press the 0rocker switch up or down.
The indicator lamp above the 0rocker
switch lights up or goes out.
or X Activate or deactivate the "Synchronisation"
function using the multimedia system
(Y page 128).
The synchronisation function is deactivated if
the settings for the front-passenger side are
changed. Demisting the windscreen
General notes You can use this function to defrost the wind-
screen or to demist the inside of the windscreen
and the front side windows.
Switch off the "Windscreen demisting" functionas soon as the windscreen is clear again.
Switching the "Windscreen demisting"
function on or off X
Turn the key to position 2in the ignition lock
(Y page 133).
X To switch on: press rocker switch ¬on
the front control unit up or down.
The indicator lamp above rocker switch ¬
lights up. The current climate control settings are deactivated. 128
Operating the climate control systemClimate control
Page 135 of 377
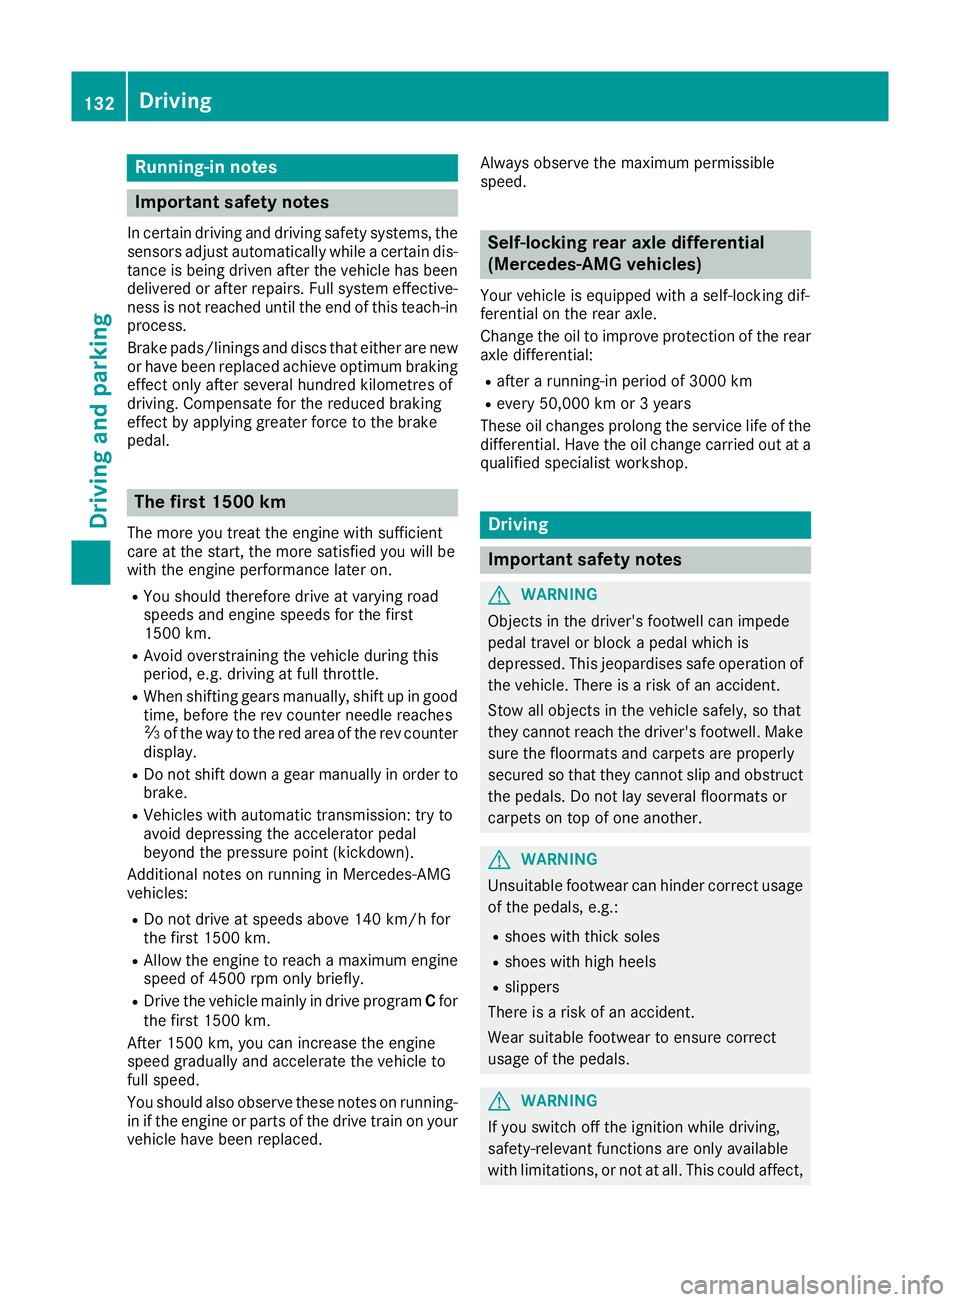
Running-in notes
Important safety notes
In certain driving and driving safety systems, the sensors adjust automatically while a certain dis-
tance is being driven after the vehicle has been delivered or after repairs. Full system effective-
ness is not reached until the end of this teach-in process.
Brake pads/linings and discs that either are new or have been replaced achieve optimum braking
effect only after several hundred kilometres of
driving. Compensate for the reduced braking
effect by applying greater force to the brake
pedal. The first 1500 km
The more you treat the engine with sufficient
care at the start, the more satisfied you will be
with the engine performance later on.
R You should therefore drive at varying road
speeds and engine speeds for the first
1500 km.
R Avoid overstraining the vehicle during this
period, e.g. driving at full throttle.
R When shifting gears manually, shift up in good
time, before the rev counter needle reaches
Ô of the way to the red area of the rev counter
display.
R Do not shift down a gear manually in order to
brake.
R Vehicles with automatic transmission: try to
avoid depressing the accelerator pedal
beyond the pressure point (kickdown).
Additional notes on running in Mercedes-AMG
vehicles:
R Do not drive at speeds above 140 km/h for
the first 1500 km.
R Allow the engine to reach a maximum engine
speed of 4500 rpm only briefly.
R Drive the vehicle mainly in drive program Cfor
the first 1500 km.
After 1500 km, you can increase the engine
speed gradually and accelerate the vehicle to
full speed.
You should also observe these notes on running- in if the engine or parts of the drive train on your
vehicle have been replaced. Always observe the maximum permissible
speed. Self-locking rear axle differential
(Mercedes-AMG vehicles)
Your vehicle is equipped with a self-locking dif-
ferential on the rear axle.
Change the oil to improve protection of the rear
axle differential:
R after a running-in period of 3000 km
R every 50,000 km or 3 years
These oil changes prolong the service life of the
differential. Have the oil change carried out at a
qualified specialist workshop. Driving
Important safety notes
G
WARNING
Objects in the driver's footwell can impede
pedal travel or block a pedal which is
depressed. This jeopardises safe operation of the vehicle. There is a risk of an accident.
Stow all objects in the vehicle safely, so that
they cannot reach the driver's footwell. Make sure the floormats and carpets are properly
secured so that they cannot slip and obstruct the pedals. Do not lay several floormats or
carpets on top of one another. G
WARNING
Unsuitable footwear can hinder correct usage of the pedals, e.g.:
R shoes with thick soles
R shoes with high heels
R slippers
There is a risk of an accident.
Wear suitable footwear to ensure correct
usage of the pedals. G
WARNING
If you switch off the ignition while driving,
safety-relevant functions are only available
with limitations, or not at all. This could affect, 132
DrivingDriving and parking
Page 138 of 377

the engine running in enclosed spaces with-
out sufficient ventilation. G
WARNING
Flammable materials introduced through
environmental influence or by animals can
ignite if in contact with the exhaust system or parts of the engine that heat up. There is a risk
of fire.
Carry out regular checks to make sure that
there are no flammable foreign materials in
the engine compartment or in the exhaust
system.
General notes Vehicles with a petrol engine:
the catalytic
converter is preheated for up to 30 seconds
after a cold start. The sound of the engine may
change during this time.
Manual transmission X
Depress the brake pedal and keep it
depressed.
X Fully depress the clutch pedal.
X Engage neutral i.
Automatic transmission X
Shift the transmission to position j
(Y page 145).
The transmission position indicator on the
multifunction display shows j
(Y page 146).
i You can start the engine in transmission
position jand i.
Starting procedure using the key To start the engine using the key instead of the
Start/Stop button, pull the Start/Stop button
out of the ignition lock.
X To start a diesel engine: turn the key to
position 2in the ignition lock (Y page 133).
The % preglow indicator lamp on the
instrument cluster lights up.
X Turn the key to position 3in the ignition lock
(Y page 133) and release it as soon as the
engine is running. i
Vehicles with a diesel engine:
you can
start the engine without preglow if the engine
is warm.
If the engine will not start:
X Remove the key from the ignition lock.
X Reinsert the key in the ignition lock after wait-
ing for a short period.
X Turn the key to position 2in the ignition lock
(Y page 133).
The indicator lamps on the instrument cluster
light up (Y page 273).
X Turn the key to position 3in the ignition lock
(Y page 133) and release it as soon as the
engine is running.
Starting procedure using the Start/
Stop button The Start/Stop button is available only on vehi-
cles with KEYLESS-GO or the KEYLESS-GO start
function.
The Start/Stop button can be used to start the
vehicle manually without inserting the key in the ignition lock. The key must be in the vehicle and
the Start/Stop button must be inserted in the
ignition lock. This mode for starting the engine
manually operates independently of the ECO
start/stop automatic engine start function.
You can start the engine if a valid key is in the
vehicle. Switch off the engine and always take
the key with you when leaving the vehicle, even
if you leave it for only a short time. Observe the important safety notes.
X Depress the brake pedal and keep it
depressed.
X Press the Start/Stop button once
(Y page 133).
Vehicles with a petrol engine: the engine
starts.
Vehicles with a diesel engine: preglow is
activated and the engine starts. Pulling away
General notes G
WARNING
Vehicles with automatic transmission: Driving
135Driving an d parking
Z