light MERCEDES-BENZ E-Class 2002 W210 Comand Manual
[x] Cancel search | Manufacturer: MERCEDES-BENZ, Model Year: 2002, Model line: E-Class, Model: MERCEDES-BENZ E-Class 2002 W210Pages: 235, PDF Size: 1.96 MB
Page 102 of 235
100 Telephone
AudioTelephoneNavigation
Index Info Services and
system settings Introduction
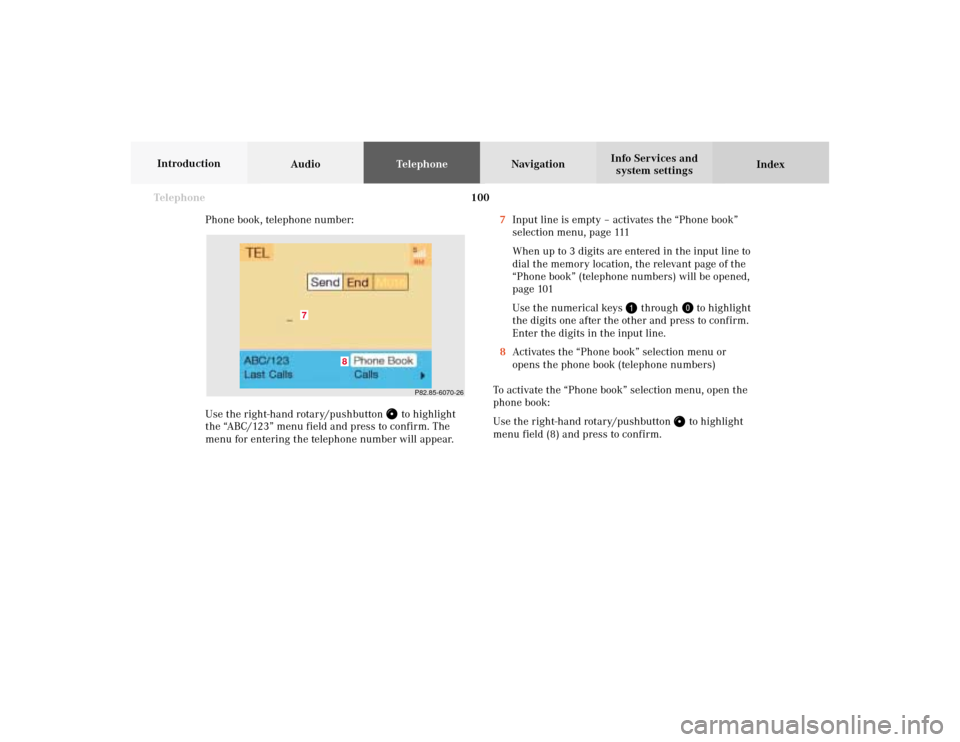
Phone book, telephone number:
Use the right-hand rotary/pushbutton
to highlight
the “ABC/123” menu field and press to confirm. The
menu for entering the telephone number will appear.7Input line is empty – activates the “Phone book”
selection menu, page 111
When up to 3 digits are entered in the input line to
dial the memory location, the relevant page of the
“Phone book” (telephone numbers) will be opened,
page 101
Use the numerical keys
through
to highlight
the digits one after the other and press to confirm.
Enter the digits in the input line.
8Activates the “Phone book” selection menu or
opens the phone book (telephone numbers)
To activate the “Phone book” selection menu, open the
phone book:
Use the right-hand rotary/pushbutton to highlight
menu field (8) and press to confirm.
P82.85-6070-26
7
8
07-Telefon-20-US.pm507.06.2001, 11:59 Uhr 100
Page 103 of 235
Telephone
Telephone101
Introduction
AudioTelephone
Navigation
Index Info Services and
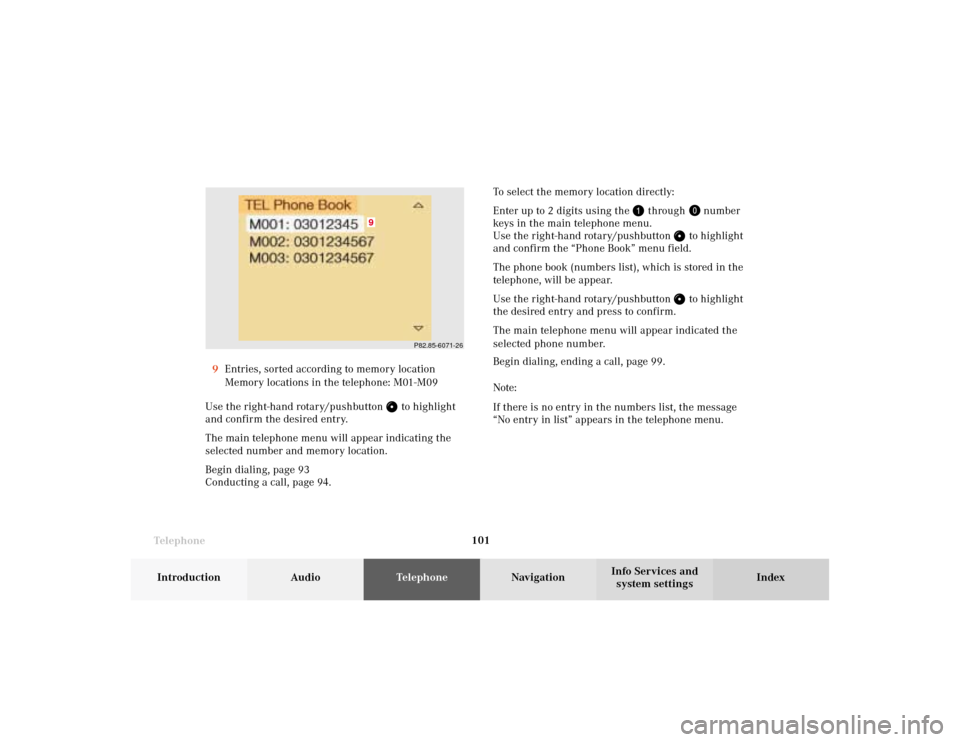
system settings 9Entries, sorted according to memory location
Memory locations in the telephone: M01-M09
Use the right-hand rotary/pushbutton
to highlight
and confirm the desired entry.
The main telephone menu will appear indicating the
selected number and memory location.
Begin dialing, page 93
Conducting a call, page 94.
P82.85-6071-26
9
To select the memory location directly:
Enter up to 2 digits using the
through
number
keys in the main telephone menu.
Use the right-hand rotary/pushbutton
to highlight
and confirm the “Phone Book” menu field.
The phone book (numbers list), which is stored in the
telephone, will be appear.
Use the right-hand rotary/pushbutton to highlight
the desired entry and press to confirm.
The main telephone menu will appear indicated the
selected phone number.
Begin dialing, ending a call, page 99.
Note:
If there is no entry in the numbers list, the message
“No entry in list” appears in the telephone menu.
07-Telefon-20-US.pm507.06.2001, 11:59 Uhr 101
Page 106 of 235
104 Telephone
AudioTelephoneNavigation
Index Info Services and
system settings Introduction
Dialing with COMAND
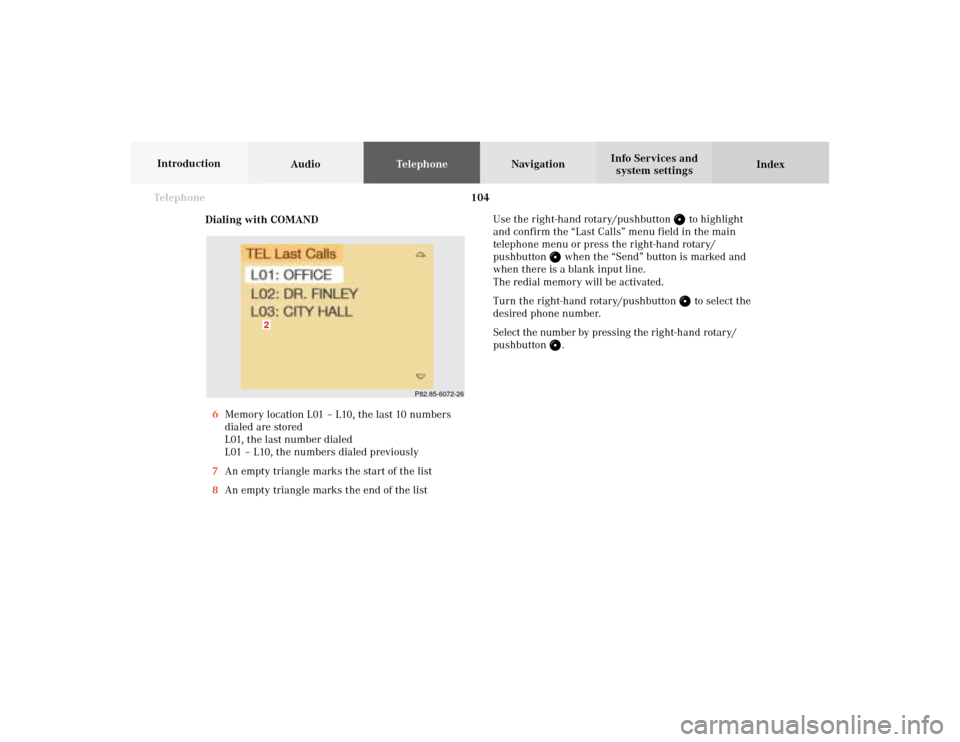
6Memory location L01 – L10, the last 10 numbers
dialed are stored
L01, the last number dialed
L01 – L10, the numbers dialed previously
7An empty triangle marks the start of the list
8An empty triangle marks the end of the listUse the right-hand rotary/pushbutton
to highlight
and confirm the “Last Calls” menu field in the main
telephone menu or press the right-hand rotary/
pushbutton
when the “Send” button is marked and
when there is a blank input line.
The redial memory will be activated.
Turn the right-hand rotary/pushbutton
to select the
desired phone number.
Select the number by pressing the right-hand rotary/
pushbutton
.
P82.85-6072-26
2
07-Telefon-20-US.pm507.06.2001, 11:59 Uhr 104
Page 107 of 235
Telephone
Telephone105
Introduction
AudioTelephone
Navigation
Index Info Services and
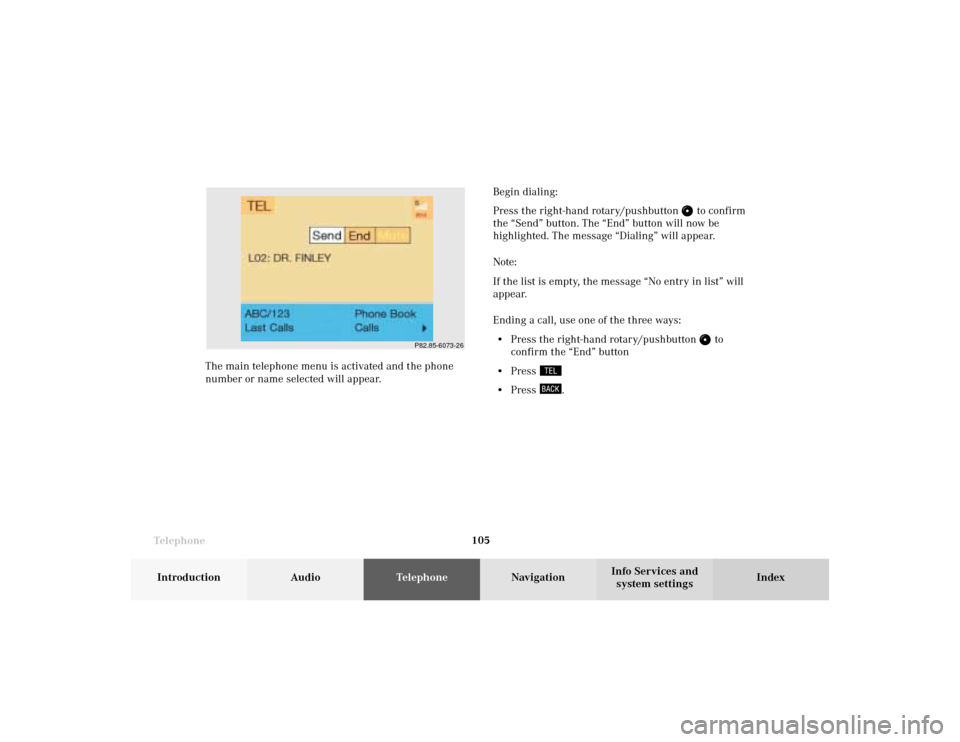
system settings Begin dialing:
Press the right-hand rotary/pushbutton
to confirm
the “Send” button. The “End” button will now be
highlighted. The message “Dialing” will appear.
Note:
If the list is empty, the message “No entry in list” will
appear.
Ending a call, use one of the three ways:
• Press the right-hand rotary/pushbutton
to
confirm the “End” button
• Press
• Press
. The main telephone menu is activated and the phone
number or name selected will appear.
P82.85-6073-26
07-Telefon-20-US.pm507.06.2001, 11:59 Uhr 105
Page 108 of 235
106 Telephone
AudioTelephoneNavigation
Index Info Services and
system settings Introduction
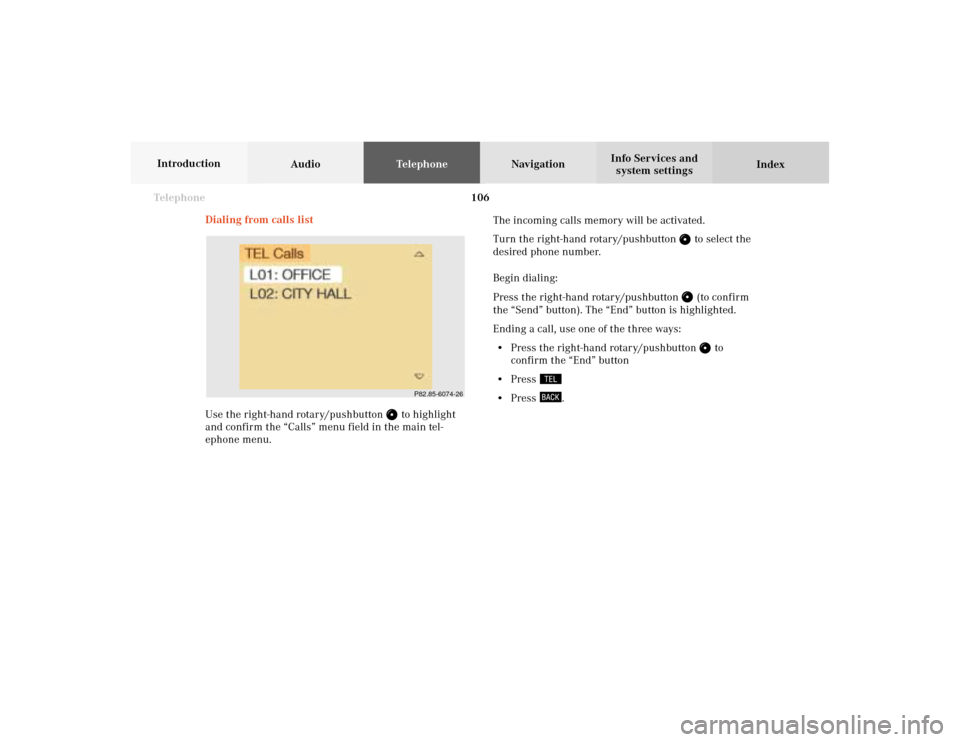
Dialing from calls list
Use the right-hand rotary/pushbutton
to highlight
and confirm the “Calls” menu field in the main tel-
ephone menu.The incoming calls memory will be activated.
Turn the right-hand rotary/pushbutton
to select the
desired phone number.
Begin dialing:
Press the right-hand rotary/pushbutton (to confirm
the “Send” button). The “End” button is highlighted.
Ending a call, use one of the three ways:
• Press the right-hand rotary/pushbutton
to
confirm the “End” button
• Press
• Press
.
P82.85-6074-26
07-Telefon-20-US.pm507.06.2001, 11:59 Uhr 106
Page 109 of 235
Telephone
Telephone107
Introduction
AudioTelephone
Navigation
Index Info Services and
system settings Speed-dialing (only with COMAND)
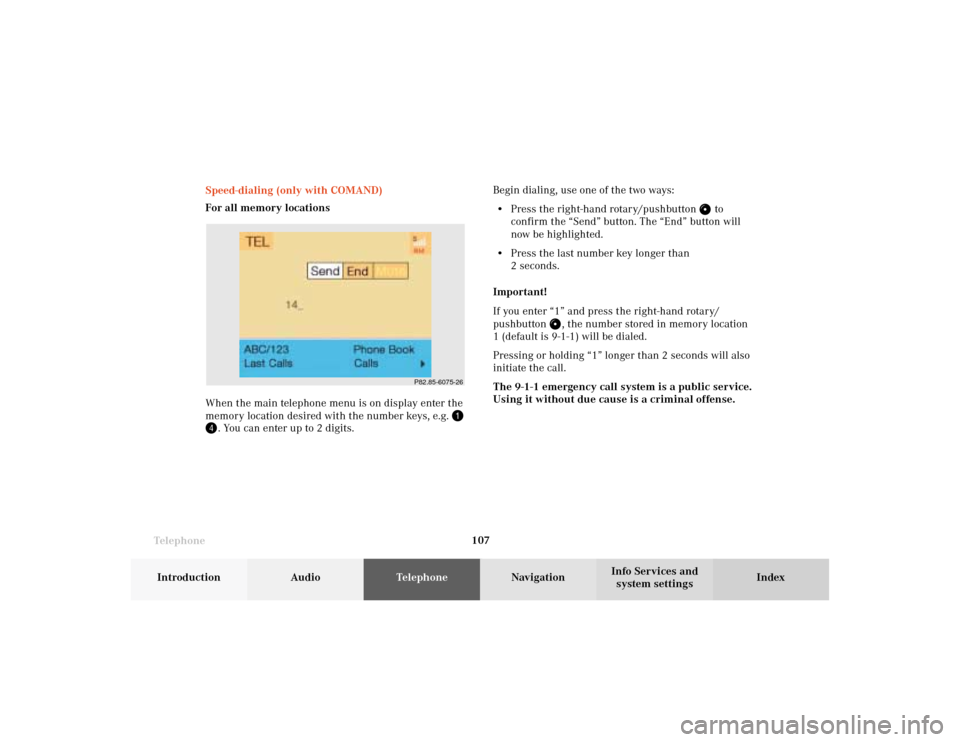
For all memory locations
When the main telephone menu is on display enter the
memory location desired with the number keys, e.g.
. You can enter up to 2 digits.Begin dialing, use one of the two ways:
• Press the right-hand rotary/pushbutton
to
confirm the “Send” button. The “End” button will
now be highlighted.
• Press the last number key longer than
2 seconds.
Important!
If you enter “1” and press the right-hand rotary/
pushbutton
, the number stored in memory location
1 (default is 9-1-1) will be dialed.
Pressing or holding “1” longer than 2 seconds will also
initiate the call.
The 9-1-1 emergency call system is a public service.
Using it without due cause is a criminal offense.
P82.85-6075-26
07-Telefon-20-US.pm507.06.2001, 11:59 Uhr 107
Page 112 of 235
110 Telephone
AudioTelephoneNavigation
Index Info Services and
system settings Introduction
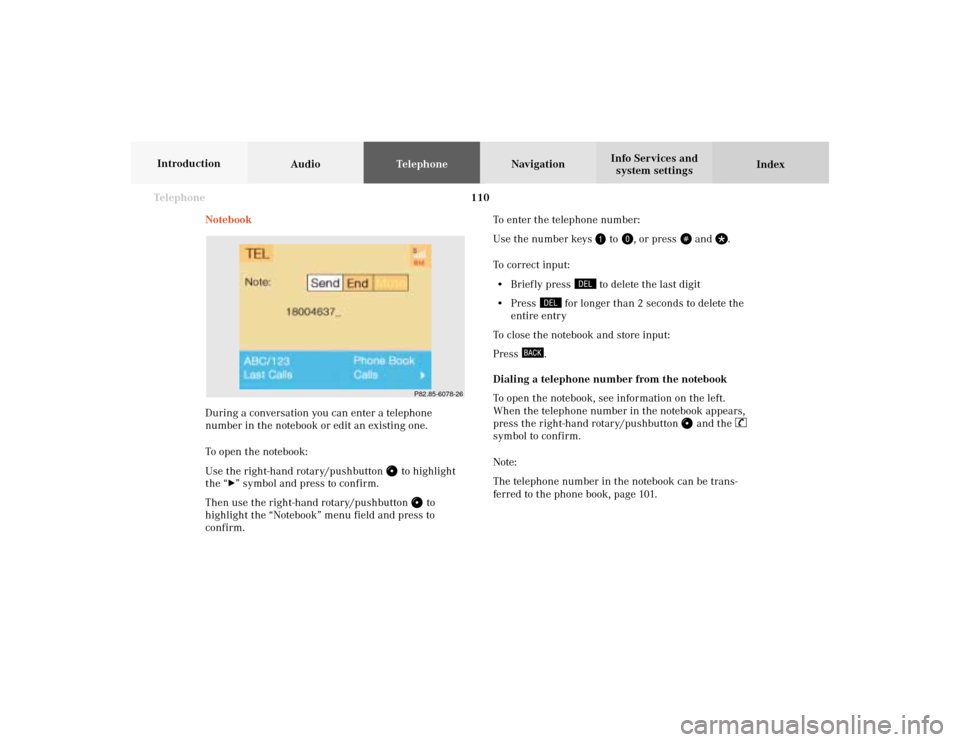
Notebook
During a conversation you can enter a telephone
number in the notebook or edit an existing one.
To open the notebook:
Use the right-hand rotary/pushbutton
to highlight
the “
” symbol and press to confirm.
Then use the right-hand rotary/pushbutton
to
highlight the “Notebook” menu field and press to
confirm.To enter the telephone number:
Use the number keys
to
, or press
and
.
To correct input:
• Brief ly press
to delete the last digit
• Press
for longer than 2 seconds to delete the
entire entry
To close the notebook and store input:
Press
.
Dialing a telephone number from the notebook
To open the notebook, see information on the left.
When the telephone number in the notebook appears,
press the right-hand rotary/pushbutton
and the
symbol to confirm.
Note:
The telephone number in the notebook can be trans-
ferred to the phone book, page 101.
P82.85-6078-26
07-Telefon-20-US.pm507.06.2001, 11:59 Uhr 110
Page 113 of 235
Telephone
Telephone111
Introduction
AudioTelephone
Navigation
Index Info Services and
system settings Changing entries in the phone book
Use the right-hand rotary/pushbutton
to highlight
menu field (1) and press to confirm.
The phone book will either display the list of names
sorted alphabetically or the list of telephone numbers
sorted according to memory location.
To activate the input menu:
Use the right-hand rotary/pushbutton to highlight
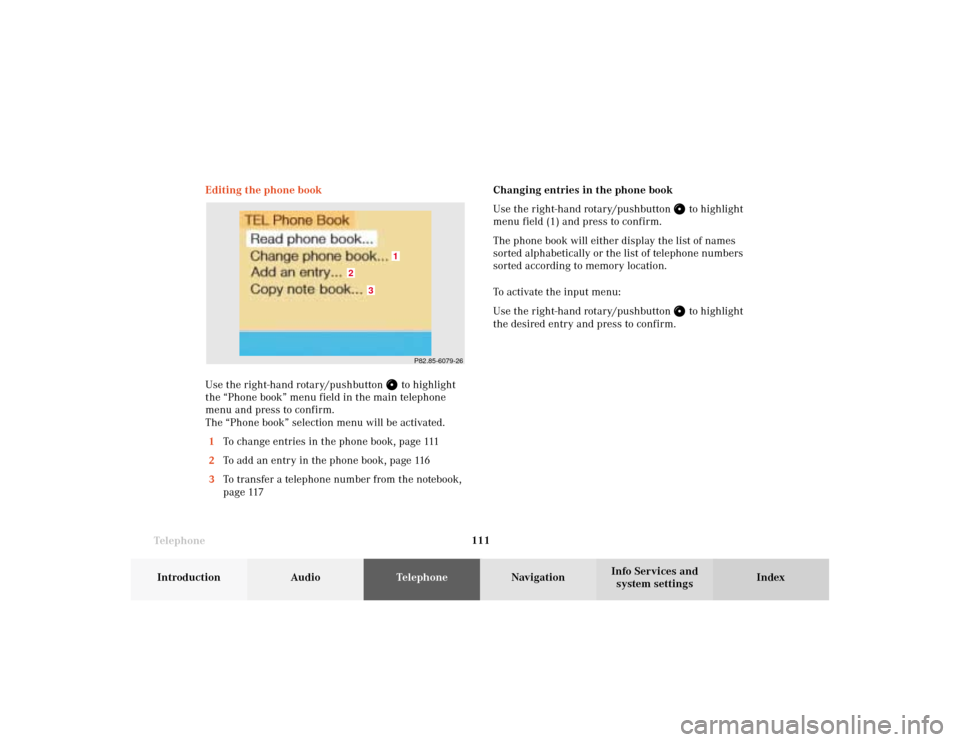
the desired entry and press to confirm. Editing the phone book
Use the right-hand rotary/pushbutton
to highlight
the “Phone book” menu field in the main telephone
menu and press to confirm.
The “Phone book” selection menu will be activated.
1To change entries in the phone book, page 111
2To add an entry in the phone book, page 116
3To transfer a telephone number from the notebook,
page 117
P82.85-6079-26
3
2
1
07-Telefon-20-US.pm507.06.2001, 11:59 Uhr 111
Page 114 of 235
112 Telephone
AudioTelephoneNavigation
Index Info Services and
system settings Introduction
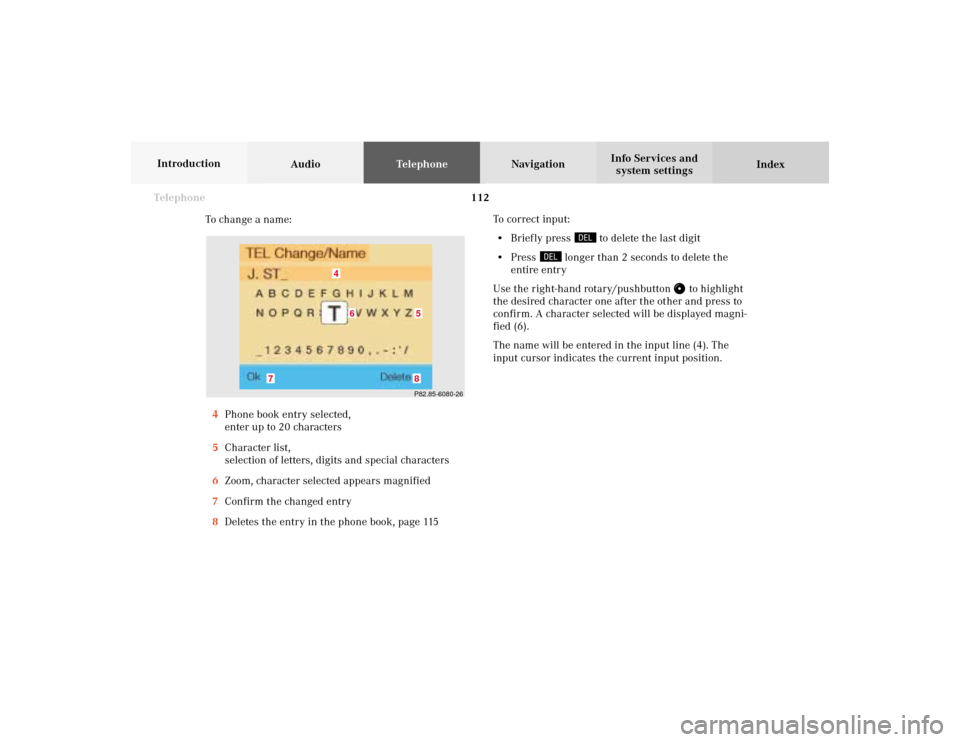
To change a name:
4Phone book entry selected,
enter up to 20 characters
5Character list,
selection of letters, digits and special characters
6Zoom, character selected appears magnified
7Confirm the changed entry
8Deletes the entry in the phone book, page 115To correct input:
• Brief ly press
to delete the last digit
• Press
longer than 2 seconds to delete the
entire entry
Use the right-hand rotary/pushbutton
to highlight
the desired character one after the other and press to
confirm. A character selected will be displayed magni-
fied (6).
The name will be entered in the input line (4). The
input cursor indicates the current input position.
P82.85-6080-268
7
4
5
6
07-Telefon-20-US.pm507.06.2001, 11:59 Uhr 112
Page 115 of 235
Telephone
Telephone113
Introduction
AudioTelephone
Navigation
Index Info Services and
system settings To adopt the character selected and to enter it in the
input line:
• press
or turn the right-hand
rotary/pushbutton
• automatically after 2 seconds.
Select one of the options to store a name changed in the
phone book:
• Use the right-hand rotary/pushbutton
highlight
the “OK” menu field and press it to confirm.
• Press and hold down the right-hand rotary/
pushbutton
to confirm the last letter of the
name.
The menu for entering telephone numbers (page 114)
will appear.
If you do not wish to save the changes:
Press
. Note:
The characters can also be selected using the numerical
keys. Each numerical key has more than one assign-
ment.
Select a character by pressing the key as listed below the
corresponding number of times. The character selected
(6) will appear magnified.
Button 1: , . – 1 : ‘ /
Button 2: A B C 2 Ä Å Æ Ç
Button 3: D E F 3 É È
Button 4: G H I 4 IJ
Button 5: J K L 5
Button 6: M N O 6 Ñ Ö Ø Œ
Button 7: P Q R S 7
Button 8: T U V 8 Ü
Button 9: W X Y Z 9
Button 0: Blank 0
07-Telefon-20-US.pm507.06.2001, 11:59 Uhr 113