change wheel MERCEDES-BENZ E-CLASS COUPE 2009 Owners Manual
[x] Cancel search | Manufacturer: MERCEDES-BENZ, Model Year: 2009, Model line: E-CLASS COUPE, Model: MERCEDES-BENZ E-CLASS COUPE 2009Pages: 313, PDF Size: 7.76 MB
Page 9 of 313
Overview
........................................ 261
Parking lamp .................................. 262
Replacing ....................................... 261
Side lamp ....................................... 262
Turn signa llam p............................ 262
see Lamp C
Cabriole tsoft top
Cleaning ......................................... 200
Calling up afault
see Display message .....................208
Care
Automatic car wash .......................198
Cabriolet soft top ........................... 200
Care products ................................ 198
Cleaning agents ............................. 198
Dashboard ..................................... 203
Display ........................................... 203
Exterior .......................................... 198
Headlamps ..................................... 202
High-pressure cleaners ..................199
Interior ........................................... 203
Matt paintwork .............................. 199
Paintwork ...................................... 200
Plastic trim .................................... 204
Reversing camera ..........................202
Seat covers .................................... 204
Sensors ......................................... 202
Steering wheel boss ......................203
Tai lpipes ....................................... 203
Trailer tow hitch ............................. 203
Trim strips ..................................... 204
Wheels ........................................... 202
Windows ........................................ 202
Wiper blades .................................. 202
Wooden trim .................................. 204
Care products .................................... 198
CD player/CD changer Operating (on-board computer) .....113
Central locking
Automatic locking (on-board com-
puter) ............................................. 120
Key .................................................. 62
Central locking/unlocking button .....64
Central unlocking Key .................................................. 62Centre console
Overview .......................................... 29
Changing awheel
see Flat tyre
Children
In the vehicle ................................... 41
Restraint system .............................. 42
Child seat
Automatic recognition .....................44
Automatic recognition (malfunc-
tion) ............................................... 231
Child sea tlock ................................ 49
Display message ............................ 215
ISOFIX .............................................. 50
Recommendations ...........................47
Suitable sea tposition ...................... 45
Child seat lock ..................................... 49
Cigarette lighter ................................ 173
Cleaning agents ................................. 198
Cockpit Overview .......................................... 23
COMAND display
Cleaning ......................................... 203
Constant headlamp mode
see Daytime driving lights
Convenience closing feature ..............97
Convenience opening feature ............96
Coolant Checking the leve l......................... 183
Display message ............................ 220
Mixture ratio .................................. 290
Temperature gauge ........................ 107
Warning lamp ................................. 234
Cornerin glight function
Display message ............................ 222
Cruis econtrol .................................... 122
Display message ............................ 215
Cup holder ......................................... 167
Current fuel consumptio n(on-
board computer) ............................... 111 D
Dashboard Cleaning ......................................... 203
see Instrument cluster ...................106
Date
Setting (on-board computer) .......... 118 6
Index 207_AKB; 2; 3, en-GB
mkalafa,
Version: 2.11.8.1 2009-07-23T10:23:49+02:00-Seite 6
Page 21 of 313
Operating safety
Safet
ynotes G
Risk of accident and injury
Always have work on the vehicle carried out
by aq ualified specialist workshop. In particu-
lar, work relevant to safety or on safety-rela-
ted systems as well as maintenanc ework
must be carried out at aqualified specialist
workshop. The worksho pmust have the nec-
essary specialist knowledge and tools to carry
out the work required. Mercedes-Benz rec-
ommends that you use aMercedes-Benz
Service Centr efor this purpose. G
Risk of accident and injury
Some safety systems only function when the
engin eisrunning. Therefore, do not switch off
the engin ewhen driving. Otherwise, the
safety systems in your vehicle may no longer
function correctly and thereby not provide
you or other swith the intended degree of pro-
tection .This also increases the danger of your
losing control of your vehicle and thereby the
risk of causing an accident. G
Risk of accident and injury
Work carried out incorrectly, or alterations
made to the vehicle, e.g. re-routing of cables
under coverings, could cause the safety sys-
tems of your vehicle to stop workin gproperly.
The safety systems would thus no longer pro-
tecty ou and other persons as intended. In
addition, there is arisk that you may lose con-
trol of your vehicle and thus cause an acci-
dent.
All work and alteration stothe vehicle, e.g.
installations or modifications, should there-
fore be carried out at aqualified specialist
workshop. G
Risk of accident
If you drive over obstacles at high speed or if
the vehicle bottoms out in rough terrain, it
could cause heavy impacts to the vehicle
underbody, tyres or wheels. This could cause your vehicle to be damaged, which in turn
might lead to an accident. This also applies to
vehicles which are equipped with underbody
protection.
You should therefore drive over obstacles
slowly and preven
tthe vehicle from bottom-
ing out when driving off-road. If necessary,
have your vehicle inspected at aqualified spe-
cialist workshop. G
Risk of accident
If work on electronic equipment and its soft-
ware is carried out incorrectly, this equipment
could stop working. The electronic systems
are networked via interfaces. Tampering with
these electronic systems could cause mal-
function sinsystems which have not been
modified. Malfunctions such as these can
seriously jeopardise the vehicle's operating
safety and therefore your own safety.
You should therefore have all work and mod-
ification stoelectronic componentsc arried
out at aqualified specialist workshop. Vehicle registration
Mercedes-Benz may ask its Service Centres
to carry out technical inspections on certain
vehicles to improve their quality or safety.
If you did not purchase your vehicle from an
authorised specialist dealer and your vehicle
has never been inspected at aMercedes-
Benz Service Centre, it is possible that your
vehicle is not registered in your name with
Mercedes-Benz .Mercedes-Benz can only
infor myou about vehicle checks if it has your
registration data.
It is advisable to register your vehicle with a
Mercedes-Benz Service Centre.
Inform Mercedes-Benz as soon as possible
about any change in address or vehicle own-
ership. 18
Introduction 207_AKB
;2;3,en-GB
mkalafa, Version:2.11.8.1
2009-07-23T10:23:49+02:00
-Seite 18
Page 66 of 313
approximately six seconds until th
ebattery
check lamp flashes twice.
The ke ynow function sasfollows:
X To unlock th edriver's door: pressthe
0036 buttononce.
X To unlock centrally: pressthe 0036 but-
to nt wice.
X To lock centrally: pressthe 0037 button.
The KEYLESS GO* function is changed as fol-
lows:
X To unlock th edriver's door: touch the
inner surface of th edoor handle on the
driver' sdoor.
X To unlock centrally: touch theinner sur-
fac eoft hefront-passenger door handle.
X To lock centrally: touch sensor sur-
face 0046on on eofthedoor handles.
Restoring th efactor ysettings X
Press the 0036and0037 buttons simulta-
neously for approximately six seconds until
th eb attery check lamp flashes twice.
Additional information R
Convenience opening (Y page 96)
R Convenience closin g(Ypage 97)
R Opening and closin ginanemergency
(Y page 249) Opening th
edoor sfromt heinside
You can open adoor from th einside eve nifit
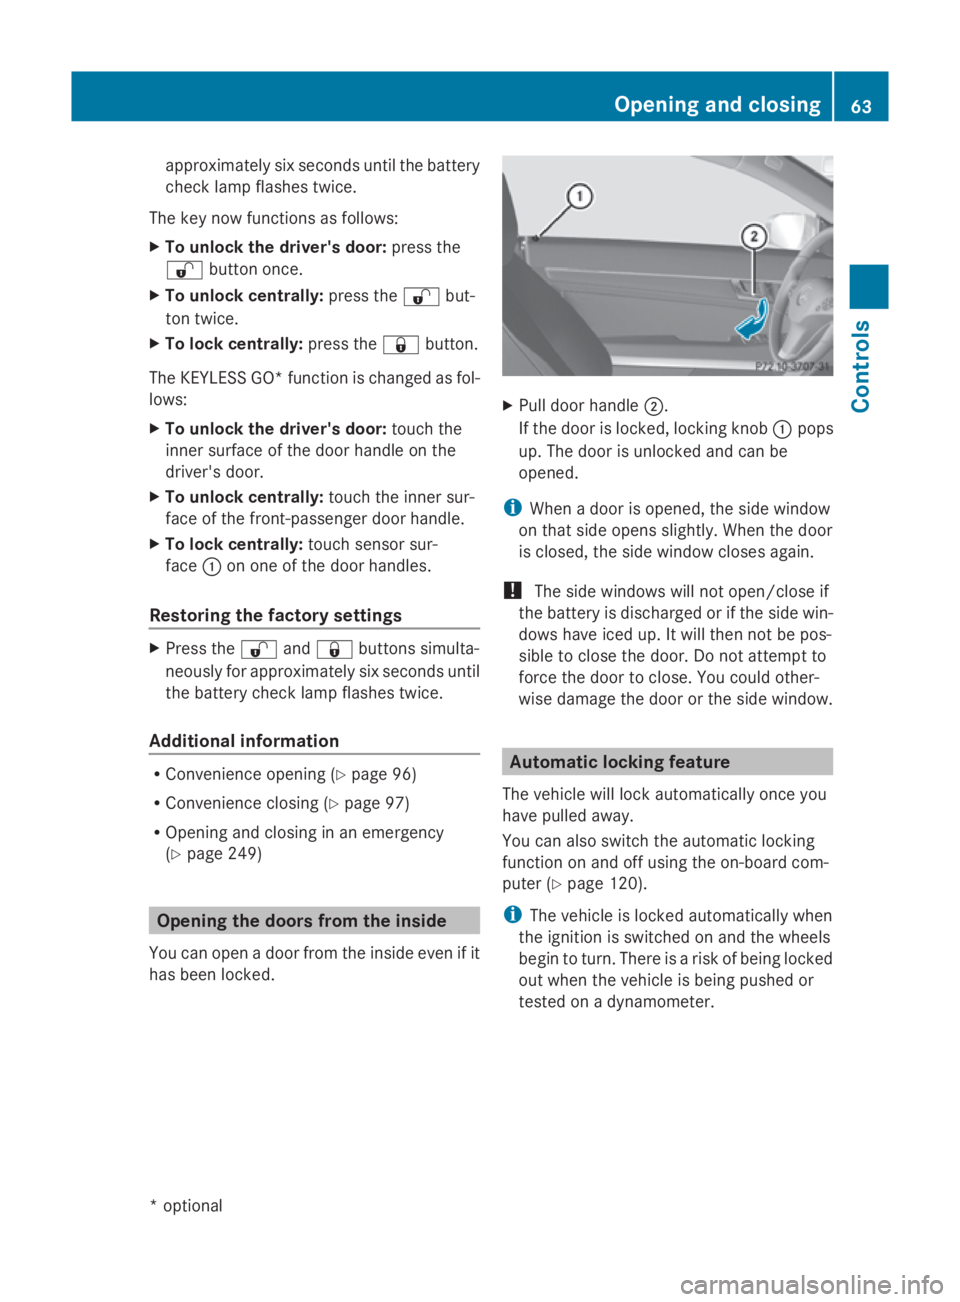
has been locked. X
Pull door handle 0047.
If th edoor is locked, lockin gknob 0046pops
up. The door is unlocked and can be
opened.
i When adoor is opened, th eside window
on that side open sslightly. When th edoor
is closed, th eside window closes again.
! The side windows will no topen/close if
th eb attery is discharged or if th eside win-
dows have ice dup. It will then no tbepos-
sible to close th edoor .Don otattempt to
force th edoor to close. You could other-
wise damag ethe door or th eside window. Automatic lockin
gfeature
The vehicle will loc kautomaticall yoncey ou
have pulled away.
You can also switch th eautomatic locking
function on and off usin gthe on-board com-
puter (Y page 120).
i The vehicle is locke dautomaticall ywhen
th ei gnition is switched on and th ewheels
begin to turn. Ther eisariskofb einglocked
out when th evehicle is bein gpushe dor
tested on adynamometer. Opening and closing
63Controls
*optional
207_AKB
;2;3,en-GB
mkalafa ,V ersion: 2.11.8.1
2009-07-23T10:23:49+02:00
-Seite 63 Z
Page 102 of 313
Starting the engine using KEYLESS-
GO* G
Risk of injury
Your vehicle can be started using avalid KEY-
LESS-GO* key. For this reason, children
should never be left unsupervised in the vehi-
cle. Always take the key with you when leaving
the vehicle, even if you are only leaving it for
as hort time.
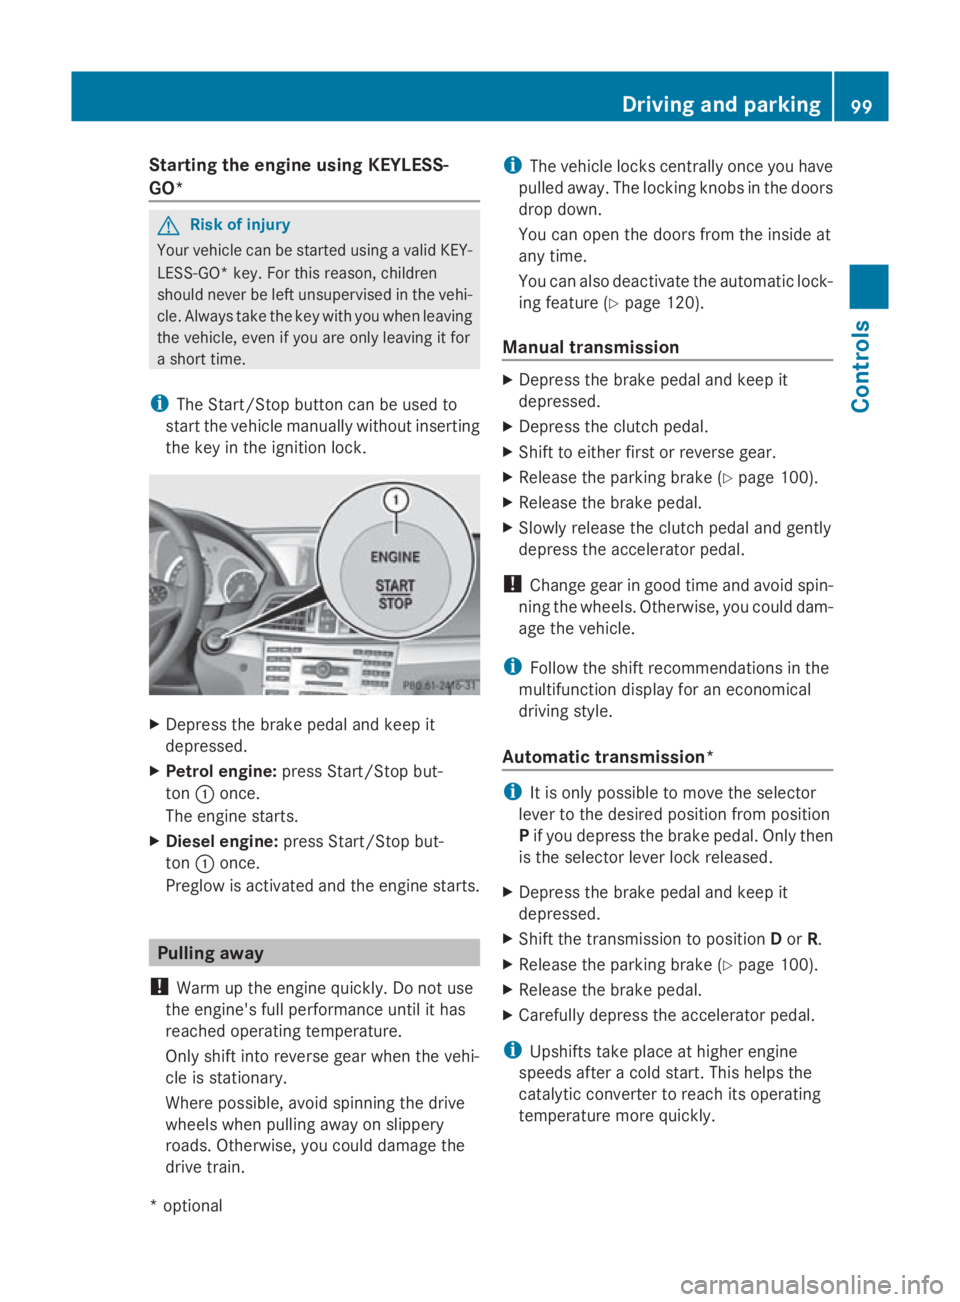
i The Start/Stop button can be used to
start the vehicle manually without inserting
the key in the ignition lock. X
Depress the brake pedal and keep it
depressed.
X Petrol engine: press Start/Stop but-
ton 0046once.
The engine starts.
X Diesele ngine:press Start/Stop but-
ton 0046once.
Preglow is activated and the engine starts. Pulling away
! Warm up the engine quickly. Do not use
the engine's full performanc euntil it has
reached operating temperature.
Only shift into reverse gear when the vehi-
cle is stationary.
Where possible, avoid spinning the drive
wheels when pulling away on slippery
roads. Otherwise, you could damage the
drive train. i
The vehicle locks centrally once you have
pulleda way.The locking knobs in the doors
drop down.
You can open the doors from the inside at
any time.
You can also deactivate the automatic lock-
ing feature (Y page 120).
Manual transmission X
Depress the brake pedal and keep it
depressed.
X Depress the clutch pedal.
X Shift to either first or reverse gear.
X Release the parking brake (Y page 100).
X Release the brake pedal.
X Slowly release the clutch pedal and gently
depress the accelerator pedal.
! Change gear in good time and avoid spin-
ning the wheels. Otherwise, you could dam-
age the vehicle.
i Follow the shift recommendations in the
multifunction display for an economical
driving style.
Automatic transmission* i
It is only possible to move the selector
lever to the desired position from position
P if you depress the brake pedal. Only then
is the selector lever lock released.
X Depress the brake pedal and keep it
depressed.
X Shift the transmission to position Dor R.
X Release the parking brake (Y page 100).
X Release the brake pedal.
X Carefull ydepress the accelerator pedal.
i Upshifts take place at higher engine
speeds after acold start. This helps the
catalytic converter to reach its operating
temperature more quickly. Driving and parking
99Controls
*optional
207_AKB; 2; 3, en-GB
mkalafa,
Version: 2.11.8.1 2009-07-23T10:23:49+02:00-Seite 99 Z
Page 104 of 313
Switching off the engine
G
Risk of accident
If the engine is not running, there is no power
assistance for the steering and brakes. Steer-
ing and braking will then require significantly
greater effort.
As aresult, you might lose control of the vehi-
cle, cause an accident and injure yourself and
others.
Therefore, do not switch off the engine while
you are driving.
Vehicles with manualt ransmission X
Shift to either first or reverse gear.
X Turn the key to position 0in the ignition
lock and remove it.
The immobiliser is activated.
Vehicles with automatic transmission* X
Shift the transmission to position P.
Using the key
X Turn the key to position 0in the ignition
lock and remove it.
The immobiliser is activated.
i The key can only be removed when the
selector lever is in position P.
Using KEYLESS GO*
X Press the Start/Stop button (Y page 66).
The engine stops and all the indicator
lamps in the instrumen tcluster go out
(Y page 25).
i The engine can be turned off while the
vehicle is in motion by pressing and holding
the Start/Stop button for three seconds. Transmission
Notes on the transmission
G
Risk of accident
The movement of the pedals must not be
impaired in any way. Do not keep any objects
in the driver's footwell. Make sure that floor-
mats or carpets are correctly secured and
that there is sufficient clearance for the ped-
als.
Do not place several floormats on top of one
another. G
Risk of accident
Do not change down for additional engine
braking on aslippery road surface. This could
cause the drive wheels to lose their grip and
the vehicle could skid. This could cause you
to lose control of your vehicle and cause an
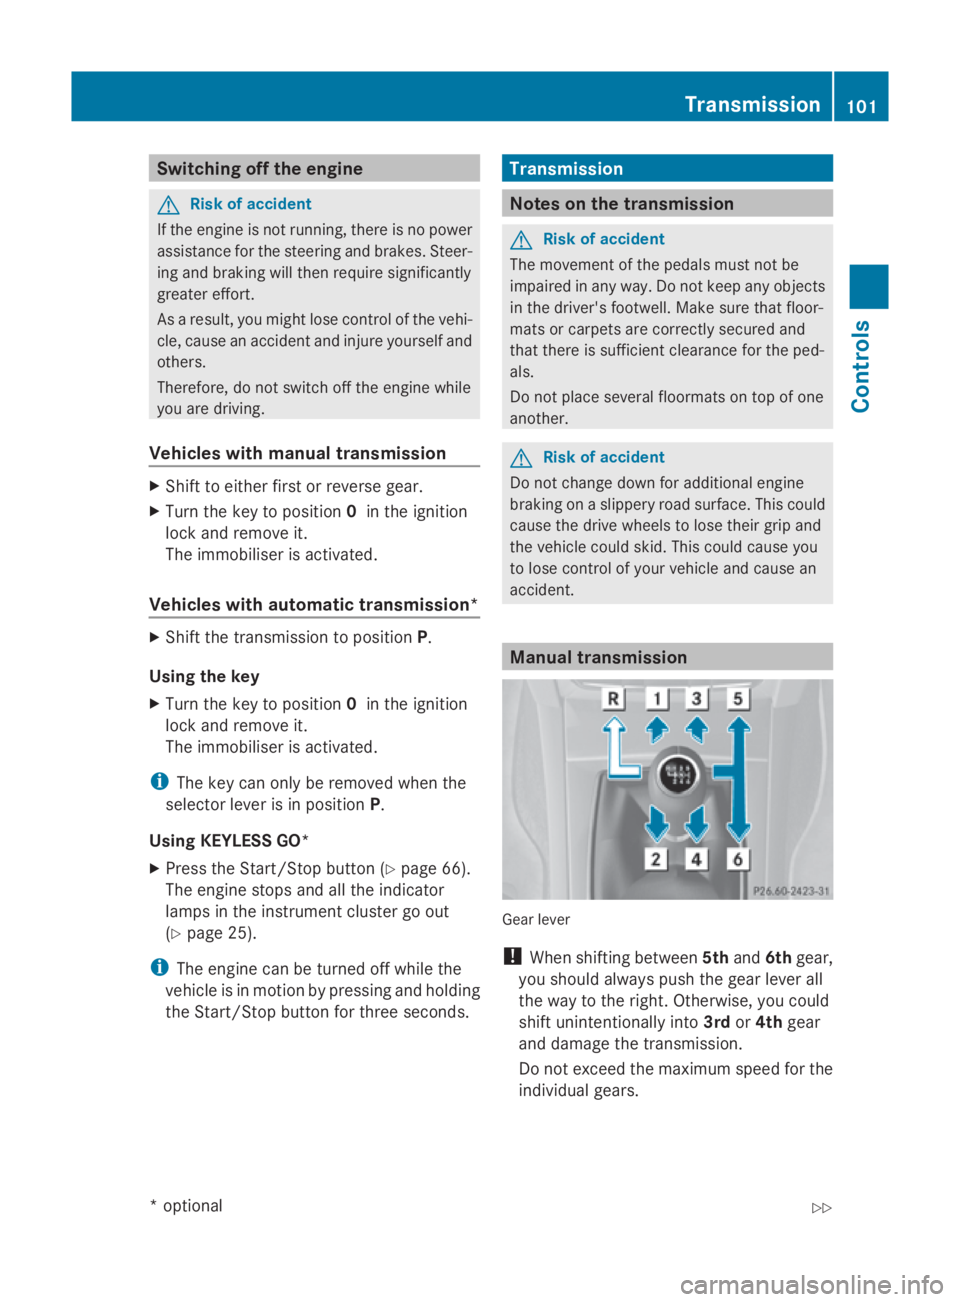
accident. Manual transmission
Gear lever
!
When shifting between 5thand 6thgear,
you should always push the gear lever all
the way to the right. Otherwise, you could
shift unintentionally into 3rdor4th gear
and damage the transmission.
Do not exceed the maximum speed for the
individual gears. Transmission
101Controls
*optional
207_AKB; 2; 3, en-GB
mkalafa,
Version: 2.11.8.1 2009-07-23T10:23:49+02:00-Seite 101 Z
Page 107 of 313
i
On vehicles with steering wheel gearshift
paddles* ,you can restrict or derestrict the
shift range in the same way as with Touch-
shift (Y page 103).
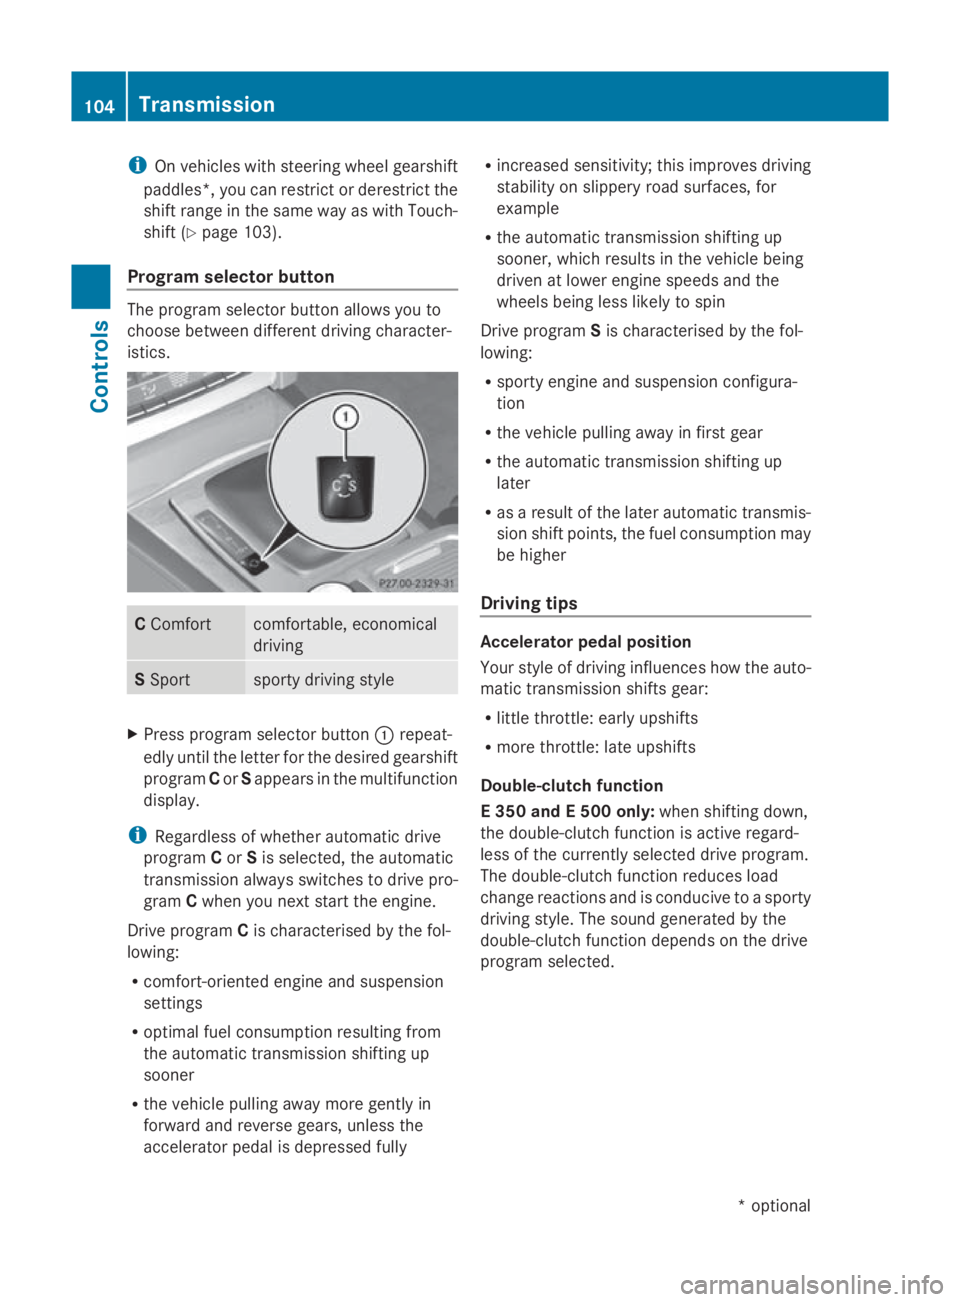
Program selector button The program selector button allows you to
choose between different driving character-
istics. C
Comfort comfortable, economical
driving
S
Sport sporty driving style
X
Press program selector button 0046repeat-
edly until the letter for the desired gearshift
program Cor Sappears in the multifunction
display.
i Regardless of whether automatic drive
program Cor Sis selected, the automatic
transmission always switches to drive pro-
gram Cwhen you next start the engine.
Drive program Cis characterised by the fol-
lowing:
R comfort-oriented engine and suspension
settings
R optimal fuel consumption resulting from
the automatic transmission shifting up
sooner
R the vehicle pulling awaym ore gently in
forward and reverse gears, unless the
accelerator pedal is depressed fully R
increased sensitivity; this improves driving
stability on slippery road surfaces, for
example
R the automatic transmission shifting up
sooner, which results in the vehicle being
driven at lower engine speeds and the
wheels being less likely to spin
Drive program Sis characterised by the fol-
lowing:
R sporty engine and suspension configura-
tion
R the vehicle pulling awayinf irst gear
R the automatic transmission shifting up
later
R as aresult of the later automatic transmis-
sion shift points, the fuel consumption may
be higher
Driving tips Accelerator pedal position
Your style of driving influences how the auto-
matic transmission shifts gear:
R
little throttle: early upshifts
R more throttle: late upshifts
Double-clutch function
E3 50 and E500 only: when shifting down,
the double-clutch function is active regard-
less of the currently selected drive program.
The double-clutch function reduces load
change reactions and is conducive to asporty
driving style. The sound generated by the
double-clutch function depends on the drive
program selected. 104
TransmissionControls
*o
ptional
207_AKB;2;3,e
n-GB
mkalafa, Version: 2.11.8.1 2009-07-23T10:23:49+02:00-Seite 104
Page 110 of 313
lamps, display messages or system failures.
The vehicle's handlin gcharacteristics may be
affected. Adjust your drivin gstyle and speed
accordingly.
Immediately consult aqualified specialist
workshop which has the necessary specialist
knowledge and tools to carr yout the work
required. Mercedes-Ben zrecommends that
you use aMercedes-Ben zService Centre for
this purpose .Inparticular, work relevant to
safet yoro nsafety-related systems must be
carried out at aqualified specialist workshop. Coolant temperatur
egauge
The coolan ttemperature gauge is in the
instrumen tcluster on the right-han dside.
Under normal operating condition sand with
the specified coolan tlevel, the coolan ttem-
perature may rise to 120 †. The coolan ttem-
perature may rise to the top end of the scale
at high outside temperatures and on long
uphill stretches. Speedometer with segments
The segment sinthe speedometer indicate
which speed rang eisavailable.
Cruise control mode:
The segment slight up fro mthe stored speed
to the maximum speed.
Variable Speedtronic mode:
The segment slight up fro mthe star tofthe
scale to the selected limit speed.
Distronic Plus* mode:
One or two segment saround the stored
speed light up. Rev counter
The red band in the rev counter indicates the
engine's overrevving range. The fuel supply is
interrupted to protect the engin ewhen the
red band is reached. !
Do not drive in the overrevving range.
Doin gsow ill damage the engine. Outside temperatur
edisplay G
Risk of accident
At temperatures just above freezin gpoint ,the
street may be icy, especially in wooded areas
or on bridges .Ifyou do not adapt your driving
style to the conditions, the vehicle could skid.
For this reason ,adapt your drivin gstyle and
speed to the weathe rconditions.
Changes in the outside temperature are dis-
played after ashor tdelay. On-board computer
Points to remember
The on-board computer is activate dassoon
as you turn the key to position 1in the ignition
lock. G
Risk of accident
Only use the on-board computer when road
and traffic condition spermit. You would oth-
erwise be distracted and unable to concen-
trate properly on driving, and could cause an
accident. Multifunction steering wheel
You can control the multi-function display and
the settings in the on-board computer using On-board computer
107Controls
*optional
207_AKB; 2; 3, en-GB
mkalafa,
Version: 2.11.8.1 2009-07-23T10:23:49+02:00-Seite1 07 Z
Page 119 of 313
for five seconds. Other messages in the multi-
function displayw
illbef adedout for this
length of time.
When Speed Limi tAssist is operational and
the message function is activated, the multi-
function displays howsthe 00BA symbol
whe nthe ignition is switched on.
Displaying Spee dLimi tAssist
X Press 0040or003E on the steering wheel
to select the Assist.menu.
X Press 003Cor003D to select Speed Lim.
Asst.
X Press the 0064button.
Speed Limi tAssist appears in the multi-
function display.
When aspee dlimi tisd etected, this
appears in the multi-function displayu ntil:
R the spee dlimi tcease stoa pply.
R you pas scity limits.
R the type of road changes ,e.g. motorway
or country road.
R the spee dlimi tisn ot detected anymore
after acertain distance.
Activating/deactivating the Spee dLimit
Assist messag efunction
X Press 0040or003E on the steering wheel
to select the Assist.menu.
X Press 003Cor003D to select Speed Lim.
Asst.
X Press the 0064button.
Speed Limi tAssist appears in the multi-
function display.
X Press the 003Dbutton.
The current selection is displayed.
X To activate or deactivate: press0064.
Ad etected spee dlimi tappears automati-
call yfor five seconds.
Showing the distanc edisplay* This function is only available with Distronic
Plus*. X
Press 0040or003E on the steering wheel
to select the Assist.menu.
X Press the 003Cor003D button to select
Distance display.
X Press the 0064button.
The Distronic Plus* distance display
appears in the multi-function display.
Activating/deactivating PRE-SAFE ®
Brake* This function is only available with Distronic
Plus*.
X
Press 0040or003E on the steering wheel
to select the Assist.menu.
X Press 003Cor003D to select PRE-SAFE
Brake.
X Press 0064.
The current selection is displayed.
X To activate or deactivate: press0064
again.
When PRE-SAFE ®
Brake is activated, the
multi-function displays howsthe 00C7 sym-
bol.
Activating/deactivating ATTENTION
ASSIST X
Press 0040or003E on the steering wheel
to select the Assist.menu.
X Press 003Cor003D to select the Atten‐
tion Asst. menu.
X Press 0064.
The current selection is displayed.
X To activate or deactivate: press0064
again.
When ATTENTION ASSIST is activated, the
00AF symbol appears in the multi-function
displayw hent he ignition is on. 116
On-board computerControls
*o
ptional
207_AKB; 2; 3, en-GB
mkalafa,
Version: 2.11.8.1 2009-07-23T10:23:49+02:00-Seite 116
Page 120 of 313
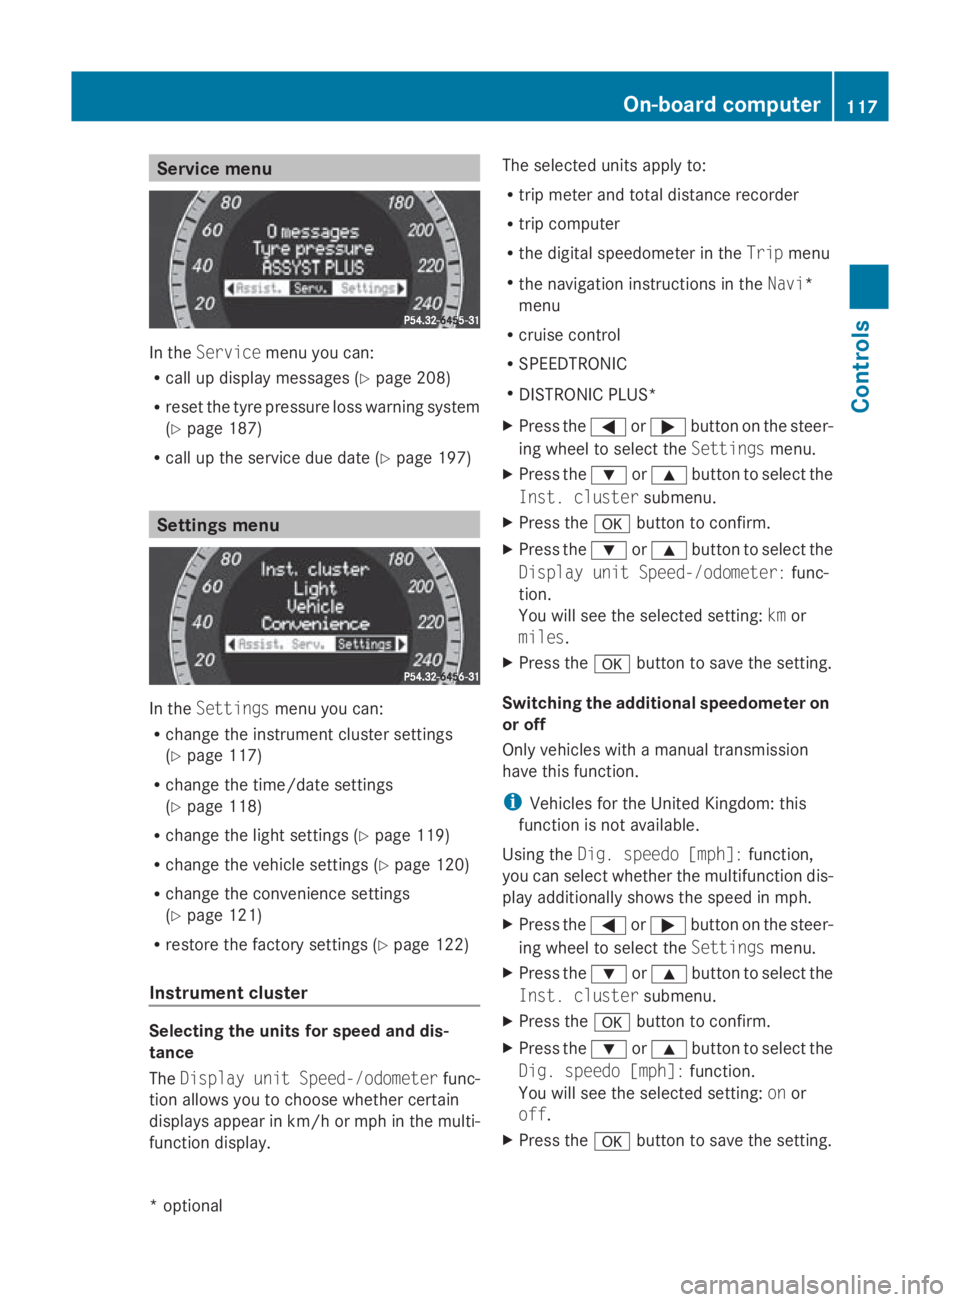
Service menu
In the
Service menu you can:
R call up display messages (Y page 208)
R reset the tyre pressure loss warning system
(Y page 187)
R call up the service due date (Y page 197)Settings menu
In the
Settings menu you can:
R change the instrumen tcluster settings
(Y page 117)
R change the time/date settings
(Y page 118)
R change the light settings (Y page 119)
R change the vehicle settings (Y page 120)
R change the convenience settings
(Y page 121)
R restore the factory settings (Y page 122)
Instrument cluster Selecting the units for speed and dis-
tance
The Display unit Speed-/odometer func-
tion allowsy ou to choose whether certain
displaysa ppearinkm/ horm ph in the multi-
function display. The selected units apply to:
R
trip meter and total distance recorder
R trip computer
R the digital speedometer in the Tripmenu
R the navigation instructions in the Navi*
menu
R cruise control
R SPEEDTRONIC
R DISTRONIC PLUS*
X Press the 0040or003E button on the steer-
ing wheel to select the Settingsmenu.
X Press the 003Dor003C button to select the
Inst. cluster submenu.
X Press the 0064button to confirm.
X Press the 003Dor003C button to select the
Display unit Speed-/odometer: func-
tion.
You will see the selected setting: kmor
miles.
X Press the 0064button to save the setting.
Switching the additional speedometer on
or off
Only vehicles with amanual transmission
have this function.
i Vehicles for the United Kingdom: this
function is not available.
Using the Dig. speedo [mph]: function,
you can select whether the multifunction dis-
play additionally shows the speed in mph.
X Press the 0040or003E button on the steer-
ing wheel to select the Settingsmenu.
X Press the 003Dor003C button to select the
Inst. cluster submenu.
X Press the 0064button to confirm.
X Press the 003Dor003C button to select the
Dig. speedo [mph]: function.
You will see the selected setting: onor
off.
X Press the 0064button to save the setting. On-board computer
117Controls
*optional
207_AKB; 2; 3, en-GB
mkalafa,
Version: 2.11.8.1 2009-07-23T10:23:49+02:00-Seite 117 Z
Page 121 of 313
Selecting the permanent display func-
tion*
This function is only available for vehicles with
automatic transmission*.
i
Vehicles for the United Kingdom: this
function is not available.
The Permanent display: function allows
you to choose whether the multifunction dis-
play always shows the outside temperature
or the speed in mph.
X Press the 0040or003E button on the steer-
ing wheel to select the Settingsmenu.
X Press the 003Dor003C button to select the
Inst. cluster submenu.
X Press the 0064button to confirm.
X Press the 003Dor003C button to select the
Permanent display: function.
You will see the selected setting: outside
temperature orDig. speedo [mph].
X Press the 0064button to save the setting.
Time/date This submenu is only available on vehicles
with Audio 20.
Your vehicle may be equipped with one of the
following audios
ystems:
A: Audio 20
B: Audio 50 APS*
C: COMAND APS*
X You can see which audios ystem is fitted in
your vehicle by referring to the separate
operating instructions. Depending on the audios
ystem fitted, time
and date are received from GPS satellites and
therefore cannot be set using the on-board
computer. Refer to the following table. A B C
Setting using the on-board com-
puter X
Automatic GPS satellite recep-
tion X X
Set the time zone once; see the
separate operating instructions X X
In the
Time/date submenu, you can set the
time and date.
Setting the time
X Press the 0040or003E button on the steer-
ing wheel to select the Settingsmenu.
X Press the 003Dor003C button to select the
Time/date submenu.
X Press the 0064button to confirm.
X Press the 003Dor003C button to select the
Time: function.
You will see the time currently set.
X Press the 0064button to change it.
X Press the 0040or003E button to select the
display to be changed: hours, minutes.
X Press the 003Dor003C button to set the
selected display.
X Press the 0064button to store the entry.
Setting the date
X Press the 0040or003E button on the steer-
ing wheel to select the Settingsmenu.
X Press the 003Dor003C button to select the
Time/date submenu.
X Press the 0064button to confirm.
X Press the 003Dor003C button to select the
Date: function.
You will see the date currently set.
X Press the 0064button to change it. 118
On-board computerControls
*o
ptional
207_AKB; 2; 3, en-GB
mkalafa,
Version: 2.11.8.1 2009-07-23T10:23:49+02:00-Seite 118