MERCEDES-BENZ E-CLASS ESTATE 2016 Owners Manual
Manufacturer: MERCEDES-BENZ, Model Year: 2016, Model line: E-CLASS ESTATE, Model: MERCEDES-BENZ E-CLASS ESTATE 2016Pages: 565, PDF Size: 11.34 MB
Page 121 of 565
#
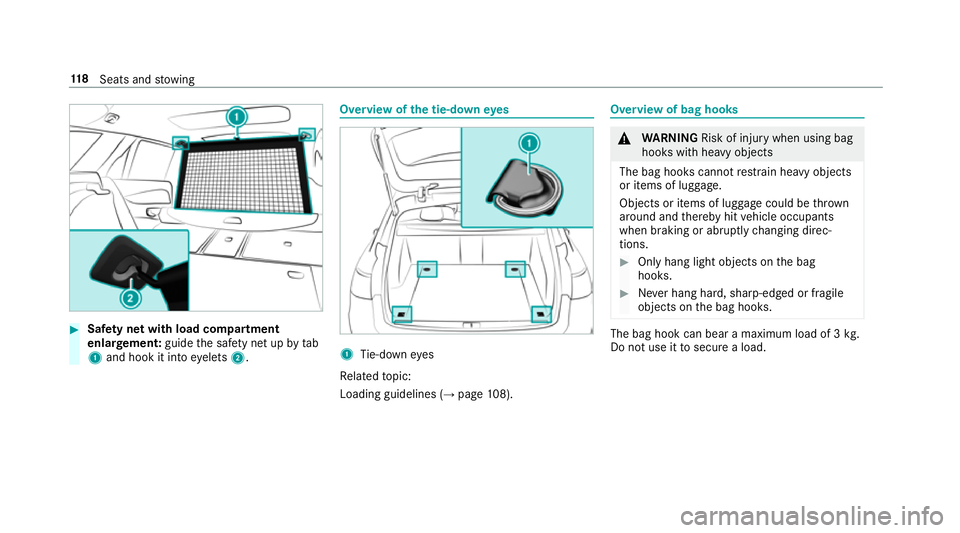
Safety net with load compartment
enlar gement: guidethe saf ety net up bytab
1 and hook it into eyelets 2. Overview of
the tie-down eyes 1
Tie-down eyes
Re lated topic:
Loading guidelines (→ page108). Overview of bag hoo
ks &
WARNING Risk of inju rywhen using bag
hooks with heavy objects
The bag hooks cannot restra in heavy objects
or items of luggage.
Objects or items of luggage could be thrown
around and thereby hit vehicle occupants
when braking or abruptly changing direc‐
tions. #
Onlyhang light objects on the bag
hooks. #
Never hang hard, sharp-edged or fragile
objects on the bag hooks. The bag hook can bear a maximum load of 3
kg.
Do not use it tosecure a load. 11 8
Seats and stowing
Page 122 of 565
1
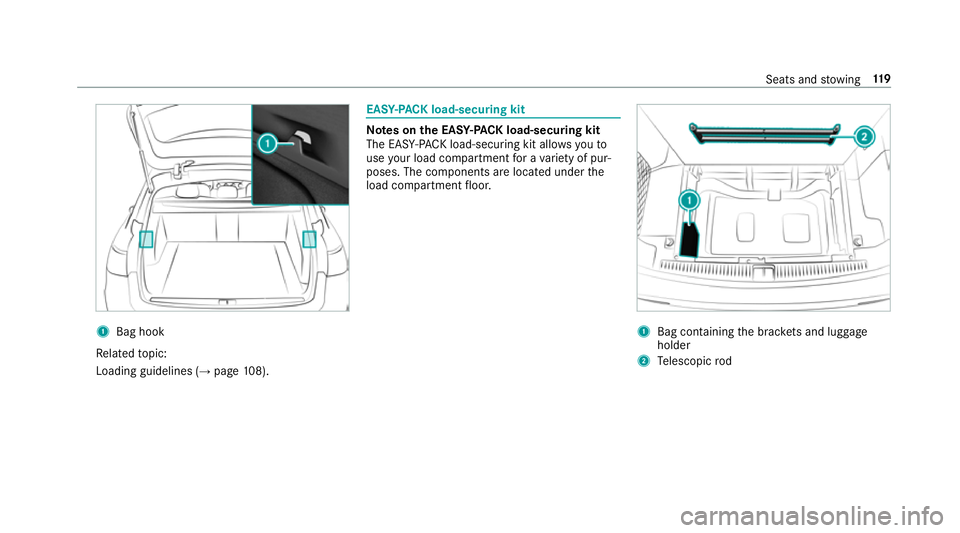
Bag hook
Re lated topic:
Loading guidelines (→ page108). EASY
-PAC K load-secu ring kit Note
s onthe EAS Y-PA CK load-securing kit
The EA SY-PAC K load-securing kit allows youto
use your load co mpartment for a variet y of pur‐
poses. The co mponents are located under the
load compartment floor. 1
Bag containing the brac kets and luggage
holder
2 Telescopic rod Seats and
stowing 11 9
Page 123 of 565
Inserting
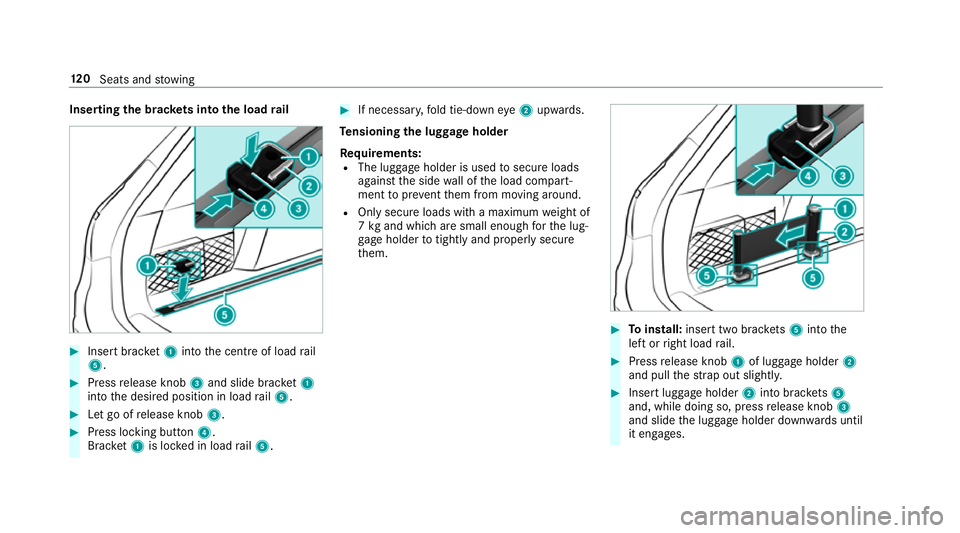
the brac kets in tothe load rail #
Insert brac ket1 into the cent reof load rail
5. #
Press release knob 3and slide brac ket1
into the desired position in load rail5. #
Let go of release knob 3. #
Press locking button 4.
Brac ket1 is lo cked in load rail5. #
If necessar y,fold tie-down eye2 upwards.
Te nsioning the luggage holder
Re quirements:
R The luggage holder is used tosecure loads
against the side wall of the load compart‐
ment topreve ntthem from moving around.
R Only secure loads with a maximum weight of
7 kg and which are small enough forth e lug‐
ga ge holder totightly and proper lysecure
th em. #
Toinstall: insert two brac kets 5 into the
left or right load rail. #
Press release knob 1of luggage holder 2
and pull thest ra p out slightl y. #
Insert lugga geholder 2into brac kets 5
and, while doing so, press release knob 3
and slide the luggage holder down wards until
it engages. 12 0
Seats and stowing
Page 124 of 565
#
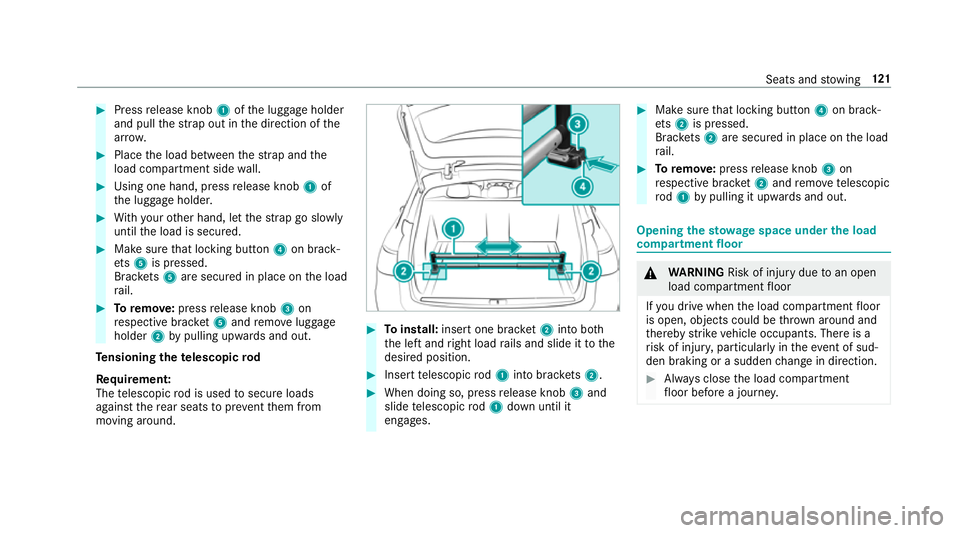
Press release knob 1ofthe luggage holder
and pull thest ra p out in the direction of the
ar row. #
Place the load between thest ra p and the
load compartment side wall. #
Using one hand, press release knob 1of
th e luggage holder. #
With your other hand, let thest ra p go slowly
until the load is secured. #
Make sure that locking button 4on brack‐
et s5 is pressed.
Brac kets 5 are secured in place on the load
ra il. #
Toremo ve:press release knob 3on
re spective brac ket5 and remo veluggage
holder 2bypulling upwards and out.
Te nsioning thete lescopic rod
Re quirement:
The telescopic rod is used tosecure loads
against there ar seats topreve ntthem from
moving around. #
Toinstall: insert one brac ket2 into bo th
th e left and right load rails and slide it tothe
desired position. #
Insert telescopic rod1 into brac kets 2. #
When doing so, press release knob 3and
slide telescopic rod1 down until it
engages. #
Make sure that locking button 4on brack‐
et s2 is pressed.
Brac kets 2 are secured in place on the load
ra il. #
Toremo ve: press release knob 3on
re spective brac ket2 and remo ve te lescopic
ro d1 bypulling it upwards and out. Opening
thesto wage space under the load
compa rtment floor &
WARNING Risk of inju rydue toan open
load compartment floor
If yo u drive when the load compartment floor
is open, objects could be thro wn around and
th ereby strike vehicle occupants. There is a
ri sk of injur y,particular lyin theeve nt of sud‐
den braking or a sudden change in direction. #
Alw ays close the load compartment
fl oor before a journe y. Seats and
stowing 121
Page 125 of 565
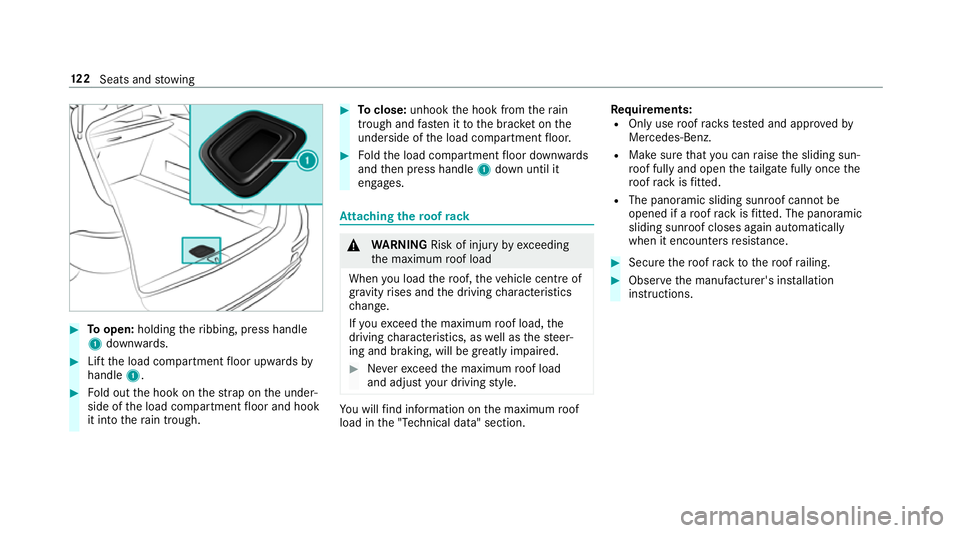
#
Toopen: holding theribbing, press handle
1 down wards. #
Lift the load compartment floor upwards by
handle 1. #
Fold out the hook on thest ra p on the under‐
side of the load compartment floor and hook
it into thera in trough. #
Toclose: unhook the hook from thera in
trough and fasten it tothe brac ket on the
underside of the load compartment floor. #
Foldthe load compartment floor down wards
and then press handle 1down until it
engages. At
taching thero of rack &
WARNING Risk of inju ryby ex ceeding
th e maximum roof load
When you load thero of, theve hicle centre of
gr av ity rises and the driving characteristics
ch ange.
If yo uexc eed the maximum roof load, the
driving characteristics, as well as thesteer‐
ing and braking, will be greatly impaired. #
Neverexc eed the maximum roof load
and adjust your driving style. Yo
u will find information on the maximum roof
load in the "Technical data" section. Re
quirements:
R Only use roof rack ste sted and appr ovedby
Mercedes-Benz.
R Make sure that you can raise the sliding sun‐
ro of fully and open theta ilgate fully once the
ro of rack isfitted.
R The panoramic sliding sunroof cann otbe
opened if a roof rack isfitted. The panoramic
sliding sunroof closes again au tomatically
when it encounters resis tance. #
Secu rethero of rack tothero of railing. #
Obser vethe manufacturer's ins tallation
instructions. 12 2
Seats and stowing
Page 126 of 565
Cup holders
Fi
tting or removing the cup holder in the
centre console &
WARNING ‑ Risk of accident or inju ry
when using the cup holder while the
ve hicle is in motion
The cup holder cannot hold a container
secure while theve hicle is in motion.
If yo u use a cup holder while theve hicle is in
motion, the conta iner may be flung around
and liquids could be spilled. The vehicle
occupants may come into contact with the
liquid and if it is hot, they could be scalded.
Yo u could be distracted from traf fic condi‐
tions and you may lose cont rol of theve hicle. #
Only use the cup holder when theve hi‐
cle is stationar y. #
Only use the cup holder for containers
of theright size. #
Alw ays close the conta iner, particularly
if th e liquid is hot. #
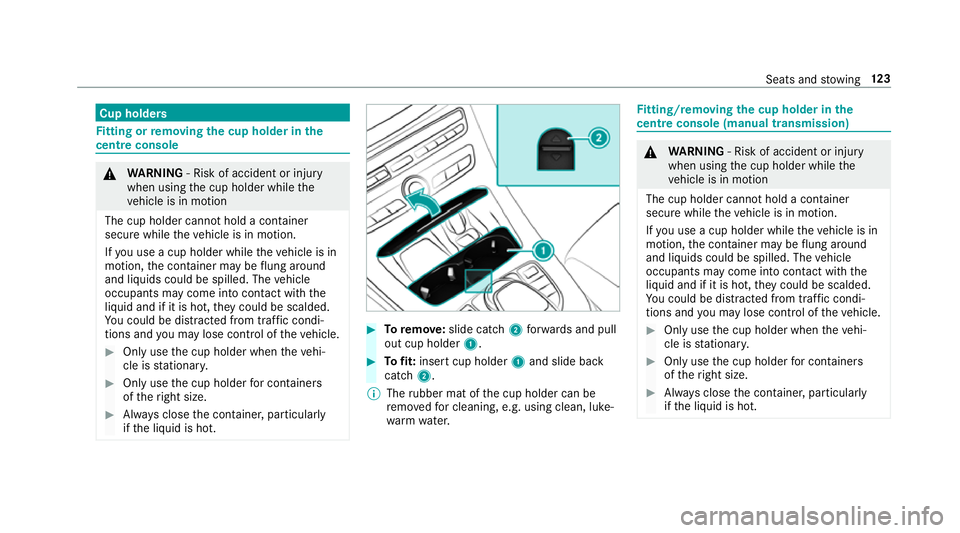
Toremo ve:slide catch 2forw ards and pull
out cup holder 1. #
Tofit: inse rtcup holder 1and slide ba ck
catch 2.
% The rubber mat of the cup holder can be
re mo vedfo r cleaning, e.g. using clean, luke‐
wa rm wate r. Fi
tting/ removing the cup holder in the
centre console (manual transmission) &
WARNING ‑ Risk of accident or inju ry
when using the cup holder while the
ve hicle is in motion
The cup holder cannot hold a container
secure while theve hicle is in motion.
If yo u use a cup holder while theve hicle is in
motion, the conta iner may be flung around
and liquids could be spilled. The vehicle
occupants may come into contact with the
liquid and if it is hot, they could be scalded.
Yo u could be distracted from traf fic condi‐
tions and you may lose cont rol of theve hicle. #
Only use the cup holder when theve hi‐
cle is stationar y. #
Only use the cup holder for containers
of theright size. #
Alw ays close the conta iner, particularly
if th e liquid is hot. Seats and
stowing 12 3
Page 127 of 565
#
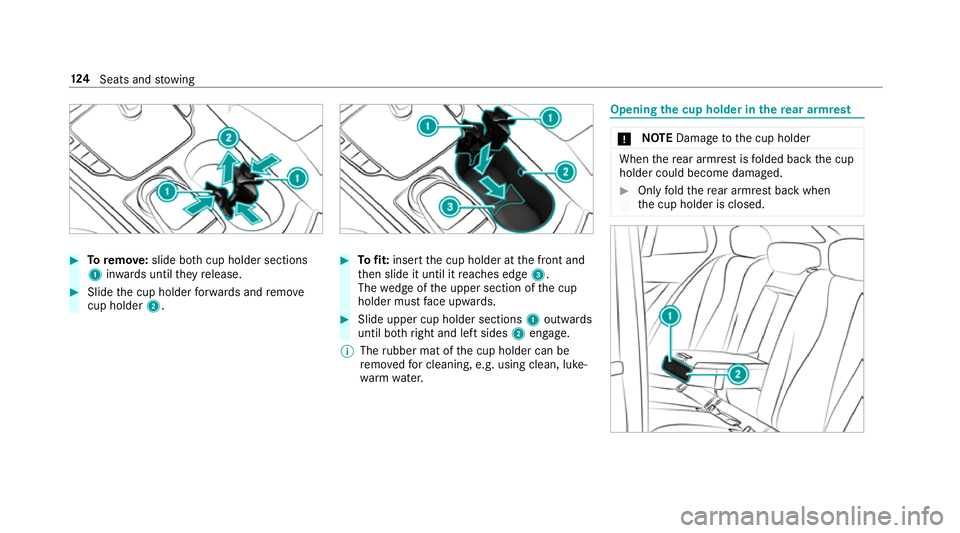
Toremo ve:slide bo thcup holder sections
1 inwa rds until they release. #
Slide the cup holder forw ards and remo ve
cup holder 2. #
Tofit: inse rtthe cup holder at the front and
th en slide it until it reaches edge 3.
The wedge of the upper section of the cup
holder must face up wards. #
Slide upper cup holder sections 1outwards
until bo thright and left sides 2engage.
% The rubber mat of the cup holder can be
re mo vedfo r cleaning, e.g. using clean, luke‐
wa rm wate r. Opening
the cup holder in there ar armrest *
NO
TEDama getothe cup holder When
there ar armrest is folded back the cup
holder could become damaged. #
Only fold there ar armrest back when
th e cup holder is closed. 124
Seats and stowing
Page 128 of 565
#
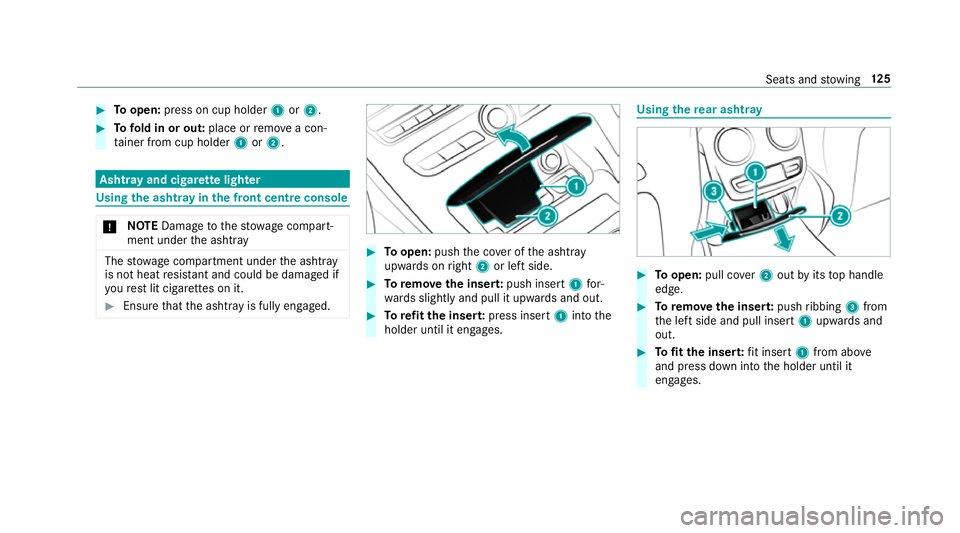
Toopen: press on cup holder 1or2. #
Tofold in or out: place orremo vea con‐
ta iner from cup holder 1or2. Asht
ray and cigar ette lighter Using
the ashtr ayinthe front centre console *
NO
TEDama getothestow age compart‐
ment under the ashtr ay The
stow age compartment under the ashtray
is not heat resis tant and could be damaged if
yo ure st lit cigar ette s on it. #
Ensure that the ashtr ayis fully engaged. #
Toopen: pushthe co ver of the ashtr ay
upwards on right 2or left side. #
Toremo vethe inser t:push insert 1for‐
wa rds slightly and pull it upwards and out. #
Torefit the inse rt:press insert 1into the
holder until it engages. Using
there ar ashtr ay #
Toopen: pull co ver2 out byits top handle
edge. #
Toremo vethe inser t:push ribbing 3from
th e left side and pull insert 1upwards and
out. #
Tofit the inse rt:fi t insert 1from ab ove
and press down into the holder until it
engages. Seats and
stowing 12 5
Page 129 of 565
Using
the cigar ette lighter &
WARNING ‑ Risk of fire and injury from
th e hot cigar ette lighter
Yo u can burn yourself if youto uch the hot
heating element or the soc ket of the ciga‐
re tte lighter.
In addition, flammable materials may ignite
if:
R you drop the hot cigar ette lighter
R ach ild holds the hot cigar ette lighter to
objects, forex ample #
Alw ays hold the cigar ette lighter bythe
knob. #
Alw ays make sure that the cigar ette
lighter is out of reach of children. #
Never lea vechildren unat tended in the
ve hicle. #
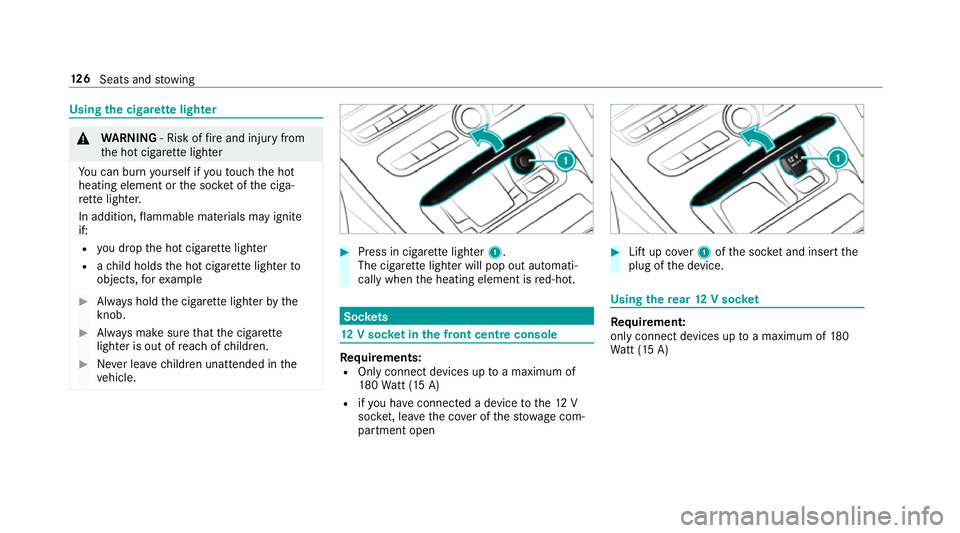
Press in cigar ette lighter 1.
The cigar ette lighter will pop out automati‐
cally when the heating element is red-hot. Soc
kets 12
V so cket inthe front centre console Re
quirements:
R Only connect devices up toa maximum of
18 0Wa tt (15 A)
R ifyo u ha veconnected a device tothe12 V
soc ket, le aveth e co ver of thestow age com‐
partment open #
Lift up co ver1 ofthe soc ket and insert the
plug of the device. Using
there ar 12 V so cket Re
quirement:
only connect devices up toa maximum of 180
Wa tt (15 A) 12 6
Seats and stowing
Page 130 of 565
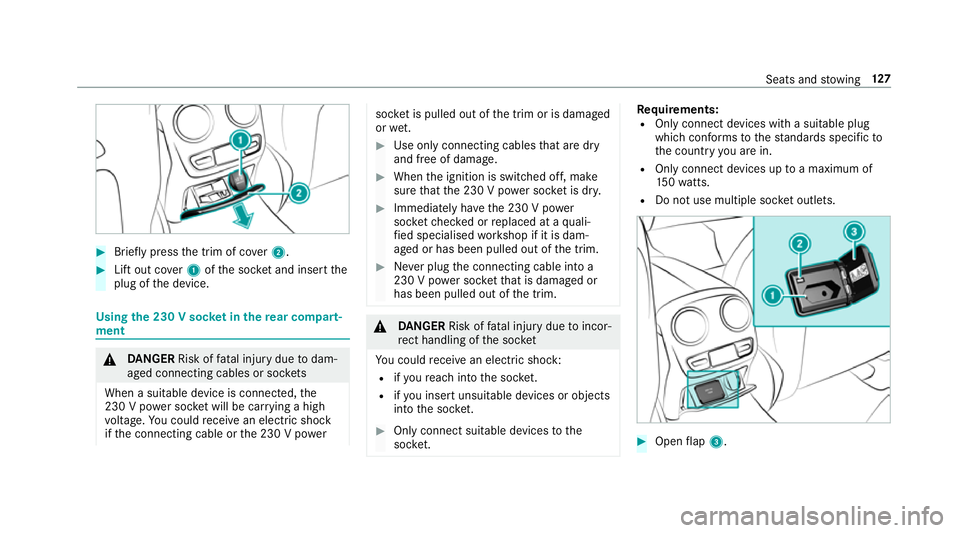
#
Brief lypress the trim of co ver2. #
Lift out co ver1 ofthe soc ket and insert the
plug of the device. Using
the 230 V soc ket in the rear comp art‐
ment &
DANG ER Risk of fata l injury due todam‐
aged connecting cables or soc kets
When a suitable device is connected, the
230 V power soc ket will be car rying a high
vo ltage. You could recei vean electric shock
if th e connecting cable or the 230 V po wer soc
ket is pulled out of the trim or is damaged
or we t. #
Use only connecting cables that are dry
and free of damage. #
When the ignition is switched off, make
sure that the 230 V po wer soc ket is dr y. #
Immedia tely ha ve the 230 V po wer
soc ketch ecked or replaced at a quali‐
fi ed specialised workshop if it is dam‐
aged or has been pulled out of the trim. #
Never plug the connecting cable into a
230 V po wer soc ketth at is damaged or
has been pulled out of the trim. &
DANG ER Risk of fata l injury due toincor‐
re ct handling of the soc ket
Yo u could recei vean electric shock:
R ifyo ure ach into the soc ket.
R ifyo u insert unsuitable devices or objects
into the soc ket. #
Only connect suitable devices tothe
soc ket. Re
quirements:
R Only connect devices with a suitable plug
which con form sto thest andards specific to
th e count ryyou are in.
R Only connect devices uptoa maximum of
15 0wa tts.
R Do not use multiple soc ket outlets. #
Open flap 3. Seats and
stowing 127