MERCEDES-BENZ G-CLASS SUV 2008 Manual Online
Manufacturer: MERCEDES-BENZ, Model Year: 2008, Model line: G-CLASS SUV, Model: MERCEDES-BENZ G-CLASS SUV 2008Pages: 293, PDF Size: 4.49 MB
Page 81 of 293
Lights
78
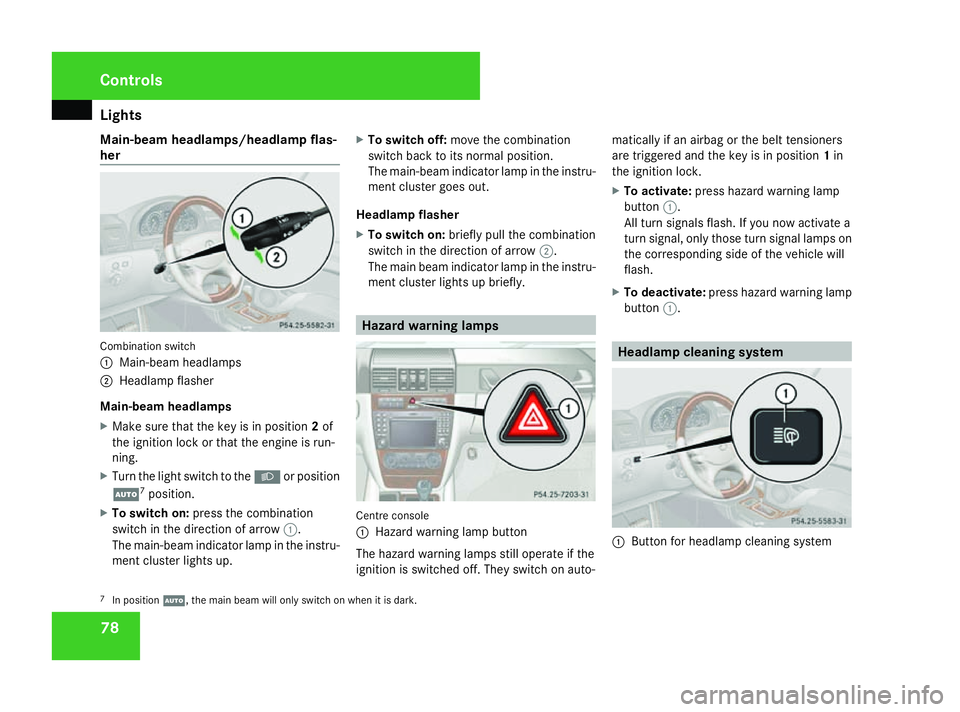
Main-beam headlamps/headlamp flas-
her Combination switch
1
Main-beam headlamps
2 Headlamp flasher
Main-beam headlamps
X Make sure that the key is in position 2of
the ignition lock or that the engine is run-
ning.
X Turn the light switch to the Bor position
U 7
position.
X To switch on: press the combination
switch in the direction of arrow 1.
The main-beam indicator lamp in the instru-
ment cluster lights up. X
To switch off: move the combination
switch back to its normal position.
The main-beam indicator lamp in the instru-
ment cluster goes out.
Headlamp flasher
X To switch on: briefly pull the combination
switch in the direction of arrow 2.
The main beam indicator lamp in the instru-
ment cluster lights up briefly. Hazard warning lamps
Centre console
1
Hazard warning lamp button
The hazard warning lamps still operate if the
ignition is switched off. They switch on auto- matically if an airbag or the belt tensioners
are triggered and the key is in position
1in
the ignition lock.
X To activate: press hazard warning lamp
button 1.
All turn signals flash. If you now activate a
turn signal, only those turn signal lamps on
the corresponding side of the vehicle will
flash.
X To deactivate: press hazard warning lamp
button 1. Headlamp cleaning system
1
Button for headlamp cleaning system
7 In position U, the main beam will only switch on when it is dark. Controls
463_AKB; 1; 8, en-GB
wobuchh,
Version: 2.10.6 2008-07-17T15:19:41+02:00 - Seite 78Dateiname: 6515_4091_02_buchblock.pdf; preflight
Page 82 of 293
Lights
79
X
Make sure the key is in position 2in the
ignition lock.
X To switch on: briefly press button 1.
The headlamps are cleaned with a high-
pressure water jet. Cornering light function
Specially designed front foglamps light up the
area into which you are driving when turning
corners.
The cornering light function is automatically
deactivated if:
R the engine is switched off.
R the foglamps are switched on.
R you are driving at speeds above 40 km /h.
R it is light.
X To activate: make sure that the light
switch is set to the UorB position.
X Switch on the turn signal.
The cornering lamp on the same side as the
turn signal comes on, even if you turn the
steering wheel in the opposite direction
after indicating.
or X
Turn the steering wheel in the desired
direction.
When in a forwards gear: the cornering
lamp on the inside of the bend comes on.
When in reverse gear: the cornering lamp
on the outside of the bend comes on.
X To deactivate: turn the steering wheel
back to the straight-ahead position.
The turn signal switches off. The cornering
lamp may remain lit for a short time.
or
X Switch off the turn signal.
The cornering lamp may remain lit for a
short time.
The cornering light will go out after a maxi-
mum of three minutes. Interior lighting
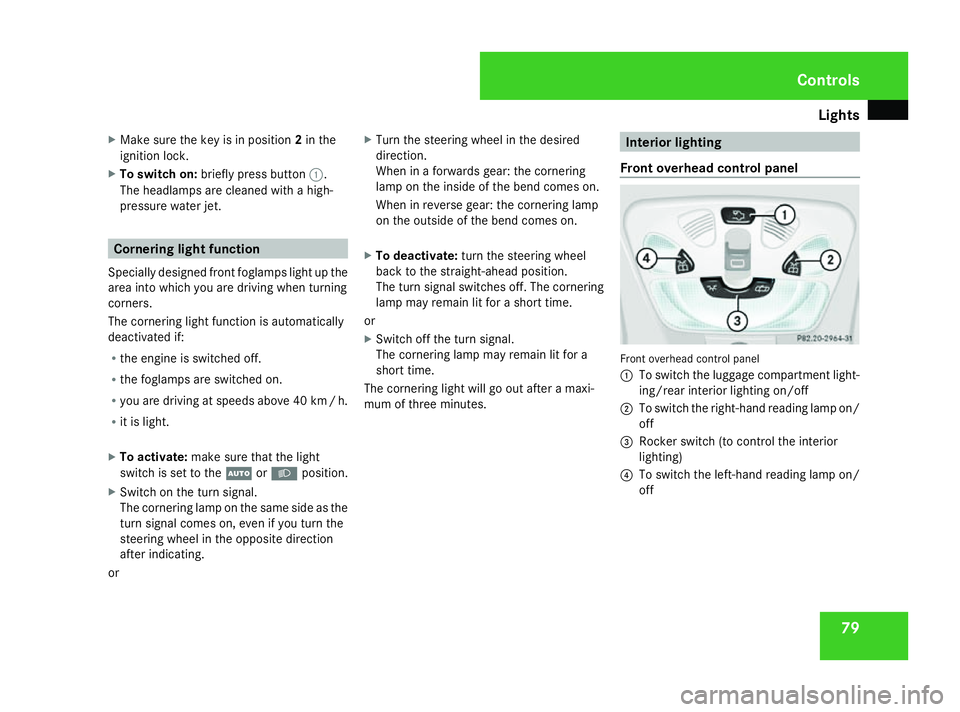
Front overhead control panel Front overhead control panel
1
To switch the luggage compartment light-
ing/rear interior lighting on/off
2 To switch the right-hand reading lamp on/
off
3 Rocker switch (to control the interior
lighting)
4 To switch the left-hand reading lamp on/
off Controls
463_AKB; 1; 8, en-GB
wobuchh,
Version: 2.10.6 2008-07-17T15:19:41+02:00 - Seite 79 ZDateiname: 6515_4091_02_buchblock.pdf; preflight
Page 83 of 293
Lights
80
Automatic function
X
To switch on: set rocker switch 3to the
centre position.
The interior lighting (except in the luggage
compartment) comes on automatically when
it is dark if you:
R unlock the vehicle
R open a door
R remove the key from the ignition lock
When a front door is opened, the front interior
lighting comes on. When a rear door is
opened, the rear interior lighting comes on.
In addition, the courtesy lights come on.
The interior lighting switches off after a delay.
You can set the delayed switch-off using the
on-board computer.
i If a door remains open and the ignition
key is not in the ignition lock, the interior
lighting switches off automatically after
approximately 30 minutes. X
To switch off: press the¤symbol on
rocker switch 3.
The interior lighting remain switched off even
when it is dark if you:
R unlock the vehicle
R open a door
R remove the key from the ignition lock
Manual control
Front interior lighting
X To switch on: press theðsymbol on
rocker switch 3.
X To switch off: set rocker switch 3to the
centre position.
Front reading lamps
X To switch on/off: press theXsymbol
on button 2or4.
Luggage compartment lighting
X To switch on/off: press button1.
i If you open the rear door, luggage com-
partment lighting comes on. Then, you can
not switch it off using switch 1.
Switch off the luggage compartment light-
ing if you wish to leave the rear door open for a longer period. This prevents the bat-
tery from discharging.
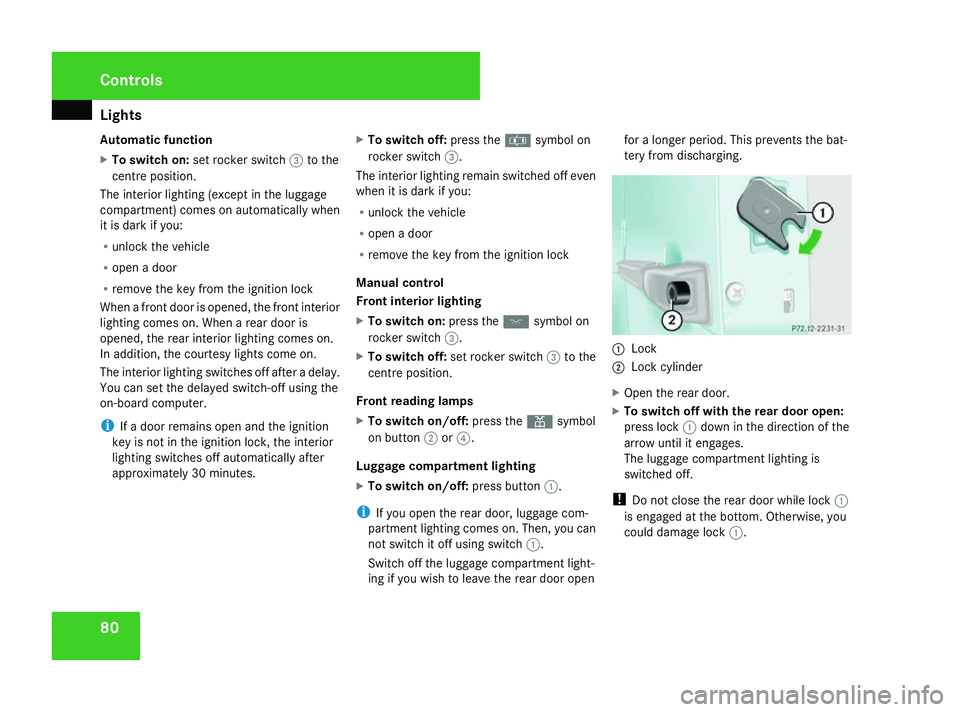
1
Lock
2 Lock cylinder
X Open the rear door.
X To switch off with the rear door open:
press lock 1down in the direction of the
arrow until it engages.
The luggage compartment lighting is
switched off.
! Do not close the rear door while lock 1
is engaged at the bottom. Otherwise, you
could damage lock 1.Controls
463_AKB; 1; 8, en-GB
wobuchh,
Version: 2.10.6 2008-07-17T15:19:41+02:00 - Seite 80Dateiname: 6515_4091_02_buchblock.pdf; preflight
Page 84 of 293
Lights
81
X
To switch on with the rear door open:
press lock cylinder 2.
The luggage compartment lighting resumes
its normal function.
Rear interior lighting
X To switch on/off: press button1on the
front overhead control panel (Y page 79).
i If you open the rear door, the rear interior
lighting comes on. You can then not switch
it off using button 1on the front overhead
control panel.
Switch off the rear interior lighting if you
wish to leave the rear door open for a longer
period. This prevents the battery from dis-
charging.
To switch off the rear interior lighting with the
rear door open, see Switching off with rear
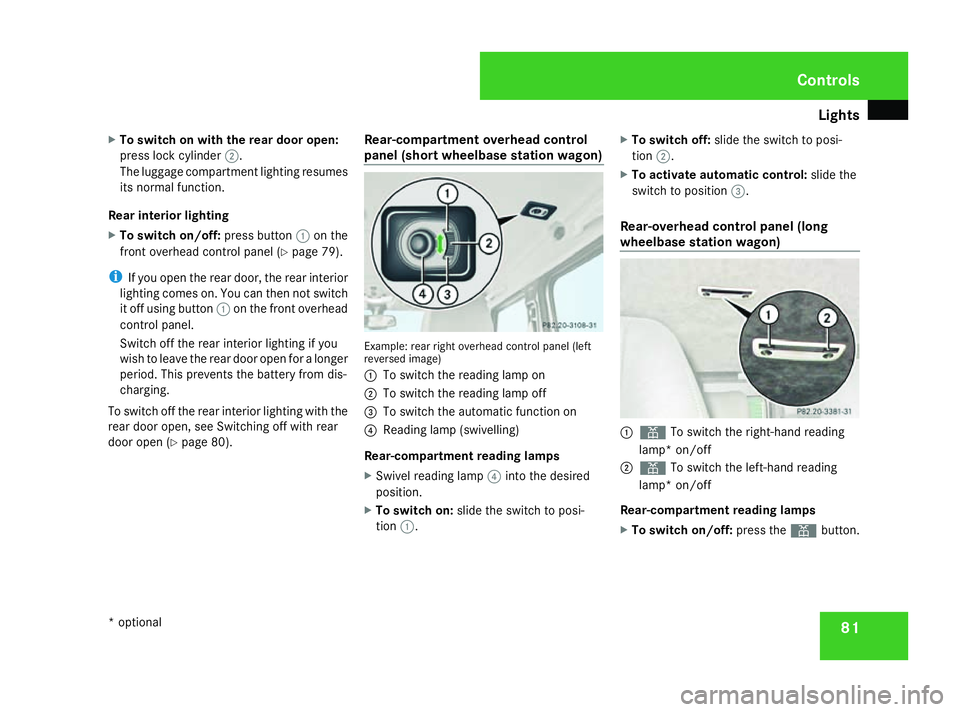
door open (Y page 80). Rear-compartment overhead control
panel (short wheelbase station wagon) Example: rear right overhead control panel (left
reversed image)
1
To switch the reading lamp on
2 To switch the reading lamp off
3 To switch the automatic function on
4 Reading lamp (swivelling)
Rear-compartment reading lamps
X Swivel reading lamp 4into the desired
position.
X To switch on: slide the switch to posi-
tion 1. X
To switch off: slide the switch to posi-
tion 2.
X To activate automatic control: slide the
switch to position 3.
Rear-overhead control panel (long
wheelbase station wagon) 1
X To switch the right-hand reading
lamp* on/off
2 X To switch the left-hand reading
lamp* on/off
Rear-compartment reading lamps
X To switch on/off: press theXbutton. Controls
* optional
463_AKB; 1; 8, en-GB
wobuchh,
Version: 2.10.6
2008-07-17T15:19:41+02:00 - Seite 81 ZDateiname: 6515_4091_02_buchblock.pdf; preflight
Page 85 of 293
Windscreen wipers
82 Courtesy lighting in the front doors
To help you see better when it is dark, the
courtesy light is switched on when the
respective door is opened if you have activa-
ted the automatic control for the interior light.
The courtesy light is switched off when the
door is closed. Windscreen wipers
Switching the windscreen wipers on/
off
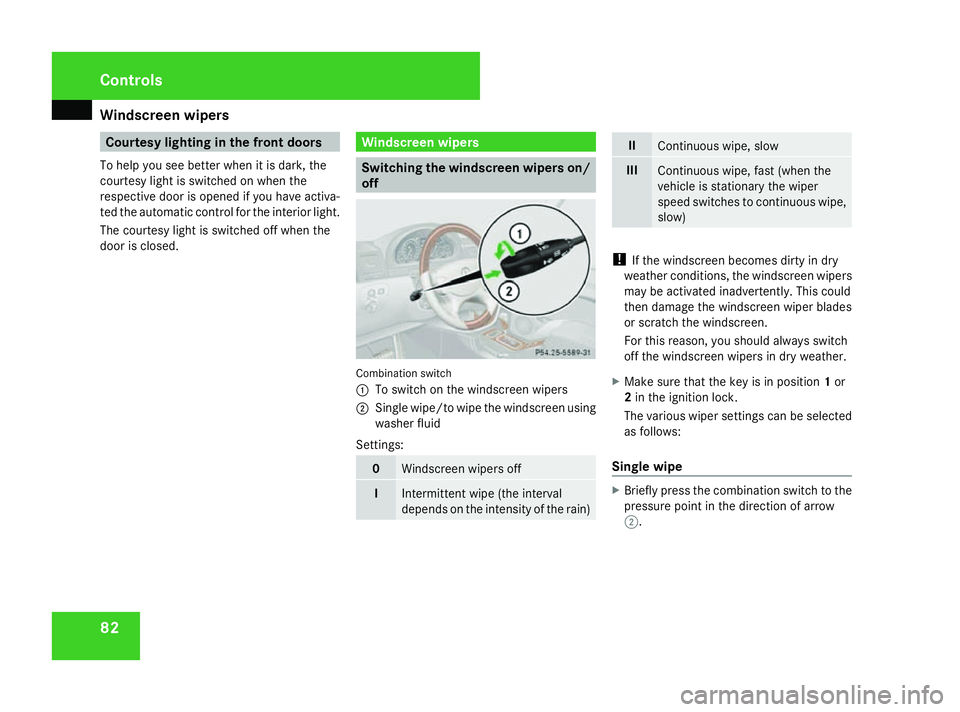
Combination switch
1
To switch on the windscreen wipers
2 Single wipe/to wipe the windscreen using
washer fluid
Settings: 0
Windscreen wipers off
I
Intermittent wipe (the interval
depends on the intensity of the rain) II
Continuous wipe, slow
III
Continuous wipe, fast (when the
vehicle is stationary the wiper
speed switches to continuous wipe,
slow)
!
If the windscreen becomes dirty in dry
weather conditions, the windscreen wipers
may be activated inadvertently. This could
then damage the windscreen wiper blades
or scratch the windscreen.
For this reason, you should always switch
off the windscreen wipers in dry weather.
X Make sure that the key is in position 1or
2 in the ignition lock.
The various wiper settings can be selected
as follows:
Single wipe X
Briefly press the combination switch to the
pressure point in the direction of arrow
2. Controls
463_AKB; 1; 8, en-GB
wobuchh
,V ersion: 2.10.6
2008-07-17T15:19:41+02:00 - Seite 82 Dateiname: 6515_4091_02_buchblock.pdf; preflight
Page 86 of 293
Windscreen wipers
83
Wiping with washer fluid X
Press the combination switch beyond the
pressure point in the direction of arrow
2.
i Wipe the windscreen using washer fluid
even if it is raining. By doing so, you will
avoid smearing the windscreen.
Intermittent wipe/rain sensor X
Turn the combination switch in the direc-
tion of arrow 1to position I.
The rain sensor is activated. The appropri-
ate wiping frequency is set automatically
according to the intensity of the rain.
i If you have selected the intermittent wipe
setting, wiping is interrupted when the
vehicle is stationary and you open the driv-
er's or the front-passenger door. This pro-
tects people getting into and out of the
vehicle from being sprayed with water.
Intermittent wipe continues when:
R you close the doors again
R you turn the combination switch to posi-
tion IIor III
R you shift the selector lever to Dor R Continuous wipe X
Depending on the intensity of the rain, turn
the combination switch in the direction of
arrow 1to position IIor III.
i When the windscreen wiper is switched
on and you stop the vehicle, the windscreen
wiper wipes more slowly.
Switching off the windscreen wipers X
Turn the combination switch to position 0. Rear window wiper
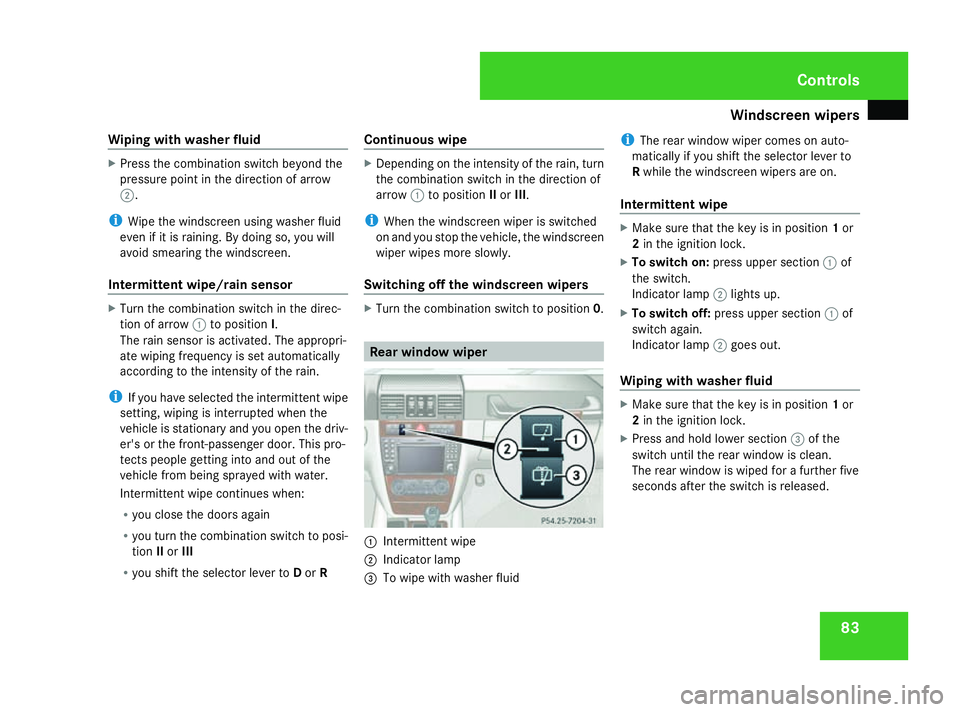
1
Intermittent wipe
2 Indicator lamp
3 To wipe with washer fluid i
The rear window wiper comes on auto-
matically if you shift the selector lever to
R while the windscreen wipers are on.
Intermittent wipe X
Make sure that the key is in position 1or
2 in the ignition lock.
X To switch on: press upper section 1of
the switch.
Indicator lamp 2lights up.
X To switch off: press upper section 1of
switch again.
Indicator lamp 2goes out.
Wiping with washer fluid X
Make sure that the key is in position 1or
2 in the ignition lock.
X Press and hold lower section 3of the
switch until the rear window is clean.
The rear window is wiped for a further five
seconds after the switch is released. Controls
463_AKB; 1; 8, en-GB
wobuchh
,V ersion: 2.10.6
2008-07-17T15:19:41+02:00 - Seite 83 ZDateiname: 6515_4091_02_buchblock.pdf; preflight
Page 87 of 293
Side windows
84 Side windows
Opening/closing the side windows
G
Risk of injury
Make sure that nobody can become trap-
ped between the side window and the door
frame as a side window is opened. Do not
touch or lean against the side window dur-
ing the opening procedure. You could
become trapped between the side window
and the door frame as the window moves
down. If danger threatens, release the
switch or pull the switch upwards to close
the side window again. G
Risk of injury
Make sure that nobody can become trap-
ped as you close a side window. If danger
threatens, release the switch or press the
switch a second time to open the side win-
dow again. G
Risk of injury
Do not leave children unsupervised in the
vehicle, even if they are secured in a child
restraint system. The children could: R
be seriously or even fatally injured on
parts of the vehicle
R be seriously or even fatally injured by
prolonged exposure to extremely high or
extremely low temperatures
R press the central unlocking switch and
thereby override the child-proof locks
and open the door
If children open a door, they could:
R seriously or even fatally injure other peo-
ple
R get out of the vehicle, thereby injuring
themselves or be seriously or even fatally
injured by a passing vehicle
Activate the child-proof locks if children are
travelling in the vehicle. They could other-
wise open doors or windows while the vehi-
cle is in motion and thereby injure them-
selves or others.
i It is also possible to open and close the
side windows from the outside using the
"Summer opening" (Y page 85) and "Con-
venience closing" (Y page 85) features
respectively. You can disable the controls for the rear
side windows from the driver's seat
(Y
page 46).
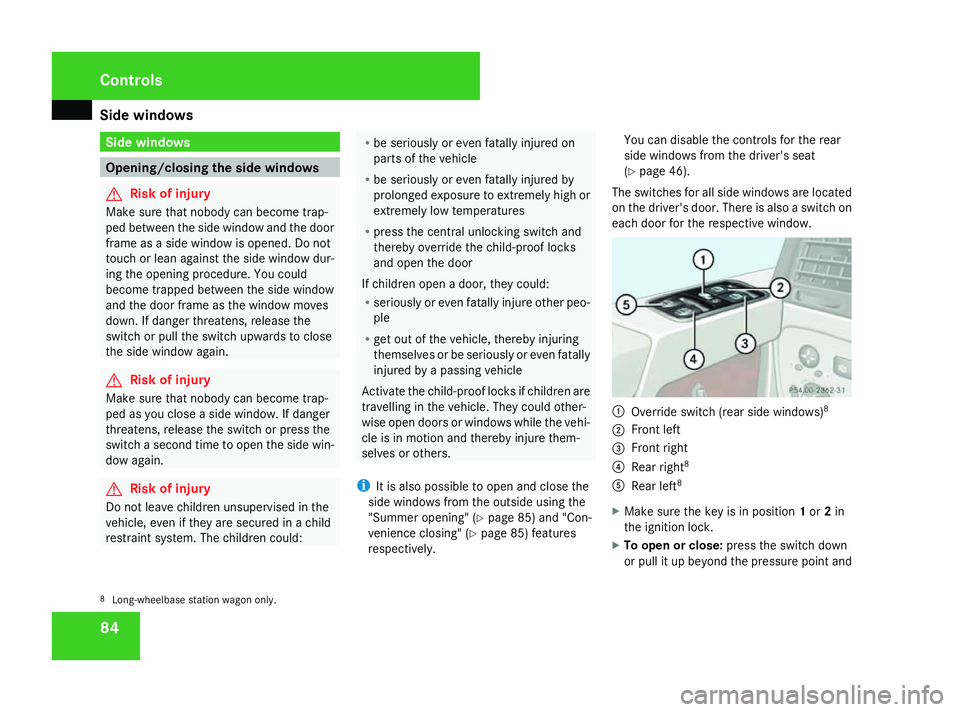
The switches for all side windows are located
on the driver's door. There is also a switch on
each door for the respective window. 1
Override switch (rear side windows) 8
2 Front left
3 Front right
4 Rear right 8
5 Rear left 8
X Make sure the key is in position 1or 2in
the ignition lock.
X To open or close: press the switch down
or pull it up beyond the pressure point and
8 Long-wheelbase station wagon only. Controls
463_AKB; 1; 8, en-GB
wobuchh,
Version: 2.10.6
2008-07-17T15:19:41+02:00 - Seite 84 Dateiname: 6515_4091_02_buchblock.pdf; preflight
Page 88 of 293
Side windows
85
hold it until the corresponding window is in
the desired position.
X To open fully: press the switch down
briefly beyond the pressure point and
release it.
X To stop: briefly press the switch down or
pull it up. Resetting the windows
Each side window must be reset if the battery
was disconnected or discharged.
X Make sure that the key is in position 2in
the ignition lock.
X Pull the corresponding switch upwards
until the side window is closed, and hold it
in this position for about another second. Summer opening
You can ventilate the vehicle before a journey.
To do this, you can use the key to simultane-
ously:
R open the side windows
R open the sliding/tilting sunroof*
i The "Summer opening" feature can only
be operated via the key. X
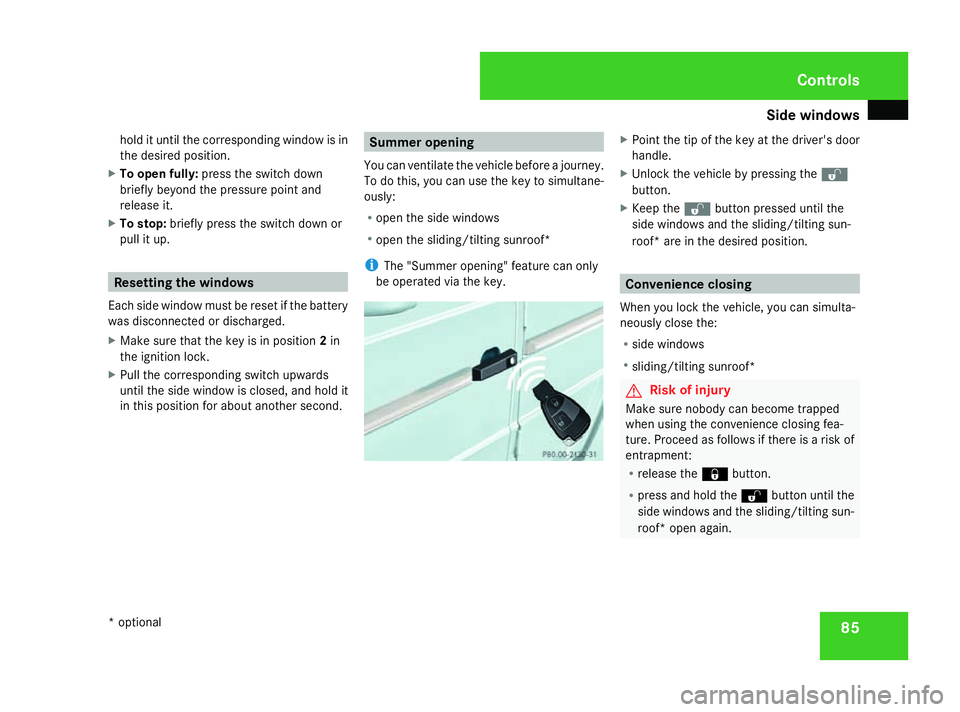
Point the tip of the key at the driver's door
handle.
X Unlock the vehicle by pressing the k
button.
X Keep the kbutton pressed until the
side windows and the sliding/tilting sun-
roof* are in the desired position. Convenience closing
When you lock the vehicle, you can simulta-
neously close the:
R side windows
R sliding/tilting sunroof* G
Risk of injury
Make sure nobody can become trapped
when using the convenience closing fea-
ture. Proceed as follows if there is a risk of
entrapment:
R release the jbutton.
R press and hold the kbutton until the
side windows and the sliding/tilting sun-
roof* open again. Controls
* optional
463_AKB; 1; 8, en-GB
wobuchh,
Version: 2.10.6 2008-07-17T15:19:41+02:00 - Seite 85 ZDateiname: 6515_4091_02_buchblock.pdf; preflight
Page 89 of 293
Driving and pa
rking 86X
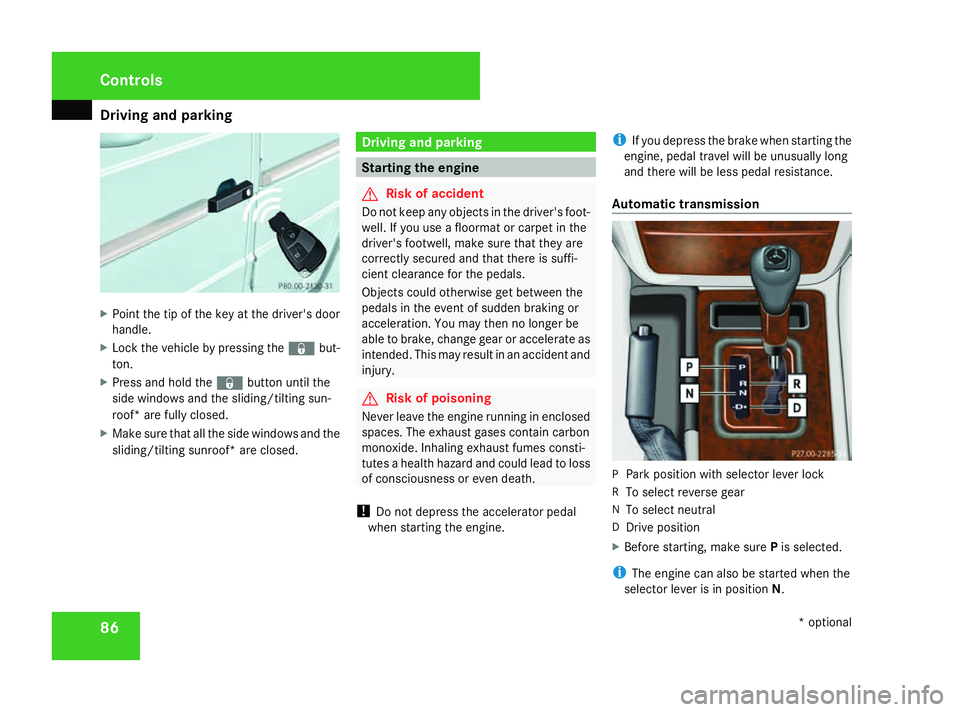
Point the tip of the key at the driver's door
handle.
X Lock the vehicle by pressing the jbut-
ton.
X Press and hold the jbutton until the
side windows and the sliding/tilting sun-
roof* are fully closed.
X Make sure that all the side windows and the
sliding/tilting sunroof* are closed. Driving and parking
Starting the engine
G
Risk of accident
Do not keep any objects in the driver's foot-
well. If you use a floormat or carpet in the
driver's footwell, make sure that they are
correctly secured and that there is suffi-
cient clearance for the pedals.
Objects could otherwise get between the
pedals in the event of sudden braking or
acceleration. You may then no longer be
able to brake, change gear or accelerate as
intended. This may result in an accident and
injury. G
Risk of poisoning
Never leave the engine running in enclosed
spaces. The exhaust gases contain carbon
monoxide. Inhaling exhaust fumes consti-
tutes a health hazard and could lead to loss
of consciousness or even death.
! Do not depress the accelerator pedal
when starting the engine. i
If you depress the brake when starting the
engine, pedal travel will be unusually long
and there will be less pedal resistance.
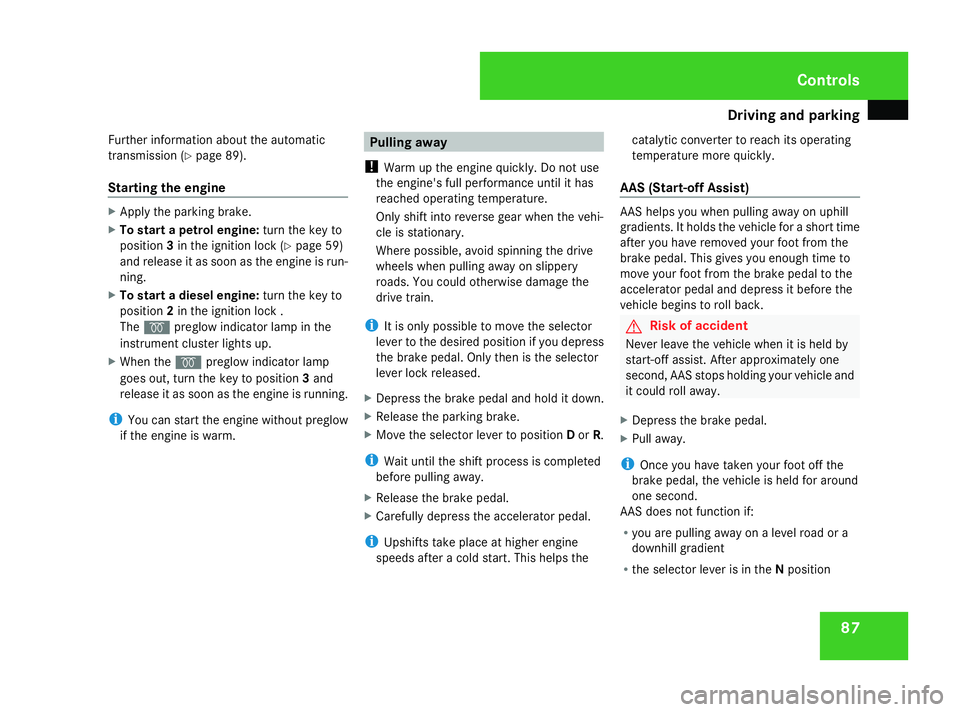
Automatic transmission P
Park position with selector lever lock
R To select reverse gear
N To select neutral
D Drive position
X Before starting, make sure Pis selected.
i The engine can also be started when the
selector lever is in position N.Cont
rols
* optional
463_AKB; 1; 8, en-GB
wobuchh,
Version: 2.10.6 2008-07-17T15:19:41+02:00 - Seite 86Dateiname: 6515_4091_02_buchblock.pdf; preflight
Page 90 of 293
Driving and pa
rking 87
Further information about the automatic
transmission (Y
page 89).
Starting the engine X
Apply the parking brake.
X To start a petrol engine: turn the key to
position 3in the ignition lock (Y page 59)
and release it as soon as the engine is run-
ning.
X To start a diesel engine: turn the key to
position 2in the ignition lock .
The q preglow indicator lamp in the
instrument cluster lights up.
X When the qpreglow indicator lamp
goes out, turn the key to position 3and
release it as soon as the engine is running.
i You can start the engine without preglow
if the engine is warm. Pulling away
! Warm up the engine quickly. Do not use
the engine's full performance until it has
reached operating temperature.
Only shift into reverse gear when the vehi-
cle is stationary.
Where possible, avoid spinning the drive
wheels when pulling away on slippery
roads. You could otherwise damage the
drive train.
i It is only possible to move the selector
lever to the desired position if you depress
the brake pedal. Only then is the selector
lever lock released.
X Depress the brake pedal and hold it down.
X Release the parking brake.
X Move the selector lever to position Dor R.
i Wait until the shift process is completed
before pulling away.
X Release the brake pedal.
X Carefully depress the accelerator pedal.
i Upshifts take place at higher engine
speeds after a cold start. This helps the catalytic converter to reach its operating
temperature more quickly.
AAS (Start-off Assist) AAS helps you when pulling away on uphill
gradients. It holds the vehicle for a short time
after you have removed your foot from the
brake pedal. This gives you enough time to
move your foot from the brake pedal to the
accelerator pedal and depress it before the
vehicle begins to roll back. G
Risk of accident
Never leave the vehicle when it is held by
start-off assist. After approximately one
second, AAS stops holding your vehicle and
it could roll away.
X Depress the brake pedal.
X Pull away.
i Once you have taken your foot off the
brake pedal, the vehicle is held for around
one second.
AAS does not function if:
R you are pulling away on a level road or a
downhill gradient
R the selector lever is in the Nposition Controls
463_AKB; 1; 8, en-GB
wobuchh
,V ersion: 2.10.6
2008-07-17T15:19:41+02:00 - Seite 87 ZDateiname: 6515_4091_02_buchblock.pdf; preflight