fuel MERCEDES-BENZ GLB SUV 2019 Owners Manual
[x] Cancel search | Manufacturer: MERCEDES-BENZ, Model Year: 2019, Model line: GLB SUV, Model: MERCEDES-BENZ GLB SUV 2019Pages: 689, PDF Size: 11.39 MB
Page 6 of 689
Mir
rors ........................................................ 171
Operating the sun visors ............................. 174Climate control
......................................... 175
Overview of climate contro l systems ..........1 75
Operating the climate control sy stem ......... 176 Driving and pa
rking ................................. 18 5
Driving ........................................................ 185
DY NA MIC SELECT switch ............................1 98
Manual transmission .................................. 201
Au tomatic transmission .............................. 203
Fu nction of the 4MATIC .............................. 208
Re fuelling ................................................... 209
Pa rking ........................................................ 215
Driving and driving sa fety sy stems .............2 24
Tr ailer hit ch................................................ 288
Bicycle rack function .................................. 291
Ve hicle towing instructions ........................ .293 Instrument Display and on-board
comp uter.................................................. 294
Instrument display overview ...................... .294 Overview of
the buttons on thesteering
wheel ..........................................................2 95
Operating the on-board computer .............. 296
Ad justing the design of the instrument
display ........................................................ 297
Showing display conte nt onthe instru‐
ment clus ter ............................................... 298
Overview of displa yson the multifunc‐
tion display .................................................2 99
Ad justing the instrument lighting ............... 300
Menus and submenus ................................ 300
Head-up Display ......................................... 307 LINGU
ATRO NIC ........................................ 309
No tes on operating saf ety .......................... 309
Ope ration .................................................... 310
Using LINGU ATRO NIC ef fectively ................ 312
Essential voice commands .......................... 313 MBUX multimedia sy
stem ...................... 329
Overview and operation .............................. 329
Sy stem settings .......................................... 363
Fit & Healt hy............................................... 373
Na vigation ................................................... 378Te
lephone .................................................. .423
Online and Internet functions ..................... 459
Media ........................................................ .468
Ra dio .......................................................... 477
Sound ......................................................... 480 Main
tenance and care ............................. 484
ASS YST PLUS service inter val display ........ 484
Engine compartment .................................. 485
Cleaning and care ...................................... .491 Breakdown assistance
............................501
Emergency .................................................. 501
Flat tyre ...................................................... 503
Battery (vehicle) ......................................... 509
To w- starting or towing away ........................ 514
Electrical fuses ........................................... 520 Wheels and tyres
..................................... 524
No tes on noise or unusual handling char‐
acteristics .................................................. .524
No tes on regular lyinspecting wheels and
tyres .......................................................... .524 Con
tents 3
Page 14 of 689
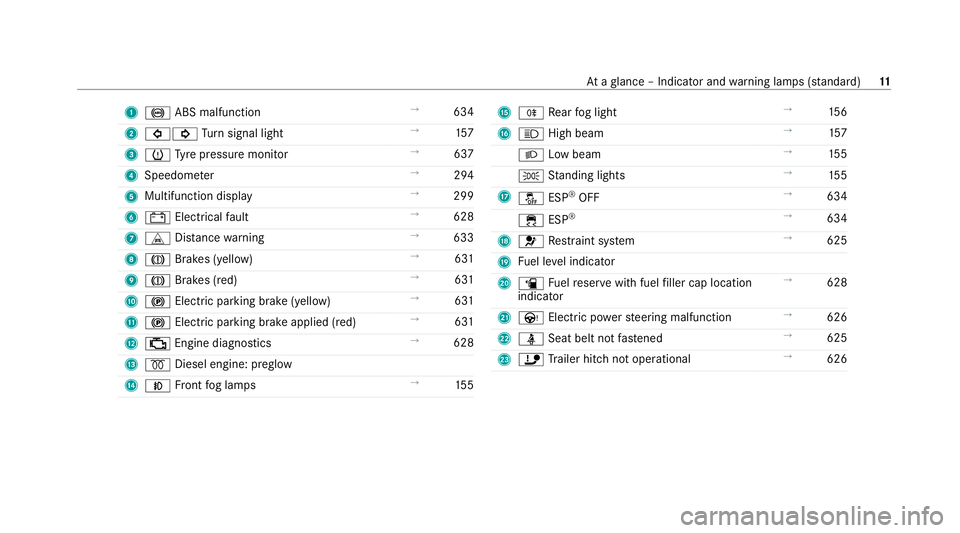
1
! ABS malfunction →
634
2 #! Turn signal light →
157
3 h Tyre pressure monitor →
637
4 Speedome ter →
294
5 Multifunction display →
299
6 # Electrical fault →
628
7 L Distance warning →
633
8 J Brakes (yellow) →
631
9 J Brakes (red) →
631
A ! Electric parking brake (yellow) →
631
B ! Electric parking brake applied (red) →
631
C ; Engine diagno stics →
628
D % Diesel engine: preglow
E N Front fog lamps →
15 5 F
R Rear fog light →
15 6
G K High beam →
157
L Low beam →
15 5
T Standing lights →
15 5
H å ESP®
OFF →
634
÷ ESP®
→
634
I 6 Restra int sy stem →
625
J Fuel le vel indicator
K æ Fuelreser vewith fuel filler cap location
indicator →
628
L Ù Electric po werst eering malfunction →
626
M ü Seat belt not fastened →
625
N ï Trailer hit chnot operational →
626 At
aglance – Indicator and warning lamps (s tanda rd) 11
Page 16 of 689
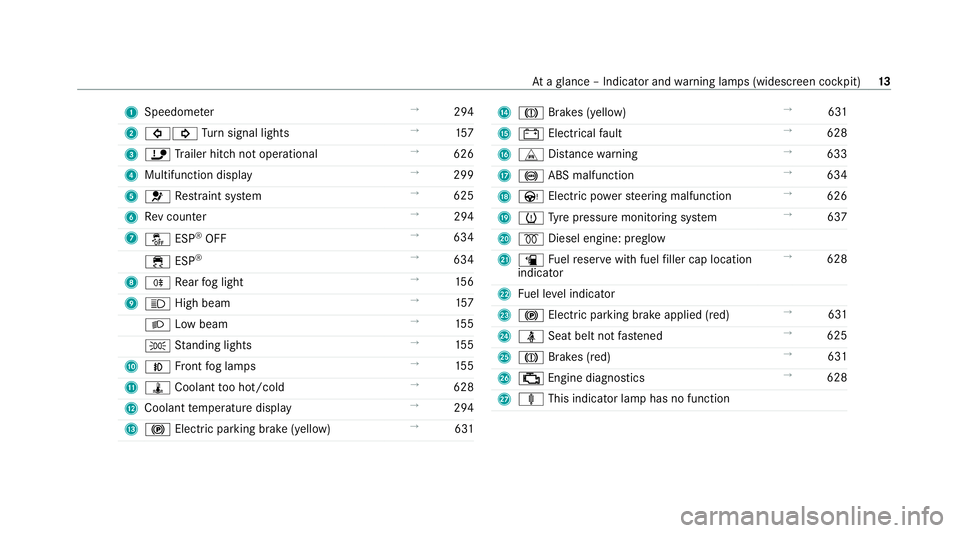
1
Speedom eter →
294
2 #! Turn signal lights →
157
3 ï Trailer hit chnot operational →
626
4 Multifunction displ ay →
299
5 6 Restra int sy stem →
625
6 Rev counter →
294
7 å ESP®
OFF →
634
÷ ESP®
→
634
8 R Rear fog light →
15 6
9 K High beam →
157
L Low beam →
15 5
T Standing lights →
15 5
A N Front fog lamps →
15 5
B ÿ Coolant too hot/cold →
628
C Coolant temp erature display →
294
D ! Electric pa rking brake (yellow) →
631 E
J Brakes (yellow) →
631
F # Electrical fault →
628
G L Distance warning →
633
H ! ABS malfunction →
634
I Ù Electric po werst eering malfunction →
626
J h Tyre pressure monitoring sy stem →
637
K % Diesel engine: preglow
L æ Fuelreser vewith fuel filler cap location
indicator →
628
M Fuel le vel indicator
N ! Electric parking brake applied (red) →
631
O ü Seat belt not fastened →
625
P J Brakes (red) →
631
Q ; Engine diagnostics →
628
R ä This indicator lamp has no function At
aglance – Indicator and warning lamps (widesc reen cockpit) 13
Page 22 of 689

1
Safetyve sts →
501
2 Fire extinguisher →
502
3 me button and SOS button →
447
4 Haza rdwa rning lights →
15 8
5 Starting assis tance →
513
6 Tocheck and top up operating fluids →
552
7 Totow- start and tow aw ay →
516
8 Flat tyre →
503 9
QR code for accessing there scue card →
31
A Totow- start and tow aw ay →
516
B TIREFIT kit →
505
C First-aid kit (so ftsided) →
502
D Warning triangle →
501
E Fuelfiller flap with instruction labels for tyre
pressu re, fuel type and QR code for accessing
th ere scue card →
209 At
aglance – Emer gencies and breakdowns 19
Page 24 of 689

Pr
otection of the environment
+ ENVIRONMENTAL
NOTEEnvironmental
dama gedue tooperating conditions and
personal driving style The pollutant emission of
theve hicle is
directly related tothewa yyo u operate the
ve hicle.
Operate your vehicle in an environmentally
re sponsible manner tohelp pr otect the envi‐
ro nment. Please obser vethefo llowing rec‐
ommendations on ope rating conditions and
pe rsonal driving style.
Operating conditions: #
Make sure that the tyre pressure is cor‐
re ct. #
Do not car ryany unnecessary weight
(e.g. roof luggage rack s once you no
lon ger need them). #
Adhere tothe service inter vals.
A regularly serviced vehicle will contri b‐
ute toenvironmen tal pr otection. #
Alw ays ha vemaintenance workcar ried
out at a qualified specialist workshop.
Pe rsonal driving style: #
Do not depress the accelera tor pedal
when starting the engine. #
Do not warm upthe engine while the
ve hicle is stationar y. #
Drive carefully and maintain a suitable
di st ance from theve hicle in front. #
Avoid frequent, sudden acceleration
and braking. #
Change gear in good time and use each
ge ar on lyup toÔ of its maximum
engine speed. #
Switch off the engine in stationary traf‐
fi c, e.g. byusing the ECO start/ stop
function. #
Drive fuel-ef ficiently. Obser vethe ECO
display for a fuel-ef ficient driving style. Ta
ke -back of end-of-life vehicles
EU countries onl y:
Mercedes-Benz will take back your end-of-life
ve hicle for environment-friendly disposal in
accordance with the European Union(EU) End-
of-Life Vehicles Directive.
A network of vehicle take -ba ckpoints and dis‐
mantlers has been es tablished foryo uto return
yo ur vehicle. You can lea veit at any of these
points free of charge . This makes an impor tant
contribution toclosing there cycling circle and
conse rving resources.
Fo r fur ther information about there cycling and
disposal of end-of-li fevehicles, and theta ke-
back conditions, please visit the national
Mercedes-Benz website foryo ur count ry. Gene
ral no tes 21
Page 34 of 689
R
laws and saf etyst andards per taining to
mo torve hicles Information on
the REA CHregulation
EU and EFTA countries onl y:
The REA CHregulation (Regulation (EC) No.
19 07 /2006, Article 33) stipulates a duty tosup‐
ply information about subs tances of very high
concern (SVHCs).
Daimler AGacts tothe best of its know ledgeto
pr eve ntthese SVHCs from being used and to
enable cus tomers tosafely handle these sub‐
st ances. There are SVHCs known toDaimler AG,
according tosupplier information and internal
product information, found in individual co mpo‐
nents of this vehicle in quantities of over 0.1 per‐
cent byweight.
Fu rther information can be obtained at thefo l‐
lowing addresses:
R https://reach.daimler.com/de/home/
R https://reach.daimler.com/en/home/ Implied
warranty
* NO
TEDama getotheve hicle arising
from violation of these operating instruc‐
tions. Damage
totheve hicle can arise from viola‐
tion of these operating instructions.
This damage is not co vered either bythe
Mercedes-Benz implied warranty or bythe
New‑ or Used- Vehicle Warrant y. #
Follow the instructions in these operat‐
ing instructions on proper operation of
yo ur vehicle as well as on possible vehi‐
cle damage. QR code
forre scue card
The QR code is secured in the fuel filler flap and
on the opposite side on the B-pillar. In theeve nt
of an accident, rescue services can use the QR
code toquickly find the appropriate rescue card
fo ryo ur vehicle. The cur rent rescue card con‐
ta ins the most impor tant information about your ve
hicle in a compact form , e.g. thero uting of the
electric lines.
Fu rther information can be obtained at https://
www.mercedes-benz.de/qr-code. Data
storage Electronic control units
Elect
ronic control units are fitted in your vehicle.
Some of these are necessary forth e safe opera‐
tion of your vehicle, while some assist you when
driving (driver assis tance sy stems). In addition,
yo ur vehicle pr ovides com fort and enter tainment
functions, which are also made possible byelec‐
tronic control units.
Elect ronic control units contain da tamemories
which can temp orarily or permanently store
te ch nical information about theve hicle's operat‐
ing state, component loads, main tenance
re qu irements and tech nical events or faults. General no
tes31
Page 85 of 689
Key
Overview of
key functions &
WARNING Risk of accident and inju ry
due tochildren left unat tended in the
ve hicle
If ch ildren are left unat tended in theve hicle,
th ey could:
R Open doo rs,th ereby endangering other
persons or road users.
R Get out and be stru ck byoncoming traf‐
fi c.
R Ope rate ve hicle equipment and become
trapped, forex ample.
In addition, thech ildren could also set the
ve hicle in motion, forex ample by:
R Releasing the parking brake.
R Changing the transmission position.
R Starting theve hicle. #
Never lea vechildren unat tended in the
ve hicle. #
When leaving theve hicle, alw aysta ke
th eke y with you and lock theve hicle. #
Keep theve hicle key out of reach of
ch ildren. This also applies
tothe Digital Vehicle Key if the
"Digital Vehicle Key" function is activated via
Mercedes me connect.
* NO
TEDama getotheke y caused by
magnetic fields #
Keep theke yaw ay from strong mag‐
netic fields. %
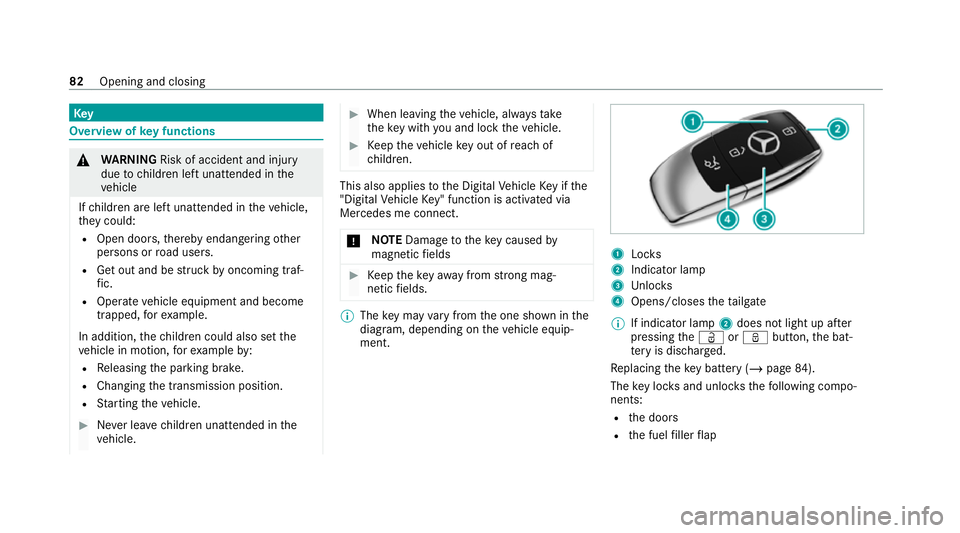
The key may vary from the one shown in the
diagram, depending on theve hicle equip‐
ment. 1
Locks
2 Indicator lamp
3 Unloc ks
4 Opens/closes theta ilgate
% If indicator lamp 2does not light up af ter
pressing theÜ orß button, the bat‐
te ry is dischar ged.
Re placing theke y bat tery ( / page 84).
The key loc ksand unlo cksth efo llowing compo‐
nents:
R the doors
R the fuel filler flap 82
Opening and closing
Page 86 of 689
R
theta ilgate
If th eve hicle is not opened within appr oximately
40 seconds af ter unlocking, it loc ksagain. Anti-
th eft pr otection is primed again.
Do not keep theke yto get her with electronic
devices or me tal objects. This can af fect the
ke y's functionalit y.
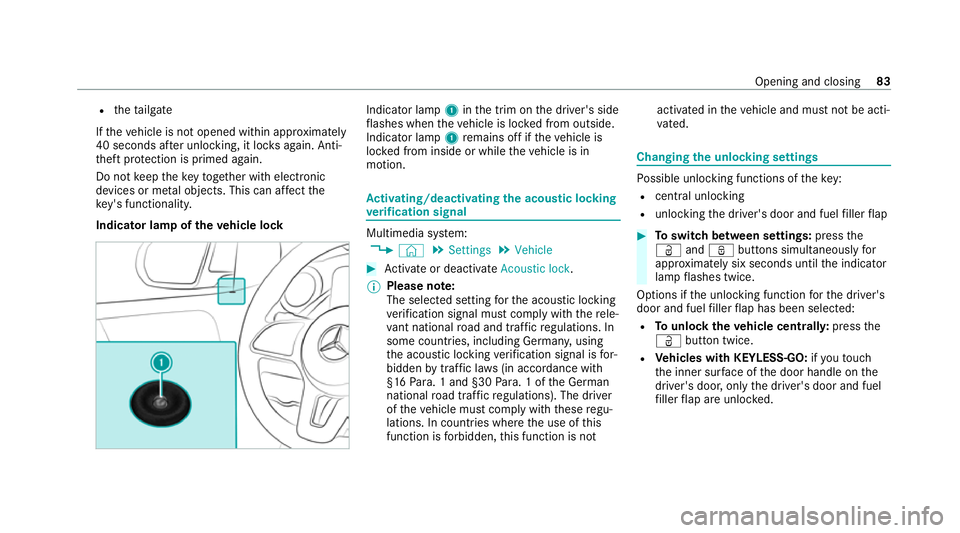
Indicator lamp of theve hicle lock Indica
tor lamp 1inthe trim on the driver's side
fl ashes when theve hicle is loc ked from outside.
Indicator lamp 1remains off if theve hicle is
loc ked from inside or while theve hicle is in
motion. Ac
tivating/deactivating the acoustic lo cking
ve rification signal Multimedia sy
stem:
4 © 5
Settings 5
Vehicle #
Activate or deacti vate Acoustic lock .
% Please no
te:
The selected setting forth e acoustic locking
ve rification signal must comply wi th there le‐
va nt national road and traf fic re gulations. In
some countri es, including German y,using
th e acoustic locking verification signal is for‐
bidden bytraf fic la ws(in accordance with
§16 Para. 1 and §30 Para. 1 of the German
national road traf fic re gulations). The driver
of theve hicle must comply with these regu‐
lations. In countri es wherethe use of this
function is forbidden, this function is not activated in
theve hicle and must not be acti‐
va ted. Changing
the unlocking settings Po
ssible unlocking functions of theke y:
R cent ral unlocking
R unlocking the driver's door and fuel filler flap #
Toswitch between settings: pressthe
Ü andß buttons simultaneously for
appr oximately six seconds until the indicator
lamp flashes twice.
Options if the unlocking function forth e driver's
door and fuel filler flap has been selec ted:
R Tounlo cktheve hicle centrall y:press the
Ü button twice.
R Vehicles with KEYLESS-GO: ifyo uto uch
th e inner sur face of the door handle on the
driver's door, only the driver's door and fuel
fi ller flap are unlo cked. Opening and closing
83
Page 90 of 689
#
Ifth ere are persons in theve hicle, do
not activate the additional door loc k.The additional door lock is automatically activa‐
te d in thefo llowing situations:
R The vehicle is loc ked using thekey.
R The vehicle is loc ked using KEYLESS-GO.
If th eve hicle has been loc ked via Mercedes me
connect, the additional door lock is not activa‐
te d.
If th e additional door lock is activated, the doors
cann otbe opened from the inside.
% After locking you can issue a signal with the
horn.
Yo u can pr eventthe additional door lock from
being activated bydeactivating interior pr otec‐
tion before locking theve hicle (/ page109). Un
locking/opening the doors from the inside #
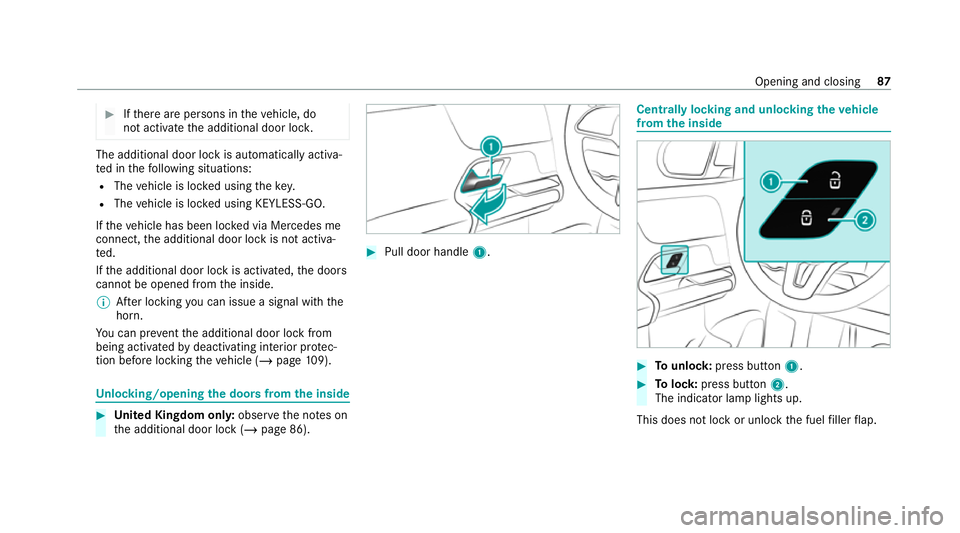
United Kingdom onl y:obser vethe no tes on
th e additional door lock (/ page 86). #
Pull door handle 1. Centrally locking and unlocking
theve hicle
from the inside #
Tounlo ck:press button 1. #
Tolock: press button 2.
The indicator lamp lights up.
This does not lock or unlock the fuel filler flap. Opening and closing
87
Page 182 of 689
R
The air inside theve hicle cannot be cooled
down totemp eratures below the outside
te mp erature.
R Ifth e outside temp erature changes, ventila‐
tion mode au tomatical lyswitches toheating
mode or heating mode automatically
switches toventilation mode.
The stationary heater and theex haust gas outlet
are situated in front of theright-hand front
wheel.
Switching thest ationary heater/stationary
ve ntilation on/off via the control panel &
DANG ER Risk of fata l injury due topoi‐
sonous exhaust gases
If th eta ilpipe is bloc ked or suf ficient ventila‐
tion is not possible, poisonous exhaust gases
such as carbon monoxide may enter theve hi‐
cle. This is the case in enclosed spaces or if
th eve hicle gets stuck in sn ow,fo rex ample. #
Alw ays switch thest ationary heater off
in enclosed spaces without an air
ex traction sy stems, e.g. in garage s. #
Keep theta ilpipe and the area around
th eve hicle free from snow when the
engine or thest ationary heater are run‐
ning. #
Open a window on the windward side of
th eve hicle toensure an adequate sup‐
ply of fresh air. &
WARNING Risk offire due tohot station‐
ary heater components
When thest ationary heater is swit ched on,
parts of theve hicle can become very hot,
e.g. thest ationary heater exhaust sy stem.
Flammable materials such as lea ves, grass or
twigs may ignite if they come into contact
wi th:
R hot parts of thest ationary heater exhaust
sy stem
R theex haust gas itself
There is a risk of fire. #
When thest ationary heater is swit ched
on, make sure that: R
hot vehicle parts do not come into
contact with flammable materials.
R theex haust gas can flow out of the
st ationary heater exhaust pipe
unhindered.
R theex haust gas does not come into
contact with flammable materials. *
NO
TEBattery discharge caused bysta‐
tionary heater or stationary ventilation
operation Ope
rating thest ationary heater or stationary
ve ntilation drains the batter y. #
After heating or ventilating theve hicle
twice, drive for a longer period of time. Re
quirements:
R The fuel tank has been filled toat least Õ. Climate control
17 9