buttons MERCEDES-BENZ METRIS 2020 MY20 Operator’s Manual
[x] Cancel search | Manufacturer: MERCEDES-BENZ, Model Year: 2020, Model line: METRIS, Model: MERCEDES-BENZ METRIS 2020Pages: 320, PDF Size: 26.38 MB
Page 187 of 320
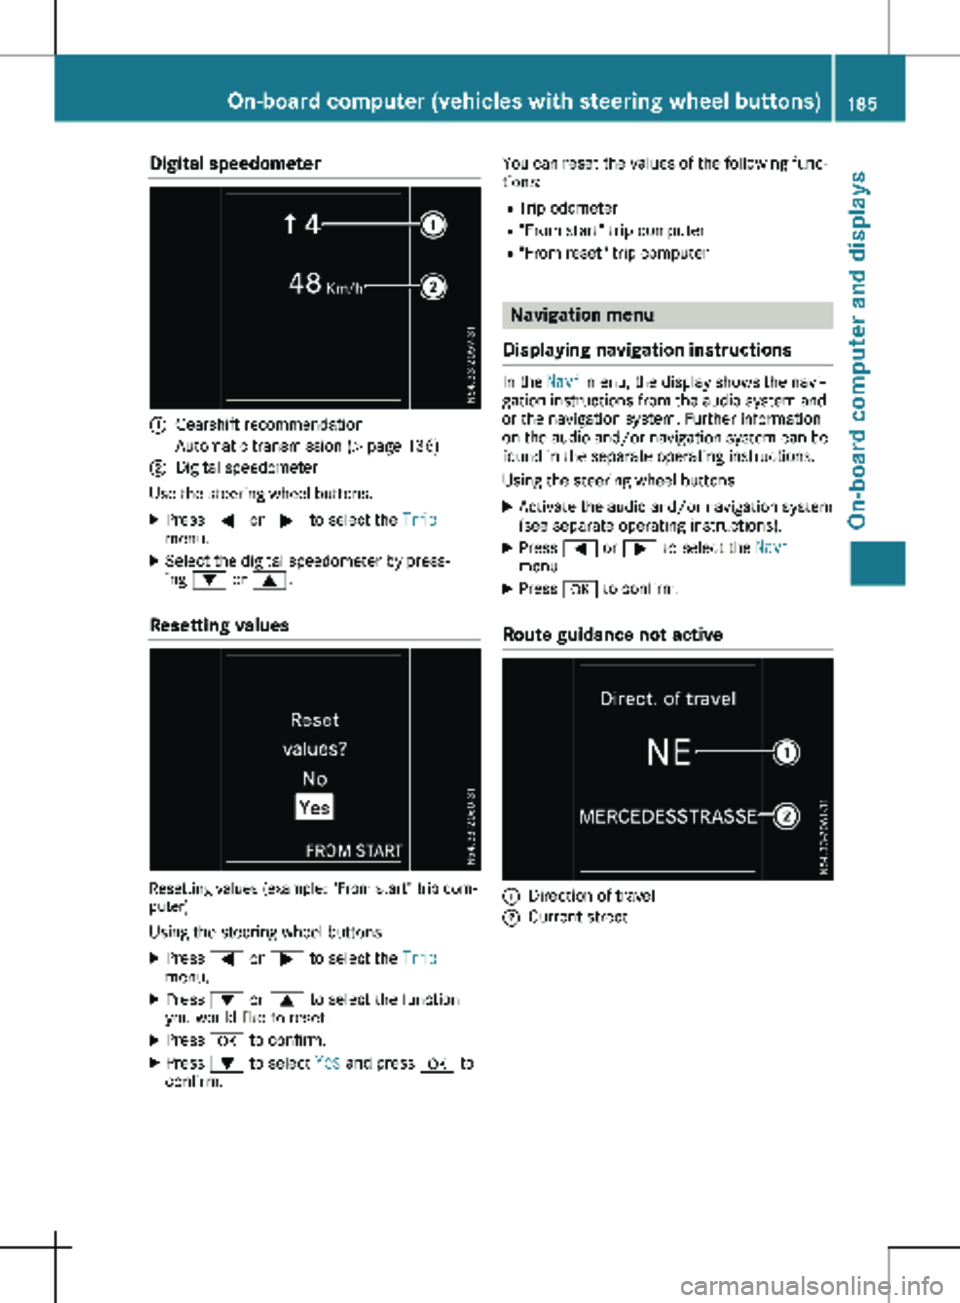
Digital speedometer
:
Gearshift recommendation
Automatic transmission (Y page 136)
; Digital speedometer
Use the steering wheel buttons.
X Press = or ; to select the Trip
menu.
X Select the digital speedometer by press-
ing : or 9.
Resetting values Resetting values (example: "From start" trip com-
puter)
Using the steering wheel buttons
X Press = or ; to select the Trip
menu.
X Press : or 9 to select the function
you would like to reset.
X Press a to confirm.
X Press : to select Yes and press a to
confirm. You can reset the values of the following func-
tions:
R Trip odometer
R "From start" trip computer
R "From reset" trip computer Navigation menu
Displaying navigation instructions In the
Navi menu, the display shows the navi-
gation instructions from the audio system and
or the navigation system. Further information
on the audio and/or navigation system can be
found in the separate operating instructions.
Using the steering wheel buttons
X Activate the audio and/or navigation system
(see separate operating instructions).
X Press = or ; to select the Navi
menu.
X Press a to confirm.
Route guidance not active :
Direction of travel
; Current street On-board computer (vehicles with steering wheel buttons)
185
On-board computer and displays Z
Page 188 of 320
Route guidance active
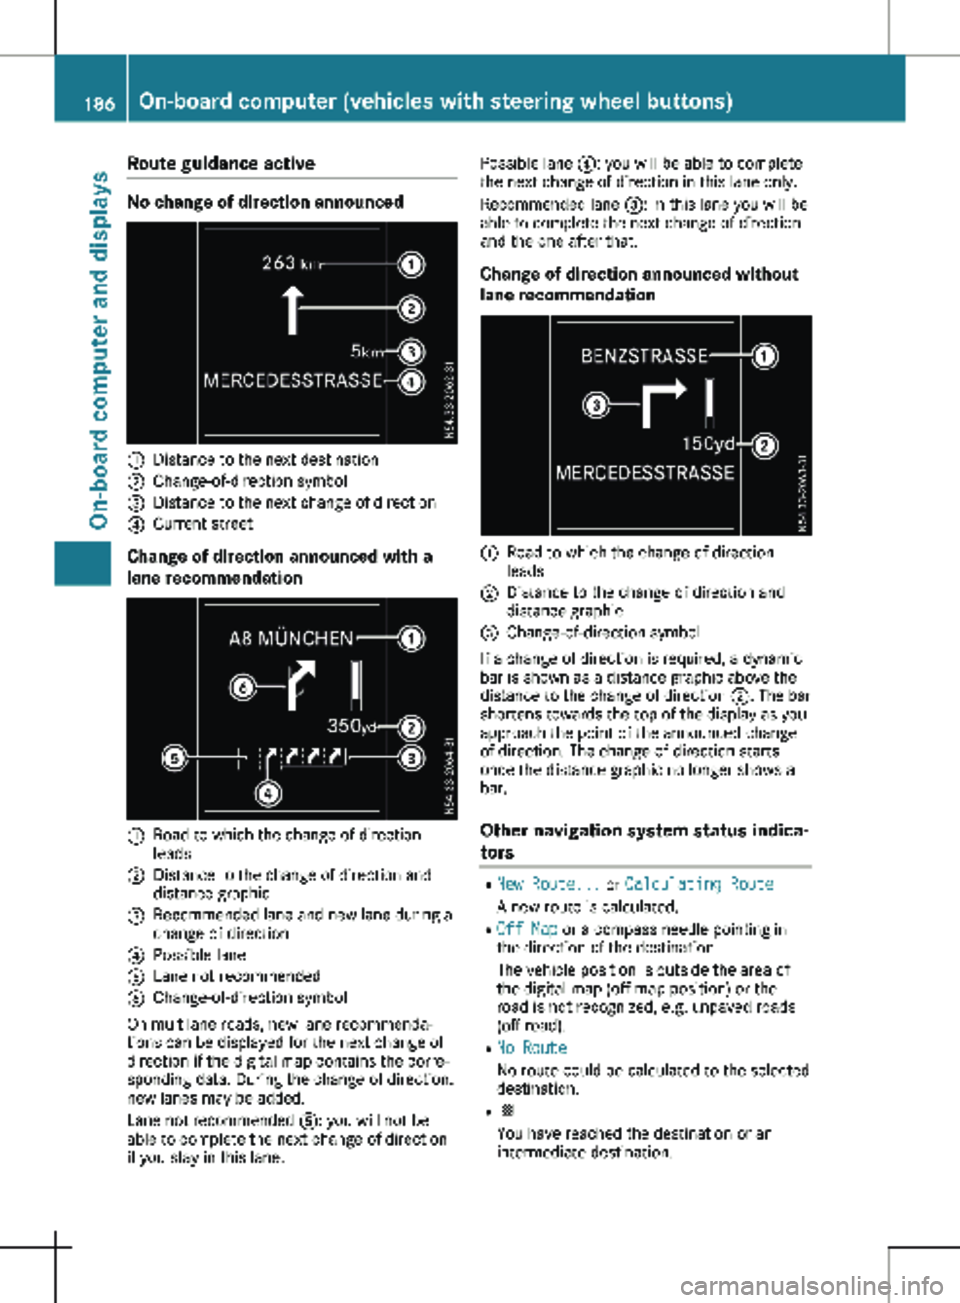
No change of direction announced
:
Distance to the next destination
; Change-of-direction symbol
= Distance to the next change of direction
? Current street
Change of direction announced with a
lane recommendation :
Road to which the change of direction
leads
; Distance to the change of direction and
distance graphic
= Recommended lane and new lane during a
change of direction
? Possible lane
A Lane not recommended
B Change-of-direction symbol
On multilane roads, new lane recommenda-
tions can be displayed for the next change of
direction if the digital map contains the corre-
sponding data. During the change of direction,
new lanes may be added.
Lane not recommended A: you will not be
able to complete the next change of direction
if you stay in this lane. Possible lane
?: you will be able to complete
the next change of direction in this lane only.
Recommended lane =: in this lane you will be
able to complete the next change of direction
and the one after that.
Change of direction announced without
lane recommendation :
Road to which the change of direction
leads
; Distance to the change of direction and
distance graphic
= Change-of-direction symbol
If a change of direction is required, a dynamic
bar is shown as a distance graphic above the
distance to the change of direction ;. The bar
shortens towards the top of the display as you
approach the point of the announced change
of direction. The change of direction starts
once the distance graphic no longer shows a
bar.
Other navigation system status indica-
tors R
New Route... or Calculating Route
A new route is calculated.
R Off Map or a compass needle pointing in
the direction of the destination
The vehicle position is outside the area of
the digital map (off-map position) or the
road is not recognized, e.g. unpaved roads
(off-road).
R No Route
No route could be calculated to the selected
destination.
R O
You have reached the destination or an
intermediate destination.186
On-board computer (vehicles with steering wheel buttons)On-board computer and displays
Page 189 of 320
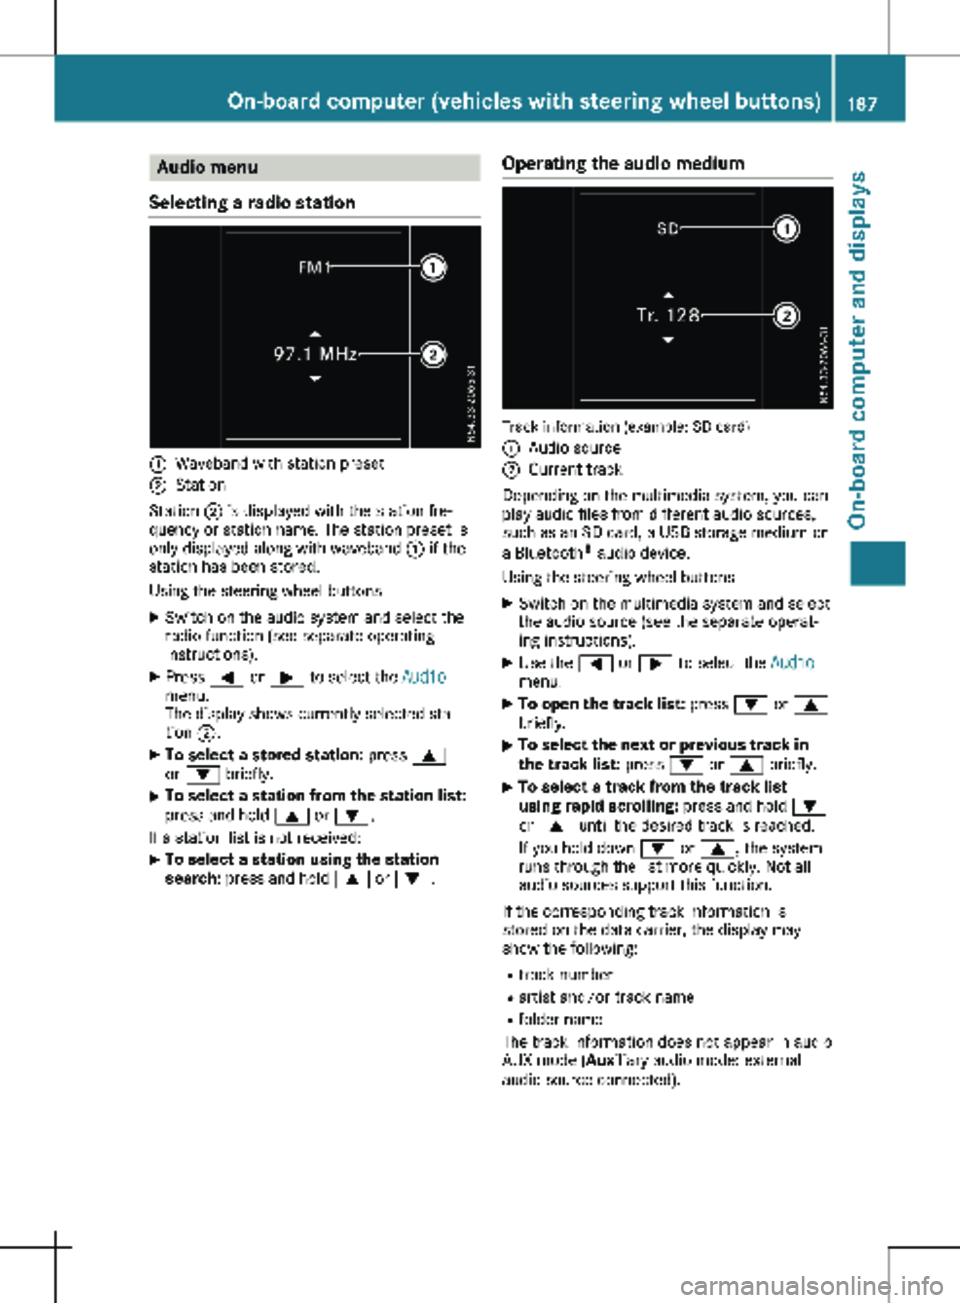
Audio menu
Selecting a radio station :
Waveband with station preset
; Station
Station ; is displayed with the station fre-
quency or station name. The station preset is
only displayed along with waveband : if the
station has been stored.
Using the steering wheel buttons
X Switch on the audio system and select the
radio function (see separate operating
instructions).
X Press = or ; to select the Audio
menu.
The display shows currently selected sta-
tion ;.
X To select a stored station: press 9
or : briefly.
X To select a station from the station list:
press and hold
9 or :.
If a station list is not received: X To select a station using the station
search: press and hold 9 or :. Operating the audio medium Track information (example: SD card)
:
Audio source
; Current track
Depending on the multimedia system, you can
play audio files from different audio sources,
such as an SD card, a USB storage medium or
a Bluetooth ®
audio device.
Using the steering wheel buttons
X Switch on the multimedia system and select
the audio source (see the separate operat-
ing instructions).
X Use the = or ; to select the Audio
menu.
X To open the track list: press : or 9
briefly.
X To select the next or previous track in
the track list:
press : or 9 briefly.
X To select a track from the track list
using rapid scrolling: press and hold
:
or 9 until the desired track is reached.
If you hold down : or 9, the system
runs through the list more quickly. Not all
audio sources support this function.
If the corresponding track information is
stored on the data carrier, the display may
show the following:
R track number
R artist and/or track name
R folder name
The track information does not appear in audio
AUX mode (Aux iliary audio mode: external
audio source connected). On-board computer (vehicles with steering wheel buttons)
187On-board computer and displays Z
Page 190 of 320

Telephone menu
Introduction G
WARNING
If you operate information systems and com-
munication equipment integrated in the
vehicle when driving, you may be distracted
from the traffic situation. You could also
lose control of the vehicle. There is a risk of
an accident.
Only operate this equipment when the traffic
situation permits. If you are not sure that
this is possible, park the vehicle paying
attention to traffic conditions and operate
the equipment when the vehicle is station-
ary.
When using the phone, you must observe the
legal requirements for the country in which
you are currently driving.
X Switch on the audio system (see the sepa-
rate operating instructions).
X Switch on the mobile phone (see the manu-
facturer's separate operating instructions).
X Establish a Bluetooth ®
connection between
the mobile phone and the audio system (see
the separate operating instructions).
Using the steering wheel buttons
X Press = or ; to select the Tel menu.
The display shows one of the following mes-
sages:
R The name of the network provider or Phone
READY: the mobile phone has found a net-
work and is ready to receive.
R No Service: there is no network available
or the mobile phone is searching for a net-
work.
R Bluetooth Ready: you have not yet estab-
lished a Bluetooth ®
connection between the
mobile phone and the audio system.
You can obtain further information about suita-
ble mobile phones and connecting mobile
phones via Bluetooth ®
:
R at a Mercedes-Benz Commercial Van Center
R on the Internet at
http://www.mercedes-
benz.com/connect Accepting a call
X
Press the 6 button to answer a call.
If someone calls you when you are in the Tel
menu, a corresponding display message
appears in the multifunction display.
Rejecting or ending a call X
Press the ~ steering wheel button.
Dialing a number from the phone book Using the steering wheel buttons
X Press = or ; to select the Tel menu.
X Press :, 9 or a to switch to the
phone book.
X Press : or 9 to select names succes-
sively.
If you press and hold the button for longer
than one second, the names in the phone
book are shown rapidly one after another.
or
X Press and hold : or 9 for longer than
five seconds.
Rapid scrolling — the name that starts with
the next letter or the previous letter in the
alphabet is displayed. Rapid scrolling stops
when you release the button or reach the
end of the list.
X If only one telephone number is stored
for a name:
press 6 or a to start
dialing.
or X If there is more than one number for a
particular name:
press the 6 or a
button to display the numbers.
X Press : or 9 to select a telephone
number. 188
On-board computer (vehicles with steering wheel buttons)
On-board computer and displays
Page 191 of 320
X
Press 6 or a to start dialing.
or X To exit the phone book: press ~ or
%.
Redialing The on-board computer saves the last names
or numbers dialed in the redial memory. Using
the steering wheel buttons
X Press = or ; to select the Tel menu.
X Press the 6 button to switch to the
redial memory.
X Press : or 9 to select names or tele-
phone numbers.
X Press the 6 or a button to start dial-
ing.
or X To exit the redial memory: press the ~
or % button. Assistance menu
Introduction Depending on the vehicle’s equipment, you
have the following options in the Assist.
menu:
R Displaying the status overview
(Y page
189)
R Deactivating or activating ESP ®
(Y page 190)
R Activating or deactivating the COLLISION
PREVENTION ASSIST distance warning func-
tion (Y page 190)
R Setting the ATTENTION ASSIST sensitivity
(Y page 190) R
Activating or deactivating Blind Spot Assist
(Y page
191)
R Setting the sensitivity of Lane Keeping
Assist (Y page 191)
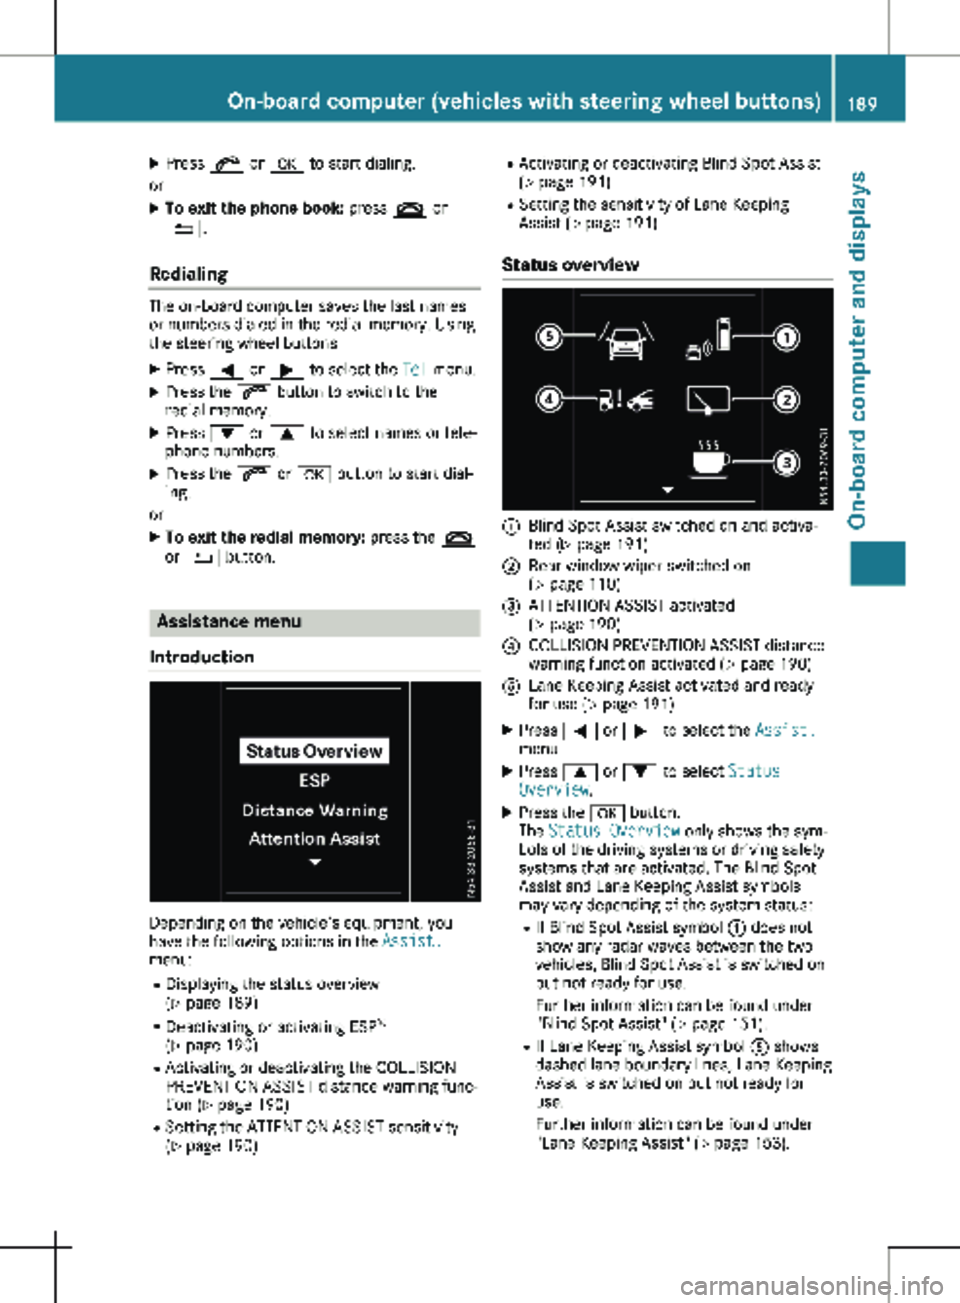
Status overview :
Blind Spot Assist switched on and activa-
ted
(Y page 191)
; Rear window wiper switched on
(Y page
110)
= ATTENTION ASSIST activated
(Y page
190)
? COLLISION PREVENTION ASSIST distance
warning function activated
(Y page 190)
A Lane Keeping Assist activated and ready
for use (Y page
191)
X Press = or ; to select the Assist.
menu.
X Press 9 or : to select Status
Overview.
X Press the a button.
The Status Overview only shows the sym-
bols of the driving systems or driving safety
systems that are activated. The Blind Spot
Assist and Lane Keeping Assist symbols
may vary depending of the system status:
R If Blind Spot Assist symbol : does not
show any radar waves between the two
vehicles, Blind Spot Assist is switched on
but not ready for use.
Further information can be found under
"Blind Spot Assist" (Y page
151).
R If Lane Keeping Assist symbol A shows
dashed lane boundary lines, Lane Keeping
Assist is switched on but not ready for
use.
Further information can be found under
"Lane Keeping Assist" (Y page 153). On-board computer (vehicles with steering wheel buttons)
189
On-board computer and displays Z
Page 192 of 320
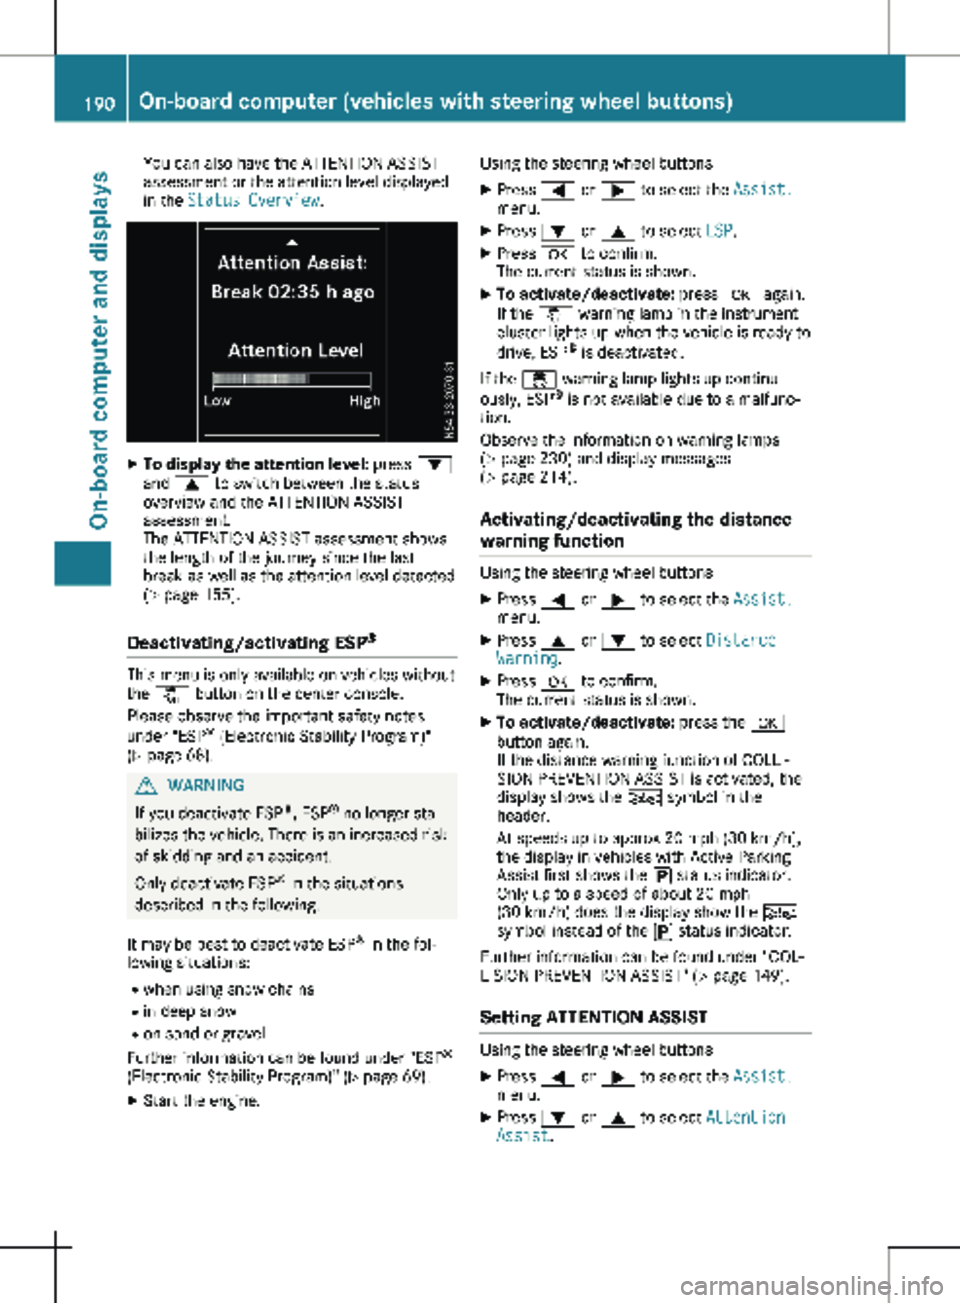
You can also have the ATTENTION ASSIST
assessment or the attention level displayed
in the Status Overview.
X
To display the attention level: press :
and 9 to switch between the status
overview and the ATTENTION ASSIST
assessment.
The ATTENTION ASSIST assessment shows
the length of the journey since the last
break as well as the attention level detected
(Y page
155).
Deactivating/activating ESP ®This menu is only available on vehicles without
the å button on the center console.
Please observe the important safety notes
under "ESP ®
(Electronic Stability Program)"
(Y page
68). G
WARNING
If you deactivate ESP ®
, ESP ®
no longer sta-
bilizes the vehicle. There is an increased risk
of skidding and an accident.
Only deactivate ESP ®
in the situations
described in the following.
It may be best to deactivate ESP ®
in the fol-
lowing situations:
R when using snow chains
R in deep snow
R on sand or gravel
Further information can be found under "ESP ®
(Electronic Stability Program)"
(Y page 69).
X Start the engine. Using the steering wheel buttons
X Press = or ; to select the Assist.
menu.
X Press : or 9 to select ESP.
X Press a to confirm.
The current status is shown.
X To activate/deactivate: press a again.
If the å warning lamp in the instrument
cluster lights up when the vehicle is ready to
drive, ESP ®
is deactivated.
If the ÷ warning lamp lights up continu-
ously, ESP ®
is not available due to a malfunc-
tion.
Observe the information on warning lamps
(Y page
230) and display messages
(Y page 214).
Activating/deactivating the distance
warning function Using the steering wheel buttons
X Press = or ; to select the Assist.
menu.
X Press 9 or : to select Distance
Warning.
X Press a to confirm.
The current status is shown.
X To activate/deactivate: press the a
button again.
If the distance warning function of COLLI-
SION PREVENTION ASSIST is activated, the
display shows the Ä symbol in the
header.
At speeds up to approx 20 mph (30 km/h
),
the display in vehicles with Active Parking
Assist first shows the í status indicator.
Only up to a speed of about 20 mph
(30 km/h) does the display show the Ä
symbol instead of the í status indicator.
Further information can be found under "COL-
LISION PREVENTION ASSIST"
(Y page 149).
Setting ATTENTION ASSIST Using the steering wheel buttons
X Press = or ; to select the Assist.
menu.
X Press : or 9 to select Attention
Assist. 190
On-board computer (vehicles with steering wheel buttons)
On-board computer and displays
Page 193 of 320
X
Press a to confirm.
The current setting is displayed.
X To change the setting: press a again.
X Press : or 9 to set Deactivated,
Standard or Sensitive.
X Press a to confirm the choice.
If ATTENTION ASSIST is activated, the À
symbol is shown in the status area of the
display. The selection Standard
or Sensi‐
tive sets the sensitivity with which the sys-
tem determines the attention level.
Further information can be found under
"ATTENTION ASSIST"
(Y page 155).
Activating/deactivating Blind Spot
Assist Using the steering wheel buttons
X Press = or ; to select the Assist.
menu.
X Press : or 9 to select Blind Spot
Assist.
X Press a to confirm.
The current status is shown.
X To activate/deactivate: press the a
button again.
Further information can be found under "Blind
Spot Assist"
(Y page 151).
Setting Lane Keeping Assist Using the steering wheel buttons
X Press = or ; to select the Assist.
menu.
X Press : or 9 to select Lane Keep‐
ing Assist.
X Press a to confirm.
The current selection Standard or Adap‐
tive is displayed.
X To change the setting: press a again.
Further information can be found under "Lane
Keeping Assist" (Y page
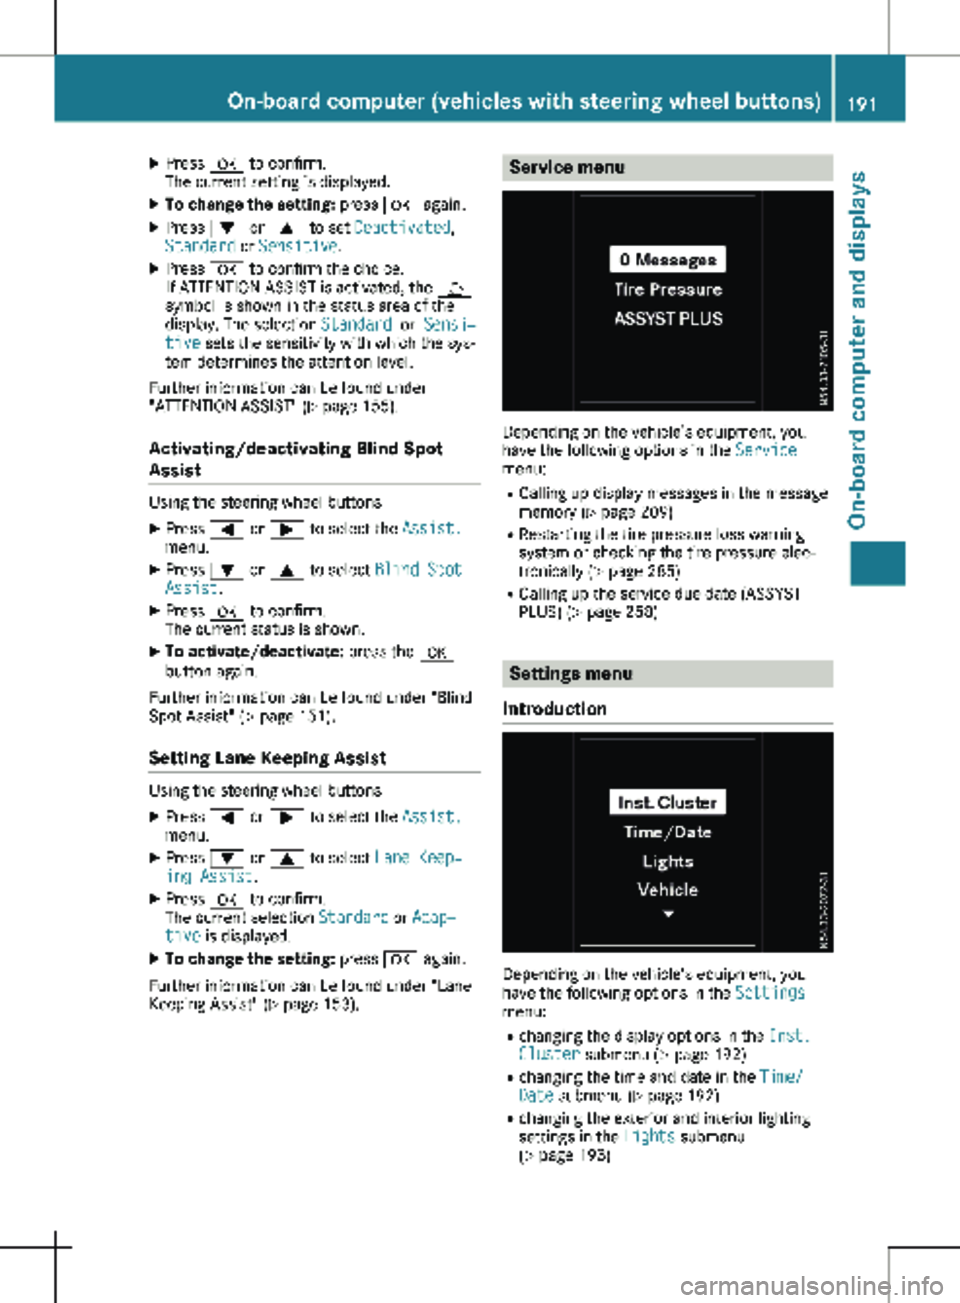
153). Service menu
Depending on the vehicle’s equipment, you
have the following options in the
Service
menu:
R Calling up display messages in the message
memory ( Y page
209)
R Restarting the tire pressure loss warning
system or checking the tire pressure elec-
tronically ( Y page 285)
R Calling up the service due date (ASSYST
PLUS) (Y page 258) Settings menu
Introduction Depending on the vehicle’s equipment, you
have the following options in the
Settings
menu:
R changing the display options in the Inst.
Cluster submenu
(Y page 192)
R changing the time and date in the Time/
Date submenu (Y page 192)
R changing the exterior and interior lighting
settings in the Lights submenu
(Y page 193) On-board computer (vehicles with steering wheel buttons)
191
On-board computer and displays Z
Page 194 of 320
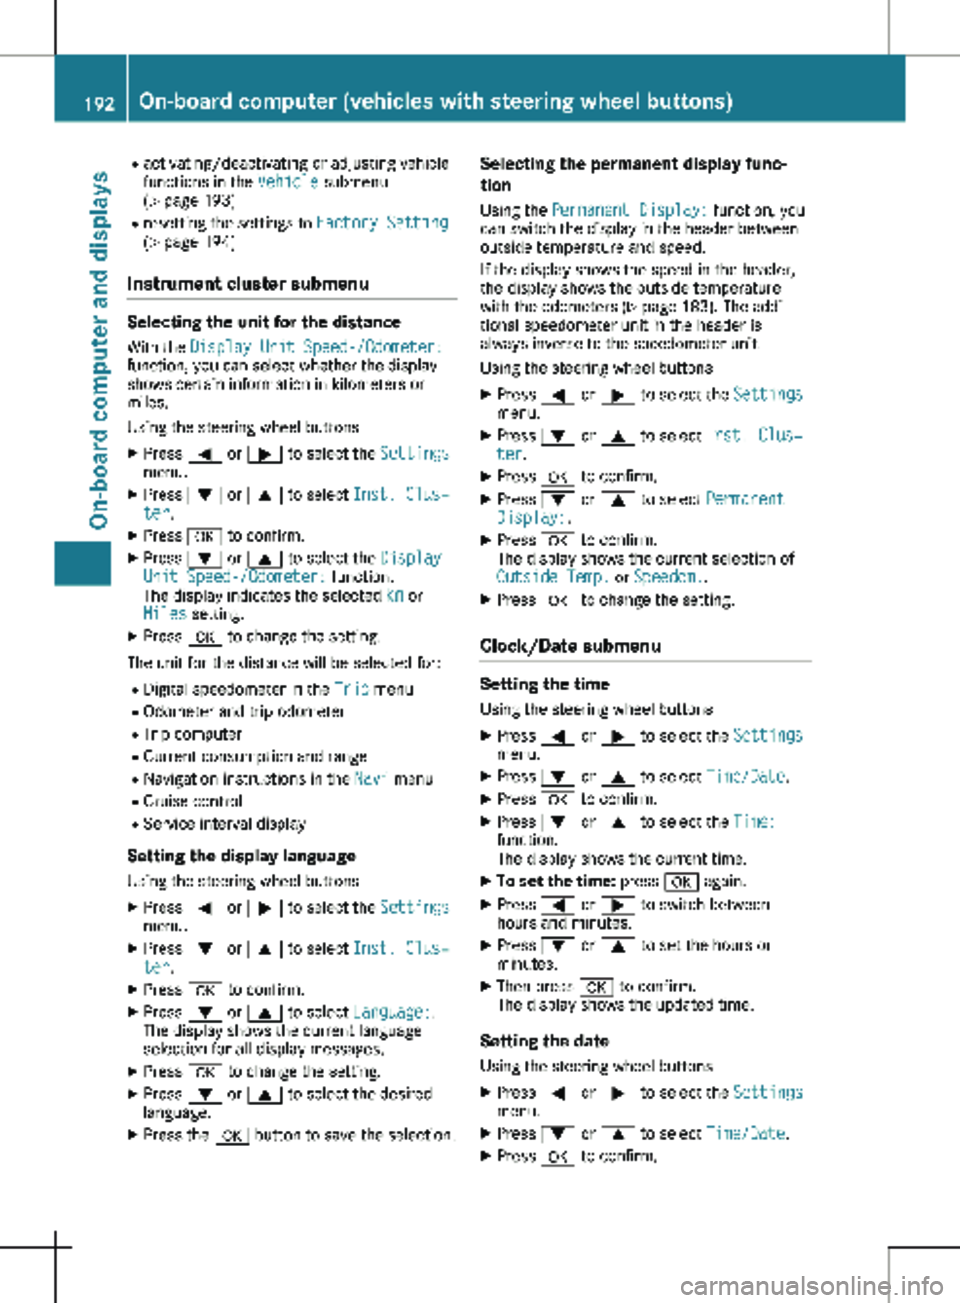
R
activating/deactivating or adjusting vehicle
functions in the Vehicle submenu
(Y page
193)
R resetting the settings to Factory Setting
( Y page 194)
Instrument cluster submenu Selecting the unit for the distance
With the Display Unit Speed-/Odometer:
function, you can select whether the display
shows certain information in kilometers or
miles.
Using the steering wheel buttons
X Press = or ; to select the Settings
menu.
X Press : or 9 to select Inst. Clus‐
ter.
X Press a to confirm.
X Press : or 9 to select the Display
Unit Speed-/Odometer: function.
The display indicates the selected km or
Miles setting.
X Press a to change the setting.
The unit for the distance will be selected for:
R Digital speedometer in the Trip menu
R Odometer and trip odometer
R Trip computer
R Current consumption and range
R Navigation instructions in the Navi menu
R Cruise control
R Service interval display
Setting the display language Using the steering wheel buttons
X Press = or ; to select the Settings
menu.
X Press : or 9 to select Inst. Clus‐
ter.
X Press a to confirm.
X Press : or 9 to select Language:.
The display shows the current language
selection for all display messages.
X Press a to change the setting.
X Press : or 9 to select the desired
language.
X Press the a button to save the selection. Selecting the permanent display func-
tion
Using the Permanent Display: function, you
can switch the display in the header between
outside temperature and speed.
If the display shows the speed in the header,
the display shows the outside temperature
with the odometers (Y page
183). The addi-
tional speedometer unit in the header is
always inverse to the speedometer unit.
Using the steering wheel buttons
X Press = or ; to select the Settings
menu.
X Press : or 9 to select Inst. Clus‐
ter.
X Press a to confirm.
X Press : or 9 to select Permanent
Display:.
X Press a to confirm.
The display shows the current selection of
Outside Temp. or Speedom..
X Press a to change the setting.
Clock/Date submenu Setting the time
Using the steering wheel buttons
X Press = or ; to select the Settings
menu.
X Press : or 9 to select Time/Date.
X Press a to confirm.
X Press : or 9 to select the Time:
function.
The display shows the current time.
X To set the time: press a again.
X Press = or ; to switch between
hours and minutes.
X Press : or 9 to set the hours or
minutes.
X Then press a to confirm.
The display shows the updated time.
Setting the date Using the steering wheel buttons
X Press = or ; to select the Settings
menu.
X Press : or 9 to select Time/Date.
X Press a to confirm.192
On-board computer (vehicles with steering wheel buttons)
On-board computer and displays
Page 195 of 320

X
Press : or 9 to select the Date:
function.
The display shows the current date.
X To set the date: press a again.
X Press = or ; to switch between day,
month and year.
X Press : or 9 to set the day, month or
year.
X Then press a to confirm.
The display shows the updated date.
Lights submenu Activating/deactivating the surround
lighting and exterior lighting delayed
switch-off
If you activate the Locator Lighting func-
tion and the light switch is turned to the Ã
position, the following functions are activated
when it is dark:
R surround lighting: the exterior lighting
remains on for
40 seconds after the doors
are unlocked. When you start the engine,
the surround lighting is deactivated and the
automatic headlamp feature is activated
(Y page 100).
R exterior lighting delayed switch-off: the
exterior lighting remains lit for 60 seconds
after the engine is switched off. When you
close all the doors and the tailgate/rear
doors, the exterior lighting switches off after
15 seconds.
Using the steering wheel buttons
X Use the = or ; button to select the
Settings. menu.
X Use : or 9 to select Lights.
X Press a to confirm.
X Use : or 9 to select the Locator
Lighting function.
The current status appears.
X To switch on/off: press a again.
If you change the setting, conversion does
not take place until the next time the vehicle
is stationary. Deactivating exterior lighting delayed switch-
off temporarily:
X Before leaving the vehicle, turn the key to
position g in the ignition lock.
X Turn the key to position 2 in the ignition
lock.
The exterior lighting delayed switch-off is
deactivated until the next time the engine is
started.
With surround lighting and exterior lighting
delayed switch-off, the following light up
depending on the vehicle's equipment:
R Parking lamps
R Fog lamps
R Low-beam headlamps
R Daytime running lamps
Activating/deactivating interior lighting
delayed switch-off If you activate the Interior Lighting
Delay: function, the interior lighting remains
lit for a further 20 seconds.
Using the steering wheel buttons
X Use the = or ; button to select the
Settings. menu.
X Use : or 9 to select Lights.
X Press a to confirm.
X Use : or 9 to select the Interior
Lighting Delay function.
The current status appears.
X To switch on/off: press a again.
Vehicle submenu Setting the sensitivity of the rain sensor
Using the steering wheel buttons
X Press = or ; to select the Settings
menu.
X Press : or 9 to select Vehicle.
X Press a to confirm.
X Press : or 9 to select the Rain
Sensor Sensitivity function.
The display shows the current setting.
X Press a to change the setting.
X Press : or 9 to select the High,
Standard or Low setting. This setting con-
trols the rain sensor's sensitivity to precipi-
tation. The windshield wiper then wipes On-board computer (vehicles with steering wheel buttons)
193
On-board computer and displays Z
Page 196 of 320
more or less frequently at the same precipi-
tation intensity.
X Press the a button to store the entry.
You can find further information under "Wind-
shield wiper" (Y page 109).
Switching the automatic locking feature
on/off
Using the steering wheel buttons
X Press = or ; to select the Settings
menu.
X Press : or 9 to select Vehicle.
X Press a to confirm.
X Press : or 9 to select the Auto‐
matic Door Lock function.
The current status is shown.
X To activate/deactivate: press a again.
If you activate the Automatic Door Lock
function, your vehicle will lock automatically
from a speed of approximately
15 km/h.
You can find further information under "Auto-
matic door lock" (Y page 76).
Activating/deactivating the acoustic
locking confirmation i The selected setting of the acoustic lock-
ing verification signal must comply with the
relevant national road traffic rules. In some
countries, including Germany, the use of the
acoustic locking verification signal is not
permitted under national road traffic regula-
tions (in Germany according to § 16 para. 1
and § 30 para. 1 StVO). Compliance must be ensured by the driver of the vehicle. In
countries where the use of this function is
not permitted, this function is not and must
not be activated in your vehicle.
Using the steering wheel buttons
X Press = or ; to select the Settings
menu.
X Press : or 9 to select Vehicle.
X Press a to confirm.
X Press : or 9 to select Acoustic
lock feedback.
The current status is shown.
X To activate/deactivate: press a again.
If you activate the Acoustic lock feedback function, an acoustic tone sounds when the
vehicle is locked.
Restoring the factory settings Using the steering wheel buttons
X Press = or ; to select the Settings
menu.
X Press : or 9 to select Factory
Setting.
X Press a to confirm.
The Reset All Settings? function is dis-
played.
X Press : or 9 to select No or Yes.
X Press a to confirm the choice.
If you select Yes, the display shows a confir-
mation message. Display messages (vehicles without steering wheel buttons)
Introduction
Important safety notes G
WARNING
If the instrument cluster has failed or malfunctioned, you may not recognize function restric-
tions in systems relevant to safety. The operating safety of your vehicle may be impaired.
There is a risk of an accident.
Drive on carefully. Have the vehicle checked at a qualified specialist workshop immediately.
The on-board computer only shows messages or warnings from certain systems in the instru-
ment cluster display. You should therefore make sure your vehicle is operating safely at all
times. If the operating safety of your vehicle is impaired, stop the vehicle as soon as possible,
paying attention to road and traffic conditions. Then consult a qualified specialist workshop. 194
Display messages (vehicles without steering wheel buttons)On-board computer and displays