brake fluid MERCEDES-BENZ METRIS 2020 MY20 Operator’s Manual
[x] Cancel search | Manufacturer: MERCEDES-BENZ, Model Year: 2020, Model line: METRIS, Model: MERCEDES-BENZ METRIS 2020Pages: 320, PDF Size: 26.38 MB
Page 8 of 320
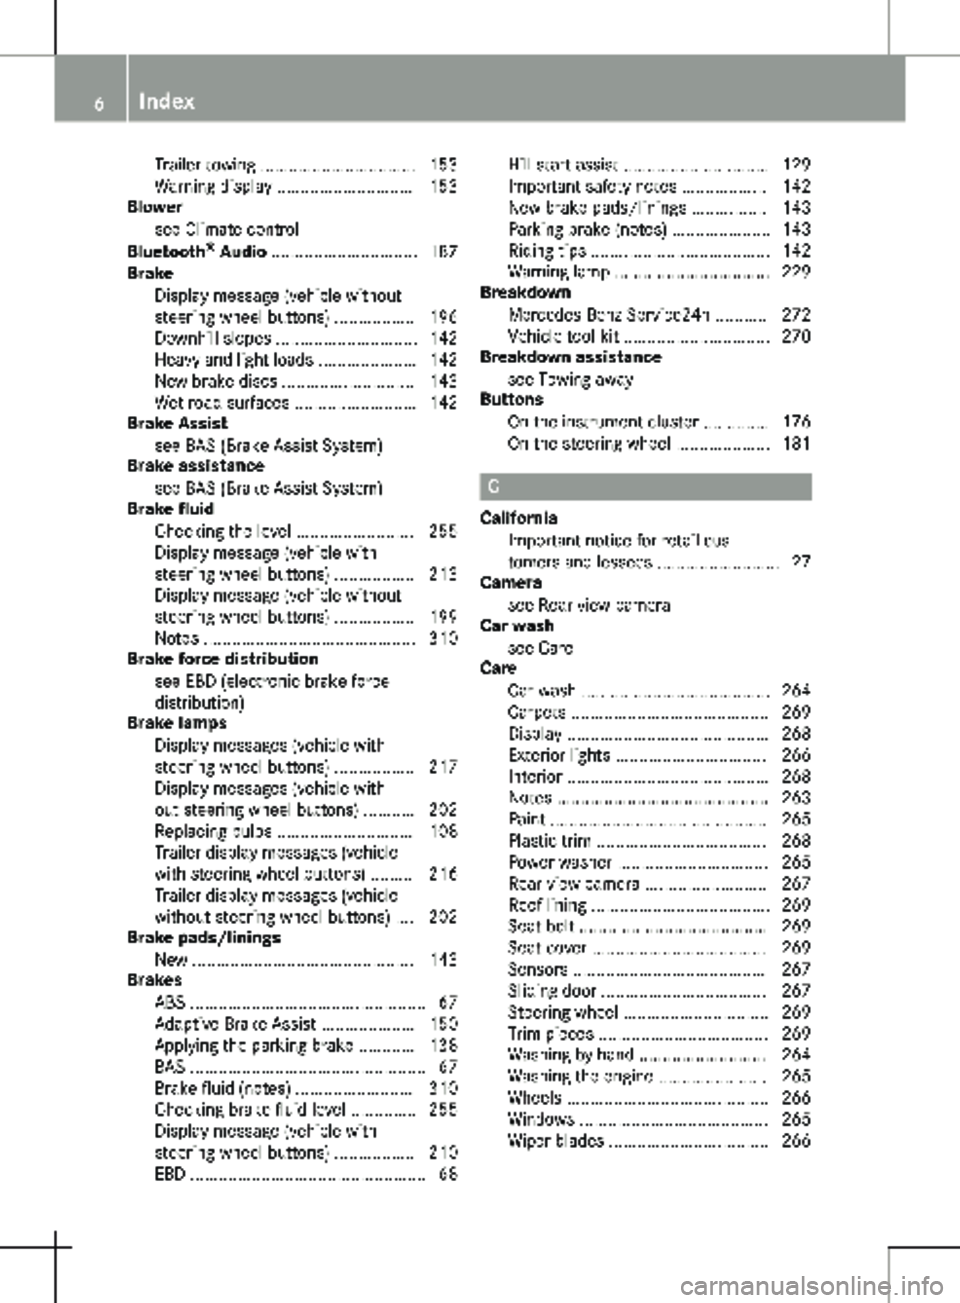
Trailer towing ................................. 153
Warning display
............................. 153
Blower
see Climate control
Bluetooth ®
Audio ............................... 187
Brake
Display message (vehicle without
steering wheel buttons) ................. 196
Downhill slopes .............................. 142
Heavy and light loads ..................... 142
New brake discs ............................ 143
Wet road surfaces .......................... 142
Brake Assist
see BAS (Brake Assist System)
Brake assistance
see BAS (Brake Assist System)
Brake fluid
Checking the level ......................... 255
Display message (vehicle with
steering wheel buttons) ................. 213
Display message (vehicle without
steering wheel buttons) ................. 199
Notes ............................................. 310
Brake force distribution
see EBD (electronic brake force
distribution)
Brake lamps
Display messages (vehicle with
steering wheel buttons) ................. 217
Display messages (vehicle with-
out steering wheel buttons) ........... 202
Replacing bulbs ............................. 108
Trailer display messages (vehicle
with steering wheel buttons) ......... 216
Trailer display messages (vehicle
without steering wheel buttons) .... 202
Brake pads/linings
New ............................................... 143
Brakes
ABS .................................................. 67
Adaptive Brake Assist .................... 150
Applying the parking brake ............ 138
BAS .................................................. 67
Brake fluid (notes) ......................... 310
Checking brake fluid level .............. 255
Display message (vehicle with
steering wheel buttons) ................. 210
EBD .................................................. 68 Hill start assist ............................... 129
Important safety notes
.................. 142
New brake pads/linings ................ 143
Parking brake (notes) ..................... 143
Riding tips ...................................... 142
Warning lamp ................................. 229
Breakdown
Mercedes-Benz Service24h ........... 272
Vehicle tool kit ............................... 270
Breakdown assistance
see Towing away
Buttons
On the instrument cluster .............. 176
On the steering wheel .................... 181 C
California Important notice for retail cus-
tomers and lessees ..........................
27
Camera
see Rear view camera
Car wash
see Care
Care
Car wash ........................................ 264
Carpets .......................................... 269
Display ........................................... 268
Exterior lights ................................ 266
Interior ........................................... 268
Notes ............................................. 263
Paint .............................................. 265
Plastic trim .................................... 268
Power washer ................................ 265
Rear view camera .......................... 267
Roof lining ...................................... 269
Seat belt ........................................ 269
Seat cover ..................................... 269
Sensors ......................................... 267
Sliding door ................................... 267
Steering wheel ............................... 269
Trim pieces .................................... 269
Washing by hand ........................... 264
Washing the engine ....................... 265
Wheels ........................................... 266
Windows ........................................ 265
Wiper blades .................................. 266 6
Index
Page 21 of 320
Fuel gauge (vehicle without
steering wheel buttons) .................
176
Refueling procedure (fuel) ............. 137
see Fuel
Remote control
see Key
Replacing bulbs
Important safety notes .................. 105
Replacing bulbs
see Replacing bulbs
Reporting safety defects .................... 32
Rescue card ......................................... 35
Reserve (fuel tank) see Fuel
Reserve fuel
Display messages (vehicle with
steering wheel buttons) ................. 221
Display messages (vehicle with-
out steering wheel buttons) ........... 206
Warning lamp ................................. 233
Residual heat (climate control) ........ 123
Restraint system
Display message (vehicle with
steering wheel buttons) ................. 215
Display message (vehicle without
steering wheel buttons) ................. 201
Important safety notes .................... 46
Introduction ..................................... 46
PASSENGER AIR BAG OFF indica-
tor lamp ........................................... 47
Warning lamp ................................. 232
Warning lamp (function) ................... 46
Reverse warning feature .................. 129
Reversing feature
Electric sliding door ......................... 78
Side windows ................................... 84
Roadside Assistance (breakdown) .... 28
Roof carrier
Maximum payload .......................... 314
Notes ............................................. 249
Roof lining and carpets (cleaning
guidelines) ......................................... 269
Roof load (roof carrier) ..................... 314S
Safety Children in the vehicle
..................... 60 Operating safety and registration .... 30
see Occupant safety
Safety system
see Driving safety systems
Seat
Correct driver's seat position ...........
87
Seat belts
Adjusting the height ......................... 50
Cleaning ......................................... 269
Correct usage .................................. 49
Fastening ......................................... 50
Important safety guidelines ............. 48
Introduction ..................................... 47
Releasing ......................................... 50
Warning lamp ................................. 228
Warning lamp (function) ................... 50
Seat sliders
Problems ......................................... 89
Seats
Adjusting (electrically) ..................... 88
Adjusting (manually) ........................ 88
Adjusting lumbar support ................ 89
Adjusting the head restraint ............ 93
Armrest ............................................ 95
Cleaning the cover ......................... 269
Important safety notes .................... 87
Seat heating .................................... 95
Storing settings (memory func-
tion) ................................................. 97
Selecting a gear
see Automatic transmission
Selector lever
Cleaning ......................................... 269
see Automatic transmission
Sensors (cleaning instructions) ....... 267
Service interval display
Calling up the service due date ...... 258
Hiding service messages ............... 258
Notes ............................................. 257
Service menu (on-board com-
puter) .................................................. 191
Service phone number ...................... 272
Service products
Brake fluid ..................................... 310
Coolant (engine) ............................ 310
Engine oil ....................................... 308
Fuel ................................................ 306
Important safety notes .................. 305 Index
19
Page 27 of 320
Vehicle data .......................................
312
Vehicle dimensions ........................... 313
Vehicle emergency locking ................ 73
Vehicle identification number
see VIN
Vehicle identification plate .............. 304
Vehicle key
see SmartKey
Vehicle tool kit
in the seat base ............................. 270
Scope ............................................ 270
Storage location ............................ 270
Stowage compartment in the
rear ................................................ 271
Stowage space in the cargo com-
partment ........................................ 272
Ventilation
see Climate control
Vents
see Air vents
VIN
Engine compartment ..................... 305
Type plate ...................................... 304 W
Warning Stickers
........................................... 29
Warning and indicator lamps
ABS ................................................ 230
Brakes ........................................... 229
Check Engine ................................. 233
COLLISION PREVENTION ASSIST .. 235
Coolant .......................................... 233
Distance warning ........................... 235
Door ............................................... 237
ESP ®
.............................................. 230
ESP ®
OFF ....................................... 232
Fuel tank ........................................ 233
General notes ................................ 227
Overview (vehicle with steering
wheel buttons) ................................. 41
Overview (vehicle without steer-
ing wheel buttons) ........................... 39
Parking brake ................................ 138
PASSENGER AIR BAG OFF ............... 47
Rear door ....................................... 237
Reserve fuel ................................... 233 Restraint system ............................ 232
Seat belt ........................................
228
Sliding door ................................... 237
Steering ......................................... 237
Tire pressure monitor .................... 236
Warranty .............................................. 27
Washer fluid
Adding ........................................... 256
Capacities ...................................... 312
Display messages (vehicle with
steering wheel buttons) ................. 227
Display messages (vehicle with-
out steering wheel buttons) ........... 209
Notes ............................................. 312
Wheel and tire combination
see Tires
Wheel bolt tightening torque ........... 300
Wheels
Changing a wheel .......................... 297
Checking ........................................ 279
Cleaning ......................................... 266
Important safety notes .................. 278
Interchanging/changing ................ 297
Mounting a new wheel ................... 300
Mounting a wheel .......................... 298
Removing a wheel .......................... 299
Removing and mounting the
spare wheel ................................... 303
Snow chains .................................. 281
Storing ........................................... 298
Tightening torque ........................... 300
Wheel/tire combinations ............... 301
Window curtain air bag
Display message (vehicle with
steering wheel buttons) ................. 215
Display message (vehicle without
steering wheel buttons) ................. 201
Operation ......................................... 53
Windows
see Side windows
Windows misted up
see Climate control
Windshield
Cleaning ......................................... 265
Defrosting ...................................... 121
Windshield
see Windshield Index
25
Page 111 of 320

Bulb holder
=
Turn signals/brake lamps/tail lamps/
standing lamps
? Backup lamp
A Rear fog lamp (driver's side only)
X Apply light pressure to the corresponding
bulb, turn it counter-clockwise and remove
it from the bulb holder.
X Press the new bulb into the socket and
screw it in clockwise.
X Insert bulb holder ; into the tail lamp and
tighten all three screws :.
X Install the tail lamp (Y page 108).Windshield wipers
Switching the windshield wiper
on/off
! Do not operate the windshield wipers
when the windshield is dry, as this could
damage the wiper blades. Moreover, dust
that has collected on the windshield can
scratch the glass if wiping takes place when
the windshield is dry.
If it is necessary to switch on the windshield
wipers in dry weather conditions, always use
washer fluid when operating the windshield
wipers.
! If the windshield wipers leave smears on
the windshield after the vehicle has been
washed in an automatic car wash, wax or
other residues may be the reason for this.
Clean the windshield using washer fluid
after washing the vehicle in an automatic
car wash.
! Intermittent wiping with rain sensor: due
to optical influences and the windshield becoming dirty in dry weather conditions,
the windshield wipers may be activated
inadvertently. This could then damage the
windshield wiper blades or scratch the wind-
shield.
For this reason, you should always switch
off the windshield wipers in dry weather. 1
$ Windshield wipers off
2 Ä Intermittent wipe, low (rain sensor
set to low sensitivity)
3 Å Intermittent wipe, high (rain sensor
set to high sensitivity)
4 ° Continuous wipe, slow
5 ¯ Continuous wipe, fast
B î 1st pressure point – single wipe; 2nd
pressure point – wipe with washer fluid
X Turn the key to position 1 or 2 in the igni-
tion lock.
X Turn the í wiper switch to the corre-
sponding position.
In the Ä or Å
positions, the appropriate
wiping frequency is set automatically accord-
ing to the intensity of the rain. In the Å
position, the rain sensor is more sensitive to
precipitation than in the Ä position, caus-
ing the windshield wipers to wipe more fre-
quently.
The windshield will no longer be wiped prop-
erly if the wiper blades are worn. This may pre-
vent you from observing the traffic conditions.
Information on replacing the wiper blades can
be found under "Replacing wiper blades"
( Y page 110). Windshield wipers
109
Lights and windshield wipers Z
Page 201 of 320

Display messages
Possible causes/consequences and
M SolutionsX
Visit a qualified specialist workshop immediately.
Further information on the Occupant Classification System (OCS)
can be found under "Occupant Classification System (OCS)"
(Y page
54). #
Check Brake Pad
Wear The brake pads/linings have reached their wear limit.
X Visit a qualified specialist workshop. $ (USA only)
J (Canada only)
Check Brake Fluid
Level There is insufficient brake fluid in the brake fluid reservoir.
G WARNING
Braking performance can be impaired.
There is a risk of an accident.
X Stop the vehicle immediately, paying attention to road and traffic
conditions. Do not continue driving under any circumstances.
X Secure the vehicle to prevent it from rolling away (Y page
138).
X Do not add brake fluid. Adding more will not remedy the malfunc-
tion.
X Consult a qualified specialist workshop. EBD, ABS, ESP Inop‐
erative
+ EBD is unavailable due to a malfunction. ABS, BAS, hill start assist
and ESP
®
as well as its driving safety systems, for example, are
therefore also unavailable.
ATTENTION ASSIST is deactivated and other driving systems could
be automatically deactivated.
G WARNING
The brake system continues to function normally, but without the
functions listed above. The wheels could therefore lock prematurely
if you brake hard, for example.
This causes steerability and braking to be greatly impaired. The
braking distance can increase in emergency braking situations.
If ESP ®
is not operational, ESP ®
will not stabilize the vehicle.
There is an increased risk of skidding and accidents.
X Switch the engine off, wait briefly and start the engine again.
X Check if the display message has disappeared and ESP ®
is opera-
tional.
X If the display message continues to be displayed:
R Drive on with care.
R Visit a qualified specialist workshop immediately. Display messages (vehicles without steering wheel buttons)
199On-board computer and displays Z
Page 215 of 320
Display messages
Possible causes/consequences and
M SolutionsIf these conditions are not met, the Occupant Classification System
(OCS) is malfunctioning.
X Install the child restraint system on a suitable rear seat.
or X Seat a person of smaller stature on a suitable rear seat.
X Visit a qualified specialist workshop immediately.
Further information on the Occupant Classification System (OCS)
can be found under "Occupant Classification System (OCS)"
(Y page
54). Check Brake Pad
Wear The brake pads/linings have reached their wear limit.
X Visit a qualified specialist workshop. $ (USA only)
J (Canada only)
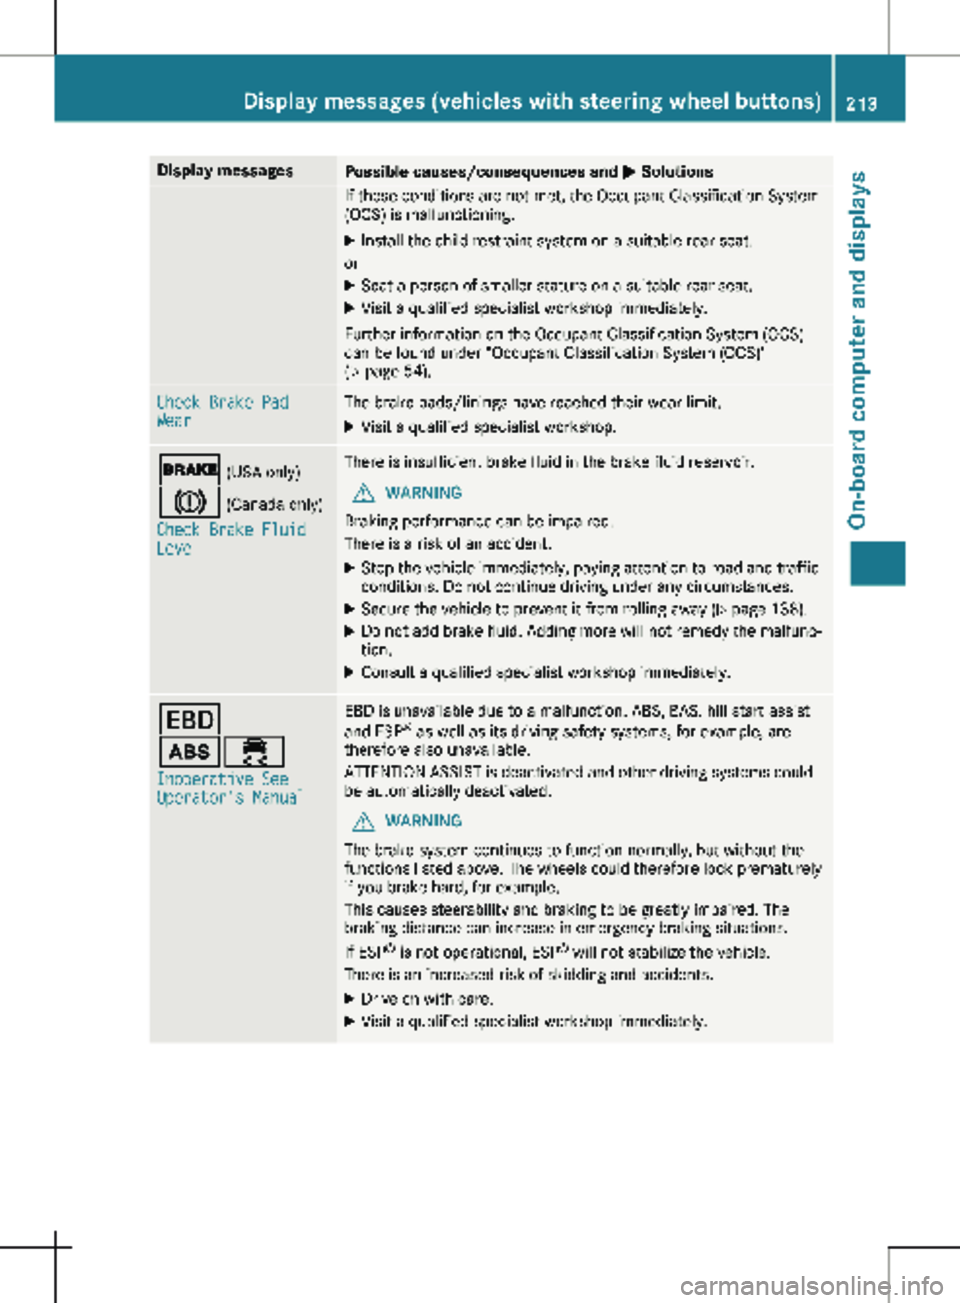
Check Brake Fluid
Level There is insufficient brake fluid in the brake fluid reservoir.
G WARNING
Braking performance can be impaired.
There is a risk of an accident.
X Stop the vehicle immediately, paying attention to road and traffic
conditions. Do not continue driving under any circumstances.
X Secure the vehicle to prevent it from rolling away (Y page
138).
X Do not add brake fluid. Adding more will not remedy the malfunc-
tion.
X Consult a qualified specialist workshop immediately. T
ò÷
Inoperative See
Operator's Manual EBD is unavailable due to a malfunction. ABS, BAS, hill start assist
and ESP
®
as well as its driving safety systems, for example, are
therefore also unavailable.
ATTENTION ASSIST is deactivated and other driving systems could
be automatically deactivated.
G WARNING
The brake system continues to function normally, but without the
functions listed above. The wheels could therefore lock prematurely
if you brake hard, for example.
This causes steerability and braking to be greatly impaired. The
braking distance can increase in emergency braking situations.
If ESP ®
is not operational, ESP ®
will not stabilize the vehicle.
There is an increased risk of skidding and accidents.
X Drive on with care.
X Visit a qualified specialist workshop immediately. Display messages (vehicles with steering wheel buttons)
213
On-board computer and displays Z
Page 231 of 320
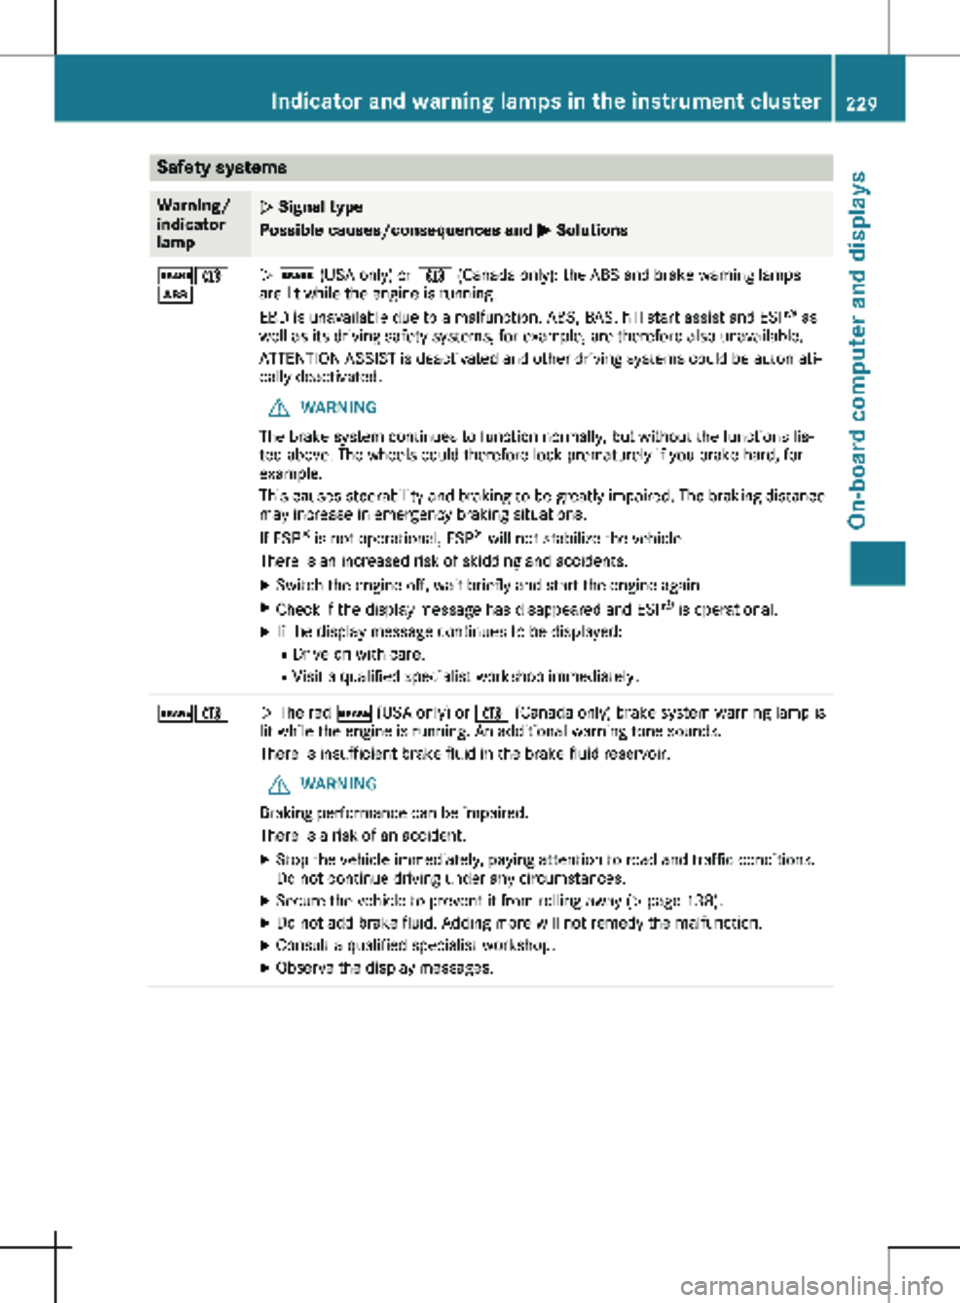
Safety systems
Warning/
indicator
lamp
N Signal type
Possible causes/consequences and
M Solutions$J
ò
N $ (USA only) or J (Canada only): the ABS and brake warning lamps
are lit while the engine is running.
EBD is unavailable due to a malfunction. ABS, BAS, hill start assist and ESP
®
as
well as its driving safety systems, for example, are therefore also unavailable.
ATTENTION ASSIST is deactivated and other driving systems could be automati-
cally deactivated.
G WARNING
The brake system continues to function normally, but without the functions lis-
ted above. The wheels could therefore lock prematurely if you brake hard, for
example.
This causes steerability and braking to be greatly impaired. The braking distance
may increase in emergency braking situations.
If ESP ®
is not operational, ESP ®
will not stabilize the vehicle.
There is an increased risk of skidding and accidents.
X Switch the engine off, wait briefly and start the engine again.
X Check if the display message has disappeared and ESP ®
is operational.
X If the display message continues to be displayed:
R Drive on with care.
R Visit a qualified specialist workshop immediately. $J
N The red
$ (USA only) or J (Canada only) brake system warning lamp is
lit while the engine is running. An additional warning tone sounds.
There is insufficient brake fluid in the brake fluid reservoir.
G WARNING
Braking performance can be impaired.
There is a risk of an accident.
X Stop the vehicle immediately, paying attention to road and traffic conditions.
Do not continue driving under any circumstances.
X Secure the vehicle to prevent it from rolling away ( Y page 138).
X Do not add brake fluid. Adding more will not remedy the malfunction.
X Consult a qualified specialist workshop.
X Observe the display messages. Indicator and warning lamps in the instrument cluster
229
On-board computer and displays Z
Page 254 of 320
X
Hold support strut ? and lift the hood
slightly.
X Guide support strut ? towards retainer =
and apply slight pressure to make it engage.
X Lower the hood and allow it to fall with
momentum from a height of approximately
1 ft (30 cm
).
The hood locks audibly.
X Check that the hood is correctly locked.
If the hood can be raised slightly, it is not
properly engaged. If the hood is not cor-
rectly engaged, open the hood again. Let
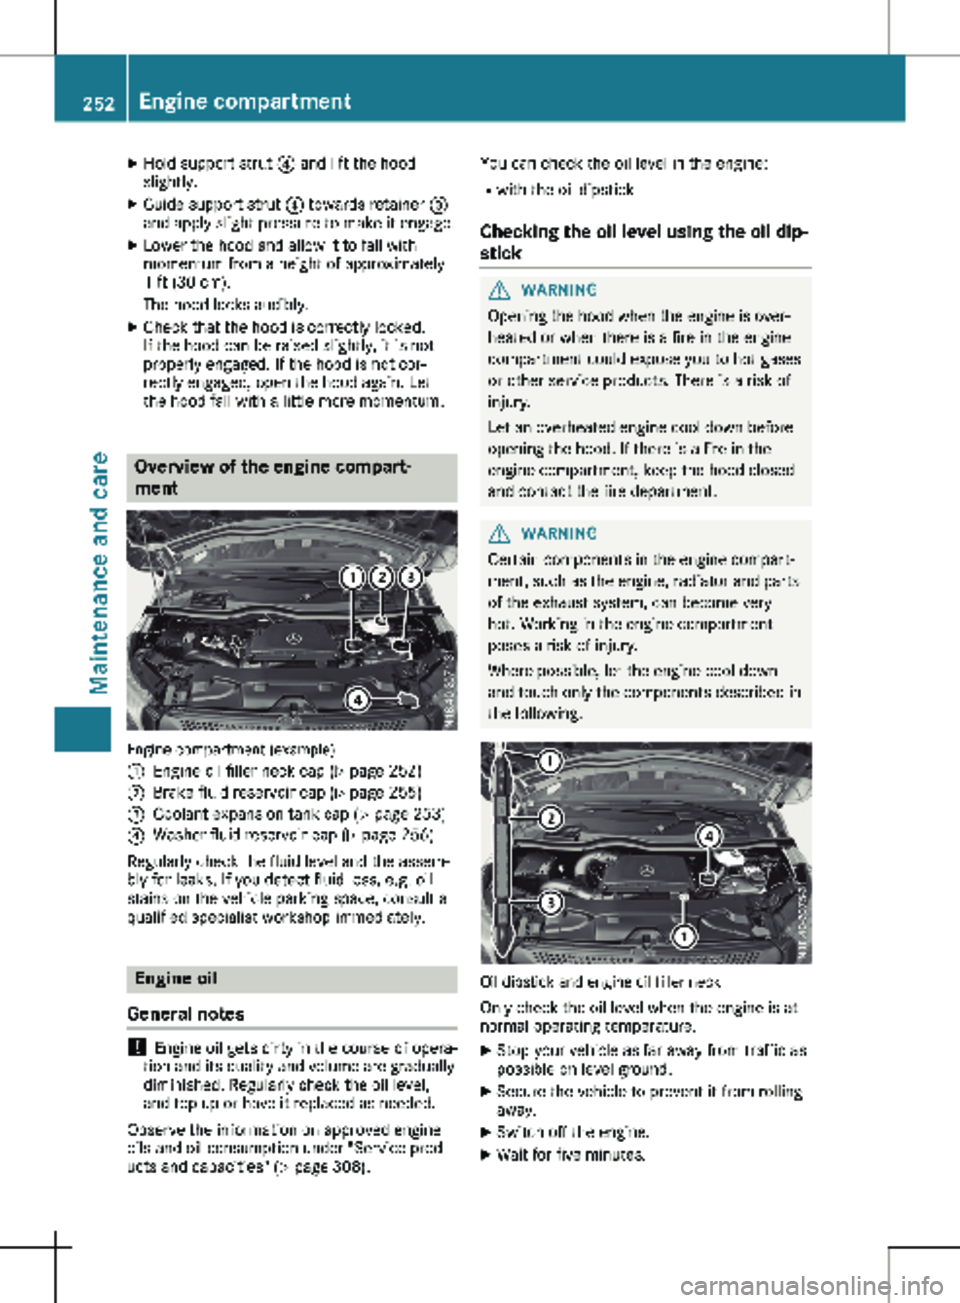
the hood fall with a little more momentum. Overview of the engine compart-
ment
Engine compartment (example)
:
Engine oil filler neck cap (Y page
252)
; Brake fluid reservoir cap (Y page
255)
= Coolant expansion tank cap ( Y page
253)
? Washer fluid reservoir cap (Y page
256)
Regularly check the fluid level and the assem-
bly for leaks. If you detect fluid loss, e.g. oil
stains on the vehicle parking space, consult a
qualified specialist workshop immediately. Engine oil
General notes !
Engine oil gets dirty in the course of opera-
tion and its quality and volume are gradually
diminished. Regularly check the oil level,
and top up or have it replaced as needed.
Observe the information on approved engine
oils and oil consumption under "Service prod-
ucts and capacities" ( Y page
308).You can check the oil level in the engine:
R with the oil dipstick
Checking the oil level using the oil dip-
stick G
WARNING
Opening the hood when the engine is over-
heated or when there is a fire in the engine
compartment could expose you to hot gases
or other service products. There is a risk of
injury.
Let an overheated engine cool down before
opening the hood. If there is a fire in the
engine compartment, keep the hood closed
and contact the fire department. G
WARNING
Certain components in the engine compart-
ment, such as the engine, radiator and parts
of the exhaust system, can become very
hot. Working in the engine compartment
poses a risk of injury.
Where possible, let the engine cool down
and touch only the components described in
the following. Oil dipstick and engine oil filler neck
Only check the oil level when the engine is at
normal operating temperature. X Stop your vehicle as far away from traffic as
possible on level ground.
X Secure the vehicle to prevent it from rolling
away.
X Switch off the engine.
X Wait for five minutes.252
Engine compartment
Maintenance and care
Page 257 of 320
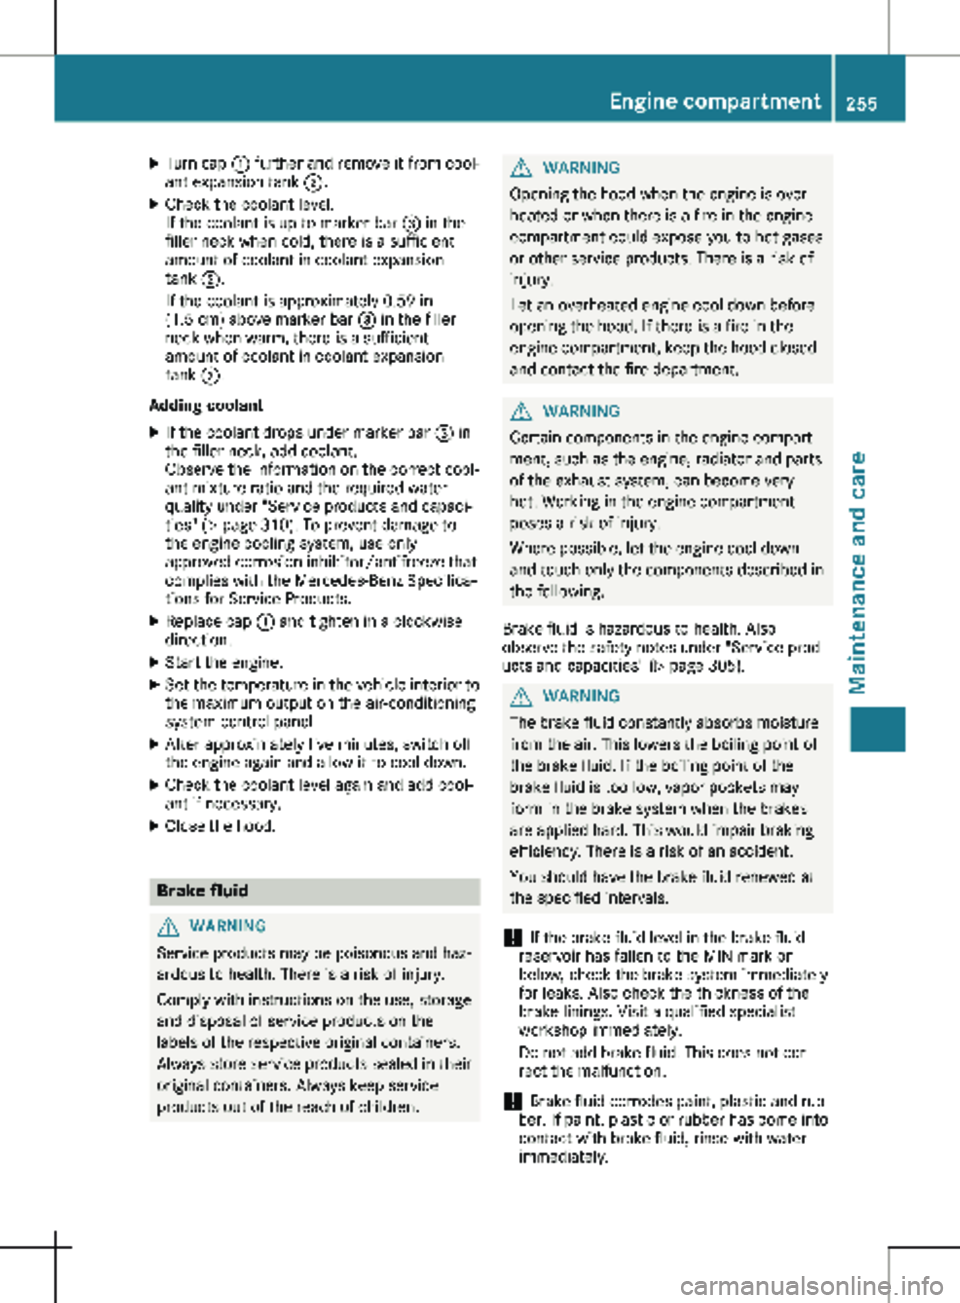
X
Turn cap : further and remove it from cool-
ant expansion tank ;.
X Check the coolant level.
If the coolant is up to marker bar =
in the
filler neck when cold, there is a sufficient
amount of coolant in coolant expansion
tank ;.
If the coolant is approximately 0.59 in
(1.5 cm) above marker bar = in the filler
neck when warm, there is a sufficient
amount of coolant in coolant expansion
tank ;.
Adding coolant X If the coolant drops under marker bar = in
the filler neck, add coolant.
Observe the information on the correct cool-
ant mixture ratio and the required water
quality under "Service products and capaci-
ties" ( Y page
310). To prevent damage to
the engine cooling system, use only
approved corrosion inhibitor/antifreeze that
complies with the Mercedes-Benz Specifica-
tions for Service Products.
X Replace cap : and tighten in a clockwise
direction.
X Start the engine.
X Set the temperature in the vehicle interior to
the maximum output on the air-conditioning
system control panel.
X After approximately five minutes, switch off
the engine again and allow it to cool down.
X Check the coolant level again and add cool-
ant if necessary.
X Close the hood. Brake fluid
G
WARNING
Service products may be poisonous and haz-
ardous to health. There is a risk of injury.
Comply with instructions on the use, storage
and disposal of service products on the
labels of the respective original containers.
Always store service products sealed in their
original containers. Always keep service
products out of the reach of children. G
WARNING
Opening the hood when the engine is over-
heated or when there is a fire in the engine
compartment could expose you to hot gases
or other service products. There is a risk of
injury.
Let an overheated engine cool down before
opening the hood. If there is a fire in the
engine compartment, keep the hood closed
and contact the fire department. G
WARNING
Certain components in the engine compart-
ment, such as the engine, radiator and parts
of the exhaust system, can become very
hot. Working in the engine compartment
poses a risk of injury.
Where possible, let the engine cool down
and touch only the components described in
the following.
Brake fluid is hazardous to health. Also
observe the safety notes under "Service prod-
ucts and capacities"
(Y page 305). G
WARNING
The brake fluid constantly absorbs moisture
from the air. This lowers the boiling point of
the brake fluid. If the boiling point of the
brake fluid is too low, vapor pockets may
form in the brake system when the brakes
are applied hard. This would impair braking
efficiency. There is a risk of an accident.
You should have the brake fluid renewed at
the specified intervals.
! If the brake fluid level in the brake fluid
reservoir has fallen to the MIN mark or
below, check the brake system immediately
for leaks. Also check the thickness of the
brake linings. Visit a qualified specialist
workshop immediately.
Do not add brake fluid. This does not cor-
rect the malfunction.
! Brake fluid corrodes paint, plastic and rub-
ber. If paint, plastic or rubber has come into
contact with brake fluid, rinse with water
immediately. Engine compartment
255
Maintenance and care Z
Page 258 of 320
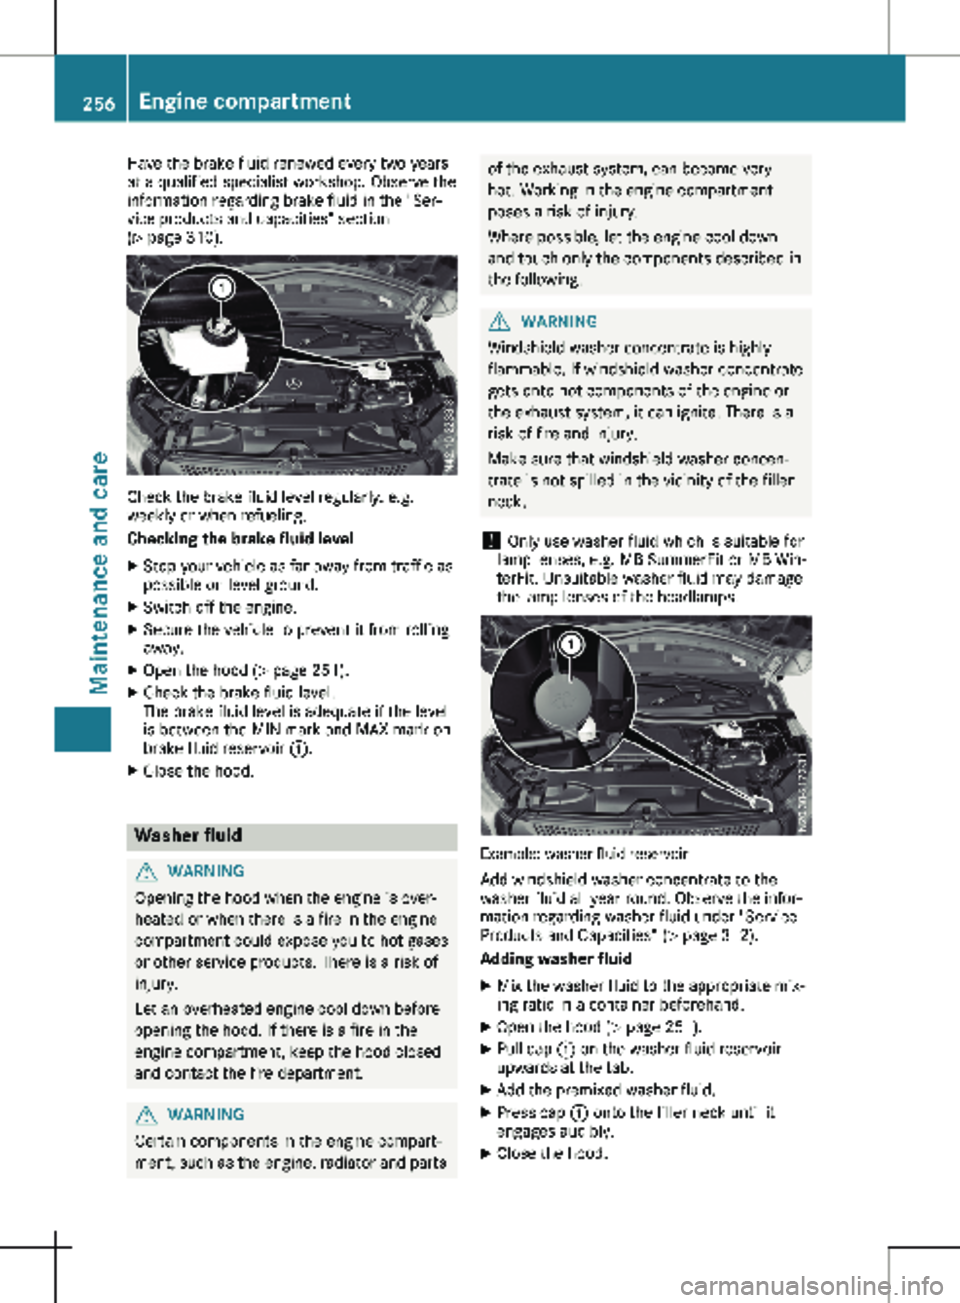
Have the brake fluid renewed every two years
at a qualified specialist workshop. Observe the
information regarding brake fluid in the "Ser-
vice products and capacities" section
(Y page
310).Check the brake fluid level regularly, e.g.
weekly or when refueling.
Checking the brake fluid level
X Stop your vehicle as far away from traffic as
possible on level ground.
X Switch off the engine.
X Secure the vehicle to prevent it from rolling
away.
X Open the hood (Y page
251).
X Check the brake fluid level.
The brake fluid level is adequate if the level
is between the MIN mark and MAX mark on
brake fluid reservoir :.
X Close the hood. Washer fluid
G
WARNING
Opening the hood when the engine is over-
heated or when there is a fire in the engine
compartment could expose you to hot gases
or other service products. There is a risk of
injury.
Let an overheated engine cool down before
opening the hood. If there is a fire in the
engine compartment, keep the hood closed
and contact the fire department. G
WARNING
Certain components in the engine compart-
ment, such as the engine, radiator and parts of the exhaust system, can become very
hot. Working in the engine compartment
poses a risk of injury.
Where possible, let the engine cool down
and touch only the components described in
the following. G
WARNING
Windshield washer concentrate is highly
flammable. If windshield washer concentrate
gets onto hot components of the engine or
the exhaust system, it can ignite. There is a
risk of fire and injury.
Make sure that windshield washer concen-
trate is not spilled in the vicinity of the filler
neck.
! Only use washer fluid which is suitable for
lamp lenses, e.g. MB SummerFit or MB Win-
terFit. Unsuitable washer fluid may damage
the lamp lenses of the headlamps. Example: washer fluid reservoir
Add windshield washer concentrate to the
washer fluid all year round. Observe the infor-
mation regarding washer fluid under "Service
Products and Capacities"
(Y page 312).
Adding washer fluid
X Mix the washer fluid to the appropriate mix-
ing ratio in a container beforehand.
X Open the hood ( Y page
251).
X Pull cap : on the washer fluid reservoir
upwards at the tab.
X Add the premixed washer fluid.
X Press cap : onto the filler neck until it
engages audibly.
X Close the hood.256
Engine compartment
Maintenance and care