instrument cluster MERCEDES-BENZ SL-CLASS ROADSTER 2013 Service Manual
[x] Cancel search | Manufacturer: MERCEDES-BENZ, Model Year: 2013, Model line: SL-CLASS ROADSTER, Model: MERCEDES-BENZ SL-CLASS ROADSTER 2013Pages: 572, PDF Size: 9.23 MB
Page 228 of 572
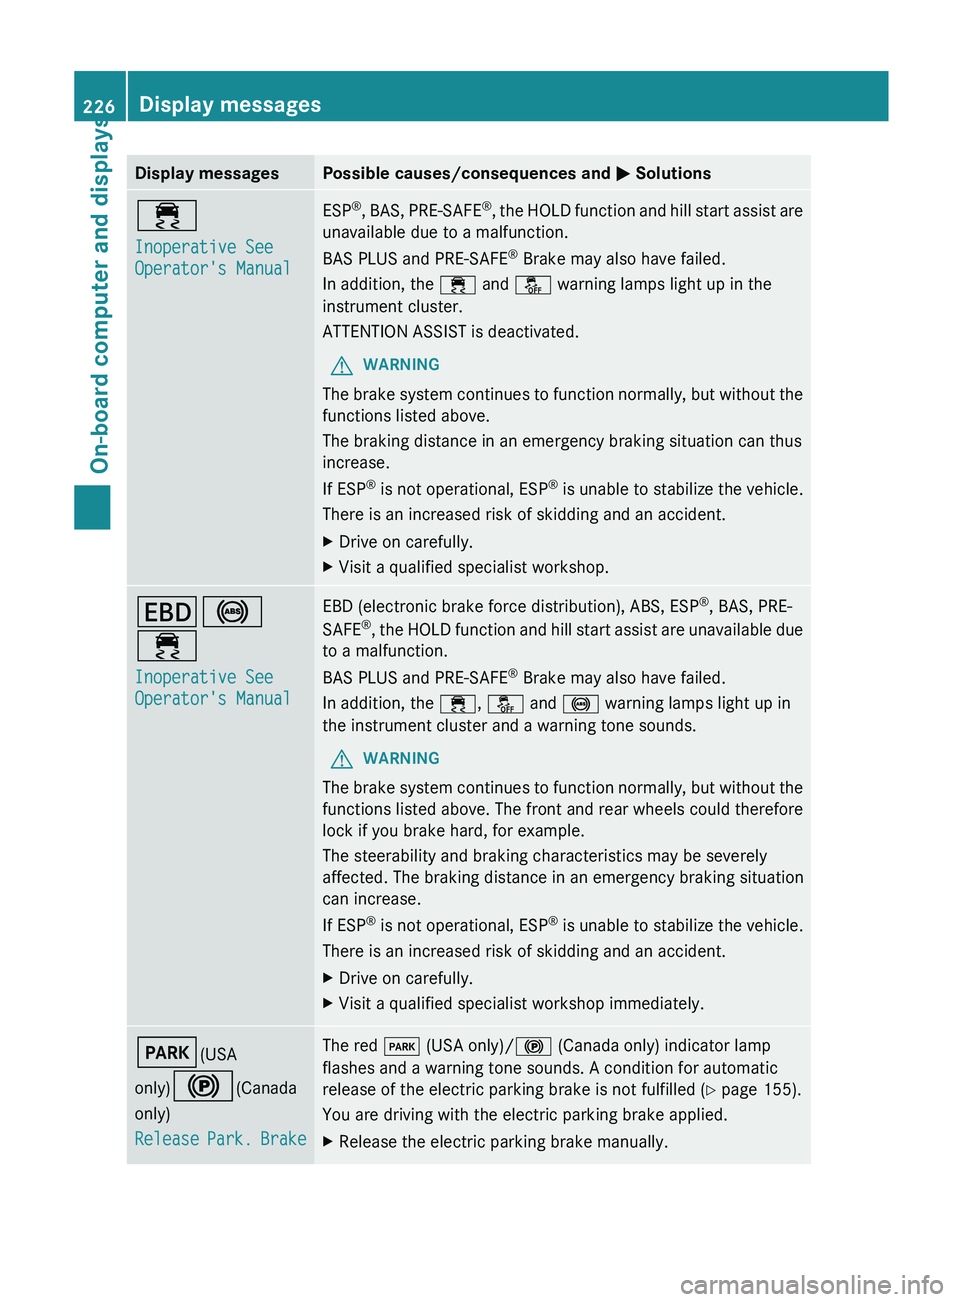
Display messages Possible causes/consequences and
M Solutions÷
Inoperative See
Operator's Manual ESP
®
, BAS, PRE-SAFE ®
, the HOLD function and hill start assist are
unavailable due to a malfunction.
BAS PLUS and PRE-SAFE ®
Brake may also have failed.
In addition, the ÷ and å warning lamps light up in the
instrument cluster.
ATTENTION ASSIST is deactivated.
G WARNING
The brake system continues to function normally, but without the
functions listed above.
The braking distance in an emergency braking situation can thus
increase.
If ESP ®
is
not operational, ESP ®
is unable to stabilize the vehicle.
There is an increased risk of skidding and an accident.
X Drive on carefully.
X Visit a qualified specialist workshop. T!
÷
Inoperative See
Operator's Manual EBD (electronic brake force distribution), ABS, ESP
®
, BAS, PRE-
SAFE ®
, the
HOLD function and hill start assist are unavailable due
to a malfunction.
BAS PLUS and PRE-SAFE ®
Brake may also have failed.
In addition, the ÷, å and ! warning lamps light up in
the instrument cluster and a warning tone sounds.
G WARNING
The brake system continues to function normally, but without the
functions listed above. The front and rear wheels could therefore
lock if you brake hard, for example.
The steerability and braking characteristics may be severely
affected. The braking distance in an emergency braking situation
can increase.
If ESP ®
is
not operational, ESP ®
is unable to stabilize the vehicle.
There is an increased risk of skidding and an accident.
X Drive on carefully.
X Visit a qualified specialist workshop immediately. F(USA
only)!(Canada
only)
Release
Park.
Brake The red
F (USA only)/! (Canada only) indicator lamp
flashes and a warning tone sounds. A condition for automatic
release of the electric parking brake is not fulfilled (Y
page 155).
You are driving with the electric parking brake applied.
X Release the electric parking brake manually.226
Display messages
On-board computer and displays
Page 232 of 572
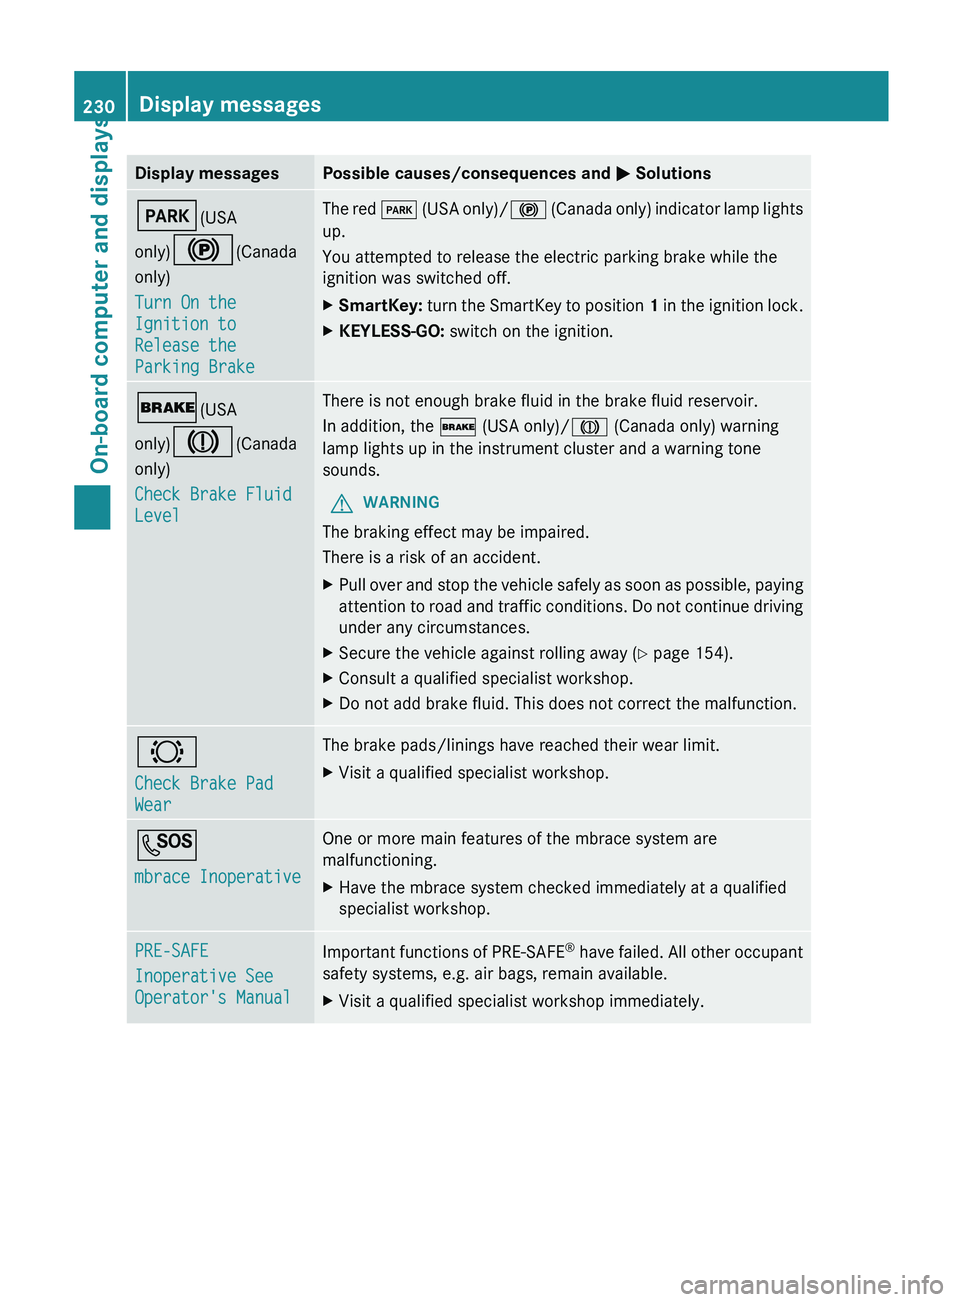
Display messages Possible causes/consequences and
M SolutionsF(USA
only)!(Canada
only)
Turn On the
Ignition to
Release the
Parking Brake The red
F
(USA only)/! (Canada only) indicator lamp lights
up.
You attempted to release the electric parking brake while the
ignition was switched off.
X SmartKey: turn the SmartKey to position 1
in the ignition lock.
X KEYLESS-GO: switch on the ignition.$(USA
only)J(Canada
only)
Check Brake Fluid
Level There is not enough brake fluid in the brake fluid reservoir.
In addition, the $ (USA only)/J (Canada only) warning
lamp lights up in the instrument cluster and a warning tone
sounds.
G WARNING
The braking effect may be impaired.
There is a risk of an accident.
X Pull over and stop the vehicle safely as soon as possible, paying
attention to
road and traffic conditions. Do not continue driving
under any circumstances.
X Secure the vehicle against rolling away ( Y page 154).
X Consult a qualified specialist workshop.
X Do not add brake fluid. This does not correct the malfunction. #
Check Brake Pad
Wear The brake pads/linings have reached their wear limit.
X
Visit a qualified specialist workshop. G
mbrace Inoperative One or more main features of the mbrace system are
malfunctioning.
X
Have the mbrace system checked immediately at a qualified
specialist workshop. PRE-SAFE
Inoperative See
Operator's Manual
Important functions of PRE-SAFE
®
have
failed. All other occupant
safety systems, e.g. air bags, remain available.
X Visit a qualified specialist workshop immediately.230
Display messages
On-board computer and displays
Page 234 of 572
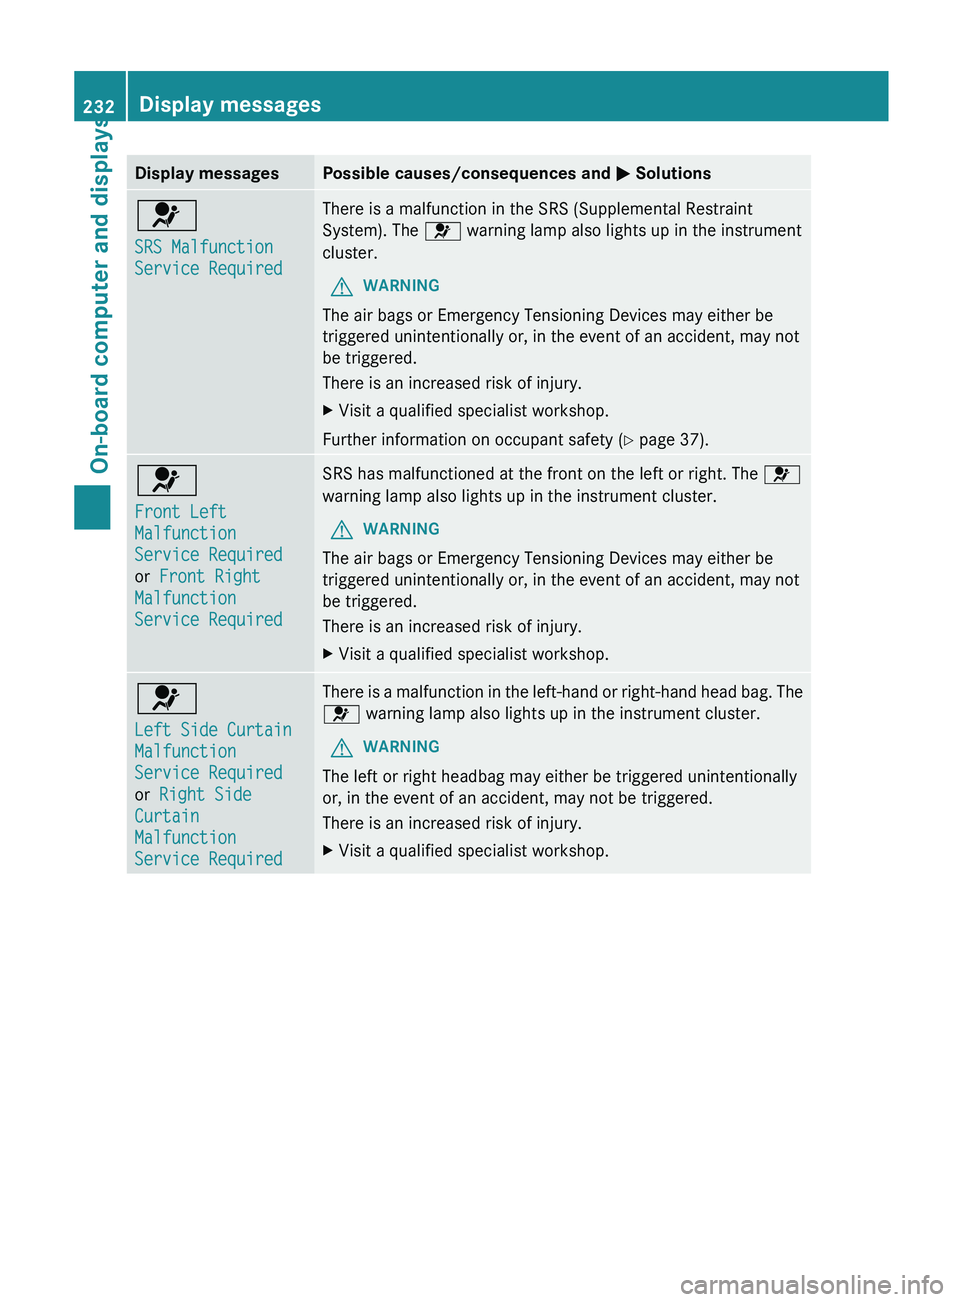
Display messages Possible causes/consequences and
M Solutions6
SRS Malfunction
Service Required There is a malfunction in the SRS (Supplemental Restraint
System). The 6 warning lamp also lights up in the instrument
cluster.
G WARNING
The air bags or Emergency Tensioning Devices may either be
triggered unintentionally or, in the event of an accident, may not
be triggered.
There is an increased risk of injury.
X Visit a qualified specialist workshop.
Further information on occupant safety (Y page 37). 6
Front Left
Malfunction
Service Required
or Front Right
Malfunction
Service Required SRS has malfunctioned at the front on the left or right. The
6
warning lamp also lights up in the instrument cluster.
G WARNING
The air bags or Emergency Tensioning Devices may either be
triggered unintentionally or, in the event of an accident, may not
be triggered.
There is an increased risk of injury.
X Visit a qualified specialist workshop. 6
Left Side Curtain
Malfunction
Service Required
or Right Side
Curtain
Malfunction
Service Required There is a malfunction in the left-hand or right-hand head bag. The
6 warning lamp also lights up in the instrument cluster.
G WARNING
The left or right headbag may either be triggered unintentionally
or, in the event of an accident, may not be triggered.
There is an increased risk of injury.
X Visit a qualified specialist workshop.232
Display messagesOn-board computer and displays
Page 344 of 572
Storing the crosshair position in the list
of previous destinations
A crosshair appears on the map if you have
moved the map manually
(Y
page 343). You
can store the crosshair position as a
destination in the list of previous
destinations.
X To show the menu: press W
the COMAND
controller.
X Select Position in the navigation system
menu bar by turning cVd the COMAND
controller and press W to confirm.
X Select Save Crosshair Position and
press W to confirm.
Deleting one of the previous
destinations X
To switch on navigation mode: press
the
Ø function button.
X To show the menu:
press W
the COMAND
controller.
X Select Destination in the navigation
system menu bar by turning cVd the
COMAND controller and pressing W to
confirm.
X Select From Last Destinations and
press W to confirm.
The list of last destinations appears.
X Select the desired destination and press
W to confirm.
The destination address appears.
X Select Delete and press W to confirm.
A prompt
appears asking whether the entry
should be deleted.
X Select Yes or No and press W to confirm.
If you select Yes, the entry is deleted.
If you select No, the process will be
canceled. Map operation and map settings
General notes Company logos displayed on the map are
trademarks
of
the respective companies and
used solely for the purpose of indicating the
locations of these companies. The use of such
logos on the map does not indicate approval
of, support of or advertising by these
companies for the navigation system itself.
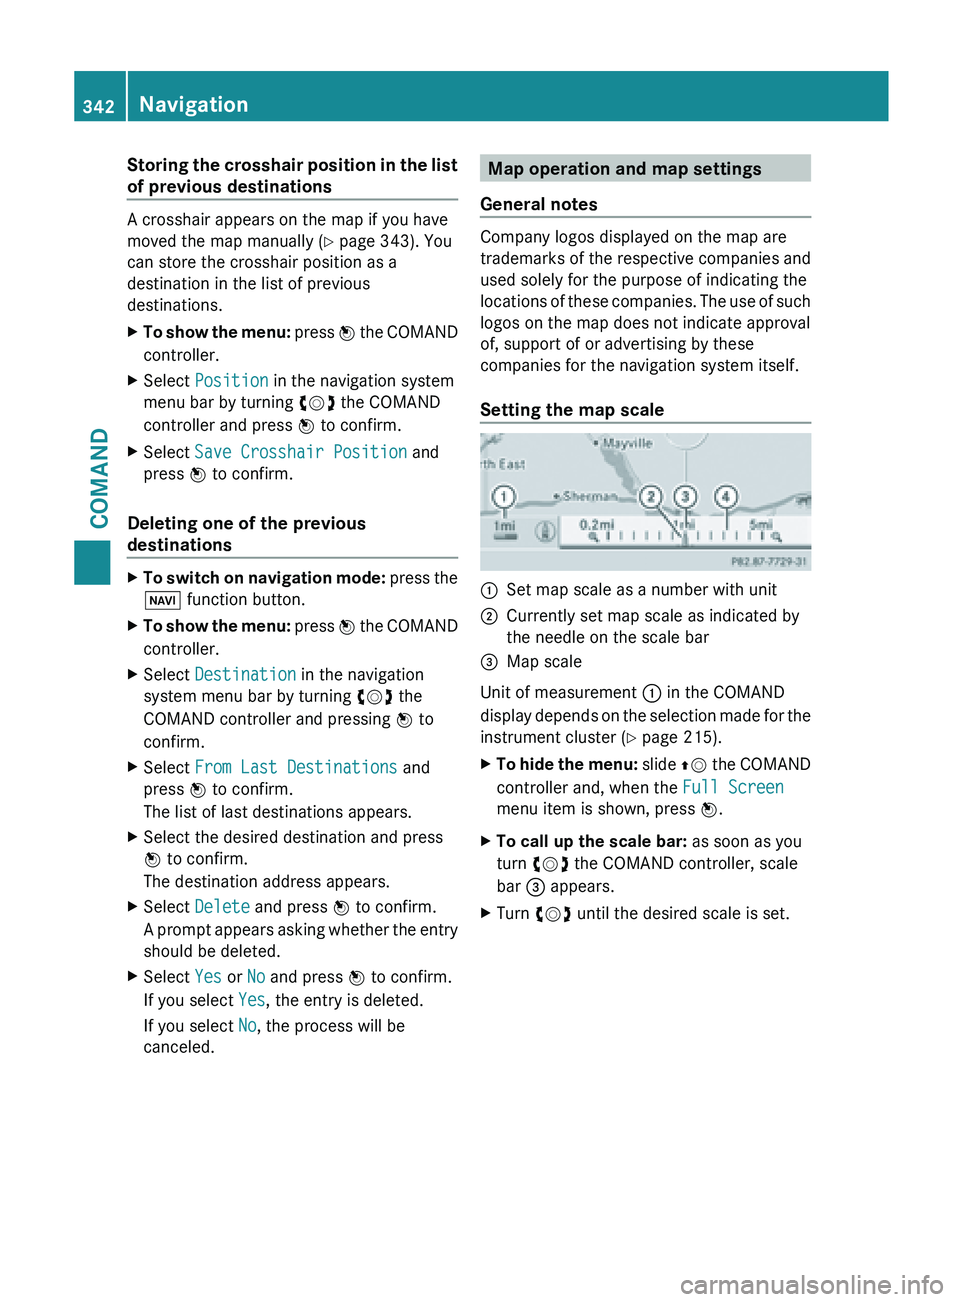
Setting the map scale :
Set map scale as a number with unit
; Currently set map scale as indicated by
the needle on the scale bar
= Map scale
Unit of measurement : in the COMAND
display depends
on the selection made for the
instrument cluster (Y page 215).
X To hide the menu: slide ZV
the COMAND
controller and, when the Full Screen
menu item is shown, press W.
X To call up the scale bar: as soon as you
turn cVd the COMAND controller, scale
bar = appears.
X Turn cVd until the desired scale is set.342
Navigation
COMAND
Page 501 of 572
R
using a cloth, slowly turn the cap
approximately Ö turn to relieve excess
pressure. If
you open the cap immediately,
pressurized scalding hot fluid and vapor will
be blown out.
R do not spill antifreeze on hot engine parts.
Antifreeze contains ethylene glycol which
may burn if it comes into contact with hot
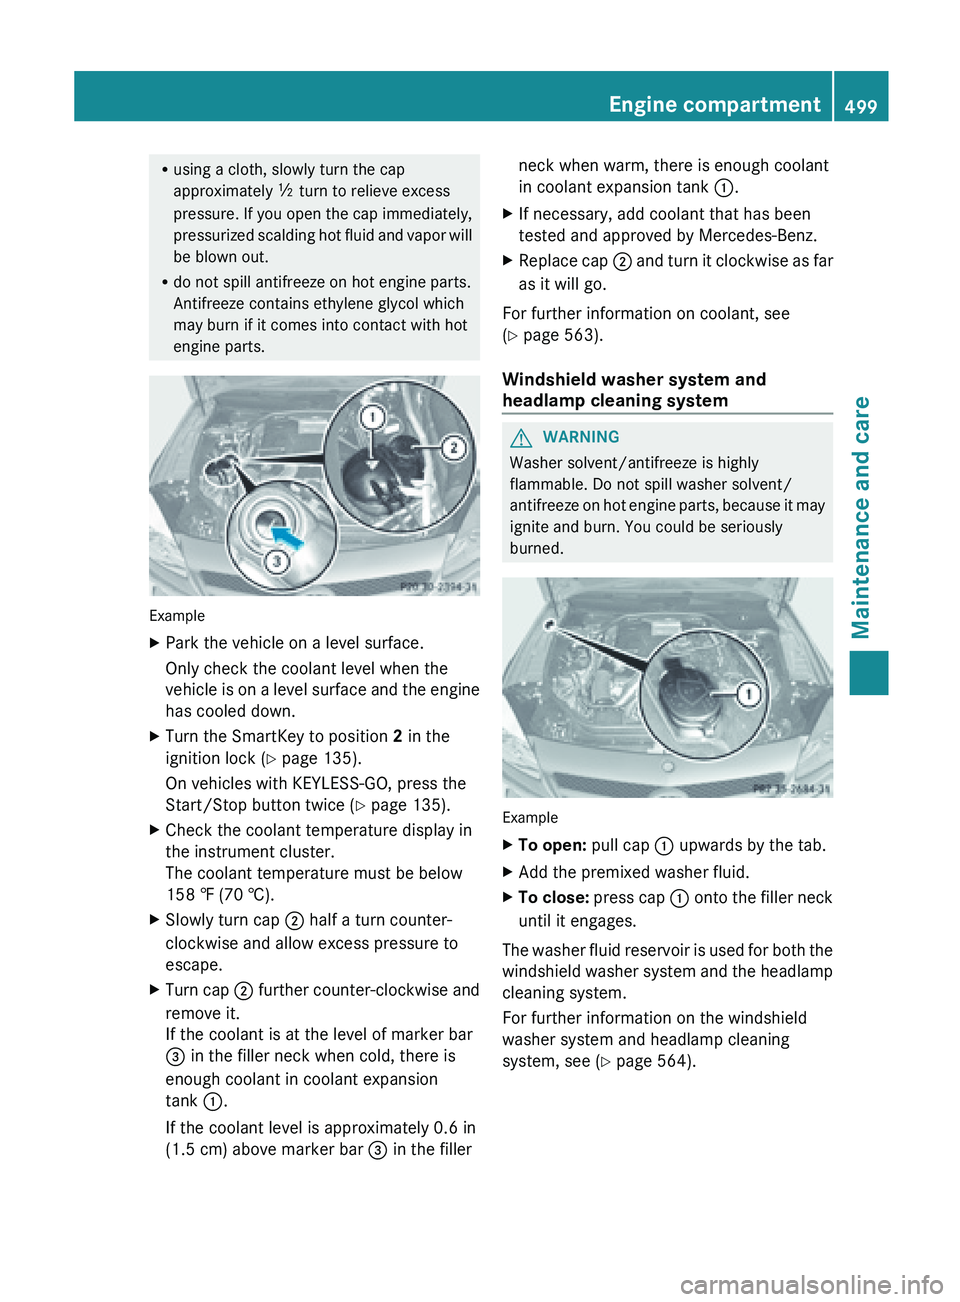
engine parts. Example
X
Park the vehicle on a level surface.
Only check the coolant level when the
vehicle is
on a level surface and the engine
has cooled down.
X Turn the SmartKey to position 2 in the
ignition lock (Y page 135).
On vehicles with KEYLESS-GO, press the
Start/Stop button twice (
Y page 135).
X Check the coolant temperature display in
the instrument cluster.
The coolant temperature must be below
158 ‡ (70 †).
X Slowly turn cap ;
half a turn counter-
clockwise and allow excess pressure to
escape.
X Turn cap ; further
counter-clockwise and
remove it.
If the coolant is at the level of marker bar
= in the filler neck when cold, there is
enough coolant in coolant expansion
tank :.
If the coolant level is approximately 0.6 in
(1.5 cm) above marker bar = in the fillerneck when warm, there is enough coolant
in coolant expansion tank
:.
X If necessary, add coolant that has been
tested and approved by Mercedes-Benz.
X Replace cap ; and
turn it clockwise as far
as it will go.
For further information on coolant, see
(Y page 563).
Windshield washer system and
headlamp cleaning system G
WARNING
Washer solvent/antifreeze is highly
flammable. Do not spill washer solvent/
antifreeze on
hot engine parts, because it may
ignite and burn. You could be seriously
burned. Example
X
To open:
pull cap
: upwards by the tab.
X Add the premixed washer fluid.
X To close:
press cap :
onto the filler neck
until it engages.
The washer fluid reservoir is used for both the
windshield washer
system and the headlamp
cleaning system.
For further information on the windshield
washer system and headlamp cleaning
system, see ( Y page 564). Engine compartment
499
Maintenance and care Z
Page 505 of 572
should drive for a few minutes after
cleaning.
Braking
heats the brake discs and
the brake pads/linings, thus drying them.
The vehicle can then be parked.
Cleaning the windows G
WARNING
Before cleaning the windshield or wiper
blades, switch off the windshield wipers and
remove the SmartKey from the ignition lock.
On vehicles with KEYLESS-GO, press the
Start/Stop button repeatedly until all
indicator lamps
in the instrument cluster have
gone out. The windshield wipers could
otherwise move and injure you. G
WARNING
Do not clean the rear window with the
reatractable hardtop
(vario-roof) in a position
other than the fully raised and closed position.
Otherwise, the retractable hardtop may move
unexpectedly which may result in personal
injury to you or others.
! Only fold the windshield wipers away from
the windshield when vertical. Otherwise,
you will damage the hood.
! Do not use dry cloths, abrasive products,
solvents or cleaning agents containing
solvents to clean the inside of the windows.
Do not touch the insides of the windows
with hard objects, e.g. an ice scraper or
ring. There is otherwise a risk of damaging
the windows.
! Clean the water drainage channels of the
windshield and the rear window at regular
intervals. Deposits such as leaves, petals
and pollen may under certain
circumstances prevent water from draining
away. This can lead to corrosion damage
and damage to electronic components.
X Clean the inside and outside of the
windows with a damp cloth and a cleaning
agent that is recommended and approved
by Mercedes-Benz. Cleaning the wiper blades G
WARNING
Before cleaning the windshield or wiper
blades, switch off the windshield wipers and
remove the SmartKey from the ignition lock.
On vehicles with KEYLESS-GO, press the
Start/Stop button repeatedly until all
indicator lamps
in the instrument cluster have
gone out. The windshield wipers could
otherwise move and injure you.
! Do not pull the wiper blade. Otherwise,
the wiper blade could be damaged.
! Do not clean wiper blades too often and
do not rub them too hard. Otherwise, the
graphite coating could be damaged. This
could cause wiper noise.
! Hold the wiper arm securely when folding
back. The windshield could be damaged if
the wiper arm smacks against it suddenly.
X Fold the windshield wiper arms away from
the windshield.
X Carefully clean the wiper blades with a
damp cloth.
X Fold the windshield wiper arms back again
before switching on the ignition.
Cleaning the exterior lighting !
Only use cleaning agents or cleaning
cloths which are suitable for plastic light
lenses. Unsuitable cleaning agents or
cleaning cloths could scratch or damage
the plastic light lenses.
X Clean the plastic lenses of the exterior
lighting using a wet sponge and a mild
cleaning agent, e.g. Mercedes-Benz car
shampoo or cleaning cloths.
Mirror turn signals !
Only use cleaning agents or cleaning
cloths that are suitable for plastic lenses.
Unsuitable cleaning agents or cleaning Care
503
Maintenance and care Z
Page 515 of 572
instrument cluster within the driver's field
of vision.
X Stop after driving for approximately ten
minutes and check the tire pressure with
the tire inflation compressor.
The tire pressure must now be at least
130 kPa (1.3 bar/19 psi). G
WARNING
If the required tire pressure is not reached
after driving for a short period, the tire is too
badly damaged.
The tire sealant cannot repair
the tire in this instance. Damaged tires and a
tire pressure that is too low can significantly
impair the vehicle's braking and driving
characteristics. There is a risk of accident.
Do not continue driving. Contact a qualified
specialist workshop.
X Correct the tire pressure if it is still at least
130 kPa (1.3 bar/19 psi) (for the values,
see the Tire and Loading Information
placard on the driver's side B-pillar or tire
pressure table on the fuel filler flap).
X To increase the tire pressure: switch on
the tire inflation compressor. X
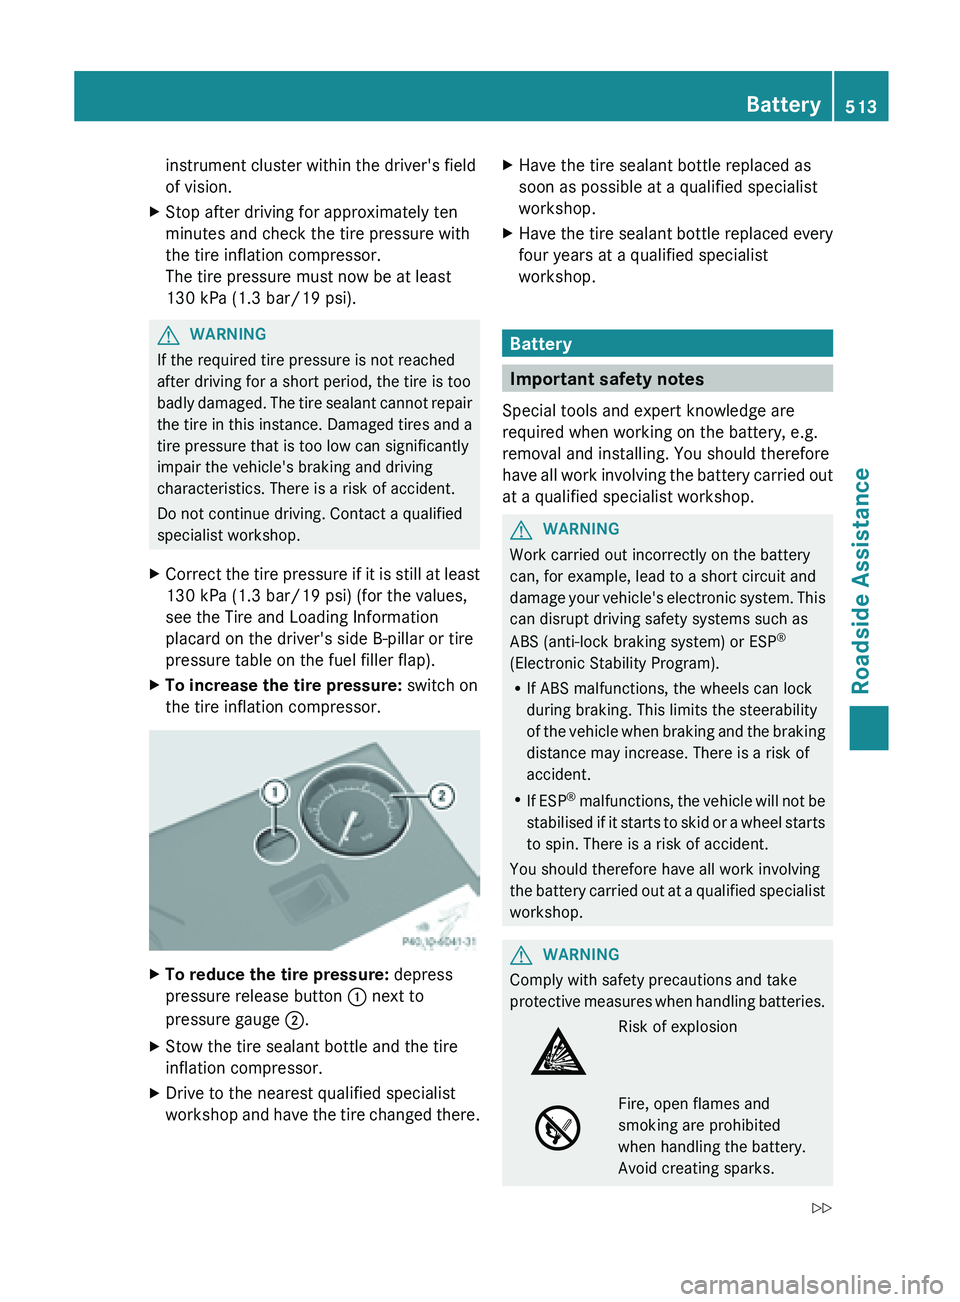
To reduce the tire pressure: depress
pressure release button : next to
pressure gauge ;.
X Stow the tire sealant bottle and the tire
inflation compressor.
X Drive to the nearest qualified specialist
workshop and
have the tire changed there. X
Have the tire sealant bottle replaced as
soon as possible at a qualified specialist
workshop.
X Have the tire sealant bottle replaced every
four years at a qualified specialist
workshop. Battery
Important safety notes
Special tools and expert knowledge are
required when working on the battery, e.g.
removal and installing. You should therefore
have all
work involving the battery carried out
at a qualified specialist workshop. G
WARNING
Work carried out incorrectly on the battery
can, for example, lead to a short circuit and
damage your
vehicle's electronic system. This
can disrupt driving safety systems such as
ABS (anti-lock braking system) or ESP ®
(Electronic Stability Program).
R If ABS malfunctions, the wheels can lock
during braking. This limits the steerability
of the vehicle when braking and the braking
distance may increase. There is a risk of
accident.
R If ESP ®
malfunctions, the vehicle will not be
stabilised if it starts to skid or a wheel starts
to spin. There is a risk of accident.
You should therefore have all work involving
the battery carried out at a qualified specialist
workshop. G
WARNING
Comply with safety precautions and take
protective measures
when handling batteries. Risk of explosion
Fire, open flames and
smoking are prohibited
when handling the battery.
Avoid creating sparks. Battery
513
Roadside Assistance
Z
Page 516 of 572
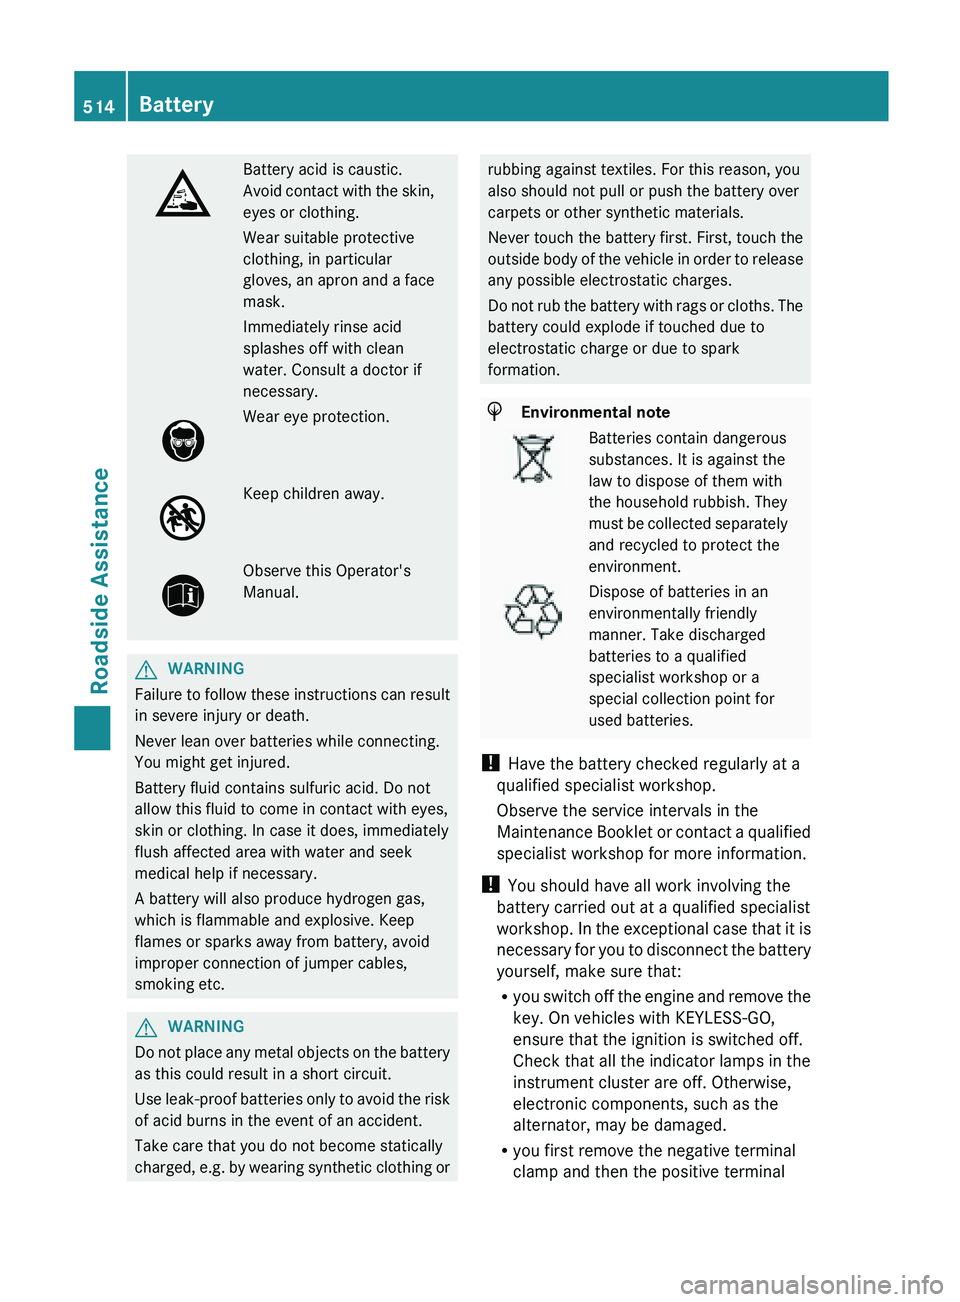
Battery acid is caustic.
Avoid
contact
with the skin,
eyes or clothing.
Wear suitable protective
clothing, in particular
gloves, an apron and a face
mask.
Immediately rinse acid
splashes off with clean
water. Consult a doctor if
necessary. Wear eye protection.
Keep children away.
Observe this Operator's
Manual.
G
WARNING
Failure
to follow these instructions can result
in severe injury or death.
Never lean over batteries while connecting.
You might get injured.
Battery fluid contains sulfuric acid. Do not
allow this fluid to come in contact with eyes,
skin or clothing. In case it does, immediately
flush affected area with water and seek
medical help if necessary.
A battery will also produce hydrogen gas,
which is flammable and explosive. Keep
flames or sparks away from battery, avoid
improper connection of jumper cables,
smoking etc. G
WARNING
Do not place any metal objects on the battery
as this could result in a short circuit.
Use leak-proof
batteries only to avoid the risk
of acid burns in the event of an accident.
Take care that you do not become statically
charged, e.g. by wearing synthetic clothing or rubbing against textiles. For this reason, you
also should not pull or push the battery over
carpets or other synthetic materials.
Never touch the battery first. First, touch the
outside
body
of the vehicle in order to release
any possible electrostatic charges.
Do not rub the battery with rags or cloths. The
battery could explode if touched due to
electrostatic charge or due to spark
formation. H
Environmental note Batteries contain dangerous
substances. It is against the
law to dispose of them with
the household rubbish. They
must
be
collected separately
and recycled to protect the
environment. Dispose of batteries in an
environmentally friendly
manner. Take discharged
batteries to a qualified
specialist workshop or a
special collection point for
used batteries.
! Have the battery checked regularly at a
qualified specialist workshop.
Observe the service intervals in the
Maintenance Booklet
or contact a qualified
specialist workshop for more information.
! You should have all work involving the
battery carried out at a qualified specialist
workshop. In the exceptional case that it is
necessary for you to disconnect the battery
yourself, make sure that:
R you switch off the engine and remove the
key. On vehicles with KEYLESS-GO,
ensure that the ignition is switched off.
Check that all the indicator lamps in the
instrument cluster are off. Otherwise,
electronic components, such as the
alternator, may be damaged.
R you first remove the negative terminal
clamp and then the positive terminal514
Battery
Roadside Assistance
Page 518 of 572
Jump-starting
G
WARNING
Failure to follow these directions will cause damage to the electronic components, and can lead
to a battery explosion and severe injury or death.
Never lean over batteries while connecting or jump starting. You might get injured.
Battery fluid contains sulfuric acid. Do not allow this fluid to come in contact with eyes, skin or
clothing. In case it does, immediately flush affected area with water, and seek medical help if
necessary.
A battery will also produce hydrogen gas, which is flammable and explosive. Keep flames or
sparks away from battery, avoid improper connection of jumper cables, smoking, etc.
Attempting to jump start a frozen battery can result in it exploding, causing personal injury.
Read all instructions before proceeding. G
WARNING
Non-combusted fuel can collect in the exhaust system and ignite. There is a risk of fire. Avoid
repeated and lengthy starting attempts.
! Avoid repeated
and lengthy starting attempts. Otherwise, the catalytic converter could be
damaged by the non-combusted fuel.
Do not start the vehicle using a rapid charging device. If your vehicle's battery is discharged,
the engine can be jump-started from another vehicle or from a second battery using jumper
cables. Observe the following points:
R The battery is not accessible in all vehicles. If the other vehicle's battery is not accessible,
jump-start the vehicle using a second battery or a jump-starting device.
R You may only jump-start the vehicle when the engine and catalytic converter are cold.
R Do not start the engine if the battery is frozen. Let the battery thaw first.
R Only jump-start from batteries with a 12 V voltage rating.
R Only use jumper cables which have a sufficient cross-section and insulated terminal clamps.
R If the battery is fully discharged, leave the battery that is being used to jump-start connected
for a few minutes before attempting to start. This charges the empty battery a little.
R Make sure that the two vehicles do not touch.
Make sure that:
R the jumper cables are not damaged.
R when the jumper cables are connected to the battery, uninsulated sections of the terminal
clamp do not come into contact with other metal sections.
R the jumper cables cannot come into contact with parts such as the V-belt pulley or the fan.
These parts move when the engine is started and while it is running.
X Secure the vehicle by applying the electric parking brake.
X Shift the transmission to position P.
X Turn the SmartKey to position 0
in
the ignition lock and remove it (Y page 135). On vehicles
with KEYLESS-GO, make sure the ignition is switched off ( Y page 135). All indicator lamps
in the instrument cluster must be off. 516
Jump-starting
Roadside Assistance
Page 523 of 572
Fuses
Important safety notes
G
WARNING
Only use fuses that have been approved for
Mercedes-Benz vehicles and that have the
correct fuse rating for the systems
concerned. Do
not attempt to repair or bridge
faulty fuses. Using fuses that have not been
approved or attempting to repair or bridge
faulty fuses could cause the fuse to be
overloaded and result in a fire. Have the cause
traced and rectified at a qualified specialist
workshop.
! Only use fuses that have been approved
for Mercedes-Benz vehicles and which
have the correct fuse rating for the system
concerned. Otherwise, components or
systems could be damaged.
The fuses in your vehicle serve to close down
faulty circuits. If a fuse blows, all the
components on the circuit and their functions
stop operating.
Blown fuses must be replaced with fuses of
the same rating, which you can recognize by
the color and value. The fuse ratings are listed
in the fuse allocation chart.
If a newly inserted fuse also blows, have the
cause traced and rectified at a qualified
specialist workshop, e.g. an authorized
Mercedes-Benz Center. Before changing a fuse
X Secure the vehicle against rolling away
(
Y page 154).
X Switch off all electrical consumers.
X Turn the key to position 0 in the ignition
lock and remove it (Y page 135). On
vehicles with KEYLESS-GO, make sure the
ignition is switched off (Y page 135). All
indicator lamps in the instrument cluster
must be off. The fuses are located in various fuse boxes:
R
fuse box
in the engine compartment on the
right-hand side of the vehicle, when viewed
in the direction of travel
R Dashboard fuse box
R Fuse box in the rear
The fuse allocation chart is located in the
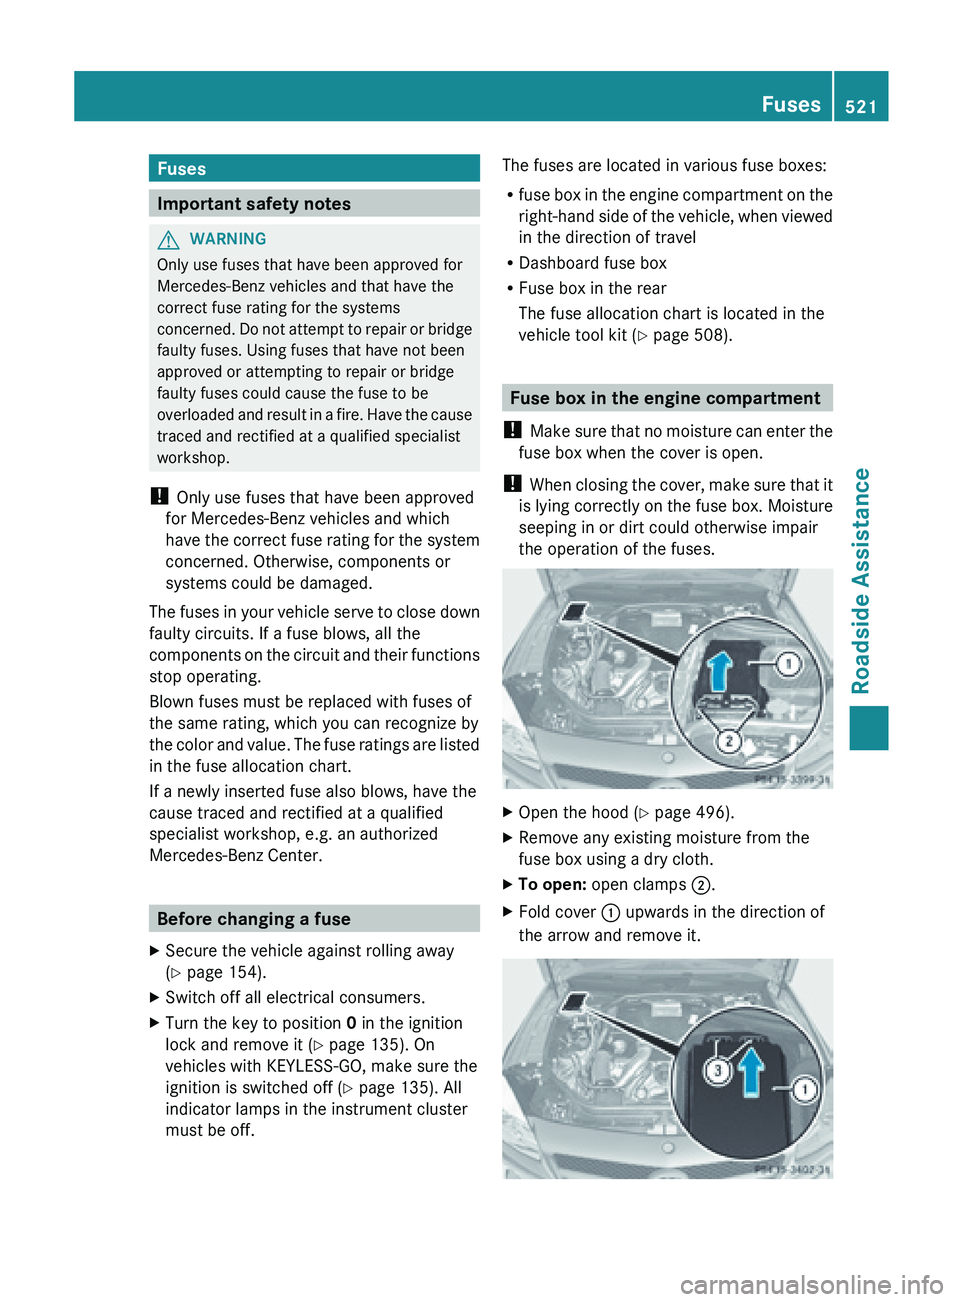
vehicle tool kit (Y page 508). Fuse box in the engine compartment
! Make sure
that no moisture can enter the
fuse box when the cover is open.
! When closing the cover, make sure that it
is lying correctly on the fuse box. Moisture
seeping in or dirt could otherwise impair
the operation of the fuses. X
Open the hood (
Y page 496).
X Remove any existing moisture from the
fuse box using a dry cloth.
X To open: open clamps ;.
X Fold cover : upwards in the direction of
the arrow and remove it. Fuses
521
Roadside Assistance Z