Mercury Mountaineer 1997 Owner's Manuals
Manufacturer: MERCURY, Model Year: 1997, Model line: Mountaineer, Model: Mercury Mountaineer 1997Pages: 197, PDF Size: 2.08 MB
Page 111 of 197

If the GVWR or the GAWR
specified on the Safety
Compliance Certification Label is
exceeded, your vehicle may be
damaged or you may lose control
and injure someone.
Towing trailers beyond the
maximum recommended
gross trailer weight exceeds the
limits of the vehicle and could
result in engine damage,
transmission/axle damage,
structural damage, loss of
control, and personal injury.
Calculating the load your
vehicle can carry/tow
1. Use the Safety Compliance
Certification Label to find the axle
code number and engine type for
your vehicle.
2. Use the appropriate maximum
Gross Combined Weight Rating
(GCWR) chart to find the
maximum GCWR for your type
engine and rear axle ratio.
3. Weigh your vehicle as you
customarily operate the vehicle
without cargo. To obtain correct
weights, try taking your vehicle to
a shipping company or an
inspection station for trucks.
4. Subtract your loaded vehicle
weight from the maximum GCWR
on the following charts. This is the
maximum trailer weight your
vehicle can tow and must fall
Driving
111
Page 112 of 197

below the maximum shown under
maximum trailer weight on the
chart.
Trailer Towing Table
4R70W Automatic Transmission
EngineRear
Axle
RatioMaximum
GCWR kg (lb)
1
Maximum
Trailer Weight
kg (lb)
2
Maximum
Frontal Area of
Trailer ft
2-Wheel Drive
5.0L 3.73 4,990 (11,000) 3,039 (6,700) 50
All-Wheel Drive
5.0L 3.73 4,990 (11,000) 2,944 (6,500) 50
1For high altitude operation, reduce GCWR by 2% per 300 meters
(1,000 ft) elevation.
2To determine the maximum trailer weight designed for your particular
vehicle as equipped, follow the sectionCalculating the load your
vehicle can carry/towearlier in this section.
Preparing to tow
Use the proper equipment for
towing a trailer, and make sure it
is properly attached to your
vehicle. See your dealer or a
reliable trailer dealer if you require
assistance.
Hitches
Do not use or install hitches that
clamp onto the bumper or to the
axle. Underbody hitches are
acceptable if installed properly.
The rear bumper has an integral
hitch and only requires a ball with
a 3/4 inch shank diameter. The
Driving
112
Page 113 of 197

bumper has a Class II rating (1590
kg/3500 lb trailer weight and 159
kg/350 lb tongue weight).
Safety chains
Always connect the trailer's safety
chains to the vehicle. To connect
chains when towing with the step
bumper, cross the chains under the
trailer tongue and allow slack for
turning corners. Connect the
chains to the holes in the
underside of the hitch plate for a
Class II frame mounted hitch.
When using a frame mounted
trailer hitch, attach the safety
chains to the frame mounted hitch
using the recommendations
supplied by the hitch
manufacturer.
Trailer brakes
Trailer brakes are required on
most towed vehicles weighing over
680 kg/ 1500 lb. Use electric
brakes or manual, automatic, or
surge-type hydraulic brakes that
meet Federal and local regulations.
Install and adjust the brakes
according to the manufacturer's
instructions.
Do not connect a trailer's
hydraulic brake system
directly to your vehicle's brake
system. Your vehicle may not
have enough braking power and
your chances of having a
collision greatly increase.
Driving
113
Page 114 of 197

Trailer lamps
Trailer lamps are required on most
towed vehicles. Make sure your
trailer lamps conform to Federal
and local regulations. See your
dealer or trailer rental agency for
the proper instructions and
equipment for hooking up trailer
lamps.
Do not hook the trailer
lamps directly into the
vehicle's lighting system wiring.
If the trailer lamps are not
installed properly, the warning
lights in the instrument cluster
may not work properly.
Driving while you tow
Do not drive faster than 88km/h
(55 mph) while towing a trailer. Do
not drive faster than 72 km/h (45
mph) while towing in hilly country
or on hot days.
Speed control may shut off if you
are towing on very long, steep
grades.
When towing a trailer:
²Use D (3rd gear) rather than
D(Overdrive) while towing up
or down steep hills. This will
eliminate excessive downshifting
and upshifting for optimum fuel
economy and transmission
cooling.
²Anticipate stops and brake
gradually.
Driving
114
Page 115 of 197

Servicing while towing
If you tow a trailer for long
distances, your vehicle will require
more frequent service intervals.
Refer to theService Guidefor
more information.
Trailer towing
²Practice turning, stopping and
backing in an area before
starting on a trip to get the feel
of the vehicle/trailer
combination. When turning,
drive slightly beyond the normal
turning point so the trailer
wheels will clear curbs and
other obstacles.
²Allow more room for stopping
with a trailer attached.
²The trailer tongue weight should
be 10-15% of the loaded trailer
weight for a Class I or II rear
bumper hitch.
²After you have travelled about
80 km (50 miles), thoroughly
check your hitch, electrical
connections and trailer wheel
lug nuts.
²When stopped in traffic for long
periods of time in hot weather,
place the gearshift in P (Park)
to increase idle speed. This aids
engine cooling and air
conditioner efficiency.
²Vehicles with trailers should not
be parked on a grade. If you
must park on a grade, place
wheel chocks under the trailer's
wheels.
Driving
115
Page 116 of 197

Luggage rack (if equipped)
Load luggage as far back as it will
safely go without loading more
than 45 kg (100 lb) or cause the
vehicle to exceed the Gross
Vehicle Weight Rating (GVWR) or
its Gross Axle Weight Rating
(GAWR). Use the following steps
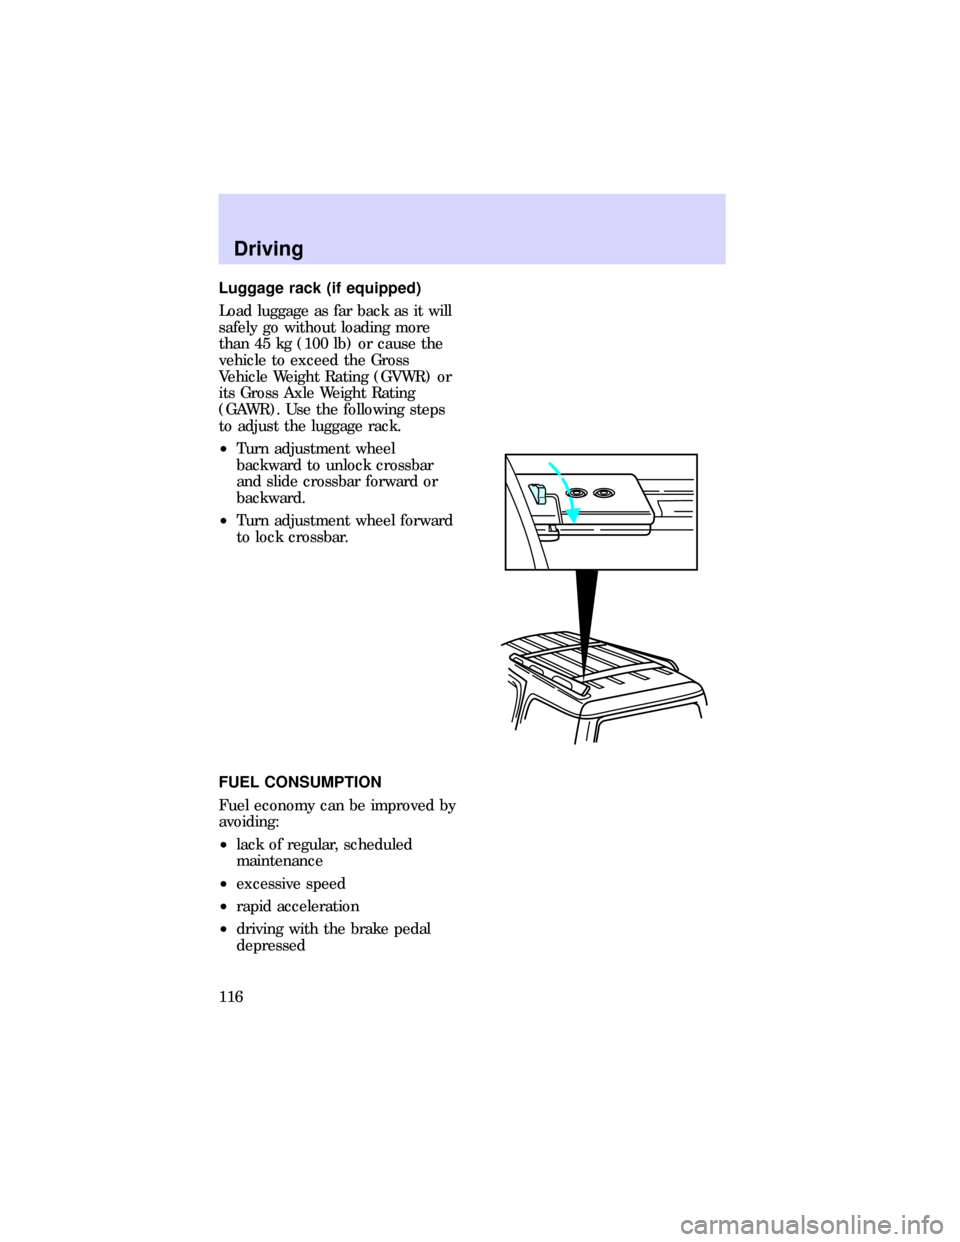
to adjust the luggage rack.
²Turn adjustment wheel
backward to unlock crossbar
and slide crossbar forward or
backward.
²Turn adjustment wheel forward
to lock crossbar.
FUEL CONSUMPTION
Fuel economy can be improved by
avoiding:
²lack of regular, scheduled
maintenance
²excessive speed
²rapid acceleration
²driving with the brake pedal
depressed
Driving
116
Page 117 of 197

²sudden stops
²extended engine idling
²use of speed control in hilly
terrain
²extended use of the air
conditioner, defroster, rear
window defroster and other
accessories
²underinflated tires
²heavy loads
²aftermarket add-ons such as
bike, ski or luggage racks, bug
deflectors, etc.
Driving
117
Page 118 of 197

HAZARD SWITCH
Use the hazard flashers to warn
traffic of vehicle problems.
Press button down to activate
hazard flashers.
Press button again to deactivate
hazard flashers.
FUEL PUMP SHUTOFF SWITCH
The fuel pump shutoff switch stops
the fuel pump when the vehicle
has been involved in a collision or
major jolt. If the vehicle does not
start, it is possible that the fuel
pump shutoff switch needs to be
reset.
If you see or smell fuel, do
not reset the switch or try
to start your vehicle. Have all the
passengers get out of the vehicle
and call the local fire department
or a towing service.
0P RND21
UNLEADED
FUEL ONLY
RPM x 100012345
6H
C
F
E
RSM
SET
ACC
COAST OFF ON
SRS
- +H
H
L L020
1030405060
70
80
90
110
120000000oooo
km/h100
20406080100
120
140
160
180
Roadside emergencies
118
Page 119 of 197

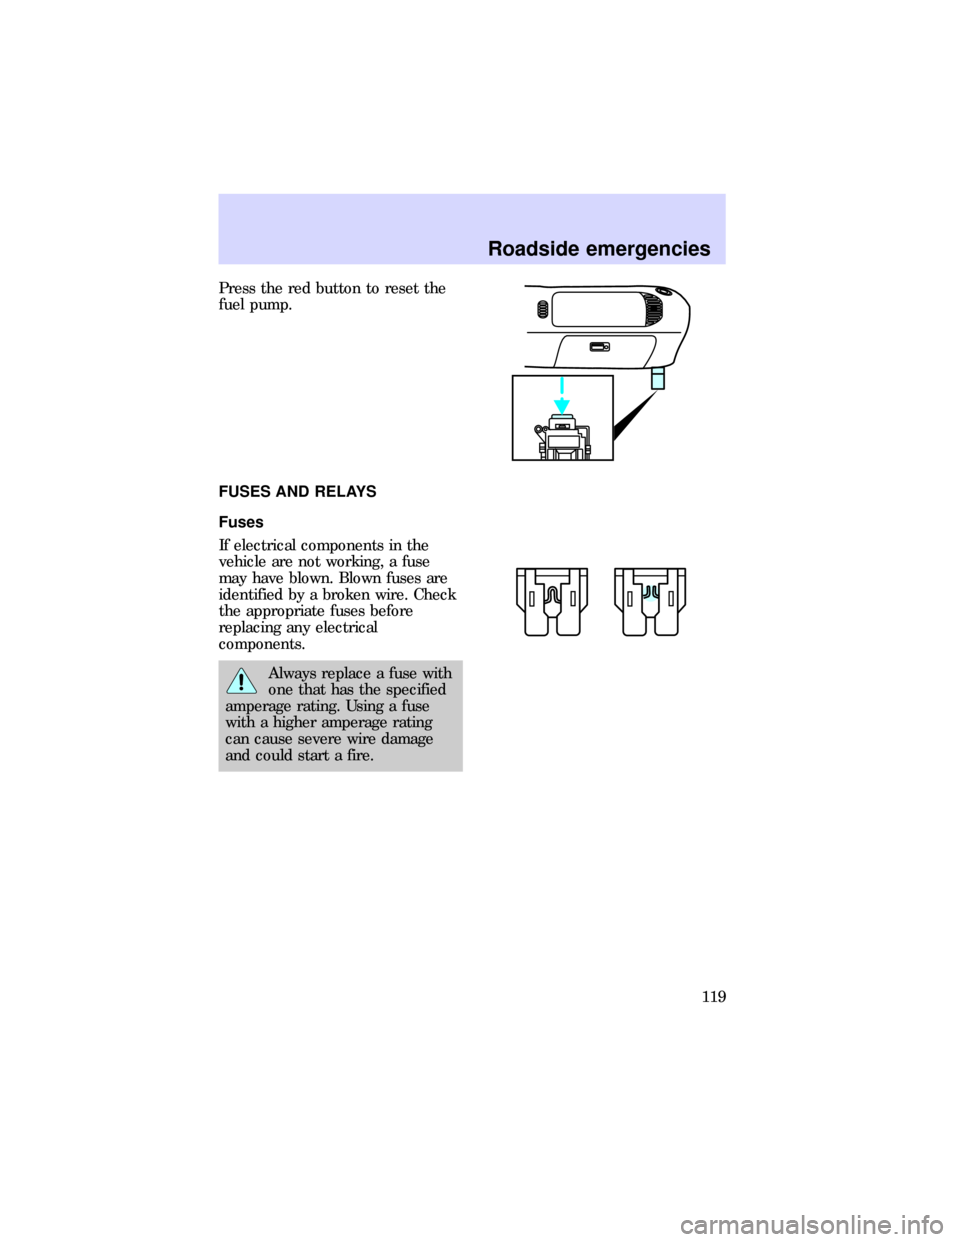
Press the red button to reset the
fuel pump.
FUSES AND RELAYS
Fuses
If electrical components in the
vehicle are not working, a fuse
may have blown. Blown fuses are
identified by a broken wire. Check
the appropriate fuses before
replacing any electrical
components.
Always replace a fuse with
one that has the specified
amperage rating. Using a fuse
with a higher amperage rating
can cause severe wire damage
and could start a fire.
Roadside emergencies
119
Page 120 of 197

Standard fuse amperage rating
and color
Fuse Rating Color
7.5 amp Brown
10 amp Red
15 amp Blue
20 amp Yellow
30 amp Light Green
30 amp fuse link Pink
40 amp Green
60 amp fuse link Yellow
80 amp fuse link Black
100 amp fuse link Blue
Even after a fuse is replaced, it
will continue to blow if the cause
of the overload is not identified
and corrected. If a fuse continues
to blow, have the vehicle's
electrical system checked.
Passenger compartment fuse
panel
Pull panel outward to access
passenger compartment fuse panel.
Roadside emergencies
120