Mercury Villager 1999 Owner's Manuals
Villager 1999
Mercury
Mercury
https://www.carmanualsonline.info/img/33/11172/w960_11172-0.png
Mercury Villager 1999 Owner's Manuals
Trending: coolant, catalytic converter, service, wheelbase, horn, check engine light, wheel
Page 111 of 264
Always drive and ride with your seatback upright and the lap
belt snug and low across the hips.
Reclining the seatback can reduce the effectiveness of the seat's
safety belt in the event of a collision.
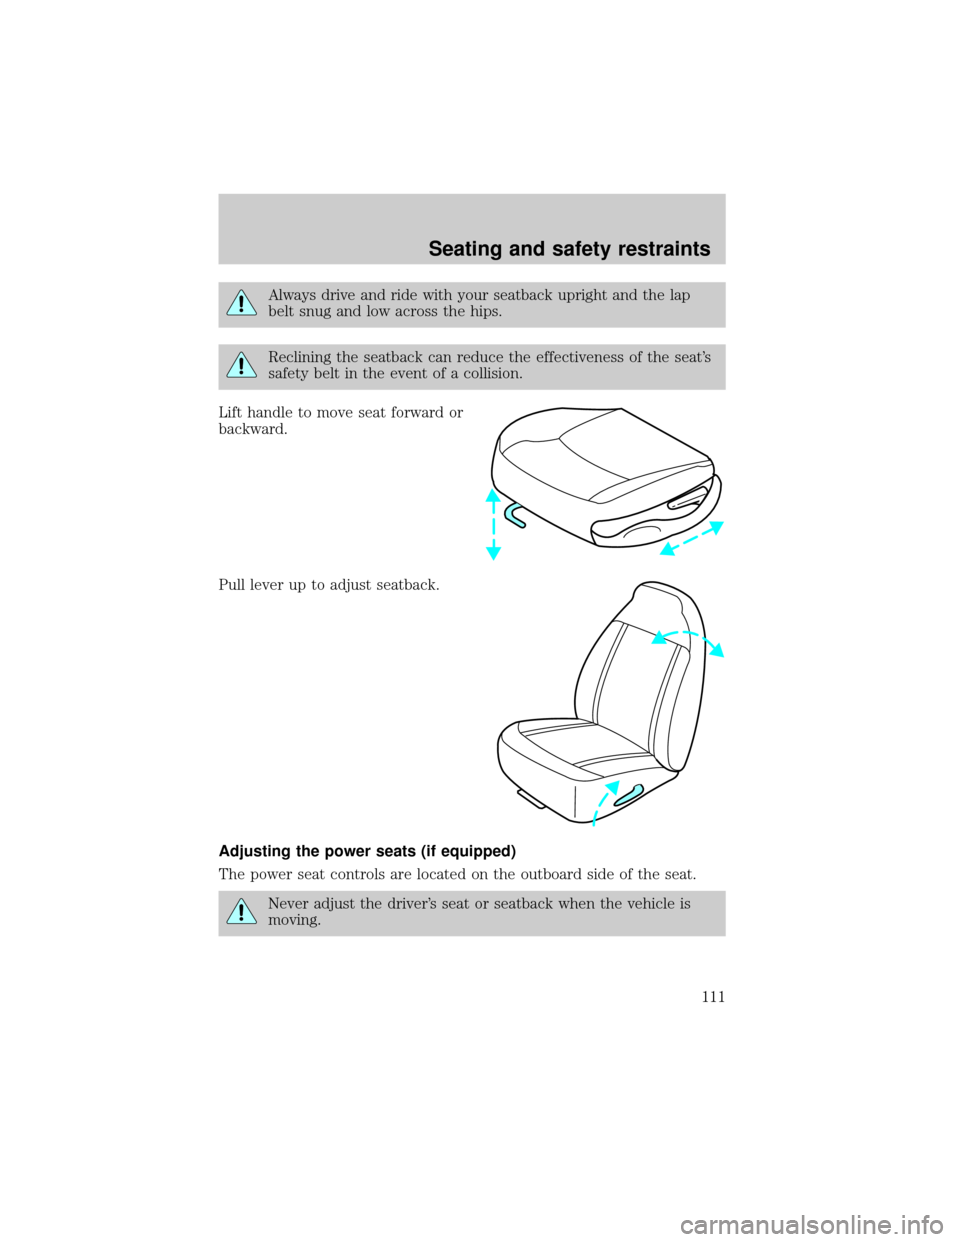
Lift handle to move seat forward or
backward.
Pull lever up to adjust seatback.
Adjusting the power seats (if equipped)
The power seat controls are located on the outboard side of the seat.
Never adjust the driver's seat or seatback when the vehicle is
moving.
Seating and safety restraints
111
Page 112 of 264
Always drive and ride with your seatback upright and the lap
belt snug and low across the hips.
Reclining the seatback can reduce the effectiveness of the seat's
safety belt in the event of a collision.
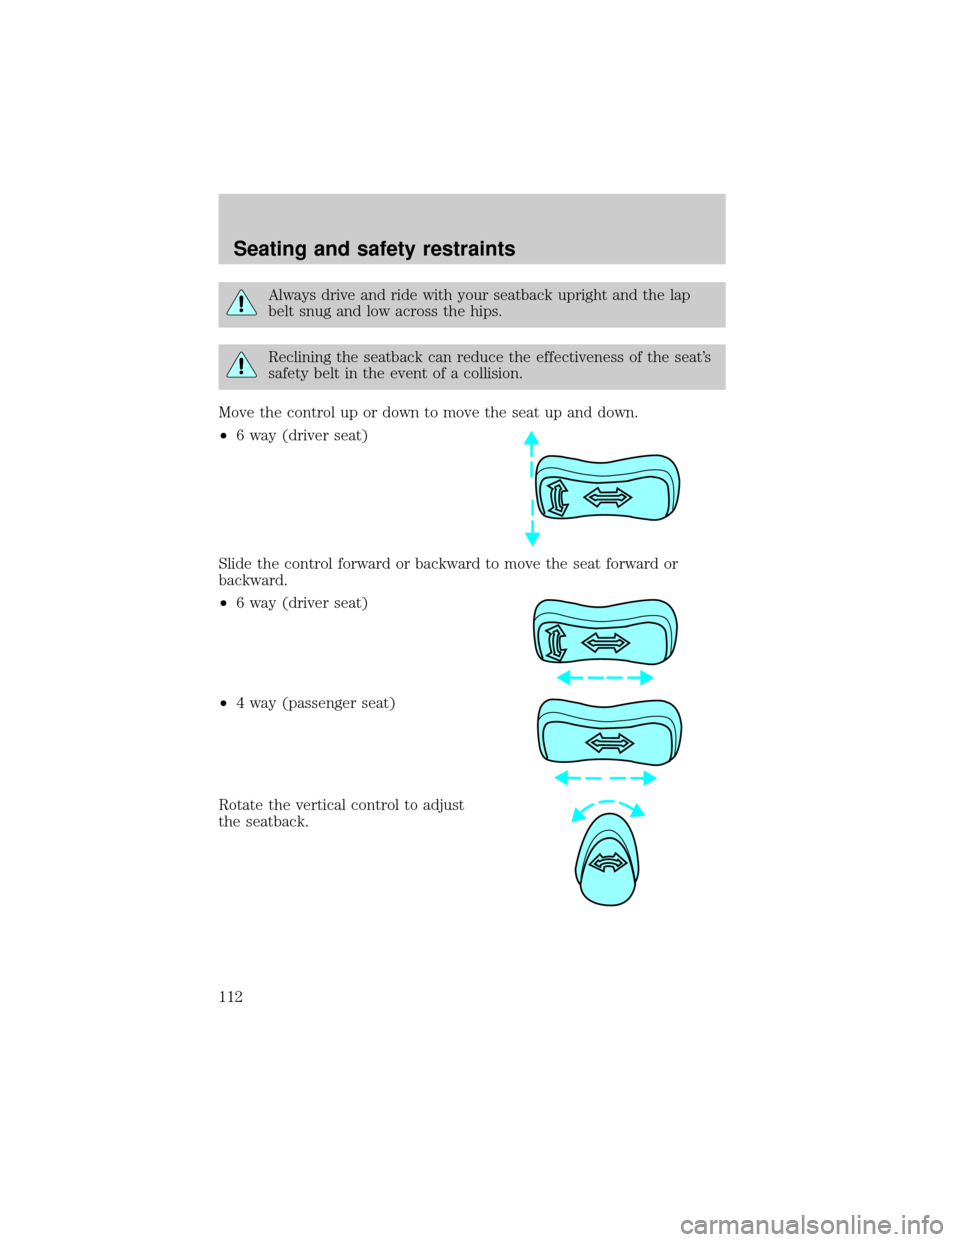
Move the control up or down to move the seat up and down.
²6 way (driver seat)
Slide the control forward or backward to move the seat forward or
backward.
²6 way (driver seat)
²4 way (passenger seat)
Rotate the vertical control to adjust
the seatback.
Seating and safety restraints
112
Page 113 of 264

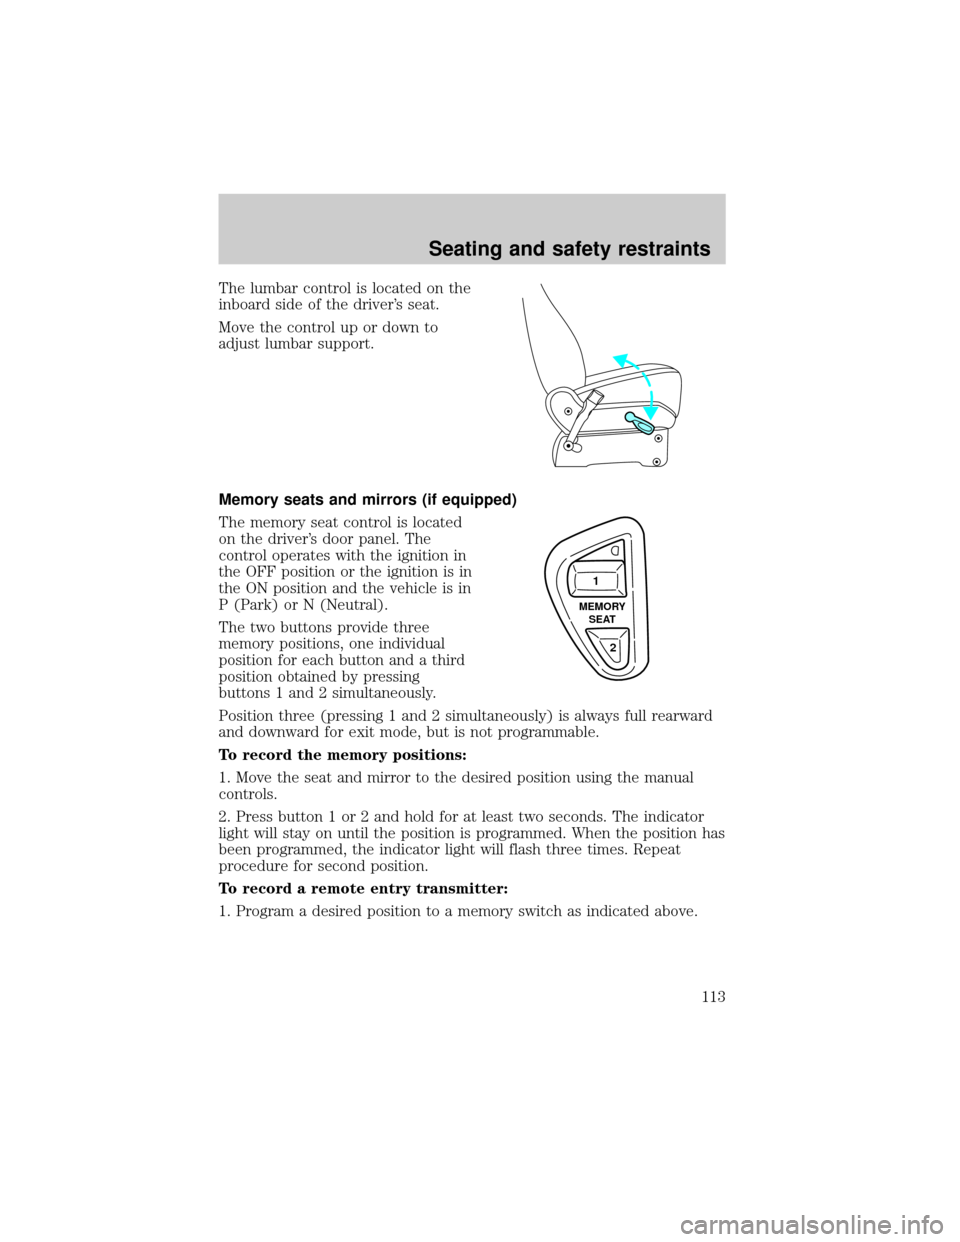
The lumbar control is located on the
inboard side of the driver's seat.
Move the control up or down to
adjust lumbar support.
Memory seats and mirrors (if equipped)
The memory seat control is located
on the driver's door panel. The
control operates with the ignition in
the OFF position or the ignition is in
the ON position and the vehicle is in
P (Park) or N (Neutral).
The two buttons provide three
memory positions, one individual
position for each button and a third
position obtained by pressing
buttons 1 and 2 simultaneously.
Position three (pressing 1 and 2 simultaneously) is always full rearward
and downward for exit mode, but is not programmable.
To record the memory positions:
1. Move the seat and mirror to the desired position using the manual
controls.
2. Press button 1 or 2 and hold for at least two seconds. The indicator
light will stay on until the position is programmed. When the position has
been programmed, the indicator light will flash three times. Repeat
procedure for second position.
To record a remote entry transmitter:
1. Program a desired position to a memory switch as indicated above.
2 1
MEMORY
SEAT
Seating and safety restraints
113
Page 114 of 264
2. Press and hold the desired memory position button. Within ten
seconds, press the unlock button on the transmitter while the memory
button is pressed.
3. When the transmitter has been programmed, the indicator will flash
five times. The indicator light will remain illuminated until the memory
button is pressed again or ten seconds lapse.
To remove a remote entry transmitter from memory:
1. Press and hold both memory seat buttons 1 and 2 and then press the
unlock button on the remote entry transmitter.
REAR SEATS
Removable floor mats
Whenever the floor mats are removed to adjust or move any of the rear
seats, always reinstall the mats before passengers ride in the vehicle. The
floor mats are specifically designed to keep objects out of the seat
tracks.
The cargo mat (A.) can be reversed (top to bottom) to retain soils and
liquids.
²7 passenger vehicle
A. Cargo mat
B. Narrow mats
C. Sliding door mats, LH/RH
ACB
Seating and safety restraints
114
Page 115 of 264
²4 passenger vehicle (with third row seat in storage position)
A. Cargo mat
B. Narrow mats
C. Sliding door mats, LH/RH
²5 passenger vehicle (second row seats removed)
A. Cargo mat
B. Narrow mats
C. Sliding door mats, LH/RH
ABCB
BAB
C
Seating and safety restraints
115
Page 116 of 264
²5 passenger vehicle (second row seats removed and third row bench
seat moved forward to limousine seating position)
A. Cargo mat
B. Narrow mats
²Two passenger vehicle (second row seats removed and third row seat
stored in full forward position)
A. Cargo mat
B. Narrow mats
Stowed cupholders
The vehicle is equipped with cupholders that pull out from the 2nd row
seat:
²Bench seat - below center of the seat cushion
AB
AB
Seating and safety restraints
116
Page 117 of 264
²Bucket seat (driver's side only) -
inboard side of seat base
Use only soft cups in the cupholder. Hard objects can injure you
in a collision.
Adjusting 2nd row bench
Pull control up to flip seatback to
forward flat position.
Seating and safety restraints
117
Page 118 of 264
2nd row bucket seats (if equipped)
²Adjusting the left side bucket seat
Pull control up to recline the
seatback or fold the seatback flat.
²Adjusting the right side (E-Z Entry Tip Slide) bucket seat
The E-Z Entry Tip Slide seat allows for easier entry and exit to and from
the 3rd row seat. The E-Z Entry system will slide the seat and tip the
seatback forward (the seatback must be in the upright position).
To enter the 3rd row seat, pull up
on the seatback recline handle.
Seating and safety restraints
118
Page 119 of 264
To exit the third row seat, pull up
on the 3rd row access control.
To return the seat to a seating position, move the seat rearward until the
seat track locks. Then readjust the seatback.
Lift handle to move the seat forward
or backward.
Seating and safety restraints
119
Page 120 of 264
Pull control up to flip seatback to a
forward flat position.
Adjusting 3rd row bench
Pull control up to adjust seatback
position.
This control will also allow the
seatback to be put in the forward
flat position.
Seating and safety restraints
120
Trending: transmission fluid, power steering fluid, belt, traction control, stop start, low oil pressure, remote control


