MINI COOPER 2003 Manual PDF
Manufacturer: MINI, Model Year: 2003, Model line: COOPER, Model: MINI COOPER 2003Pages: 148, PDF Size: 3.17 MB
Page 71 of 148
69
OVERVIEW REPAIRS OPERATIONCONTROLS DATA INDEX
AIR CONDITIONING SYSTEM
*
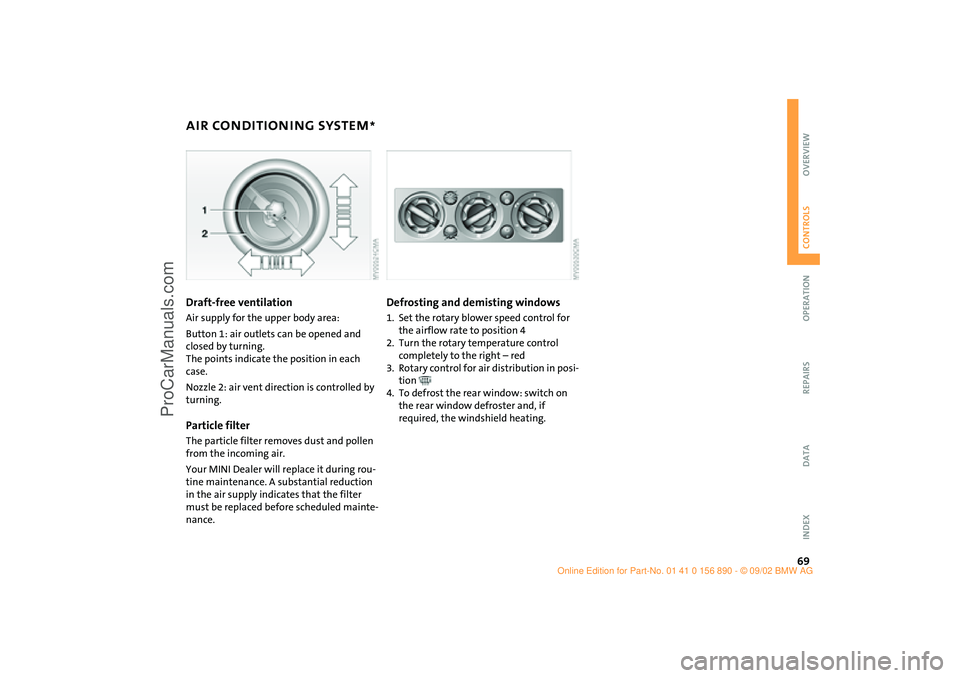
Draft-free ventilation
Air supply for the upper body area:
Button 1: air outlets can be opened and
closed by turning.
The points indicate the position in each
case.
Nozzle 2: air vent direction is controlled by
turning.Particle filter The particle filter removes dust and pollen
from the incoming air.
Your MINI Dealer will replace it during rou-
tine maintenance. A substantial reduction
in the air supply indicates that the filter
must be replaced before scheduled mainte-
nance.
Defrosting and demisting windows 1. Set the rotary blower speed control for
the airflow rate to position 4
2. Turn the rotary temperature control
completely to the right – red
3. Rotary control for air distribution in posi-
tion
4. To defrost the rear window: switch on
the rear window defroster and, if
required, the windshield heating.
ba.book Seite 69 Montag, 5. August 2002 8:09 20
ProCarManuals.com
Page 72 of 148

70
AUTOMATIC CLIMATE CONTROL
*
1Air onto the windshield and onto the
side windows
2Air for the upper body area72
3Air for the front and rear footwells
4Rear window defroster and windshield
heating715Interior temperature sensor – please
keep clear and unobstructed
6Recirculated air mode71
7Air conditioner68
8Automatic air distribution and supply71
9Switching the automatic climate control
on/off7110 Temperature71
11 Display for temperature and air
supply71
12 Blower for air supply71
13 Defrosting and demisting the wind-
shield and side windows69
14 Individual air distribution72
ba.book Seite 70 Montag, 5. August 2002 8:09 20
ProCarManuals.com
Page 73 of 148

71
OVERVIEW REPAIRS OPERATIONCONTROLS DATA INDEX
AUTOMATIC CLIMATE CONTROL
*
Automatic air distribution and supply
Automatic program (AUTO):
Indicator lamp lights up.
Automatic adjustment of the air distribution
and supply, and adaptation of the specified
temperatures to external influences, i.e. out-
side temperature and sunlight.
In the automatic program (AUTO), the air
conditioner is activated automatically.
Switching the automatic climate
control on/off
The blower, heating and air condi-
tioner are switched off.
To switch the automatic climate control on
again: Press any button of the automatic
climate control.
Air conditioning
Air conditioner switched on:
Indicator lamp lights up.
The air is cooled and dehumidified and –
depending on the temperature setting –
rewarmed.
In the automatic program (AUTO), the air
conditioner is activated automatically.
After the engine start, the windshield may
fog over briefly. Switching on the air condi-
tioner reduces condensation on the windows.
Condensation forms in the air condi-
tioner system during operation, and
then exits under the vehicle. Traces of con-
densed water on the ground are therefore
normal.<
Recirculated air mode
Supply of outside air into the vehi-
cle is blocked: Indicator lamp lights
up.
The air within the vehicle is recirculated.
In the automatic program (AUTO) in hot
weather conditions, the recirculated air
mode is activated temporarily to enable
faster cooling.
Do not run the recirculated air mode
for longer than approx. 30 minutes,
as otherwise the air quality in the interior
will deteriorate.<
If the windows fog up in the recircu-
lated air mode, turn the recirculated
air mode off and if necessary increase the
air supply.<
Rear window defroster and windshield
heating*
Rear window defroster and wind-
shield heating switched on:
Indicator lamp lights up.
As long as the indicator lamp is lit, the
heating operates at high power output –
rapid defrosting.
Indicator lamp goes out.
The heating continues to run with reduced
power output and then switches itself off
automatically.Temperature
Setting the temperature:
Move or turn the wheel in the
appropriate direction to increase
the temperature step by step.
The figures in the display provide a general
indication of interior temperature. When
you start the vehicle, the system ensures
that the selected temperature is achieved
as quickly as possible and then maintained.
Permanent heating with maximum
power output at temperature selec-
tion HI. Permanent cooling at LO.<
Air supply
Press the left or right half of the
button: the air supply varies.
ba.book Seite 71 Montag, 5. August 2002 8:09 20
ProCarManuals.com
Page 74 of 148
72
AUTOMATIC CLIMATE CONTROL
*
Defrosting and demisting windows
Press the button briefly.
The indicator lamp flashes.
Ice and condensation are removed from the
rear window/windshield and side
windows.
The rear window defroster/windshield
heating is switched on automatically. It can
be switched off again separately.
Press the button for a longer period.
Only air to the windshield.
Individual air distribution
Combine the air distribution
yourself. This switches off the
automatic program.
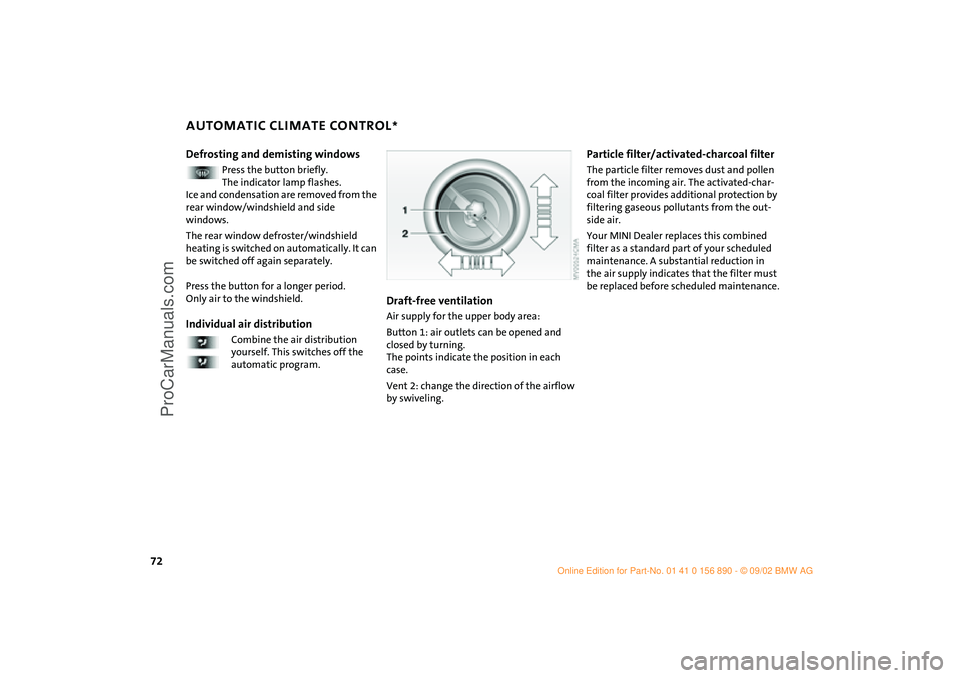
Draft-free ventilation Air supply for the upper body area:
Button 1: air outlets can be opened and
closed by turning.
The points indicate the position in each
case.
Vent 2: change the direction of the airflow
by swiveling.
Particle filter/activated-charcoal filterThe particle filter removes dust and pollen
from the incoming air. The activated-char-
coal filter provides additional protection by
filtering gaseous pollutants from the out-
side air.
Your MINI Dealer replaces this combined
filter as a standard part of your scheduled
maintenance. A substantial reduction in
the air supply indicates that the filter must
be replaced before scheduled maintenance.
ba.book Seite 72 Montag, 5. August 2002 8:09 20
ProCarManuals.com
Page 75 of 148

73
OVERVIEW REPAIRS OPERATIONCONTROLS DATA INDEX
GLOVE COMPARTMENT ASHTRAY/BEVERAGE HOLDER
LIGHTER/12 V POWER SUPPLY
To open:
Pull the handle.
The light goes on.
To close:
Fold the door up.
To prevent injury in the event of an
accident, close the glove compart-
ment immediately after use.<
AshtrayThe ashtray is located in one of the bever-
age holders in the center console.
In the rear, an ashtray can also be fitted in
the beverage holder at the end of the cen-
ter console.Beverage holdersThere are two beverage holders at the front
of the center console. Another is located at
the end of the center console.
From ignition key position 1:
Press the cigarette lighter in.
Remove as soon as the lighter jumps back
out.
Hold or touch the hot cigarette lighter
by the knob only. Holding or touching
it in other areas could result in burns.
flashlights, car vacuum cleaners, etc., up to
a rating of approx. 200 Watts at 12 Volts.
Avoid damaging the socket with plugs of
different shapes or sizes.
The 12 V power supply is also used for sup-
plying the compressor of the MINI Mobility
System.
ba.book Seite 73 Montag, 5. August 2002 8:09 20
ProCarManuals.com
Page 76 of 148

74
CARGO AREA COVER FOLDABLE REAR BACKRESTWhen the tailgate is opened, the cargo area
cover is also raised.
Never place any heavy or hard objects
on the cargo area cover, otherwise
occupants could be injured during braking
maneuvers.<
RemovalTo load bulky luggage, the compartment
cover can be removed.
1. Remove the retaining straps on the tail-
gate.
2. Pull the cargo area cover out towards
the rear.
To unlock and fold1. Pull lever
2. Fold the rear backrest forwards.
When folding the backrest back into
its original position always ensure
that the catch engages securely. A loose
backrest might fail to prevent cargo from
entering the passenger compartment dur-
ing sudden braking or evasive maneuvers,
posing a potential hazard to occupants.<
ba.book Seite 74 Montag, 5. August 2002 8:09 20
ProCarManuals.com
Page 77 of 148

75
OVERVIEW REPAIRS OPERATIONCONTROLS DATA INDEX
LOADING CARGOStowing cargo >Place heavy cargo as far forward as possi-
ble – directly behind the backrests – and
as low as possible.
>Cover sharp edges and corners
>Do not pile objects higher than the top
edge of the backrest
>For very heavy cargo when the rear seat
is unoccupied, fasten each safety belt in
the opposite buckle. This provides addi-
tional stabilization for the rear backrests.
Securing the load >Secure smaller and lighter items using
the cargo area net
* or elastic straps
>For large, heavy items, see your MINI
Dealer for load-securing devices
*. Lash-
ing eyes are provided at the inner corners
of the cargo area for attaching these
load-securing devices
>Comply with the information enclosed
with the load-securing devices.
ba.book Seite 75 Montag, 5. August 2002 8:09 20
ProCarManuals.com
Page 78 of 148
76
LOADING CARGO ROOF-MOUNTED LUGGAGE RACK
*
Always position and secure the load
carefully. If you do not, it can endan-
ger the passengers during braking or eva-
sive maneuvers.
Do not exceed the permissible gross weight
and axle load, see page 132, otherwise the
vehicle's operating safety is no longer
assured and you are in violation of the law.
Do not stow heavy or hard objects in the
passenger compartment without first
securing them. Otherwise they would be
thrown around during braking and evasive
maneuvers and endanger the occupants.<
When loading a roof-mounted lug-
gage rack, ensure that there is suffi-
cient space for the movement of the slid-
ing/tilt sunroof and that no objects
protrude into the swiveling area of the tail-
gate, as otherwise damage can occur.<
Do not secure the roof-mounted lug-
gage rack to the trim panels/strips:
the lack of a secure hold could lead to dam-
age or accidents.<
Special roof-mounted luggage racks
for your MINI are available as acces-
sories from your MINI Dealer.<
ba.book Seite 76 Montag, 5. August 2002 8:09 20
ProCarManuals.com
Page 79 of 148
77
OVERVIEW REPAIRS OPERATIONCONTROLS DATA INDEX
ba.book Seite 77 Montag, 5. August 2002 8:09 20
ProCarManuals.com
Page 80 of 148
78
ba.book Seite 78 Montag, 5. August 2002 8:09 20
ProCarManuals.com