MINI COOPER 2003 Owner's Guide
Manufacturer: MINI, Model Year: 2003, Model line: COOPER, Model: MINI COOPER 2003Pages: 148, PDF Size: 3.17 MB
Page 31 of 148

29
OVERVIEW REPAIRS OPERATIONCONTROLS DATA INDEX
SLIDING/TILT SUNROOF
*
To prevent injuries, exercise care
when closing the sliding/tilt sunroof
and keep it in your field of vision until it is
shut. Make sure that the closing path of the
sliding/tilt sunroof is clear.
When leaving the vehicle, always remove
the ignition key from the lock and remem-
ber to close the doors, e.g. to prevent chil-
dren from operating the sunroof and injur-
ing themselves.
Be sure that adequate clearance is main-
tained for the opening path of the sliding/
tilt sunroof, otherwise damage can occur.<
For convenience operation via the door
lock, refer to page 25.
Raising – Opening – ClosingFrom ignition key position 1:To raisePress the switch
or
push the switch backwards to the resis-
tance point.To open and close1. Push the switch in the desired direction
until you feel resistance, and hold in this
position
2. Release the switch when the desired
sunroof position has been reached.
Do not use force to close the sliding/
tilt sunroof in its raised position, as
damage to the mechanism could result.<
After the ignition has been switched off:
You can still operate the sliding/tilt sunroof
for up to one minute, as long as no one
opens any of the doors.
If a door is opened during operation, the
opening/closing stops immediately.
Automatic openingPush the switch back past the point of
resistance:
The sunroof opens completely.
Touching the switch briefly during opening
stops the movement immediately.
ba.book Seite 29 Montag, 5. August 2002 8:09 20
ProCarManuals.com
Page 32 of 148

30
SLIDING/TILT SUNROOF
*
ROLLER SUN BLIND
*
Manual opening and closing
In the event of an electrical malfunction,
you can also operate the sliding/tilt sun-
roof manually:
1. Push the clock towards the interior and
remove
2. Use an Allen wrench to turn the sliding/
tilt sunroof in the desired direction.
1Opening1. Press the button in the handle, see
arrow 1.
The cap is unlocked
2. Guide the roller sun blind towards the
back.2Closing1. Use the handle to pull the roller sun
blind forwards
2. Engage the handle in the device, see
arrow 2.
ba.book Seite 30 Montag, 5. August 2002 8:09 20
ProCarManuals.com
Page 33 of 148

31
OVERVIEW REPAIRS OPERATIONCONTROLS DATA INDEX
ALARM SYSTEM
*
The concept
The alarm system reacts if:
>A door, the bonnet or the tailgate is
opened
>There is any movement inside the vehicle
– interior motion sensor
>There is a change in the tilt angle of the
vehicle, e. g. during attempts to steal
wheels or tow away the vehicle
>There is interruption of the battery volt-
age.
Depending on the country-specific version,
the alarm system signals unauthorized
entry or tampering in different ways:
>Acoustic alarm for 30 seconds
>Turning on the hazard warning flashers
for approx. five minutes.
To arm and disarm the alarm systemWhen the vehicle is locked or unlocked via
the driver's door lock or with the remote
control, the alarm system is also simulta-
neously armed or disarmed.
The interior motion and tilt alarm sensors
are also activated with the closing action.
The alarm system cannot be armed if
the driver's door is not properly
closed.
In some country-specific versions the alarm
system can only be operated with the
remote control.
Unlocking these vehicles with the key trig-
gers the alarm.
To stop the alarm:
Press button 1 – unlock –
or
turn the ignition key to position 1.<
Indicator lampAlarm system:
>Indicator lamp in the wiper system lever
changes after 10 seconds from fast blink-
ing to constant flashing:
The system is activated
>Indicator lamp does not react:
Doors, bonnet or tailgate are not prop-
erly closed.
Even if these are not closed any more,
the alarm system is activated and
secures the remaining part of the vehi-
cle. If everything is closed, the indicator
lamp changes after 10 seconds from fast
blinking to constant flashing
ba.book Seite 31 Montag, 5. August 2002 8:09 20
ProCarManuals.com
Page 34 of 148

32
ALARM SYSTEM
*
>Indicator lamp goes out when the sys-
tem is disarmed:
No tampering with your vehicle has been
detected
>Indicator lamp continues to flash at a
slow rate after the system is disarmed:
Your vehicle has been tampered with.
The indicator lamp will not go out until
the ignition key is turned in the ignition
lock or the alarm system is re-armed.
Interior motion sensor:
>Indicator lamp does not react:
Doors or tailgate are not properly closed
>Indicator lamp flashes constantly:
Only driver/passenger window and slid-
ing/tilt sunroof is open.
Interior motion sensor is not activated.
Alarm system is armed
>Indicator lamp is lit somewhat longer
and then flashes constantly:
Window and/or sliding/tilt sunroof were
closed after the system was armed:
interior motion sensor is not activated.
Avoiding unwanted alarm The tilt alarm and interior motion sensors
may be turned off at the same time. This
will prevent unwanted alarms, e.g. in
duplex garages or when on car transport
trains:
Lock the vehicle twice – activating:
Press button 2 of the remote control twice
in succession, see page 25
or
lock with the key twice, see page 25.
The indicator lamp goes from fast blinking
to regular blinking. After approx. ten sec-
onds the indicator lamp changes to con-
stant flashing. The tilt alarm and interior
motion sensors are deactivated until the
system is disarmed.
Interior motion sensorTransmitter and receiver of the interior
motion sensor system are found under a
cover in the vehicle roof.
For the interior motion sensor to function
properly, the windows, sliding/tilt sunroof
and doors must be closed.
Turn off the interior motion sensor – see
previous column – if
>children or animals remain in the vehicle
>windows or the sliding/tilt sunroof
remain open.
The tilt alarm and interior motion
sensors are inadvertently turned off if
the convenience closing of windows and
sliding/tilt sunroof is interrupted in the
first 10 seconds and then restarted. The
alarm must then be disarmed and reacti-
vated.<
ba.book Seite 32 Montag, 5. August 2002 8:09 20
ProCarManuals.com
Page 35 of 148

33
OVERVIEW REPAIRS OPERATIONCONTROLS DATA INDEX
SAFE SEATING POSITIONThe ideal seating position can make a vital
contribution to relaxed, fatigue-free driv-
ing. Together with the safety belts and air-
bags, the seating position plays an impor-
tant role in providing occupants with
maximum levels of passive safety in an
accident. To ensure that the safety systems
operate with optimal efficiency, we
strongly urge you to observe the instruc-
tions contained in the following section.
For supplementary information on trans-
porting children, refer to page 41.
Sitting safely with airbags
Always maintain an adequate dis-
tance between yourself and all of the
airbags. Always hold the steering wheel by
the rim with the hands at the 9 and
3 o'clock positions to keep any chance of
injury to hands or arms to an absolute min-
imum, should the airbag be deployed. No
one and nothing is to come between the
airbags and the seat occupant. Never use
the front passenger airbag cover as a sto-
rage surface for objects of any kind, or as a
support for legs or feet, as this will increase
the risk of injury in a collision severe
enough in which the airbag will deploy.<
For airbag locations and additional infor-
mation on airbags, refer to page 40.
Safe with safety belts
Never allow more than one person to
wear a single safety belt. Never allow
infants or small children to ride in a passen-
ger's lap. Avoid twisting the belt while rout-
ing it firmly across the hips and shoulder,
wear it as snugly against your body as pos-
sible. Do not allow the belt to rest against
hard or fragile objects. Do not route the
belt across your neck, or run it across sharp
edges. Be sure that the belt does not
become caught or jammed.
Avoid wearing bulky clothing that prevents
the belt from fitting properly, and pull on
the belt periodically to retension it over
your shoulders. In the event of a frontal
impact, a loose lap belt could slide over the
hips, leading to abdominal injury. In addi-
tion, the safety belt's restraint effective-
ness is reduced if the belt is worn loosely.
Expectant mothers should always wear
their safety belts, taking care to position
the lap belt against the lower hips, where it
will not exert pressure against the abdomi-
nal area.<
For information on using the safety belts,
refer to page 38.
ba.book Seite 33 Montag, 5. August 2002 8:09 20
ProCarManuals.com
Page 36 of 148

34
SEAT ADJUSTMENTImportant adjustment information
Never try to adjust your seat while
operating the vehicle. The seat could
respond with an unexpected movement,
and the ensuing loss of vehicle control
could lead to an accident.
Never ride with the backrest reclined to an
extreme horizontal angle – especially
important for front passengers to remem-
ber. Keep the backrest relatively upright to
minimize the risk of sliding under the
safety belt and sustaining injury in an acci-
dent.<
To adjust the seats, see the following sec-
tion.
Longitudinal seat adjustment 1. Lift the handle
2. Push the seat into the desired position
3. After releasing the handle, apply pres-
sure to the seat to ensure that the latch
engages securely.
Make corrections in the longitudinal
adjustment of the seat to ensure that
the safety belt still fits firmly against your
body. If you do not do this, the protection
provided by the safety belt may be
reduced.<
Seat height 1. To raise:
Pull the handle up repeatedly, continu-
ing until the seat reaches the desired
height
2. To lower:
Push the handle repeatedly, continuing
until the seat reaches the desired height.
ba.book Seite 34 Montag, 5. August 2002 8:09 20
ProCarManuals.com
Page 37 of 148

35
OVERVIEW REPAIRS OPERATIONCONTROLS DATA INDEX
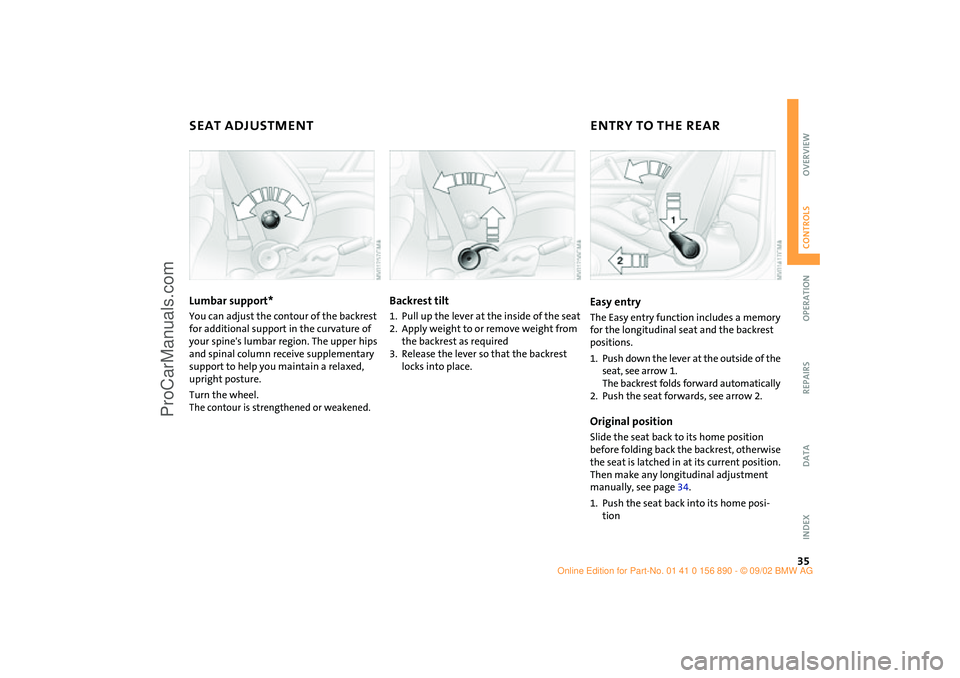
SEAT ADJUSTMENT ENTRY TO THE REARLumbar support* You can adjust the contour of the backrest
for additional support in the curvature of
your spine's lumbar region. The upper hips
and spinal column receive supplementary
support to help you maintain a relaxed,
upright posture.
Turn the wheel. The contour is strengthened or weakened.
Backrest tilt 1. Pull up the lever at the inside of the seat
2. Apply weight to or remove weight from
the backrest as required
3. Release the lever so that the backrest
locks into place.
Easy entryThe Easy entry function includes a memory
for the longitudinal seat and the backrest
positions.
1. Push down the lever at the outside of the
seat, see arrow 1.
The backrest folds forward automatically
2. Push the seat forwards, see arrow 2.Original positionSlide the seat back to its home position
before folding back the backrest, otherwise
the seat is latched in at its current position.
Then make any longitudinal adjustment
manually, see page 34.
1. Push the seat back into its home posi-
tion
ba.book Seite 35 Montag, 5. August 2002 8:09 20
ProCarManuals.com
Page 38 of 148

36
ENTRY TO THE REAR HEATED SEATS
*
2. Fold the backrest back to the home posi-
tion to lock the seat.
When returning the seat to the rear
position, ensure that no one is
injured and that no objects are damaged.
Engage and lock both seats and backrests
into position prior to driving, otherwise
unexpected movement could increase the
risk of accident.<
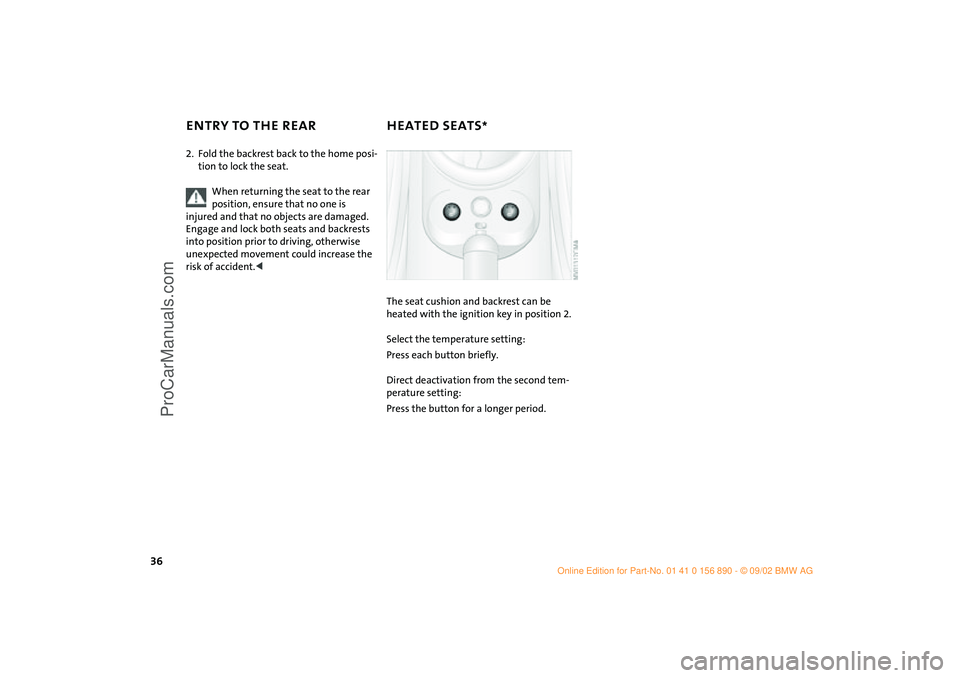
The seat cushion and backrest can be
heated with the ignition key in position 2.
Select the temperature setting:
Press each button briefly.
Direct deactivation from the second tem-
perature setting:
Press the button for a longer period.
ba.book Seite 36 Montag, 5. August 2002 8:09 20
ProCarManuals.com
Page 39 of 148

37
OVERVIEW REPAIRS OPERATIONCONTROLS DATA INDEX
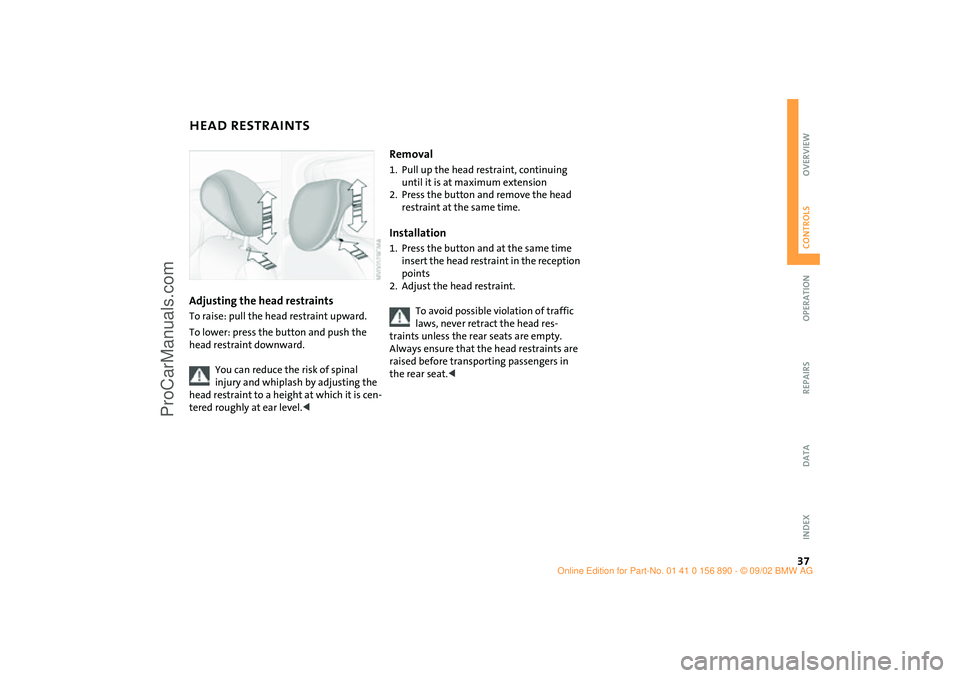
HEAD RESTRAINTSAdjusting the head restraintsTo raise: pull the head restraint upward.
To lower: press the button and push the
head restraint downward.
You can reduce the risk of spinal
injury and whiplash by adjusting the
head restraint to a height at which it is cen-
tered roughly at ear level.<
Removal1. Pull up the head restraint, continuing
until it is at maximum extension
2. Press the button and remove the head
restraint at the same time.Installation1. Press the button and at the same time
insert the head restraint in the reception
points
2. Adjust the head restraint.
To avoid possible violation of traffic
laws, never retract the head res-
traints unless the rear seats are empty.
Always ensure that the head restraints are
raised before transporting passengers in
the rear seat.<
ba.book Seite 37 Montag, 5. August 2002 8:09 20
ProCarManuals.com
Page 40 of 148

38
SAFETY BELTS STEERING WHEEL Drive with your safety belt onEven though there is an airbag, always fasten
your seat belt before driving off, because air-
bags are designed to enhance the effective-
ness of the safety belts, not to replace them.To fastenMake sure you hear the lock engage in the
belt buckle.
The warning lamp – Fasten safety
belts – lights up for several seconds
or until after the safety belts are
fastened.To release1. Press the red button in the belt buckle
2. Hold the belt
3. Guide the belt back into its reel.
Safety belt height adjustmentUse the height adjustment mechanism to
adapt the safety belt to the ideal position
for your own body:
Press the button and at the same time push
the entire unit upwards or downwards.
Also observe the instructions on adjusting
the seats on page 33.
If the safety belts are damaged or
stretched in an accident: have the
safety belt system replaced by your MINI
Dealer and the belt anchors checked, other-
wise the safety function can no longer be
guaranteed. If a child-restraint system was
in the vehicle during an accident, consult
the manufacturer's instructions regarding
replacement.<
To adjust the steering wheel height1. Push the locking lever downward
2. Adjust the desired steering wheel posi-
tion
3. Pull the lever back in.
Do not adjust the steering wheel
while the vehicle is moving, other-
wise unexpected movement could increase
the risk of accident.<
ba.book Seite 38 Montag, 5. August 2002 8:09 20
ProCarManuals.com