clock MITSUBISHI 380 2005 Owner's Guide
[x] Cancel search | Manufacturer: MITSUBISHI, Model Year: 2005, Model line: 380, Model: MITSUBISHI 380 2005Pages: 1500, PDF Size: 47.87 MB
Page 1360 of 1500
AUTO-CRUISE CONTROL
ENGINE AND EMISSION CONTROL17-29
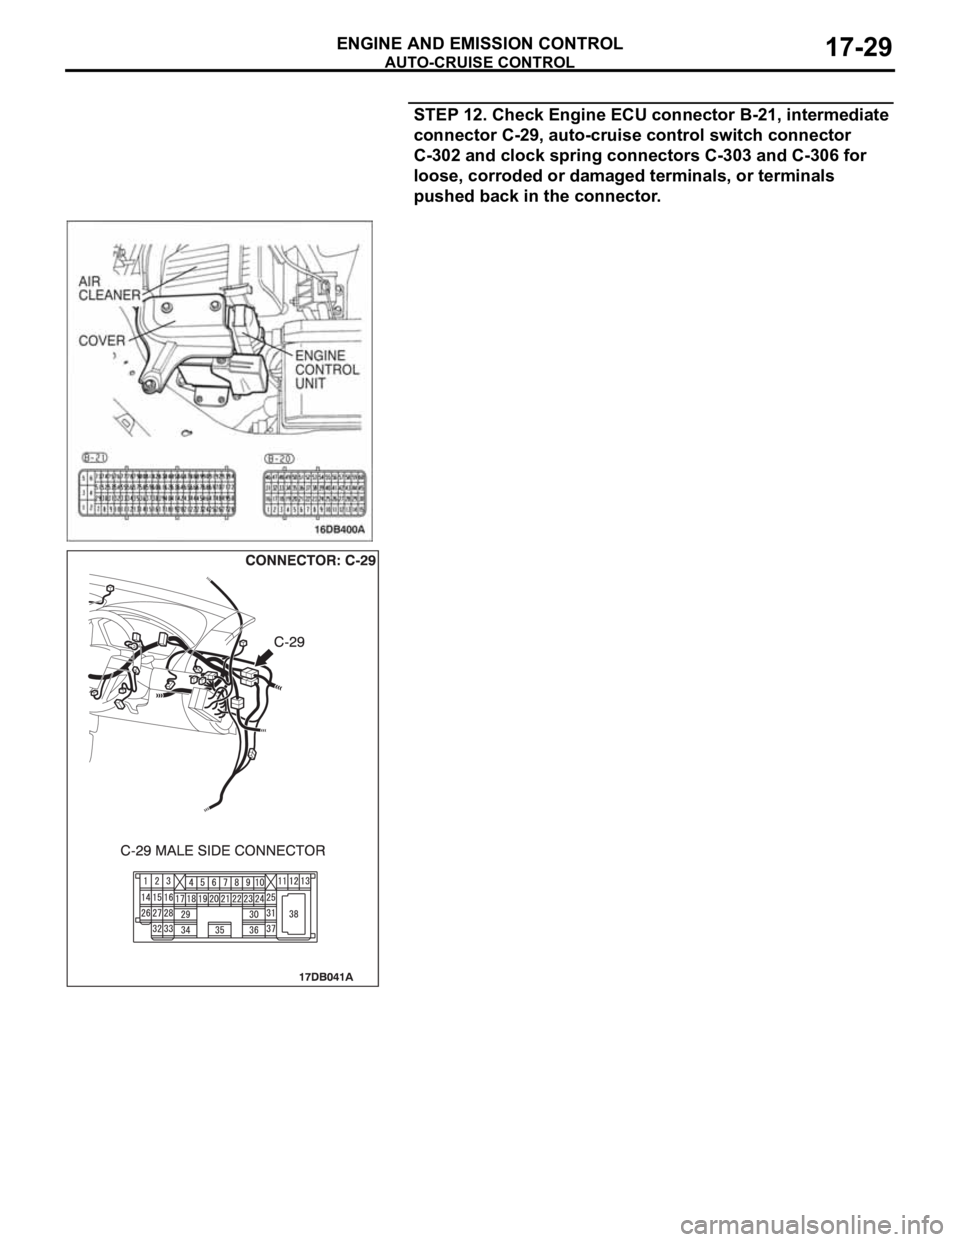
STEP 12. Check Engine ECU connector B-21, intermediate
connector C-29, auto-cruise control switch connector
C-302 and clock spring connectors C-303 and C-306 for
loose, corroded or damaged terminals, or terminals
pushed back in the connector.
Page 1361 of 1500
AUTO-CRUISE CONTROL
ENGINE AND EMISSION CONTROL17-30
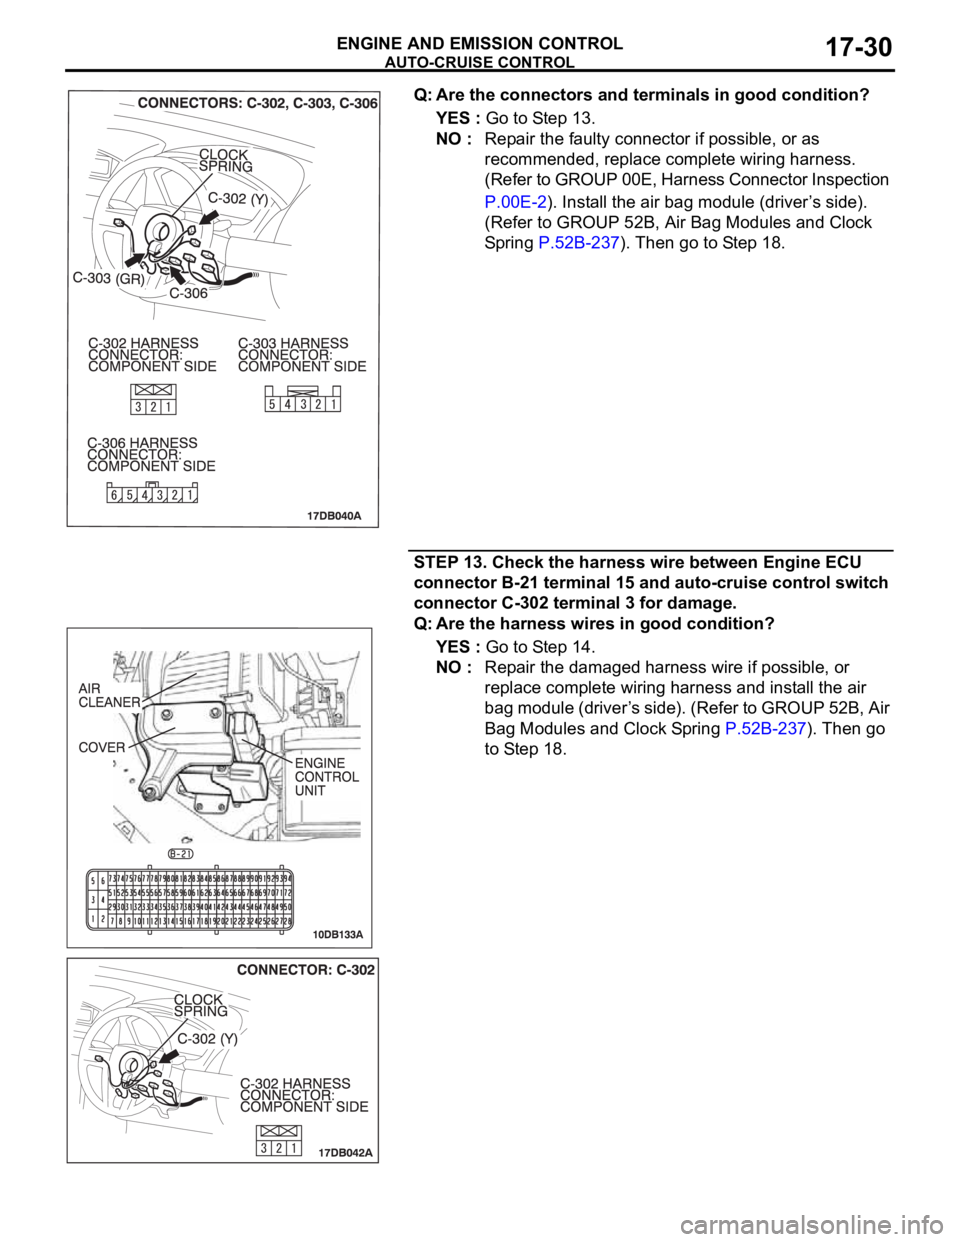
Q: Are the connectors and terminals in good condition?
YES : Go to Step 13.
NO : Repair the faulty connector if possible, or as
recommended, replace complete wiring harness.
(Refer to GROUP 00E, Harness Connector Inspection
P.00E-2). Install the air bag module (driver’s side).
(Refer to GROUP 52B, Air Bag Modules and Clock
Spring P.52B-237). Then go to Step 18.
STEP 13. Check the harness wire between Engine ECU
connector B-21 terminal 15 and auto-cruise control switch
connector C-302 terminal 3 for damage.
Q: Are the harness wires in good condition?
YES : Go to Step 14.
NO : Repair the damaged harness wire if possible, or
replace complete wiring harness and install the air
bag module (driver’s side). (Refer to GROUP 52B, Air
Bag Modules and Clock Spring P.52B-237). Then go
to Step 18.
Page 1362 of 1500
AUTO-CRUISE CONTROL
ENGINE AND EMISSION CONTROL17-31
STEP 14. Check the clock spring.
Refer to GROUP 52B, Air Bag Modules and Clock Spring
P.52B-244.
Q: Is the clock spring in good condition?
YES : It can be assumed that this malfunction is intermittent.
(Refer to GROUP 00, How to Use
Troubleshooting/Inspection Service Points
How to
Cope with Intermittent Malfunction P.00-14). Install
the air bag module (driver’s side). (Refer to GROUP
52B, Air Bag Modules and Clock Spring P.52B-237).
Then go to Step 18.
NO : Replace the clock spring and install the air bag
module (driver’s side). (Refer to GROUP 52B, Air Bag
Modules and Clock Spring P.52B-237). Then go to
Step 18.
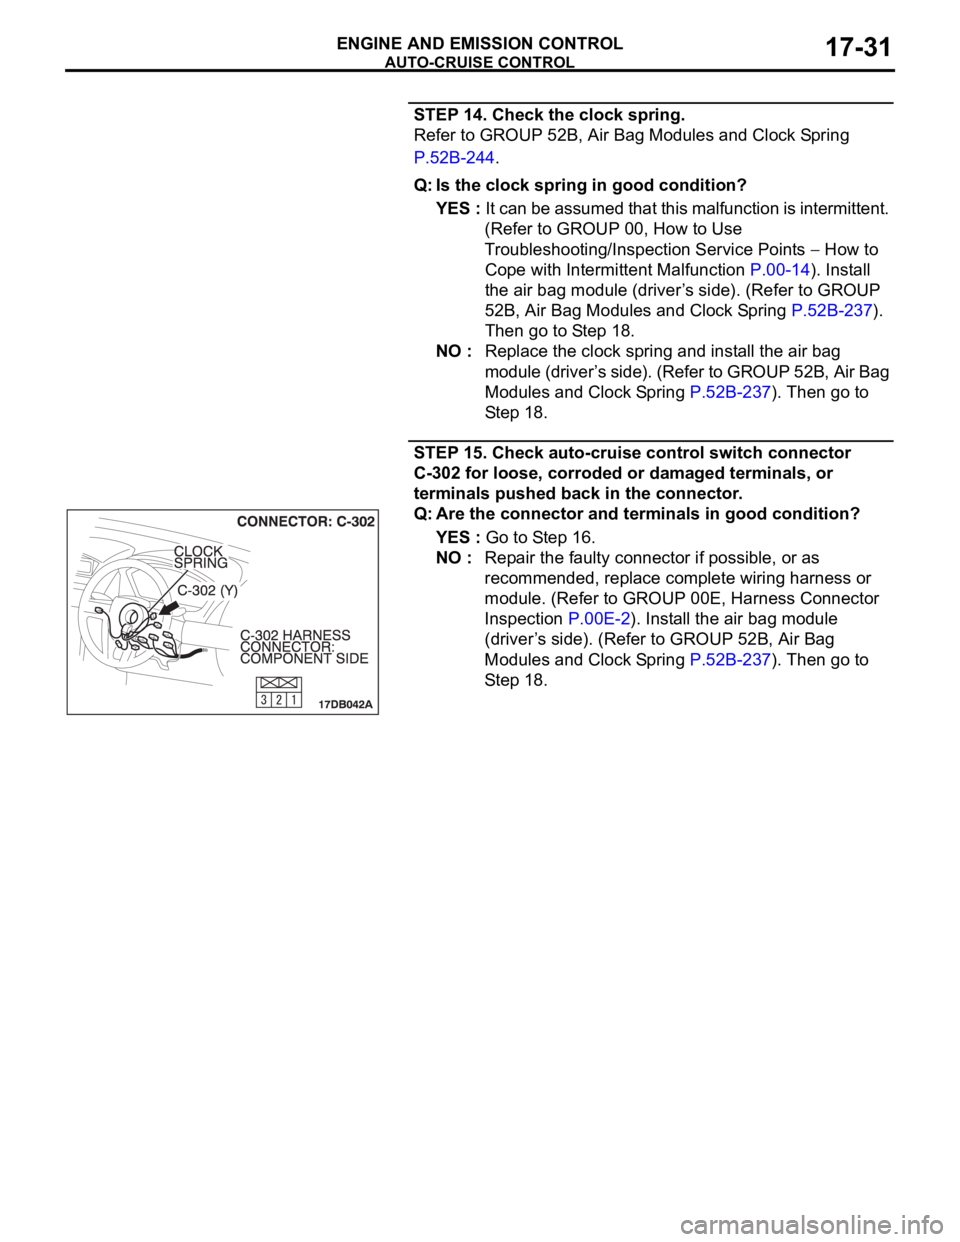
STEP 15. Check auto-cruise control switch connector
C-302 for loose, corroded or damaged terminals, or
terminals pushed back in the connector.
Q: Are the connector and terminals in good condition?
YES : Go to Step 16.
NO : Repair the faulty connector if possible, or as
recommended, replace complete wiring harness or
module. (Refer to GROUP 00E, Harness Connector
Inspection P.00E-2). Install the air bag module
(driver’s side). (Refer to GROUP 52B, Air Bag
Modules and Clock Spring P.52B-237). Then go to
Step 18.
Page 1363 of 1500
AUTO-CRUISE CONTROL
ENGINE AND EMISSION CONTROL17-32
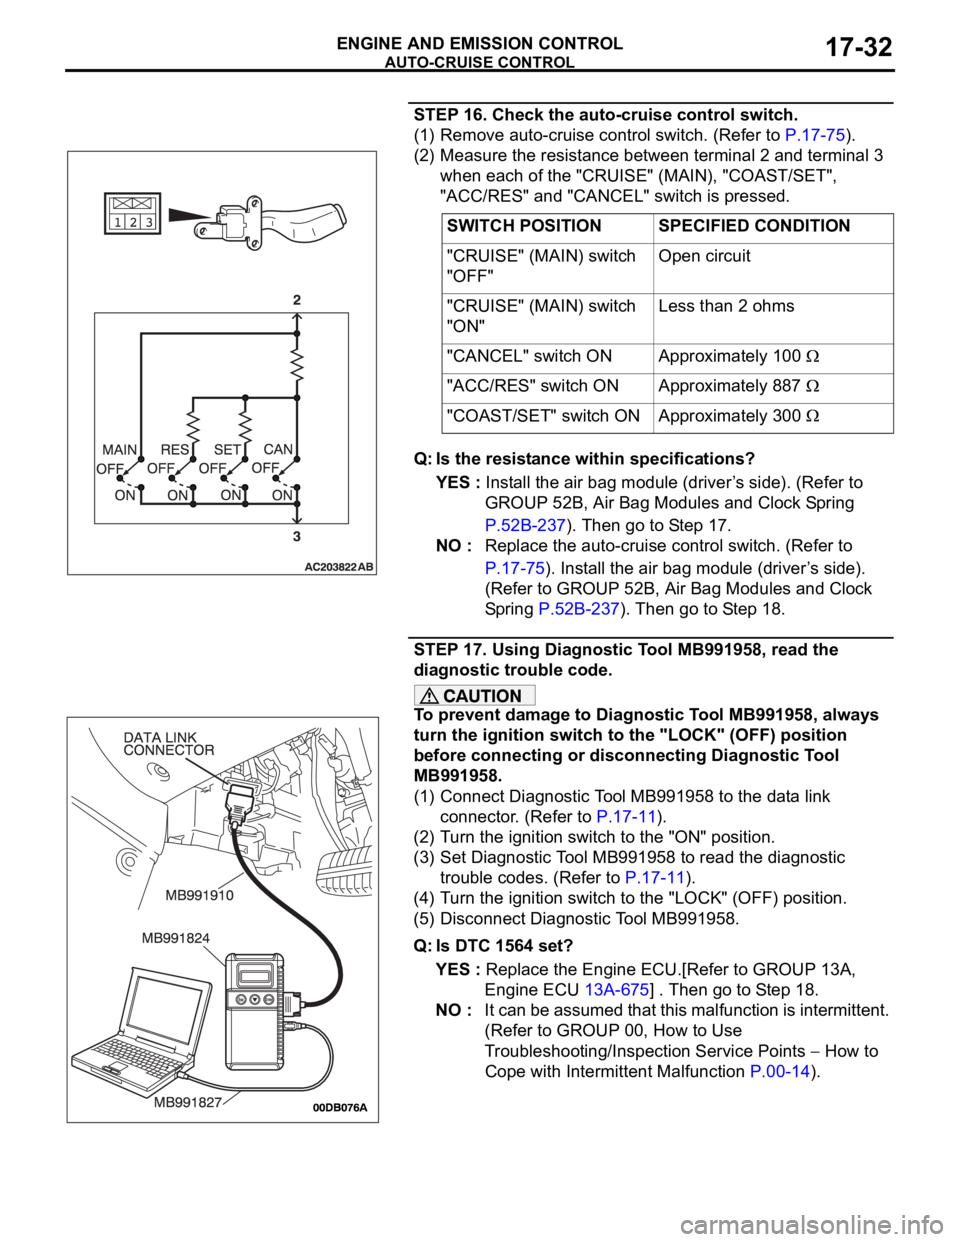
STEP 16. Check the auto-cruise control switch.
(1) Remove auto-cruise control switch. (Refer to P.17-75).
(2) Measure the resistance between terminal 2 and terminal 3
when each of the "CRUISE" (MAIN), "COAST/SET",
"ACC/RES" and "CANCEL" switch is pressed.
Q: Is the resistance within specifications?
YES : Install the air bag module (driver’s side). (Refer to
GROUP 52B, Air Bag Modules and Clock Spring
P.52B-237). Then go to Step 17.
NO : Replace the auto-cruise control switch. (Refer to
P.17-75). Install the air bag module (driver’s side).
(Refer to GROUP 52B, Air Bag Modules and Clock
Spring P.52B-237). Then go to Step 18.
STEP 17. Using Diagnostic Tool MB991958, read the
diagnostic trouble code.
To prevent damage to Diagnostic Tool MB991958, always
turn the ignition switch to the "LOCK" (OFF) position
before connecting or disconnecting Diagnostic Tool
MB991958.
(1) Connect Diagnostic Tool MB991958 to the data link
connector. (Refer to P.17-11).
(2) Turn the ignition switch to the "ON" position.
(3) Set Diagnostic Tool MB991958 to read the diagnostic
trouble codes. (Refer to P.17-11).
(4) Turn the ignition switch to the "LOCK" (OFF) position.
(5) Disconnect Diagnostic Tool MB991958.
Q: Is DTC 1564 set?
YES : Replace the Engine ECU.[Refer to GROUP 13A,
Engine ECU 13A-675] . Then go to Step 18.
NO : It can be assumed that this malfunction is intermittent.
(Refer to GROUP 00, How to Use
Troubleshooting/Inspection Service Points
How to
Cope with Intermittent Malfunction P.00-14). SWITCH POSITION SPECIFIED CONDITION
"CRUISE" (MAIN) switch
"OFF"Open circuit
"CRUISE" (MAIN) switch
"ON"Less than 2 ohms
"CANCEL" switch ON Approximately 100
"ACC/RES" switch ON Approximately 887
"COAST/SET" switch ON Approximately 300
Page 1406 of 1500
AUTO-CRUISE CONTROL
ENGINE AND EMISSION CONTROL17-75
AUTO-CRUISE CONTROL
REMOVAL AND INSTALLATIONM1172001400467
Before removal of the air bag module, refer to GROUP 52B, SRS Service Precautions
P.52B-16 and GROUP 52B, Air Bag Module and Clock Spring P.52B-237.
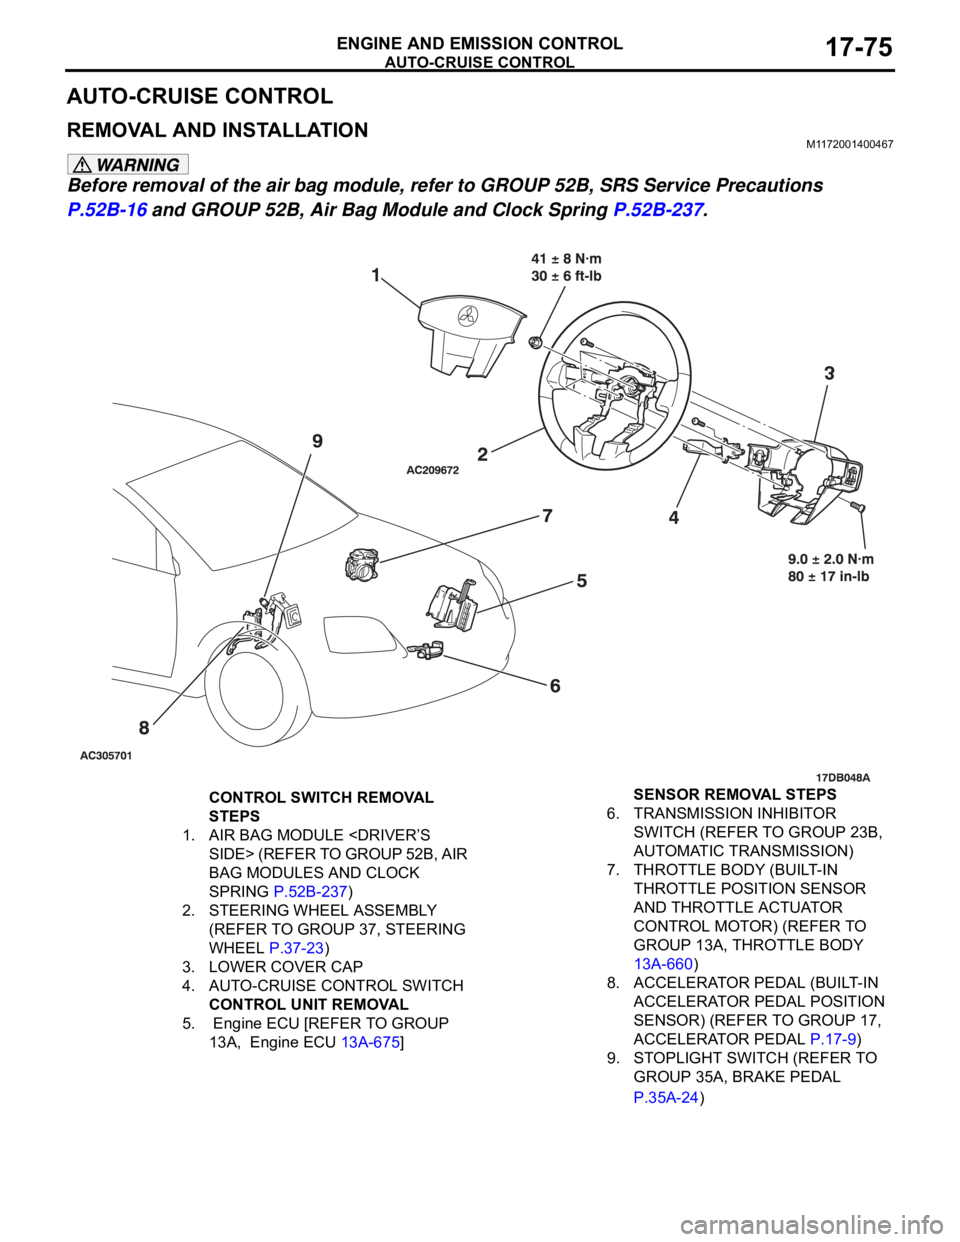
CONTROL SWITCH REMOVAL
STEPS
1. AIR BAG MODULE
BAG MODULES AND CLOCK
SPRING P.52B-237)
2. STEERING WHEEL ASSEMBLY
(REFER TO GROUP 37, STEERING
WHEEL P.37-23)
3. LOWER COVER CAP
4. AUTO-CRUISE CONTROL SWITCH
CONTROL UNIT REMOVAL
5. Engine ECU [REFER TO GROUP
13A, Engine ECU 13A-675] SENSOR REMOVAL STEPS
6. TRANSMISSION INHIBITOR
SWITCH (REFER TO GROUP 23B,
AUTOMATIC TRANSMISSION)
7. THROTTLE BODY (BUILT-IN
THROTTLE POSITION SENSOR
AND THROTTLE ACTUATOR
CONTROL MOTOR) (REFER TO
GROUP 13A, THROTTLE BODY
13A-660)
8. ACCELERATOR PEDAL (BUILT-IN
ACCELERATOR PEDAL POSITION
SENSOR) (REFER TO GROUP 17,
ACCELERATOR PEDAL P.17-9)
9. STOPLIGHT SWITCH (REFER TO
GROUP 35A, BRAKE PEDAL
P.35A-24)
Page 1492 of 1500
AUTOMATIC TRANSMISSION DIAGNOSIS
AUTOMATIC TRANSMISSION23A-33
LINE PRESSURE ADJUSTMENTM1231001700361
1. Drain the transmission fluid.
NOTE: The hydraulic pressure test must be performed
before attempting any adjustments.
2. Remove the valve body cover.
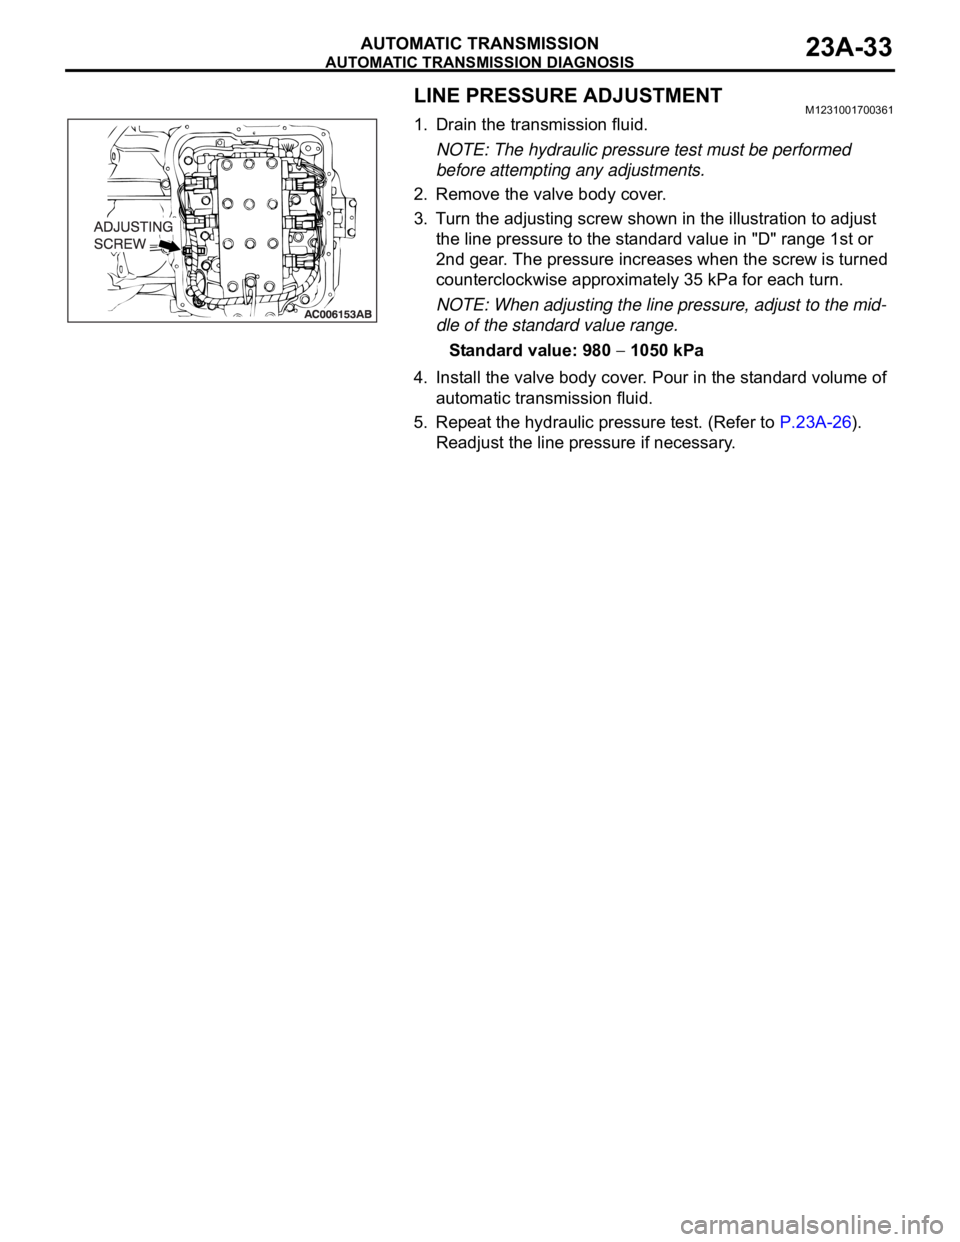
3. Turn the adjusting screw shown in the illustration to adjust
the line pressure to the standard value in "D" range 1st or
2nd gear. The pressure increases when the screw is turned
counterclockwise approximately 35 kPa for each turn.
NOTE: When adjusting the line pressure, adjust to the mid-
dle of the standard value range.
Standard value: 980
1050 kPa
4. Install the valve body cover. Pour in the standard volume of
automatic transmission fluid.
5. Repeat the hydraulic pressure test. (Refer to P.23A-26).
Readjust the line pressure if necessary.