display MITSUBISHI COLT 2008 (in English) Repair Manual
[x] Cancel search | Manufacturer: MITSUBISHI, Model Year: 2008, Model line: COLT, Model: MITSUBISHI COLT 2008Pages: 450, PDF Size: 14.57 MB
Page 303 of 450
For emergencies6-13
6
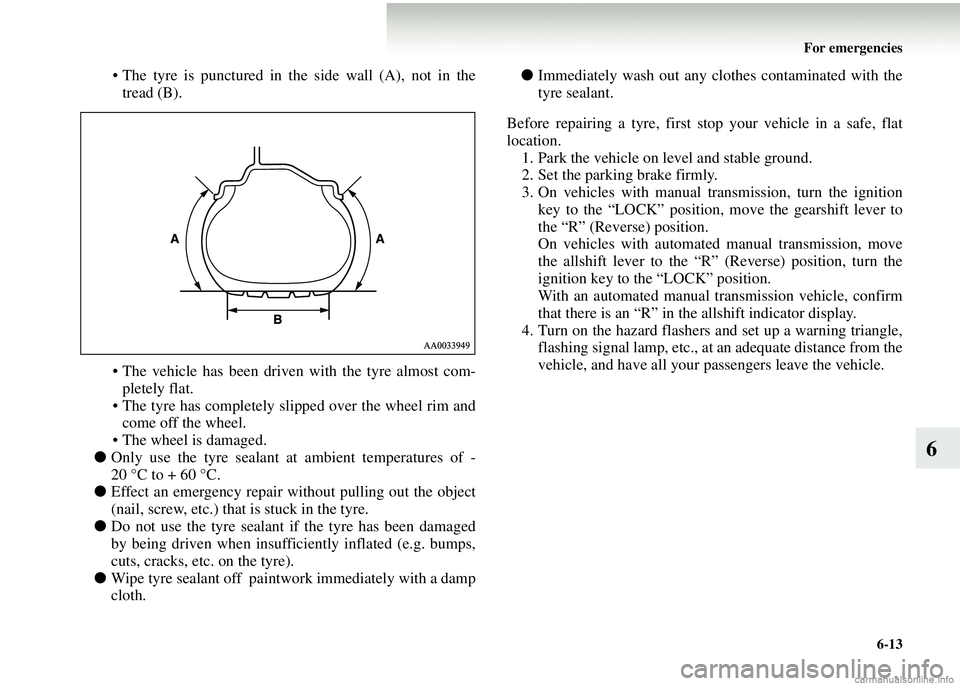
• The tyre is punctured in the side wall (A), not in thetread (B).
• The vehicle has been driven with the tyre almost com-
pletely flat.
• The tyre has completely sl ipped over the wheel rim and
come off the wheel.
• The wheel is damaged.
● Only use the tyre sealant at ambient temperatures of -
20 °C to + 60 °C.
● Effect an emergency repair without pulling out the object
(nail, screw, etc.) that is stuck in the tyre.
● Do not use the tyre sealant if the tyre has been damaged
by being driven when insufficiently inflated (e.g. bumps,
cuts, cracks, etc. on the tyre).
● Wipe tyre sealant off paintwork immediately with a damp
cloth. ●
Immediately wash out any clot hes contaminated with the
tyre sealant.
Before repairing a tyre, first stop your vehicle in a safe, flat
location. 1. Park the vehicle on level and stable ground.
2. Set the parking brake firmly.
3. On vehicles with manual transmission, turn the ignition key to the “LOCK” position, move the gearshift lever to
the “R” (Reverse) position.
On vehicles with automated manual transmission, move
the allshift lever to the “R” (Reverse) position, turn the
ignition key to the “LOCK” position.
With an automated manual transmission vehicle, confirm
that there is an “R” in th e allshift indicator display.
4. Turn on the hazard flashers and set up a warning triangle, flashing signal lamp, etc., at an adequate distance from the
vehicle, and have all your passengers leave the vehicle.
Page 307 of 450
For emergencies6-17
6
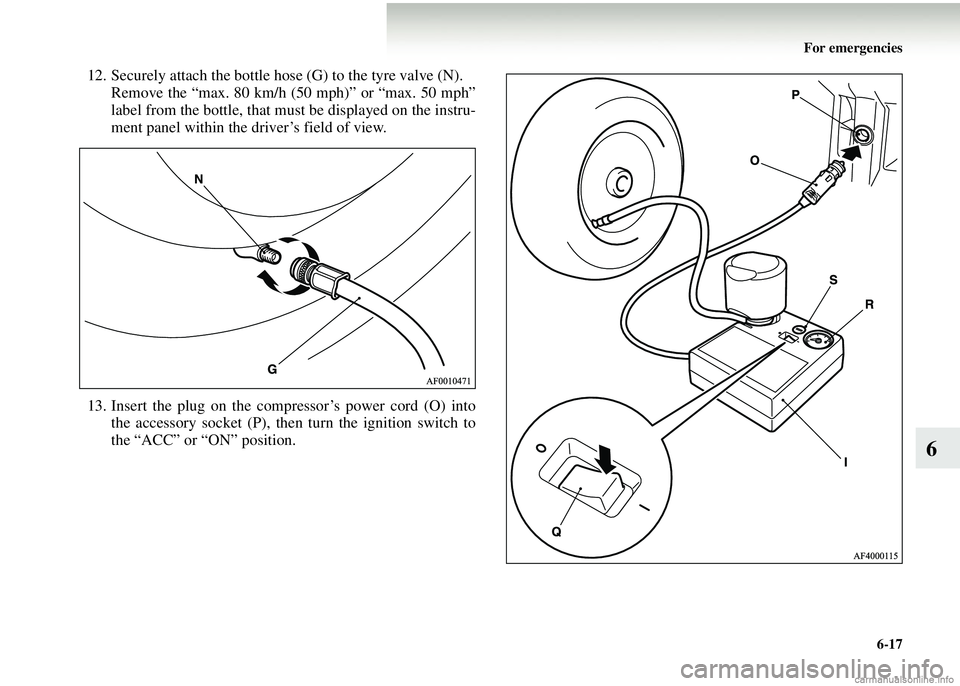
12. Securely attach the bottle hose (G) to the tyre valve (N).Remove the “max. 80 km/h (50 mph)” or “max. 50 mph”
label from the bottle, that must be displayed on the instru-
ment panel within the driver’s field of view.
13. Insert the plug on the co mpressor’s power cord (O) into
the accessory socket (P), then turn the ignition switch to
the “ACC” or “ON” position.
Page 309 of 450
For emergencies6-19
6
16. When you have inflated the ty re to the specified pressure,
stow the compressor and bottle in the vehicle and
promptly start driving the vehi cle so that the tire sealant
can spread evenly in the ty re. Drive with great care. Do
not exceed a speed of 80 km /h (50 mph). Observe local
speed limits.
Remove the “max. 80 km/h (50 mph)” or “max. 50 mph”
label from the bottle, that must be displayed on the instru-
ment panel within the driver’s field of view.
NOTE● Driving faster than 80 km/h (50 mph) can make the vehi-
cle vibrate. 17. After driving for 10 minutes,
check the tyre pressure using
the air pressure gauge on the compressor.
If the tyre pressure is not sufficient, inflate the tyre to the
specified pressure again an d drive the vehicle carefully
without exceeding a speed of 80 km/h (50 mph).
CAUTION!
●If you sense any abnormalit y while driving, stop the
vehicle and contact a MITSUBISHI MOTORS
Authorized Service Point or another specialist. Oth-
erwise the tyre pressure may drop before the emer-
gency repair procedure is completed, rendering the
vehicle unsafe.
CAUTION!
● If the tyre pressure is lower than the minimum per-
mitted pressure (1.3 bar {130 kPa}), the tyre cannot
successfully be repaired with the tyre sealant. Do not
drive the vehicle any further. Contact a
MITSUBISHI MOTORS Auth orized Service Point
or another specialist.
Page 313 of 450

For emergencies6-23
6
Jacking up the vehicle
E00801001016
1. Park the vehicle on level and stable ground.
2. Set the parking brake firmly.
3. On vehicles with manual transmission, turn the ignition
key to the “LOCK” position, move the gearshift lever to
the “R” (Reverse) position.
On vehicles with automated manual transmission, move
the allshift lever to the “R” (Reverse) position, turn the
ignition key to the “LOCK” position.
With an automated manual tr ansmission vehicle, confirm
that there is an “A” or “1” in the allshift indicator display.
4. Turn on the hazard flashers and set up a warning triangle,
flashing signal lamp, etc., at an adequate distance from the
vehicle, and have all your passengers leave the vehicle. 5. To prevent the vehicle from roll
ing when it is raised on the
jack, place a chock or block (A) at the tyre that is diago-
nally opposite from the tyre (B) you are changing.
NOTE● The chock shown in the illustration does not come with
your vehicle. It is recommended that you keep one in the
vehicle for use if needed.
● If a chock is not available, use a stone or any other object
that is large enough to hold the wheel in position.
WARNING!
●Be sure to apply a chock to the correct tyre when
jacking up the vehi cle. If the vehicle moves while
jacked up, the jack could slip out of position and
cause an accident.
Page 318 of 450
6-28 For emergencies
6
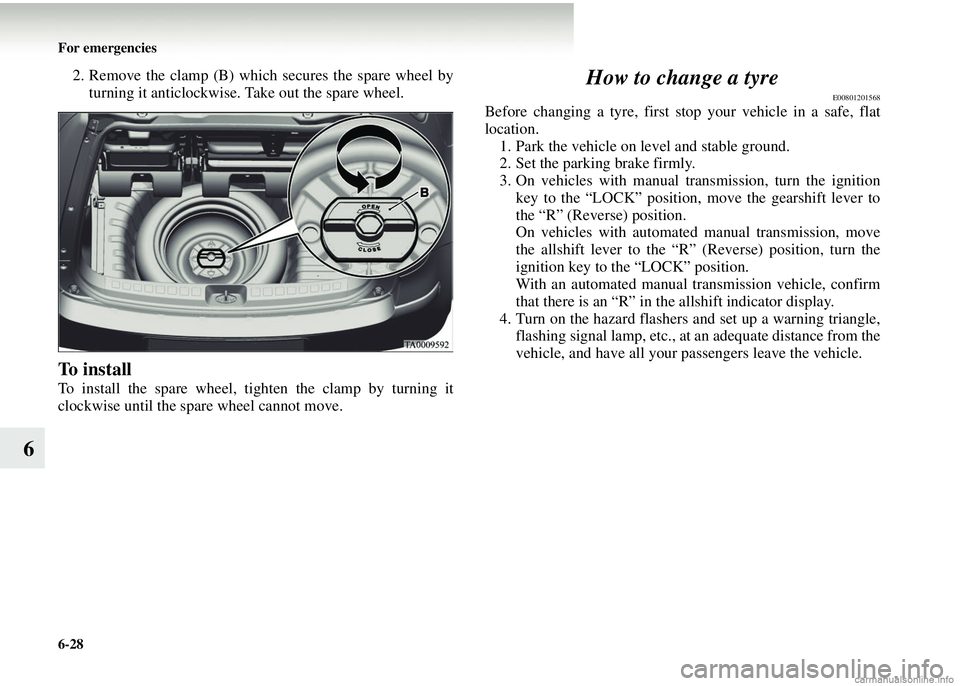
2. Remove the clamp (B) which secures the spare wheel byturning it anticlockwise. Take out the spare wheel.
To install
To install the spare wheel, ti ghten the clamp by turning it
clockwise until the sp are wheel cannot move.
How to change a tyre
E00801201568
Before changing a tyre, first stop your vehicle in a safe, flat
location.
1. Park the vehicle on level and stable ground.
2. Set the parking brake firmly.
3. On vehicles with manual transmission, turn the ignition key to the “LOCK” position, move the gearshift lever to
the “R” (Reverse) position.
On vehicles with automated manual transmission, move
the allshift lever to the “R” (Reverse) position, turn the
ignition key to the “LOCK” position.
With an automated manual tran smission vehicle, confirm
that there is an “R” in th e allshift indicator display.
4. Turn on the hazard flashers an d set up a warning triangle,
flashing signal lamp, etc., at an adequate distance from the
vehicle, and have all your passengers leave the vehicle.
Page 327 of 450
For emergencies6-37
6
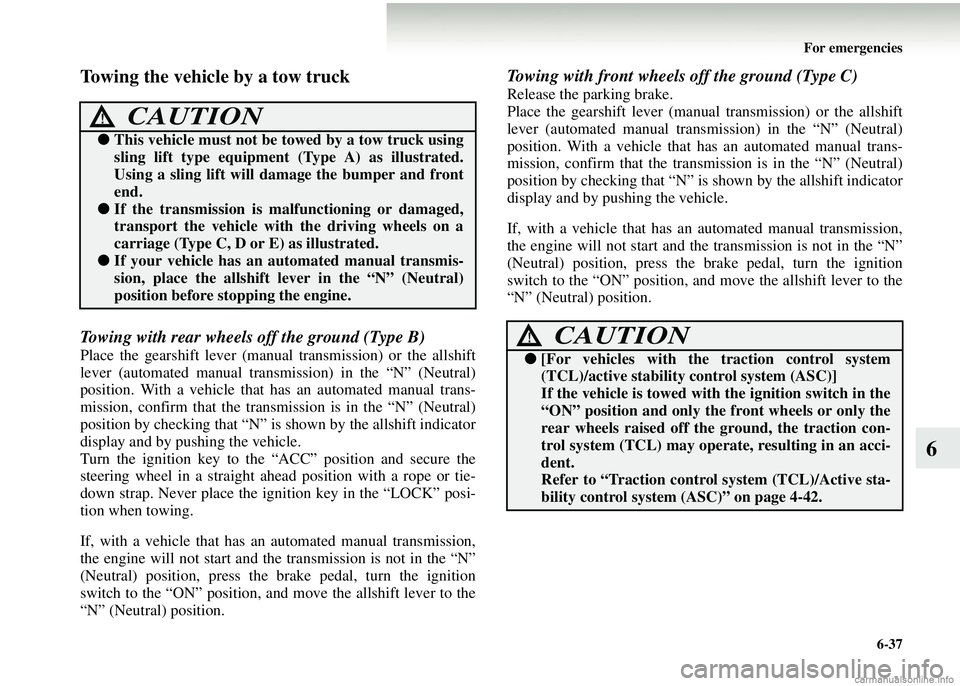
Towing the vehicle by a tow truck
Towing with rear wheels off the ground (Type B)
Place the gearshift lever (manual transmission) or the allshift
lever (automated manual transm ission) in the “N” (Neutral)
position. With a vehicle that has an automated manual trans-
mission, confirm that the transm ission is in the “N” (Neutral)
position by checking that “N” is shown by the allshift indicator
display and by pushing the vehicle.
Turn the ignition key to the “ACC” position and secure the
steering wheel in a straight ah ead position with a rope or tie-
down strap. Never place the igni tion key in the “LOCK” posi-
tion when towing.
If, with a vehicle that has an automated manual transmission,
the engine will not start and the transmission is not in the “N”
(Neutral) position, press the brake pedal, turn the ignition
switch to the “ON” position, and move the allshift lever to the
“N” (Neutral) position.
Towing with front wheels off the ground (Type C)
Release the parking brake.
Place the gearshift lever (manual transmission) or the allshift
lever (automated manual transm ission) in the “N” (Neutral)
position. With a vehicle that has an automated manual trans-
mission, confirm that the transmi ssion is in the “N” (Neutral)
position by checking th at “N” is shown by the allshift indicator
display and by pushing the vehicle.
If, with a vehicle that has an automated manual transmission,
the engine will not start and th e transmission is not in the “N”
(Neutral) position, press the brake pedal, turn the ignition
switch to the “ON” position, and move the allshift lever to the
“N” (Neutral) position.
CAUTION!
● This vehicle must not be towed by a tow truck using
sling lift type equipment (Type A) as illustrated.
Using a sling lift will da mage the bumper and front
end.
● If the transmission is malfunctioning or damaged,
transport the vehicle with the driving wheels on a
carriage (Type C, D or E) as illustrated.
●If your vehicle has an automated manual transmis-
sion, place the a llshift lever in the “N” (Neutral)
position before stopping the engine.
CAUTION!
● [For vehicles with the traction control system
(TCL)/active stability control system (ASC)]
If the vehicle is towed with the ignition switch in the
“ON” position and only th e front wheels or only the
rear wheels raised off the ground, the traction con-
trol system (TCL) may operate, resulting in an acci-
dent.
Refer to “Traction control system (TCL)/Active sta-
bility control system (ASC)” on page 4-42.
Page 330 of 450
6-40 For emergencies
6
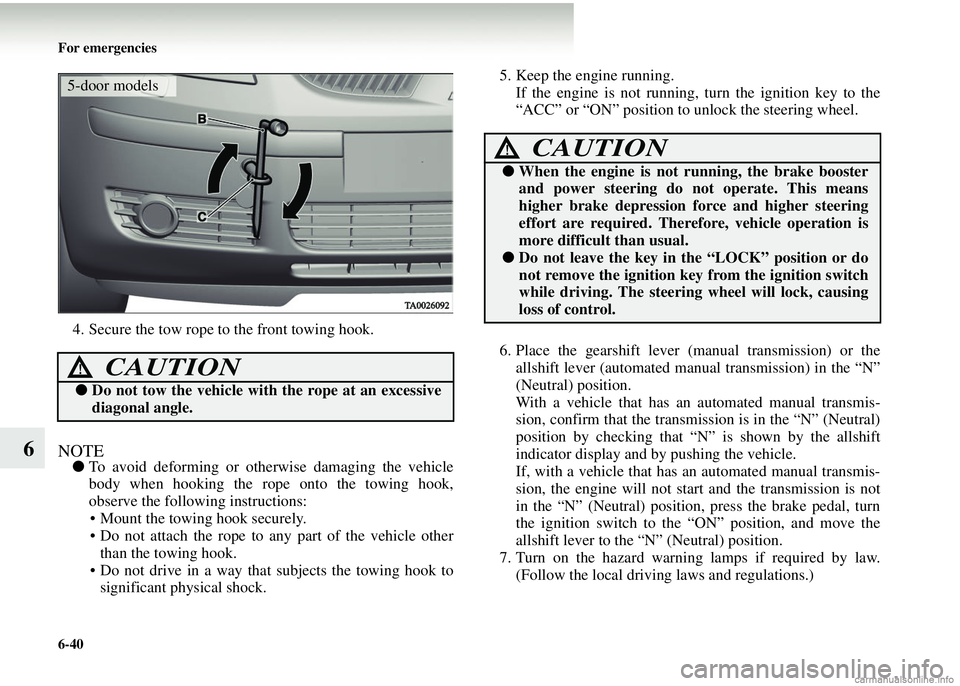
4. Secure the tow rope to the front towing hook.
NOTE●To avoid deforming or otherwise damaging the vehicle
body when hooking the rope onto the towing hook,
observe the following instructions:
• Mount the towing hook securely.
• Do not attach the rope to any part of the vehicle other
than the towing hook.
• Do not drive in a way that subjects the towing hook to significant physical shock. 5. Keep the engine running.
If the engine is not running, turn the ignition key to the
“ACC” or “ON” position to unlock the steering wheel.
6. Place the gearshift lever (m anual transmission) or the
allshift lever (automated manual transmission) in the “N”
(Neutral) position.
With a vehicle that has an automated manual transmis-
sion, confirm that the transmi ssion is in the “N” (Neutral)
position by checking that “N ” is shown by the allshift
indicator display and by pushing the vehicle.
If, with a vehicle that has an automated manual transmis-
sion, the engine will not start and the transmission is not
in the “N” (Neutral) position, press the brake pedal, turn
the ignition switch to the “ON” position, and move the
allshift lever to the “N” (Neutral) position.
7. Turn on the hazard warning lamps if required by law. (Follow the local driving laws and regulations.)
CAUTION!
● Do not tow the vehicle with the rope at an excessive
diagonal angle.
5-door models
CAUTION!
● When the engine is not running, the brake booster
and power steering do no t operate. This means
higher brake depression force and higher steering
effort are required. Therefore, vehicle operation is
more difficult than usual.
● Do not leave the key in the “LOCK” position or do
not remove the ignition key from the ignition switch
while driving. The steering wheel will lock, causing
loss of control.
Page 333 of 450
For emergencies6-43
6
Operation under adve
rse driving conditions
E00801701390
If your vehicle becomes stuck in sand, mud or
snow
If the vehicle becomes stuck in snow, sand, or mud, it can often
be moved by a rocking motion. Fo r vehicles with manual trans-
mission, move the gearshift leve r alternately between 1st and
Reverse, while applying slight pressure to the accelerator
pedal.
With an automated manual transmission vehicle, place the
allshift lever in the “A” (automatic mode) position to select
automatic mode or select 1st or 2nd gear in the manual mode or
place the allshift lever in th e “R” (Reverse) position for
reverse. Confirm that there is an “A”, “1”, “2” or “R” in the
allshift indicator display, then gently press the accelerator
pedal. Do not press the acceler ator pedal while moving the
allshift lever.
Avoid racing the engine or spinning the wheels. Prolonged
efforts to free a stuck vehicl e may result in overheating and
transmission failure. Allow the engine to idle for a few minutes
to let the transmission cool between rocking attempts.
If the vehicle remains stuck afte r several rocking attempts, seek
other assistance.
WARNING!
● When attempting to rock your vehicle out of a stuck
position, be sure that the area around the vehicle is
clear of people and physic al objects. The rocking
motion may cause the vehicle to suddenly launch
forward or backward, causing injury or damage to
nearby people or objects.
Page 440 of 450
Alphabetical index
4
K
Keyless entry system 1-5
Keys 1-2
L
Labeling 9-2
Lamp monitor buzzer 3-33
Leakage (Fuel, engine coolant, oil and exhaust gas) 8-28
Licence plate lamps Bulb capacity 8-41
Replacement 8-67
Low fuel warning lamp 3-6
Lubricants 9-21
Luggage compartment lamp 5-63 Bulb capacity 8-43
Replacement 8-69
Luggage floor boxes 5-67
Luggage hooks 5-72
Luggage net 5-73
LW/MW/FM electronic tuning radio with CD player 5-24
M
Manual transmission 4-22
Oil 9-21
Map lamps 5-62
Mirror Inside rear-view mirror 4-10
Outside rear-view mirrors 4-10 Modification/alterations to th
e electrical or fuel systems 6
Multi-centre display 3-14
N
Notes regarding diesel fuel 9-20
O
Odometer 3-4
Oil Automated manual transmission oil 9-21
Engine oil 8-7
Manual transmission oil 9-21
Oil pressure warning lamp 3-12
Operation under adverse driving conditions 6-44
Other specifications 9-16
Outside rear-view mirrors 4-10 Electric remote-controlled outside rear-view mirrors 4-12
Manual remote-controlled outside rear-view mirrors 4-11
Overheating 6-6
P
Parking 4-8 Parking brake 4-6
Parking brake lever stroke 8-24
Position lamps Bulb capacity 8-41
Replacement 8-48
Power brakes 4-35
Power steering