service MITSUBISHI ECLIPSE 1993 Owner's Guide
[x] Cancel search | Manufacturer: MITSUBISHI, Model Year: 1993, Model line: ECLIPSE, Model: MITSUBISHI ECLIPSE 1993Pages: 57, PDF Size: 4.18 MB
Page 50 of 57

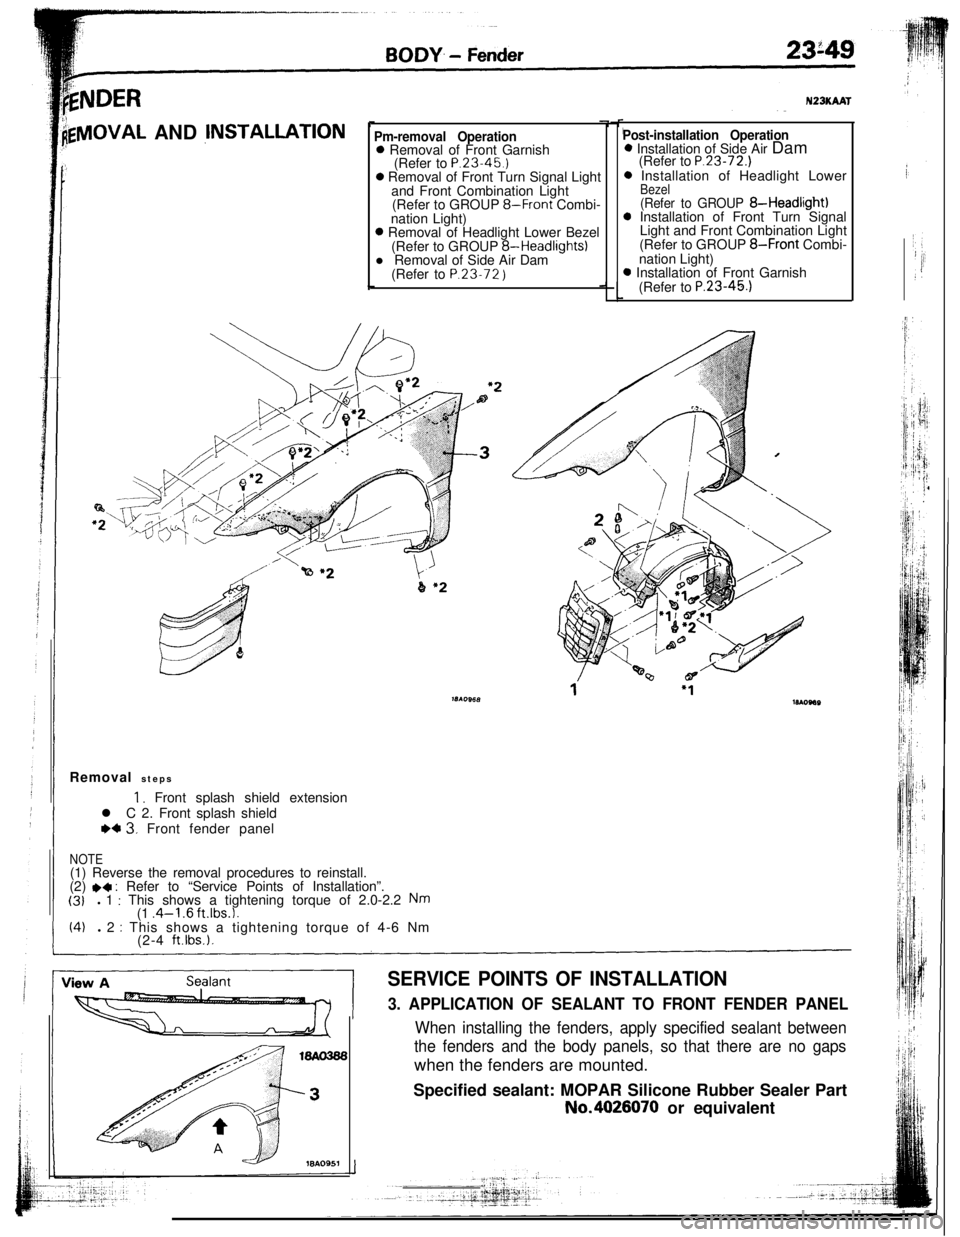
kNDER
lgVlOVAL AND jNSTALLATIONPm-removal Operation0 Removal of Front Garnish
(Refer to P.23.45.)0 Removal of Front Turn Signal Light
and Front Combination Light
(Refer to GROUP
8-Front Combi-
nation Light)0 Removal of Headlight Lower Bezel
(Refer to GROUP 8-Headlights)
l Removal of Side Air Dam
(Refer to P.23.72
)
N23KAAT
Post-installation Operation0 Installation of Side Air Dam
(Refer to
P.23-72.)0 Installation of Headlight Lower
Bezel(Refer to GROUP 8-Headlight)0 Installation of Front Turn Signal
Light and Front Combination Light
(Refer to GROUP
8-Front Combi-
nation Light)0 Installation of Front Garnish
(Refer to
P.23-45.1Removal steps
1, Front splash shield extension
l C 2. Front splash shield
WC 3. Front fender panel
NOTE(1) Reverse the removal procedures to reinstall.
(2)
.4 : Refer to “Service Points of Installation”.(31l 1 : This shows a tightening torque of 2.0-2.2 Nm(1 .4-l .6 ft.lbs.1.(4)l 2 : This shows a tightening torque of 4-6 Nm
(2-4 ft.lbs.).
SERVICE POINTS OF INSTALLATION
3. APPLICATION OF SEALANT TO FRONT FENDER PANEL
When installing the fenders, apply specified sealant between
the fenders and the body panels, so that there are no gapswhen the fenders are mounted.
Specified sealant: MOPAR Silicone Rubber Sealer PartNo.4026070 or equivalent
Page 54 of 57

BODY - Aero Parts23-73
18A0967
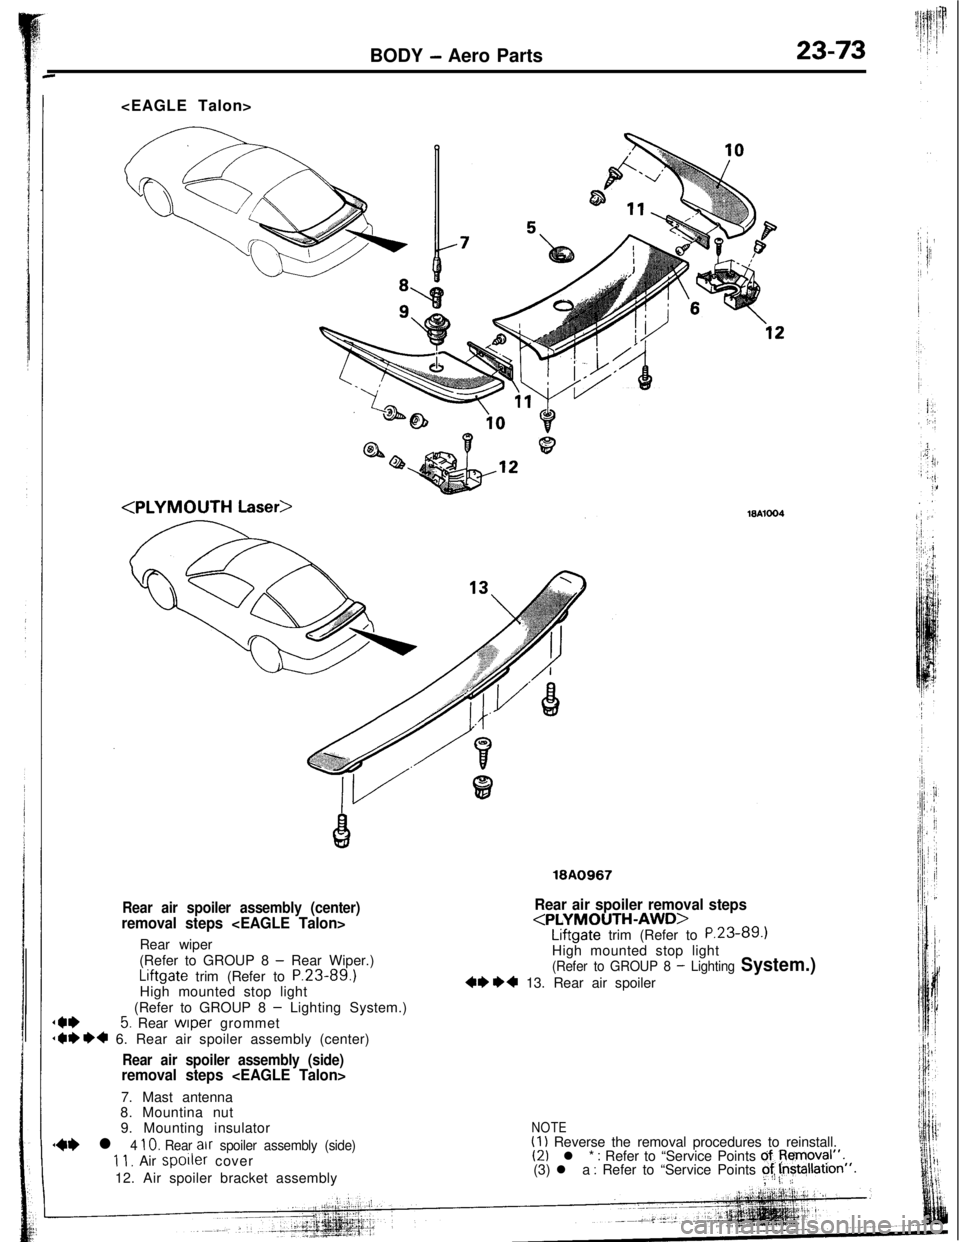
Rear air spoiler assembly (center)removal steps
(Refer to GROUP 8
- Rear Wiper.)Liftgate trim (Refer to
P.23-89.)High mounted stop light
_ (Refer to GROUP 8 - Lighting System.)
(I*5. Rear wiper grommet
+I)*4 6. Rear air spoiler assembly (center)
Rear air spoiler assembly (side)removal steps
8. Mountina nut
Rear air spoiler removal steps
(Refer to GROUP 8 - Lighting System.)
4* *4 13. Rear air spoiler
9. Mounting insulator
@ l 4 10. Rear air spoiler assembly (side)11, Air spooler cover
12. Air spoiler bracket assembly
NOTE(1) Reverse the removal procedures to reinstall.(2) l * : Refer to “Service Points of,Removal”.(3) l a : Refer to “Service Points of! kistallatron”.
, i. ::
Page 55 of 57

I
23-74BODY - Aero Parts
\18AQ245
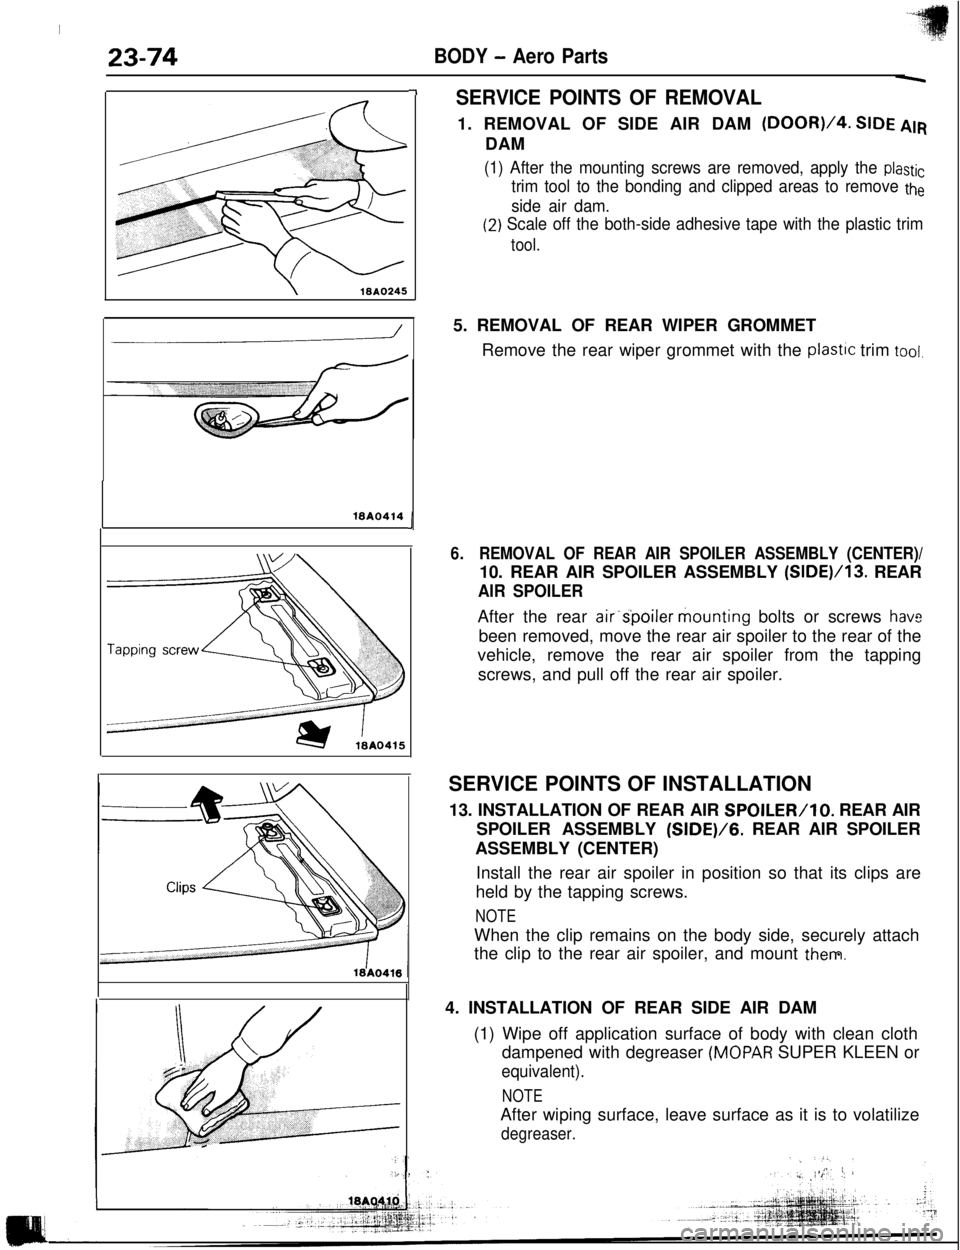
-ISERVICE POINTS OF REMOVAL1. REMOVAL OF SIDE AIR DAM
(DOOR)/4. SIDE AIRDAM
(1) After the mounting screws are removed, apply the plastic
trim tool to the bonding and clipped areas to remove the
side air dam.
(2) Scale off the both-side adhesive tape with the plastic trim
tool.
16AQ414J5. REMOVAL OF REAR WIPER GROMMET
Remove the rear wiper grommet with the
plastlc trim tool.
6.REMOVAL OF REAR AIR SPOILER ASSEMBLY (CENTER)/10. REAR AIR SPOILER ASSEMBLY (SIDE)/13. REAR
AIR SPOILERAfter the rear air’s’poiler mounting bolts or screws
hav2been removed, move the rear air spoiler to the rear of the
vehicle, remove the rear air spoiler from the tapping
screws, and pull off the rear air spoiler.
SERVICE POINTS OF INSTALLATION
13. INSTALLATION OF REAR AIR
SPOILER/lo. REAR AIR
SPOILER ASSEMBLY (SIDE)/G. REAR AIR SPOILER
ASSEMBLY (CENTER)
Install the rear air spoiler in position so that its clips are
held by the tapping screws.
NOTEWhen the clip remains on the body side, securely attach
the clip to the rear air spoiler, and mount
them.4. INSTALLATION OF REAR SIDE AIR DAM
(1) Wipe off application surface of body with clean cloth
dampened with degreaser
(MOPAR SUPER KLEEN or
equivalent).
NOTEAfter wiping surface, leave surface as it is to volatilize
degreaser.