System control MITSUBISHI ECLIPSE CROSS 2019 Owner's Manual (in English)
[x] Cancel search | Manufacturer: MITSUBISHI, Model Year: 2019, Model line: ECLIPSE CROSS, Model: MITSUBISHI ECLIPSE CROSS 2019Pages: 423, PDF Size: 75.41 MB
Page 271 of 423
Combination headlights and dimmer switch 5-188 Features and controls
5
N00532601652
If the following operation is performed with the combination headlights and dim- mer switch in the “ ” or “ ” position, the lights automatically turn off. [Except for vehicles equipped with the F. A . S . T. - k e y ] The ignition switch is turned to the “OFF”or “ACC” position or the key is removed from the ignition switch and the driver’s door is opened. [For vehicles equipped with the F.A.S.T.- key] The operation mode is changed to OFF or ACC and the driver’s door is opened. If the following operation is performed with the combination headlights and dim- mer switch in the “ ” or “ ” position, the lights automatically turn off after approximately 3 minutes. [Except for vehicles equipped with the F. A . S . T. - k e y ] The ignition switch is turned to the “OFF” or “ACC” position or the key is removedfrom the ignition switch and the driver’sdoor is not opened.
[For vehicles equipped with the F.A.S.T.- key] The operation mode is changed to OFF or ACC and the driver’s door is not opened.
If the combination headlights and dimmer switch is turned to the “ ” or “ ” posi- tion again after the engine is turned off, theapproximately 3-minute auto-cutout function described above will not work. The lights (the parking lights, tail lights and license platelights) will stay on and will not turn off auto- matically.
N00584500044
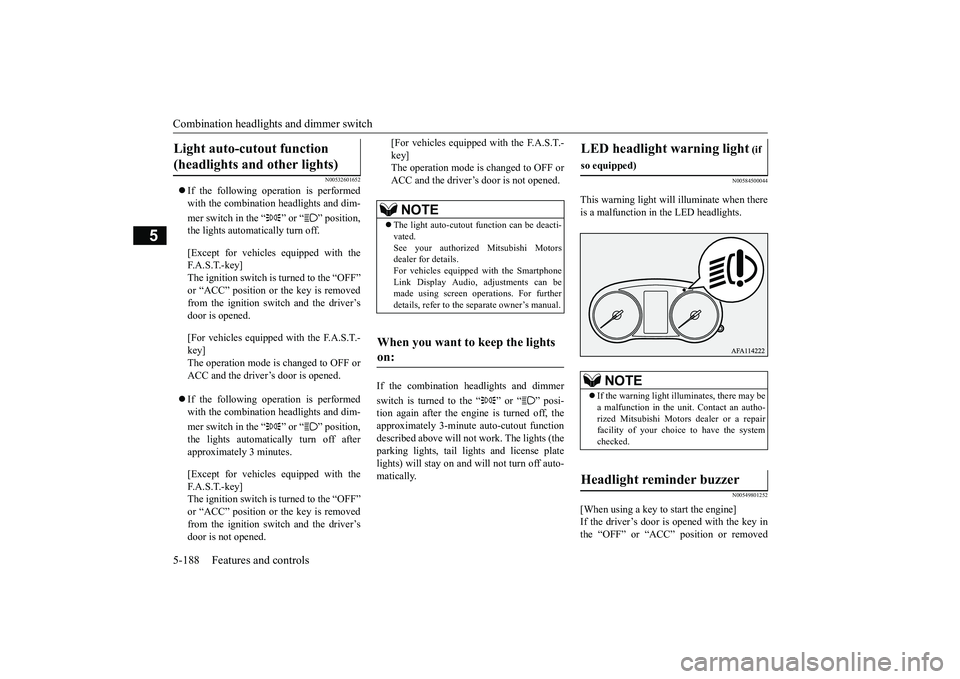
This warning light will illuminate when thereis a malfunction in the LED headlights.
N00549801252
[When using a key to start the engine]If the driver’s door is opened with the key in the “OFF” or “ACC” position or removed
Light auto-cutout function (headlights and other lights)
NOTE
The light auto-cutout function can be deacti- vated.See your authorized Mitsubishi Motors dealer for details. For vehicles equipped with the SmartphoneLink Display Audio, adjustments can be made using screen operations. For further details, refer to the separate owner’s manual.
When you want to keep the lights on:
LED headlight warning light
(if
so equipped)
NOTE
If the warning light illuminates, there may be a malfunction in the unit. Contact an autho- rized Mitsubishi Motors dealer or a repairfacility of your choice to have the system checked.
Headlight reminder buzzer
BK0266800US.book
188 ページ 2018年6月27日 水曜日 午後5時6分
Page 274 of 423
Combination headlights and dimmer switch
Features and controls 5-191
5
The sensitivity of the sensor can be temporar- ily lowering in the following ways. 1. Park your vehicle in a safe place and the ignition switch is turned to the “OFF” position or the operation mode is put inOFF.
NOTE
The headlights may not be switched from high beam to low beam under the following circumstances. • A vehicle in front or oncoming vehicle is hindered by any object such as continuous bends, elevated median/island, traffic signs, roadside trees. • Your vehicle passes an oncoming vehicle suddenly on a bend with poor visibility. • Another vehicle crosses ahead of your vehi- cle.
The headlights may remain at low beam (or be switched from high beam to low beam)when a reflective object
(e.g. street light,
traffic signal, noticeboard and signboard) reflects light. Any of the following factors may influence the headlight beam switching timing: • How brightly the exteri
or lights of a vehicle
in front or oncoming vehicle illuminate. • Movement or direction of a vehicle in front or oncoming vehicle. • Only right or left exterior light of a vehicle in front or oncoming vehicle is illuminat-ing. • A vehicle in front or oncoming vehicle is a motorcycle. • Road conditions (gradient, bends and road surface). • The number of occupants and luggage load.
The AHB recognizes environmental condi- tions by sensing a light source ahead of your vehicle. Therefore, you may feel like some- thing is not quite right when the headlight beams are switched automatically. The system may not detect a light vehicle such as a bicycle. The system may not detect an ambient brightness precisely. This causes the trafficto be dazzled by high beam or the low beam to be maintained. In such cases, you should switch the headlight beams manually. • In bad weather (heavy rain, fog, snow or sandstorm). • The windshield is dirty or fogged up. • The windshield is cracked or broken. • The sensor is deformed or dirty.• A light, which is similar to the headlights or tail lights, is shining around your vehicle. • A vehicle in front or oncoming vehicle is driven without lights, the exterior lights aredirty or discolored, or the direction of the headlight beams is adjusted improperly. • It becomes dark and bright suddenly and continuously around your vehicle. • Your vehicle is driven on uneven surfaces. • Your vehicle is driven on a winding road.• A reflective object such as a noticeboard or a mirror reflects a light ahead of your vehi- cle.NOTE
• When lights of the vehicle in front or head-lights of an oncoming vehicle blend into the other lights. • The rear end of a vehicle in front (such as a container truck) reflect a strong light. • Your vehicle's headlight
is broken or dirty.
• Your vehicle is inclined due to a flat tire or towing. • The warning display appears. (Refer to “System problem warning” onpage 5-192.)
Observe the precautions below to maintain good usage conditions: • Do not attempt to disassemble the sensor.• Do not affix a sticker or label on the wind- shield near the sensor. • Avoid overload. • Do not modify your vehicle. • When the windshield is replaced, use the Mitsubishi Motors genuine parts.
To adjust the sensitivity of the sensor
NOTE
BK0266800US.book
191 ページ 2018年6月27日 水曜日 午後5時6分
Page 275 of 423
Combination headlights and dimmer switch 5-192 Features and controls
5
2. Press the AHB switch more than 15 times within 5 seconds after operation mode is turned on.
N00593800056
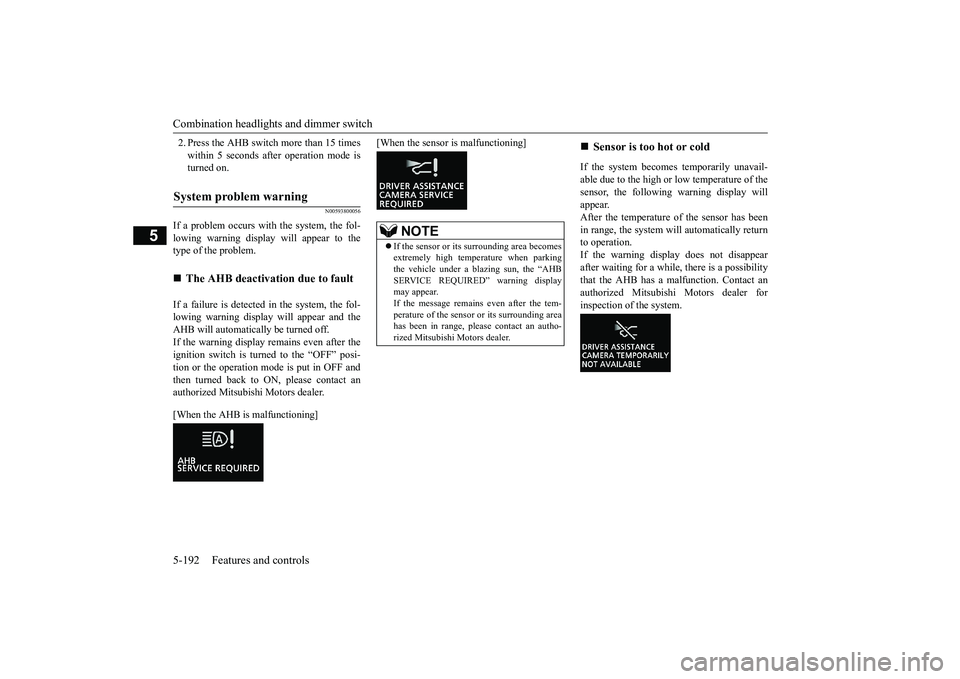
If a problem occurs with the system, the fol-lowing warning display will appear to the type of the problem. If a failure is detected in the system, the fol- lowing warning display will appear and the AHB will automatically be turned off. If the warning display remains even after theignition switch is turned to the “OFF” posi- tion or the operation mode is put in OFF and then turned back to ON, please contact anauthorized Mitsubishi Motors dealer. [When the AHB is malfunctioning]
[When the sensor is malfunctioning]
If the system becomes temporarily unavail- able due to the high or
low temperature of the
sensor, the following warning display will appear.After the temperature of the sensor has been in range, the system will automatically return to operation.If the warning display does not disappear after waiting for a while, there is a possibility that the AHB has a malfunction. Contact anauthorized Mitsubishi Motors dealer forinspection of the system.
System problem warning
The AHB deactivation due to fault
NOTE
If the sensor or its surrounding area becomes extremely high temperature when parking the vehicle under a blazing sun, the “AHBSERVICE REQUIRED” warning display may appear. If the message remains even after the tem- perature of the sensor or its surrounding area has been in range, please contact an autho-rized Mitsubishi Motors dealer.
Sensor is too hot or cold
BK0266800US.book
192 ページ 2018年6月27日 水曜日 午後5時6分
Page 278 of 423
Hazard warning flasher switch Features and controls 5-195
5
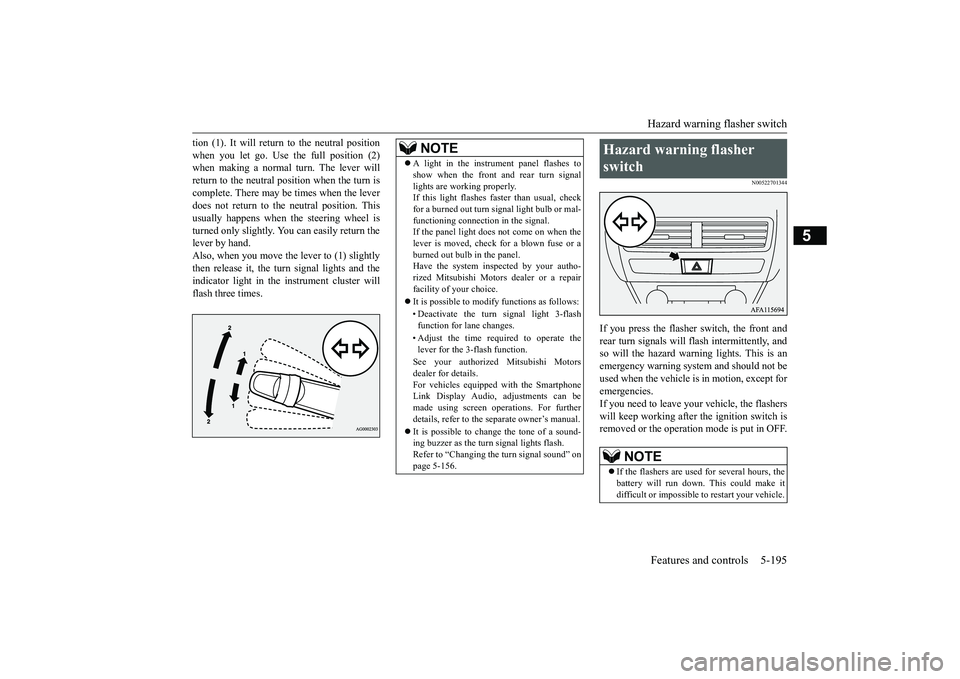
tion (1). It will return to the neutral position when you let go. Use the full position (2) when making a normal turn. The lever will return to the neutral position when the turn iscomplete. There may be times when the lever does not return to the neutral position. This usually happens when the steering wheel isturned only slightly. You can easily return the lever by hand. Also, when you move the lever to (1) slightlythen release it, the turn signal lights and theindicator light in the instrument cluster will flash three times.
N00522701344
If you press the flasher switch, the front and rear turn signals will flash intermittently, and so will the hazard warning lights. This is an emergency warning system and should not beused when the vehicle is in motion, except foremergencies. If you need to leave your vehicle, the flashers will keep working after the ignition switch isremoved or the operation mode is put in OFF.
NOTE
A light in the instrument panel flashes to show when the front and rear turn signal lights are working properly. If this light flashes faster than usual, check for a burned out turn signal light bulb or mal-functioning connection in the signal. If the panel light does not come on when the lever is moved, check for a blown fuse or aburned out bulb in the panel. Have the system inspected by your autho- rized Mitsubishi Motors dealer or a repairfacility of your choice. It is possible to modify functions as follows: • Deactivate the turn signal light 3-flash function for lane changes. • Adjust the time required to operate the lever for the 3-flash function. See your authorized Mitsubishi Motors dealer for details.For vehicles equipped with the Smartphone Link Display Audio, adjustments can be made using screen operations. For furtherdetails, refer to the separate owner’s manual. It is possible to change the tone of a sound- ing buzzer as the turn signal lights flash. Refer to “Changing the turn signal sound” on page 5-156.
Hazard warning flasher switch
NOTE
If the flashers are used for several hours, the battery will run down. This could make it difficult or impossible to restart your vehicle.
BK0266800US.book
195 ページ 2018年6月27日 水曜日 午後5時6分
Page 279 of 423
ECO mode switch 5-196 Features and controls
5
N00579300099
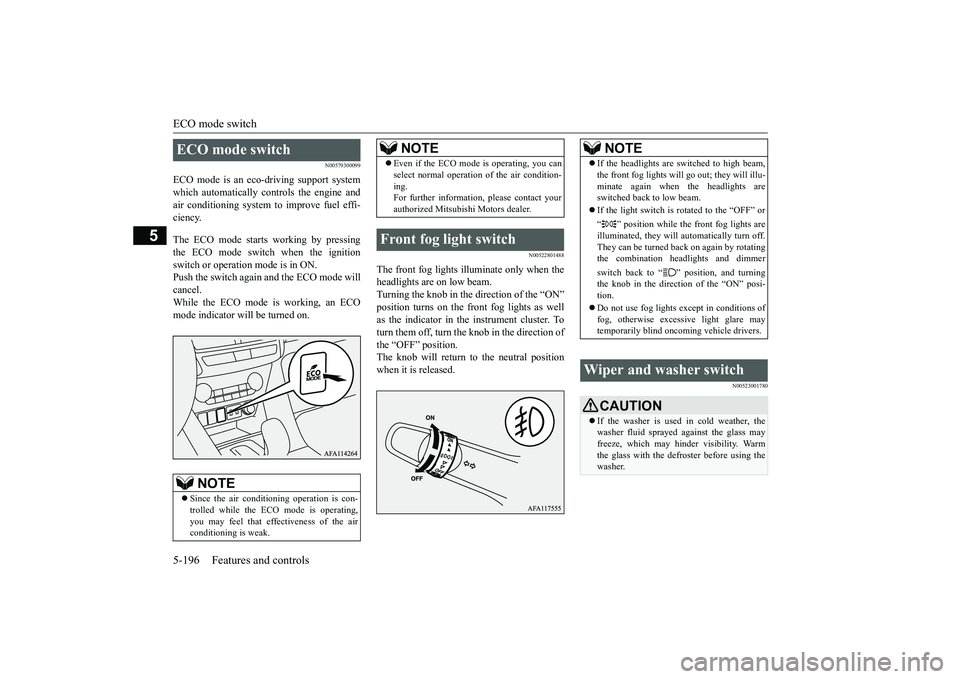
ECO mode is an eco-driving support system which automatically controls the engine andair conditioning system to improve fuel effi- ciency. The ECO mode starts working by pressing the ECO mode switch when the ignitionswitch or operation mode is in ON.Push the switch again and the ECO mode will cancel. While the ECO mode is working, an ECOmode indicator will be turned on.
N00522801488
The front fog lights illuminate only when theheadlights are on low beam.Turning the knob in the direction of the “ON” position turns on the front fog lights as well as the indicator in the instrument cluster. Toturn them off, turn the knob in the direction of the “OFF” position. The knob will return to the neutral positionwhen it is released.
N00523001780
ECO mode switch
NOTE
Since the air conditioning operation is con- trolled while the ECO mode is operating, you may feel that effectiveness of the airconditioning is weak.
Even if the ECO mode is operating, you can select normal operation of the air condition- ing. For further information, please contact your authorized Mitsubishi Motors dealer.
Front fog light switch
NOTE
NOTE
If the headlights are switched to high beam, the front fog lights will go
out; they will illu-
minate again when the headlights are switched back to low beam. If the light switch is rotated to the “OFF” or “ ” position while the front fog lights are illuminated, they will automatically turn off. They can be turned back on again by rotating the combination headlights and dimmer switch back to “ ” position, and turning the knob in the direction of the “ON” posi- tion. Do not use fog lights except in conditions of fog, otherwise excessive light glare may temporarily blind oncoming vehicle drivers.
Wiper and washer switch
CAUTION If the washer is used in cold weather, the washer fluid sprayed against the glass may freeze, which may hinder visibility. Warmthe glass with the defroster before using the washer.
BK0266800US.book
196 ページ 2018年6月27日 水曜日 午後5時6分
Page 285 of 423
Electric rear window defogger switch 5-202 Features and controls
5
N00523701514
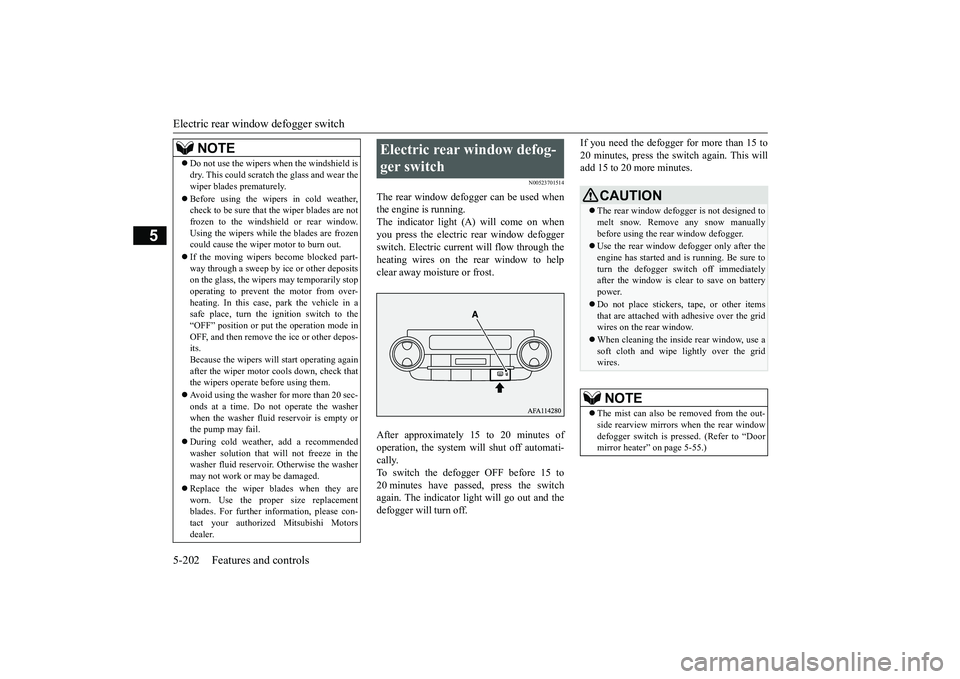
The rear window defogger can be used when the engine is running.The indicator light (A) will come on when you press the electric rear window defogger switch. Electric current will flow through theheating wires on the rear window to help clear away moisture or frost. After approximately 15 to 20 minutes of operation, the system will shut off automati- cally. To switch the defogger OFF before 15 to20 minutes have passed, press the switch again. The indicator light will go out and the defogger will turn off.
If you need the defogger for more than 15 to 20 minutes, press the switch again. This will add 15 to 20 more minutes.
NOTE
Do not use the wipers when the windshield is dry. This could scratch the glass and wear the wiper blades prematurely. Before using the wipers in cold weather, check to be sure that the wiper blades are not frozen to the windshield or rear window. Using the wipers while the blades are frozencould cause the wiper motor to burn out. If the moving wipers become blocked part- way through a sweep by ice or other deposits on the glass, the wipers may temporarily stop operating to prevent the motor from over-heating. In this case, park the vehicle in a safe place, turn the ignition switch to the “OFF” position or put the operation mode inOFF, and then remove the ice or other depos- its. Because the wipers will start operating againafter the wiper motor cools down, check that the wipers operate before using them. Avoid using the washer for more than 20 sec- onds at a time. Do not operate the washer when the washer fluid reservoir is empty orthe pump may fail. During cold weather, add a recommended washer solution that will not freeze in the washer fluid reservoir. Otherwise the washer may not work or may be damaged. Replace the wiper blades when they are worn. Use the proper size replacement blades. For further information, please con- tact your authorized Mitsubishi Motorsdealer.
Electric rear window defog- ger switch
CAUTION The rear window defogger is not designed to melt snow. Remove any snow manually before using the rear window defogger. Use the rear window defogger only after the engine has started and is running. Be sure to turn the defogger switch off immediatelyafter the window is clear to save on battery power. Do not place stickers, tape, or other items that are attached with adhesive over the grid wires on the rear window. When cleaning the inside rear window, use a soft cloth and wipe lightly over the gridwires.NOTE
The mist can also be removed from the out- side rearview mirrors when the rear windowdefogger switch is pressed. (Refer to “Door mirror heater” on page 5-55.)
BK0266800US.book
202 ページ 2018年6月27日 水曜日 午後5時6分
Page 290 of 423
HomeLink® Wireless Control System (if so equipped)
Features and controls 5-207
5
Accessories can be operated in all ignition switch positions or all operation modes.
N00554301066
HomeLink
® Wireless Control System is a
registered trademark of Gentex Corporation. HomeLink
® provides a convenient way to
replace up to 3 hand-held radio-frequency (RF) transmitters used to activate devices such as gate operators, garage door openers,entry door locks, security systems, even home lighting. Additional HomeLink
® information
can be found at www.homelink.com,www.youtube.com/HomeLinkGentex, or by
calling the toll-free HomeLink
®-Hotline at 1-
800-355-3515.
Type 2 HomeLink
® Wireless Con-
trol System
(if so equipped)
Floor console
WA R N I N G Do not use HomeLink
® with any garage
door opener that lacks safety stop and reverse features as required by U.S. Fed-eral Regulations. A garage door opener which cannot detect an object in the path of a closing garage door and then auto-matically stop and reverse, does not meet current U.S. Federal Regulations. Using a garage door opener without these featuresincreases the risk of serious injury or death. During programming, your garage door or gate may open or close. Make sure that people and objects ar
e clear of the garage
door or gate that you are programming.NOTE
Once HomeLink
® is programmed, retain the
original transmitter for future programming procedures (for example, new vehicle pur- chases). Upon sale of the vehicle, the pro- grammed HomeLink
® buttons should be
erased for security purposes. Refer to “Clear-ing the programmed information” on page 5-211.
You can program a maximum of 3 devices. To change or replace any of the 3 devices after it has been initially programmed, you must first erase the current settings. See “Clearing the programmed information”on page 5-211 or “Reprogramming a single HomeLink
® button” on page 5-211.
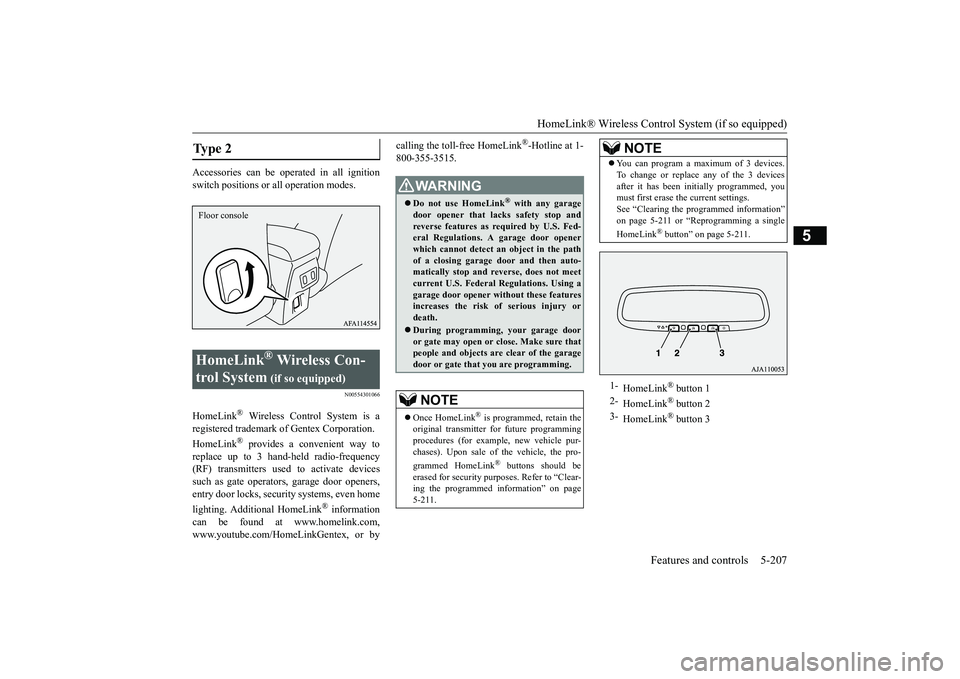
1-
HomeLink
® button 1
2-
HomeLink
® button 2
3-
HomeLink
® button 3
NOTE
BK0266800US.book
207 ページ 2018年6月27日 水曜日 午後5時6分
Page 291 of 423
HomeLink® Wireless Control System (if so equipped) 5-208 Features and controls
5
N00584600029
Some garage door openers manufactured after 1995 have “rolling code protection”. To program a garage door opener equipped with “rolling code protection”;you will need to access the garage door opener motor to press the motor’s “Learn” or “Smart” buttons. For convenience, usea ladder and another person to assist you. It is recommended that a new battery be placed in the hand-held transmitter of the device being programmed to HomeLink
®
for quicker training and accurate trans- mission of the radio-frequency signal.
N00584700046
To program HomeLink
® to operate a garage
door, gate, entry door opener, home or officelighting, you need to be at the same location as the device. 1. Press the HomeLink
® button that you
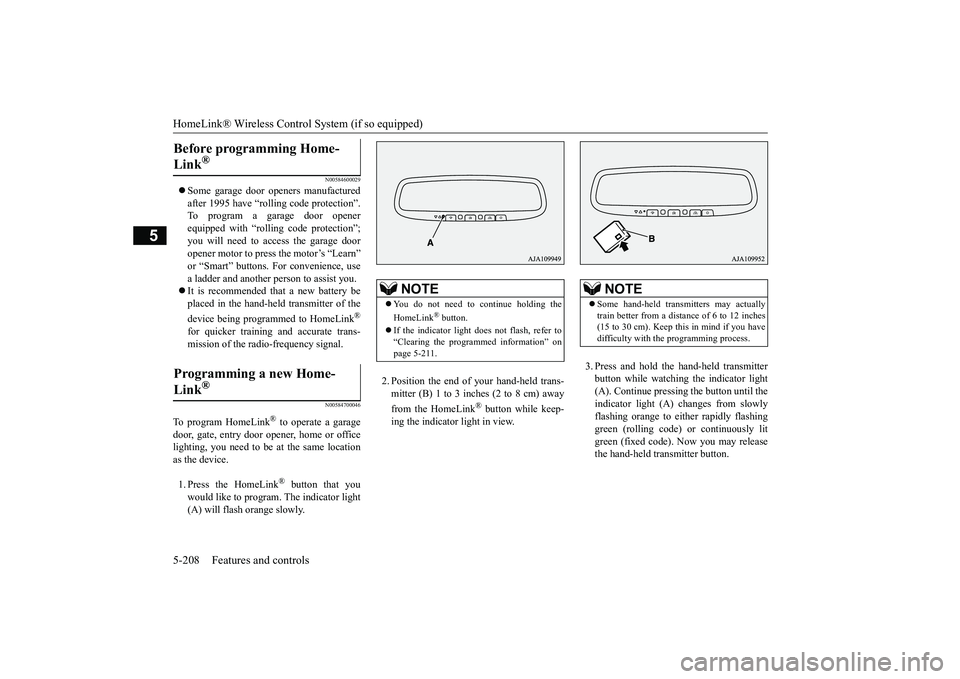
would like to program. The indicator light(A) will flash orange slowly.
2. Position the end of your hand-held trans- mitter (B) 1 to 3 inches (2 to 8 cm) away from the HomeLink
® button while keep-
ing the indicator light in view.
3. Press and hold the hand-held transmitter button while watching the indicator light(A). Continue pressing the button until theindicator light (A) changes from slowly flashing orange to either rapidly flashing green (rolling code) or continuously litgreen (fixed code). Now you may release the hand-held transmitter button.
Before programming Home- Link
®
Programming a new Home-Link
®
NOTE
You do not need to continue holding the HomeLink
® button.
If the indicator light does not flash, refer to “Clearing the programmed information” on page 5-211.
NOTE
Some hand-held transmitters may actually train better from a distance of 6 to 12 inches (15 to 30 cm). Keep this in mind if you havedifficulty with the programming process.
BK0266800US.book
208 ページ 2018年6月27日 水曜日 午後5時6分
Page 292 of 423
HomeLink® Wireless Control System (if so equipped)
Features and controls 5-209
5
4. Press the HomeLink
® button that was just
programmed and observe the indicatorlight. • If the indicator light continuously illumi- nates green, programming is completeand your device should operate when the HomeLink
® button is pressed and
released.• If the indicator light rapidly flashesgreen, firmly press, hold for 2 seconds and release the programmed HomeLink
®
button. Repeat the “press/hold/release” sequence a second time, and, depending on the brand of the garage door opener (or other rolling code equipped device),repeat this sequence a third time to com- plete the programming process. At this point if your device operates, program-ming is complete.
• If the device does not operate, continue with “Programming a new HomeLink
®”
steps 5 to 7 to complete the program- ming of a rolling code equipped device.
5. At the garage door opener receiver (motor-head unit) in the garage, locate the “Learn” or “Smart” button. This can usu-ally be found where the hanging antenna wire is attached to the motor-head unit (see the garage door opener manual toidentify the “Learn” button.)6. Firmly press and release the “Learn” or “Smart” button. (The name and color of the button may vary by manufacturer.)There are typically 30 seconds to initiate step 7. 7. Return to the vehicle and firmly press,hold for 2 seconds and release the pro- grammed HomeLink
® button. Repeat the
“press/hold/release” sequence a secondtime, and, depending on the brand of the garage door opener (or other rolling code equipped device), repeat this sequence athird time to complete the programming process. HomeLink
® should now activate your
rolling code equipped device.
N00584800021
Canadian radio-frequency laws require trans-mitter signals to “time-out” (or quit) after several seconds of transmission - which may not be long enough for HomeLink
® to pick
up the signal during programming. Similar tothis Canadian law, some U.S. gate operators are designed to “time-out” in the same man- ner.The indicator LED on the hand-held transmit- ter will go off when the device times out indi- cating that it has finished transmitting.If you live in Canada
or you are having diffi-
culties programming a gate operator or garage door opener by using the “Program-ming” procedures, replace “Programming a new HomeLink
®” step 3 with the following:
NOTE
Some devices may require you to replace this “Programming a new HomeLink
®” step 3
with procedures noted in the “Gate operator / Canadian programming” section. If the indi- cator light does not change to rapidly flash-ing green or continuously lit green after performing these steps, contact HomeLink
®
at www.homelink.com.
NOTE
In the event that there are still programming difficulties or questions, additional Home- Link
® information and programming videos
can be found online at www.homelink.com, www.youtube.com/HomeLinkGentex, or by calling the HomeLink
® Hotline.
Gate operator/Canadian pro- gramming
BK0266800US.book
209 ページ 2018年6月27日 水曜日 午後5時6分
Page 293 of 423

HomeLink® Wireless Control System (if so equipped) 5-210 Features and controls
5
3. Press and release - every 2 seconds (“cycle”) your hand-held transmitter until the HomeLink
® indicator light changes from
slowly flashing orange to either rapidly flash-ing green (rolling code) or continuously lit green (fixed code). Now you may release the hand-held transmitter button.Proceed with “Programming a new Home- Link
®” step 4 to complete.
N00584900022
The HomeLink
® has the capability of receiv-
ing garage door status from compatible garage door opener systems. Check your garage door opener manual for the available feature and HomeLink
® compatibility. Also
for a listing of compatible systems contact HomeLink
® at: www.homelink.com
1. Within 5 seconds after successfully pro- gramming the garage door opener (refer to “Programming a new HomeLink
®”
section), both garage door operation indi- cators (A) will flash rapidly green indicat- ing that the garage door feedback hasbeen enabled. If the indicators do not flash, perform steps 2 and 3 while pressing the Home- Link
® button up to the first 10 times after
successful programming. 2. Press and release the programmed Home- Link
® button to activate the door. You
now have 1 minute in which to complete step 3.
3. Once the door has stopped, press and release the “Learn” or “Smart” button on the garage door opener (refer to your garage door opener
owner’s manual for
the location of the “Learn” button). Both the HomeLink
® garage door operation
indicators will flash rapidly green uponsuccessful synchronization with the door opener (within 5 seconds).
N00585000020
To operate, simply press and release the pro- grammed HomeLink
® button. Activation will
now occur for the trained device (i.e. garage door opener, gate operator, security system,entry door lock, home/office lighting, etc.). For convenience, the hand-held transmitter of the device may also be used at any time.
N00585200022
The HomeLink
® has the capability of receiv-
ing garage door status from compatiblegarage door opener systems. Refer to “Addi- tional steps for programming a door system with feedback” on page 5-210.Garage door status is then displayed with indicators (A).
NOTE
If programming a garage door opener or gate operator, it is advised to unplug the device during the “cycling” process to prevent pos- sible overheating.
Additional steps for program- ming a door system with feed-back
Operating HomeLink
®
Garage door feedback
BK0266800US.book
210 ページ 2018年6月27日 水曜日 午後5時6分