driving MITSUBISHI ECLIPSE CROSS 2020 Owner's Manual (in English)
[x] Cancel search | Manufacturer: MITSUBISHI, Model Year: 2020, Model line: ECLIPSE CROSS, Model: MITSUBISHI ECLIPSE CROSS 2020Pages: 427, PDF Size: 78.05 MB
Page 321 of 427
Trailer towing 6-12 Driving safety
6
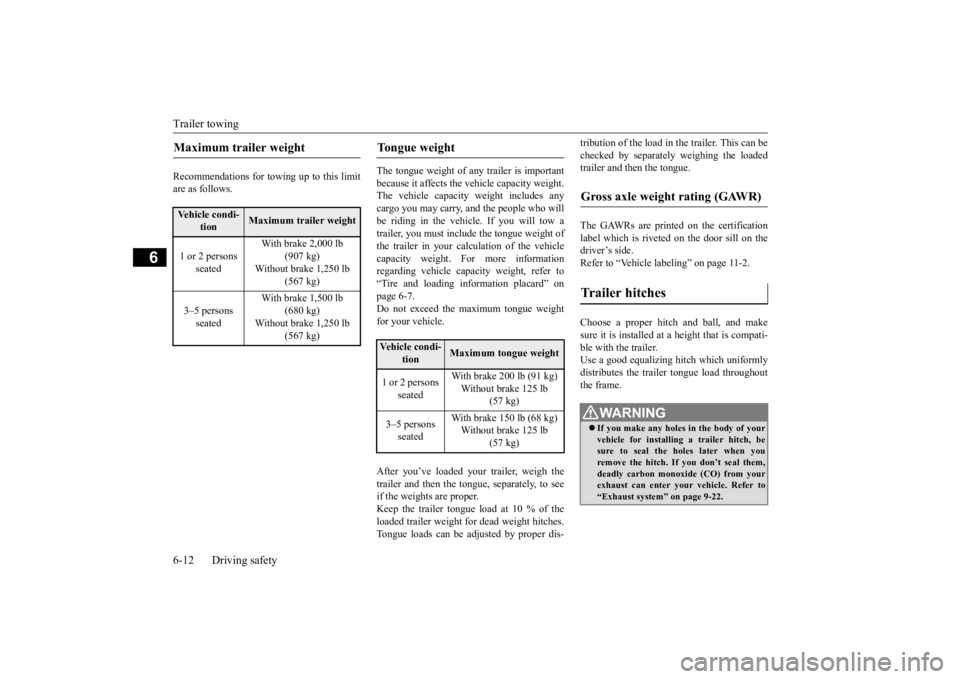
Recommendations for towing up to this limit are as follows.
The tongue weight of any trailer is important because it affects the vehicle capacity weight. The vehicle capacity weight includes anycargo you may carry, and the people who will be riding in the vehicle. If you will tow a trailer, you must include the tongue weight ofthe trailer in your calculation of the vehicle capacity weight. For more information regarding vehicle capacity weight, refer to“Tire and loading information placard” onpage 6-7. Do not exceed the maximum tongue weight for your vehicle. After you’ve loaded your trailer, weigh the trailer and then the tongue, separately, to see if the weights are proper.Keep the trailer tongue load at 10 % of the loaded trailer weight for dead weight hitches. Tongue loads can be adjusted by proper dis-
tribution of the load in the trailer. This can be checked by separately weighing the loaded trailer and then the tongue. The GAWRs are printed on the certification label which is riveted on the door sill on the driver’s side.Refer to “Vehicle labeling” on page 11-2. Choose a proper hitch and ball, and make sure it is installed at a height that is compati-ble with the trailer. Use a good equalizing hitch which uniformly distributes the trailer tongue load throughoutthe frame.
Maximum trailer weight Vehicle condi-
tion
Maximum trailer weight
1 or 2 persons
seated
With brake 2,000 lb
(907 kg)
Without brake 1,250 lb
(567 kg)
3–5 persons
seated
With brake 1,500 lb
(680 kg)
Without brake 1,250 lb
(567 kg)
Tongue weight Vehicle condi-
tion
Maximum tongue weight
1 or 2 persons
seated
With brake 200 lb (91 kg) Without brake 125 lb
(57 kg)
3–5 persons
seated
With brake 150 lb (68 kg) Without brake 125 lb
(57 kg)
Gross axle weight rating (GAWR) Trailer hitches
WA R N I N G If you make any holes in the body of your vehicle for installing a trailer hitch, be sure to seal the holes later when you remove the hitch. If you don’t seal them, deadly carbon monoxide (CO) from your exhaust can enter your
vehicle. Refer to
“Exhaust system” on page 9-22.
BK0277700US.bo
ok 12 ページ 2019年3月8日 金曜日 午前9時23分
Page 322 of 427
Trailer towing
Driving safety 6-13
6
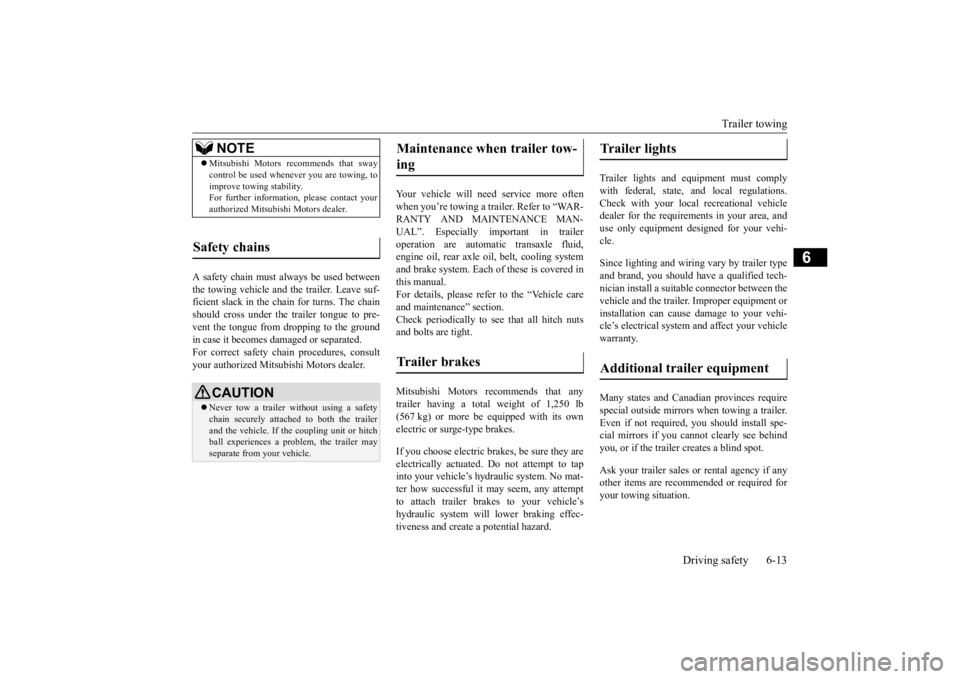
A safety chain must always be used between the towing vehicle and the trailer. Leave suf- ficient slack in the chain for turns. The chain should cross under the trailer tongue to pre-vent the tongue from dropping to the ground in case it becomes damaged or separated. For correct safety chain procedures, consultyour authorized Mitsubishi Motors dealer.
Your vehicle will need service more often when you’re towing a trailer. Refer to “WAR- RANTY AND MAINTENANCE MAN- UAL”. Especially important in traileroperation are automatic transaxle fluid, engine oil, rear axle oil, belt, cooling system and brake system. Each of these is covered inthis manual.For details, please refer to the “Vehicle care and maintenance” section. Check periodically to see that all hitch nutsand bolts are tight. Mitsubishi Motors recommends that any trailer having a total weight of 1,250 lb (567 kg) or more be equipped with its own electric or surge-type brakes. If you choose electric brakes, be sure they are electrically actuated. Do not attempt to tap into your vehicle’s hydraulic system. No mat- ter how successful it may seem, any attemptto attach trailer brakes to your vehicle’s hydraulic system will lower braking effec- tiveness and create a potential hazard.
Trailer lights and equipment must comply with federal, state, and local regulations.Check with your local recreational vehicle dealer for the requirements in your area, and use only equipment designed for your vehi-cle. Since lighting and wiring vary by trailer type and brand, you should have a qualified tech- nician install a suitable connector between the vehicle and the trailer. Improper equipment orinstallation can cause damage to your vehi- cle’s electrical system and affect your vehicle warranty. Many states and Canadian provinces require special outside mirrors when towing a trailer.Even if not required, you should install spe- cial mirrors if you cannot clearly see behind you, or if the trailer creates a blind spot. Ask your trailer sales or rental agency if any other items are recommended or required for your towing situation.
NOTE
Mitsubishi Motors recommends that sway control be used when
ever you are towing, to
improve towing stability. For further information, please contact your authorized Mitsubishi Motors dealer.
Safety chains
CAUTION Never tow a trailer without using a safety chain securely attached to both the trailer and the vehicle. If the coupling unit or hitch ball experiences a problem, the trailer may separate from your vehicle.
Maintenance when trailer tow- ing Trailer brakes
Trailer lights Additional trailer equipment
BK0277700US.bo
ok 13 ページ 2019年3月8日 金曜日 午前9時23分
Page 323 of 427
Trailer towing 6-14 Driving safety
6
Towing a trailer requires a certain amount of experience. Before setting out for the open road, you’llwant to get to know your trailer. Acquaint
yourself with the feel
of handling and braking
with the added weight of the trailer. Always keep in mind that the vehicle you are driving is now a good deal longer and not nearly asresponsive as your vehicle is without a trailer. Before you start, check the trailer hitch, safety chains, tires and mirror adjustment. Be sure your vehicle’s tires are inflated to the cold inflation pressure listed in the manual.You’ll find these numbers on the tire and loading information placard at the sill of the driver’s door.Refer to “Tire inflation pressures” on page 9-15. Stay at least twice as far behind the vehicle ahead as you would when driving your vehi-cle without a trailer. This can help you avoid situations that require heavy braking and sud- den turns.
You’ll need more passing distance up ahead when you’re towing a trailer. And, becauseyou’re a good deal longer, you’ll need to go much farther beyond the passed vehicle before you can return to your lane. Hold the bottom of the steering wheel with one hand. Then, to move the trailer to the left, just move that hand to the left. To move thetrailer to the right, move your hand to the right. Always back up slowly and, if possible, have someone guide you. When you’re turning with a trailer, make wider than normal turns to help prevent thetrailer from striking shoulders, curbs, road signs, trees or other objects.
Operating hints
WA R N I N G If you have a rear window open and you tow a trailer with your vehicle, carbon monoxide gas which you cannot see or smell could come into your vehicle. It cancause unconsciousness or death. Refer to “Exhaust system” on page 9-22. To maximize your safety when towing atrailer:• Have your exhaust system inspected forleaks, and make necessary repairs before starting on your trip.• Keep the rear windows closed.• If exhaust does come into your vehicle through a window or another opening, drive with your front, main heating or cooling system on and with the blower onany speed. This will bring fresh, outside air into your vehicle. Do not use recircu- lation because it only recirculates the airinside your vehicle. Refer to “Air selec- tion switch” on page 7-9.
Driver preparation
Vehicle preparation Tire Following distance
Passing Backing up Making turns
CAUTION Making sharp turns while towing a trailer could cause the trailer to come in contact with the vehicle. Your vehicle could be dam- aged. Avoid making sharp turns while tow-ing a trailer.
BK0277700US.bo
ok 14 ページ 2019年3月8日 金曜日 午前9時23分
Page 324 of 427
Trailer towing
Driving safety 6-15
6
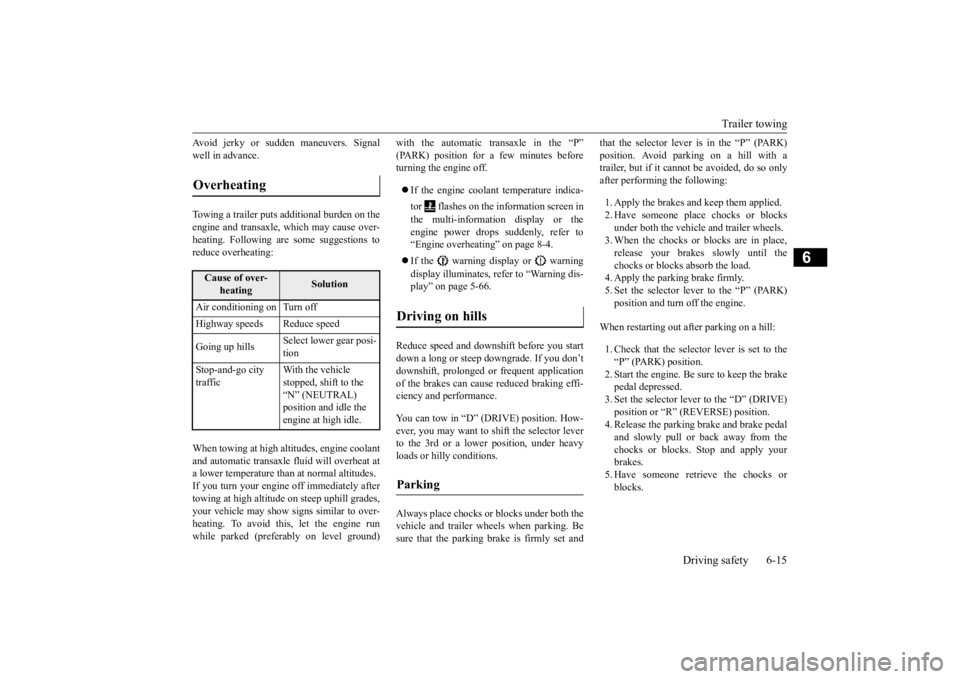
Avoid jerky or sudden maneuvers. Signal well in advance. Towing a trailer puts additional burden on the engine and transaxle, which may cause over- heating. Following are some suggestions to reduce overheating: When towing at high altitudes, engine coolant and automatic transaxle fluid will overheat at a lower temperature than at normal altitudes.If you turn your engine off immediately after towing at high altitude on steep uphill grades, your vehicle may show signs similar to over-heating. To avoid this
, let the engine run
while parked (preferably on level ground)
with the automatic transaxle in the “P” (PARK) position for a few minutes before turning the engine off. If the engine coolant temperature indica- tor flashes on the information screen in the multi-information display or the engine power drops suddenly, refer to “Engine overheating” on page 8-4. If the warning display or warning display illuminates, refer to “Warning dis- play” on page 5-66.
Reduce speed and downshift before you start down a long or steep
downgrade. If you don’t
downshift, prolonged or frequent applicationof the brakes can cause reduced braking effi- ciency and performance. You can tow in “D” (DRIVE) position. How- ever, you may want to shift the selector leverto the 3rd or a lower position, under heavy loads or hilly conditions. Always place chocks or blocks under both the vehicle and trailer wheels when parking. Be sure that the parking brake is firmly set and
that the selector lever is in the “P” (PARK) position. Avoid parking on a hill with a trailer, but if it cannot be avoided, do so only after performing the following: 1. Apply the brakes and keep them applied. 2. Have someone place chocks or blocks under both the vehicle and trailer wheels. 3. When the chocks or blocks are in place,release your brakes slowly until the chocks or blocks absorb the load. 4. Apply the parking brake firmly.5. Set the selector lever to the “P” (PARK)position and turn off the engine.
When restarting out after parking on a hill: 1. Check that the selector lever is set to the “P” (PARK) position. 2. Start the engine. Be sure to keep the brakepedal depressed. 3. Set the selector lever to the “D” (DRIVE) position or “R” (REVERSE) position.4. Release the parking brake and brake pedal and slowly pull or
back away from the
chocks or blocks. Stop and apply yourbrakes. 5. Have someone retrieve the chocks or blocks.
Overheating
Cause of over-
heating
Solution
Air conditioning on Turn off Highway speeds Reduce speed Going up hills
Select lower gear posi- tion
Stop-and-go city traffic
With the vehicle stopped, shift to the “N” (NEUTRAL) position and idle the engine at high idle.
Driving on hills Parking
BK0277700US.bo
ok 15 ページ 2019年3月8日 金曜日 午前9時23分
Page 338 of 427
Automatic air conditioning (if so equipped)
Comfort controls 7-13
7
N00731801170
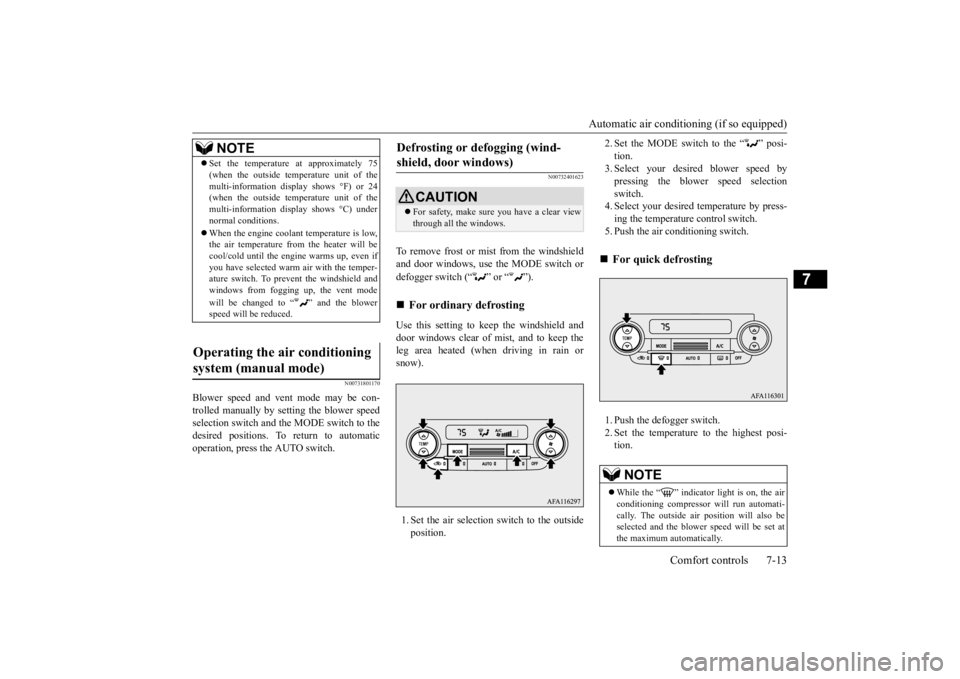
Blower speed and vent mode may be con- trolled manually by setting the blower speed selection switch and the MODE switch to the desired positions. To return to automaticoperation, press the AUTO switch.
N00732401623
To remove frost or mist from the windshield and door windows, use the MODE switch or defogger switch (“ ” or “ ”). Use this setting to keep the windshield and door windows clear of mist, and to keep the leg area heated (when driving in rain or snow). 1. Set the air selection switch to the outside position.
2. Set the MODE switch to the “ ” posi- tion. 3. Select your desired blower speed by pressing the blower speed selectionswitch. 4. Select your desired temperature by press- ing the temperature control switch.5. Push the air conditioning switch. 1. Push the defogger switch. 2. Set the temperature to the highest posi- tion.
NOTE
Set the temperature at approximately 75 (when the outside temperature unit of the multi-information display shows °F) or 24 (when the outside temperature unit of the multi-information display shows °C) undernormal conditions. When the engine coolant temperature is low, the air temperature from the heater will be cool/cold until the engine warms up, even if you have selected warm air with the temper-ature switch. To prevent the windshield and windows from fogging up, the vent mode will be changed to “ ” and the blower speed will be reduced.
Operating the air conditioning system (manual mode)
Defrosting or defogging (wind- shield, door windows)
CAUTION For safety, make sure you have a clear view through all the windows.
For ordinary defrosting
For quick defrosting NOTE
While the “ ” indicator light is on, the air conditioning compressor will run automati- cally. The outside air position will also beselected and the blower speed will be set at the maximum automatically.
BK0277700US.bo
ok 13 ページ 2019年3月8日 金曜日 午前9時23分
Page 347 of 427
Dual-zone automatic climate contro
l air conditioning (if so equipped)
7-22 Comfort controls
7
N00731701616
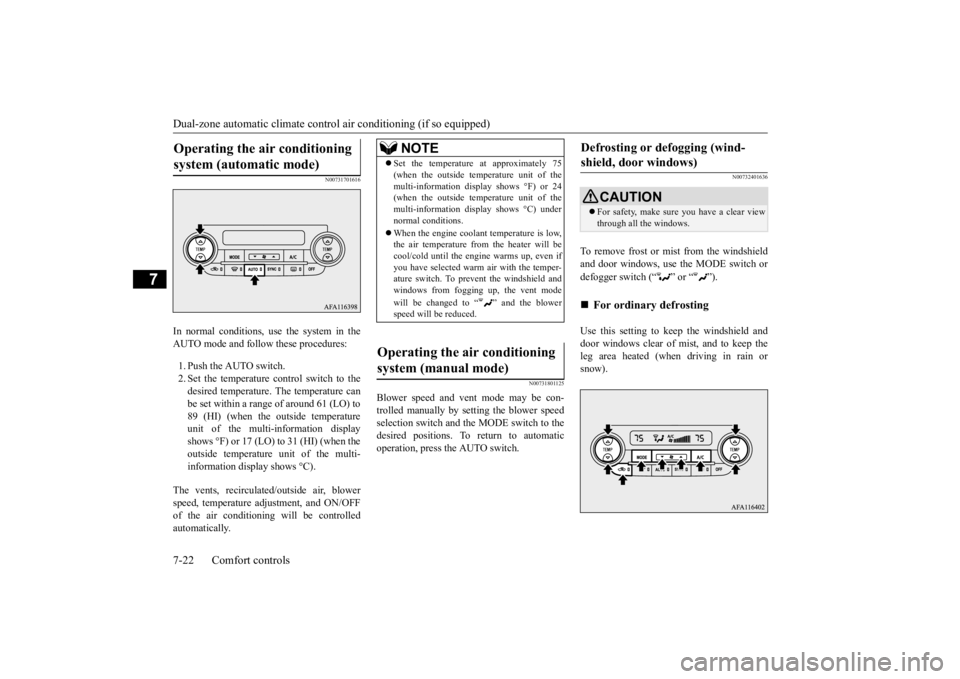
In normal conditions, use the system in the AUTO mode and follow these procedures: 1. Push the AUTO switch. 2. Set the temperature control switch to thedesired temperature. The temperature can be set within a range of around 61 (LO) to 89 (HI) (when the outside temperatureunit of the multi-information display shows °F) or 17 (LO) to 31 (HI) (when the outside temperature unit of the multi-information display shows °C).
The vents, recirculated/outside air, blower speed, temperature adjustment, and ON/OFF of the air conditioning will be controlledautomatically.
N00731801125
Blower speed and vent mode may be con-trolled manually by setting the blower speed selection switch and the MODE switch to the desired positions. To return to automaticoperation, press the AUTO switch.
N00732401636
To remove frost or mist from the windshield and door windows, use the MODE switch or defogger switch (“ ” or “ ”). Use this setting to keep the windshield and door windows clear of mist, and to keep the leg area heated (when driving in rain orsnow).
Operating the air conditioning system (automatic mode)
NOTE
Set the temperature at approximately 75 (when the outside temperature unit of the multi-information display shows °F) or 24 (when the outside temperature unit of the multi-information display shows °C) undernormal conditions. When the engine coolant temperature is low, the air temperature from the heater will be cool/cold until the engine warms up, even if you have selected warm air with the temper-ature switch. To prevent the windshield and windows from fogging up, the vent mode will be changed to “ ” and the blower speed will be reduced.
Operating the air conditioning system (manual mode)
Defrosting or defogging (wind- shield, door windows)
CAUTION For safety, make sure you have a clear view through all the windows.
For ordinary defrosting
BK0277700US.bo
ok 22 ページ 2019年3月8日 金曜日 午前9時23分
Page 355 of 427

Engine overheating 8-4 For emergencies
8
If you drive your vehicle with a low battery charge after the engine has been started by using jumper cables, the engine may misfire. This can cause the anti-lock braking systemwarning light to blink on and off. This is only due to the low battery voltage. It is not a problem with the brake system. If this hap-pens, fully charge the battery and ensure thecharging system is operating properly.
N00836501421
When the engine is overheating, the informa-tion screen in the multi-information display will be interrupted and the engine coolant temperature warning display will appear. Also “ ” will blink. If these warnings are displayed: 1. Stop the vehicle in a safe place. Turn on the hazard warning flashers.2. With the engine still running, carefully raise the engine hood to vent the engine compartment.
3. Check that the cooling fan is running. If the fan is not turning, stop the engine immediately and contact an authorized Mitsubishi Motors dealer or a repair facil-ity of your choice for assistance. 4. If you see steam or spray coming from under the hood, turn off the engine. 5. If you do not see steam or spray comingfrom under the hood, leave the engine on until the high coolant temperature warn- ing goes off. After the high coolant tem-perature warning has gone off, you can start driving again. If the high coolant temperature warning stays on, turn off theengine.
Charging the battery by using an external battery charger
WA R N I N G Always remove the battery from your vehicle when the battery is charged by anexternal battery charger. Keep sparks, cigarettes, and flames away from the battery because the battery could explode. Keep your work area well vented when charging or using the battery in an enclosed space. Remove all the caps before charging the battery. Electrolyte (battery acid) is made of corro- sive diluted sulfuric acid. If electrolytecomes in contact with your hands, eyes, clothes, or the painted surface of your vehicle, thoroughly flush with water. Ifelectrolyte gets in your eyes, flush them immediately and thoroughly with water, and get prompt medical attention. Always wear protective clothing and gog- gles when working near the battery. Keep the battery out of the reach of chil- dren.
As your vehicle has anti-lock brakes Engine overheating
WA R N I N G To avoid personal injury, keep hands, hair, jewelry and clothes away from the coolingfan. The cooling fan can start at any time.WA R N I N G Before raising the engine hood, check to see if there is steam or spray coming from under the hood. Steam or spray coming from an overheated engine could seriously scald you.Do not open the hood until there is no steam or spray.
BK0277700US.bo
ok 4 ページ 2019年3月8日 金曜日 午前9時23分
Page 356 of 427
Jack and tools
For emergencies 8-5
8
6. When you do not see any more steam or spray, open the hood. Look for obvious leaks, such as a split radiator hose. Be careful as components will be hot. Anyleak source must be repaired. 7. If there is no obvious leak source, check the coolant level in the engine coolantreserve tank. If there is none, or if it is too low, slowly add coolant. 8. If the engine coolant reserve tank needscoolant, you will probably also need toadd coolant to the radiator. Do not loosen or remove the radiator cap until the engine has cooled down. 9. Start the engine, and slowly add coolant, up to the bottom of the filler neck. Useplain water if you have to (and replace it with the right coolant as soon as possible).
10. Replace the radiator cap and tighten it
fully. Check the engine coolant tempera- ture display on the multi-information dis- play. You can start driving again when thehigh coolant temperature warning does not come on.
11. Have the system inspected by your autho-
rized Mitsubishi Motors dealer or a repair facility of your choice.
N00836601435
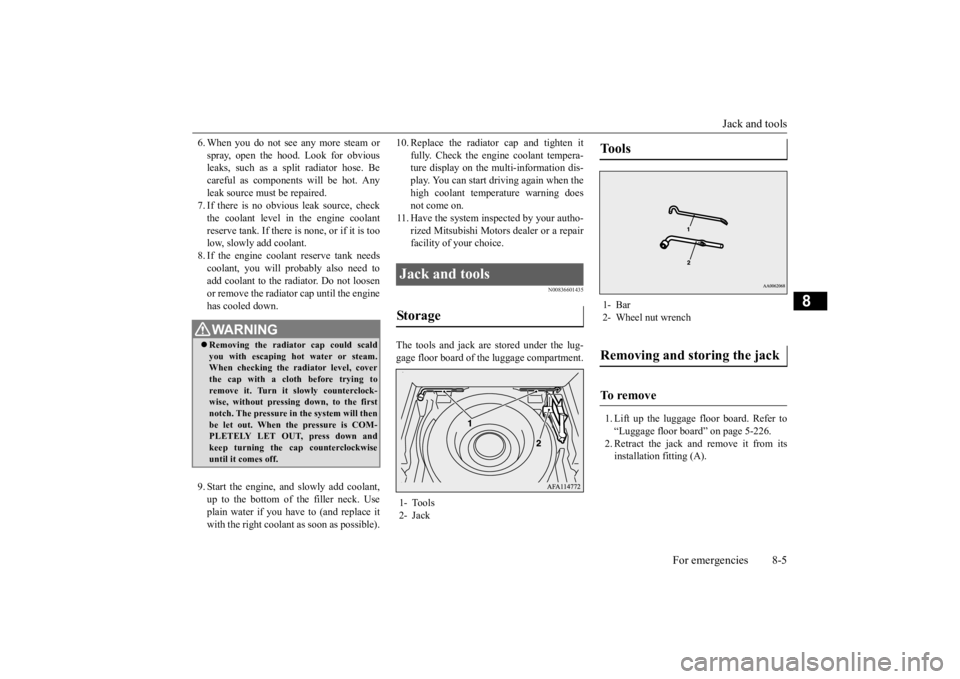
The tools and jack are stored under the lug- gage floor board of the luggage compartment.
1. Lift up the luggage floor board. Refer to “Luggage floor board” on page 5-226. 2. Retract the jack and remove it from its installation fitting (A).
WA R N I N G Removing the radiator cap could scald you with escaping hot water or steam.When checking the radiator level, cover the cap with a cloth before trying to remove it. Turn it slowly counterclock-wise, without pressing down, to the first notch. The pressure in the system will then be let out. When the pressure is COM-PLETELY LET OUT, press down and keep turning the cap counterclockwise until it comes off.
Jack and tools Storage 1- Tools 2- Jack
Tools 1- Bar2- Wheel nut wrenchRemoving and storing the jack To remove
BK0277700US.bo
ok 5 ページ 2019年3月8日 金曜日 午前9時23分
Page 358 of 427
How to change a tire
For emergencies 8-7
8
N00849601341
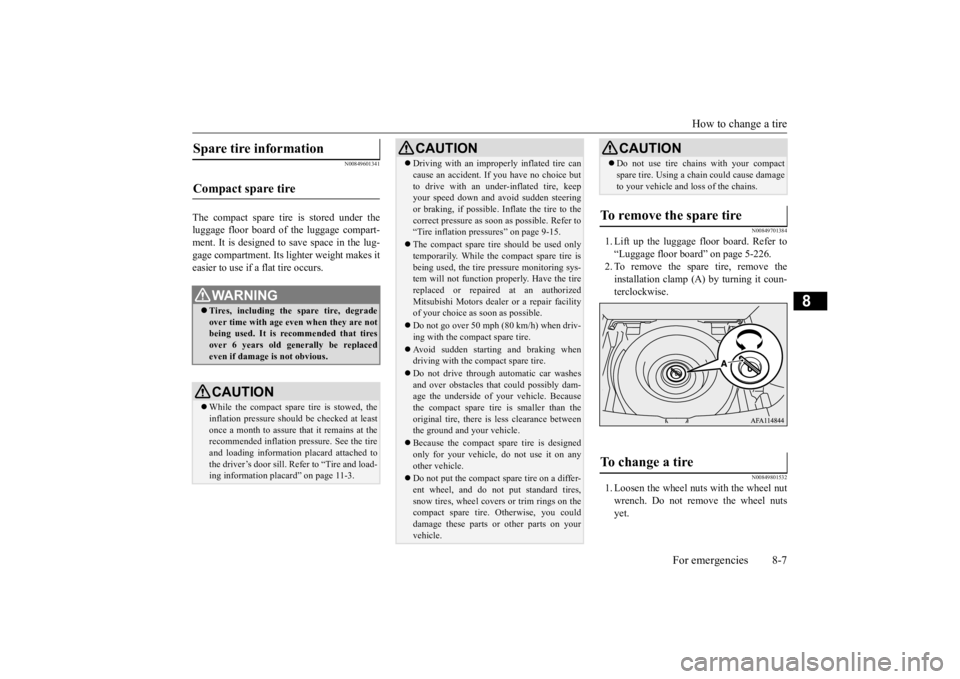
The compact spare tire is stored under the luggage floor board of the luggage compart-ment. It is designed to save space in the lug- gage compartment. Its lighter weight makes it easier to use if a flat tire occurs.
N00849701384
1. Lift up the luggage floor board. Refer to“Luggage floor board” on page 5-226.2. To remove the spare tire, remove theinstallation clamp (A) by turning it coun- terclockwise.
N00849801532
1. Loosen the wheel nuts with the wheel nut wrench. Do not remove the wheel nuts yet.
Spare tire information Compact spare tire
WA R N I N G Tires, including the spare tire, degrade over time with age even when they are notbeing used. It is recommended that tires over 6 years old generally be replaced even if damage is not obvious.CAUTION While the compact spare tire is stowed, the inflation pressure should be checked at least once a month to assure that it remains at therecommended inflation pressure. See the tire and loading information placard attached to the driver’s door sill. Refer to “Tire and load- ing information placard” on page 11-3.
Driving with an improperly inflated tire can cause an accident. If you have no choice but to drive with an under-inflated tire, keep your speed down and avoid sudden steering or braking, if possible
. Inflate the tire to the
correct pressure as soon as possible. Refer to “Tire inflation pressures” on page 9-15. The compact spare tire should be used only temporarily. While the compact spare tire is being used, the tire pressure monitoring sys-tem will not function properly. Have the tire replaced or repaired at an authorized Mitsubishi Motors dealer or a repair facilityof your choice as soon as possible. Do not go over 50 mph (80 km/h) when driv- ing with the compact spare tire. Avoid sudden starting and braking when driving with the compact spare tire. Do not drive through automatic car washes and over obstacles that could possibly dam- age the underside of your vehicle. Because the compact spare tire is smaller than theoriginal tire, there is less clearance between the ground and your vehicle. Because the compact spare tire is designed only for your vehicle, do not use it on any other vehicle. Do not put the compact spare tire on a differ- ent wheel, and do not put standard tires, snow tires, wheel covers or trim rings on the compact spare tire. Otherwise, you coulddamage these parts or other parts on your vehicle.CAUTION
Do not use tire chains with your compact spare tire. Using a chain could cause damage to your vehicle and loss of the chains.
To remove the spare tire To change a tire
CAUTION
BK0277700US.bo
ok 7 ページ 2019年3月8日 金曜日 午前9時23分
Page 361 of 427
How to change a tire 8-10 For emergencies
8
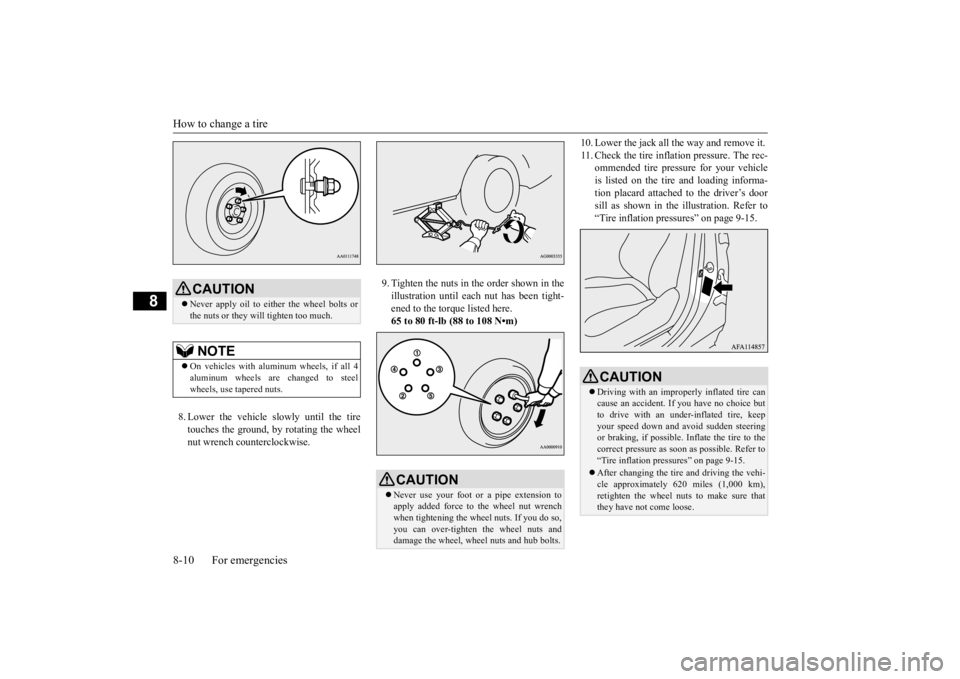
8. Lower the vehicle slowly until the tire touches the ground, by rotating the wheel nut wrench counterclockwise.
9. Tighten the nuts in the order shown in the illustration until each nut has been tight- ened to the torque listed here.65 to 80 ft-lb (88 to 108 N•m)
10. Lower the jack all the way and remove it. 11. Check the tire inflation pressure. The rec-
ommended tire pressure for your vehicle is listed on the tire and loading informa-tion placard attached to the driver’s door sill as shown in the illustration. Refer to “Tire inflation pressures” on page 9-15.
CAUTION Never apply oil to either the wheel bolts or the nuts or they will tighten too much.NOTE
On vehicles with aluminum wheels, if all 4 aluminum wheels are changed to steel wheels, use tapered nuts.
CAUTION Never use your foot or a pipe extension to apply added force to the wheel nut wrenchwhen tightening the wheel nuts. If you do so, you can over-tighten the wheel nuts and damage the wheel, wheel nuts and hub bolts.
CAUTION Driving with an improperly inflated tire can cause an accident. If
you have no choice but
to drive with an under-inflated tire, keep your speed down and avoid sudden steering or braking, if possible
. Inflate the tire to the
correct pressure as soon as possible. Refer to “Tire inflation pressures” on page 9-15. After changing the tire and driving the vehi- cle approximately 620 miles (1,000 km), retighten the wheel nuts to make sure thatthey have not come loose.
BK0277700US.bo
ok 10 ページ 2019年3月8日 金曜日 午前9時23分