MITSUBISHI GRANDIS 2010 (in English) Owners Manual
Manufacturer: MITSUBISHI, Model Year: 2010, Model line: GRANDIS, Model: MITSUBISHI GRANDIS 2010Pages: 273, PDF Size: 21.01 MB
Page 91 of 273
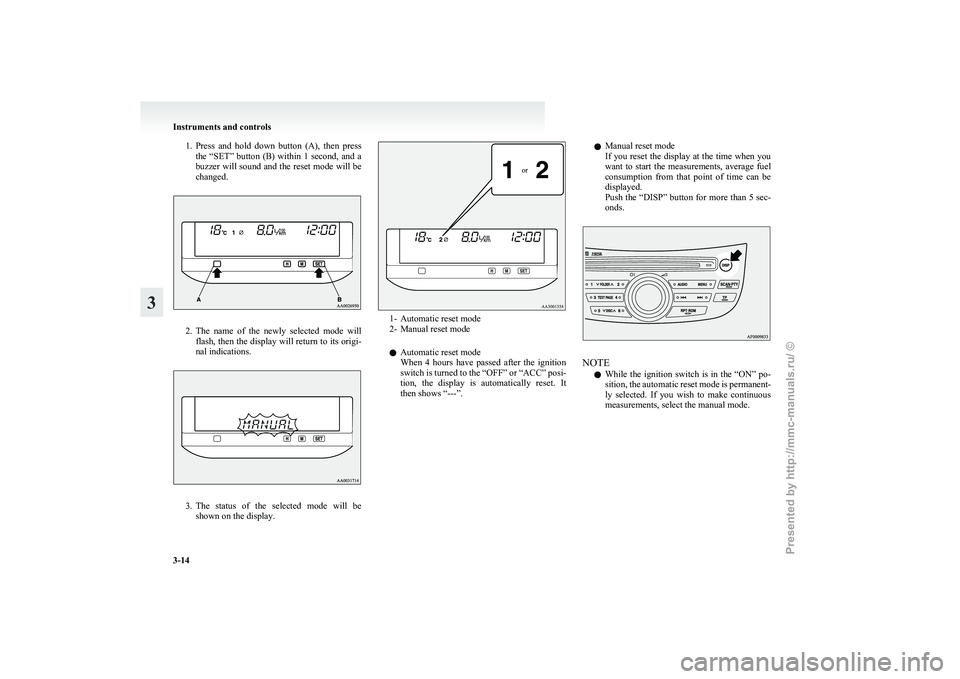
1. Press and hold down button (A), then press
the “SET” button (B) within 1 second, and a
buzzer will sound and the reset mode will be
changed. 2. The
name of the newly selected mode will
flash, then the display will return to its origi-
nal indications. 3. The
status of the selected mode will be
shown on the display.
or 1- Automatic reset mode
2-
Manual reset mode
l Automatic reset mode
When 4 hours have passed after the ignition
switch is turned to the “OFF” or “ACC” posi-
tion, the display is automatically reset. It
then shows “---”. l
Manual reset mode
If
you reset the display at the time when you
want to start the measurements, average fuel
consumption from that point of time can be
displayed.
Push the “DISP” button for more than 5 sec-
onds. NOTE
l While
the ignition switch is in the “ON” po-
sition, the automatic reset mode is permanent-
ly selected. If you wish to make continuous
measurements, select the manual mode. Instruments and controls
3-14
3
Presented by http://mmc-manuals.ru/ \251
Page 92 of 273
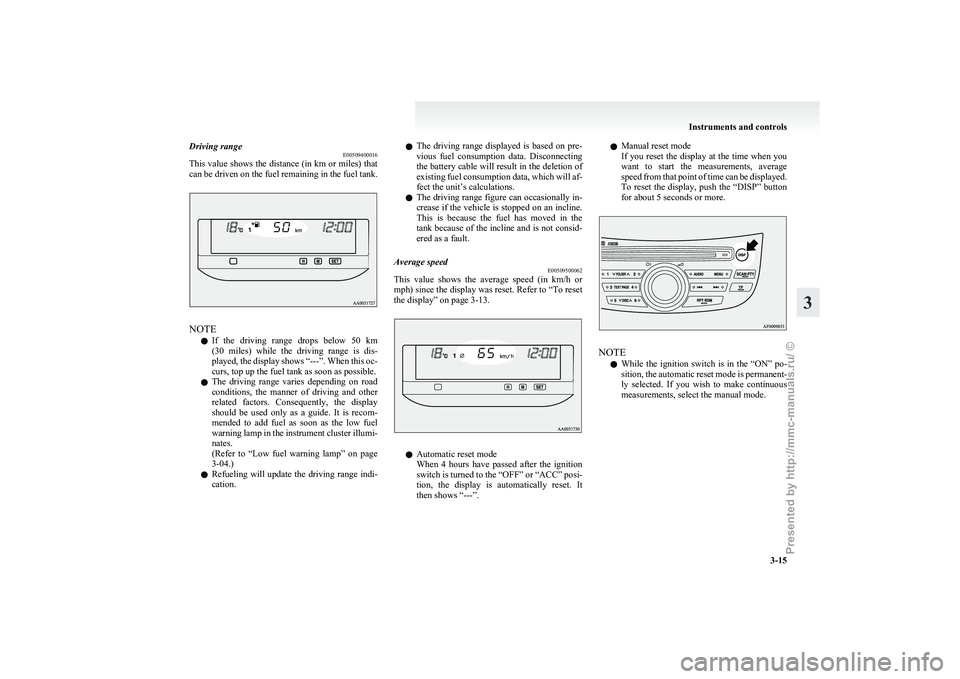
Driving range
E00509400016
This
value shows the distance (in km or miles) that
can be driven on the fuel remaining in the fuel tank. NOTE
l If
the driving range drops below 50 km
(30 miles) while the driving range is dis-
played, the display shows “---”. When this oc-
curs, top up the fuel tank as soon as possible.
l The driving range varies depending on road
conditions, the manner of driving and other
related factors. Consequently, the display
should be used only as a guide. It is recom-
mended to add fuel as soon as the low fuel
warning lamp in the instrument cluster illumi-
nates.
(Refer to “Low fuel warning lamp” on page
3-04.)
l Refueling will update the driving range indi-
cation. l
The
driving range displayed is based on pre-
vious fuel consumption data. Disconnecting
the battery cable will result in the deletion of
existing fuel consumption data, which will af-
fect the unit’s calculations.
l The driving range figure can occasionally in-
crease if the vehicle is stopped on an incline.
This is because the fuel has moved in the
tank because of the incline and is not consid-
ered as a fault.
Average speed E00509500062
This value shows the average speed (in km/h or
mph) since the display was reset. Refer to
“To reset
the display” on page 3-13. l
Automatic reset mode
When
4 hours have passed after the ignition
switch is turned to the “OFF” or “ACC” posi-
tion, the display is automatically reset. It
then shows “---”. l
Manual reset mode
If
you reset the display at the time when you
want to start the measurements, average
speed from that point of time can be displayed.
To reset the display, push the “DISP” button
for about 5 seconds or more. NOTE
l While
the ignition switch is in the “ON” po-
sition, the automatic reset mode is permanent-
ly selected. If you wish to make continuous
measurements, select the manual mode. Instruments and controls
3-15 3
Presented by http://mmc-manuals.ru/ \251
Page 93 of 273
Display brightness adjustment
E00509600018
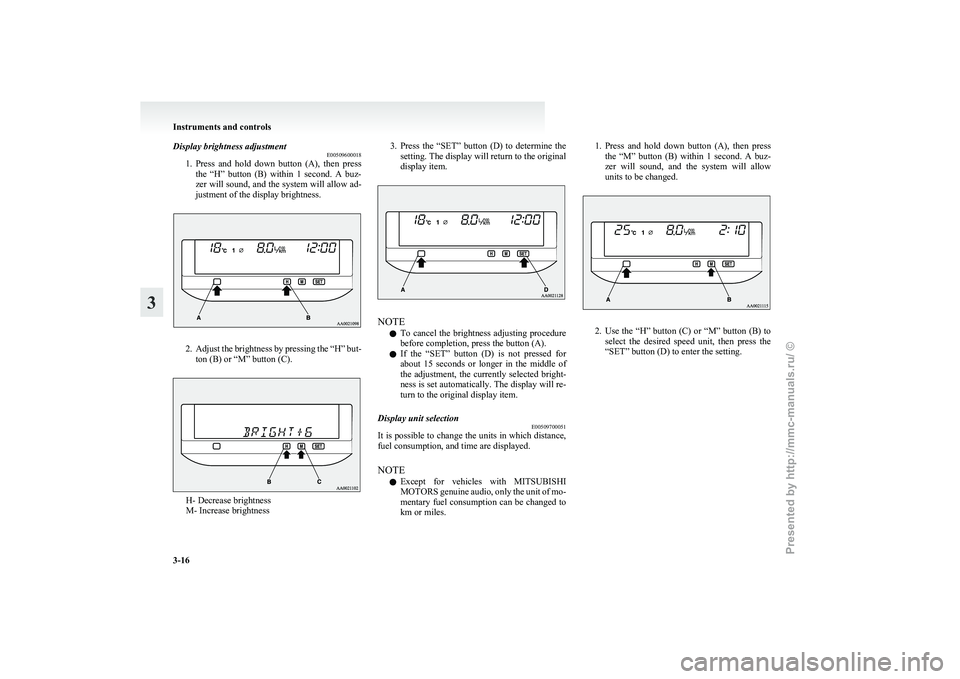
1. Press
and hold down button (A), then press
the “H” button (B) within 1 second. A buz-
zer will sound, and the system will allow ad-
justment of the display brightness. 2. Adjust
the brightness by pressing the “H” but-
ton (B) or “M” button (C). H- Decrease brightness
M- Increase brightness 3. Press
the “SET” button (D) to determine the
setting. The display will return to the original
display item. NOTE
l To
cancel the brightness adjusting procedure
before completion, press the button (A).
l If the “SET” button (D) is not pressed for
about 15 seconds or longer in the middle of
the adjustment, the currently selected bright-
ness is set automatically. The display will re-
turn to the original display item.
Display unit selection E00509700051
It is possible to change the units in which distance,
fuel consumption, and time are displayed.
NOTE
l Except
for vehicles with MITSUBISHI
MOTORS genuine audio, only the unit of mo-
mentary fuel consumption can be changed to
km or miles. 1. Press
and hold down button (A), then press
the “M” button (B) within 1 second. A buz-
zer will sound, and the system will allow
units to be changed. 2. Use
the “H” button (C) or “M” button (B) to
select the desired speed unit, then press the
“SET” button (D) to enter the setting. Instruments and controls
3-16
3
Presented by http://mmc-manuals.ru/ \251
Page 94 of 273
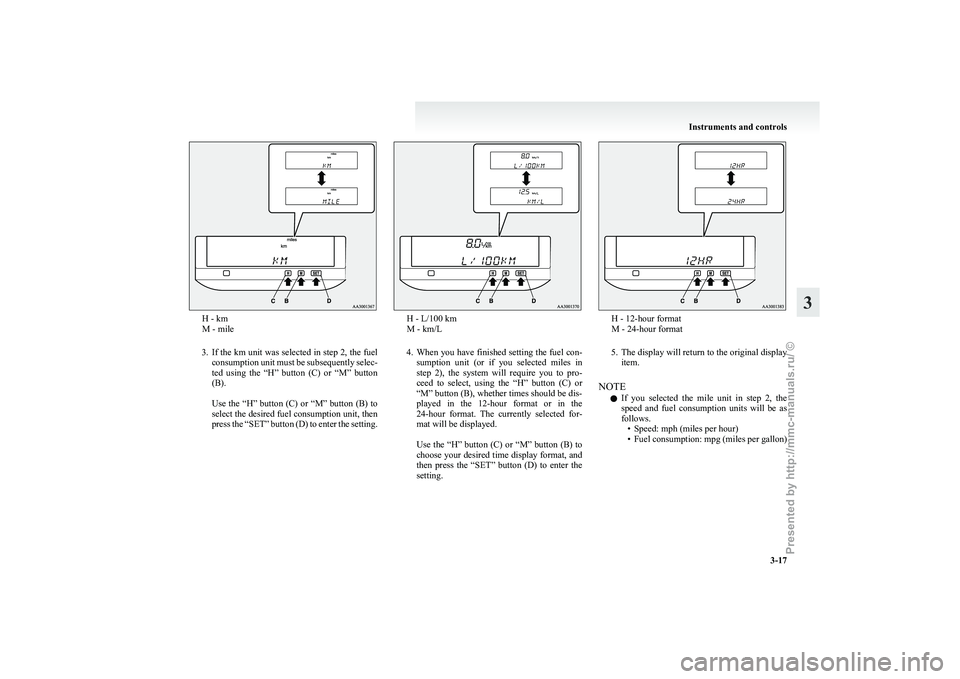
H - km
M - mile
3. If
the km unit was selected in step 2, the fuel
consumption unit must be subsequently selec-
ted using the “H” button (C) or “M” button
(B).
Use the “H” button (C) or “M” button (B) to
select the desired fuel consumption unit, then
press the “SET” button (D) to enter the setting. H - L/100 km
M - km/L
4. When
you have finished setting the fuel con-
sumption unit (or if you selected miles in
step 2), the system will require you to pro-
ceed to select, using the “H” button (C) or
“M” button (B), whether times should be dis-
played in the 12-hour format or in the
24-hour format. The currently selected for-
mat will be displayed.
Use the “H” button (C) or “M” button (B) to
choose your desired time display format, and
then press the “SET” button (D) to enter the
setting. H - 12-hour format
M - 24-hour format
5. The
display will return to the original display
item.
NOTE l If you selected the mile unit in step 2, the
speed and fuel consumption units will be as
follows.
• Speed: mph (miles per hour)
• Fuel consumption: mpg (miles per gallon) Instruments and controls
3-17 3
Presented by http://mmc-manuals.ru/ \251
Page 95 of 273
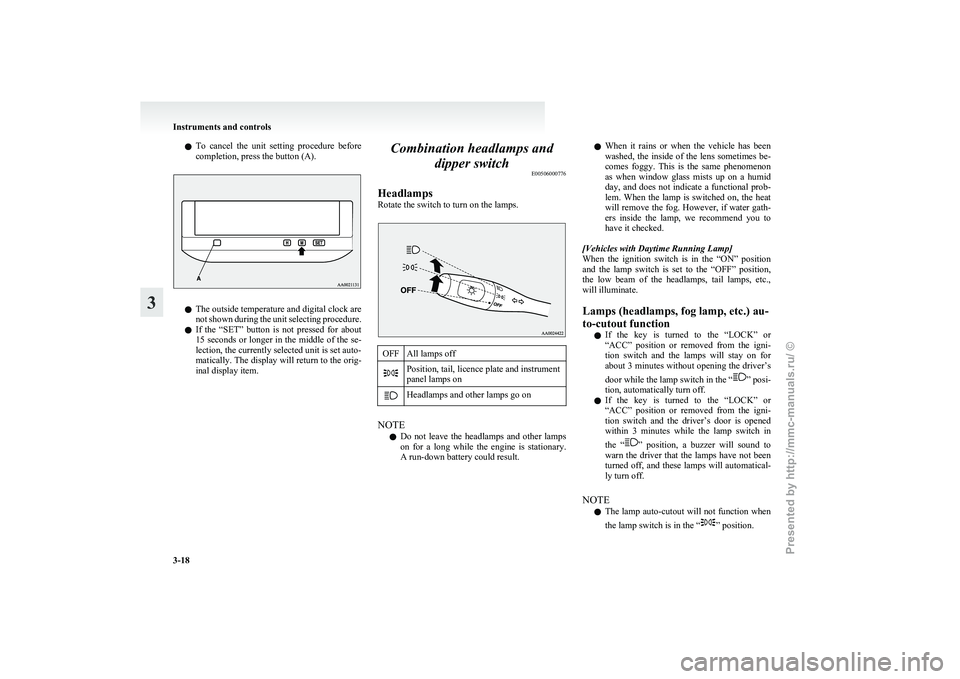
l
To cancel the unit setting procedure before
completion, press the button (A). l
The
outside temperature and digital clock are
not shown during the unit selecting procedure.
l If the “SET” button is not pressed for about
15 seconds or longer in the middle of the se-
lection, the currently selected unit is set auto-
matically. The display will return to the orig-
inal display item. Combination headlamps and
dipper switch E00506000776
Headlamps
Rotate the switch to turn on the lamps. OFF All lamps off
Position, tail, licence plate and instrument
panel lamps on
Headlamps and other lamps go on
NOTE
l Do
not leave the headlamps and other lamps
on for a long while the engine is stationary.
A run-down battery could result. l
When
it rains or when the vehicle has been
washed, the inside of the lens sometimes be-
comes foggy. This is the same phenomenon
as when window glass mists up on a humid
day, and does not indicate a functional prob-
lem. When the lamp is switched on, the heat
will remove the fog. However, if water gath-
ers inside the lamp, we recommend you to
have it checked.
[Vehicles with Daytime Running Lamp]
When the ignition switch is in the “ON” position
and the lamp switch is set to the “OFF” position,
the low beam of the headlamps, tail lamps, etc.,
will illuminate.
Lamps (headlamps, fog lamp, etc.) au-
to-cutout function l If the key is turned to the “LOCK” or
“ACC” position or removed from the igni-
tion switch and the lamps will stay on for
about 3 minutes without opening the driver’s
door while the lamp switch in the “ ” posi-
tion, automatically turn off.
l If
the key is turned to the “LOCK” or
“ACC” position or removed from the igni-
tion switch and the driver’s door is opened
within 3 minutes while the lamp switch in
the “ ”
position, a buzzer will sound to
warn the driver that the lamps have not been
turned off, and these lamps will automatical-
ly turn off.
NOTE l The lamp auto-cutout will not function when
the lamp switch is in the “ ” position.Instruments and controls
3-18
3
Presented by http://mmc-manuals.ru/ \251
Page 96 of 273
l
When the key has been turned to either the
“LOCK” or “ACC” position or removed
from the ignition switch with the lamp
switch in the “ ”
position, and the lamp
switch is turned to the “OFF” position within
approximately 3 minutes, the auto-cutout
function will not be activated.
(Even if the lamp switch is again turned to
the “ ”
position, the lamps will not go off
automatically; the lamps will remain on as
normal.)
When you want to keep the lamps on l Turn the switch in the “OFF” position to
switch off all lamps while the key is in the
“LOCK” or “ACC” position or remove the
key from the ignition switch.
l Turn on the lamps with the switch in the
“ ”
or “ ” position again, then the
lamps will remain on.
NOTE l It is possible to disable the lamps auto-cutout
function. For further information, we recom-
mend you to consult a MITSUBISHI
MOTORS Authorized Service Point.
Lamp monitor buzzer E00506100012
If the driver’s door is opened when the key is in the
“LOCK”
or “ACC” position or removed from the
ignition switch while the lamps are on, a buzzer
will sound to remind the driver to turn off the
lamps. When the lamp auto-cutout function acts,
the buzzer will stop automatically. When this func-
tion does not act, turn off the lamp switch to stop
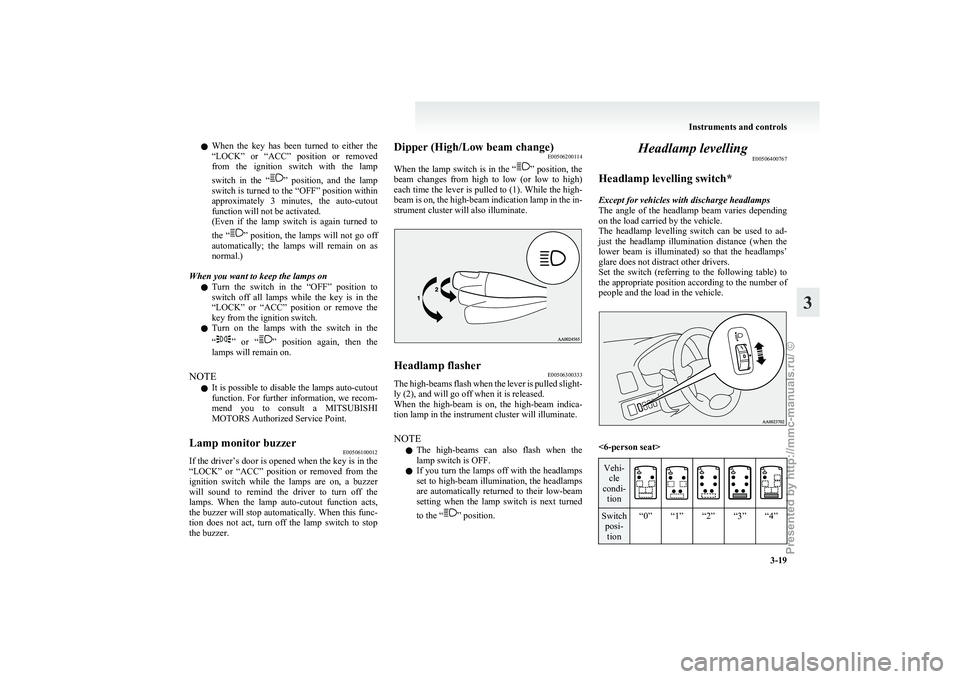
the buzzer. Dipper (High/Low beam change)
E00506200114
When
the lamp switch is in the “ ”
position, the
beam changes from high to low (or low to high)
each time the lever is pulled to (1). While the high-
beam is on, the high-beam indication lamp in the in-
strument cluster will also illuminate. Headlamp flasher
E00506300333
The high-beams flash when the lever is pulled slight-
ly (2), and will go off when it is released.
When
the high-beam is on, the high-beam indica-
tion lamp in the instrument cluster will illuminate.
NOTE
l The high-beams can also flash when the
lamp switch is OFF.
l If you turn the lamps off with the headlamps
set to high-beam illumination, the headlamps
are automatically returned to their low-beam
setting when the lamp switch is next turned
to the “ ” position.Headlamp levelling
E00506400767
Headlamp levelling switch*
Except for vehicles with discharge headlamps
The
angle of the headlamp beam varies depending
on the load carried by the vehicle.
The headlamp levelling switch can be used to ad-
just the headlamp illumination distance (when the
lower beam is illuminated) so that the headlamps’
glare does not distract other drivers.
Set the switch (referring to the following table) to
the appropriate position according to the number of
people and the load in the vehicle. <6-person seat>
Vehi-
cle
condi- tion Switch
posi-tion “0” “1” “2” “3” “4” Instruments and controls
3-19 3
Presented by http://mmc-manuals.ru/ \251
Page 97 of 273
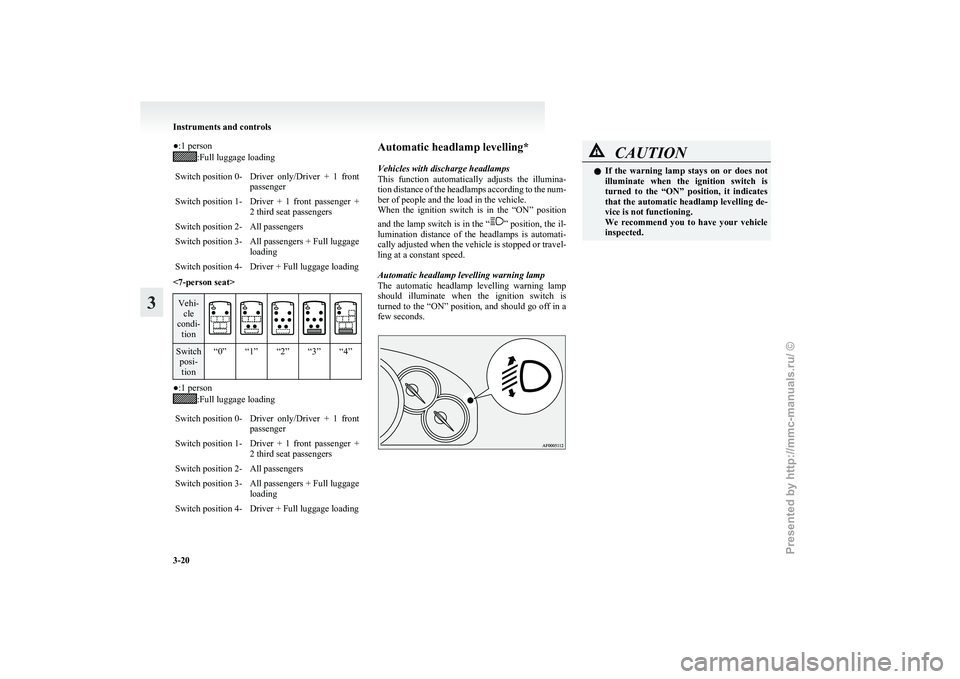
●:1 person
:Full luggage loading
Switch position 0- Driver only/Driver + 1 front passenger
Switch position 1- Driver + 1 front passenger + 2 third seat passengers
Switch position 2- All passengers
Switch position 3- All passengers + Full luggage loading
Switch position 4- Driver + Full luggage loading
<7-person seat> Vehi-
cle
condi- tion Switch
posi-tion “0” “1” “2” “3” “4” ●:1 person
:Full luggage loading
Switch position 0- Driver only/Driver + 1 front passenger
Switch position 1- Driver + 1 front passenger + 2 third seat passengers
Switch position 2- All passengers
Switch position 3- All passengers + Full luggage loading
Switch position 4- Driver + Full luggage loading Automatic headlamp levelling*
Vehicles with discharge headlamps
This
function automatically adjusts the illumina-
tion distance of the headlamps according to the num-
ber of people and the load in the vehicle.
When the ignition switch is in the “ON” position
and the lamp switch is in the “ ”
position, the il-
lumination distance of the headlamps is automati-
cally adjusted when the vehicle is stopped or travel-
ling at a constant speed.
Automatic headlamp levelling warning lamp
The automatic headlamp levelling warning lamp
should illuminate when the ignition switch is
turned to the “ON” position, and should go off in a
few seconds. CAUTION
l
If
the warning lamp stays on or does not
illuminate when the ignition switch is
turned to the “ON” position, it indicates
that the automatic headlamp levelling de-
vice is not functioning.
We recommend you to have your vehicle
inspected. Instruments and controls
3-20
3
Presented by http://mmc-manuals.ru/ \251
Page 98 of 273
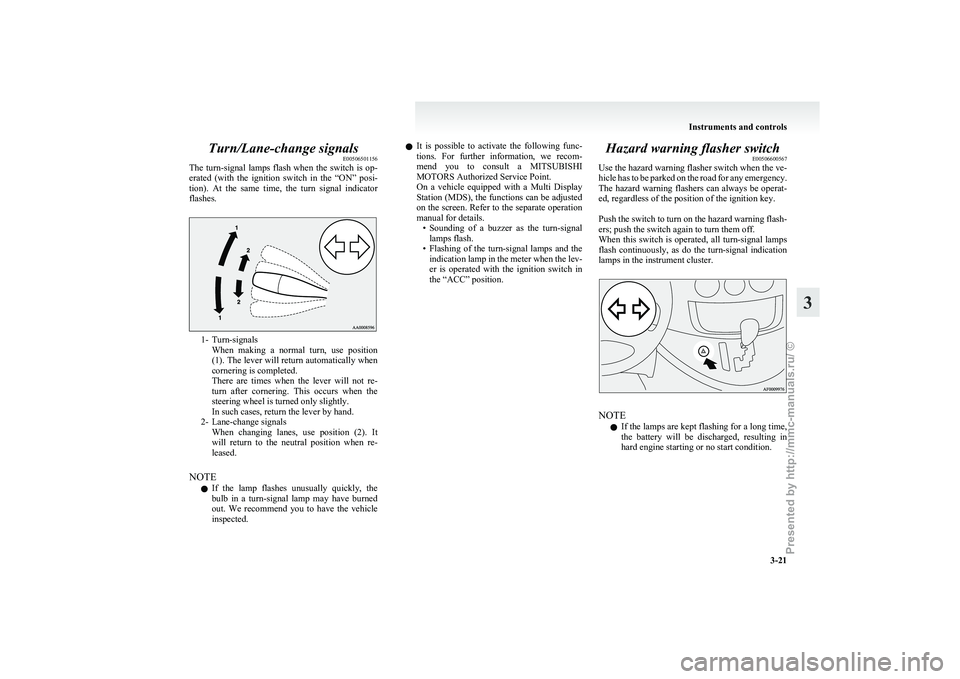
Turn/Lane-change signals
E00506501156
The
turn-signal lamps flash when the switch is op-
erated (with the ignition switch in the “ON” posi-
tion). At the same time, the turn signal indicator
flashes. 1- Turn-signals
When
making a normal turn, use position
(1). The lever will return automatically when
cornering is completed.
There are times when the lever will not re-
turn after cornering. This occurs when the
steering wheel is turned only slightly.
In such cases, return the lever by hand.
2- Lane-change signals When changing lanes, use position (2). It
will return to the neutral position when re-
leased.
NOTE l If the lamp flashes unusually quickly, the
bulb in a turn-signal lamp may have burned
out. We recommend you to have the vehicle
inspected. l
It
is possible to activate the following func-
tions. For further information, we recom-
mend you to consult a MITSUBISHI
MOTORS Authorized Service Point.
On a vehicle equipped with a Multi Display
Station (MDS), the functions can be adjusted
on the screen. Refer to the separate operation
manual for details. • Sounding of a buzzer as the turn-signallamps flash.
• Flashing of the turn-signal lamps and the indication lamp in the meter when the lev-
er is operated with the ignition switch in
the “ACC” position. Hazard warning flasher switch
E00506600567
Use
the hazard warning flasher switch when the ve-
hicle has to be parked on the road for any emergency.
The hazard warning flashers can always be operat-
ed, regardless of the position of the ignition key.
Push the switch to turn on the hazard warning flash-
ers; push the switch again to turn them off.
When this switch is operated, all turn-signal lamps
flash continuously, as do the turn-signal indication
lamps in the instrument cluster. NOTE
l If
the lamps are kept flashing for a long time,
the battery will be discharged, resulting in
hard engine starting or no start condition. Instruments and controls
3-21 3
Presented by http://mmc-manuals.ru/ \251
Page 99 of 273
l
It is possible to cause a buzzer to sound in
time with flashing of the turn-signal lamps.
For further information, we recommend you
to consult a MITSUBISHI MOTORS Author-
ized Service Point.
On a vehicle equipped with a Multi Display
Station (MDS), the functions can be adjusted
on the screen. Refer to the separate operation
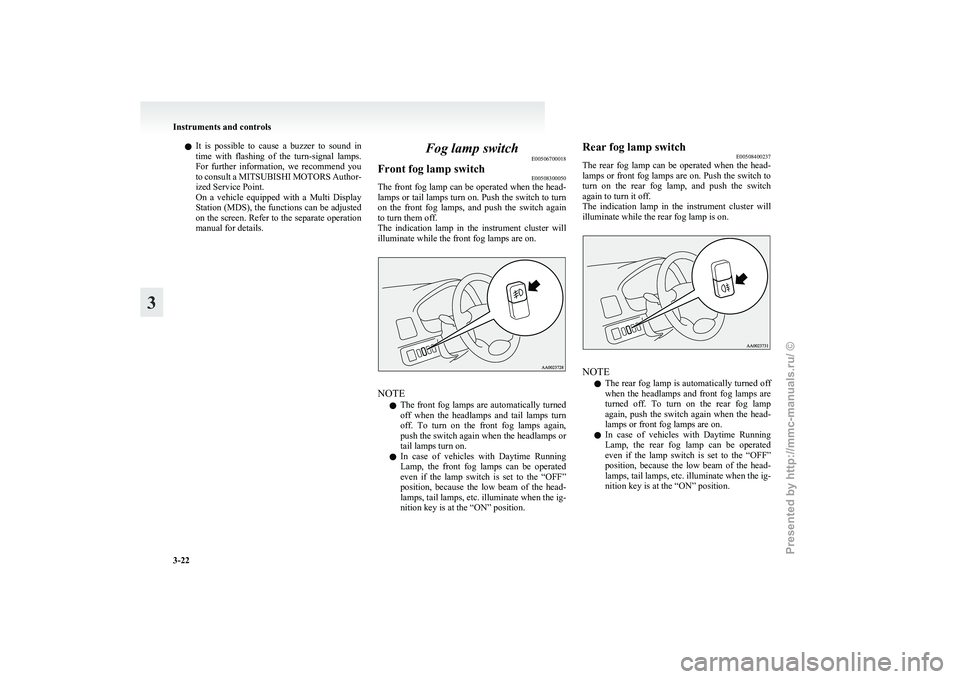
manual for details. Fog lamp switch
E00506700018
Front fog lamp switch E00508300050
The front fog lamp can be operated when the head-
lamps
or tail lamps turn on. Push the switch to turn
on the front fog lamps, and push the switch again
to turn them off.
The indication lamp in the instrument cluster will
illuminate while the front fog lamps are on. NOTE
l The
front fog lamps are automatically turned
off when the headlamps and tail lamps turn
off. To turn on the front fog lamps again,
push the switch again when the headlamps or
tail lamps turn on.
l In case of vehicles with Daytime Running
Lamp, the front fog lamps can be operated
even if the lamp switch is set to the “OFF”
position, because the low beam of the head-
lamps, tail lamps, etc. illuminate when the ig-
nition key is at the “ON” position. Rear fog lamp switch
E00508400237
The
rear fog lamp can be operated when the head-
lamps or front fog lamps are on. Push the switch to
turn on the rear fog lamp, and push the switch
again to turn it off.
The indication lamp in the instrument cluster will
illuminate while the rear fog lamp is on. NOTE
l The
rear fog lamp is automatically turned off
when the headlamps and front fog lamps are
turned off. To turn on the rear fog lamp
again, push the switch again when the head-
lamps or front fog lamps are on.
l In case of vehicles with Daytime Running
Lamp, the rear fog lamp can be operated
even if the lamp switch is set to the “OFF”
position, because the low beam of the head-
lamps, tail lamps, etc. illuminate when the ig-
nition key is at the “ON” position. Instruments and controls
3-22
3
Presented by http://mmc-manuals.ru/ \251
Page 100 of 273
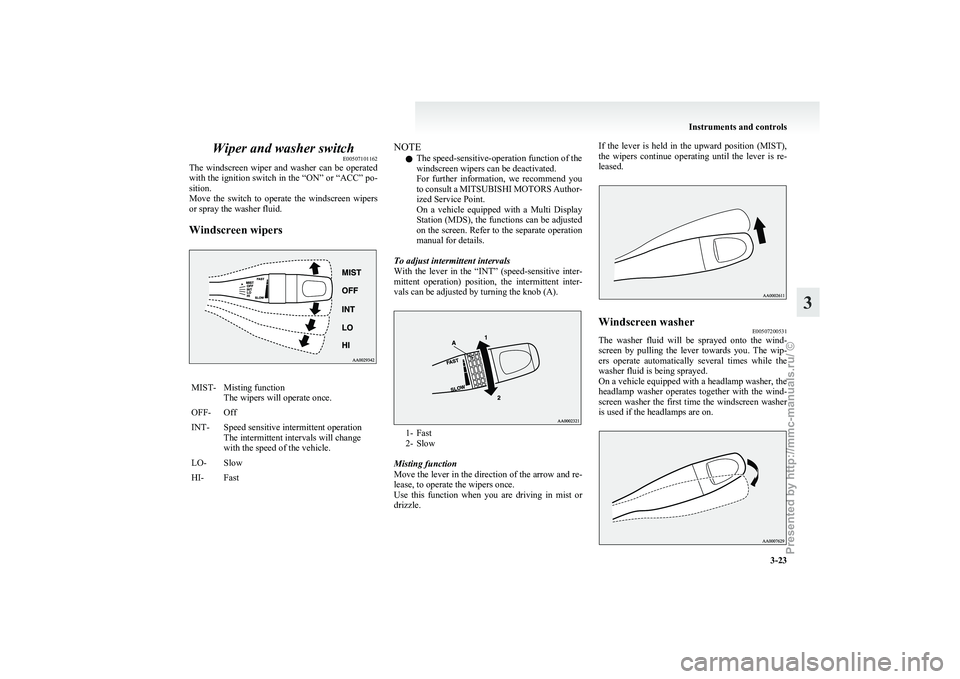
Wiper and washer switch
E00507101162
The
windscreen wiper and washer can be operated
with the ignition switch in the “ON” or “ACC” po-
sition.
Move the switch to operate the windscreen wipers
or spray the washer fluid.
Windscreen wipers MIST- Misting function
The wipers will operate once.
OFF- Off
INT- Speed sensitive intermittent operation The intermittent intervals will change
with the speed of the vehicle.
LO- Slow
HI- Fast NOTE
l The speed-sensitive-operation function of the
windscreen wipers can be deactivated.
For
further information, we recommend you
to consult a MITSUBISHI MOTORS Author-
ized Service Point.
On a vehicle equipped with a Multi Display
Station (MDS), the functions can be adjusted
on the screen. Refer to the separate operation
manual for details.
To adjust intermittent intervals
With the lever in the “INT” (speed-sensitive inter-
mittent operation) position, the intermittent inter-
vals can be adjusted by turning the knob (A). 1- Fast
2-
Slow
Misting function
Move the lever in the direction of the arrow and re-
lease, to operate the wipers once.
Use this function when you are driving in mist or
drizzle. If the lever is held in the upward position (MIST),
the
wipers continue operating until the lever is re-
leased. Windscreen washer
E00507200531
The washer fluid will be sprayed onto the wind-
screen
by pulling the lever towards you. The wip-
ers operate automatically several times while the
washer fluid is being sprayed.
On a vehicle equipped with a headlamp washer, the
headlamp washer operates together with the wind-
screen washer the first time the windscreen washer
is used if the headlamps are on. Instruments and controls
3-23 3
Presented by http://mmc-manuals.ru/ \251