key MITSUBISHI L200 2015 (in English) Owner's Guide
[x] Cancel search | Manufacturer: MITSUBISHI, Model Year: 2015, Model line: L200, Model: MITSUBISHI L200 2015Pages: 418, PDF Size: 25.8 MB
Page 191 of 418
Ventilators........................................................................................... 7-02
Heater/Manual air conditioning*........................................................ 7-04 Automatic air conditioning*............................................................... 7-09
Important operation tips for the air conditioning................................ 7-14 Air purifier*........................................................................................ 7-14LW/MW/FM electronic tuning radio with CD player (au- dio system type 1) *........................................................................ 7-15
To play tracks from USB device (audio system type 1) *.................. 7-30
To play tracks from a Bluetooth ®
device (audio system type 1) *..... 7-40
To use the external audio input function (audio system type 1) *...... 7-43
Steering wheel remote control switch (audio system type 1) *.......... 7-44
Error codes (audio system type 1).......................................................7-47 Audio system anti-theft feature (audio system type 1)....................... 7-49
Handling of compact discs (audio system type 1).............................. 7-49
LW/MW/FM radio/CD player (audio system type 2)*.......................7-51
Handling of Discs (audio system type 2)............................................ 7-55
Audio Files (MP3/WMA/AAC) (audio system type 2)...................... 7-56
Important Points on Safety for the Customer (audio system type 2)............................................................................................. 7-60
Operation Keys (audio system type 2)................................................ 7-60
Listen to Radio (audio system type 2)................................................ 7-63
Listen to DAB (audio system type 2) *...............................................7-64
Listen to Traffic Messages (audio system type 2).............................. 7-66
Listen to CDs (audio system type 2)................................................... 7-66
Listen to MP3s (audio system type 2).................................................7-67
Listen to an iPod (audio system type 2).............................................. 7-68
Listen to Audio Files on a USB Device (audio system type 2).......... 7-70
Listen to Bluetooth Audio (audio system type 2) *............................ 7-72
Use AUX (audio system type 2) *...................................................... 7-74Display Indicator (audio system type 2)............................................. 7-75
Audio Quality and Volume Balance Adjustment (audio system type 2)................................................................................. 7-75
System Settings (audio system type 2)............................................... 7-76 Troubleshooting (audio system type 2)...............................................7-80
Antenna............................................................................................... 7-83 Link System*...................................................................................... 7-84
Bluetooth ®
2.0 interface......................................................................7-84
USB input terminal*......................................................................... 7-103
Sun visors.......................................................................................... 7-106 Vanity mirror*...................................................................................7-107Ashtray.............................................................................................. 7-107Cigarette lighter.................................................................................7-108
Accessory socket*............................................................................. 7-109
Digital clock*.................................................................................... 7-109
Interior lamps.................................................................................... 7-110
Storage spaces................................................................................... 7-112
Cup holder*....................................................................................... 7-115
Bottle holder......................................................................................7-115
Convenient hook............................................................................... 7-116
Coat hook*........................................................................................ 7-116
First-aid kit and warning triangle securing bands*........................... 7-117For pleasant driving
OKTE15E37
Page 206 of 418
NOTElTo listen to the audio system while the engine is stopped, turn the ignition key to the “ACC” position.
l If a cellular phone is used inside the vehicle, it may create noise from the audio equipment. This does not mean that anything is wrong with your audio
equipment. In such a case, use the cellular phone at a place as far away as possible from the audio equipment.
l If foreign objects or water get into the audio equipment, or if smoke or a strange odour comes from it, immediately turn off the audio system. We recom-
mend you to have it checked. Never try to repair it by yourself. Avoid continuous usage without inspection by a qualified person.
l The audio system’s control knob can be removed to deter thieves. For details, refer to “Audio system anti-theft feature (audio system type 1)” on page 7-49.
l The audio amplifier (if so equipped) is located under the front right seat.
Do not subject the amplifier to a strong impact.
It could damage the amplifier or malfunctioning could result.
LW/MW/FM electronic tuning radio with CD player (audio system type 1) *
7-16OKTE15E3For pleasant driving7
Page 239 of 418
Audio system anti-theftfeature (audio system type
1) E00710201387
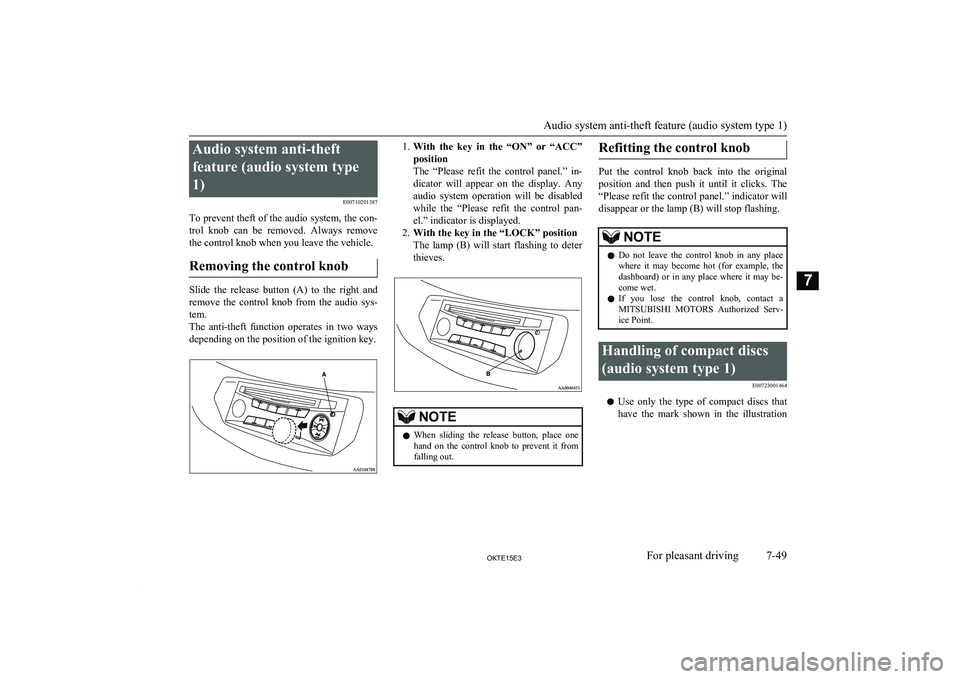
To prevent theft of the audio system, the con- trol knob can be removed. Always remove the control knob when you leave the vehicle.
Removing the control knob
Slide the release button (A) to the right and remove the control knob from the audio sys-
tem.
The anti-theft function operates in two ways
depending on the position of the ignition key.
1. With the key in the “ON” or “ACC”
position
The “Please refit the control panel.” in-
dicator will appear on the display. Any audio system operation will be disabledwhile the “Please refit the control pan-
el.” indicator is displayed.
2. With the key in the “LOCK” position
The lamp (B) will start flashing to deter thieves.NOTEl When sliding the release button, place one
hand on the control knob to prevent it fromfalling out.Refitting the control knob
Put the control knob back into the original
position and then push it until it clicks. The “Please refit the control panel.” indicator will
disappear or the lamp (B) will stop flashing.
NOTEl Do not leave the control knob in any place
where it may become hot (for example, the
dashboard) or in any place where it may be- come wet.
l If you lose the control knob, contact a
MITSUBISHI MOTORS Authorized Serv-
ice Point.Handling of compact discs
(audio system type 1) E00723001464
lUse only the type of compact discs that
have the mark shown in the illustration
Audio system anti-theft feature (audio system type 1)
7-49OKTE15E3For pleasant driving7
Page 250 of 418
Important Points on Safetyfor the Customer (audio
system type 2) E00737001045
This product features a number of pictorial indications as well as points concerning han-
dling so that you can use the product correct-
ly and in a safe manner, as well as prevent in- jury or damage to yourself, other users, or
property.WARNINGl The driver should not pay close attention
to the display while driving.
This may prevent the driver looking
where they are going, and cause an acci- dent.
l The driver should not perform complica-
ted operations while driving.
Performing complicated operations while driving may prevent the driver looking
where they are going, and cause an acci-
dent.
Therefore stop the vehicle in a safe loca- tion before performing such operations.
l Do not use during malfunctions, such as
when no sound is audible.
This may lead to accident, fire, or electric shock.WARNINGl Ensure water or other foreign objects do
not enter the product.
This may lead to smoking, fire, electric shock, or malfunction.
l Do not insert foreign objects into the disc
slot.
This may lead to fire, electric shock, or
malfunction.
l In the event of abnormalities occurring
when foreign objects or water enter the
product, resulting in smoke or a strange
smell, immediately stop using the product, and consult a MITSUBISHI MOTORS
Authorized Service Point.
Continuing to use the product may result in accident, fire, or electric shock.
l Do not disassemble or modify the prod-
uct.
This may lead to malfunction, fire, or electric shock.
l During thunderstorms, do not touch the
antenna or the front panel.
This may lead to electrical shock from
lightning.CAUTIONl Do not block ventilation holes or heat sinks
on the product.
Blocking ventilation holes or heat sinks may prevent heat from escaping from within theproduct, leading to fire or malfunction.CAUTIONl Do not turn the volume up to the extent that
you cannot hear sounds from outside the ve-
hicle while driving.
Driving without being able to hear sounds from outside the vehicle may result in an ac-
cident.
l Do not insert your hand or fingers into the
disc slot.
This may result in injury.Operation Keys (audio
system type 2) E00737101033Turn the Power ON/ OFF
E00737200024
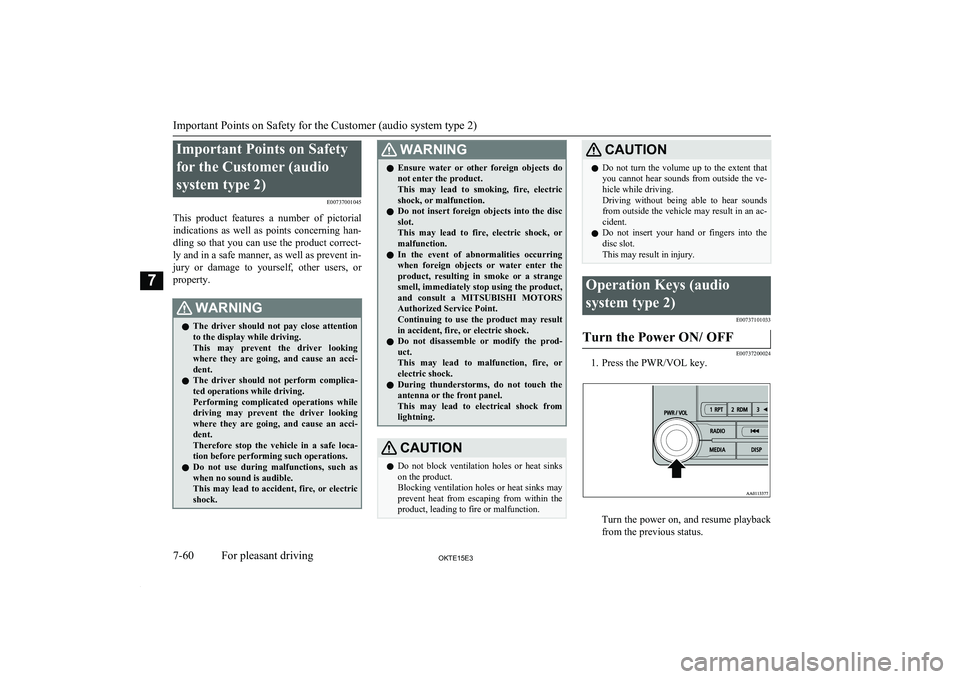
1. Press the PWR/VOL key.
Turn the power on, and resume playback
from the previous status.
Important Points on Safety for the Customer (audio system type 2)
7-60OKTE15E3For pleasant driving7
Page 251 of 418
2. Press the PWR/VOL key.Turn the power OFF.NOTEl Hold down the steering MODE key to also
turn the audio function ON/OFF.Adjust Volume
E00737300025
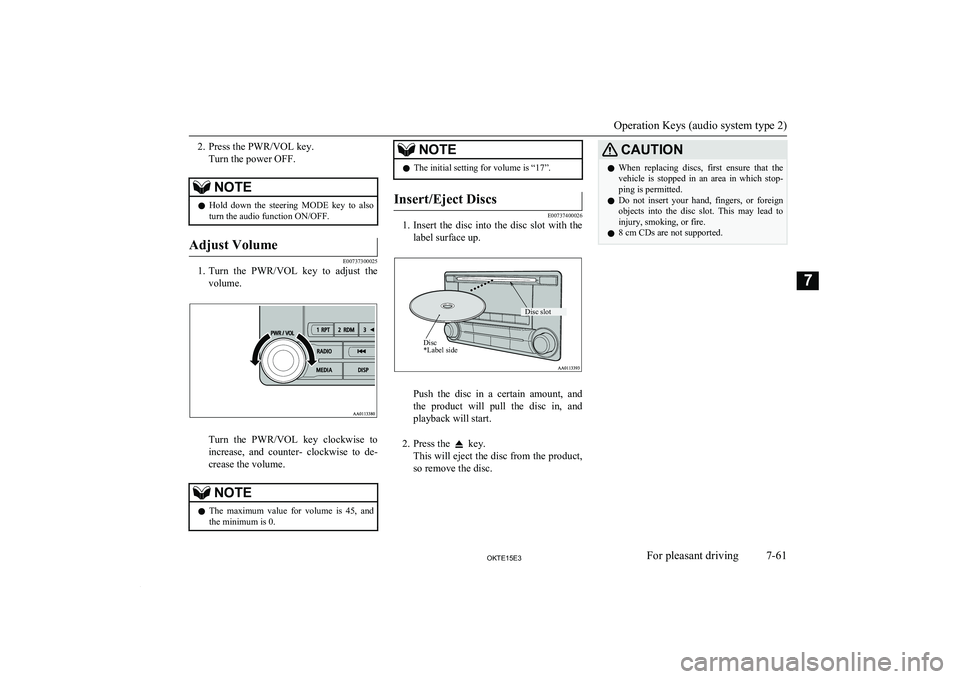
1. Turn the PWR/VOL key to adjust the
volume.
Turn the PWR/VOL key clockwise toincrease, and counter- clockwise to de-
crease the volume.
NOTEl The maximum value for volume is 45, and
the minimum is 0.NOTEl The initial setting for volume is “17”.Insert/Eject Discs
E00737400026
1.
Insert the disc into the disc slot with the
label surface up.
Push the disc in a certain amount, and
the product will pull the disc in, and playback will start.
2. Press the
key.
This will eject the disc from the product,
so remove the disc.
CAUTIONl When replacing discs, first ensure that the
vehicle is stopped in an area in which stop-ping is permitted.
l Do not insert your hand, fingers, or foreign
objects into the disc slot. This may lead to injury, smoking, or fire.
l 8 cm CDs are not supported.
Operation Keys (audio system type 2)
7-61OKTE15E3For pleasant driving7 Disc *Label sideDisc slot
Page 252 of 418
Explanation of Buttons
E00737501066
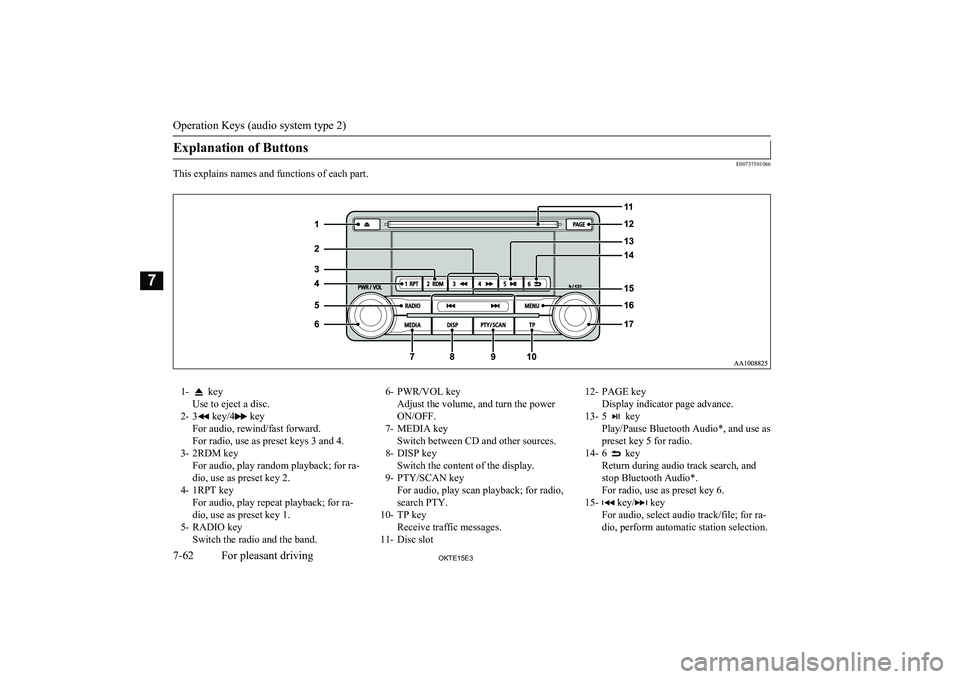
This explains names and functions of each part.
1- key
Use to eject a disc.
2- 3
key/4 key
For audio, rewind/fast forward.
For radio, use as preset keys 3 and 4.
3- 2RDM key For audio, play random playback; for ra-
dio, use as preset key 2.
4- 1RPT key For audio, play repeat playback; for ra-dio, use as preset key 1.
5- RADIO key Switch the radio and the band.
6- PWR/VOL key
Adjust the volume, and turn the power
ON/OFF.
7- MEDIA key Switch between CD and other sources.
8- DISP key Switch the content of the display.
9- PTY/SCAN key For audio, play scan playback; for radio,
search PTY.
10- TP key Receive traffic messages.
11- Disc slot12- PAGE key
Display indicator page advance.
13- 5
key
Play/Pause Bluetooth Audio*, and use as preset key 5 for radio.
14- 6
key
Return during audio track search, and stop Bluetooth Audio*.
For radio, use as preset key 6.
15-
key/ key
For audio, select audio track/file; for ra-
dio, perform automatic station selection.
Operation Keys (audio system type 2)
7-62OKTE15E3For pleasant driving7
Page 253 of 418
16- MENU keySwitch to Menu mode.17-/SEL key
Adjust audio quality and select items.
For radio, manually select stations.*:Requires a separately-purchased Bluetooth-capable audio device in equipment by type.
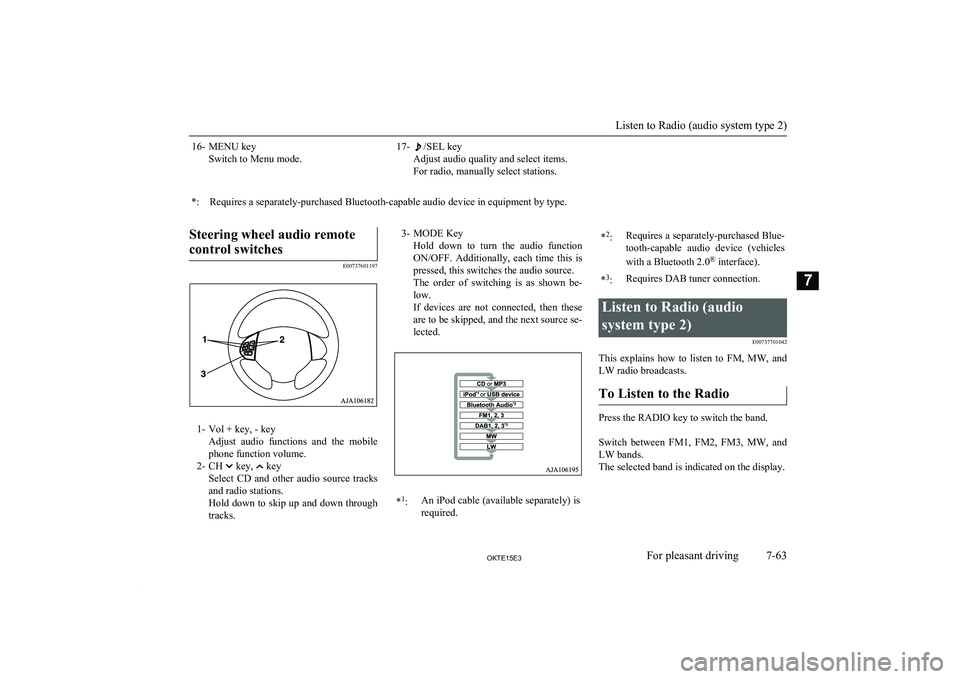
Steering wheel audio remote
control switches
E00737601197
1- Vol + key, - key Adjust audio functions and the mobile
phone function volume.
2- CH
key, key
Select CD and other audio source tracks
and radio stations.
Hold down to skip up and down through tracks.
3- MODE Key
Hold down to turn the audio functionON/OFF. Additionally, each time this is
pressed, this switches the audio source.
The order of switching is as shown be- low.
If devices are not connected, then these are to be skipped, and the next source se-lected.* 1
:An iPod cable (available separately) is
required.* 2
:Requires a separately-purchased Blue-
tooth-capable audio device (vehicles
with a Bluetooth 2.0 ®
interface).*3
:Requires DAB tuner connection.Listen to Radio (audio
system type 2) E00737701042
This explains how to listen to FM, MW, and
LW radio broadcasts.
To Listen to the Radio
Press the RADIO key to switch the band.
Switch between FM1, FM2, FM3, MW, and LW bands.
The selected band is indicated on the display.
Listen to Radio (audio system type 2)
7-63OKTE15E3For pleasant driving7
Page 254 of 418
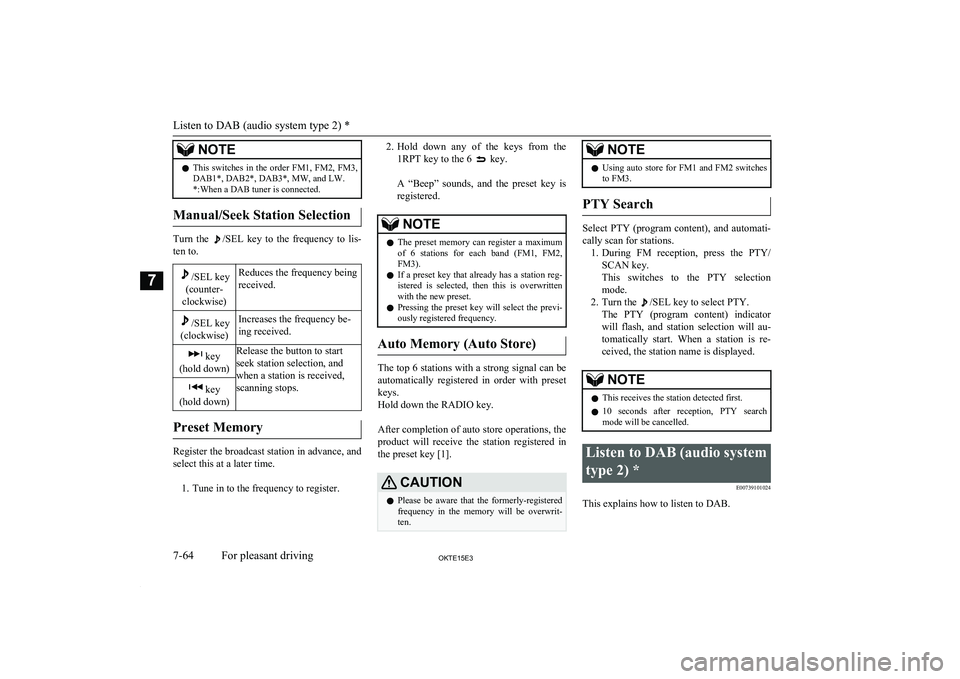
NOTElThis switches in the order FM1, FM2, FM3,
DAB1*, DAB2*, DAB3*, MW, and LW. *:When a DAB tuner is connected.
Manual/Seek Station Selection
Turn the /SEL key to the frequency to lis-
ten to.
/SEL key
(counter-
clockwise)Reduces the frequency being
received./SEL key
(clockwise)Increases the frequency be-
ing received. key
(hold down)Release the button to start
seek station selection, and
when a station is received,
scanning stops. key
(hold down)
Preset Memory
Register the broadcast station in advance, and select this at a later time.
1. Tune in to the frequency to register.
2. Hold down any of the keys from the
1RPT key to the 6
key.
A “Beep” sounds, and the preset key is registered.NOTEl The preset memory can register a maximum
of 6 stations for each band (FM1, FM2,
FM3).
l If a preset key that already has a station reg-
istered is selected, then this is overwritten with the new preset.
l Pressing the preset key will select the previ-
ously registered frequency.
Auto Memory (Auto Store)
The top 6 stations with a strong signal can be
automatically registered in order with preset keys.
Hold down the RADIO key.
After completion of auto store operations, the
product will receive the station registered in
the preset key [1].
CAUTIONl Please be aware that the formerly-registered
frequency in the memory will be overwrit- ten.NOTEl Using auto store for FM1 and FM2 switches
to FM3.
PTY Search
Select PTY (program content), and automati-
cally scan for stations. 1. During FM reception, press the PTY/
SCAN key.
This switches to the PTY selection mode.
2. Turn the
/SEL key to select PTY.
The PTY (program content) indicator
will flash, and station selection will au- tomatically start. When a station is re-
ceived, the station name is displayed.
NOTEl This receives the station detected first.
l 10 seconds after reception, PTY search
mode will be cancelled.Listen to DAB (audio system
type 2) * E00739101024
This explains how to listen to DAB.
Listen to DAB (audio system type 2) *
7-64OKTE15E3For pleasant driving7
Page 255 of 418
To listen to DAB
1.Press the RADIO key to switch the
band.
Switch between DAB1, DAB2, and DAB3 bands.
The selected band is indicated on the
display.
NOTEl This switches in the order FM1, FM2, FM3,
DAB1, DAB2, DAB3, MW, and LW.
Select a Service
1. Hold down the key or the key.
Receives the lead services of the ensem-
bles that can be received.
2. Press the
key or the key to select
the service.
key
(hold down)Automatically receives low-
er lead services within en-
sembles that can be received. key
(hold down)Automatically receives high-
er lead services within en-
sembles that can be received. keySwitches to lower services. keySwitches to higher services.NOTEl Going to the first service or last service
within the ensemble switches to the next en-
semble.
Register the Service
Register the service in advance, and select
this at a later time. 1. Tune in to the service to register.
2. Hold down any of the keys from the
1RPT key to the 6
key.
A “Beep” sounds, and the preset key is registered.
NOTEl If a preset key that already has a service reg-
istered is selected, then this is overwrittenwith the new preset.
l Pressing the preset key will select the previ-
ously registered service.
Search for a Service
Search for ensembles and services that can be
received. 1. Turn the
/SEL key to select the en-
semble.
2. Press the
/SEL key.
The service name within the selected en-
semble is displayed.
3. Turn the /SEL key to select the serv-
ice.
4. Press the
/SEL key.
Receive the selected service.
NOTEl If the text information for the service name
cannot be obtained, then nothing is dis-
played.
l If there is no operation for 10 seconds, then
service search mode will be cancelled.
PTY Search
Select PTY (program content), and automati-
cally scan for services. 1. Press the PTY/SCAN key. This switches to the PTY selection
mode.
2. Turn the
/SEL key to select PTY.
3. Press the
key or key.
This starts PTY search.
keyLower PTY search starts. keyHigher PTY search starts.
Listen to DAB (audio system type 2) *
7-65OKTE15E3For pleasant driving7
Page 256 of 418
NOTElWhen selecting PTY, press any of the keys
from the 1RPT key to the 6 key to
switch to the PTY registered as a preset.
l When selecting PTY, select the PTY to reg-
ister, and hold down any of the keys from
the 1RPT key to the 6
key to register the
PTY as a preset.
l While in PTY select status, if there is no op-
eration for 2 seconds, then an upwards
search within the selected PTY will start.
Listen to Traffic Messages
(audio system type 2) E00739201025
This explains how to listen to traffic messag-
es.
To Listen to Traffic Messages
1. When not in MW or LW mode, press the
TP key.
If traffic messages are being broadcast,
these are received.
CAUTIONl When receiving a MW or LW signal, traffic
messages cannot be received.NOTEl Receiving traffic messages will indicate
“TRAF INF” on the display, and if text in-
formation can be received, the station name is displayed.
l If traffic messages are received, then this
will switch to the volume of the previously
received traffic messages or emergency broadcasts. The volume when receiving traf-fic messages or emergency broadcasts is that
at which subsequent broadcasts will be re- ceived.
Traffic Message Standby Mode
When the broadcast of traffic messages starts,
this automatically switches to the station that is broadcasting traffic messages. 1. When not in MW or LW mode, press the
TP key.
“TP” is indicated on the display, and the product switches to standby mode.
If traffic messages are being broadcast,
these are received.
2. When not in MW or LW mode, press the
TP key.
“TP” disappears from the display, and
standby mode will be cancelled.
CAUTIONl When receiving a MW or LW signal, traffic
message standby mode will be cancelled.Listen to CDs (audio system
type 2) E00737801085
This explains how to listen to audio CDs (CD-DA/CD-TEXT).
Play CDs
Insert the disc.
Insert a disc to automatically start playback.
→ “Insert/Eject Discs” on page 7-61
If a disc is already within the product, press the MEDIA key to switch to CD as the
source.
Select the Track
Press the key or key to select the
track.
This enables selection of the next or previous
track.
Fast Forward or Rewind
Hold down the 3 key or the 4 key.
Fast forward/rewind is possible.
Listen to Traffic Messages (audio system type 2)
7-66OKTE15E3For pleasant driving7