Top MITSUBISHI LANCER 2016 8.G Workshop Manual
[x] Cancel search | Manufacturer: MITSUBISHI, Model Year: 2016, Model line: LANCER, Model: MITSUBISHI LANCER 2016 8.GPages: 392, PDF Size: 13.12 MB
Page 188 of 392
Information screen display 5-126 Features and controls
5
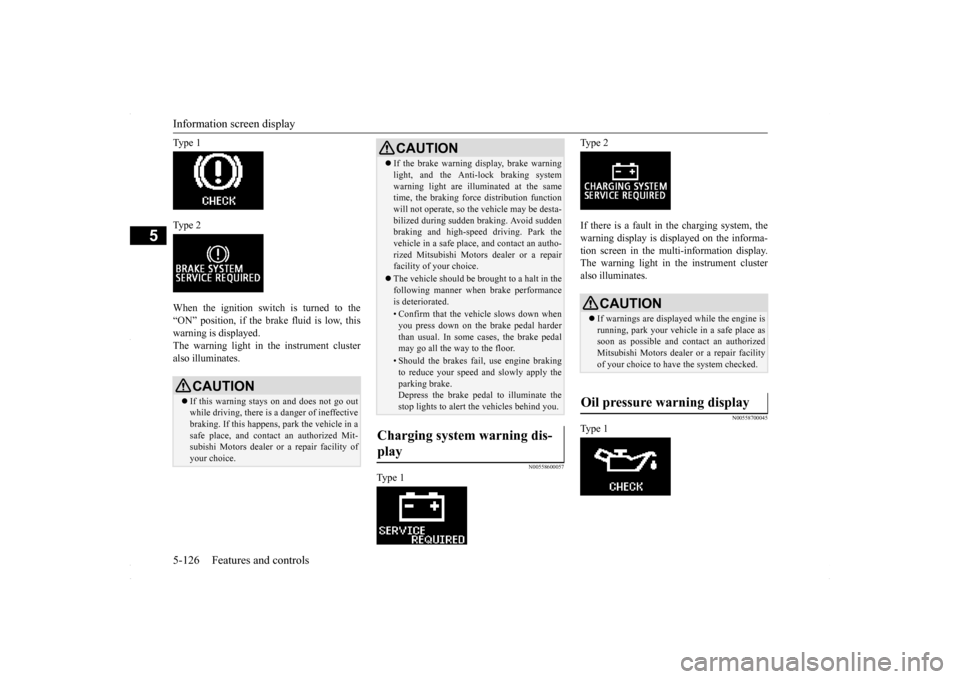
Ty p e 1 Ty p e 2 When the ignition switch is turned to the “ON” position, if the brake fluid is low, thiswarning is displayed. The warning light in the instrument cluster also illuminates.
N00558600057
Ty p e 1
Ty p e 2 If there is a fault in the charging system, the warning display is displayed on the informa- tion screen in the multi-information display.The warning light in the instrument cluster also illuminates.
N00558700045
Ty p e 1
CAUTION If this warning stays on and does not go out while driving, there is a danger of ineffectivebraking. If this happens, park the vehicle in a safe place, and contact an authorized Mit- subishi Motors dealer or a repair facility ofyour choice.
If the brake warning display, brake warning light, and the Anti-lock braking system warning light are illuminated at the same time, the braking force distribution function will not operate, so the vehicle may be desta-bilized during sudden braking. Avoid sudden braking and high-speed driving. Park the vehicle in a safe place, and contact an autho-rized Mitsubishi Motors dealer or a repair facility of your choice. The vehicle should be brought to a halt in the following manner when brake performance is deteriorated.• Confirm that the vehicle slows down whenyou press down on the brake pedal harderthan usual. In some cases, the brake pedal may go all the way to the floor.• Should the brakes fail, use engine brakingto reduce your speed and slowly apply the parking brake.Depress the brake pedal to illuminate the stop lights to alert the vehicles behind you.
Charging system warning dis- play
CAUTION
CAUTION If warnings are displayed while the engine is running, park your vehicle in a safe place assoon as possible and contact an authorized Mitsubishi Motors dealer or a repair facility of your choice to have the system checked.
Oil pressure warning display
BK0230300US.book
126 ページ 2015年7月30日 木曜日 午後8時38分
Page 192 of 392
Combination headlights and dimmer switch 5-130 Features and controls
5
If the combination headlights and dimmer switch is turned to the “ ” or “ ” posi- tion again after the engine is turned off, the about 3 minutes auto-cutout function described above will not work. The lights (theparking lights, tail lights and license plate lights) will stay on and will not turn off auto- matically.
N00549800196
If the driver’s door is opened with the key inthe “LOCK” or “ACC” position or removed from the ignition switch while the lights are on, the buzzer will sound to remind you toturn off the lights. If the driver’s door is opened with the ignition switch in the “LOCK” or “ACC” position, or
if the ignition switch is moved to the “LOCK” position while the lights are on, the buzzer will sound to remind you to turn off the lights. In either case, the li
ghts and buzzer will turn
off automatically. Or you can turn the combination headlights and dimmer switch to the “OFF” position tostop the buzzer.
N00549900155
To change the headlights from high beam tolow beam and vice versa, pull the turn signal lever to fully toward you (1). Switch the headlights to low beam as a courtesy when-ever there are oncoming vehicles, or when there is traffic moving ahead of you. An illu- minated blue light in the instrument clusterindicates when the headlights are on high beam.
NOTE
The light auto-cutout function can be deacti- vated. See your authorized Mitsubishi Motors dealer for details.
When you want to keep the lights on:
NOTE
When the engine is started using the key, if the driver’s door is opened and the key is removed, the headlight reminder buzzer intermittently emits a high-pitched sound. If the key is still in the ignition the keyreminder buzzer intermittently emits a low- pitched sound. The buzzer stops when the driver’s door isclosed. (A warning is also displayed in the multi-information display.)
operation function, if the driver’s door is opened and the ignition switch is in the “LOCK” position, the headlight reminder buzzer intermittently emits a high-pitchedsound. If the ignition sw
itch is in any posi-
tion other than “LOCK”, the ignition switch on reminder buzzer intermittently emits alow-pitched sound. The buzzer stops when the driver’s door is closed. (A warning is also displayed in themulti-information display.)
When using a key to start the engine When using the F.A.S.T.-key to start the engine
NOTE
Dimmer (high/low beam change)
BK0230300US.book
130 ページ 2015年7月30日 木曜日 午後8時38分
Page 198 of 392
Wiper and washer switch 5-136 Features and controls
5
Keep the lever in the “OFF” position if the windshield is dirty and the weather is dry. Wiper operation under these conditions can scratch the windshield and damage the wip-ers.
N00569601038
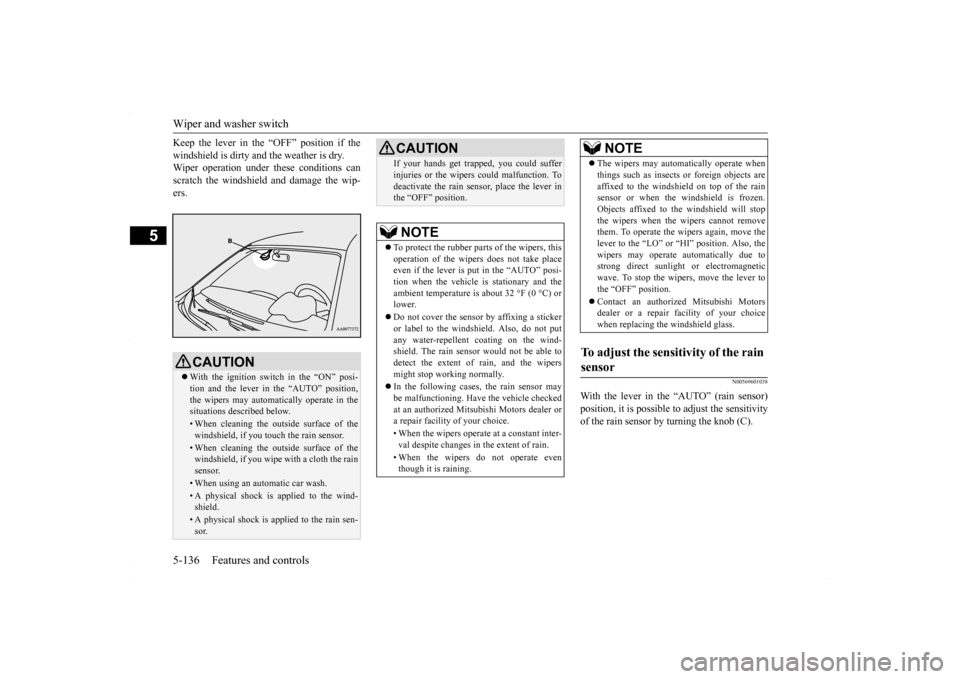
With the lever in the “AUTO” (rain sensor)position, it is possible to adjust the sensitivityof the rain sensor by turning the knob (C).
CAUTION With the ignition switch in the “ON” posi- tion and the lever in the “AUTO” position, the wipers may automatically operate in thesituations described below.• When cleaning the outside surface of thewindshield, if you touch the rain sensor.• When cleaning the outside surface of thewindshield, if you wipe with a cloth the rain sensor.• When using an automatic car wash.• A physical shock is applied to the wind- shield.• A physical shock is applied to the rain sen-sor.
If your hands get trapped, you could suffer injuries or the wipers could malfunction. To deactivate the rain sensor, place the lever in the “OFF” position.NOTE
To protect the rubber parts of the wipers, this operation of the wipers does not take placeeven if the lever is put in the “AUTO” posi- tion when the vehicle is stationary and the ambient temperature is about 32 °F (0 °C) orlower. Do not cover the sensor by affixing a sticker or label to the windshield. Also, do not put any water-repellent coating on the wind- shield. The rain sensor would not be able todetect the extent of rain, and the wipers might stop working normally. In the following cases, the rain sensor may be malfunctioning. Have the vehicle checked at an authorized Mitsubishi Motors dealer ora repair facility of your choice. • When the wipers operate at a constant inter- val despite changes in the extent of rain. • When the wipers do not operate even though it is raining.CAUTION
The wipers may automatically operate when things such as insects or foreign objects are affixed to the windshield on top of the rain sensor or when the windshield is frozen. Objects affixed to the windshield will stopthe wipers when the wipers cannot remove them. To operate the wipers again, move the lever to the “LO” or “HI” position. Also, thewipers may operate automatically due to strong direct sunlight or electromagnetic wave. To stop the wipers, move the lever tothe “OFF” position. Contact an authorized Mitsubishi Motors dealer or a repair
facility of your choice
when replacing the windshield glass.
To adjust the sensitivity of the rain sensor
NOTE
BK0230300US.book
136 ページ 2015年7月30日 木曜日 午後8時38分
Page 200 of 392
Electric rear window defogger switch 5-138 Features and controls
5
By releasing the lever soon after pulling it toward you, the washer fluid will be sprayed several times while the wipers are operating several times.Intelligent washer will stop operating with any operation of the lever.
N00523501293
N00523700315
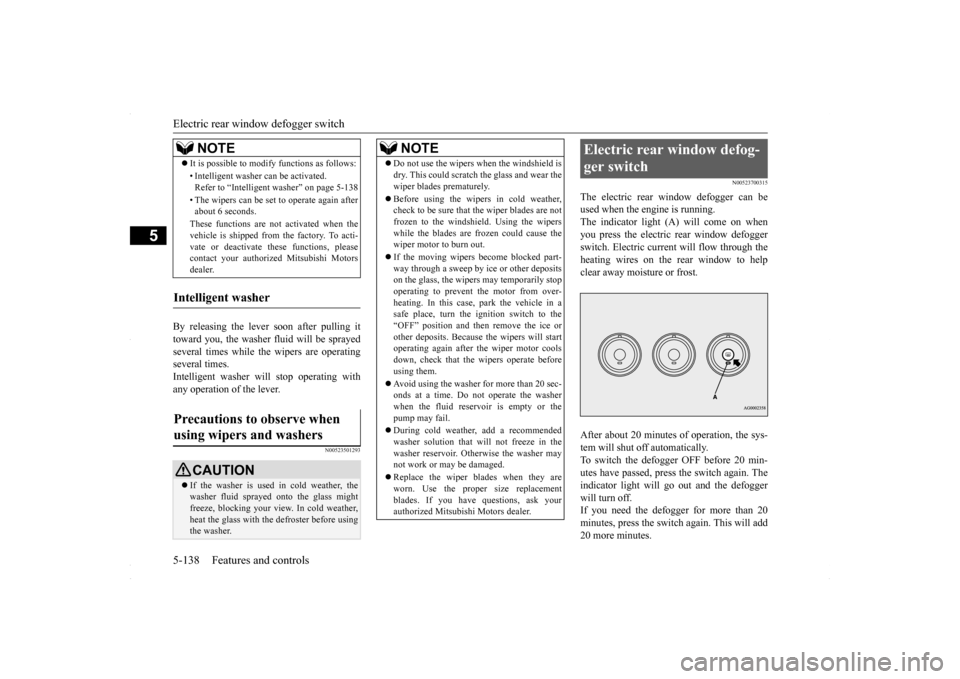
The electric rear window defogger can be used when the engine is running.The indicator light (A) will come on when you press the electric rear window defogger switch. Electric current will flow through theheating wires on the rear window to help clear away moisture or frost. After about 20 minutes of operation, the sys- tem will shut off automatically.To switch the defogger OFF before 20 min- utes have passed, press the switch again. The indicator light will go out and the defoggerwill turn off. If you need the defogger for more than 20 minutes, press the switch again. This will add20 more minutes.
It is possible to modify functions as follows: • Intelligent washer can be activated. Refer to “Intelligent washer” on page 5-138 • The wipers can be set to operate again after about 6 seconds. These functions are not activated when the vehicle is shipped from the factory. To acti- vate or deactivate these functions, pleasecontact your authorized Mitsubishi Motors dealer.
Intelligent washer Precautions to observe when using wipers and washers
CAUTION If the washer is used in cold weather, the washer fluid sprayed onto the glass might freeze, blocking your view. In cold weather, heat the glass with the defroster before usingthe washer.NOTE
NOTE
Do not use the wipers when the windshield is dry. This could scratch the glass and wear the wiper blades prematurely. Before using the wipers in cold weather, check to be sure that the wiper blades are not frozen to the windshield. Using the wipers while the blades are frozen could cause thewiper motor to burn out. If the moving wipers become blocked part- way through a sweep by ice or other deposits on the glass, the wipers may temporarily stop operating to prevent the motor from over-heating. In this case, park the vehicle in a safe place, turn the ignition switch to the “OFF” position and then remove the ice orother deposits. Because the wipers will start operating again after the wiper motor cools down, check that the wipers operate beforeusing them. Avoid using the washer for more than 20 sec- onds at a time. Do not operate the washer when the fluid reservoir is empty or the pump may fail. During cold weather, add a recommended washer solution that will not freeze in thewasher reservoir. Otherwise the washer may not work or may be damaged. Replace the wiper blades when they are worn. Use the proper size replacementblades. If you have questions, ask your authorized Mitsubishi Motors dealer.
Electric rear window defog- ger switch
BK0230300US.book
138 ページ 2015年7月30日 木曜日 午後8時38分
Page 206 of 392
Bluetooth® 2.0 interface (if so equipped) 5-144 Features and controls
5
N00564601118
It is possible to use a passcode as a security function by setting a passcode of your choice for the Bluetooth
® 2.0 interface.
When the security function is turned on, it is necessary to make a voice input of a 4-digitpasscode in order to use all functions of the Bluetooth
® 2.0 interface, except for recep-
tion. Use the following procedure to turn on the security function by setting a passcode. 1. Press the SPEECH button (except for vehicles with Mitsubishi Multi-Commu- nication System) or PICK-UP button (forvehicles with Mitsubishi Multi-Commu- nication System). 2. Say “Setup.”3. Say “Passcode.” 4. The voice guide will say “Passcode is dis- abled. Would you like to enable it?”Answer “Yes.” Answer “No” to cancel the setting of the passcode and return to the main menu. 5. The voice guide will say “Please say a 4- digit passcode. Remember this passcode. It will be required to use this system.”
Say a 4-digit number which you want to set as a passcode. 6. For confirmation purposes, the voice guide will say “Passcode <4-digit pass-code>. Is this correct?” Answer “Yes.” Answer “No” to return to the passcode input in Step 5. 7. When the registration of the passcode is completed, the voice guide will say “Pass- code is enabled” and the system willreturn to the main menu.
If a passcode has been set and the security function is enabled, the voice guide will say “Hands-free system is locked. State the pass-code to continue” when the SPEECH button (except for vehicles with Mitsubishi Multi- Communication System) or PICK-UP button(for vehicles with Mitsubishi Multi-Commu-
nication System) is pressed to enter voice rec- ognition mode. Say the 4-digit passcode number to enter the passcode. If the entered passcode is wrong, the voice guide will say “<4-digit passcode>, Incorrectpasscode. Please try again.” Enter the correct passcode. Use the following procedure to turn off the security function by disabling the passcode. 1. Press the SPEECH button (except for vehicles with Mitsubishi Multi-Commu- nication System) or PICK-UP button (for vehicles with Mitsubishi Multi-Commu-nication System).2. Say “Setup.”
Security function
Setting the passcode
NOTE
Passcode will be required to access the sys- tem after the next ignition cycle. It is required for a little time after engine stop that the entered passcode is actually recorded in the system. If the ignition switchis made to “ACC” or “ON” or the engine is started immediately after engine stop, there is a case when the entered passcode is notrecorded in the system. At this time, please try to enter the passcode again.
Entering the passcode
NOTE
You can reenter the passcode as many times as you want. If you have forgotten your passcode, say “Cancel” to quit the voice input mode and then check with an authorized Mitsubishi Motors dealer.
Disabling the passcode
NOTE
System must be unlocked to disable the pass- code.
BK0230300US.book
144 ページ 2015年7月30日 木曜日 午後8時38分
Page 207 of 392
Bluetooth® 2.0 interface (if so equipped)
Features and controls 5-145
5
3. Say “Passcode.” 4. The voice guide will say “Passcode is enabled. Would you like to disable it?” Answer “Yes.”Answer “No” to cancel the disabling of the passcode and return to the main menu. 5. When the disabling of the passcode iscompleted, the voice guide will say “Pass- code is disabled” and the system will return to the main menu.
N00564700011
The Bluetooth
® 2.0 interface can use the
speaker enrollment function to create a voice model for one person per language. This makes it easier for the Bluetooth
® 2.0
interface to recognise voice commands said by you. You can turn a voice model registered with the speaker enrollment function on and off whenever you want.
N00564801152
It takes about 2 to 3 minutes to complete thespeaker enrollment process.To ensure the best results, run through the process while in the driver’s seat, in an envi- ronment that is as quiet as possible (whenthere is no rain or st
rong winds and the vehi-
cle windows are closed). Please turn off your phone while in speaker enrollment to prevent interruption of the process. Use the following procedure for speakerenrollment. 1. Stop your vehicle in a safe area, put the shift lever (manual transaxle) in the “N” (Neutral) position, or the selector lever{continuously variable transmission (CVT)} in the “P”(PARK) position, and then pull the parking brake lever. 2. Press the SPEECH button (except for vehicles with Mits
ubishi Multi-Commu-
nication System) or PICK-UP button (forvehicles with Mits
ubishi Multi-Commu-
nication System). 3. Say “Voice training.”
4. The voice guide will say “This operation must be performed in a quiet environment while the vehicle is stopped. See the owner’s manual for the list of requiredtraining phrases. Press and release the SPEECH button when you are ready to begin. Press the HANG-UP button to can-cel at any time.” Press the SPEECH button to start the speaker enrollment process. 5. The voice guide will prompt for phrase 1. Repeat the corresponding phrase listed in table “Enrollment commands” on page 5-162.The system will register your voice and then move on to the registration of the next command. Continue the process untilall phrases have been registered.
Speaker enrollment function
Speaker enrollment
NOTE
Speaker enrollment is not possible unless the vehicle is parked. Make sure you park the vehicle in a safe area before attempting speaker enrollment.
NOTE
If you do not start the speaker enrollment process within 3 minutes after pressing the SPEECH button, the speaker enrollment function will time out. The voice guide will say “Speaker enroll- ment has timed out.” The system will then beep and the voice recognition mode will bedeactivated.
BK0230300US.book
145 ページ 2015年7月30日 木曜日 午後8時38分
Page 208 of 392
Bluetooth® 2.0 interface (if so equipped) 5-146 Features and controls
5
6. When all enrollment commands have been read out, the voice guide will say“Speaker enrollment is complete.” Thesystem will then end the speaker enroll- ment process and return to the main menu.
N00564901065
You can turn a voice model registered withthe speaker enrollment function on and offwhenever you want. You can also retrain the system. Use the following procedure to perform theseactions.
1. Press the SPEECH button (except for vehicles with Mitsubishi Multi-Commu- nication System) or PICK-UP button (for vehicles with Mitsubishi Multi-Commu-nication System). 2. Say “Voice training.” 3. If you have completed a speaker enroll-ment process once already, the voice guide will say either “Enrollment is enabled. Would you like to disable orretrain?” or “Enrollment is disabled.Would you like to enable or retrain?” 4. When enrollment is “enabled,” the voice model is on; when enrollment is “dis-abled,” the voice model is off. Say the command that fits your needs. Say “Retrain” to start the speaker enroll-ment process and recreate a new voice model. (Refer to “Speaker enrollment” on page 5-145.)
N00565001294
Before you can make or receive hands-free calls or play music using the Bluetooth
® 2.0
interface function, you must pair the Blue- tooth
® device and Bluetooth
® 2.0 interface.
Up to 7 Bluetooth
® devices can be paired
with the Bluetooth
® 2.0 interface.
If multiple paired Bluetooth
® devices are
available in the vehicle, the cellular phone or music player most recently connected is auto- matically connected to the Bluetooth
® 2.0
interface. You can also change a Bluetooth
® device to
be connected. To pair a Bluetooth
® device with the Blue-
tooth
® 2.0 interface, use either one of the fol-
lowing 2 methods (Type 1 or Type 2).
NOTE
To repeat the most recent voice training com- mand, press and release the SPEECH button. If you press the HANG-UP button anytime during the process, the system will beep andstop the speaker enrollment process.NOTE
Completing the speaker enrollment process will turn on the voice model automatically. The commands “Help” and “Cancel” will not work in this mode.
Enabling and disabling the voice model and retraining
Connecting the Bluetooth
® 2.0
interface and Bluetooth
® device
NOTE
Pairing is required only when the device is used for the first time. Once the device has been paired with the Bluetooth
® 2.0 inter-
face, all you need is
to bring the device into
the vehicle next time and the device will connect to the Bluetooth
® 2.0 interface auto-
matically (if supported by the device).
To p a i r
BK0230300US.book
146 ページ 2015年7月30日 木曜日 午後8時38分
Page 209 of 392
Bluetooth® 2.0 interface (if so equipped)
Features and controls 5-147
5
1. Stop your vehicle in a safe area, put the shift lever (manual transaxle) in the “N” (Neutral) position, or the selector lever {continuously variable transmission(CVT)} in the “P” (PARK) position, and then pull the parking brake lever. 2. Press the SPEECH button (except for vehicles with Mitsubishi Multi-Commu- nication System) or PICK-UP button (for vehicles with Mitsubishi Multi-Commu-nication System). 3. Say “Setup.” 4. Say “Pairing Options.”5. The voice guide will say “Select one ofthe following: pair, edit, delete, or list.” Say “Pair.”
digit pairing code.” Say a 4-digit number. When the confirmation function is on, thesystem will confirm whether the number said is acceptable. Answer “Yes.” Answer “No” to return to pairing codeselection.
7. The voice guide will say “Start pairing procedure on the device. See the device manual for instructions.” Enter in the Bluetooth
® device the 4-digit number you
have registered in Step 6.
Pairing procedure- Type 1
(if so
equipped)NOTE
You cannot pair any Bluetooth
® device with
the Bluetooth
® 2.0 interface unless the vehi-
cle is parked. Before pairing a Bluetooth
®
device with the Bluetooth
® 2.0 interface,
confirm that the vehicle is parked in a safelocation.
NOTE
If 7 devices have already been paired, the voice guide will say “Maximum devices paired” and then the system will end the pairing process. To register a new device, delete one device and then repeat the pairingprocess. (Refer to “Deleting a device” on page 5-150.)NOTE
Some Bluetooth
® devices require a specific
pairing code. Please refer to the device man-ual for pairing code requirements.
The pairing code entered here is only used for the Bluetooth
® connection certification.
It is any 4-digit number the user would like to select. Remember the pairing code as it needs to be keyed into the Bluetooth
® device later in the
pairing process. Depending on the connection settings of the Bluetooth
® device, this code may have to be
entered each time you connect the Blue- tooth
® device to the Bluetooth
® 2.0 inter-
face. For the default connection settings, refer to the instructions for the device.NOTE
Depending on the Bluetooth
® device, it may
take a few minutes to pair it with the Blue- tooth
® 2.0 interface.
If the Bluetooth
® 2.0 interface cannot recog-
nize the Bluetooth
® device, the voice guide
will say “Pairing has timed out” and the pair-ing process will be cancelled. Confirm that the device you are pairing sup- ports Bluetooth
®, and try pairing it again.
NOTE
BK0230300US.book
147 ページ 2015年7月30日 木曜日 午後8時38分
Page 210 of 392
Bluetooth® 2.0 interface (if so equipped) 5-148 Features and controls
5
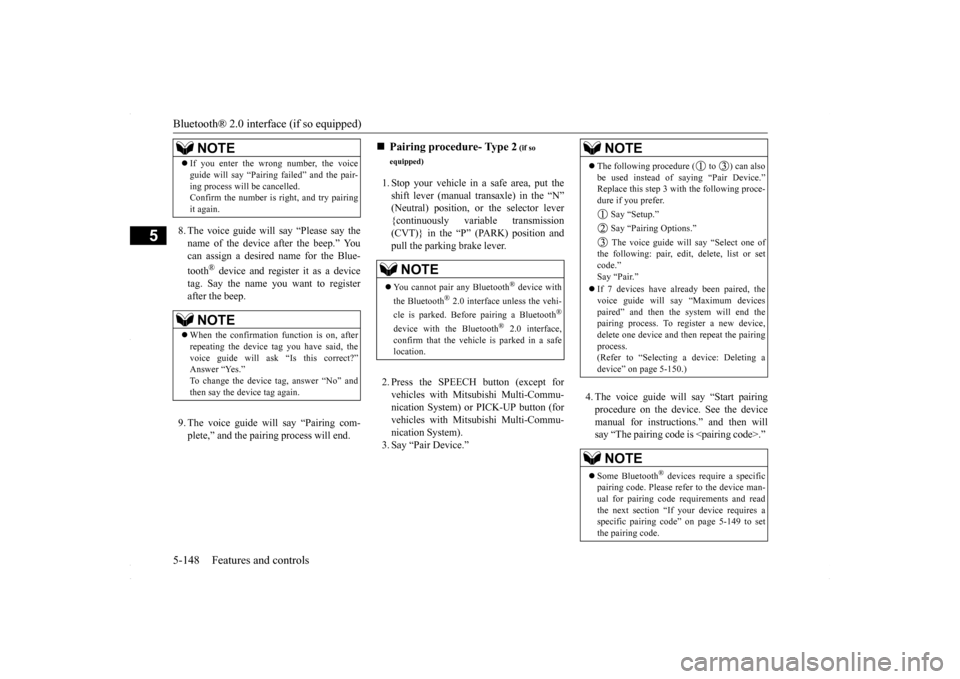
8. The voice guide will say “Please say the name of the device after the beep.” You can assign a desired name for the Blue- tooth
® device and register it as a device
tag. Say the name you want to register after the beep. 9. The voice guide will say “Pairing com- plete,” and the pairing process will end.
1. Stop your vehicle in a safe area, put the shift lever (manual transaxle) in the “N” (Neutral) position, or the selector lever{continuously variable transmission (CVT)} in the “P” (PARK) position and pull the parking brake lever. 2. Press the SPEECH button (except for vehicles with Mitsubishi Multi-Commu- nication System) or PICK-UP button (forvehicles with Mitsubishi Multi-Commu- nication System). 3. Say “Pair Device.”
4. The voice guide will say “Start pairing procedure on the device. See the device manual for instructions.” and then willsay “The pairing code is
If you enter the wrong number, the voice guide will say “Pairing failed” and the pair- ing process will be cancelled. Confirm the number is right, and try pairing it again.NOTE
When the confirmation function is on, after repeating the device tag you have said, the voice guide will ask “Is this correct?” Answer “Yes.”To change the device tag, answer “No” and then say the device tag again.NOTE
Pairing procedure- Type 2
(if so
equipped)NOTE
You cannot pair any Bluetooth
® device with
the Bluetooth
® 2.0 interface unless the vehi-
cle is parked. Before pairing a Bluetooth
®
device with the Bluetooth
® 2.0 interface,
confirm that the vehicle is parked in a safe location.
NOTE
The following procedure ( to ) can also be used instead of saying “Pair Device.” Replace this step 3 with the following proce- dure if you prefer. Say “Setup.” Say “Pairing Options.” The voice guide will say “Select one of the following: pair, edit, delete, list or set code.”Say “Pair.” voice guide will say “Maximum devices paired” and then the system will end the pairing process. To register a new device, delete one device and then repeat the pairing process.(Refer to “Selecting a device: Deleting a device” on page 5-150.)NOTE
Some Bluetooth
® devices require a specific
pairing code. Please refer to the device man- ual for pairing code requirements and read the next section “If your device requires aspecific pairing code” on page 5-149 to set the pairing code.
BK0230300US.book
148 ページ 2015年7月30日 木曜日 午後8時38分
Page 217 of 392
Bluetooth® 2.0 interface (if so equipped)
Features and controls 5-155
5
“
N00565800019
If an incoming phone call is received whilethe ignition switch is in the “ACC” or “ON”position, the audio system will be automati- cally turned on and switched to the incoming call, even when the audio system was origi-nally off. The voice guide announcement for the incoming call will be output from the frontpassenger’s seat speaker. If the CD player or radio was playing when the incoming call was received, the audio sys-tem will mute the sound from the CD player or radio and output only the incoming call. To receive the call, press the PICK-UP buttonon the steering wheel control switch. When the call is over,
the audio system will
return to its previous state.
N00565900010
At any time during a call, you can mute thevehicle microphone. Pressing the SPEECH button and then saying “Mute” during a call will turn ON the mute function and mute the microphone.Saying “Mute off” in the same way will turn off the mute function and cancel the mute on the microphone.
N00566600014
The Bluetooth
® 2.0 interface can switch
between hands-free mode (hands-free calls) and private mode (calls using cellular phone). If you press the SPEECH button and say“Transfer call” during a hands-free call, you can stop the hands-free mode and talk in pri- vate mode. To return to hands-free mode, press the SPEECH button again and say “Transfer call.”
N00566000018
The Bluetooth
® 2.0 interface has 2 types of
unique phonebooks that are different from thephonebook stored in the cellular phone. They
are the vehicle phonebook and the mobile phonebook. These phonebooks are used to register tele- phone numbers and make calls to desirednumbers via voice recognition function.
N00566101117
This phonebook is us
ed when making calls
with the voice recognition function. Up to 32 names can be registered in the vehi- cle phonebook per language.Also, each entry has 4 locations associated with: home, work, mobile and other. You can register one telephone number for each loca-tion. You can register a desired name as a name for any phonebook entry registered in the vehicle phonebook.Names and telephone numbers can be changed later on. The vehicle phonebook can be used with all paired cellular phones.
Receiving calls
Mute function
Switching between hands-free mode and private mode
Phonebook function
NOTE
Disconnecting the battery cable will not delete information registered in the phone- book.
Vehicle phonebook
BK0230300US.book
155 ページ 2015年7月30日 木曜日 午後8時38分