Top MITSUBISHI LANCER 2016 8.G Manual PDF
[x] Cancel search | Manufacturer: MITSUBISHI, Model Year: 2016, Model line: LANCER, Model: MITSUBISHI LANCER 2016 8.GPages: 392, PDF Size: 13.12 MB
Page 260 of 392
Automatic air conditioning with
Fahrenheit scale (if so equipped)
7-10 Comfort controls
7
Press the air selection switch for about 10 seconds or longer. When the setting has changed, the system will beep and the indicator light will flash.• When the setting has changed from enabled to disabled, the system will beep three times and the indicator will flashthree times. • When the setting has changed from dis- abled to enabled, the system will beeptwo times and the indicator light willflash three times.
N00737301379
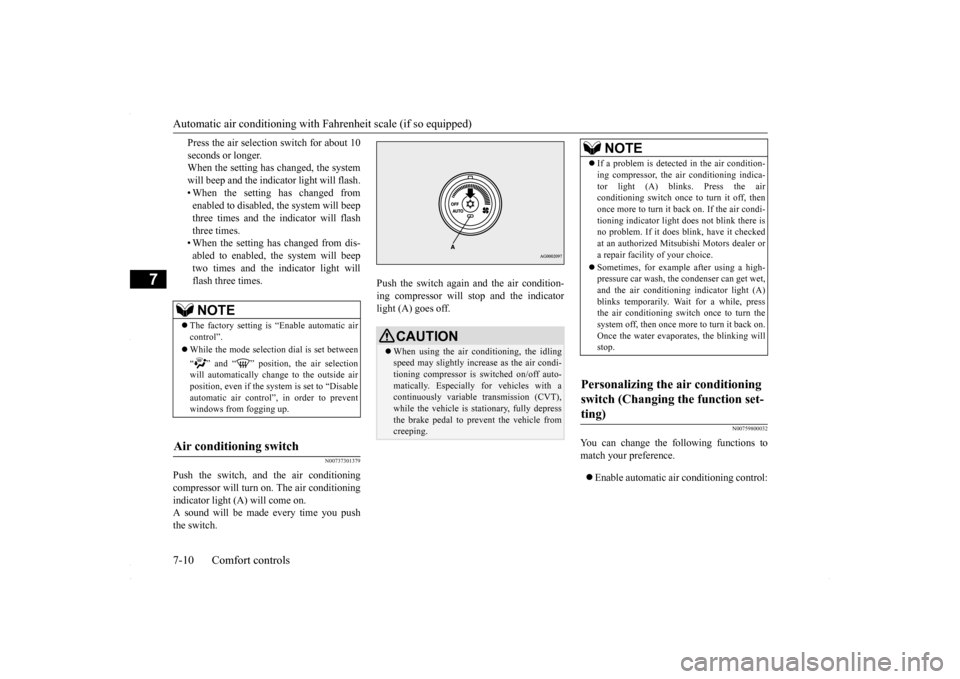
Push the switch, and the air conditioningcompressor will turn
on. The air conditioning
indicator light (A) will come on. A sound will be made every time you push the switch.
Push the switch again and the air condition- ing compressor will stop and the indicator light (A) goes off.
N00759800032
You can change the following functions tomatch your preference. Enable automatic air conditioning control:
NOTE
The factory setting is “Enable automatic air control”. While the mode selection dial is set between “ ” and “ ” position, the air selection will automatically change to the outside air position, even if the sy
stem is set to “Disable
automatic air control”, in order to preventwindows from fogging up.
Air conditioning switch
CAUTION When using the air conditioning, the idling speed may slightly increase as the air condi-tioning compressor is switched on/off auto- matically. Especially for vehicles with a continuously variable transmission (CVT),while the vehicle is stationary, fully depress the brake pedal to prevent the vehicle from creeping.
NOTE
If a problem is detected in the air condition- ing compressor, the air conditioning indica- tor light (A) blinks. Press the air conditioning switch once to turn it off, then once more to turn it b
ack on. If the air condi-
tioning indicator light does not blink there is no problem. If it does blink, have it checked at an authorized Mitsubishi Motors dealer ora repair facility of your choice. Sometimes, for example after using a high- pressure car wash, the condenser can get wet, and the air conditioning indicator light (A) blinks temporarily. Wait for a while, pressthe air conditioning switch once to turn the system off, then once more to turn it back on. Once the water evaporates, the blinking willstop.
Personalizing the air conditioning switch (Changing the function set- ting)
BK0230300US.bo
ok 10 ページ 2015年7月30日 木曜日 午後8時38分
Page 263 of 392
Automatic air conditioning with
Celsius scale (if so equipped)
Comfort controls 7-13
7
N00711801594
N00736900111
When the ignition switch is in the “ON” posi- tion, select the blower speed by turning the blower speed selection dial. Turning the dial clockwise will increase theblower speed; turning the dial counterclock- wise will decrease it. When the dial is set to the “OFF” position, all fan-driven airflowwill stop.
N00737001389
Use this dial to adjust the temperature in thepassenger compartment. Turn the temperaturecontrol dial clockwise to make the air warmer. Turn it counterclockwise to make the air cooler.
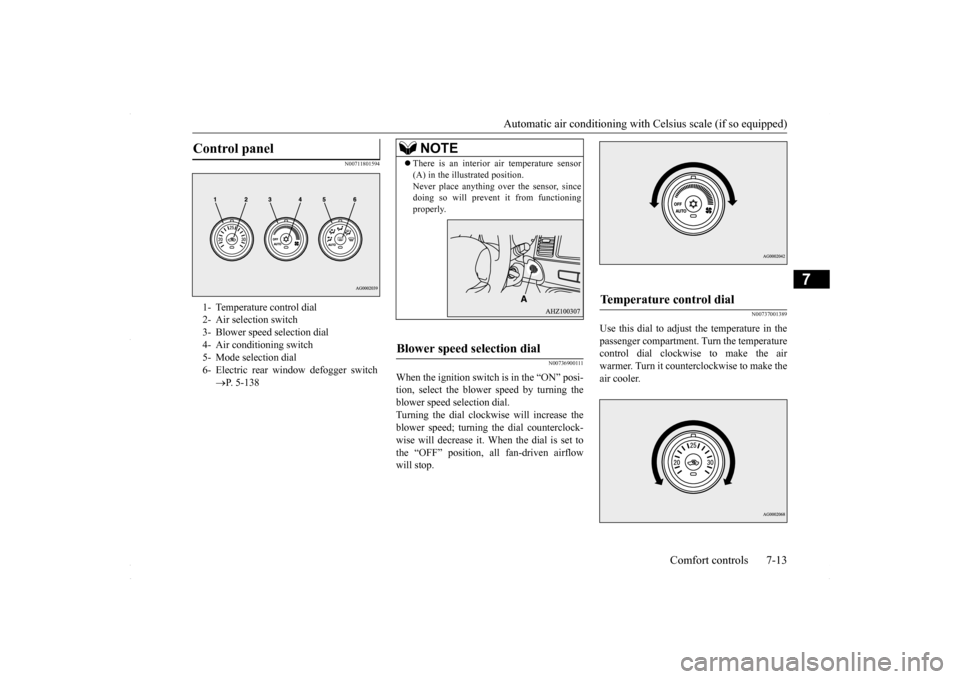
Control panel
1- Temperature control dial 2- Air selection switch 3- Blower speed selection dial4- Air conditioning switch 5- Mode selection dial 6- Electric rear window defogger switch
P. 5-138
NOTE
There is an interior
air temperature sensor
(A) in the illustrated position. Never place anything over the sensor, since doing so will prevent it from functioning properly.
Blower speed selection dial
Temperature control dial
BK0230300US.bo
ok 13 ページ 2015年7月30日 木曜日 午後8時38分
Page 264 of 392
Automatic air conditioning with
Celsius scale (if so equipped)
7-14 Comfort controls
7
The above indicates the factory settings. You can personalize the air selection switch and air conditioning switch to match your per-sonal preferences. Contact your Mitsubishi Motors dealer or a repair facility of your choice for assistance.Refer to “Personalizing the air conditioning switch (Changing the function setting)” on page 7-16.Refer to “Personalizing the air selection (Changing the function setting)” on page
7-15.
N00737100136
To change the amount of
air flowing from the
vents, turn the mode selection dial. Refer to“Changing the mode selection” on page 7-2.
N00737200241
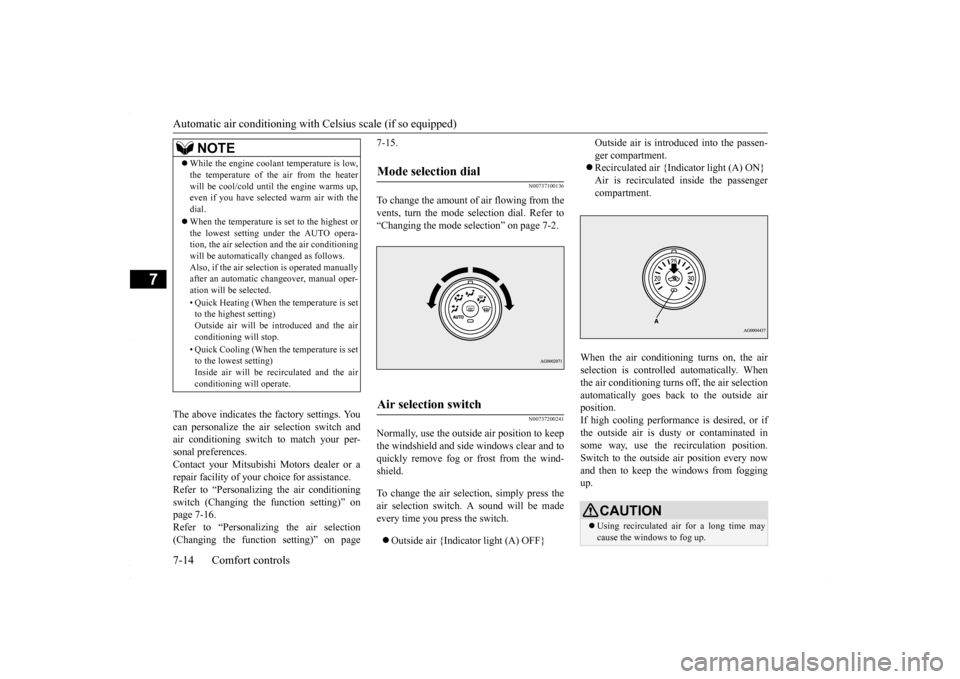
Normally, use the outside air position to keepthe windshield and side windows clear and toquickly remove fog or frost from the wind- shield. To change the air selection, simply press the air selection switch. A sound will be madeevery time you press the switch. Outside air {Indicator light (A) OFF}
Outside air is introduced into the passen- ger compartment. Recirculated air {Indicator light (A) ON} Air is recirculated inside the passengercompartment.
When the air conditioning turns on, the air selection is controll
ed automatically. When
the air conditioning turns off, the air selectionautomatically goes back to the outside air position. If high cooling performance is desired, or ifthe outside air is dusty or contaminated in some way, use the recirculation position. Switch to the outside air position every nowand then to keep the windows from fogging up.
NOTE
While the engine coolant temperature is low, the temperature of the air from the heater will be cool/cold until the engine warms up, even if you have selected warm air with the dial. When the temperature is set to the highest or the lowest setting under the AUTO opera-tion, the air selection and the air conditioning will be automatically changed as follows. Also, if the air selection is operated manuallyafter an automatic changeover, manual oper- ation will be selected. • Quick Heating (When the temperature is set to the highest setting) Outside air will be introduced and the airconditioning will stop. • Quick Cooling (When the temperature is set to the lowest setting) Inside air will be recirculated and the air conditioning will operate.
Mode selection dial
Air selection switch
CAUTION Using recirculated air for a long time may cause the windows to fog up.
BK0230300US.bo
ok 14 ページ 2015年7月30日 木曜日 午後8時38分
Page 265 of 392
Automatic air conditioning with
Celsius scale (if so equipped)
Comfort controls 7-15
7
N00760001129
You can change the following functions to match your preference. Enable automatic air control: When the mode selection dial or theblower speed selection dial is set to the “AUTO” position, the air selection switch will also be automatically controlled. Disable automatic air control: Even when the mode selection dial or theblower speed selection dial is set to the “AUTO” position, the air selection switch will not be automatically controlled. Changing the settings: Press the air selection switch for about 10 seconds or longer. When the setting has changed, the systemwill beep and the indicator light will flash. • When the setting has changed from enabled to disabled,the system will beep three times and the indicator will flash three times. • When the setting has changed from dis-abled to enabled, the system will beep two times and the indicator light will flash three times.
N00737301382
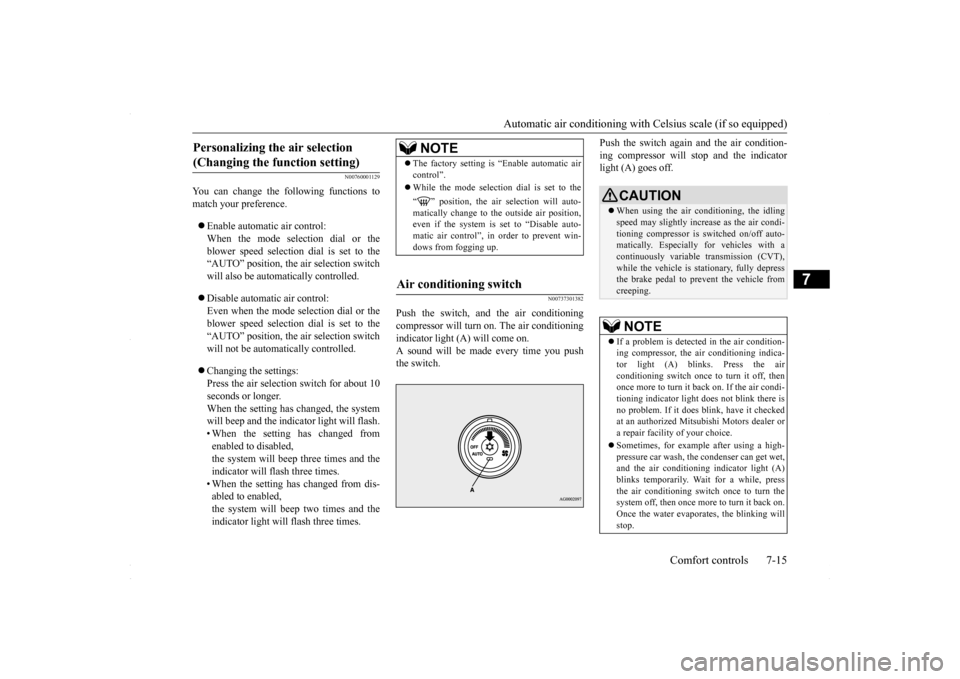
Push the switch, and the air conditioning compressor will turn
on. The air conditioning
indicator light (A) will come on.A sound will be made every time you push the switch.
Push the switch again and the air condition- ing compressor will stop and the indicator light (A) goes off.
Personalizing the air selection (Changing the function setting)
NOTE
The factory setting is “Enable automatic air control”. While the mode selection dial is set to the “ ” position, the air selection will auto- matically change to the outside air position, even if the system is set to “Disable auto-matic air control”, in order to prevent win- dows from fogging up.
Air conditioning switch
CAUTION When using the air conditioning, the idling speed may slightly increase as the air condi- tioning compressor is switched on/off auto- matically. Especially for vehicles with acontinuously variable transmission (CVT), while the vehicle is stationary, fully depress the brake pedal to prevent the vehicle fromcreeping.NOTE
If a problem is detect
ed in the air condition-
ing compressor, the air conditioning indica-tor light (A) blinks. Press the air conditioning switch once to turn it off, then once more to turn it back on. If the air condi-tioning indicator light
does not blink there is
no problem. If it does blink, have it checked at an authorized Mitsubishi Motors dealer ora repair facility of your choice. Sometimes, for example after using a high- pressure car wash, the condenser can get wet, and the air conditioning indicator light (A)blinks temporarily. Wait for a while, press the air conditioning switch once to turn the system off, then once more to turn it back on.Once the water evaporates, the blinking will stop.
BK0230300US.bo
ok 15 ページ 2015年7月30日 木曜日 午後8時38分
Page 278 of 392
Important Points on Safety for the Customer 7-28 Comfort controls
7
N00716200020
This product features a number of pictorial indications as well as points concerning han-dling so that you can use the product cor- rectly and in a safe manner, as well as prevent injury or damage to yourself, other users, orproperty.
N00716300021 N00716400022
1. Press the PWR/VOL key.
File extension m4a Supported tag information
AAC tags or ID3 tags Title, Artist name, Album name
Maximum number of characters that can be indicated on
the display
64 characters
Important Points on Safety for the Customer
WA R N I N G The driver should not pay close attention to the display while driving. This may prevent the driver looking where they are going, and cause an acci-dent.
Item
Details
The driver should not perform compli- cated operations while driving. Performing complicated operations while driving may prevent the driver looking where they are going, and cause an acci-dent. Therefore stop the vehicle in a safe loca- tion before performing such operations. Do not use during malfunctions, such as when no sound is audible.This may lead to accident, fire, or electric shock. Ensure water or other foreign objects do not enter the product. This may lead to smoking, fire, electricshock, or malfunction. Do not insert foreign objects into the disc slot. This may lead to fire, electric shock, or malfunction. In the event of abnormalities occurring when foreign objects or water enter theproduct, resulting in smoke or a strange smell, immediately stop using the product, and consult an authorized MitsubishiMotors dealer or a repair facility of your choice. Continuing to use the product may result in accident, fire, or electric shock. Do not disassemble or modify the product. This may lead to malfunction, fire, or elec- tric shock.WA R N I N G
During thunderstorms, do not touch the antenna or the front panel. This may lead to electrical shock from lightning.CAUTION Do not block ventilation holes or heat sinks on the product.Blocking ventilation holes or heat sinks may prevent heat from escaping from within the product, leading to fire or malfunction. Do not turn the volume up to the extent that you cannot hear sounds from outside thevehicle while driving. Driving without being able to hear sounds from outside the vehicle may result in anaccident. Do not insert your hand or fingers into the disc slot. This may result in injury.
Operation Keys Turn the Power ON/ OFF
WA R N I N G
BK0230300US.bo
ok 28 ページ 2015年7月30日 木曜日 午後8時38分
Page 279 of 392
Operation Keys
Comfort controls 7-29
7
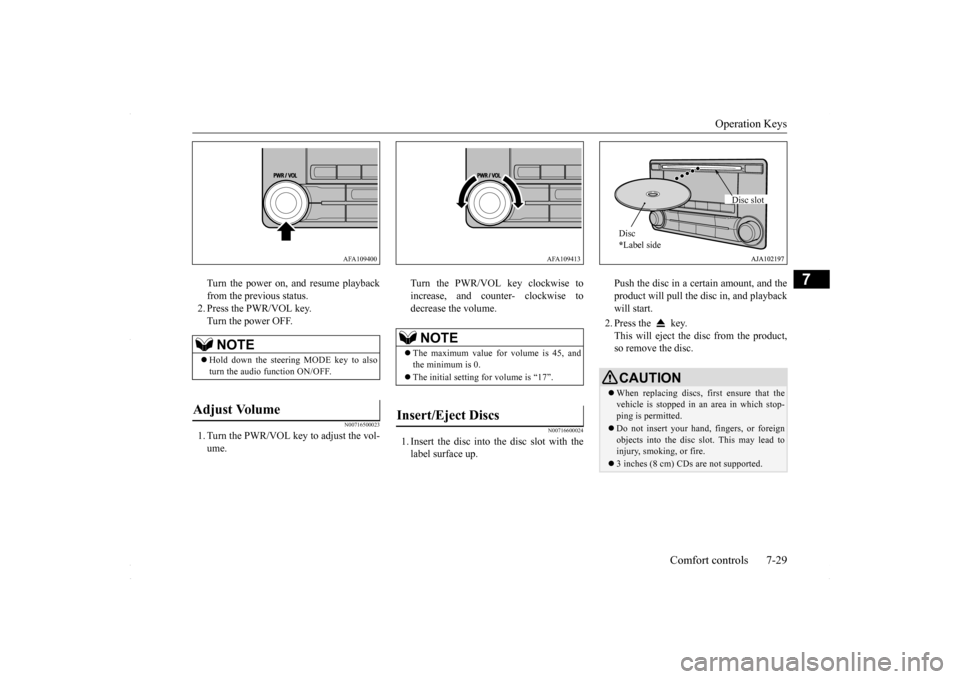
Turn the power on, and resume playback from the previous status. 2. Press the PWR/VOL key.Turn the power OFF.
N00716500023
1. Turn the PWR/VOL key to adjust the vol-ume.
Turn the PWR/VOL key clockwise to increase, and counter- clockwise to decrease the volume.
N00716600024
1. Insert the disc into the disc slot with the label surface up.
Push the disc in a certain amount, and the product will pull the disc in, and playback will start. 2. Press the key. This will eject the disc from the product, so remove the disc.
NOTE
Hold down the steering MODE key to also turn the audio function ON/OFF.
Adjust Volume
AFA109400
NOTE
The maximum value for volume is 45, and the minimum is 0. The initial setting for volume is “17”.
Insert/Eject Discs
AFA109413
CAUTIONWhen replacing discs, first ensure that the vehicle is stopped in an area in which stop- ping is permitted. Do not insert your hand, fingers, or foreign objects into the disc slot. This may lead to injury, smoking, or fire. 3 inches (8 cm) CDs are not supported.Disc * Label side
Disc slot
BK0230300US.bo
ok 29 ページ 2015年7月30日 木曜日 午後8時38分
Page 281 of 392
Operation Keys
Comfort controls 7-31
7
N00716800084
13-
5 key Play/Pause Bluetooth Audio
*2, and use
as preset key 5 for radio.
14-
6 key Return during audio track search, and stop Bluetooth Audio
*2.
For radio, use as preset key 6.
15-
key/ key
For audio, select audio track/file; forradio, perform automatic station selec- tion. Select channels in the satellite radio*
1.
16- MENU key
Switch to Menu mode.
17-
/SEL key
Adjust audio quality and select items.For radio, manually select stations. Select channels in the satellite radio*
1.
*1: Requires a satellite tuner connection.*2: Requires a separately-purchased Blue- tooth-capable audio device in equip- ment by type (vehicles with a Bluetooth
® 2.0 interface).
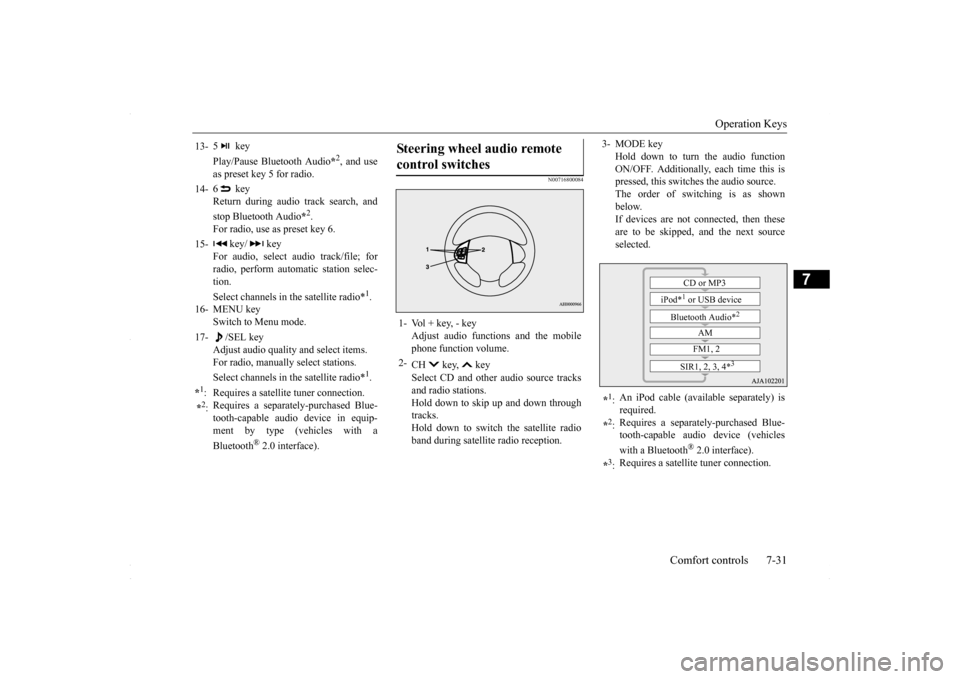
Steering wheel audio remote control switches 1- Vol + key, - key
Adjust audio functions and the mobilephone function volume.
2-
CH key, key Select CD and other audio source tracks and radio stations.Hold down to skip up and down through tracks. Hold down to switch the satellite radioband during satellite radio reception.
3- MODE key
Hold down to turn the audio functionON/OFF. Additionally, each time this is pressed, this switches the audio source. The order of switching is as shownbelow. If devices are not connected, then these are to be skipped, and the next sourceselected.
*1: An iPod cable (available separately) is required.
*2: Requires a separately-purchased Blue- tooth-capable audio device (vehicles with a Bluetooth
® 2.0 interface).
*3: Requires a satellite tuner connection.
CD or MP3
iPod*
1 or USB device
Bluetooth Audio*
2
AM FM1, 2
SIR1, 2, 3, 4*
3
BK0230300US.bo
ok 31 ページ 2015年7月30日 木曜日 午後8時38分
Page 282 of 392
Listen to Radio 7-32 Comfort controls
7
N00716900072
This explains how to listen to AM and FM radio broadcasts. Press the RADIO key to switch the band. Switch between AM and FM bands. The selected band is indicated on the display. *: When a satellite tuner is connected Turn the /SEL key to the frequency to lis- ten to.
Collective search for stations that can be received. Press the SCAN key.When a station is received, this is played for 5 seconds, then the product searches for the next station. Register the broadcast station in advance, and select this at a later time. 1. Tune in to the frequency to register.
2. Hold down any of the keys from the 1RPT key to the 6 key. A “Beep” sounds, and the preset key is registered.
During RBDS broadcast reception, select CAT (category content), and automatically scan for stations. 1. During FM reception, press the CAT key. This switches to the CAT selection mode.2. Press the CAT key to select CAT. 3. Press the key or key. The CAT (category content) indicator will flash, and station selection will automati-cally start. When a station is received, the frequency is displayed.
Listen to Radio To Listen to the Radio
NOTE
Bands switch in the order AM, FM1, FM2, SIR1*, SIR2*, SIR3*, and SIR4*. If no signal is received, bands will not be switched to SIR2, SIR3, or SIR4.
Manual/Seek Station Selection
/SEL key (counter- clockwise)
Reduces the frequency being received.
/SEL key(clockwise)
Increases the frequency being received.
key
(hold down)
Release the button to start seek station selection, and when a station is received, scanning stops.
key
(hold down)Scan Station Selection
NOTE
Press this button again while receiving the station to return to normal reception.
Preset Memory
NOTE
The preset memory can register a maximum of 6 stations for each band. If a preset key that already has a station reg- istered is selected, then this is overwritten with the new preset. Pressing the preset key will select the previ- ously registered frequency.
CAT Search
BK0230300US.bo
ok 32 ページ 2015年7月30日 木曜日 午後8時38分
Page 288 of 392
Listen to an iPod 7-38 Comfort controls
7
Press the MEDIA key to set the iPod as the source. The selected source is indicated on the dis- play.
Press the key or key to select the track. This enables selection of the next or previous track. Hold down the 3 key or the 4 key. Fast forward/rewind is possible. Repeat playback and shuffle playback are possible. Press the 1RPT key. Repeat playback of th
e track currently being
played.
For vehicles with a Bluetooth
® 2.0 interface,
the types of devices that can be connectedmay vary. [For vehicles sold in U.S.A.] For details, access the Mitsubishi MotorsNorth America website. [For vehicles sold in Canada and Mexico] For details, access the Mitsubishi Motorswebsite. Please read and agree to the “Warn- ing about Links to the Web Sites of Other Companies”. The websites mentioned abovemay connect you to websites other than the Mitsubishi Motors website. http://www.mitsubishi-motors.com/en/prod-ucts/index.html Regarding how to connect the iPod/iPhone, refer to “How to connect an iPod” on page 5-163. When connecting the iPod/iPhone, use a commercially-available iPod connectioncable. Set up the device in order that no unsafe actions, such as plugging in the connection cable are taken while driving. When inserting and removing the iPod/iPhone, for safety’s sake first stop the vehicle. Depending on the status of the iPod/iPhone, it may take some time until the device is rec-ognized, or playback starts. Buttons on the product will not operate while iPod/iPhone is connected.NOTE
iPod/iPhone specifications and settings may mean that connection is not possible, or result in differences in operation or display. Depending on audio data in the iPod/iPhone, track information may not be displayed cor- rectly. Depending on the status of the vehicle and device, the iPod/iPhone may not play back after starting the engine. Data containing copyright information may not play back. It is recommended that the iPod/iPhone equalizer settings be set to flat. Operate the iPod/iPhone while connected to this product. If the iPod/iPhone is connected via Bluetooth as a Bluetooth-capable audio device, then donot connect the iPod/iPhone using an iPod cable. Connection using both methods will result in erroneous operation. If an iPod/iPhone does not operate correctly, then remove the iPod/iPhone from the prod-uct, reset, then reconnect.
Play iPod
NOTE
Select the Track (File) Fast Forward or Rewind Switch Playback Mode Repeat Playback (RPT)
NOTE
Pressing again will cancel.
BK0230300US.bo
ok 38 ページ 2015年7月30日 木曜日 午後8時38分
Page 290 of 392
Listen to Audio Files on a USB Device 7-40 Comfort controls
7
Press the MEDIA key to set USB as the source. The selected source is indicated on the dis- play.
Press the key or key to select the track. This enables selection of the next or previous track. Hold down the 3 key or the 4 key. Fast forward/rewind is possible. Repeat playback, random playback, and scan playback are possible. Press the 1RPT key. Repeat playback of th
e track currently being
played.
For details regarding the types of USB devices that can be connected and the types of files that can be played back in vehicles with a Bluetooth
® 2.0 interface, refer to
“Types of connectable devices and supportedfile specifications” on page 5-164. Regarding how to connect USB devices, refer to “How to connect a USB memory device” on page 5-163. When connecting a USB device, use a con- nection cable. Failure to use a connection cable when connecting may place undue loadon, or damage the USB connector. Set up the device in order that no unsafe actions, such as plugging in the connection cable are taken while driving. When inserting and removing the USB device, for safety’s sake first stop the vehi- cle. Do not insert other than audio devices into the USB port. Damage to the device or equipment may result. Depending on the status of the USB device, it may take some time until the device is rec- ognized, or playback starts. Depending on USB devices, buttons on the product will not operate while the USBdevice is connected. USB device specifications and settings may mean that connection is not possible, or result in differences in operation or display.NOTE
Depending on audio data in the USB device, track information may not be displayed cor- rectly. Depending on the status of the vehicle and device, the iPod/iPhone may not play back after starting the engine. Data containing copyright information may not play back. This product can play back MP3, WMA, and AAC format audio files. Depending on the type of USB device, usage may not be possible, or functions that can be used may be restricted. The recommended file system for USB memory is FAT32. The maximum supported capacity for USB memory is 32GB. Operate the USB device containing recorded audio files while connected to this product.
Play Back of Audio Files on a USB Device
NOTE
Select the Track (File) Fast Forward or Rewind Switch Playback Mode Repeat Playback (RPT)
NOTE
Pressing again will cancel.
BK0230300US.bo
ok 40 ページ 2015年7月30日 木曜日 午後8時38分