wheel nut MITSUBISHI OUTLANDER 2014 3.G Owners Manual
[x] Cancel search | Manufacturer: MITSUBISHI, Model Year: 2014, Model line: OUTLANDER, Model: MITSUBISHI OUTLANDER 2014 3.GPages: 451, PDF Size: 49.08 MB
Page 102 of 451
Free-hand Advanced
Security Transmitter (F.A.S
.T.-key) (if so equipped)
5-24 Features and controls
5
4. Make sure the selector
lever is in the “P”
(PARK) position. 5. Press the engine switch. 6. Confirm that all warning lights and warn-ing displays are functioning properly.
After several attempts
, you may experience
that the engine still does not start. 1. Make sure that all electric devices, such as lights, air conditi
oning blower and rear
window defogger, are turned off.
2. While depressing the brake pedal, press the accelerator peda
l halfway and hold it
there, then crank th
e engine. Release the
accelerator pedal, immediately after the engine starts.3. If the engine still wi
ll not start, the engine
could be flooded with too much gasoline. While depressing the brake pedal, pushthe accelerator pedal all the way down and hold it there, then press the engine switch to crank the engine. If the engine does not start after 5 to 6 seconds, push the engine switch to stop cranking theengine, and release th
e accelerator pedal.
Put the operation mode in OFF. Wait a few seconds, and then press the engineswitch to crank the engine again while depressing the brake pedal, but do not push the accelerator pedal. If the enginefails to start, repeat these procedures. If the engine still will
not start, contact your
local Mitsubishi Motors dealer or a repairfacility of your choi
ce for assistance.
Startability of the en
gine with an ambient
temperature of -22 °F (-30 °C) or lower When the ambient temperature is -22 °F (-30°C) or lower, it may not be possible to start from a standstill even wi
th the selector lever
in the “D” (DRIVE) position.This phenomenon occurs because the trans- axle has not warmed up sufficiently; it does
not indicate a problem.
If this occurs, place
the selector lever in the “P” (PARK) positionand let the engine idle
for at least 10 minutes.
The transaxle will wa
rm up, and you will be
able to start normally.Do not leave the vehicle during warm-up operation. The MIVEC engine automatically switches its intake-valve contro
l between a low-speed
mode and a high-speed mode in accordancewith driving conditions for maximum engine performance.
NOTE
The engine can only be started when the selector lever is in the “P” (PARK) or “N” (NEUTRAL) position.For safety reasons,
the engine should be
started when the selector lever is in the “P” (PARK) position in which the driving wheelslock.NOTE
Minor noises may be he
ard on engine start-
up. These will disappear
as the engine warms
up.
When the engine is hard to start
Using the MIVEC engine
NOTE
To protect the engine, the high-speed mode may not be selected wh
ile the engine coolant
temperature is low. In such a case, the engine revolutions do not rise to over 5,000 rpm even if the accelerator pedal is depressed.
BK0200500US.book 24 ページ 2013年2月12日 火曜日 午前9時46分
Page 134 of 451
Ignition switch 5-56 Features and controls
5
N00549201100
The outside mirror can be folded in towards the side window to prevent damage when parking in tight locations.
N00549301228
When the rear window defogger switch is pressed with the engine running, the outside rearview mirrors are defogged or defrosted.Current will flow throug
h the heater element
inside the mirrors, thus clearing away frost or condensation.The indicator light (A) will illuminate while the defogger is on. The heater will be turned off automatically inabout 15 to 20 minutes depending on the out- side temperature.
N00512401696
[For vehicles equipped with the Free-hand Advanced Security Tr
ansmitter (F.A.S.T.-
key).] For information on ope
rations for vehicles
equipped with the Free-hand Advanced Secu- rity Transmitter (F.A
.S.T.-key), refer to
“Free-hand Advanced
Security Transmitter
(F.A.S.T.-key): Engine switch” on page 5-16. [Except for vehicles equipped with the Free-hand Advanced Se
curity Transmit-
ter (F.A.S.T.-key).]
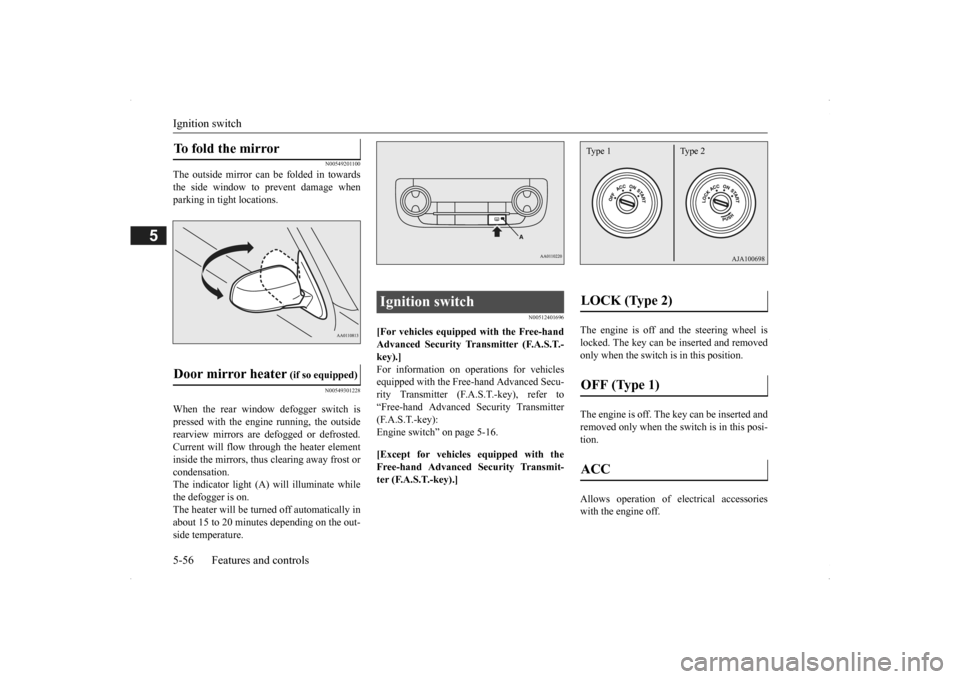
The engine is off a
nd the steering wheel is
locked. The key can be inserted and removed only when the switch is in this position. The engine is off. The
key can be inserted and
removed only when the sw
itch is in this posi-
tion. Allows operation of el
ectrical accessories
with the engine off.
To fold the mirror Door mirror heater
(if so equipped)
Ignition switch
LOCK (Type 2) OFF (Type 1) ACC Type 1 Type 2
BK0200500US.book 56 ページ 2013年2月12日 火曜日 午前9時46分
Page 195 of 451
Tire pressure monitoring system
Features and controls 5-117
5
2. If the tire pressure monitoring system warning light remain
s illuminated after
you have been driving for about 20 min- utes after you adjust the tire inflation pres- sure, one or more of the tires may have apuncture. Inspect the ti
re and if it has a
puncture, have it re
paired by an autho-
rized Mitsubishi Motors dealer as soon aspossible.
The tire pressure monitoring system may not work normally in the following circum- stances: A wireless facility
or device using the
same frequency is near the vehicle. Snow or ice is stuck inside the fenders and/or on the wheels. The tire inflation pressure sensor’s battery is dead. Wheels other than Mitsubishi genuine wheels are being used. Wheels that are not fitted with tire infla- tion pressure sensors are being used. Wheels whose ID codes are not memo- rized by the vehicle are used. Compact spare tire is fitted as a road wheel.
A window tint that affects the radio wave signals is installed.
N00532900081
If new wheels with new tire inflation pressure sensors are installed,
their ID codes must be
programmed into the tire pressure monitoringsystem. Have tire and
wheel replacement per-
formed by an authorized Mitsubishi Motors dealer to avoid the risk of damaging the tireinflation pressure sensors. If the wheel replacement is not done by an authorized Mitsubishi Motors dealer
, it is not covered by
your warranty.
Once adjustments have
been made, the warn-
ing light will go off after a few minutes ofdriving.WA R N I N G If the warning light
/ display illuminates
while you are driving, avoid hard braking, sharp steering maneuvers and high speeds.Driving with an under-inflated tire adversely affe
cts vehicle performance and
can result in an accident.CAUTION If a tire has a puncture, replace that tire with the spare tire. Driving on a punctured tirecould lead to an accident. The warning light / di
splay may not illumi-
nate immediately in the
event of a tire blow-
out or rapid leak.NOTE
NOTE
To avoid the risk of damage to the tire infla- tion pressure sensors, have any puncturedtire repaired by an authorized MitsubishiMotors dealer. If the tire repair is not done by an authorized Mitsubishi Motors dealer, it is not covered by your warranty. Do not use an aerosol puncture-repair spray on any tire.Such a spray could dama
ge the tire inflation
pressure sensors. Have any puncture repa
ired by an authorized
Mitsubishi Moto
rs dealer.
NOTE
Tire inflation pressures vary with the ambi- ent temperature. If the vehicle is subjected to large variations in ambient temperature, the tire inflation pressures may be under-inflated(causing the warning light / display come on) when the ambient temperature is relatively low. If the warning light / display comes on,adjust the tire inflation pressure.
Whenever the tires and wheels are replaced with new ones
BK0200500US.book 117 ページ 2013年2月12日 火曜日 午前9時46分
Page 262 of 451
Electric rear window defogger switch 5-184 Features and controls
5
N00523701413
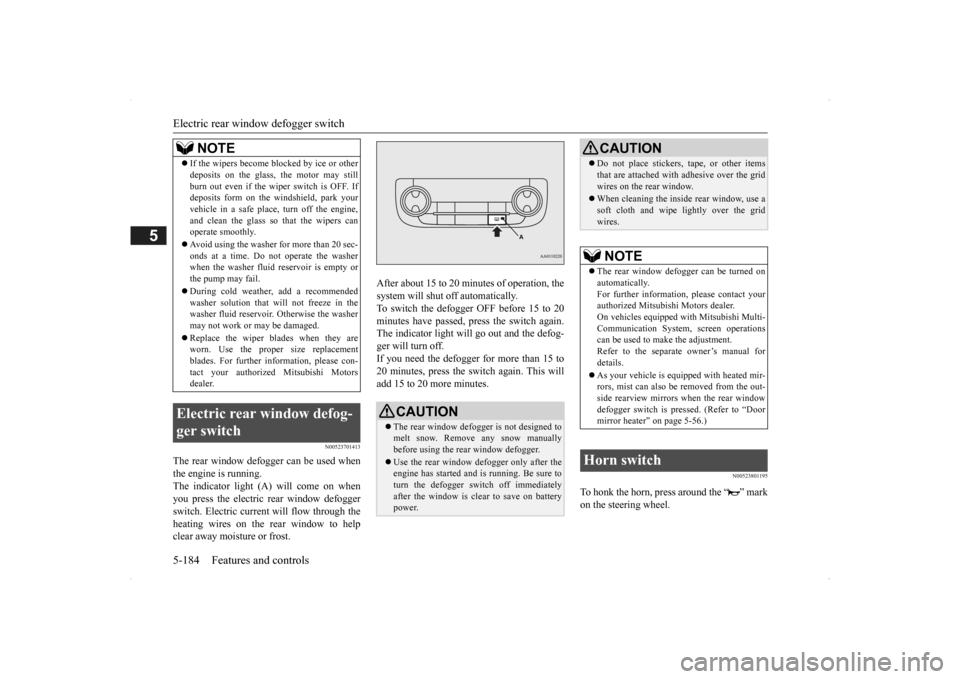
The rear window defogger can be used when the engine is running. The indicator light (A) will come on whenyou press the electric rear window defogger switch. Electric current will flow through the heating wires on the rear window to helpclear away moisture or frost.
After about 15 to 20 minutes of operation, the system will shut off automatically.To switch the defogger OFF before 15 to 20 minutes have passed, pr
ess the switch again.
The indicator light will go out and the defog-ger will turn off. If you need the defogger for more than 15 to 20 minutes, press the switch again. This willadd 15 to 20 more minutes.
N00523801195
To honk the horn, press around the “ ” markon the steering wheel.
If the wipers become bl
ocked by ice or other
deposits on the glass, the motor may stillburn out even if the wiper switch is OFF. Ifdeposits form on the windshield, park your vehicle in a safe place, turn off the engine, and clean the glass so that the wipers canoperate smoothly. Avoid using the washer for more than 20 sec- onds at a time. Do not
operate the washer
when the washer fluid reservoir is empty or the pump may fail. During cold weather, add a recommended washer solution that will not freeze in thewasher fluid reservoir. Otherwise the washer may not work or may be damaged. Replace the wiper blades when they are worn. Use the proper size replacement blades. For further info
rmation, please con-
tact your authorized
Mitsubishi Motors
dealer.
Electric rear window defog- ger switch
NOTE
CAUTION The rear window defogge
r is not designed to
melt snow. Remove
any snow manually
before using the rear window defogger. Use the rear window de
fogger only after the
engine has started and
is running. Be sure to
turn the defogger switch off immediatelyafter the window is cl
ear to save on battery
power.
Do not place stickers
, tape, or other items
that are attached with
adhesive over the grid
wires on the rear window. When cleaning the insi
de rear window, use a
soft cloth and wipe
lightly over the grid
wires.NOTE
The rear window defogger can be turned on automatically. For further information, please contact your authorized Mitsubishi Motors dealer.On vehicles e
quipped with Mitsubishi Multi-
Communication System, screen operations can be used to ma
ke the adjustment.
Refer to the separate
owner’s manual for
details. As your vehicle is equi
pped with heated mir-
rors, mist can also be removed from the out- side rearview mirrors
when the rear window
defogger switch is pre
ssed. (Refer to “Door
mirror heater” on page 5-56.)
Horn switch
CAUTION
BK0200500US.book 184 ページ 2013年2月12日 火曜日 午前9時46分
Page 304 of 451
Vehicle preparation before driving 6-4 Driving safety
6
N00629001709
For a safer and more enjoyable trip, always check for the following: Before starting the vehicle, make certain that you and all passengers are seated and wearing their seat
belts properly (with
children in the rear seat, in appropriate restraints), and that all the doors and the liftgate are locked. Move the driver’s seat as far backward as possible, while keep
ing good visibility,
and good control of the steering wheel,brakes, accelerator,
and controls. Check
the instrument panel
indicators and multi-
information display for any possible prob-lem. Similarly, the front
passenger seat should
also be moved as far back as possible. Make sure that infa
nts and small children
are properly restrained in accordance with all laws and regulations.
Check these by selecting the defroster mode, and set the blower swit
ch on high. You should
be able to feel the air blowing against thewindshield. Refer to “Defrosti
ng or defogging (wind-
shield, door windows)” on page 7-13 Check all the tires for heavy tread wear or uneven wear patterns. Look for stones, nails, glass, or other objects
stuck in the tread. Look
for any tread cuts or
sidewall cracks. Check
the wheel nuts for tightness, and the tires (including spare tire) for proper pressure. Replace your tires before they are heavilyworn out. As your vehicle is equi
pped with a tire pres-
sure monitoring system, there is a risk ofdamage to the tire inflation pressure sensors when the tire is replaced on the rim. Tire replacement should, only, be performed by anauthorized Mitsubishi Motors dealer. Have someone watch while you turn all the exterior lights on and off. Also check the turn
signal indicators and hi
gh-beam indicators on
the instrument panel. Check the ground under the vehicle after parking overnight, for
fuel, water, oil, or
other leaks. Make sure
all the fluid levels are
correct. Also, if you
can smell fuel, you need
to find out why imme
diately and have it
fixed.
N00629201134
Even this vehicle’s sa
fety equipment, and
your safest driving, ca
nnot guarantee that you
can avoid an accident or injury. However, ifyou give extra attention to the following areas, you can better protect yourself and your passengers: Drive defensively. Be aware of traffic, road and weather conditions. Leave plenty of stopping distance between your vehicle and the vehicle ahead. Before changing lanes, check your mir- rors, blind spots, and use your turn-signal light. While driving, watch the behavior of other drivers, bicyc
lists, and pedestrians.
Vehicle preparation before driving Seat belts and seats
Defrosters Tires Lights
Fluid leaks Safe driving techniques
BK0200500US.book 4 ページ 2013年2月12日 火曜日 午前9時46分
Page 315 of 451
Trailer towing
Driving safety 6-15
6
Hold the bottom of the steering wheel with one hand. Then, to move the trailer to the left, just move that hand to the left. To move thetrailer to the right, move your hand to the right. Always back up sl
owly and, if possible,
have someone guide you. When you’re turning with a trailer, make wider than normal turns to help prevent the trailer from striking shoulders, curbs, roadsigns, trees or other objects. Avoid jerky or sudde
n maneuvers. Signal
well in advance. Towing a trailer puts a
dditional burden on the
engine and transaxle,
which may cause over-
heating. Following ar
e some suggestions to
reduce overheating: When towing at high al
titudes, engine coolant
and automatic transaxle oil will overheat at a lower temperature than at normal altitudes.If you turn your engine off immediately after towing at high altitude
on steep uphill grades,
your vehicle may show
signs similar to over-
heating. To avoid this
, let the engine run
while parked (preferably on level ground) with the automatic transaxle in the “P”(PARK) position for a few minutes before turning the engine off. If the engine coolant temperature indica- tor flashes on the in
formation screen in
the multi-information display or the engine power drops suddenly, refer to “Engine overheating” on page 8-4.
If the warning display or warning display illuminates, re
fer to “Warning dis-
play” on page 5-62, 5-70.
Reduce speed and downshift before you start down a long or steep downgrade. If you don’t downshift, over using the brakes can cause reduced brake efficiency. You can tow in “D” (DRIVE) position. You may want to shift the selector lever to the 3rd or a lower position, under heavy loads or hillyconditions. Always place chocks or blocks under both the vehicle and trailer wheels when parking. Be sure that the parking brake is firmly set and that the selector lever is in the “P” (PARK)position. Avoid parki
ng on a hill with a
trailer, but if it cannot be avoided, do so only after performing the following: 1. Apply the brakes and keep them applied. 2. Have someone plac
e chocks or blocks
under both the vehicle
and trailer wheels.
Backing up Making turns
CAUTION Making sharp turns while towing a trailer could cause the
trailer to come in contact
with the vehicle. Your
vehicle could be dam-
aged. Avoid making sharp turns while tow- ing a trailer.
Overheating
Cause of overheating
Solution
Air conditioning on Turn off Highway speeds Reduce speed Going up hills Select lower gear posi-
tion
Stop-and-go city traf- fic
With the vehicle stopped, shift to the “N” (NEUTRAL) position and idle the engine at high idle.
Driving on hills Parking
BK0200500US.book 15 ページ 2013年2月12日 火曜日 午前9時46分
Page 372 of 451
How to change a tire 8-6 For emergencies
8
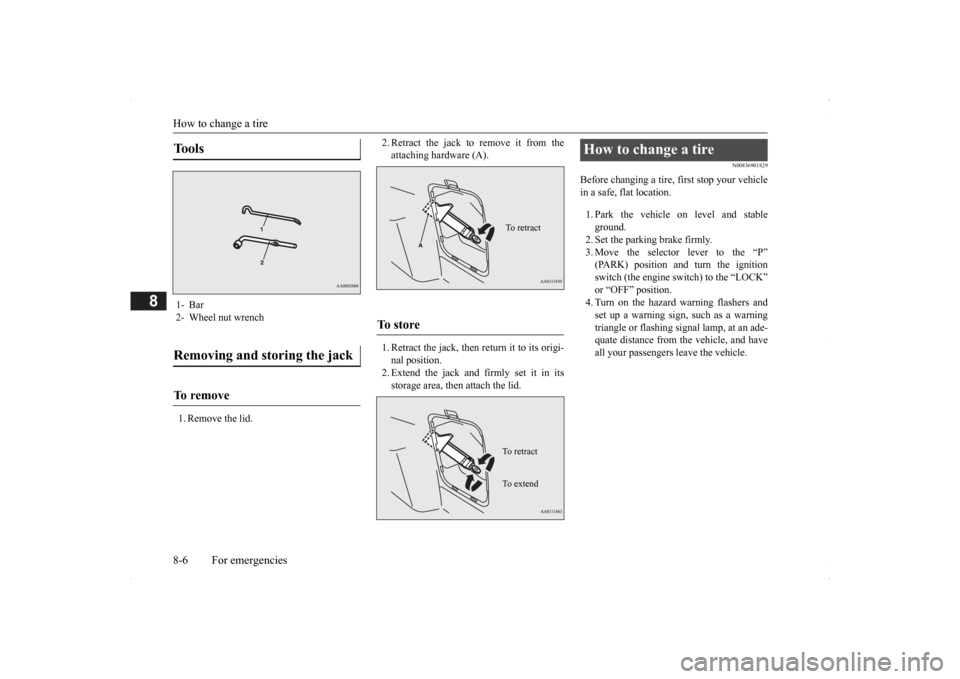
1. Remove the lid.
2. Retract the jack to remove it from the attaching hardware (A). 1. Retract the jack, then return it to its origi- nal position. 2. Extend the jack and firmly set it in itsstorage area, then attach the lid.
N00836901829
Before changing a tire, first stop your vehicle in a safe, flat location. 1. Park the vehicle on level and stable ground.2. Set the parking brake firmly. 3. Move the selector
lever to the “P”
(PARK) position and turn the ignition switch (the engine switch) to the “LOCK” or “OFF” position.4. Turn on the hazard warning flashers and set up a warning sign, such as a warning triangle or flashing signal lamp, at an ade-quate distance from the vehicle, and have all your passengers leave the vehicle.
Tools 1- Bar2- Wheel nut wrenchRemoving and storing the jack To r e m o v e
To s t o r e
To retractTo r e t r a c t To e x t e n d
How to change a tire
BK0200500US.book 6 ページ 2013年2月12日 火曜日 午前9時46分
Page 373 of 451
How to change a tire
For emergencies 8-7
8
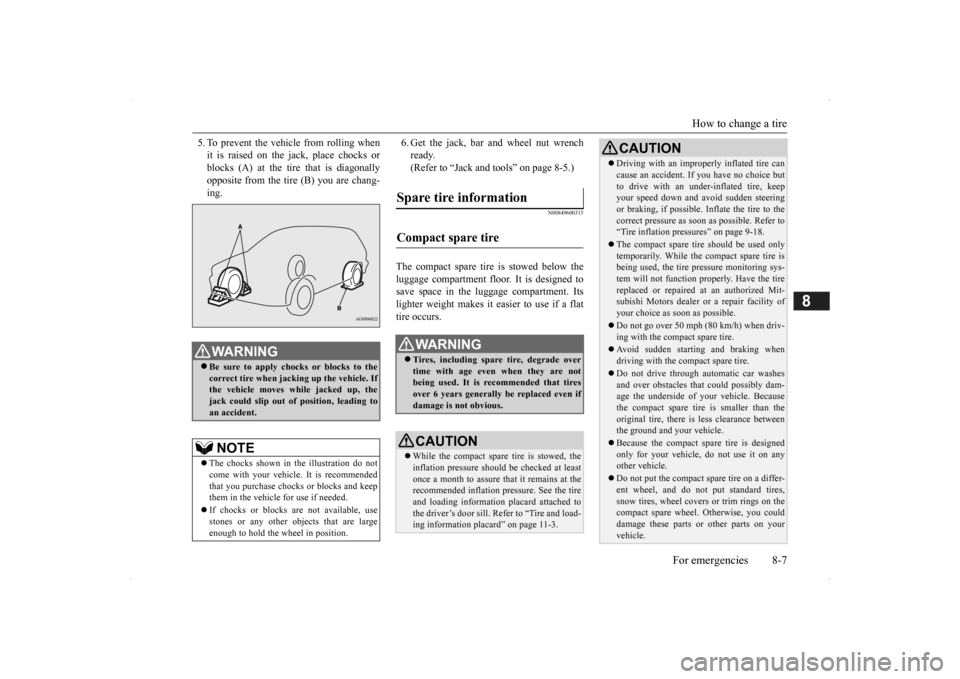
5. To prevent the vehicle from rolling when it is raised on the jack, place chocks orblocks (A) at the tire that is diagonally opposite from the tire (B) you are chang- ing.
6. Get the jack, bar and wheel nut wrench ready.(Refer to “Jack and tools” on page 8-5.)
N00849600315
The compact spare tire is stowed below the luggage compartment fl
oor. It is designed to
save space in the luggage compartment. Itslighter weight makes it easier to use if a flat tire occurs.
WA R N I N G Be sure to apply choc
ks or blocks to the
correct tire when jacking up the vehicle. If the vehicle moves while jacked up, the jack could slip out of
position, leading to
an accident.NOTE
The chocks shown in the illustration do not come with your vehicl
e. It is recommended
that you purchase chocks or blocks and keep them in the vehicle for use if needed. If chocks or blocks
are not available, use
stones or any other obj
ects that are large
enough to hold the wheel in position.
Spare tire information Compact spare tire
WA R N I N G Tires, including spar
e tire, degrade over
time with age even when they are notbeing used. It is recommended that tires over 6 years generally
be replaced even if
damage is not obvious.CAUTION While the compact spare tire is stowed, the inflation pressure shoul
d be checked at least
once a month to assure that it remains at the recommended inflation pressure. See the tire and loading informati
on placard attached to
the driver’s door sill. Refer to “Tire and load- ing information placard” on page 11-3.
Driving with an imprope
rly inflated tire can
cause an accident. If
you have no choice but
to drive with an under-inflated tire, keepyour speed down and avoid sudden steering or braking, if possible. Inflate the tire to the correct pressure as s
oon as possible. Refer to
“Tire inflation pressures” on page 9-18. The compact spare tire should be used only temporarily. While the compact spare tire is being used, the tire pr
essure monitoring sys-
tem will not function pr
operly. Have the tire
replaced or repaired at an authorized Mit- subishi Motors dealer or
a repair facility of
your choice as soon as possible. Do not go over 50 mph (80 km/h) when driv- ing with the compact spare tire. Avoid sudden starting and braking when driving with the compact spare tire. Do not drive through automatic car washes and over obstacles that
could possibly dam-
age the underside of your vehicle. Because the compact spare tire is smaller than the original tire, there is less clearance betweenthe ground and your vehicle. Because the compact spare tire is designed only for your vehicle, do not use it on any other vehicle. Do not put the compact spare tire on a differ- ent wheel, and do not put standard tires, snow tires, wheel covers
or trim rings on the
compact spare wheel. Otherwise, you could damage these parts or other parts on your vehicle.CAUTION
BK0200500US.book 7 ページ 2013年2月12日 火曜日 午前9時46分
Page 374 of 451
How to change a tire 8-8 For emergencies
8
N00849701296
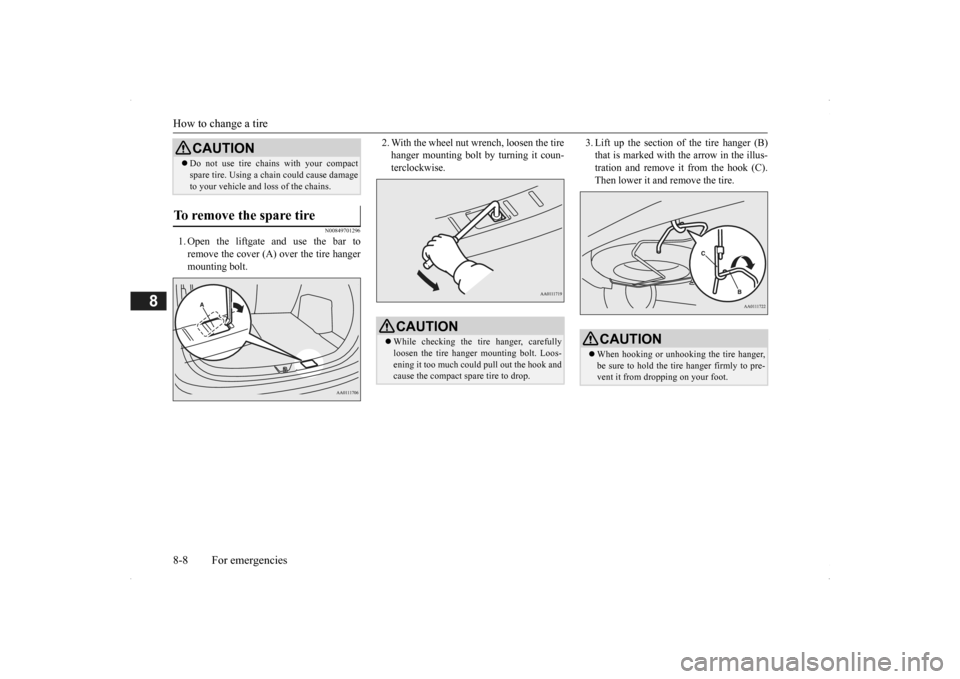
1. Open the liftgate and use the bar to remove the cover (A)
over the tire hanger
mounting bolt.
2. With the wheel nut wrench, loosen the tire hanger mounting bolt by turning it coun-terclockwise.
3. Lift up the section of the tire hanger (B) that is marked with the arrow in the illus-tration and remove it from the hook (C). Then lower it and remove the tire.
Do not use tire chains with your compact spare tire. Using a ch
ain could cause damage
to your vehicle and loss of the chains.
To remove the spare tire
CAUTION
CAUTION While checking the tir
e hanger, carefully
loosen the tire hanger mounting bolt. Loos-ening it too much could pull out the hook and cause the compact spare tire to drop.
CAUTION When hooking or unhooking the tire hanger, be sure to hold the tire hanger firmly to pre- vent it from dropping on your foot.
BK0200500US.book 8 ページ 2013年2月12日 火曜日 午前9時46分
Page 375 of 451

How to change a tire
For emergencies 8-9
8
N00849801457
1. On vehicles with
wheel covers, first
remove the covers (re
fer to “Wheel cov-
ers” on page 8-13). Then, loosen thewheel nuts with the wheel nut wrench. Do not remove the
wheel nuts yet.
2. Place the jack under one of the jacking points (A) shown in the illustration. Usethe jacking point closest to the tire you wish to change.
3. Rotate the jack by hand until the flange portion (B) fits in the groove (C) at the top of the jack.
To change a tire
WA R N I N G Set the jack only at the positions shown here. If the jack is set at a wrong position, it could dent your vehicle or the jackmight fall over and cause personal injury. Do not use the jack on a tilted or soft sur- face. Otherwise, the jack might slip and cause personal injury. Always
use the jack on a
flat, hard surface. Before setting the jack, make sure there are no sand or pebbles under the jack base.
NOTE
Put the spare wheel under the vehicle body near the jack. This makes it safer if the jackslips out of position.
BK0200500US.book 9 ページ 2013年2月12日 火曜日 午前9時46分