MITSUBISHI PAJERO IV 2011 Owners Manual
Manufacturer: MITSUBISHI, Model Year: 2011, Model line: PAJERO IV, Model: MITSUBISHI PAJERO IV 2011Pages: 377, PDF Size: 29.43 MB
Page 91 of 377
Check engine warning lamp
E00502601696
This lamp is
a part of an onboard diag-
nostic system which monitors the emis-
sions, engine control system or automat-
ic transmission control systems.
If a problem is detected in one of these
systems, this lamp illuminates.
Although your vehicle will usually be
drivable and not need towing, we recom-
mend you to have the system checked as
soon as possible.
[Vehicles to comply with the Euro 3 and
Euro 4 regulation]
This lamp will also illuminate for a few
seconds when the ignition switch is
turned to the “ON” position. If it does
not go off after a few seconds, we recom-
mend you to have the vehicle checked.
[Vehicles to comply with the Euro 5]
This lamp will also illuminate when the
ignition switch is turned “ON”, and goes
off after the engine has started. If it does
not go off after the engine has started,
we recommend you to have the system
checked. CAUTION
l
Prolonged driving
with
this
lamp on may cause further dam-
age to the emission control sys-
tem. It could also affect fuel
economy and drivability. CAUTION
l
If the lamp
does not illuminate
when the ignition switch is
turned to the “ON” position,
we recommend you to have the
system checked.
l If the lamp illuminates while
the engine is running, avoid
driving at high speeds and we
recommend you to have the sys-
tem checked.
Accelerator pedal and brake
pedal response may be negative-
ly influenced under these condi-
tions.
NOTE l The
engine electronic
control mod-
ule accommodating the onboard di-
agnostic system has various fault
data (especially about the exhaust
emission) stored.
This data will be erased if a bat-
tery cable is disconnected which
will make a rapid diagnosis diffi-
cult. Do not disconnect a battery
cable when the check engine warn-
ing lamp is ON. Charge warning display
E00502700472
This lamp illuminates
when the ignition
switch is turned to the “ON” position,
and goes off after the engine has started. CAUTION
l
If it illuminates
while the en-
gine is running, there is a prob-
lem in the charging system. In
this case, immediately park
your vehicle in a safe place and
we recommend you to have it
checked. Oil pressure warning lamp
E00502800529
This lamp illuminates
when the ignition
switch is turned to the “ON” position,
and goes off after the engine has started.
If it illuminates while the engine is run-
ning, the oil pressure is too low. Turn
the engine off and have it inspected. CAUTION
l
This warning
lamp
does not in-
dicate the amount of oil level in
the engine. This must be deter-
mined by checking the oil level
on the dipstick, while the en-
gine is switched off.
l If this lamp illuminates when
the engine oil level is not low,
have it inspected.
l If you continue driving with
low engine oil level or with this
warning lamp illuminated, en-
gine seizure may occur. Instruments and controls
3-10
3
OBKE12E1
Page 92 of 377
Door ajar warning lamp
E00503300635
This lamp illuminates
when a door or
the backdoor is either open or incomplete-
ly closed.
If the vehicle speed reaches approximate-
ly 8 km/h (5 mph) with a door or the back-
door open or incompletely closed, the
warning lamp flashes 8 times and a buz-
zer simultaneously sounds 8 times as a
warning. CAUTION
l
Before moving
your
vehicle,
check that the warning lamp is
OFF.
NOTE l On
vehicles with
keyless entry sys-
tem, the lamp remains illuminated
for a certain period and then goes
out automatically.
l Buzzer settings can be changed at
a your MITSUBISHI MOTORS
Authorized Service Point to:
• No buzzer operation (buzzerdisabled)
• Continuous buzzer operation Centre information display*
E00517800295 CAUTION
l
The driver
should
not operate the display
while the vehicle is in motion.
When the ignition switch is turned to the “ACC” po-
sition, the screen switches on automatically.
NOTE l Placing
a cellular
phone in the monitor’s
small storage compartment may weaken the
phone’s reception. This does not indicate a
fault with the system.
l Use of wireless devices such as transceivers
or a cellular phone near the monitor may
make the following condition on the display.
This does not indicate a fault with the system.
• The screen goes dark temporarily.
• The compass may not show the correct di-rection.
l Depending on the angle of view, you may
see reddish horizontal lines on the monitor.
The lines are a characteristic of the vacuum
fluorescent display (VFD) used in the moni-
tor. They do not indicate a fault. Instruments and controls
3-11 3
OBKE12E1
Page 93 of 377
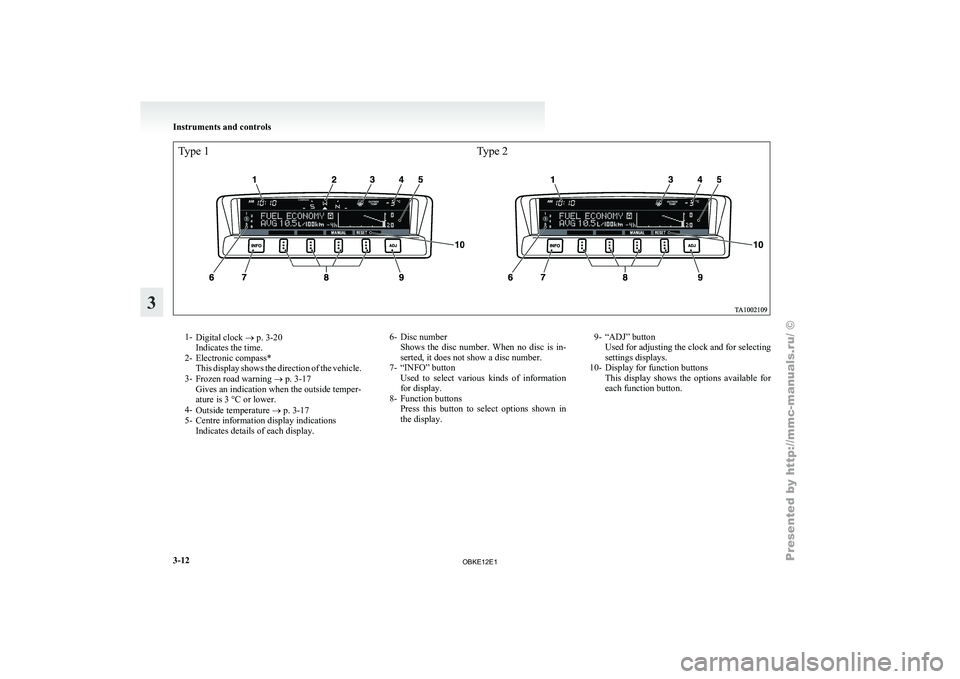
Type 1Type 21-
Digital clock ®
p. 3-20
Indicates the time.
2- Electronic compass* This display shows the direction of the vehicle.
3- Frozen road warning ® p. 3-17
Gives an indication when the outside temper-
ature is 3 °C or lower.
4- Outside temperature ® p. 3-17
5- Centre information display indications Indicates details of each display. 6- Disc number
Shows the disc
number. When no disc is in-
serted, it does not show a disc number.
7- “INFO” button Used to select various kinds of information
for display.
8- Function buttons Press this button to select options shown in
the display. 9- “ADJ” button
Used for adjusting the clock and for selecting
settings displays.
10- Display for function buttons This display
shows the options available for
each function button. Instruments and controls
3-12
3
OBKE12E1
Page 94 of 377
Adjusting the time
E00518000047Following modes are available for clock adjustment:
l For vehicles with
MITSUBISHI genuine au-
dio:
“Automatic mode” and “Manual mode”
l Except for vehicles with MITSUBISHI genu-
ine audio:
“Manual mode” only
Automatic mode (MITSUBISHI genuine audio)
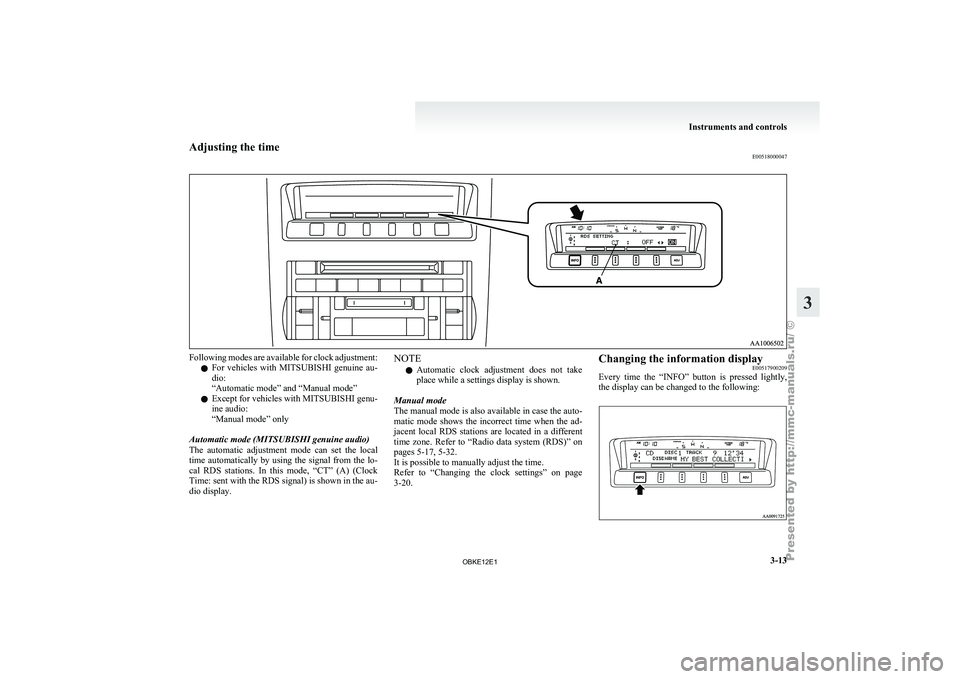
The automatic adjustment mode can set the local
time automatically by using the signal from the lo-
cal RDS stations. In this mode, “CT” (A) (Clock
Time: sent with the RDS signal) is shown in the au-
dio display. NOTE
l Automatic
clock adjustment
does not take
place while a settings display is shown.
Manual mode
The manual mode is also available in case the auto-
matic mode shows the incorrect time when the ad-
jacent local RDS stations are located in a different
time zone. Refer to “Radio data system (RDS)” on
pages 5-17, 5-32.
It is possible to manually adjust the time.
Refer to “Changing the clock settings” on page
3-20. Changing the information display
E00517900209
Every time
the
“INFO” button is pressed lightly,
the display can be changed to the following: Instruments and controls
3-13 3
OBKE12E1
Page 95 of 377
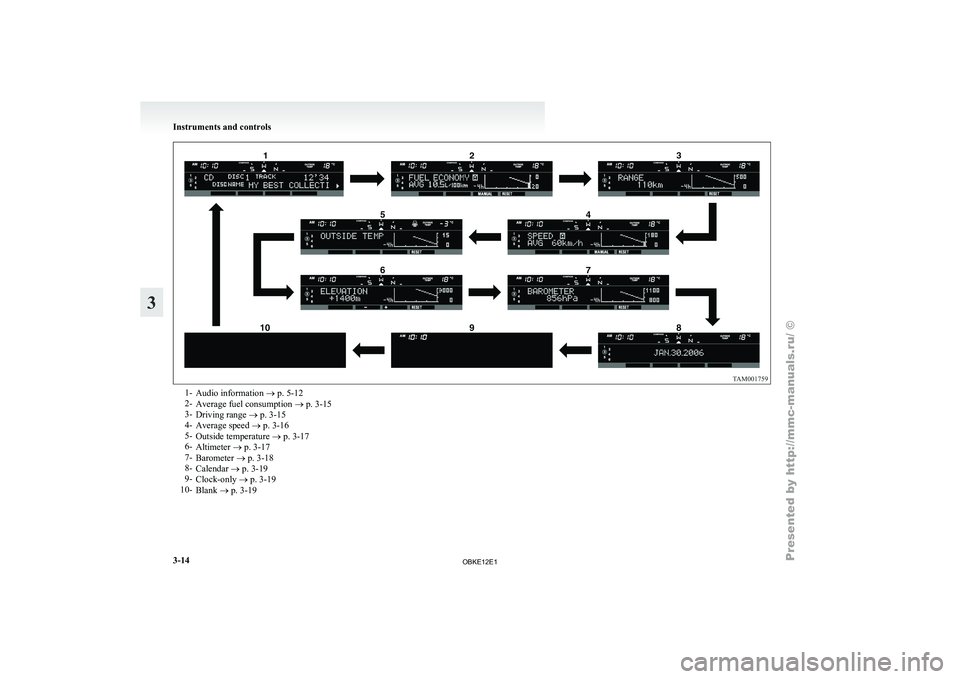
1-
Audio information ® p. 5-12
2- Average fuel consumption ®
p. 3-15
3- Driving range ® p. 3-15
4- Average speed ® p. 3-16
5- Outside temperature ® p. 3-17
6- Altimeter ® p. 3-17
7- Barometer ® p. 3-18
8- Calendar ® p. 3-19
9- Clock-only ® p. 3-19
10- Blank ® p. 3-19 Instruments and controls
3-14
3
OBKE12E1
Page 96 of 377
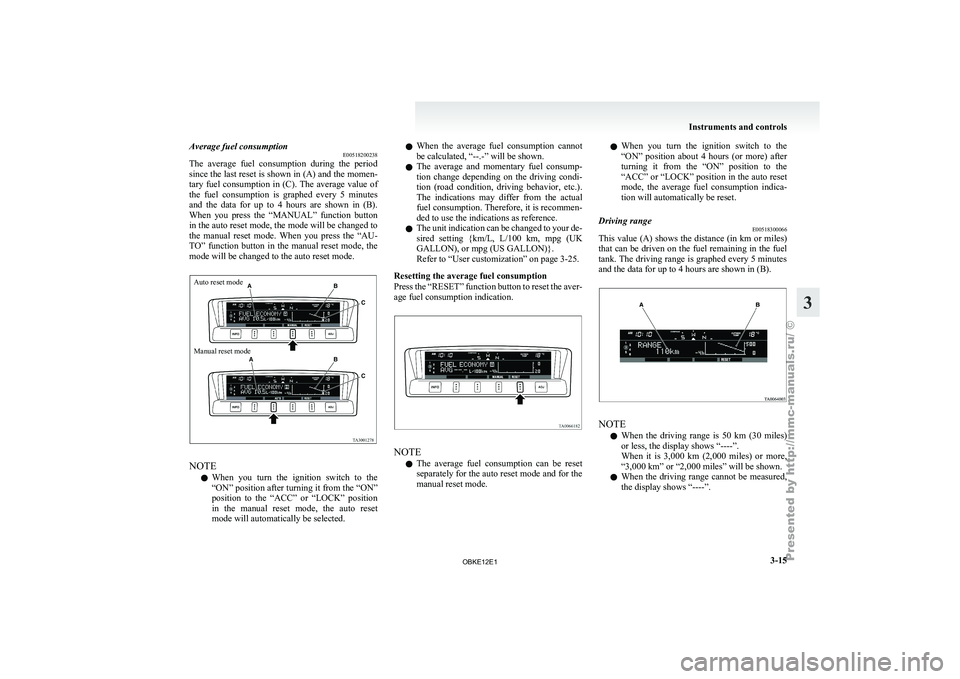
Average fuel consumption
E00518200238
The average fuel
consumption during the period
since the last reset is shown in (A) and the momen-
tary fuel consumption in (C). The average value of
the fuel consumption is graphed every 5 minutes
and the data for up to 4 hours are shown in (B).
When you press the “MANUAL” function button
in the auto reset mode, the mode will be changed to
the manual reset mode. When you press the “AU-
TO” function button in the manual reset mode, the
mode will be changed to the auto reset mode.
Auto reset mode
Manual reset mode NOTE
l When
you turn
the ignition switch to the
“ON” position after turning it from the “ON”
position to the “ACC” or “LOCK” position
in the manual reset mode, the auto reset
mode will automatically be selected. l
When
the
average
fuel consumption cannot
be calculated, “--.-” will be shown.
l The average and momentary fuel consump-
tion change depending on the driving condi-
tion (road condition, driving behavior, etc.).
The indications may differ from the actual
fuel consumption. Therefore, it is recommen-
ded to use the indications as reference.
l The unit indication can be changed to your de-
sired setting {km/L, L/100 km, mpg (UK
GALLON), or mpg (US GALLON)}.
Refer to “User customization” on page 3-25.
Resetting the average fuel consumption
Press the “RESET” function button to reset the aver-
age fuel consumption indication. NOTE
l The
average fuel
consumption can be reset
separately for the auto reset mode and for the
manual reset mode. l
When you
turn
the ignition switch to the
“ON” position about 4 hours (or more) after
turning it from the “ON” position to the
“ACC” or “LOCK” position in the auto reset
mode, the average fuel consumption indica-
tion will automatically be reset.
Driving range E00518300066
This value (A) shows the distance (in km or miles)
that can be
driven on the fuel remaining in the fuel
tank. The driving range is graphed every 5 minutes
and the data for up to 4 hours are shown in (B). NOTE
l When
the driving
range is 50 km (30 miles)
or less, the display shows “----”.
When it is 3,000 km (2,000 miles) or more,
“3,000 km” or “2,000 miles” will be shown.
l When the driving range cannot be measured,
the display shows “----”. Instruments and controls
3-15 3
OBKE12E1
Page 97 of 377
l
The driving
range is shown based on the ac-
cumulated fuel consumption data, however,
may be changed depending on the driving con-
dition (road condition, driving behavior,
etc.). If the battery terminals are disconnec-
ted, the accumulated fuel consumption data
will be erased. It is recommended to use the
indication as reference.
l When the vehicle is fueled, the driving range
will be updated. However, if the amount of
fueling is small, the indication may not be cor-
rect. Therefore, fill up the tank as much as
possible in case of fueling.
l When the vehicle is stopped on a steep slope,
the value of the driving range may increase.
This is caused by the fuel movement inside
the tank on the slope and is not deemed as a
failure.
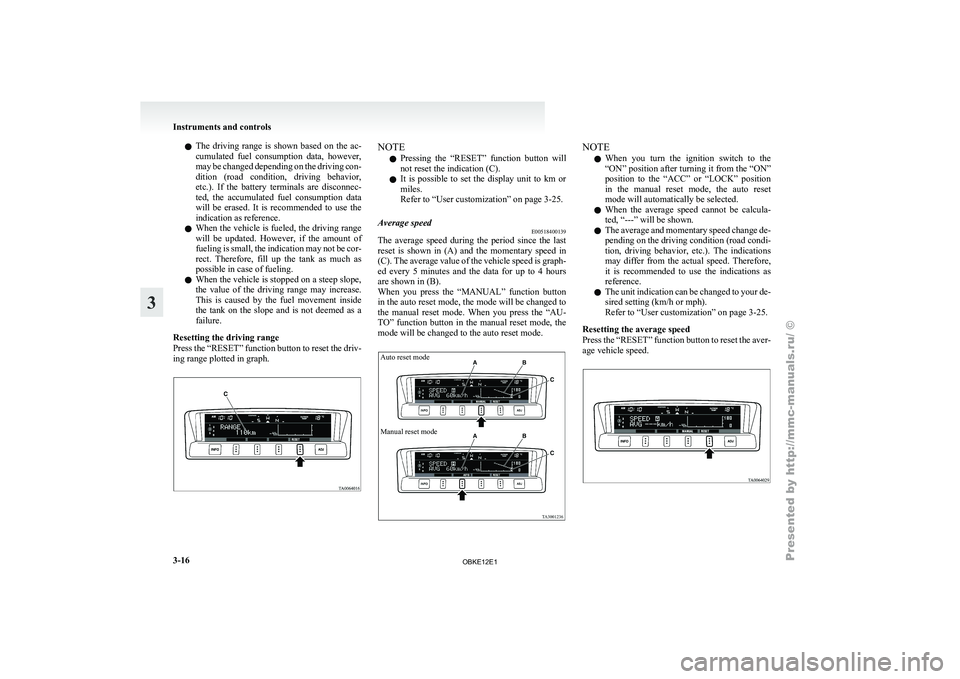
Resetting the driving range
Press the “RESET” function button to reset the driv-
ing range plotted in graph. NOTE
l Pressing
the “RESET”
function button will
not reset the indication (C).
l It is possible to set the display unit to km or
miles.
Refer to “User customization” on page 3-25.
Average speed E00518400139
The average speed during the period since the last
reset is
shown
in (A) and the momentary speed in
(C). The average value of the vehicle speed is graph-
ed every 5 minutes and the data for up to 4 hours
are shown in (B).
When you press the “MANUAL” function button
in the auto reset mode, the mode will be changed to
the manual reset mode. When you press the “AU-
TO” function button in the manual reset mode, the
mode will be changed to the auto reset mode.
Auto reset mode
Manual reset mode NOTE
l When
you turn
the ignition switch to the
“ON” position after turning it from the “ON”
position to the “ACC” or “LOCK” position
in the manual reset mode, the auto reset
mode will automatically be selected.
l When the average speed cannot be calcula-
ted, “---” will be shown.
l The average and momentary speed change de-
pending on the driving condition (road condi-
tion, driving behavior, etc.). The indications
may differ from the actual speed. Therefore,
it is recommended to use the indications as
reference.
l The unit indication can be changed to your de-
sired setting (km/h or mph).
Refer to “User customization” on page 3-25.
Resetting the average speed
Press the “RESET” function button to reset the aver-
age vehicle speed. Instruments and controls
3-16
3
OBKE12E1
Page 98 of 377
NOTE
l The
average speed
can be reset separately for
the auto reset mode and for the manual reset
mode.
l When you turn the ignition switch to the
“ON” position about 4 hours (or more) after
turning it from the “ON” position to the
“ACC” or “LOCK” position in the auto reset
mode, the average speed indication will auto-
matically be reset.
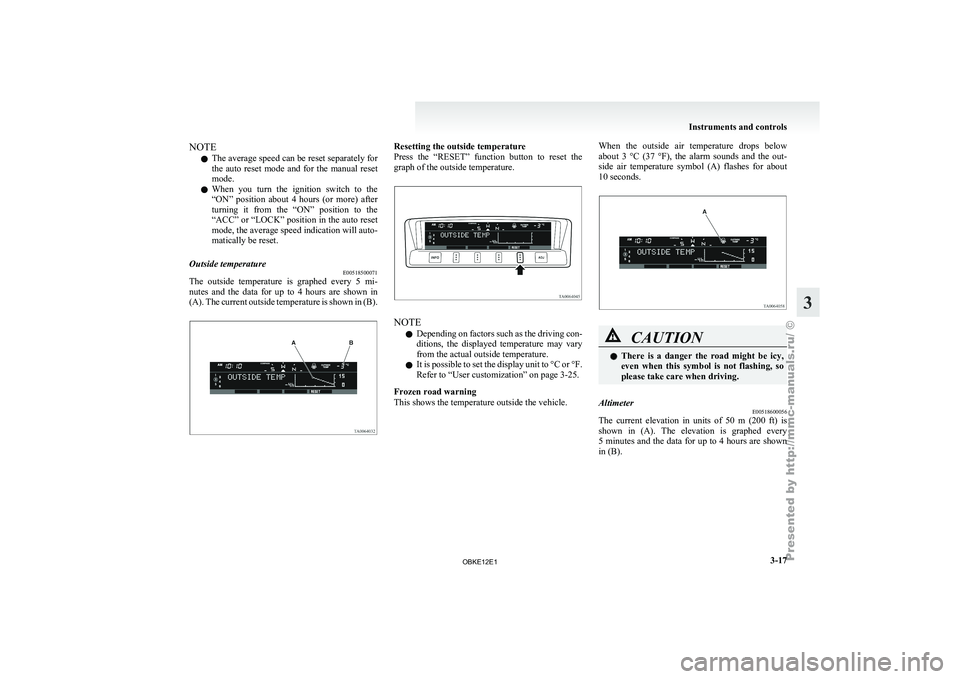
Outside temperature E00518500071
The outside temperature is graphed every 5 mi-
nutes and
the
data for up to 4 hours are shown in
(A). The current outside temperature is shown in (B). Resetting the outside temperature
Press the “RESET”
function button to reset the
graph of the outside temperature. NOTE
l Depending
on factors
such as the driving con-
ditions, the displayed temperature may vary
from the actual outside temperature.
l It is possible to set the display unit to °C or °F.
Refer to “User customization” on page 3-25.
Frozen road warning
This shows the temperature outside the vehicle. When the outside air temperature drops below
about 3
°C
(37 °F), the alarm sounds and the out-
side air temperature symbol (A) flashes for about
10 seconds. CAUTION
l
There is
a
danger the road might be icy,
even when this symbol is not flashing, so
please take care when driving.
Altimeter E00518600056
The current elevation in units of 50 m (200 ft) is
shown in (A).
The elevation is graphed every
5 minutes and the data for up to 4 hours are shown
in (B). Instruments and controls
3-17 3
OBKE12E1
Page 99 of 377
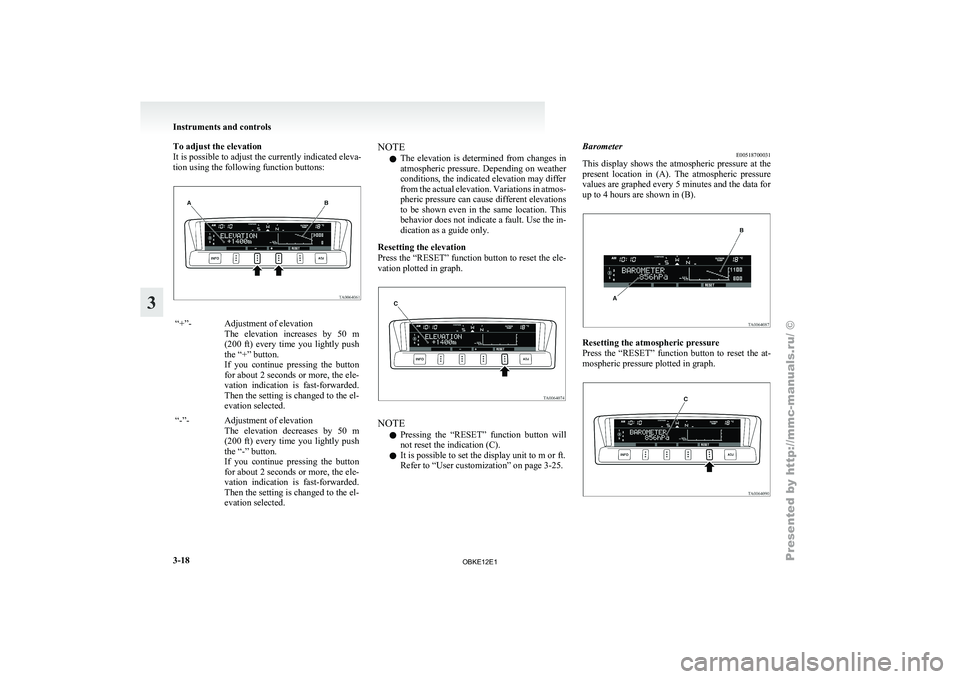
To adjust the elevation
It is possible to adjust the currently indicated eleva-
tion using the following function buttons:
“+”- Adjustment of elevation
The elevation increases
by 50 m
(200 ft) every time you lightly push
the “+” button.
If you continue pressing the button
for about 2 seconds or more, the ele-
vation indication is fast-forwarded.
Then the setting is changed to the el-
evation selected.
“-”- Adjustment of elevation The elevation decreases
by 50 m
(200 ft) every time you lightly push
the “-” button.
If you continue pressing the button
for about 2 seconds or more, the ele-
vation indication is fast-forwarded.
Then the setting is changed to the el-
evation selected. NOTE
l The
elevation is
determined from changes in
atmospheric pressure. Depending on weather
conditions, the indicated elevation may differ
from the actual elevation. Variations in atmos-
pheric pressure can cause different elevations
to be shown even in the same location. This
behavior does not indicate a fault. Use the in-
dication as a guide only.
Resetting the elevation
Press the “RESET” function button to reset the ele-
vation plotted in graph. NOTE
l Pressing
the “RESET”
function button will
not reset the indication (C).
l It is possible to set the display unit to m or ft.
Refer to “User customization” on page 3-25. Barometer
E00518700031
This display shows
the atmospheric pressure at the
present location in (A). The atmospheric pressure
values are graphed every 5 minutes and the data for
up to 4 hours are shown in (B). Resetting the atmospheric pressure
Press the
“RESET”
function button to reset the at-
mospheric pressure plotted in graph. Instruments and controls
3-18
3
OBKE12E1
Page 100 of 377
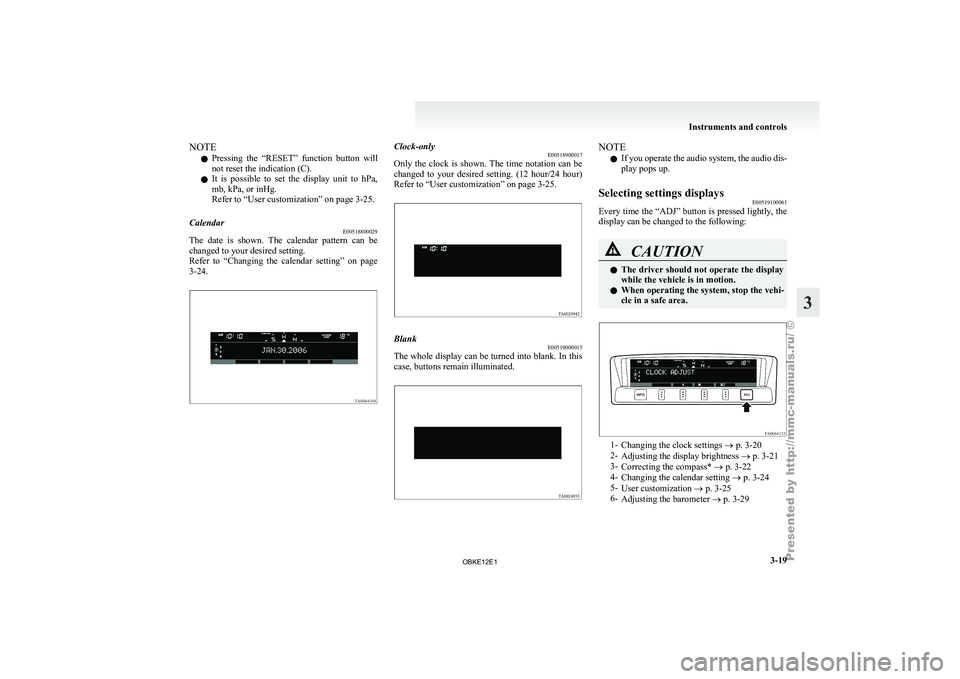
NOTE
l Pressing
the “RESET”
function button will
not reset the indication (C).
l It is possible to set the display unit to hPa,
mb, kPa, or inHg.
Refer to “User customization” on page 3-25.
Calendar E00518800029
The date is shown. The calendar pattern can be
changed to your desired setting.
Refer to
“Changing
the calendar setting” on page
3-24. Clock-only
E00518900017
Only the clock
is shown. The time notation can be
changed to your desired setting. (12 hour/24 hour)
Refer to “User customization” on page 3-25. Blank
E00519000015
The whole display can be turned into blank. In this
case, buttons remain illuminated. NOTE
l If
you operate
the audio system, the audio dis-
play pops up.
Selecting settings displays E00519100061
Every time the “ADJ” button is pressed lightly, the
display can be changed to the following: CAUTION
l
The driver
should
not operate the display
while the vehicle is in motion.
l When operating the system, stop the vehi-
cle in a safe area. 1-
Changing the clock settings ®
p. 3-20
2- Adjusting the display brightness ® p. 3-21
3- Correcting the compass* ® p. 3-22
4- Changing the calendar setting ® p. 3-24
5- User customization ® p. 3-25
6- Adjusting the barometer ® p. 3-29 Instruments and controls
3-19 3
OBKE12E1